

 Deutsch
 Español
 Français
 Hrvatski
 Italiano
 Polski
 Português (BR)
Change Order Example: Workflow in Practice
Overview
This article explains all the steps to create, review and approve a Change Order ticket for the example Change Order introduced in Change Order Example: Overview.
This Change Order ticket is based on the Change Order form that was prepared as described in Change Order Example: Setup.
The step-by-step guide below explains how to fill in all the fields and follow the Approval Workflow steps, assuming that you know how the related features work. Find more detailed explanations about relevant features below in Related Articles, including mobile app.
1. Create Change Order & Request Approval
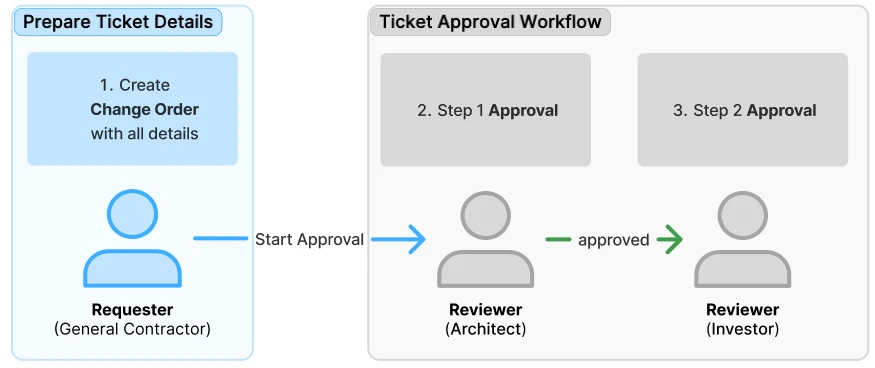
The following steps are done by the Requester (e.g. General Contractor or Site Manager):
-
Create a Change Order ticket using the Change Order form and set a plan position if relevant.
-
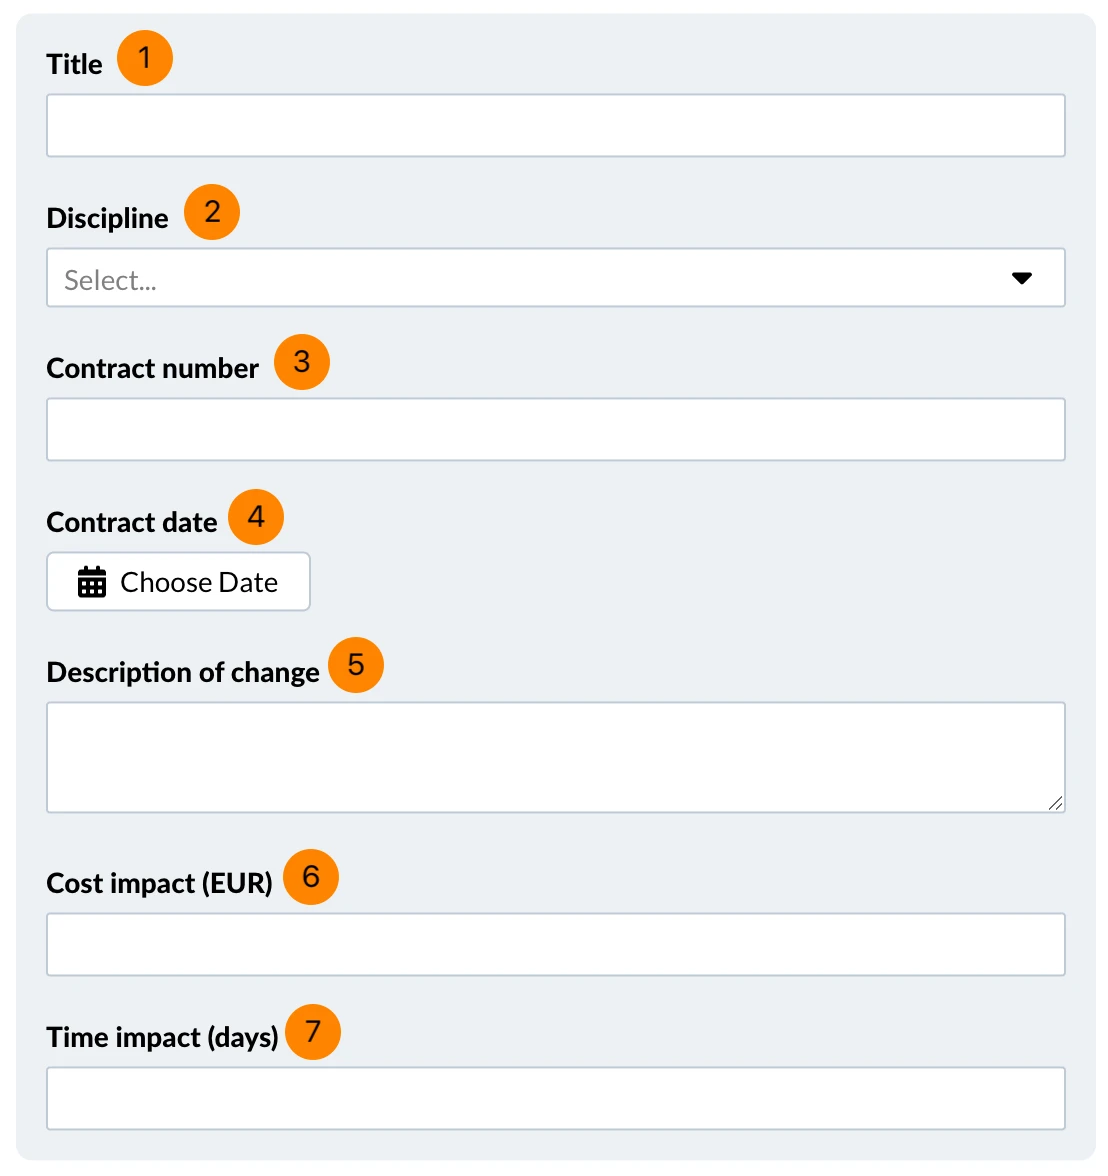
Fill in fields:
- Title: for example "Change Order – Additional Electrical Outlets".
- Discipline: Select the discipline, e.g. Electrical.
- Contract number: Add the reference to the contract.
- Contract date: Select the original contract date.
- Description of change: Clearly describe the requested change and its justification.
- Cost impact (EUR): Enter cost increase.
- Time impact (days): Enter any additional days required.
-
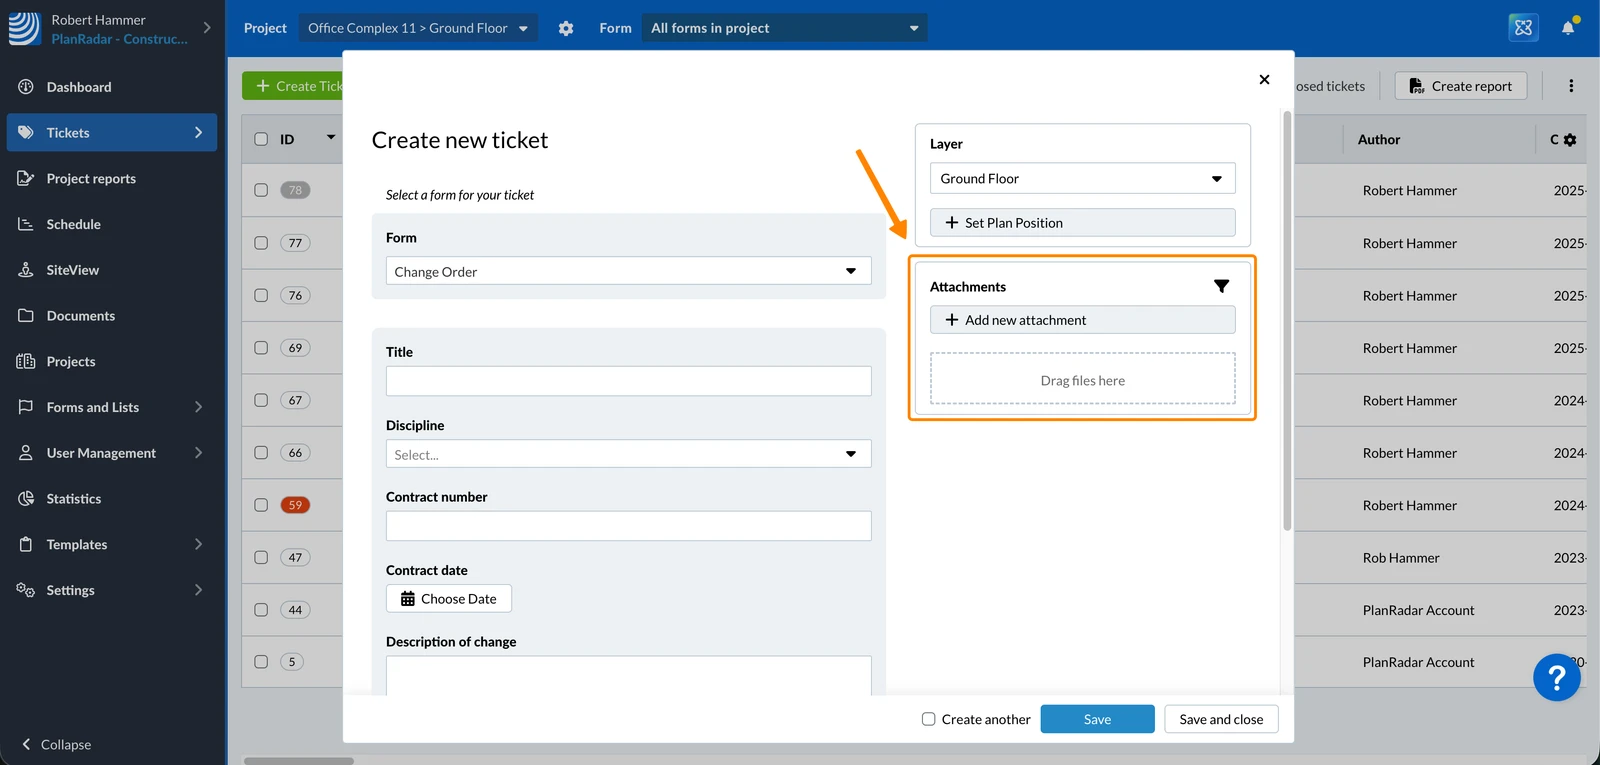
Add ticket attachments such as cost breakdowns, drawings, or supplier quotations.
-
Start the Approval Workflow:
- Select the Change Order Approval Workflow.
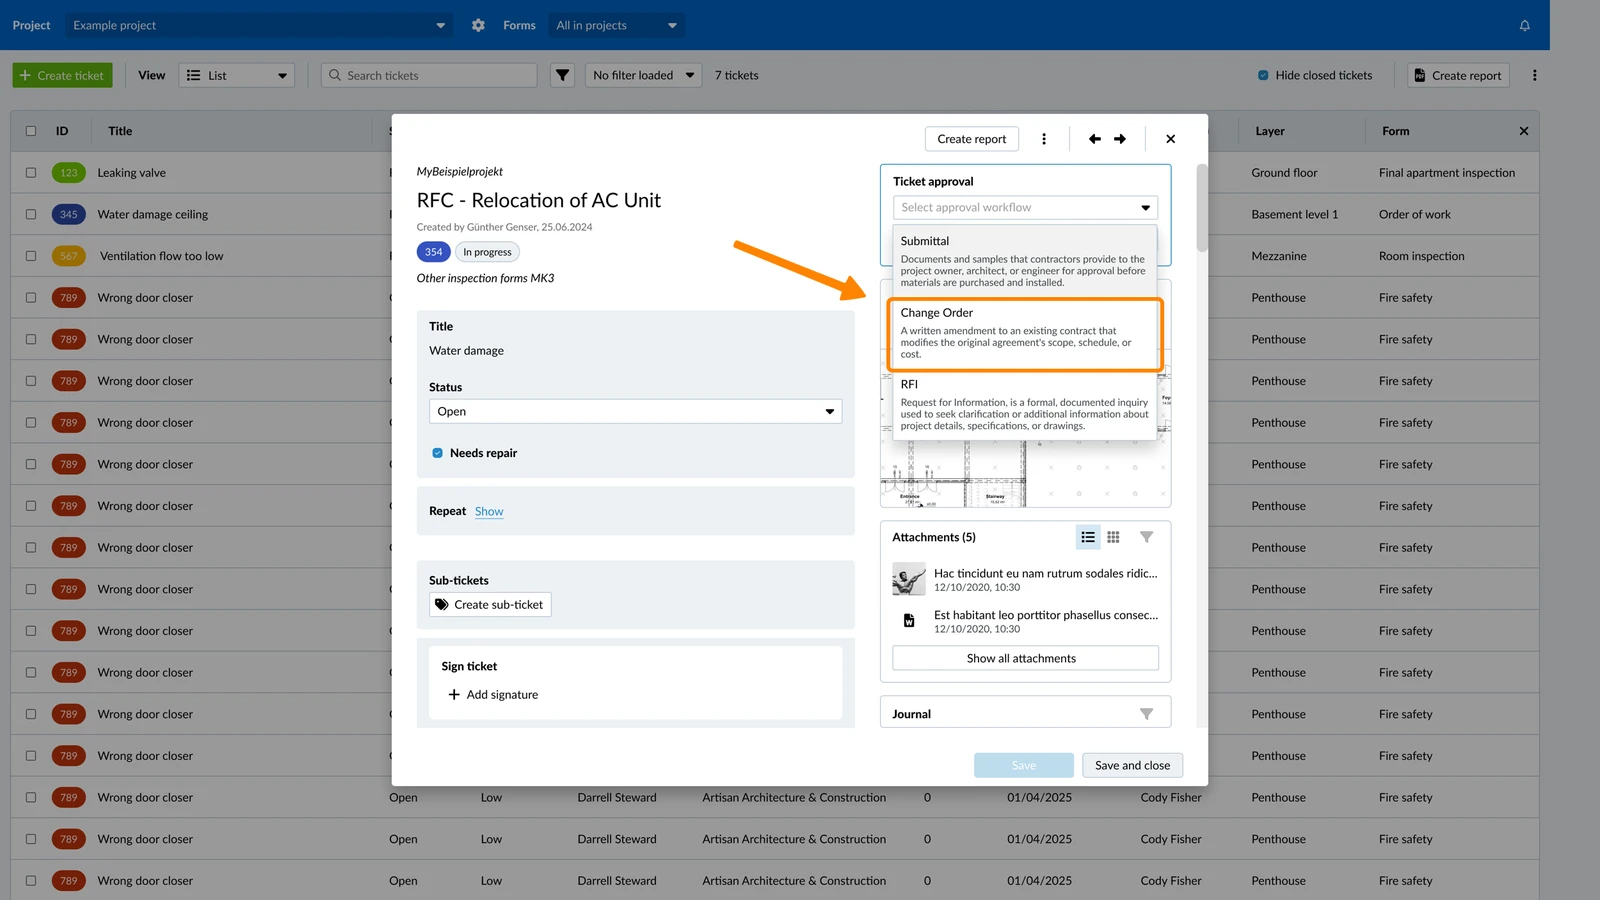
- Click Request approval.
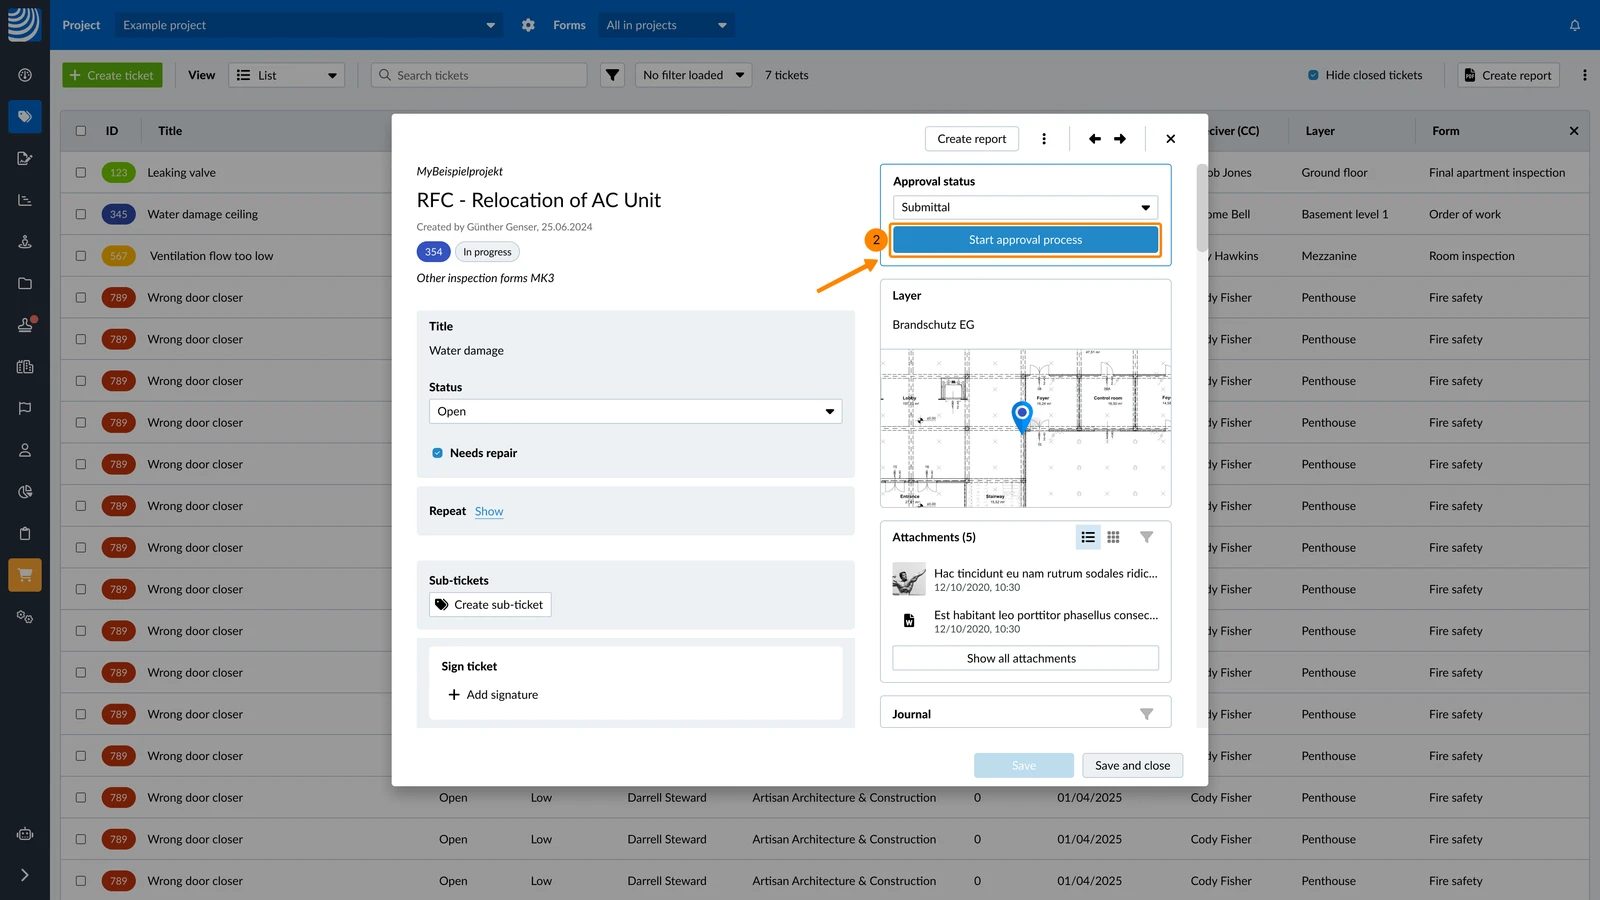
- Optional: Change steps, reviewers or duration if the predefined Submittal workflow doesn't fit for the current situation.
- Click Send request to lock the ticket and automatically notify reviewers of the first approval step.
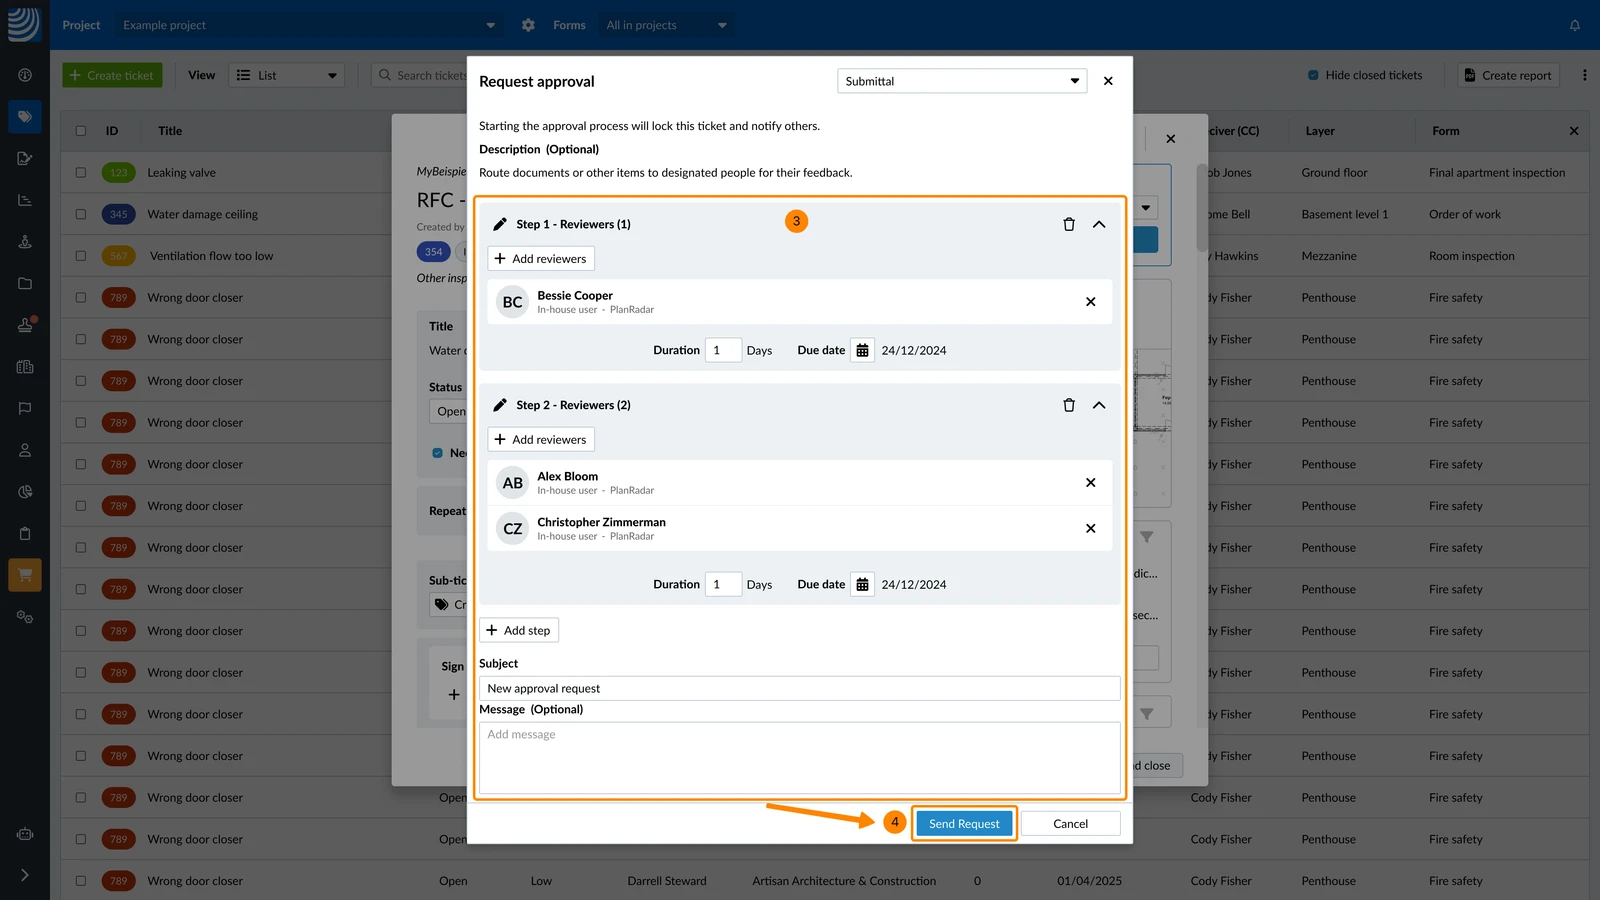
- Select the Change Order Approval Workflow.
2. Approval - Step 1 - Reviewer (Architect)
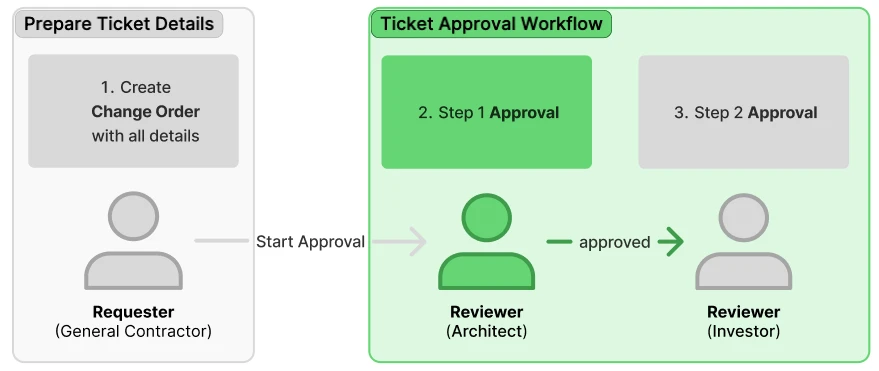
The following steps are done by the Reviewer (Architect):
- See the approval request in Approvals > Pending your approval or find it in the email notification.
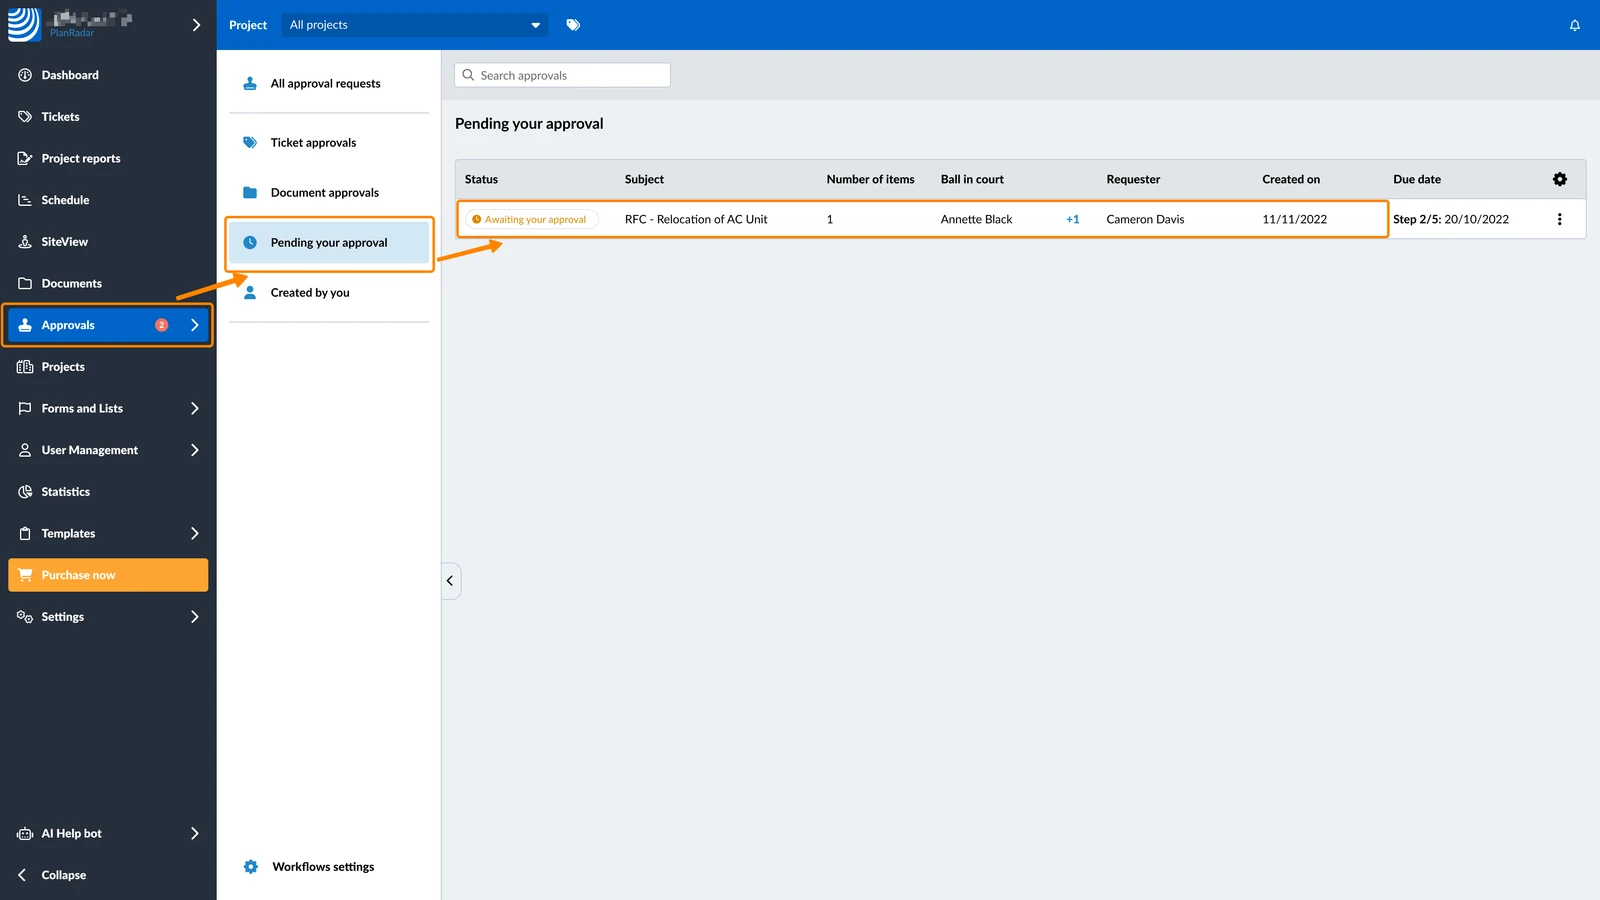
- Open the Approval request details.
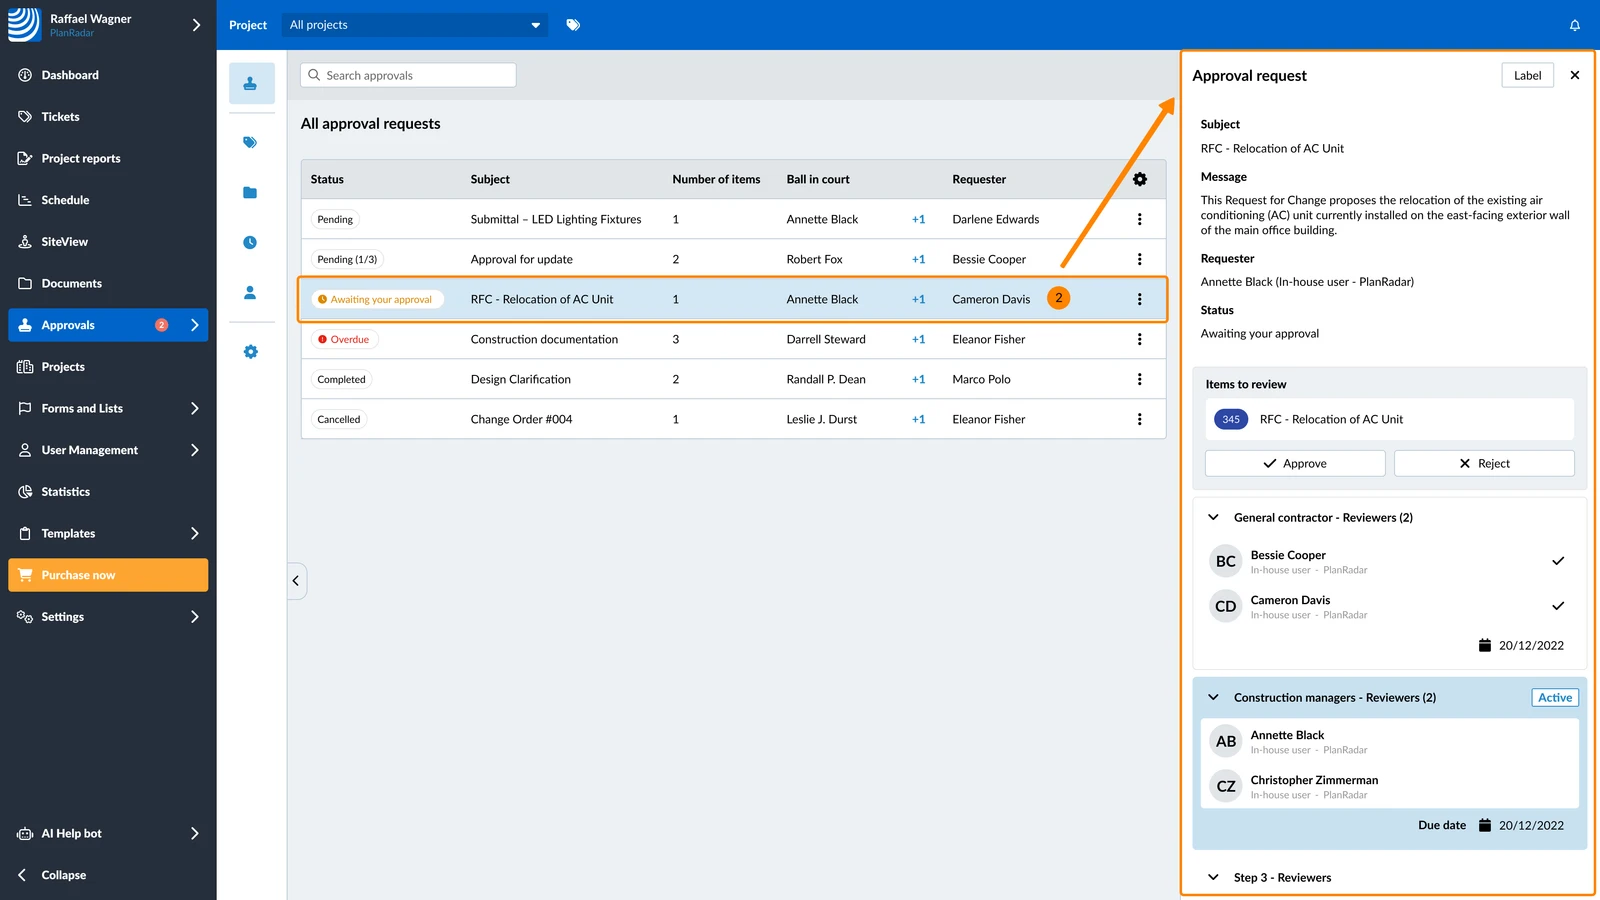
- Open the ticket under Items to review
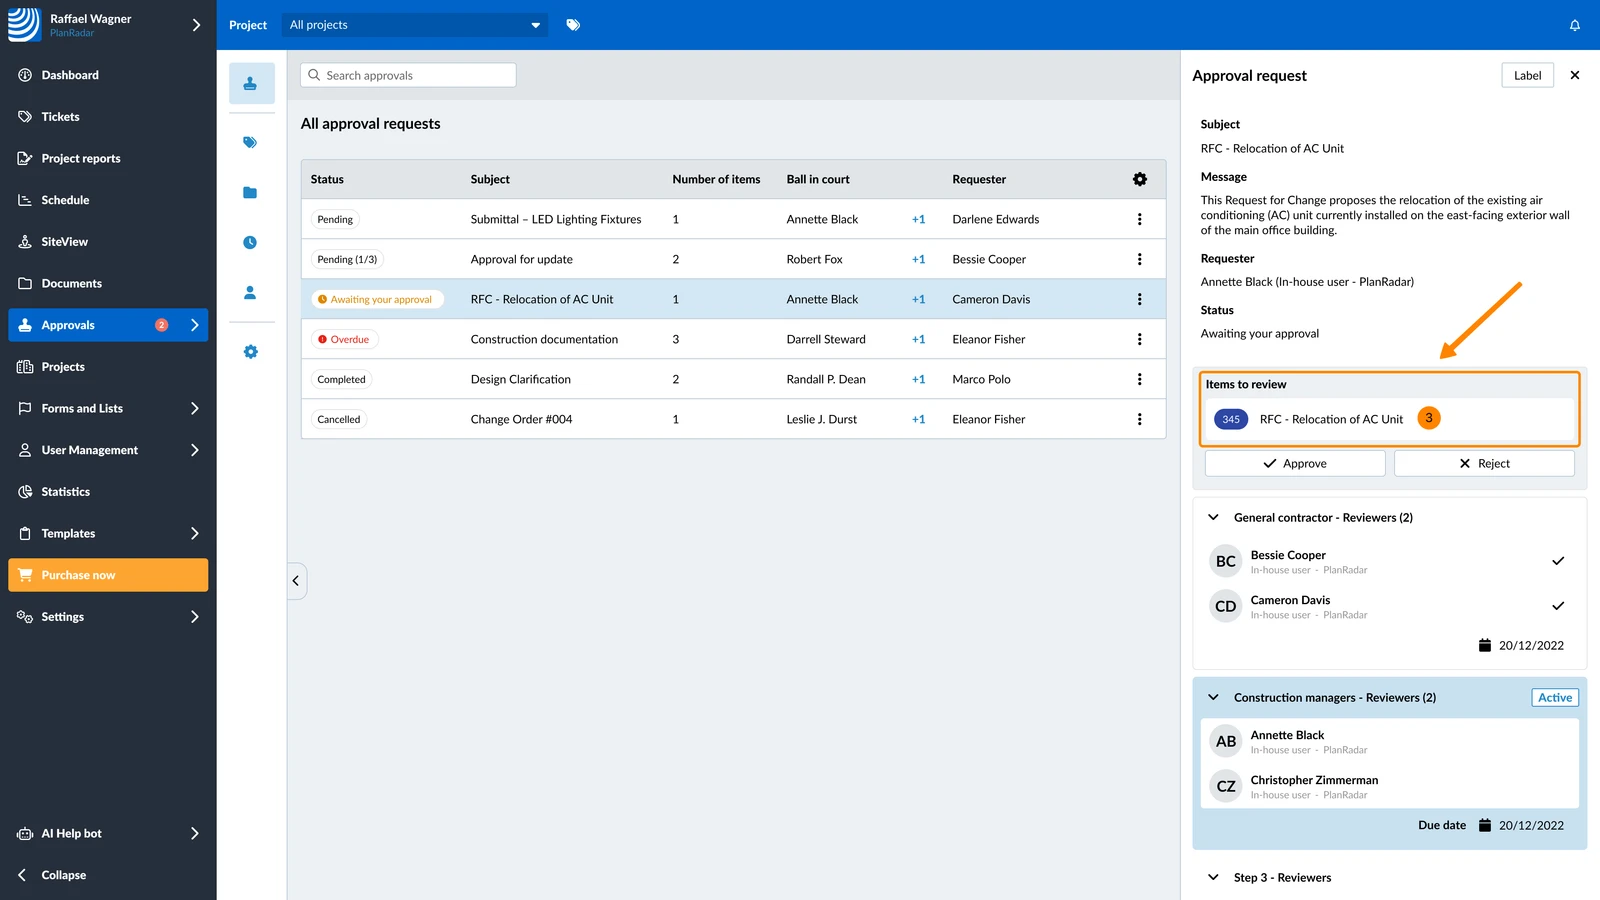
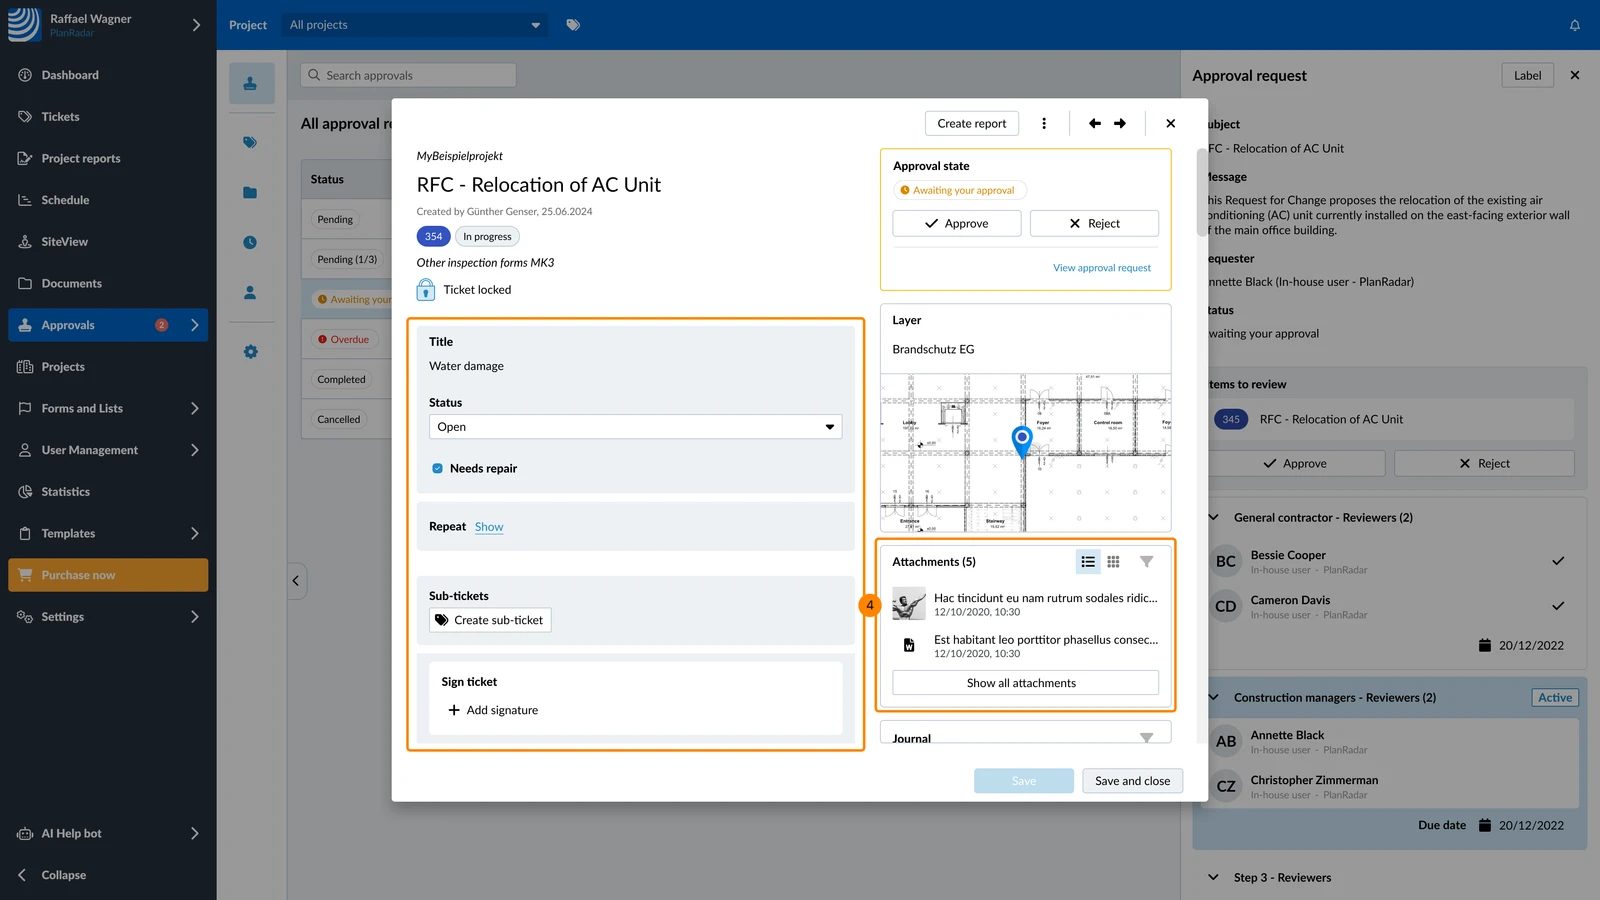
- Review all the Change Orders details and attachments
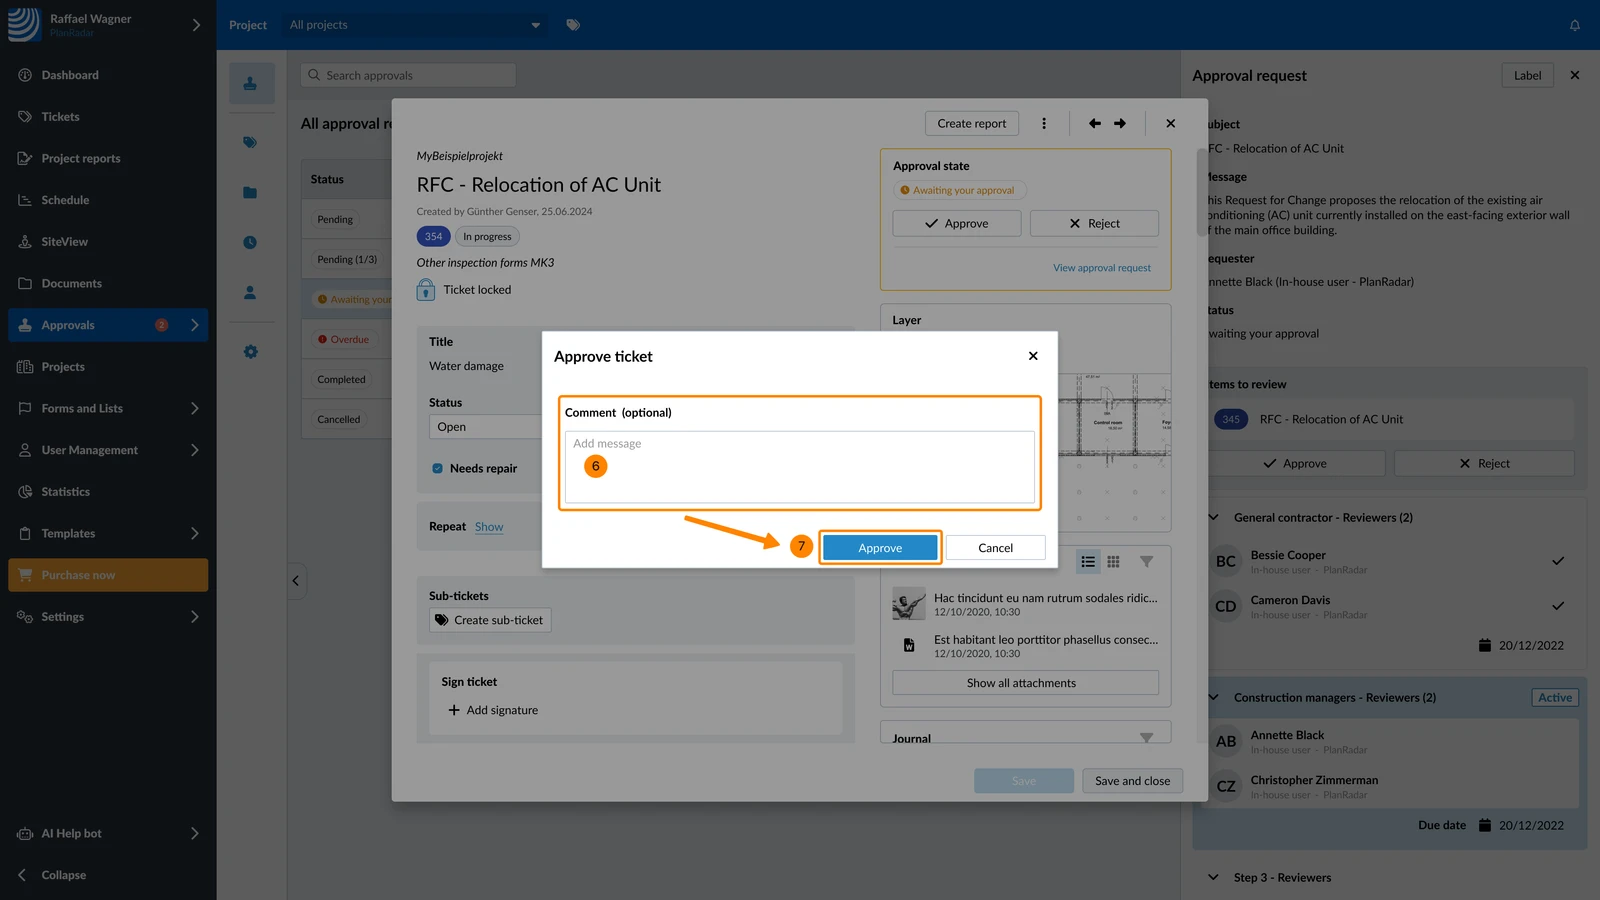
- Click Approve or Reject
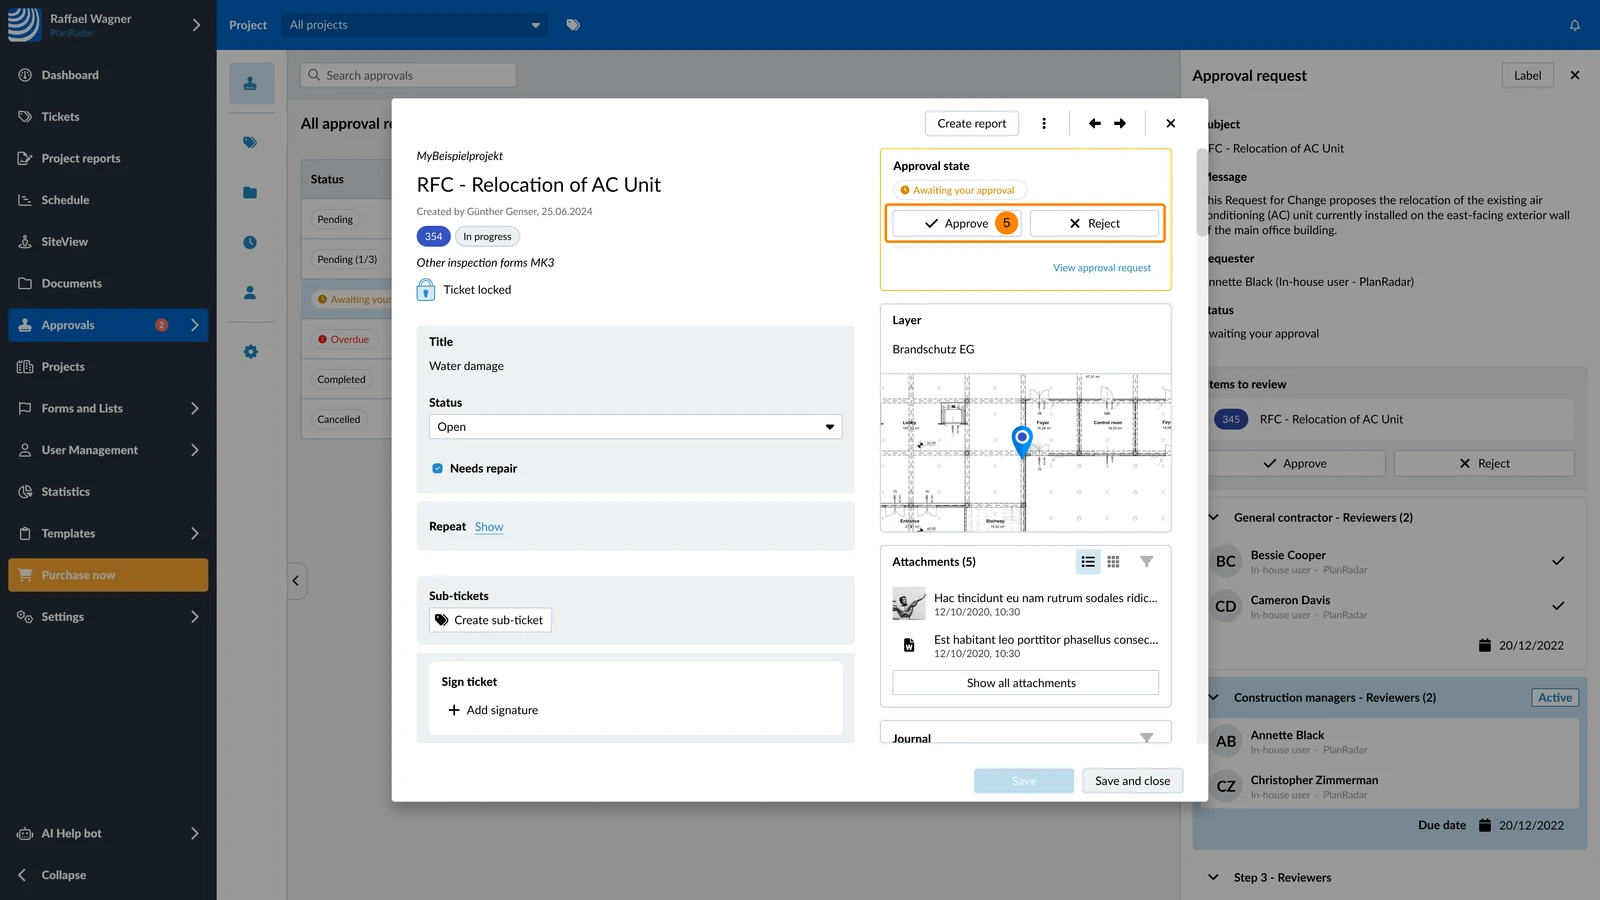
- Optional: Enter a comment
- Click Approve or Reject for final confirmation
3. Approval - Step 2 - Reviewer (Investor)
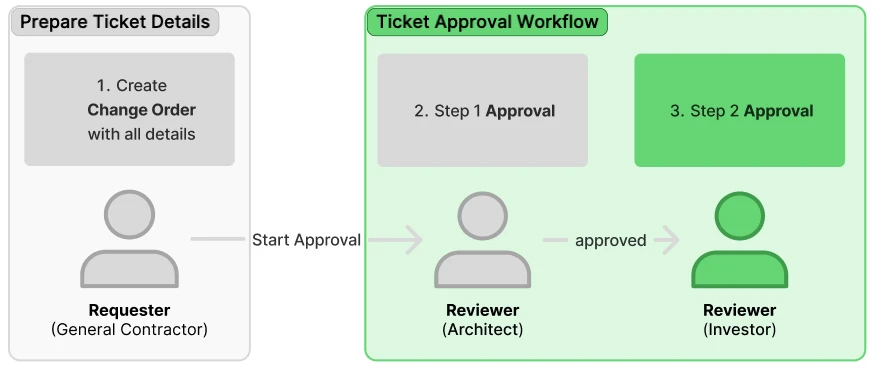
Step 2 of the Ticket Approval Workflow starts after Step 1 has been completed by the Architect's approval.
The next steps are done by the Reviewer (Investor) and are exactly the same as described above in 2. Approval - Step 1 - Reviewer (Architect).
If one of the reviewers rejects the approval request the process ends. The Requester can unlock the ticket to update the Change Order details or attachments and then start a new approval request.
4. Completed Approval Request
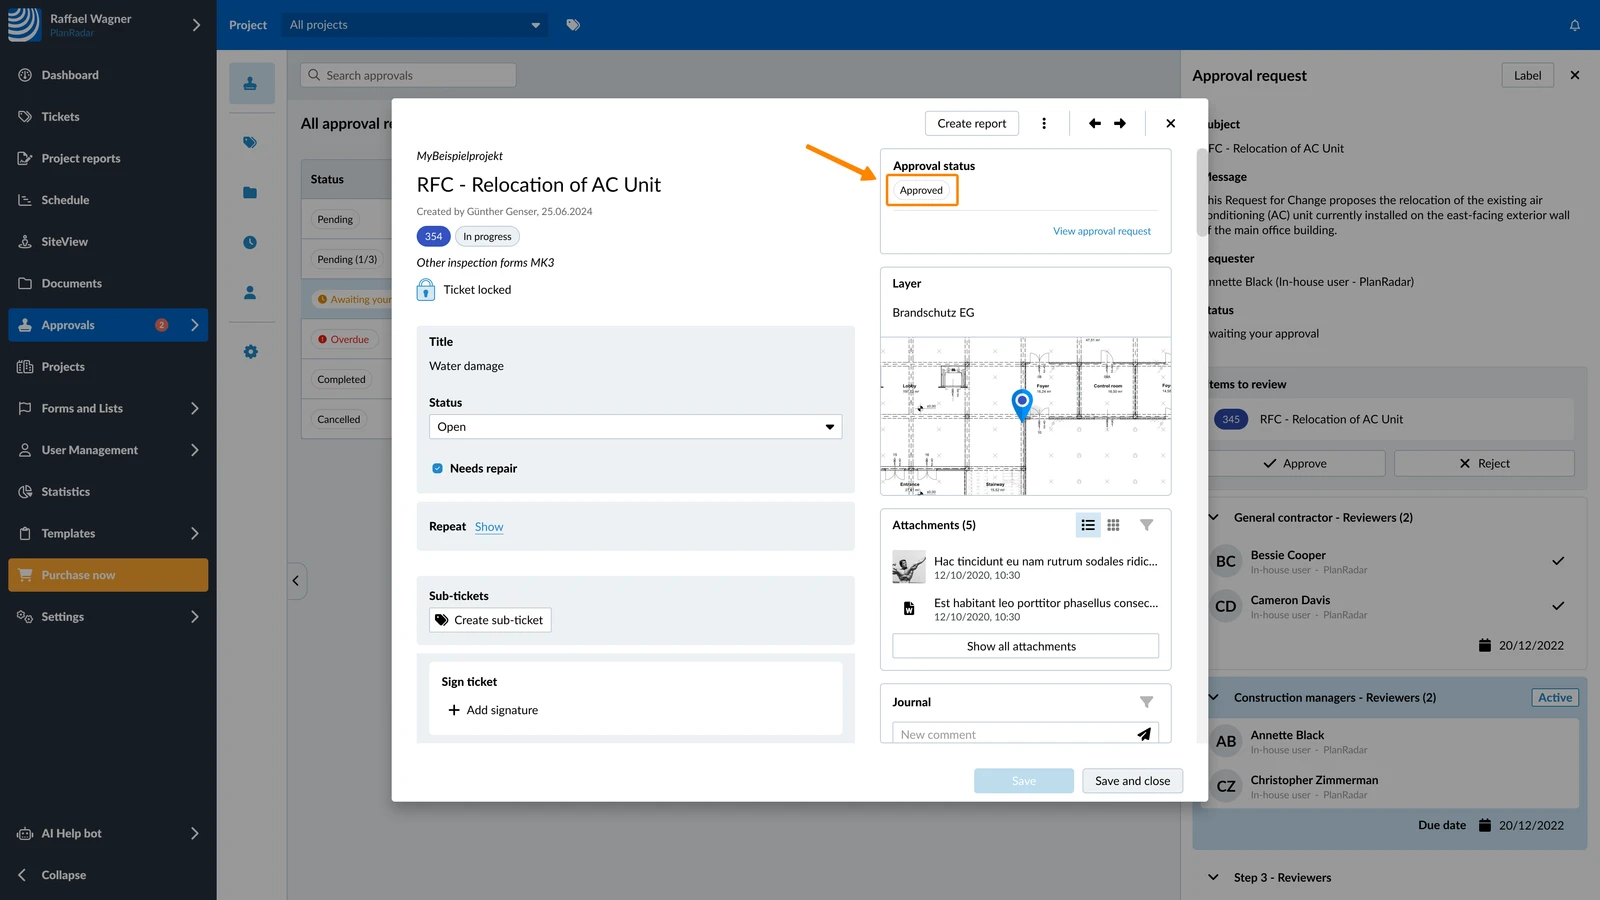
Once all reviewers approved, the request is completed with the status Approved.
View Approval Status
In the Ticket details you can see the ticket approval status:
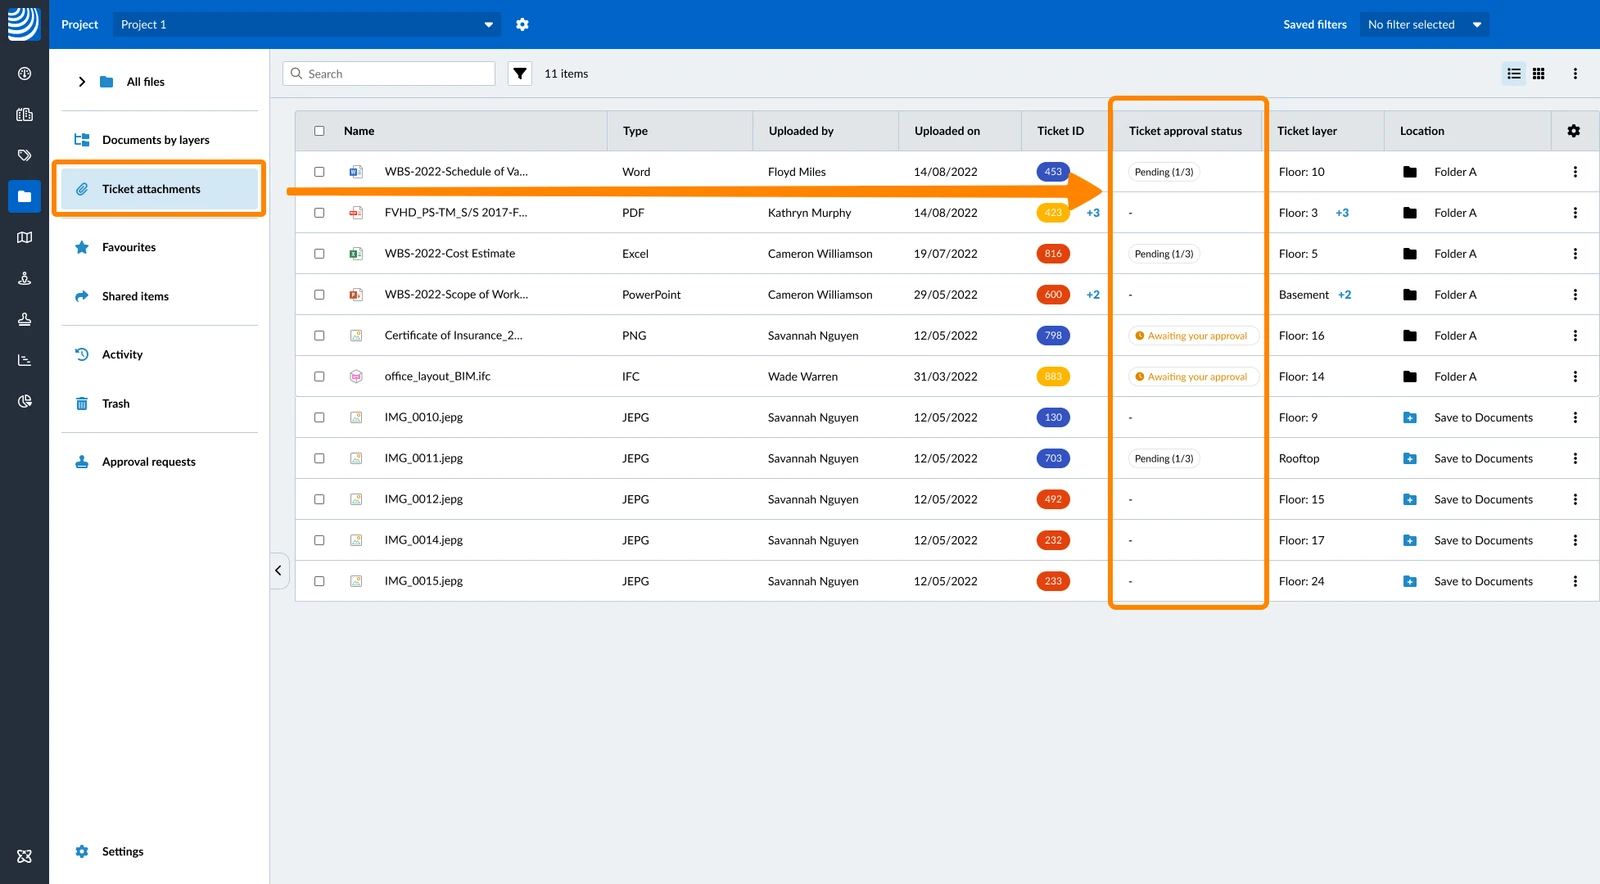
In Documents > Ticket Attachments View you can also see the ticket approval status of each attachment:
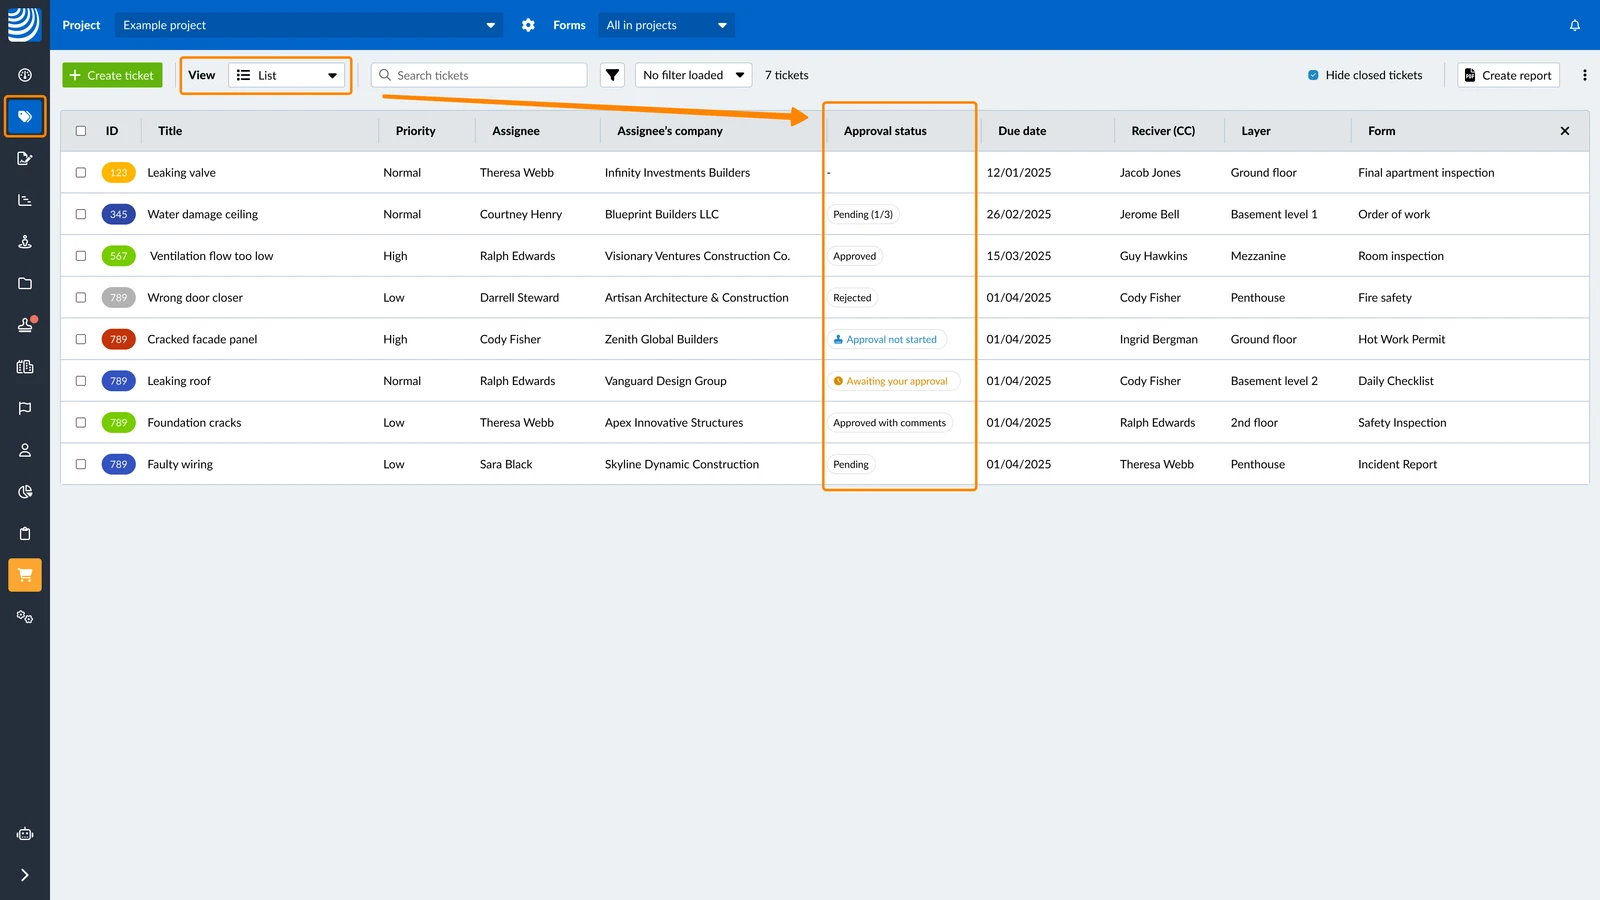
In Tickets > List View you can also see the ticket approval status:
View Approval Comments
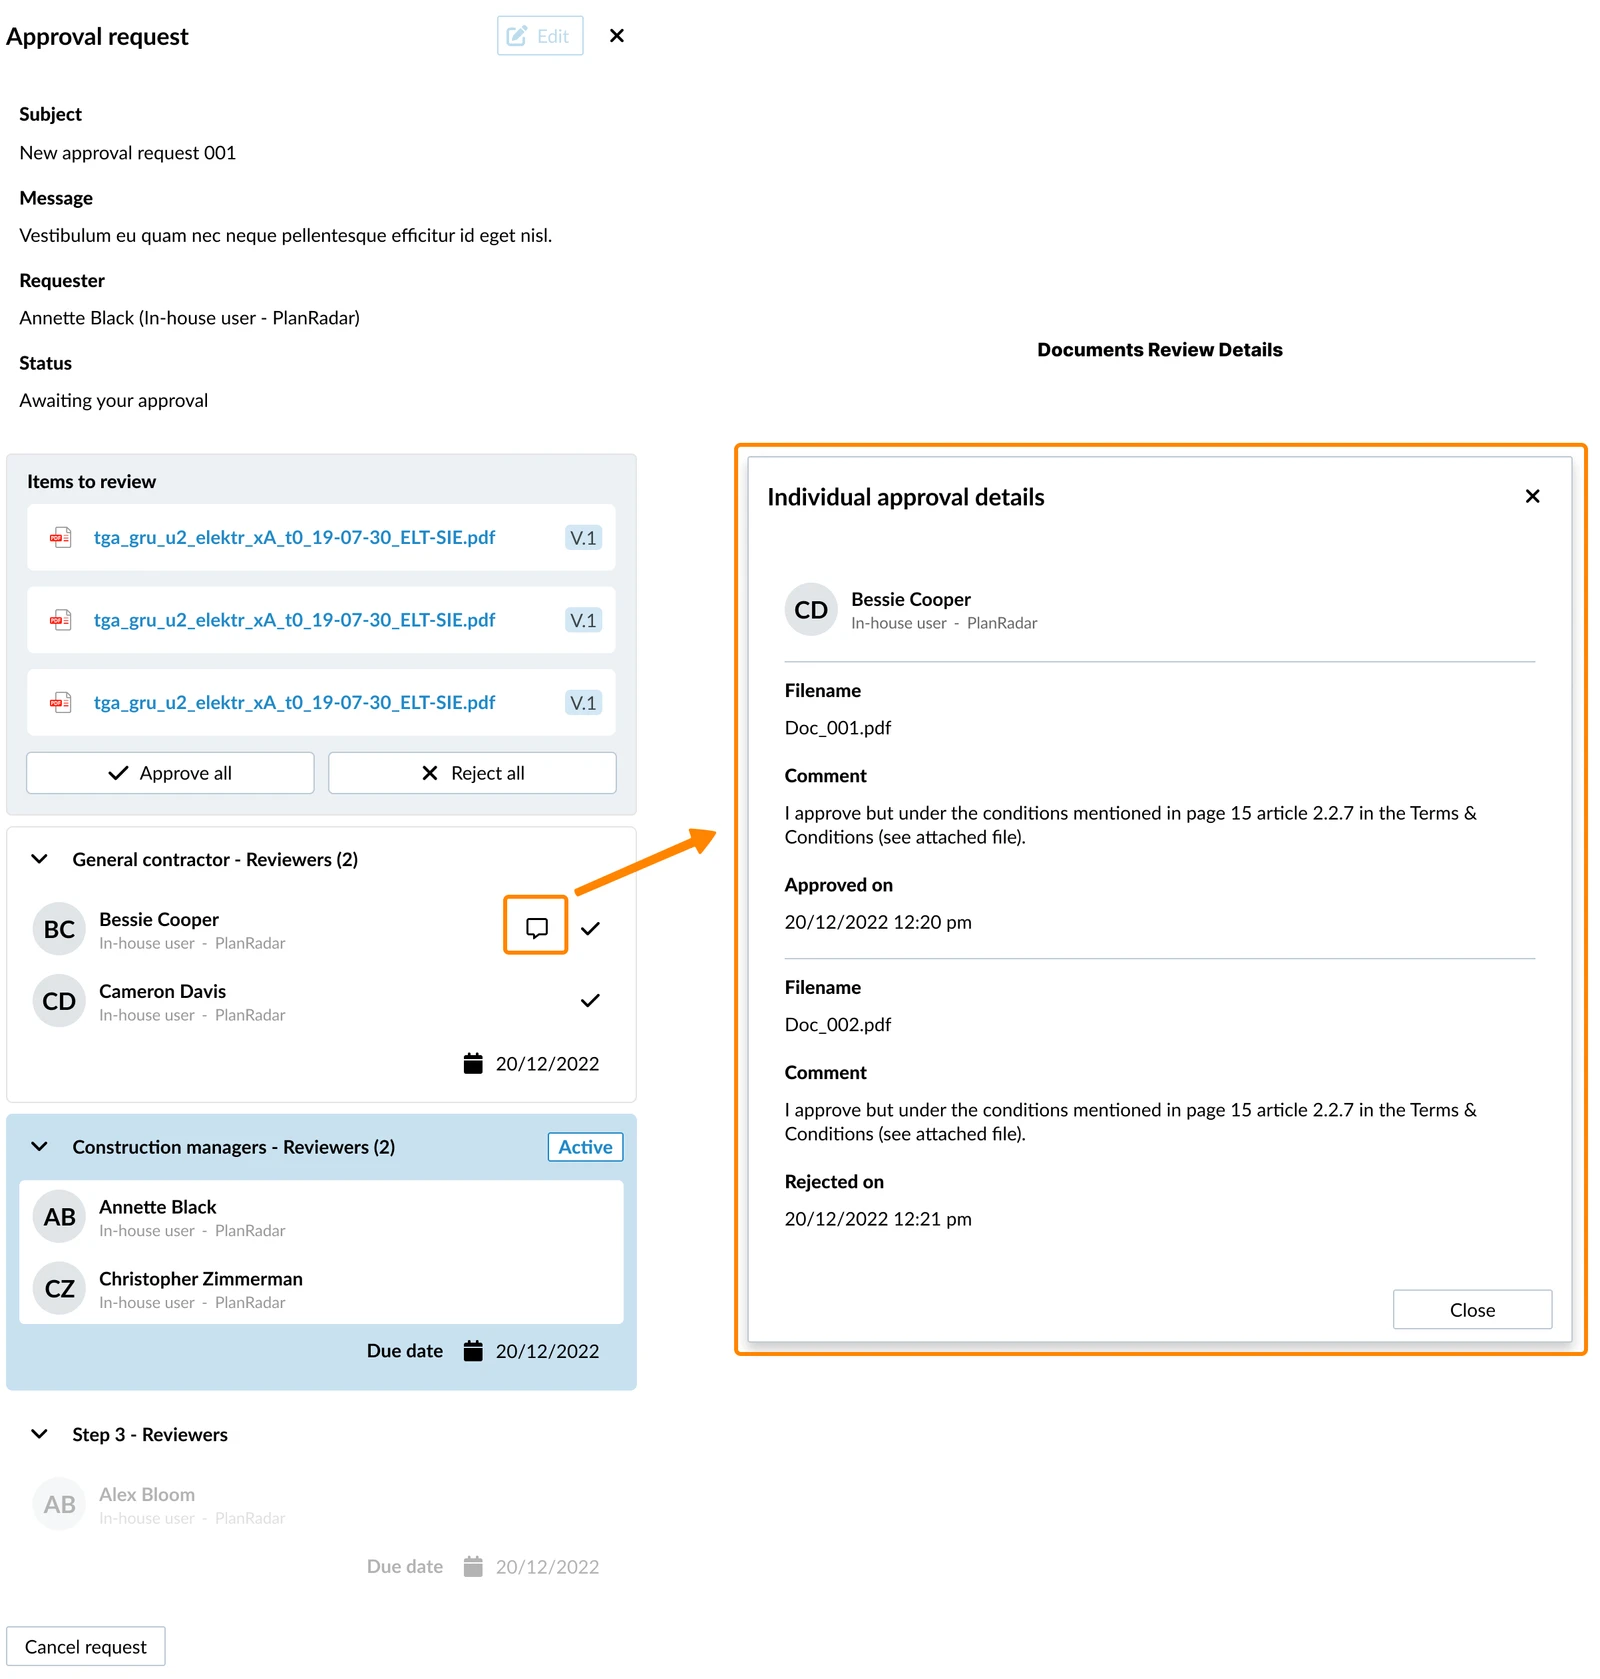
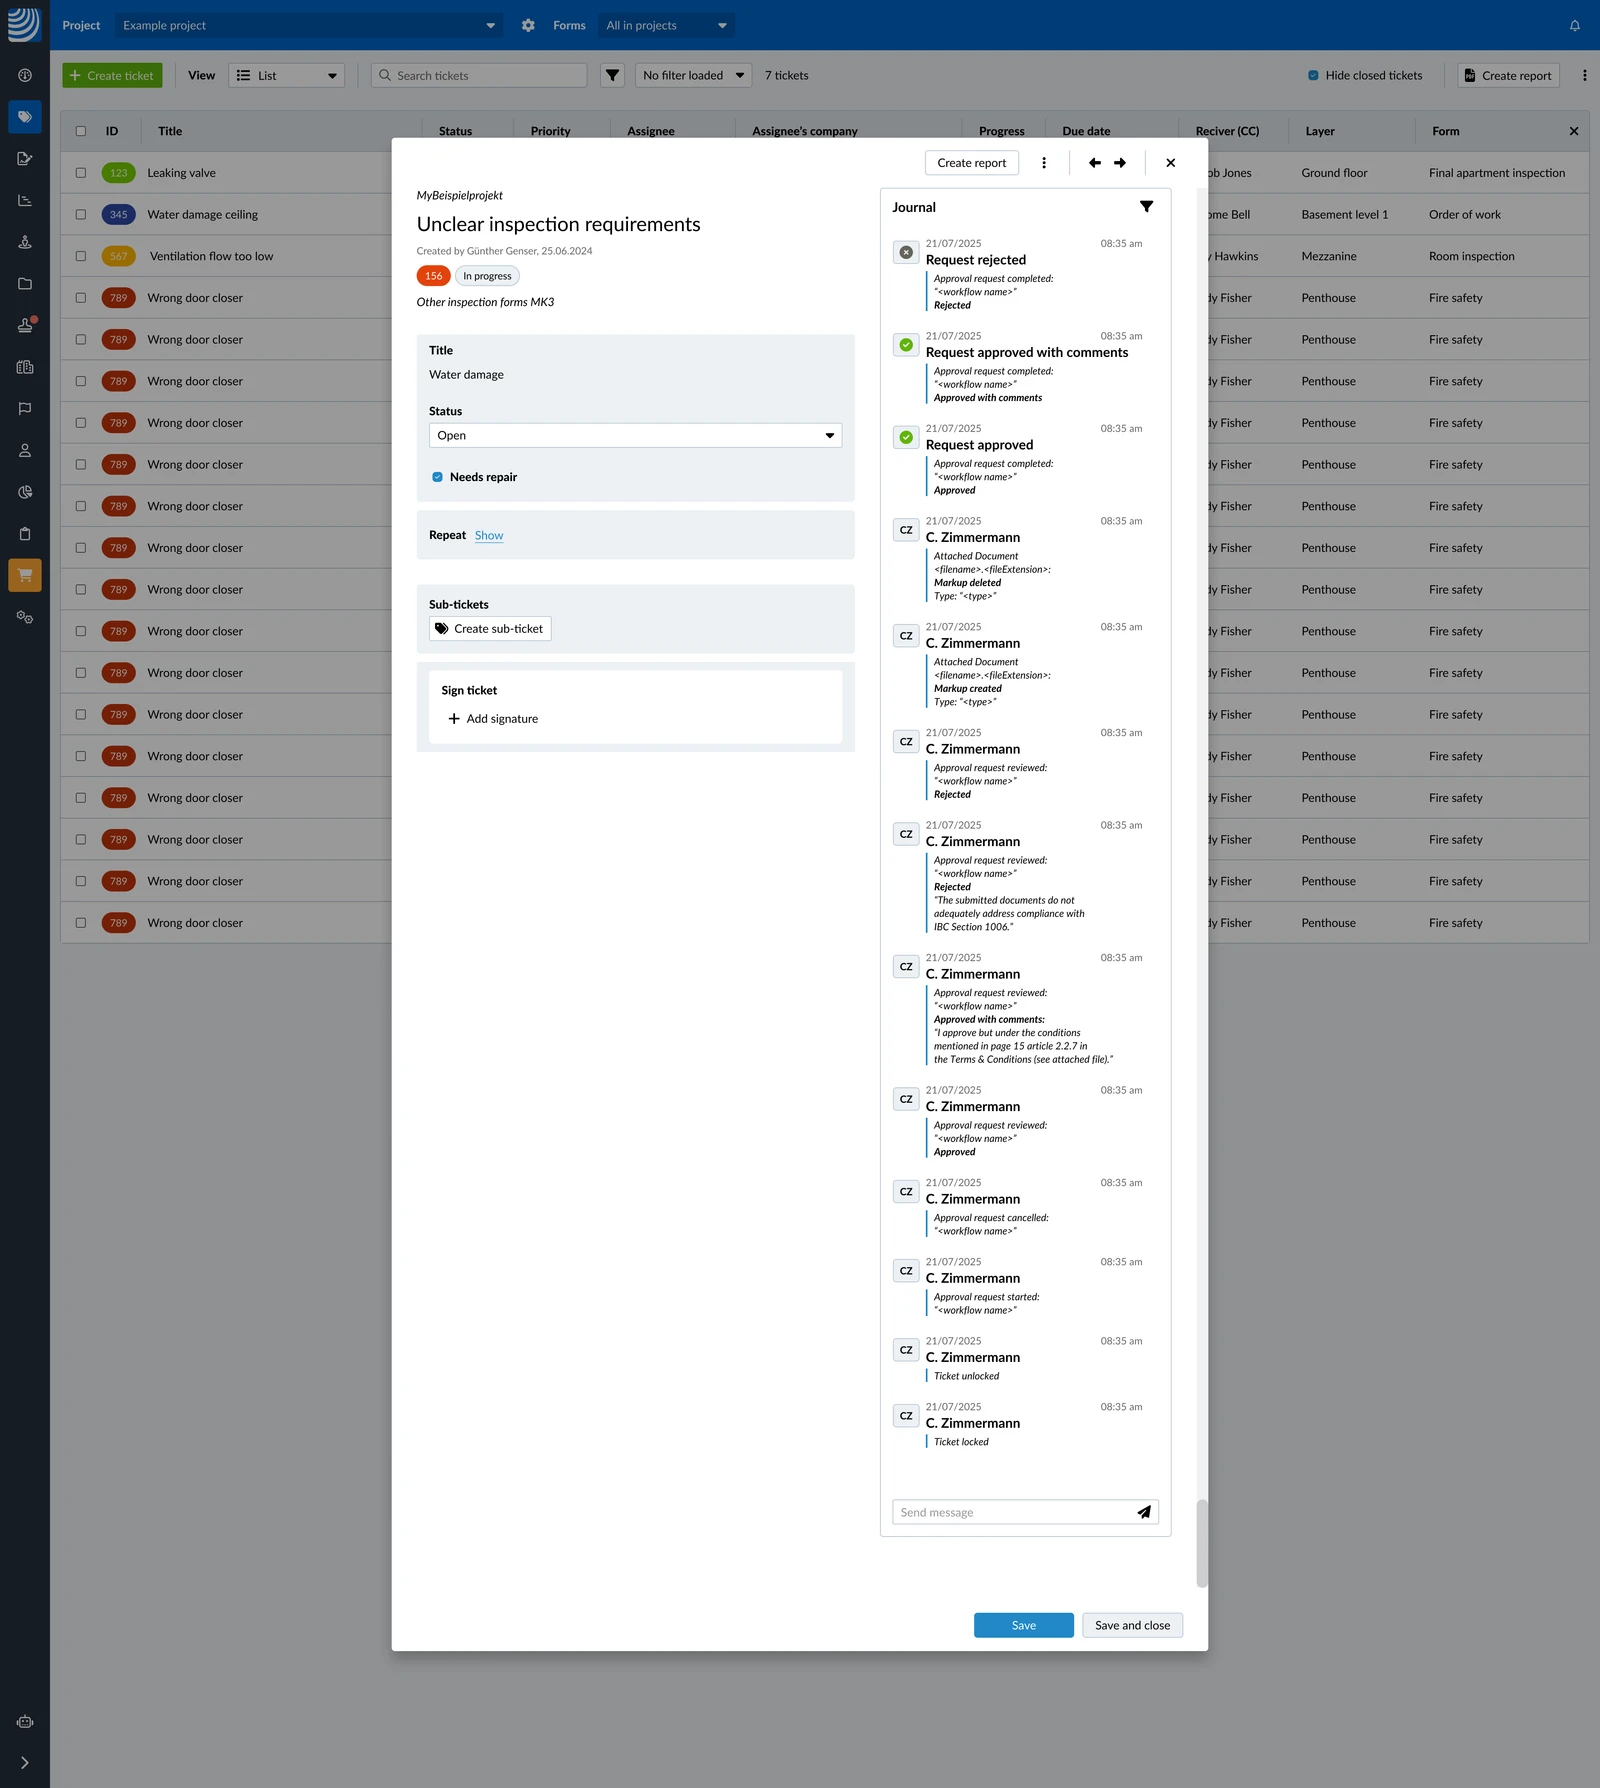
Reviewers can leave comments with each Approval or Rejection.
You can view approval comments in the Approval Request:
You can also view approval comments in the Ticket Journal:
Related Articles
For Tickets
- Create a Ticket
- Add Attachments to Tickets
- Fill in the Form of a Ticket
- Set, Change or Delete the Plan Position of a Ticket
- View Tickets of a Favourite Form via the Quick Access Menu
- View Tickets of a Project, Layer or Form in the Webapp
- View & Edit a Ticket
- Comment a Ticket
- Track Activity on a Ticket in the Journal
For Ticket Approvals
Updated December 17, 2025