

 Deutsch
 Español
 Français
 Hrvatski
 Italiano
 Polski
 Português (BR)
Request Approval for a Ticket
Overview
Request approval for a ticket by selecting an approval workflow with predefined steps and reviewers. The approval applies to the entire ticket (including all attachments). There is no partial approval of single fields or files.
Before you start working with Ticket Approvals read more in Approvals and in > Ticket Approvals.
Access & Permissions
How to access Ticket Details
Approval requests for tickets always start in the ticket details.
There are multiple ways to view a ticket and its details. Read more in View & Edit a Ticket.
View a ticket's details from the ticket list view for example:
- Click Tickets
- Click on the ticket
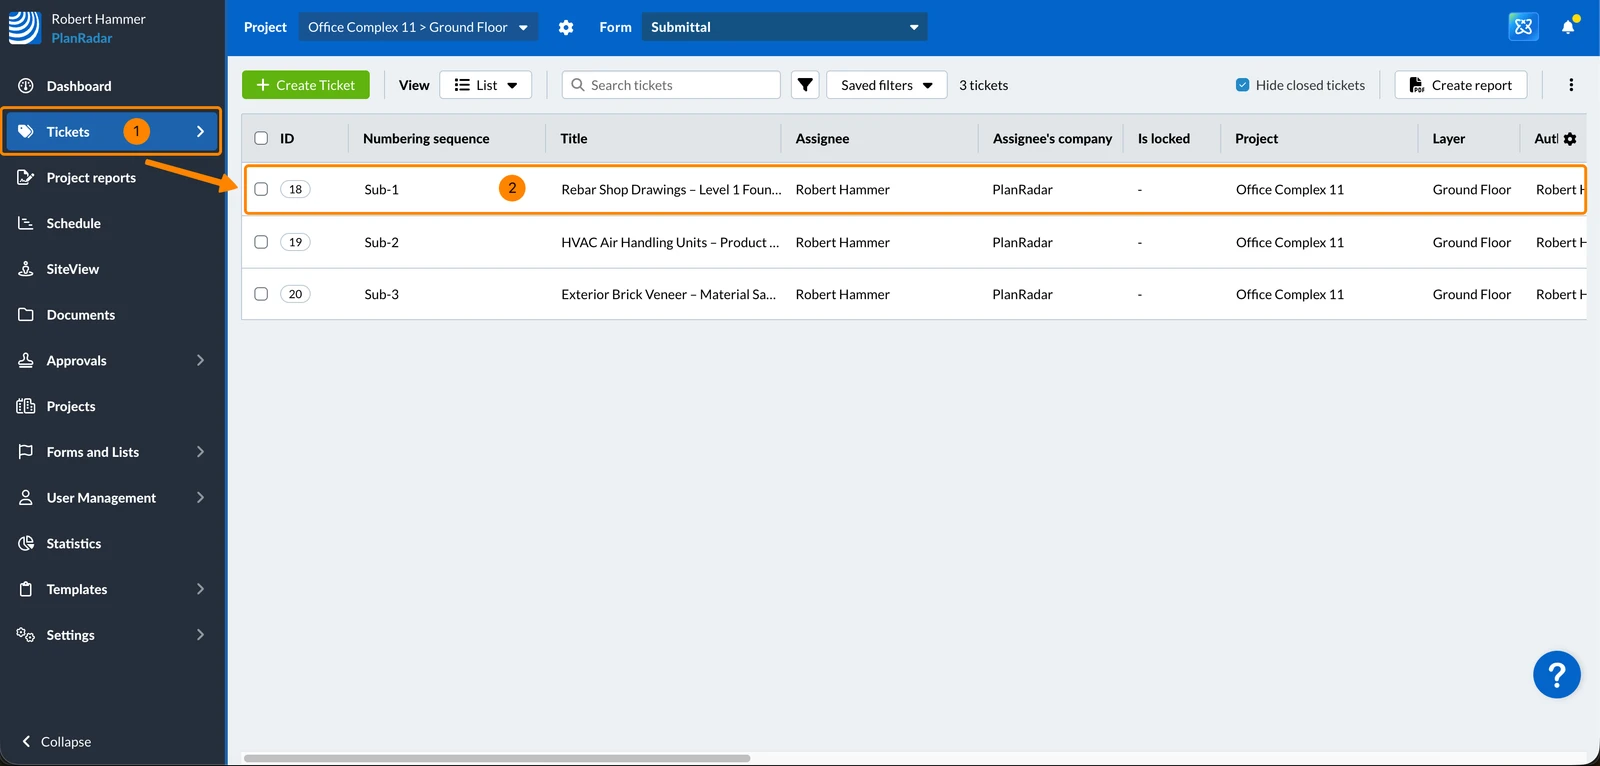
Request Approval for a Ticket
With a Predefined Workflow
To request approval for a ticket with a predefined workflow:
- Optional: Select an approval workflow in the drop-down e.g. Submittal.
If the ticket form has only one workflow assigned, it is already selected here.
If it has multiple workflows assigned, you can select a different workflow. - Click Request approval
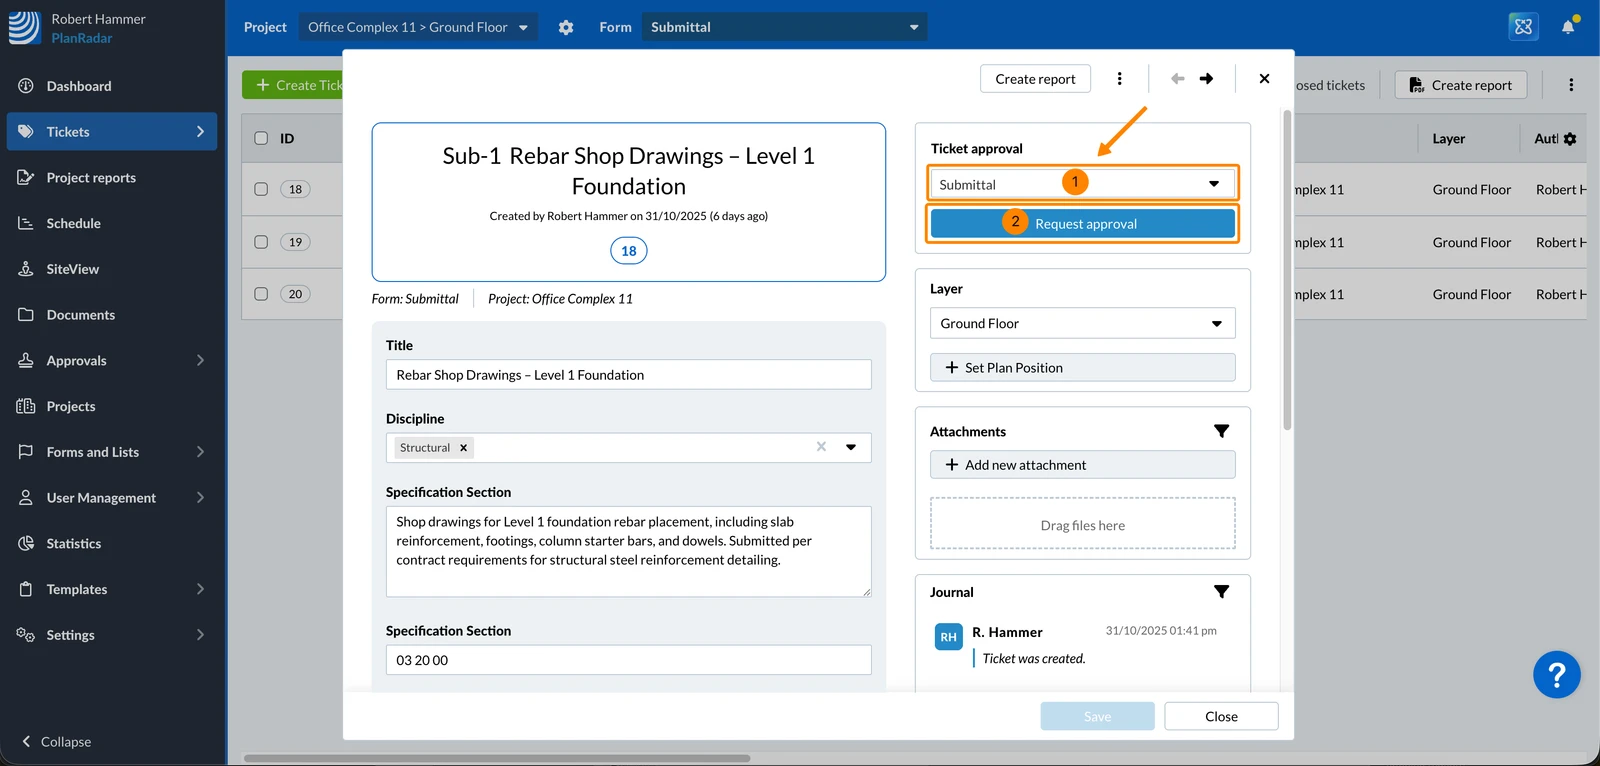
- Optional: If the workflow allows to make changes, you can edit steps, reviewers and duration as described in Create an Approval Workflow.
- Enter or change the Subject of the approval request and the Message (optional) e.g. Approval Request for Submittal of Reba Show Drawings.
The Subject and Message might be predefined in the selected workflow. - Click Send request
The Subject and at least one reviewer are mandatory to start the approval.
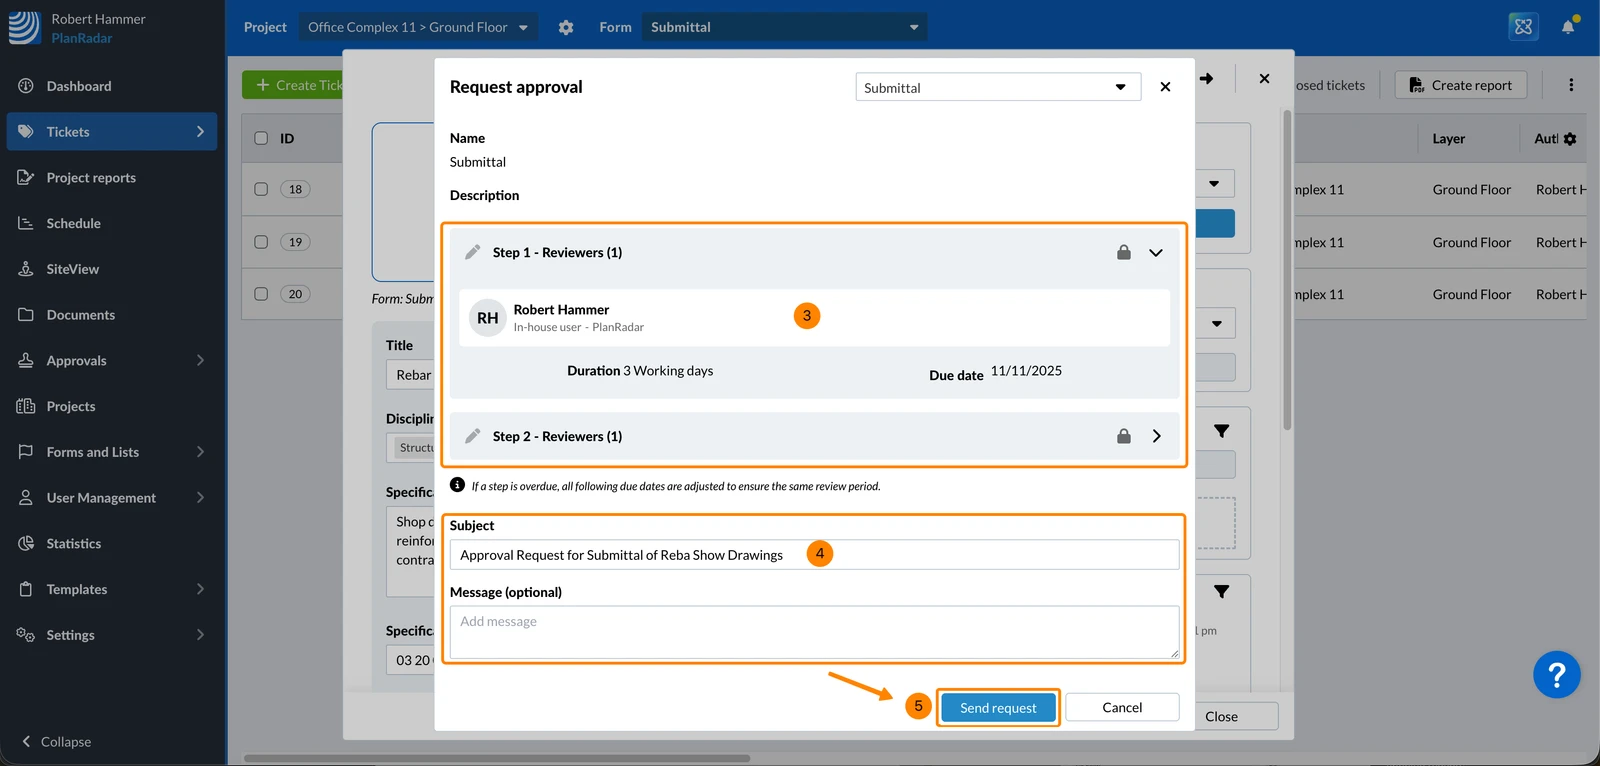
With an Individual Workflow
If the form setting Individual workflows is enabled, you can also request approval without a predefined workflow and define steps and reviewers on the fly. Read more in Edit Form Settings > Approval Workflows
To request approval for a ticket with an individual workflow (while pre-defined workflows are assigned):
- Open the Select approval workflow drop-down
- Click Create individual workflow
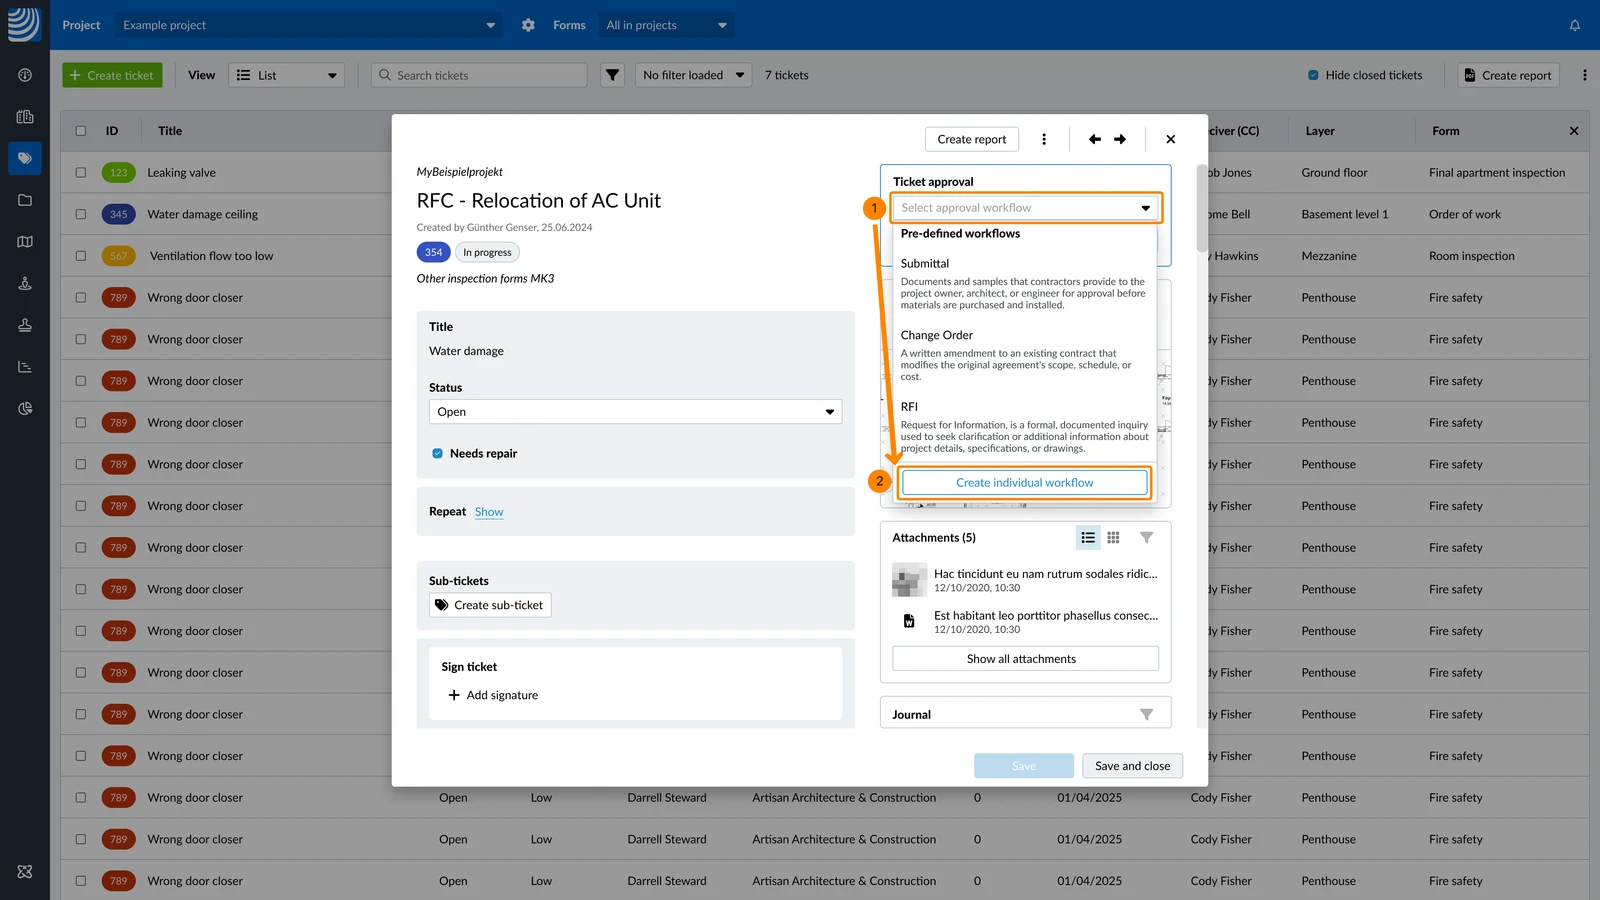
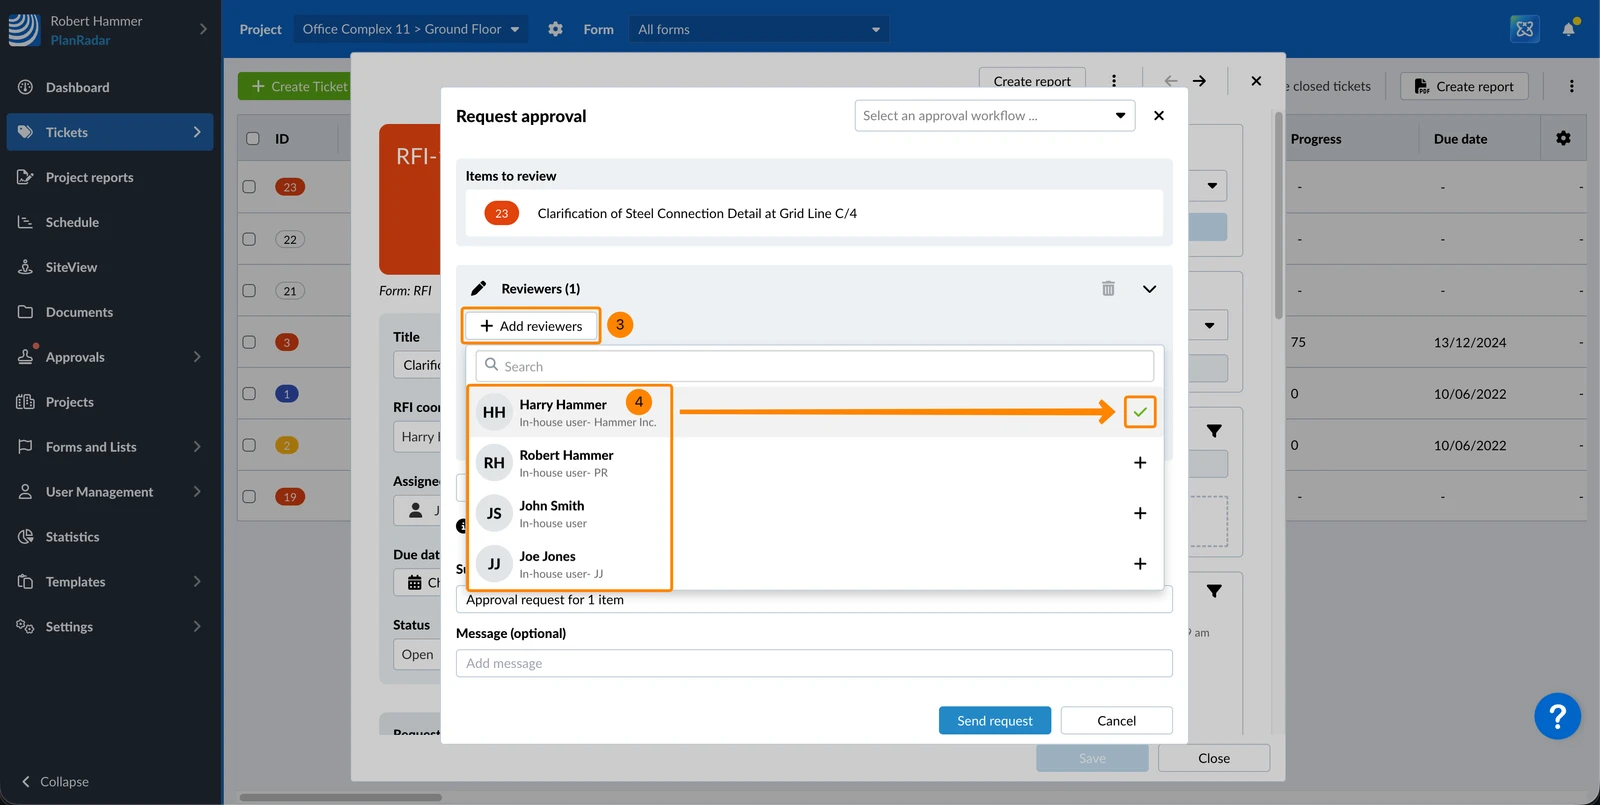
- Click Add reviewers
- Click on the user(s) to add them as a reviewer.
Once added, a ✔ is display. Click again to remove them.
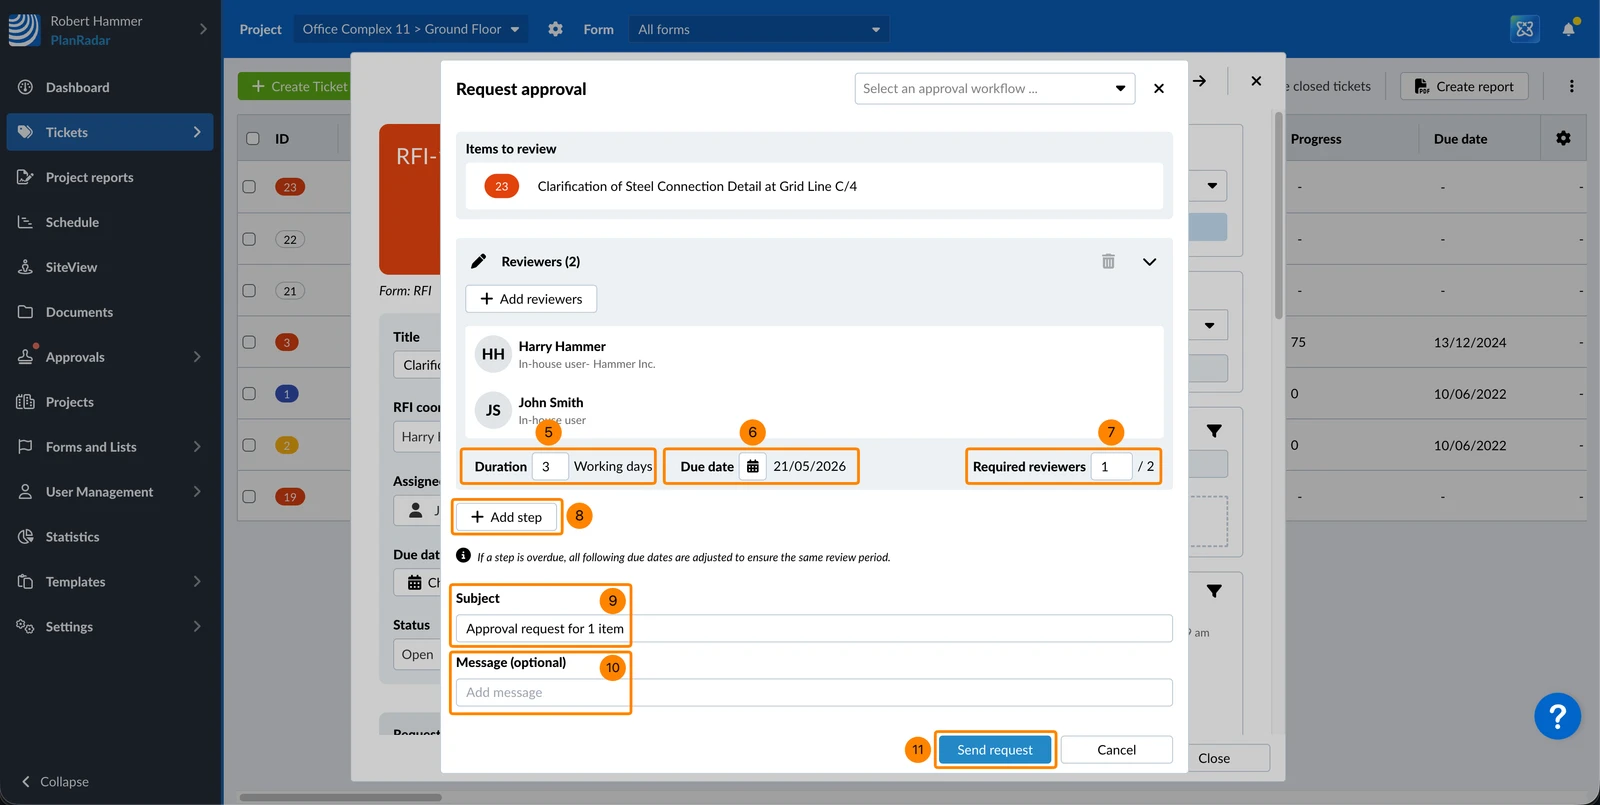
- Enter the Duration in working days. The due date will be updated automatically.
- Alternatively: Set a Due date. The duration in working days will be updated automatically.
Also see Configure Working Days (in project details). - Optional: Enter the number of Required reviewers if not all reviewers need to approve to complete the step — for example, 1 out of 2.
- Optional: Click + Add step to add additional steps and repeat 3. to 7. for each step.
- Optional: Edit the Subject
- Optional: Enter a Message
- Click Send request
To request approval for a ticket with an individual workflow (while no pre-defined workflows are assigned):
- Click Request approval
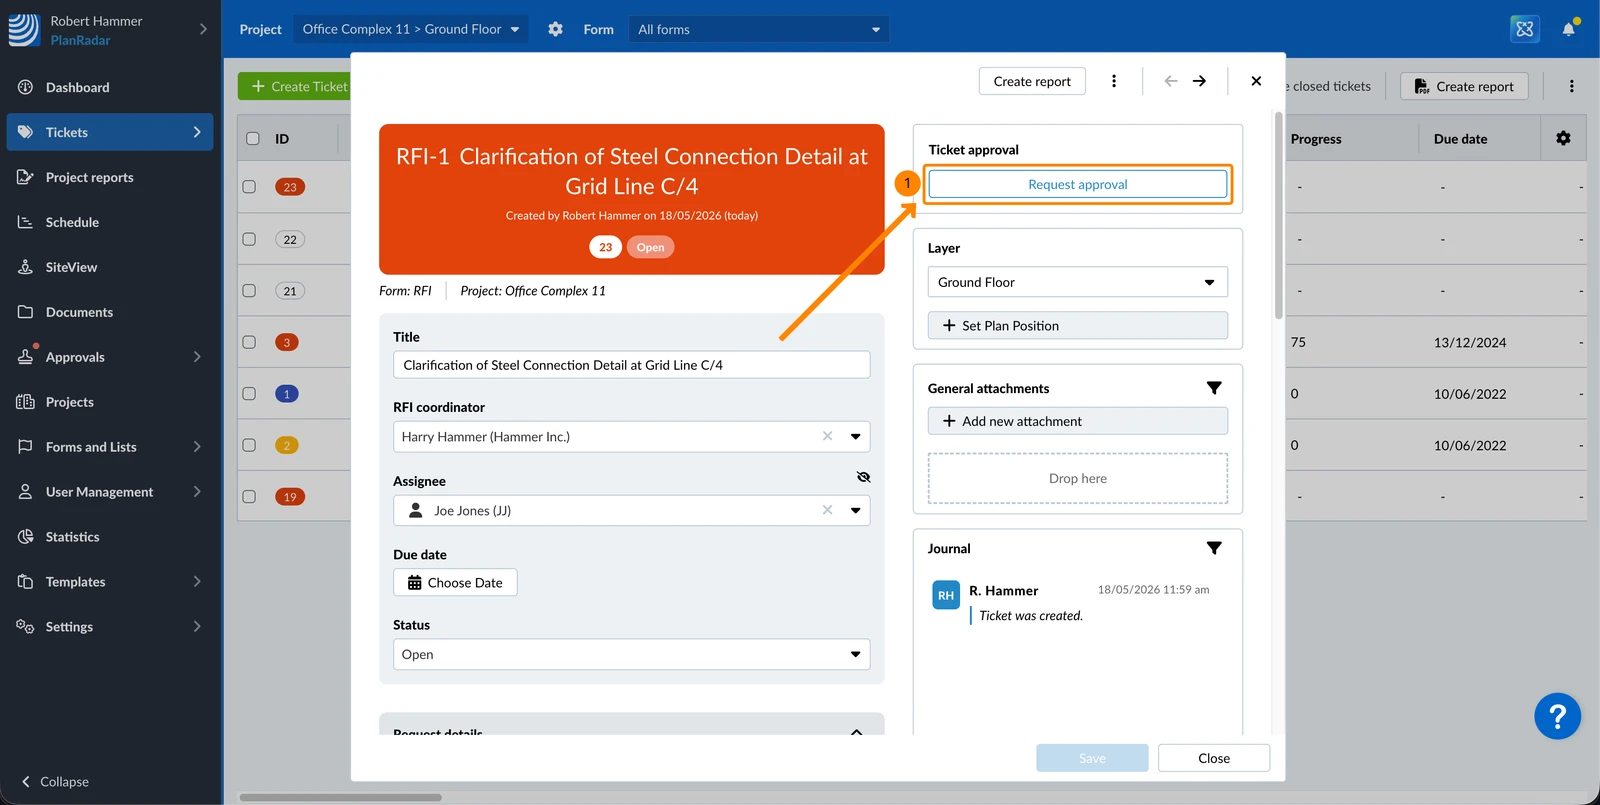
The modal opens directly — continue from step 3 (Add reviewers) as described above.
Updated May 26, 2026