

 Deutsch
 Español
 Français
 Hrvatski
 Italiano
 Polski
 Português (BR)
Setup Webhooks
Overview
When building integrations with PlanRadar you can use webhooks to react on events happening inside of your PlanRadar account. For example, when a user updates a ticket, your software is informed in real time so that it can perform the necessary actions (e.g. retrieve new ticket information via the Open API).
Technically, webhooks can be thought of as automated messages that are sent by PlanRadar when something happens. These messages contain payload data and are sent to a predefined URL of your service.
Access & Permissions
How to access Webhooks
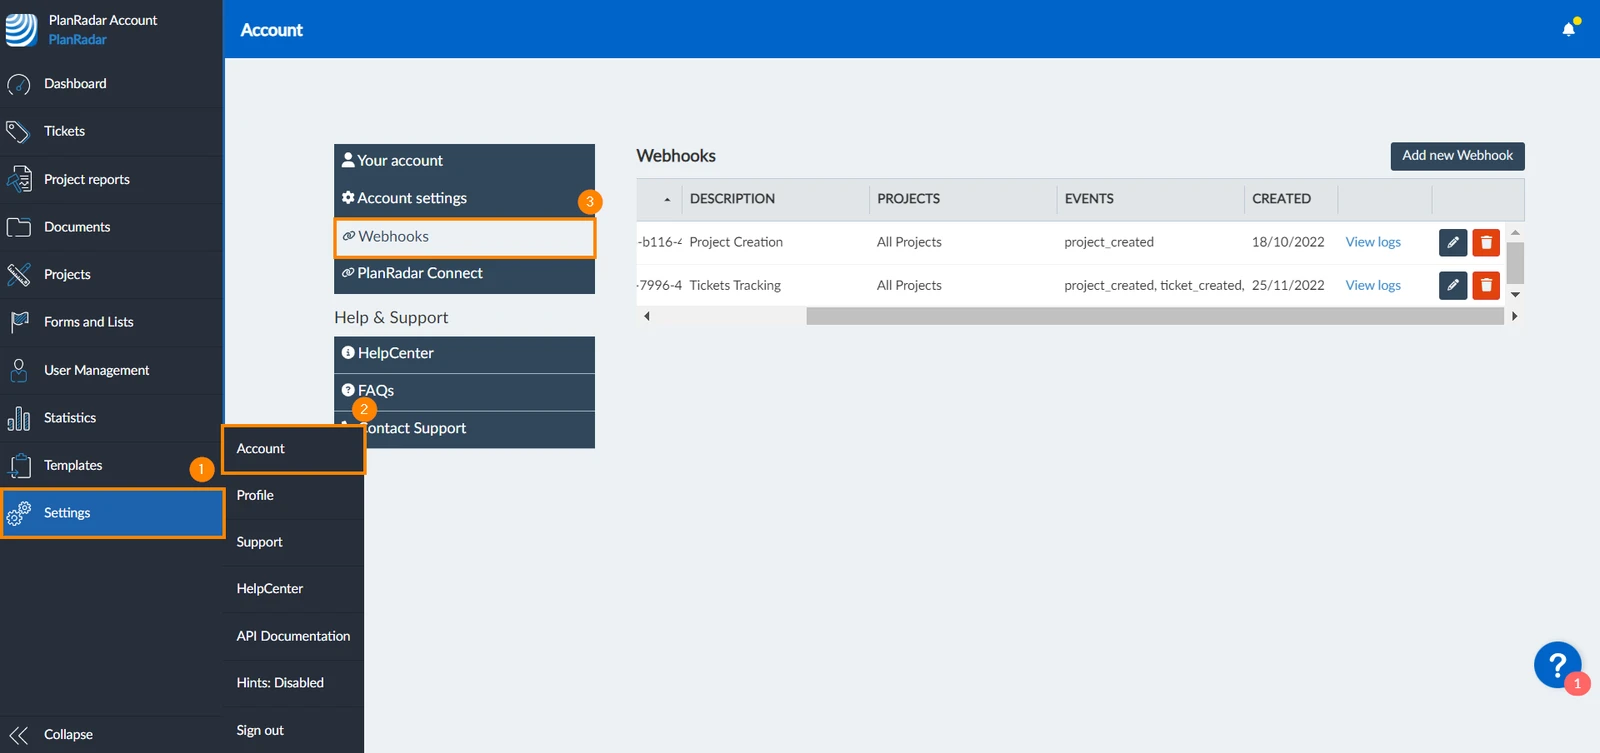
- Click Settings
- Click Account
- Click Webhooks
Add a New Webhook
PlanRadar allows you to easily use webhooks to get data whenever a certain event takes place. To setup your webhooks:
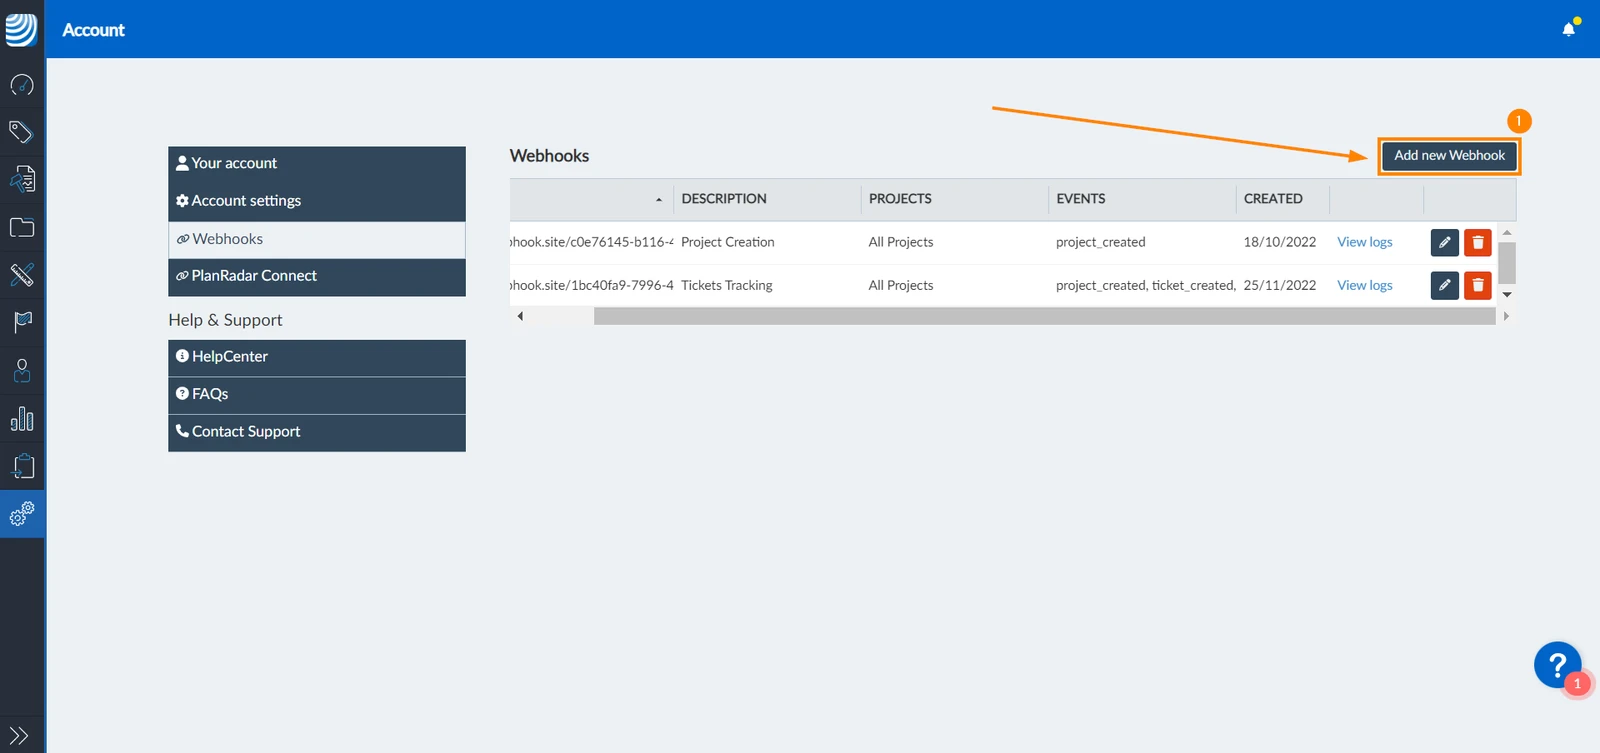
- Click Add new Webhook
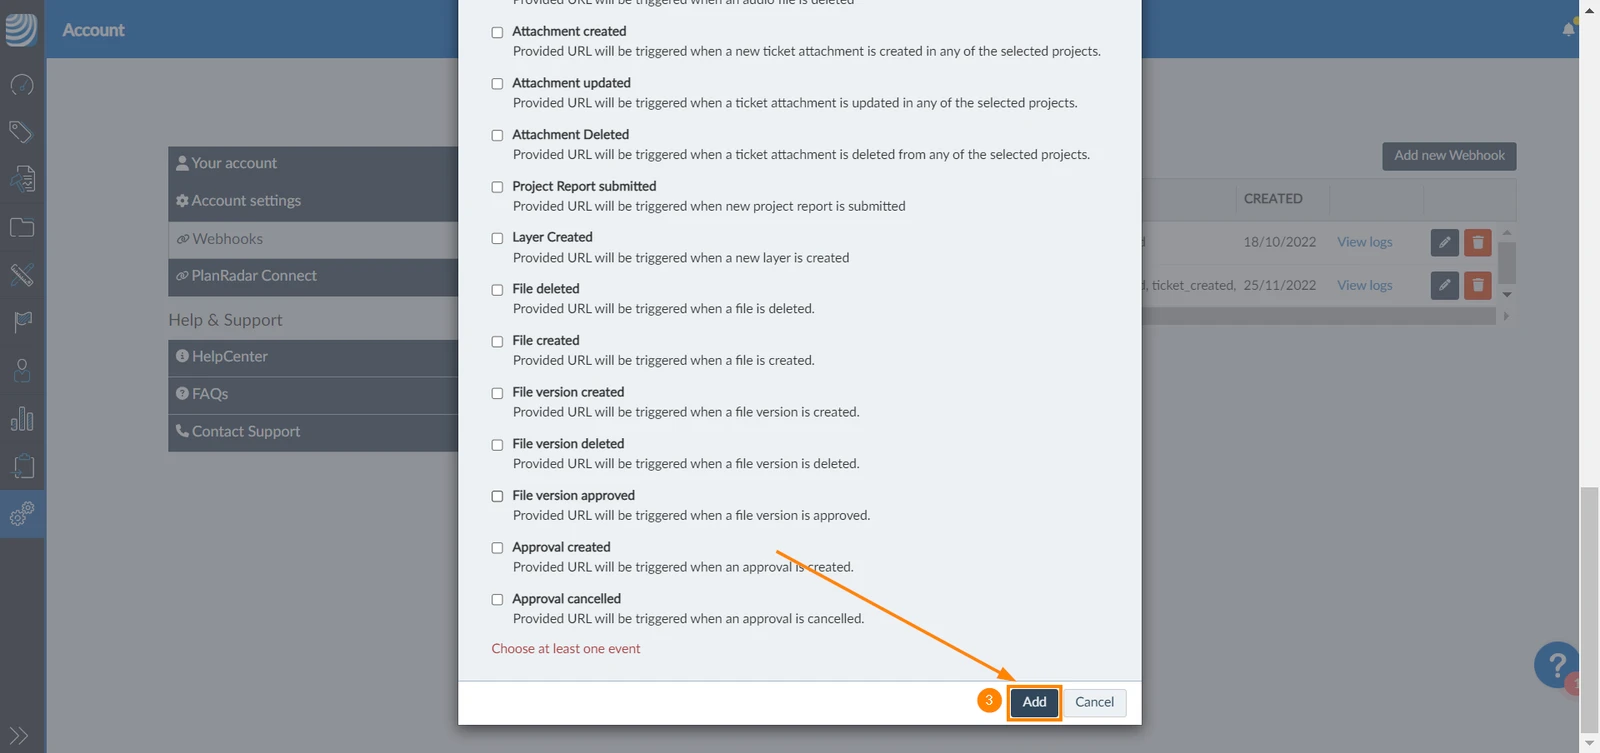
- Configure Webhooks as explained below
- Click Add
- The webhook will be listed in the webhook page
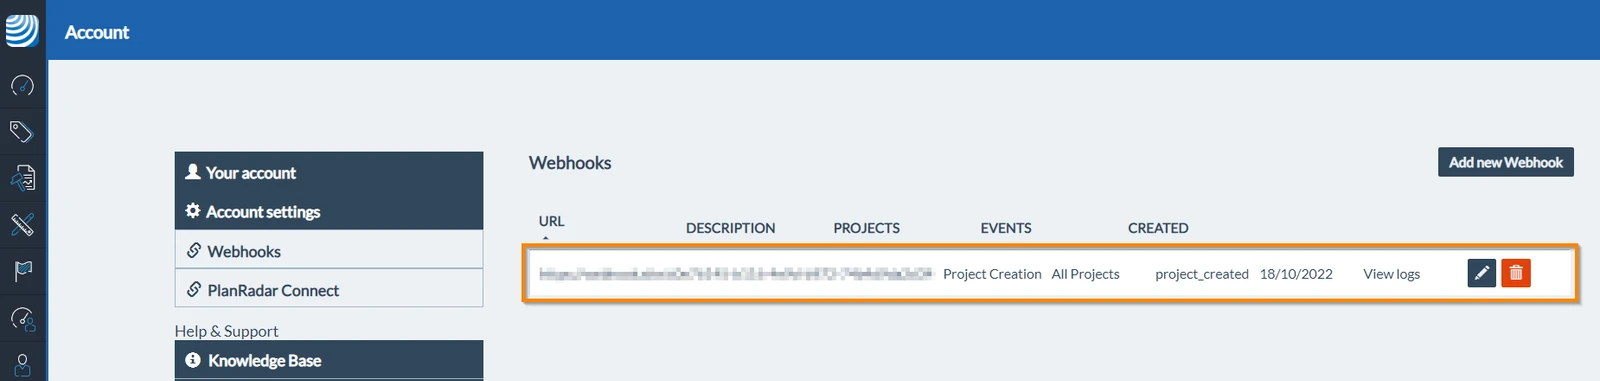
After successfully creating the webhook, every time the specified event takes place, the webhook will be triggered and send data in JSON format to your URL.
Configure Webhooks
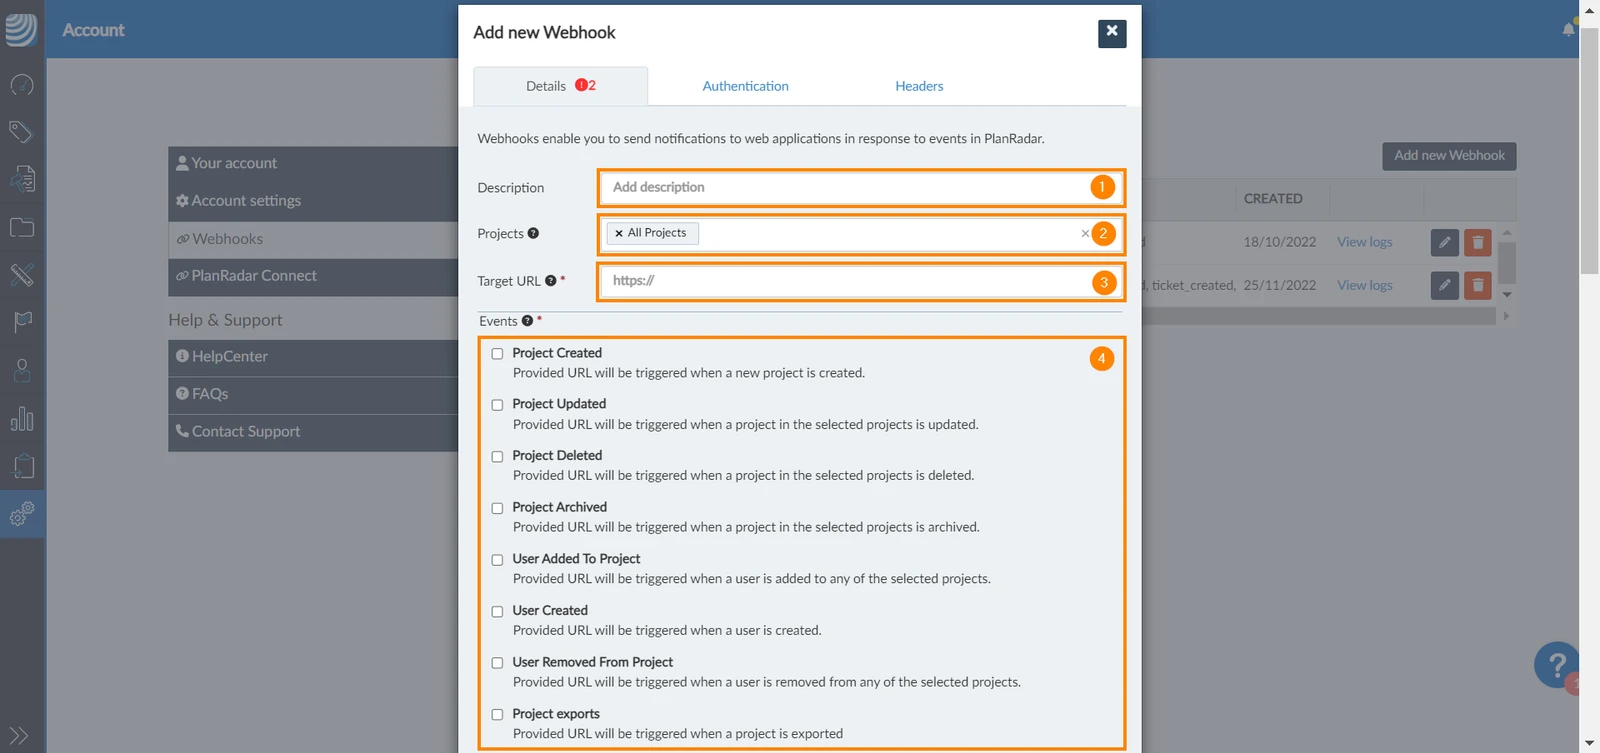
When adding a new webhook, a pop-up window will open with different tabs to set up your webhook. The details tab allows you to configure webhook data, the other two tabs, authentication and headers, offer different types of authentication. Here's an explanation of the different tabs and how to setup the fields in each one:
Details
The details tab contains:
- Description: provide a short descriptive name. Make sure the name you choose describes the webhook accurately, so it is easy for you to recognise it once you have many webhooks set in your account.
- Projects: select the projects to be monitored for the triggering event. You can either select one or multiple projects from the dropdown menu or you can select all the projects existing in your account.
- Target URL: provide a URL to which the event data will be sent. This URL can be created from the destination app/site. The Target URL is mandatory.
- Events: determine the events that shall trigger the webhook to send data to the provided URL. It is mandatory to select at least one event.
Authentication
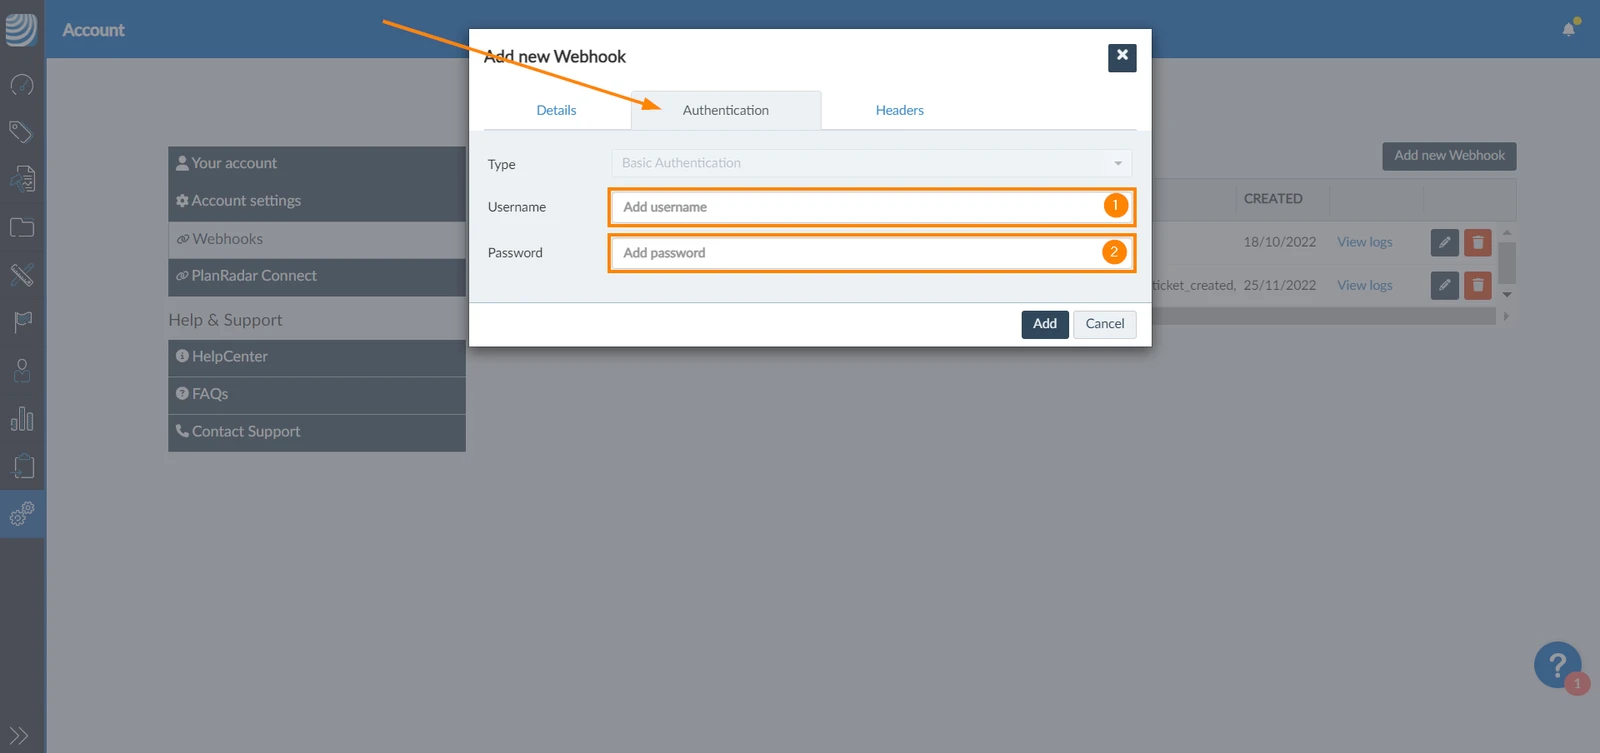
This type of authentication is used with servers that require a username and a password. To use this authentication type:
- Enter the email address of your PlanRadar account
- Enter the password
Headers
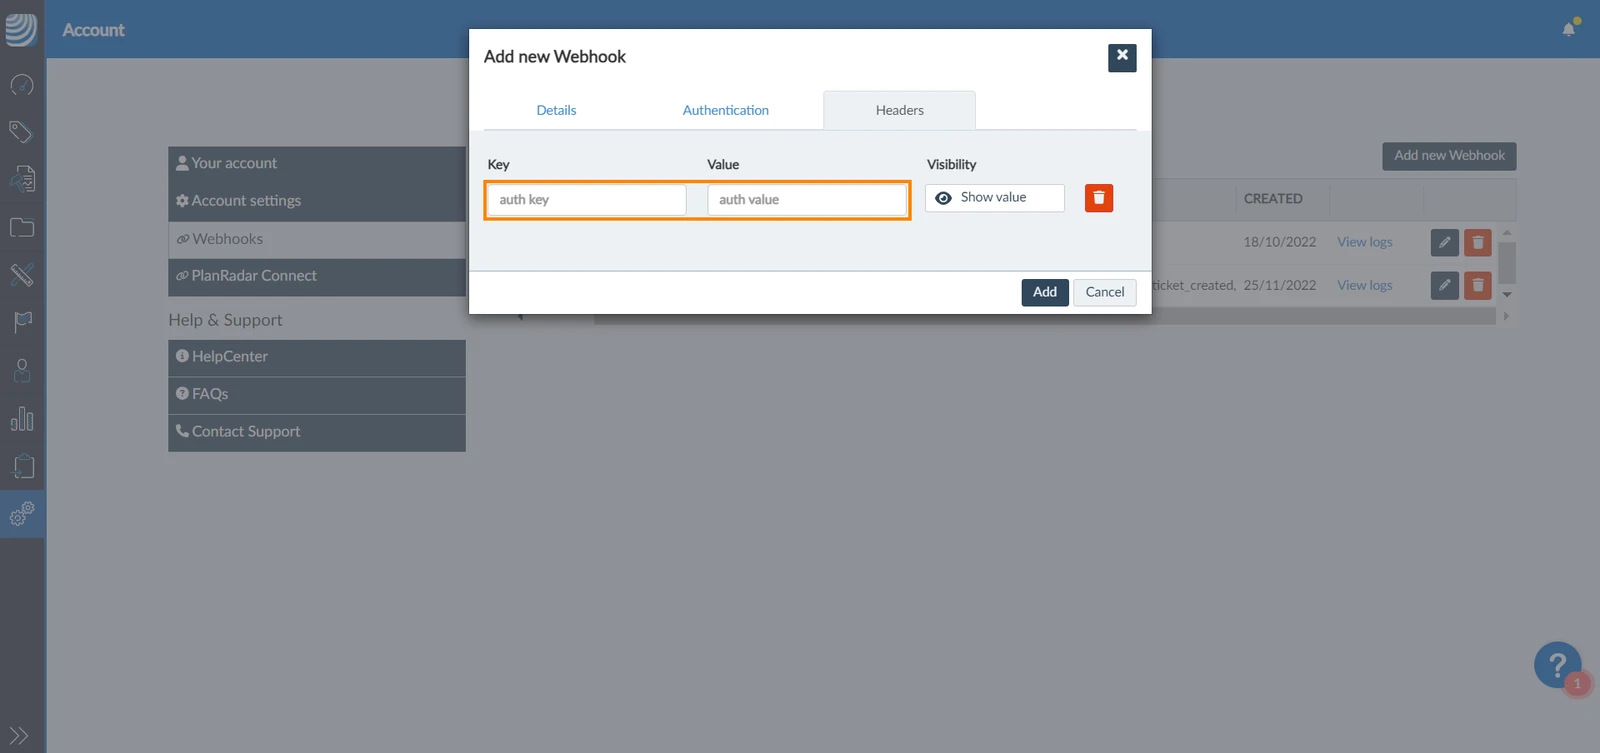
For servers that require authentication to be added in headers of the requests, use the “Headers“ tab to add key-value pairs.
Show Logs
You can view a log of all events that got triggered which can be very helpful to debug your integration.
- Click the View log hyper link next to the webhook
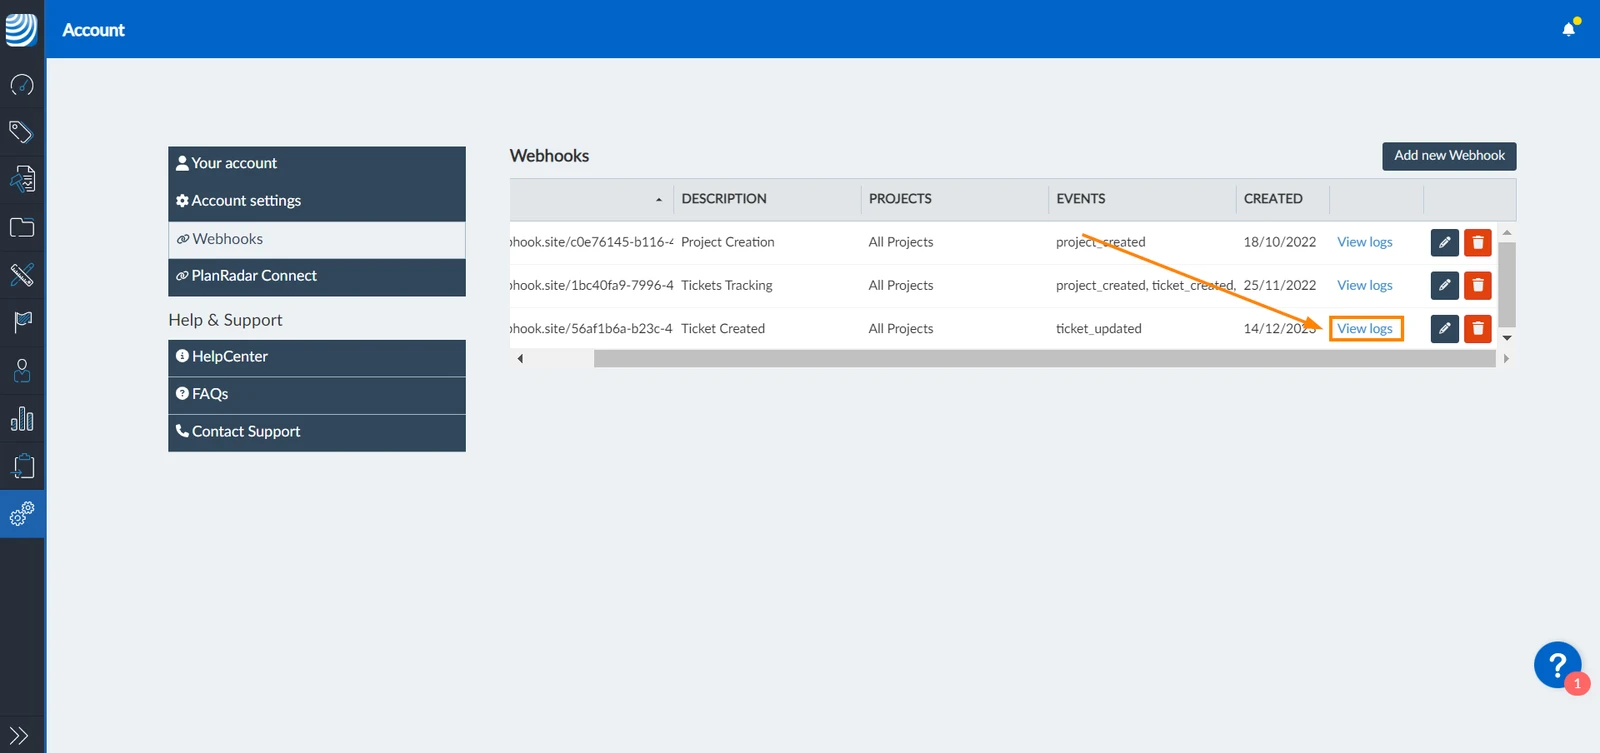
- A list of all the recorded events will show
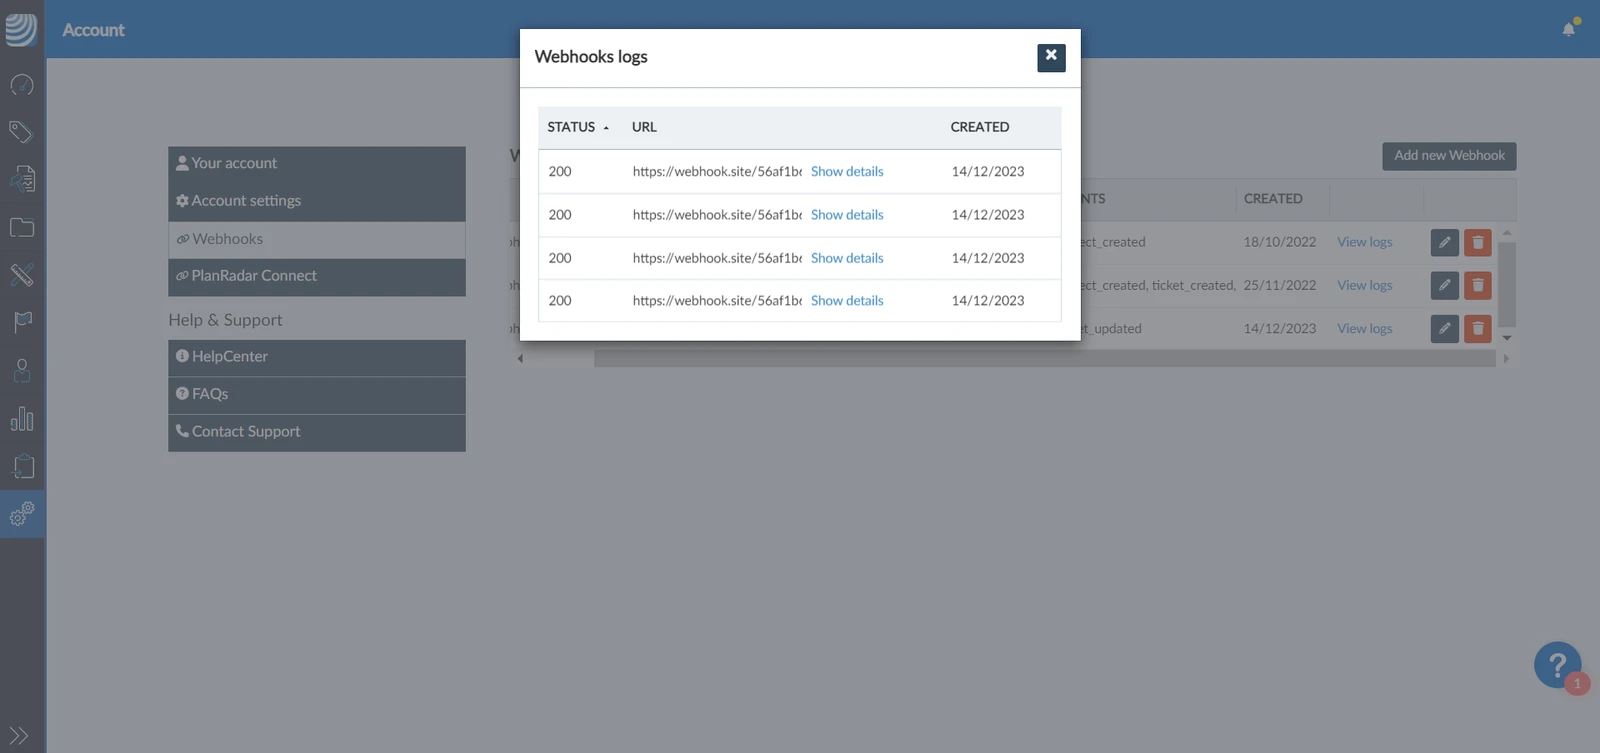
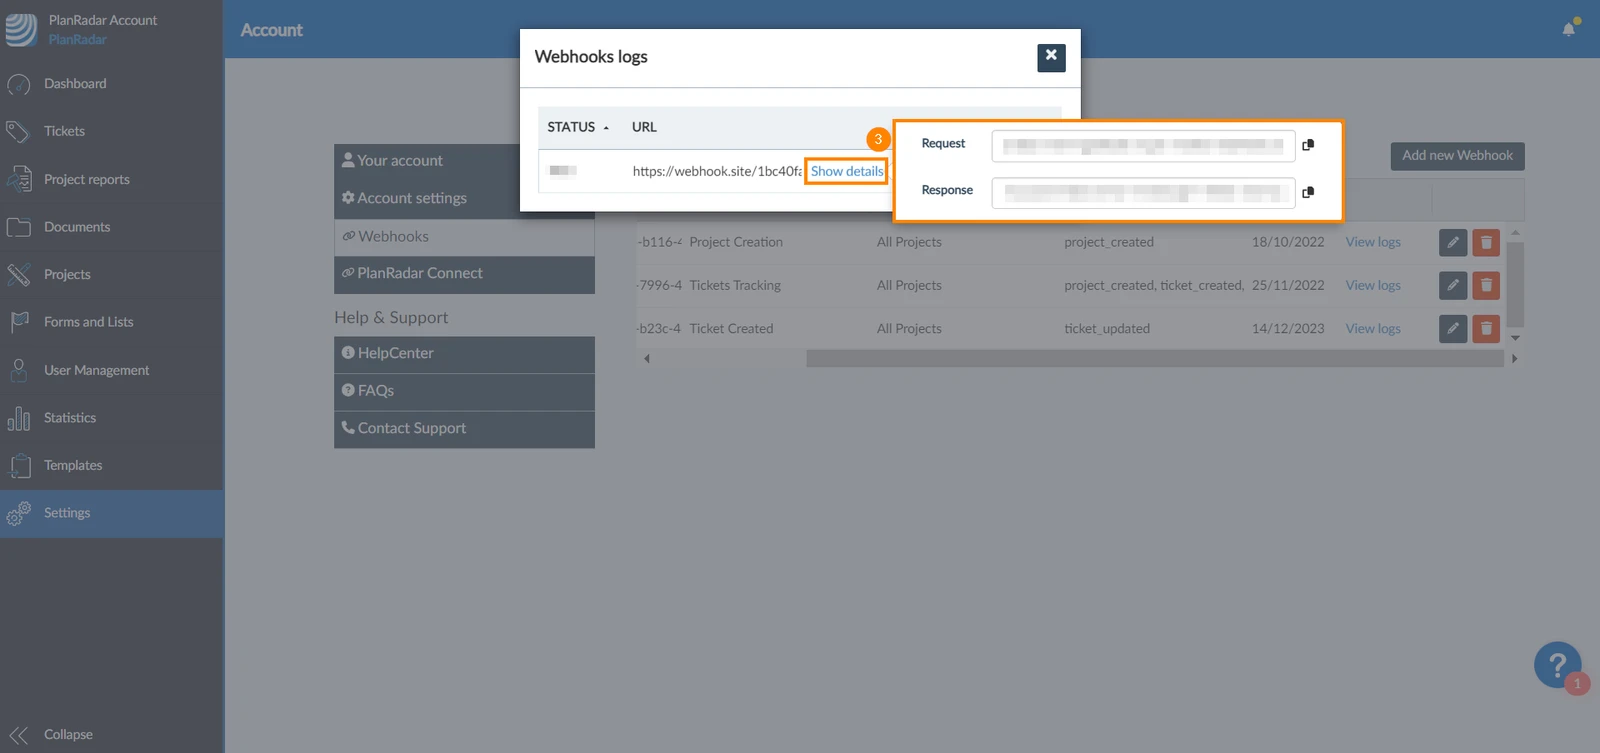
- Click Show details to view the request and response of the event
Edit Webhooks
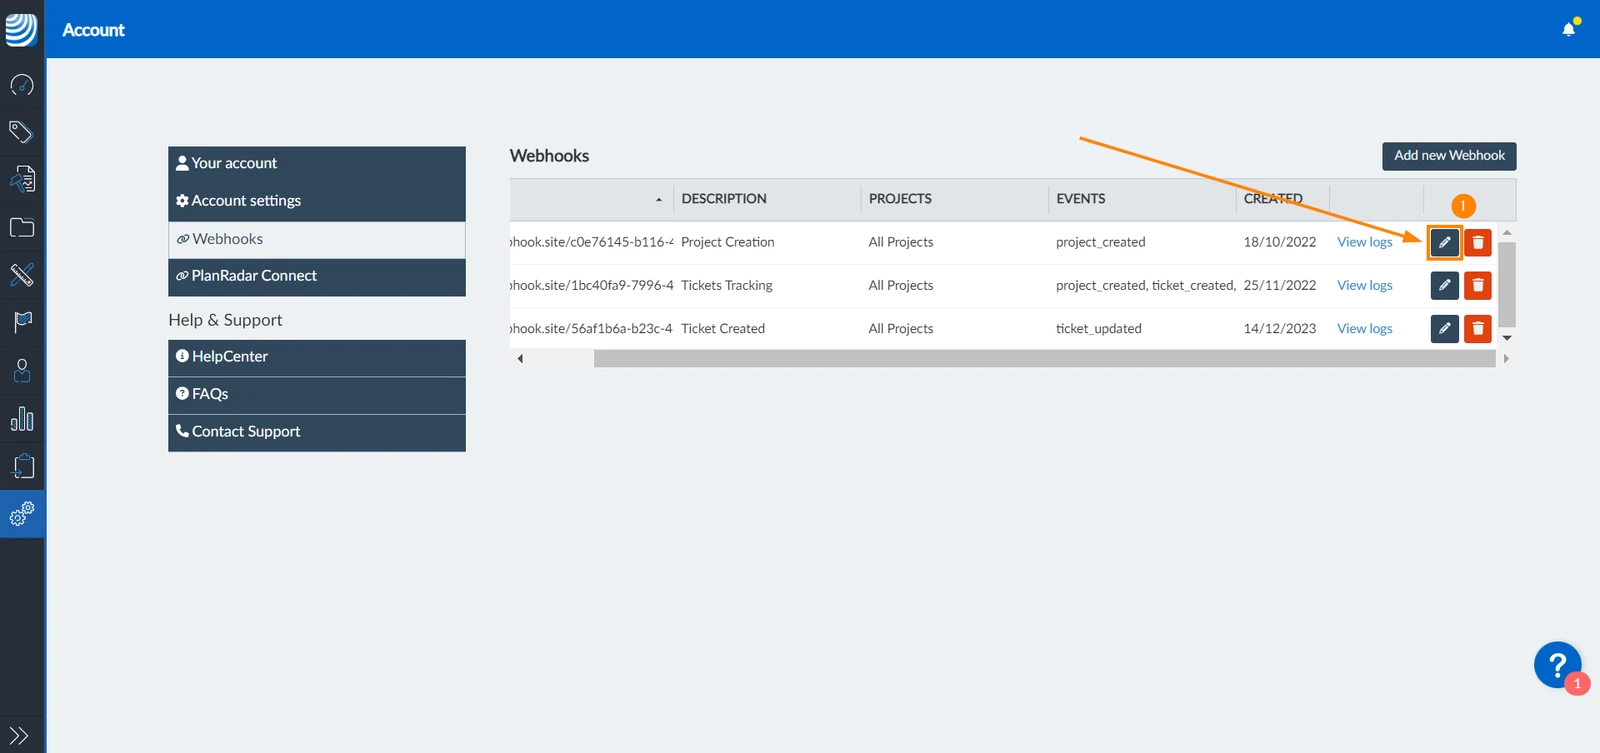
To edit a webhook:
- Click the edit icon next to the webhook
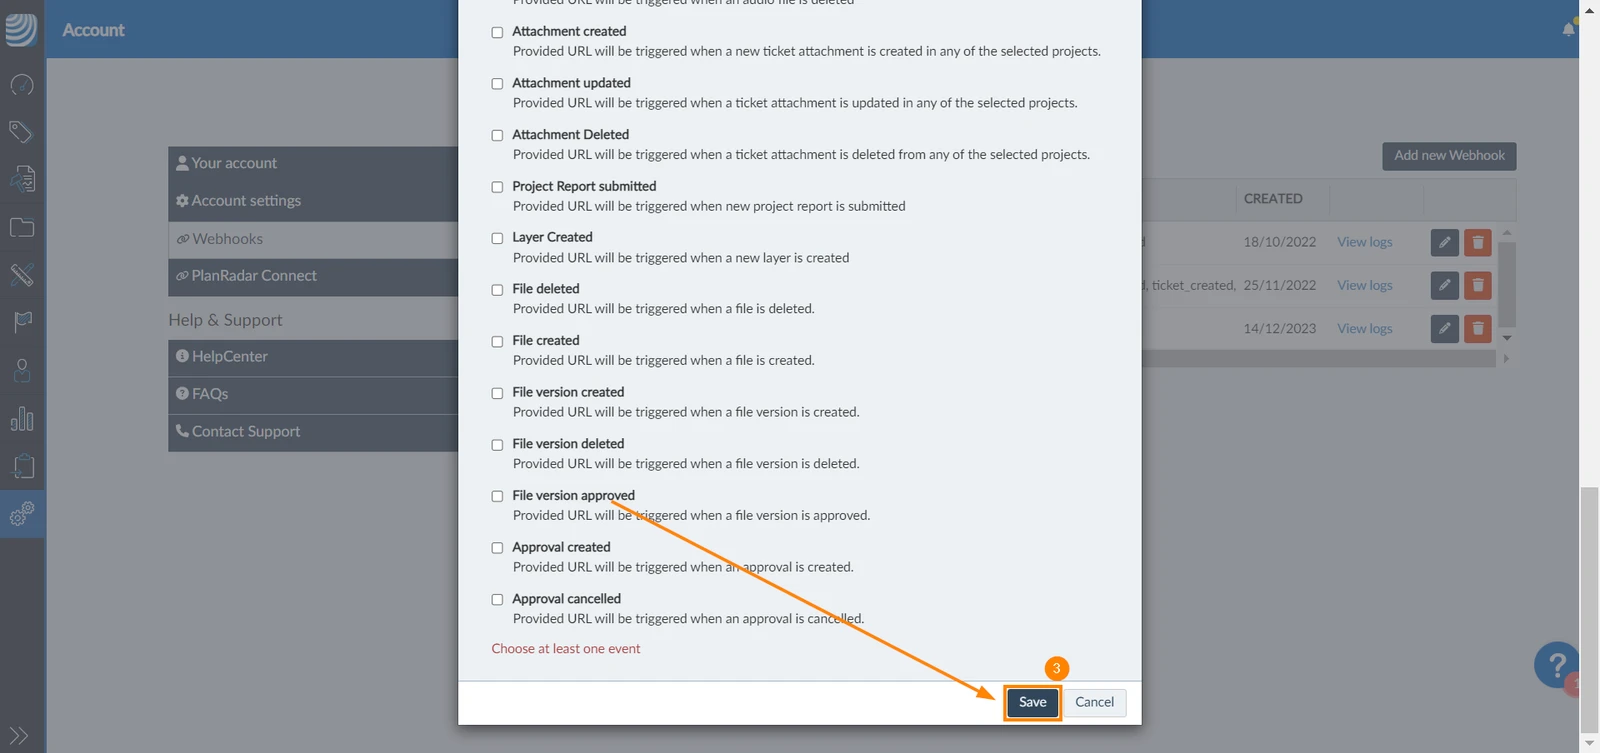
- Make the changes
- Click Save
Delete Webhooks
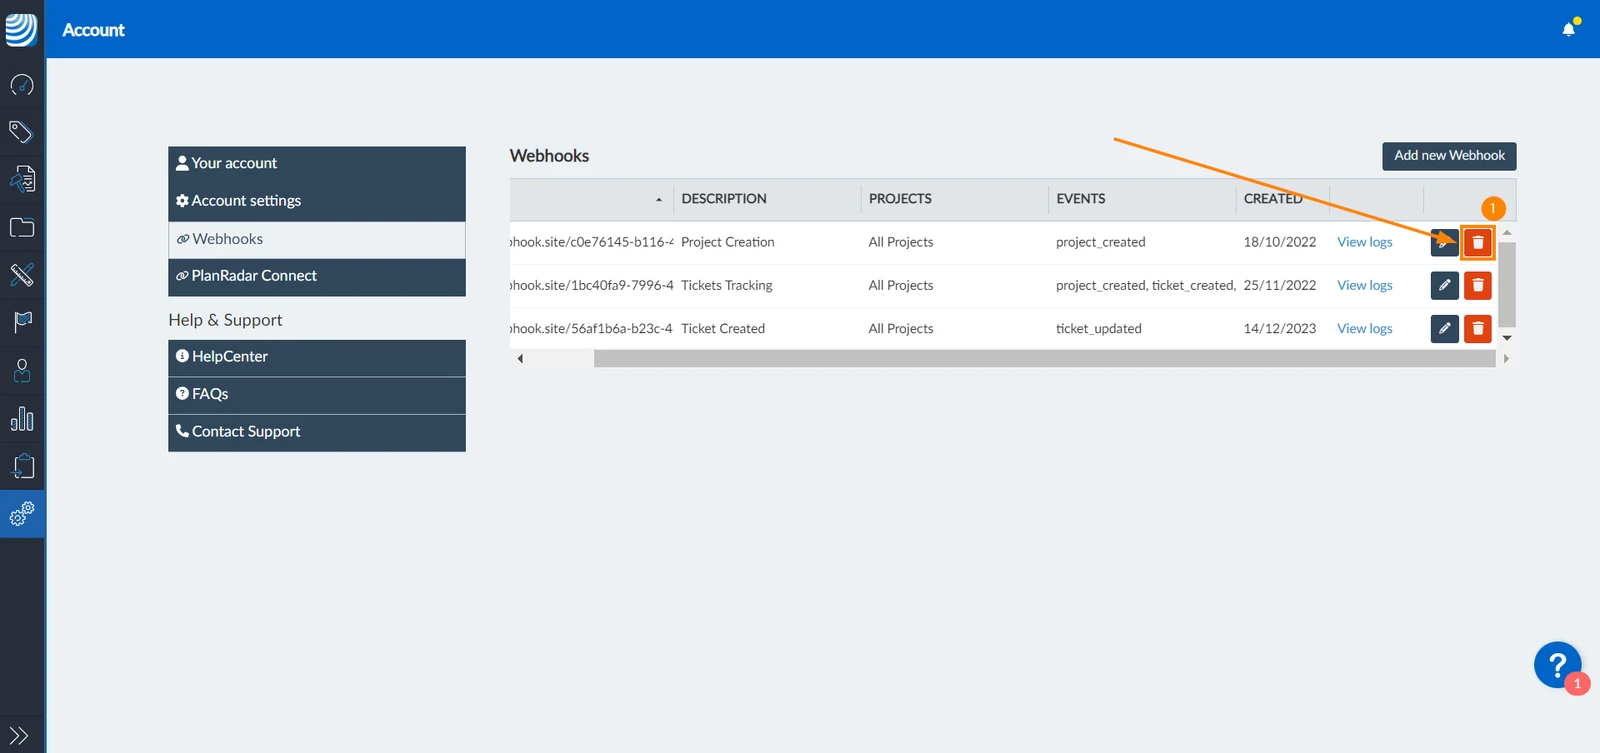
To delete a webhook:
- Click the delete icon next to the webhook
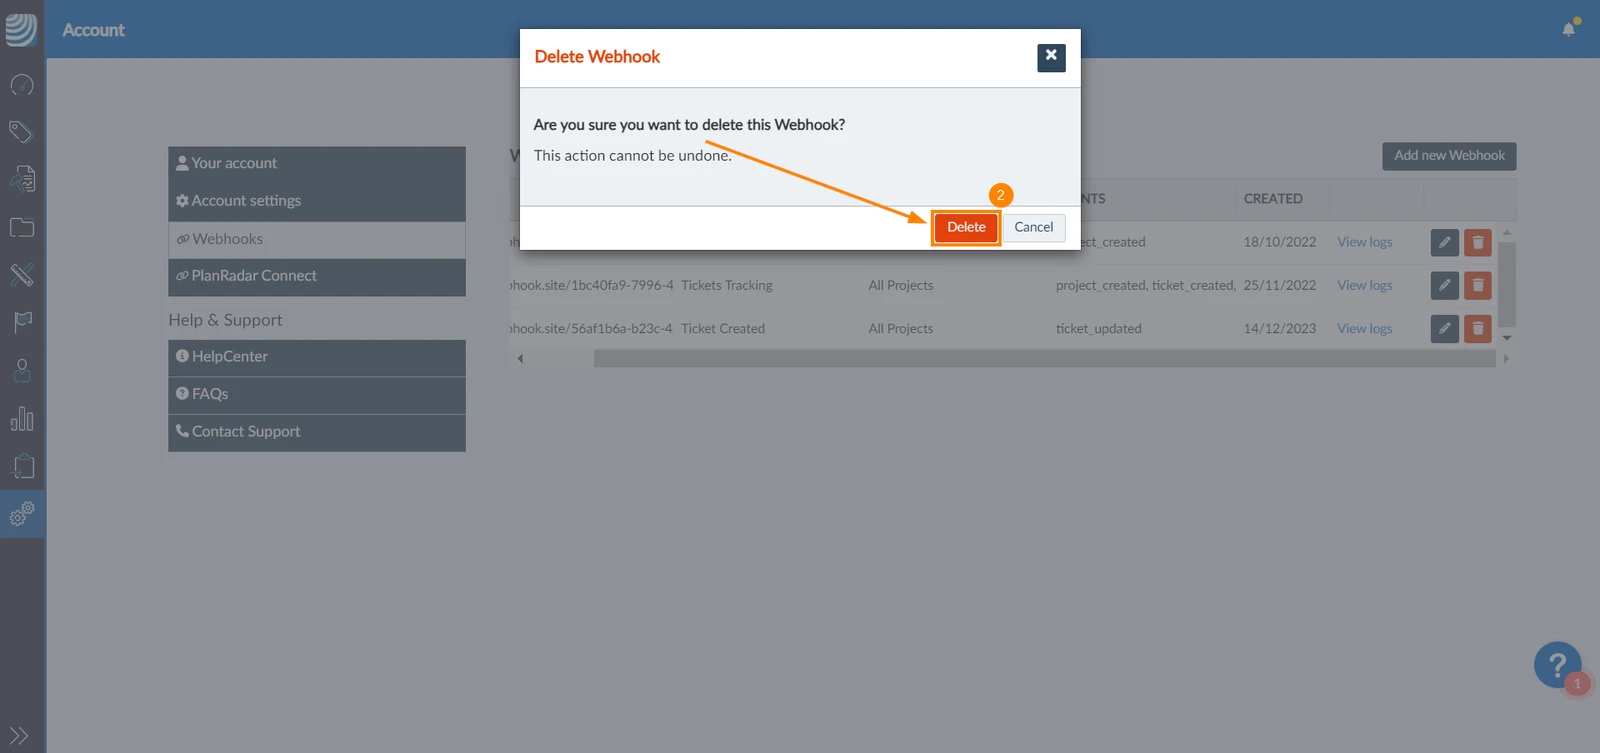
- Click Delete to confirm the deletion of the webhook
Updated February 26, 2026