

 Deutsch
 Español
 Français
 Hrvatski
 Italiano
 Polski
 Português (BR)
Account Settings
Overview
Control different aspects in your account.
Access & Permissions
How to access Account Settings
- Click Settings
- Click Account
- Click Account Settings
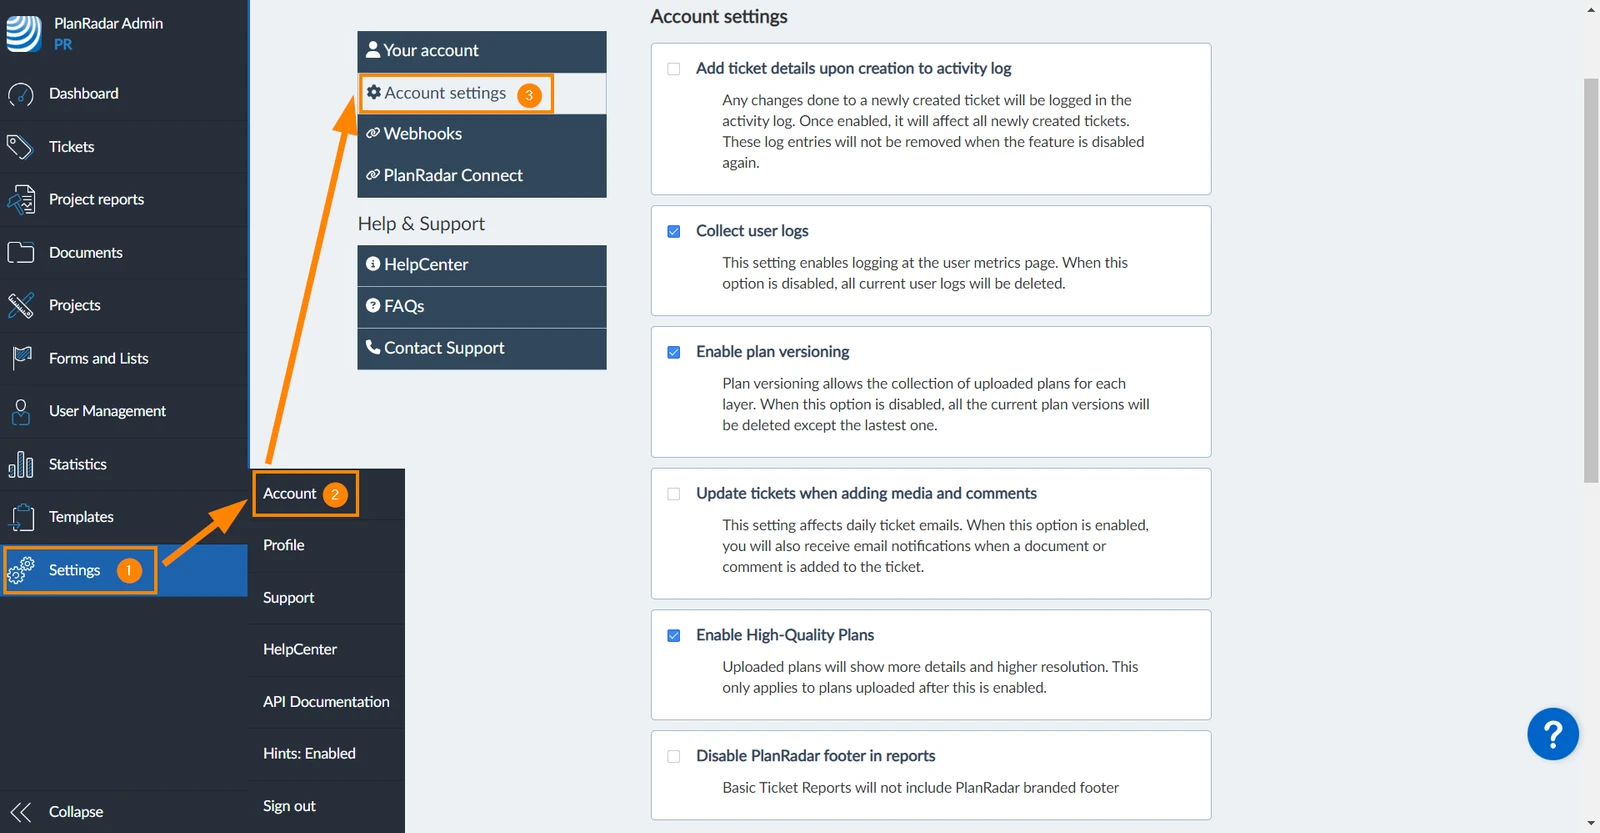
Configure Account Settings
To activate/deactivate an account setting:
- Select/Clear the setting checkbox
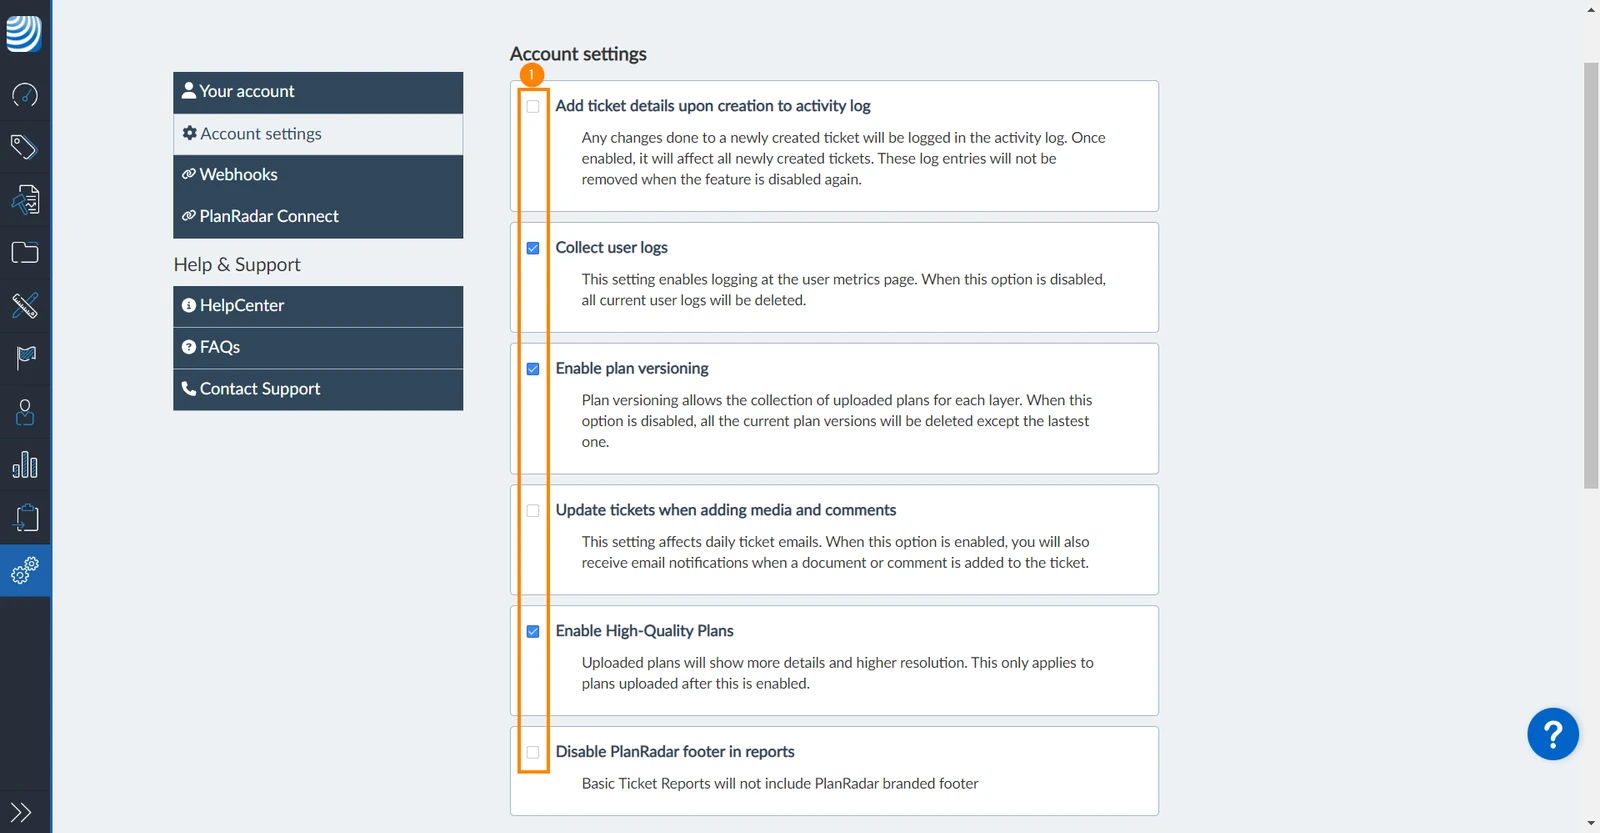
Account Settings
The following settings are available:
Ticket Journal
If the setting Add ticket details upon creation to activity log is disabled, there will only be an entry that the ticket has been created, without any details of which fields have been edited.
Activating or deactivating this setting will only affect new tickets, old ticket journal entries will not be changed or added.
Users Metrics
The Collect user logs setting controls the data collected in the User metrics page.
Once it is deactivated, collected user logs will be deleted and they won't be restored even when activating it again.
Plan Versioning
The Enable plan versioning setting enables uploading more than one version of the plan for each layer. Deactivating this setting deletes older plan versions for each layer and only keeps the current one.
Ticket Attachment Notifications
If Update tickets when adding media and comments is checked, a ticket is considered as updated when new attachments and comments are created and as a consequence email notifications will also be sent.
High Quality Plans
If Enable High-Quality Plans is checked, plans will show more details as they will be processed with higher resolution. This only applies to plans uploaded after activating this setting.
Disable PlanRadar Footer in Reports
Ticket reports created without a template or with a basic template will automatically include a branded PlanRadar footer.
You can use this setting to Disable PlanRadar Footer in Reports if you have activated a Pro or Enterprise subscription after February 2022. Also see Pricing and Subscription.
Notification Emails Formatting
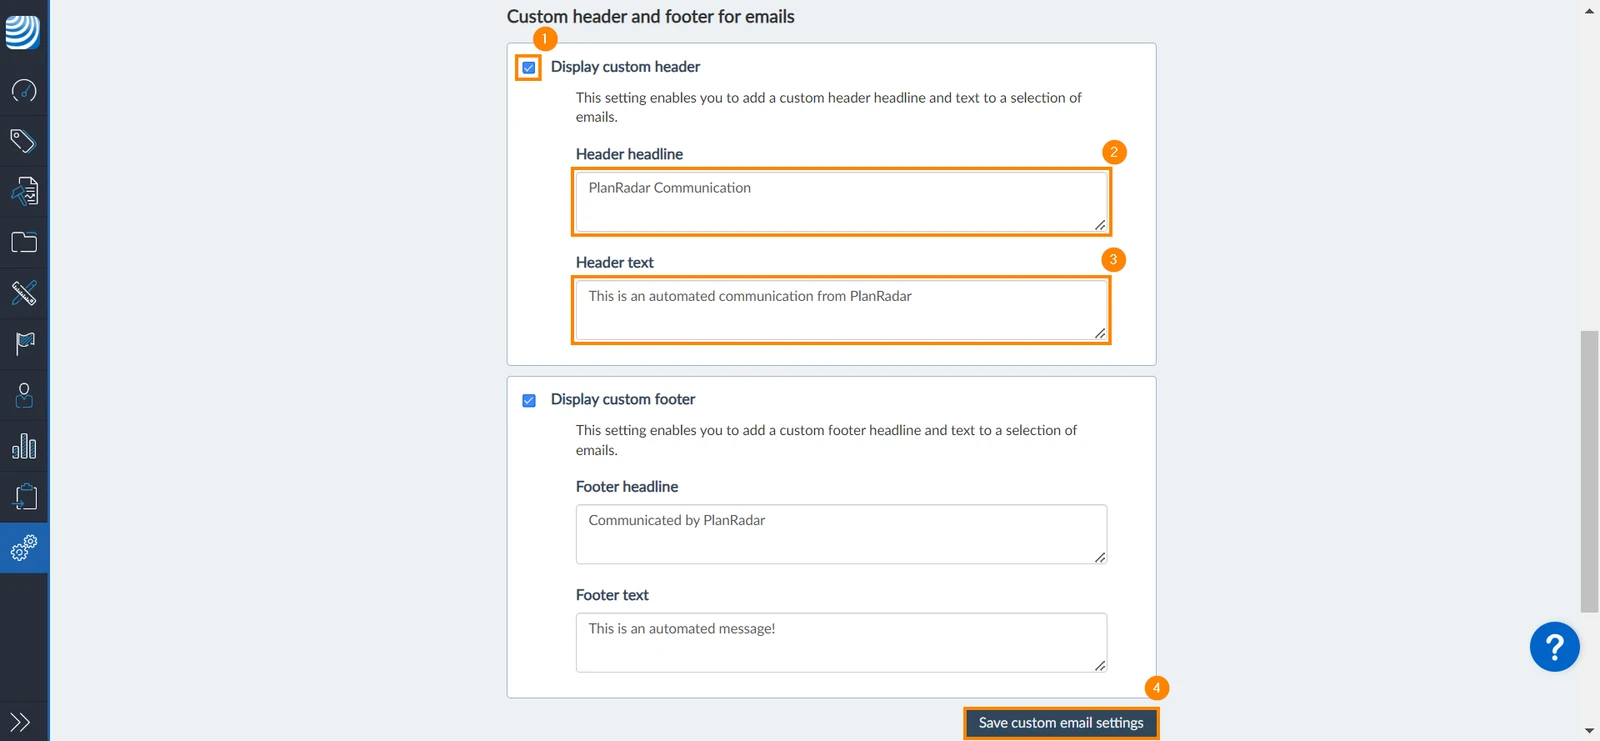
You can add a header and footer to the notification emails sent to users of your account. In the header and footer, you can include any custom text.
To add headers and footers to the notification emails:
- Select the Display custom header/footer checkbox
- Add the Header headline text
- Add the Header text
- Click Save custom email settings
Updated January 28, 2025