

 Deutsch
 Español
 Français
 Hrvatski
 Italiano
 Polski
 Português (BR)
Attach Reports to Tickets
Overview
Use this feature to attach a generated ticket report to a ticket to keep it. Project reports are stored forever, but the feature is also available for project reports.
Access & Permissions
Only the creator of a ticket report can access the generated PDF file for 24 hours.
Attach Ticket Reports to Tickets
To attach a ticket report to a ticket:
In the Webapp you currently need to download the generated ticket report and upload it like any other ticket attachment:
- Download the PDF as described in Access Generated Ticket Reports.
- Add the PDF as an attachment to a ticket as described in Add Attachments to Tickets.
- Tap Ticket Reports
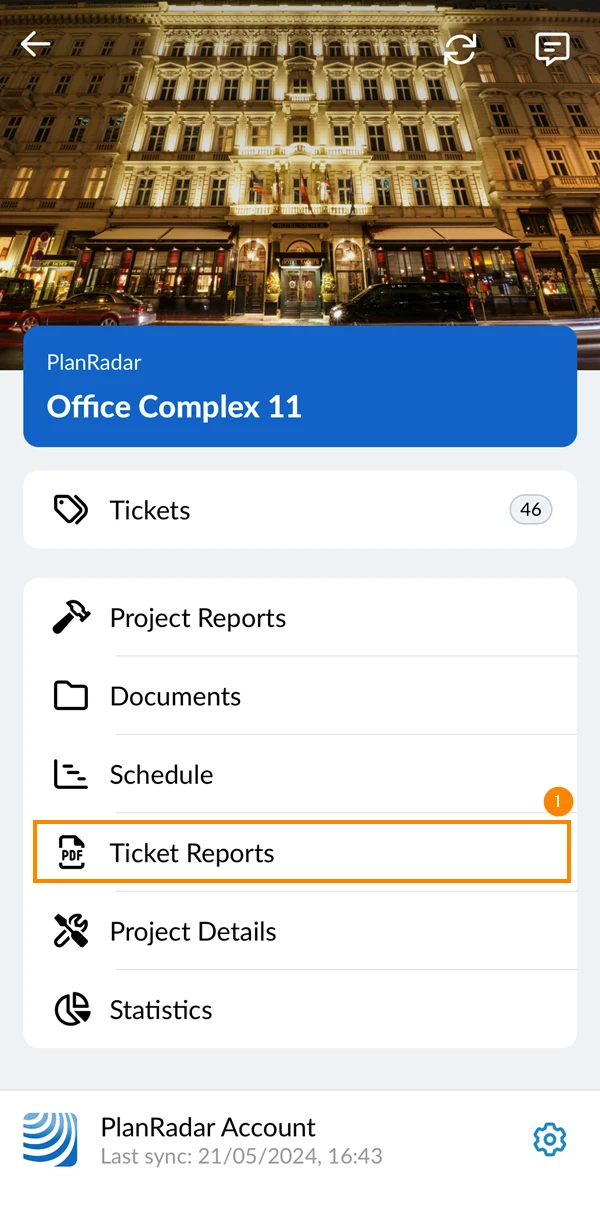
- Open the report you want to attach to a ticket
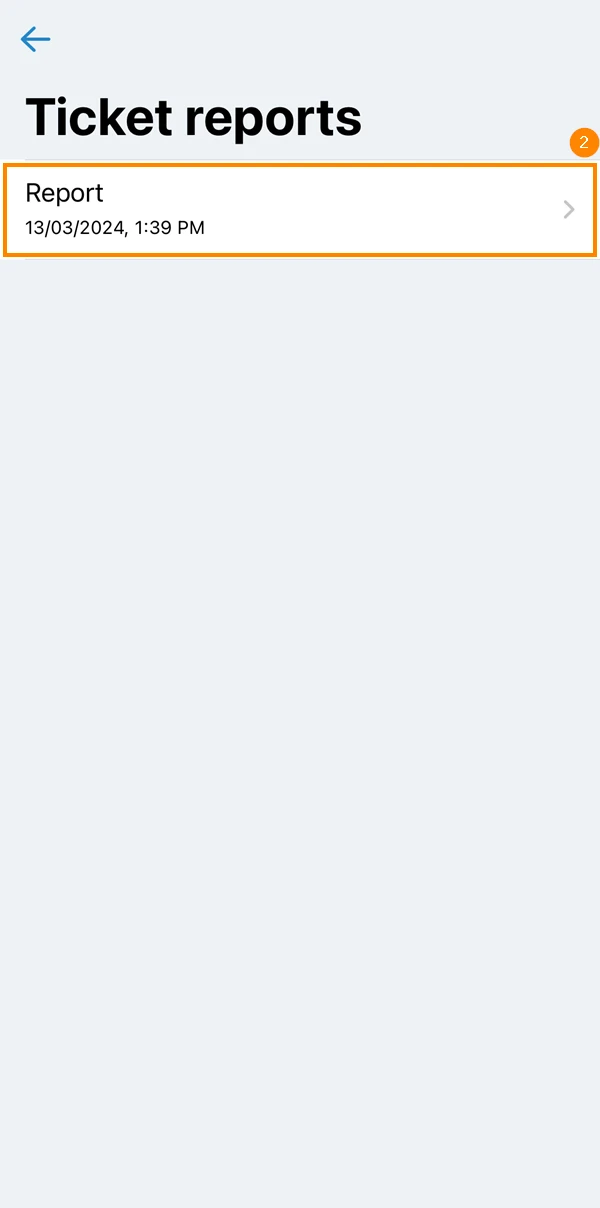
- Tap the share icon
- Tap Attach to ticket
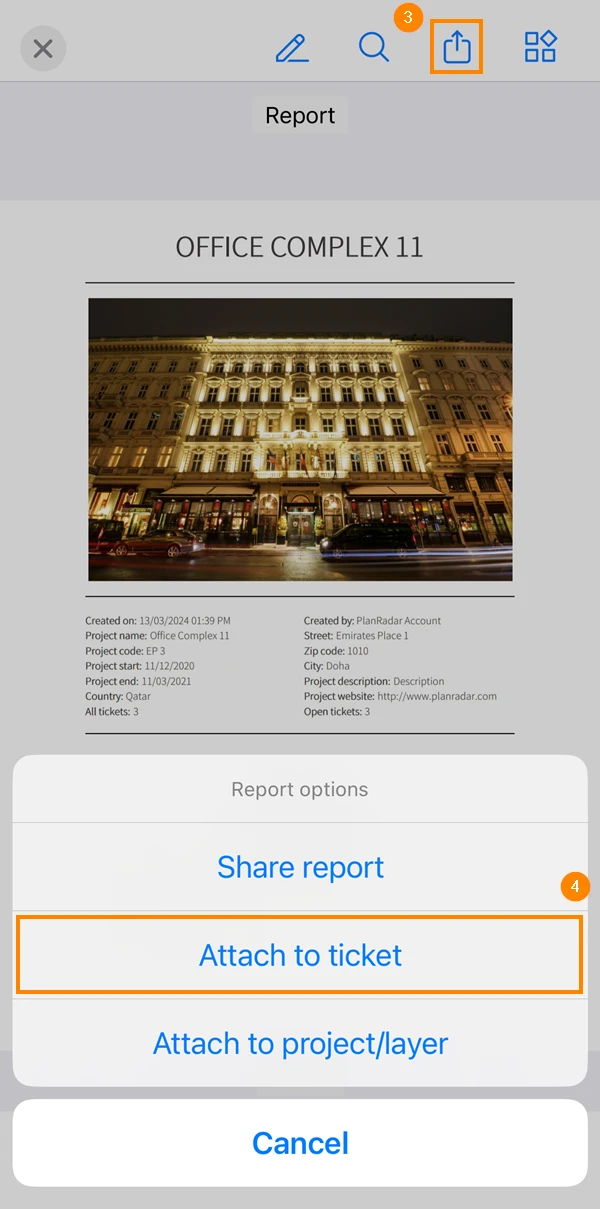
- Optional: Enter a report title
- Tap Select a ticket
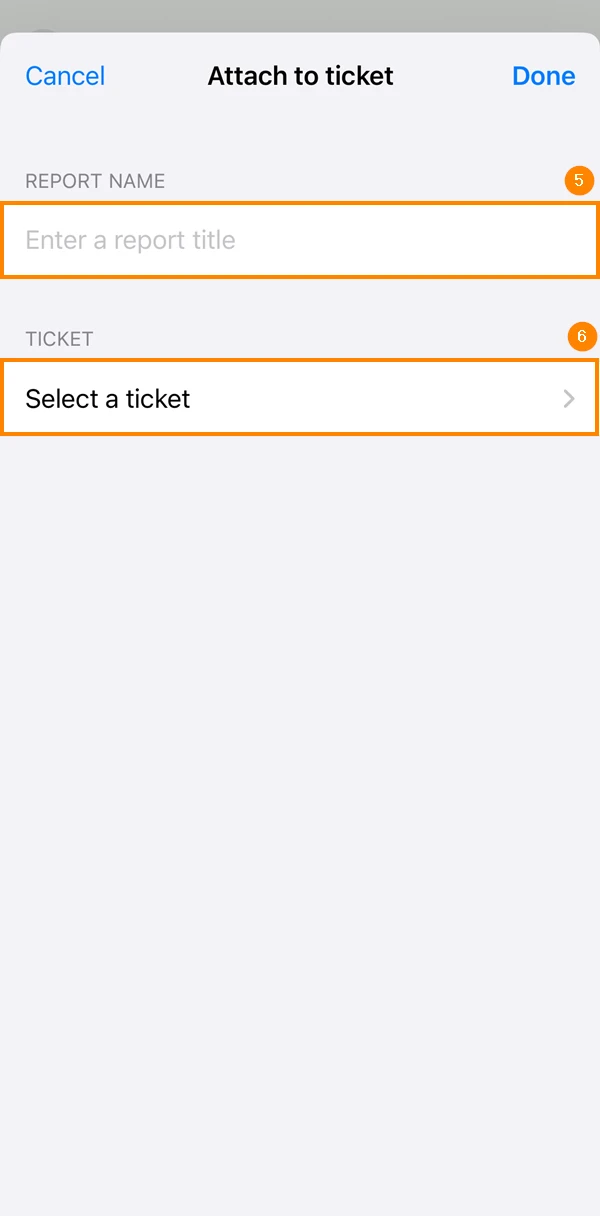
- Select the ticket you want to attach the report to
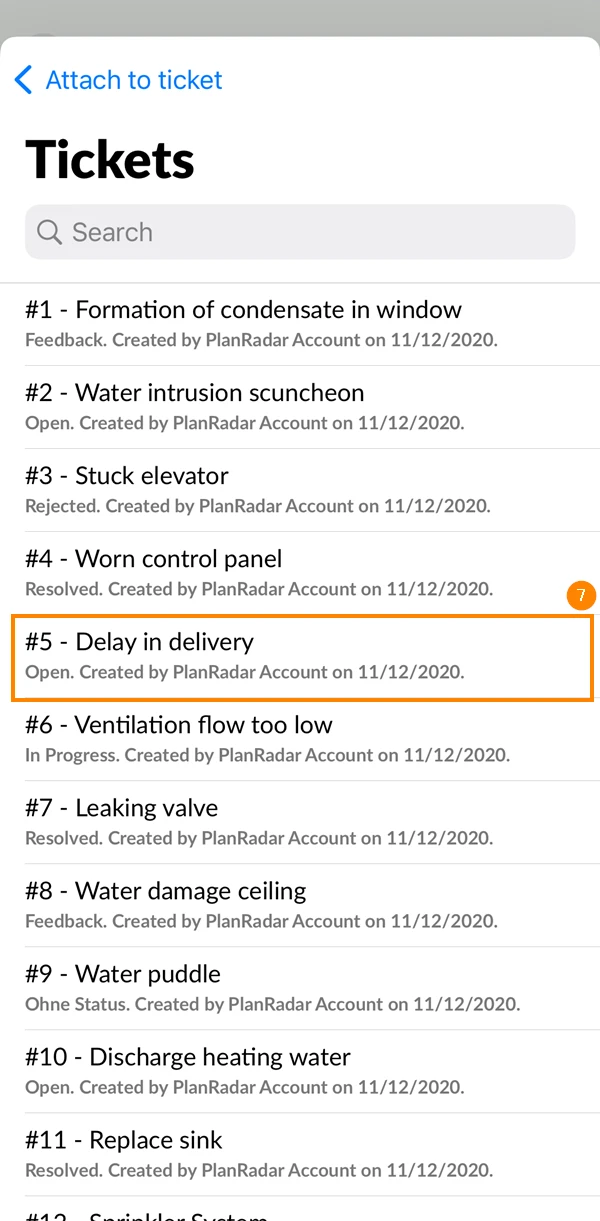
- Tap Done in the top right corner
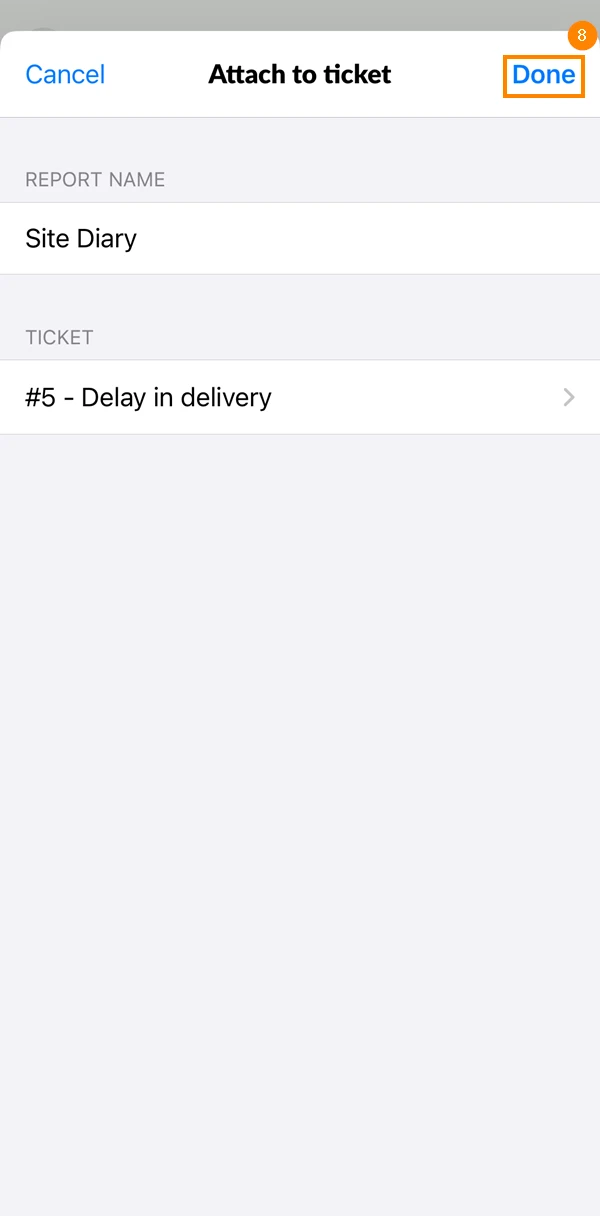
- Tap Ticket Reports
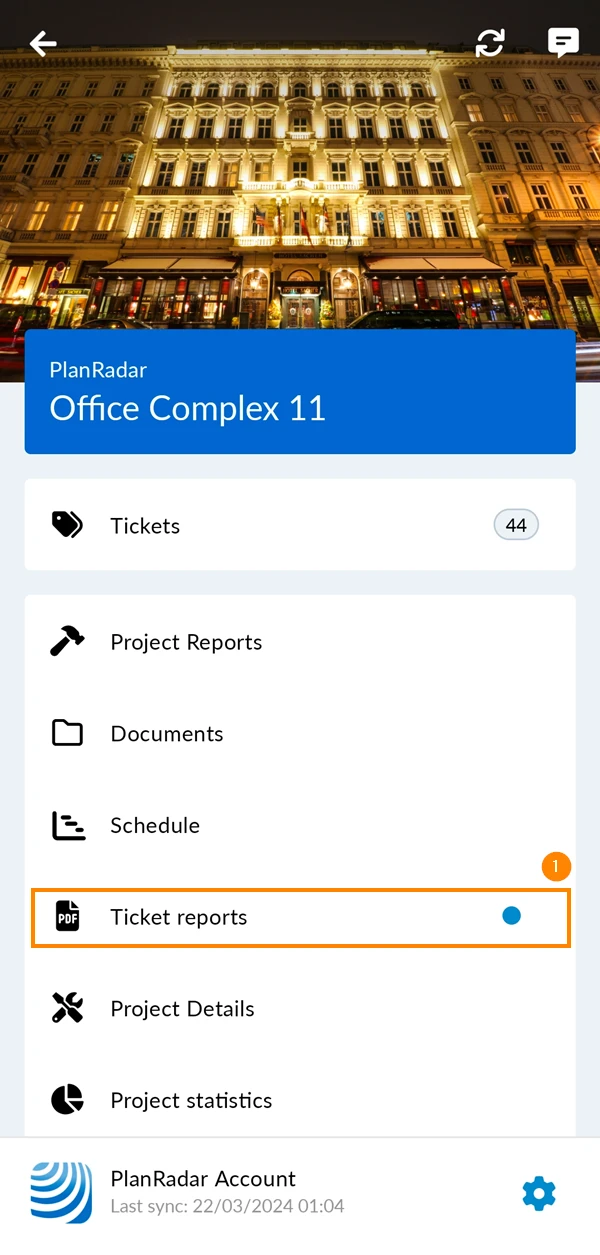
- Open the report you want to attach to a ticket
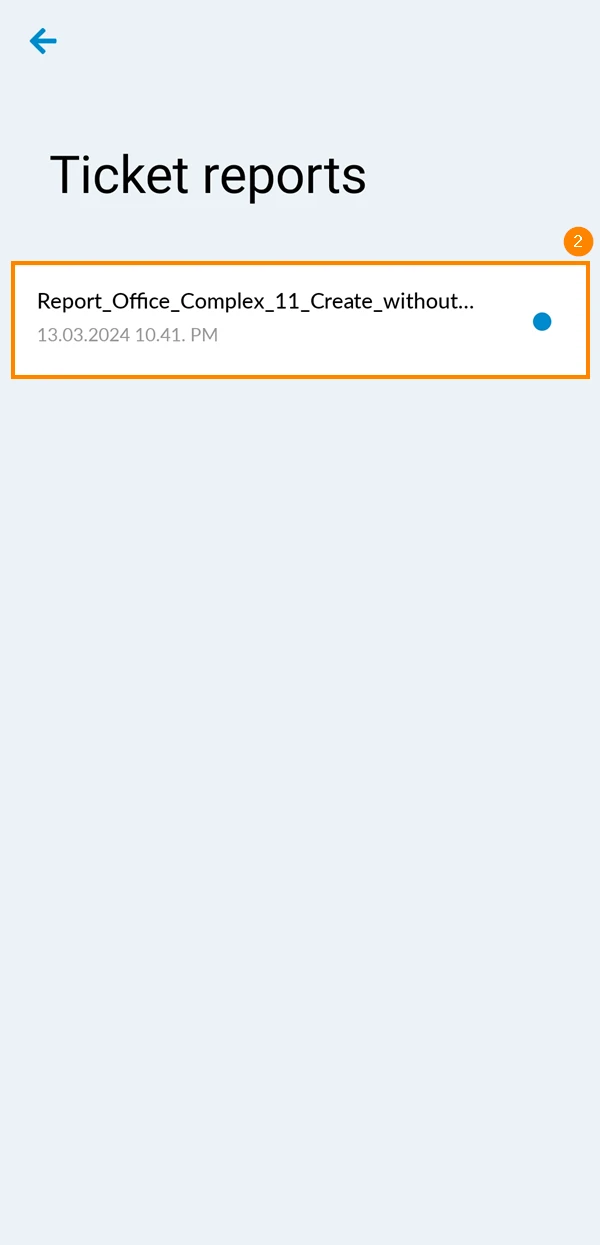
- Tap the more menu in the top right corner
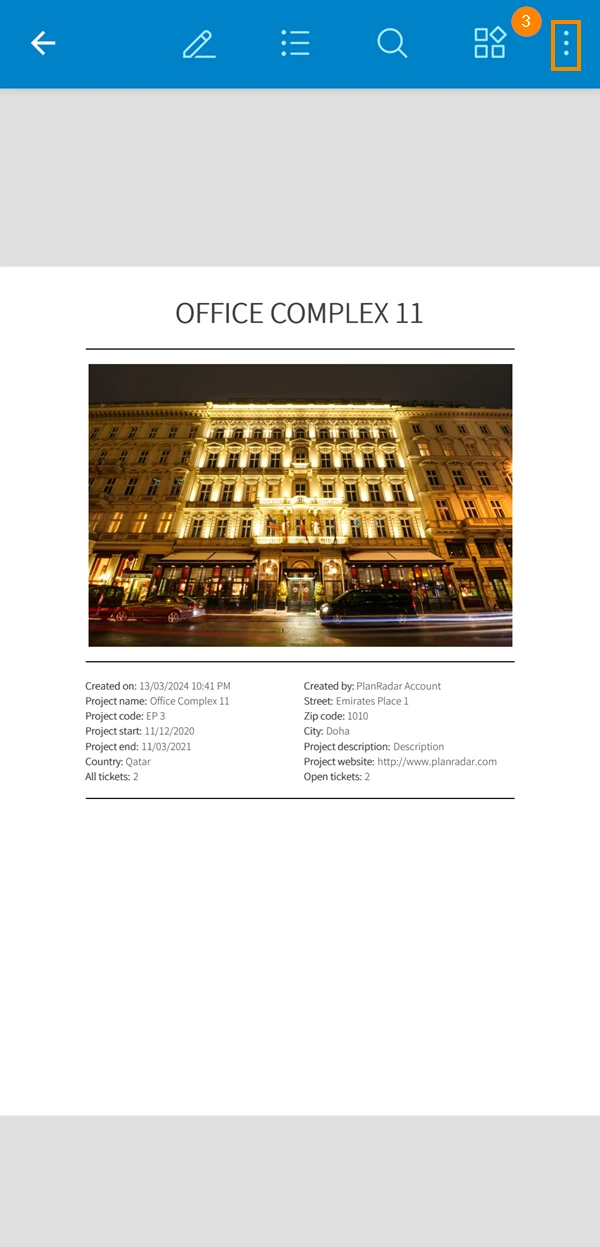
- Tap Share
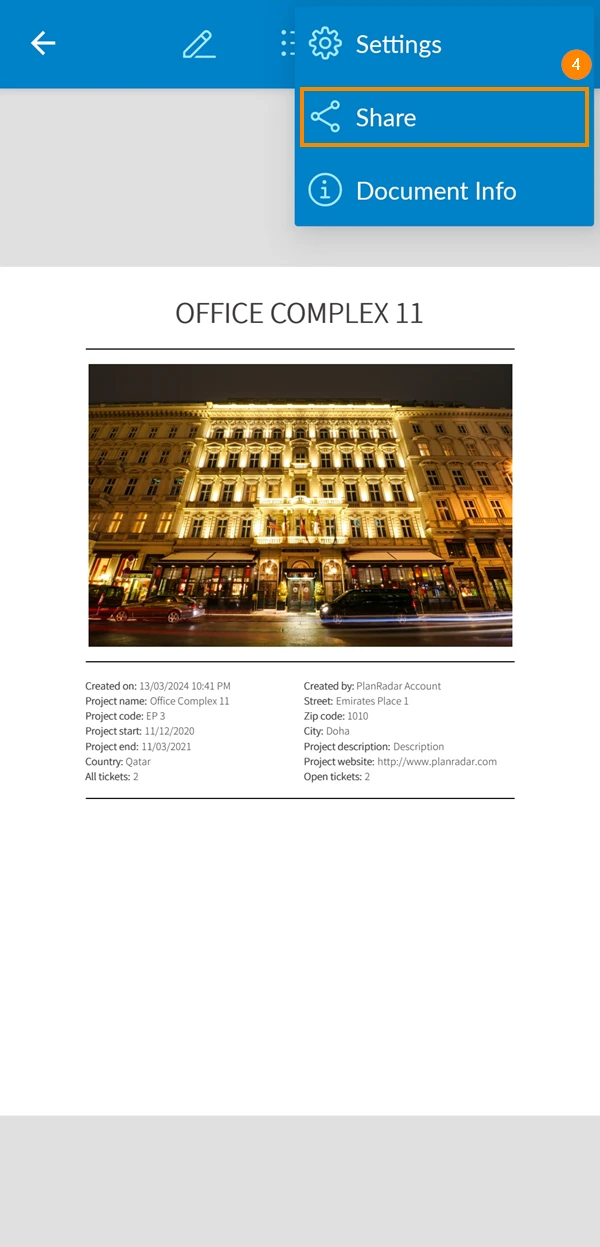
- Tap Attach to ticket
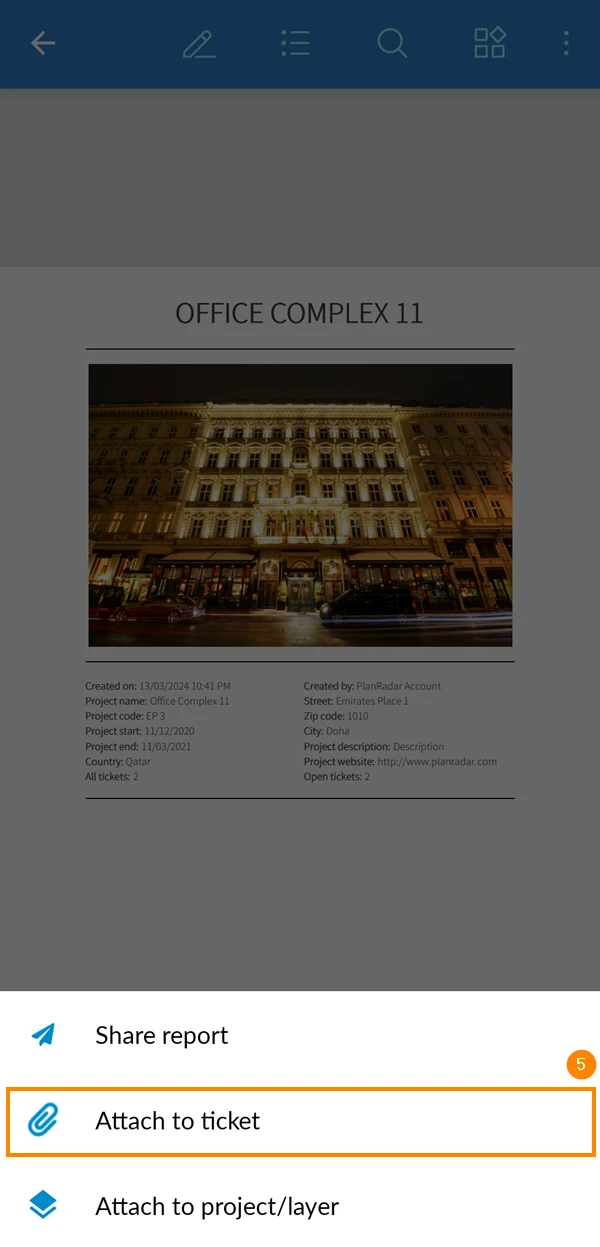
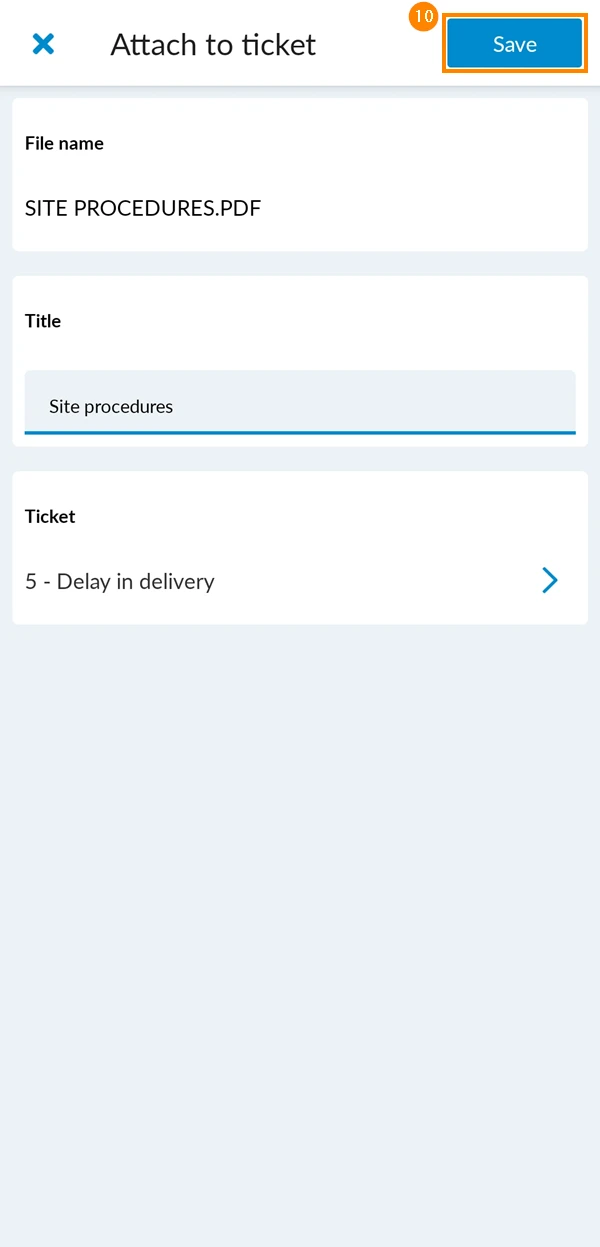
- Optional: Edit the report title
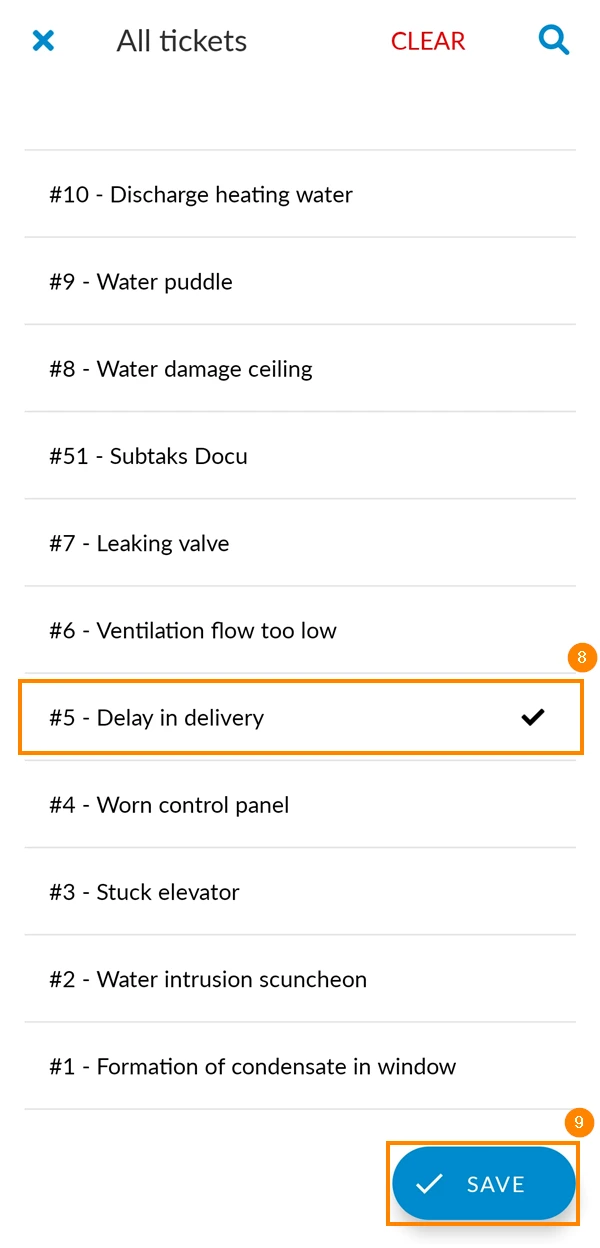
- Tap to select a ticket
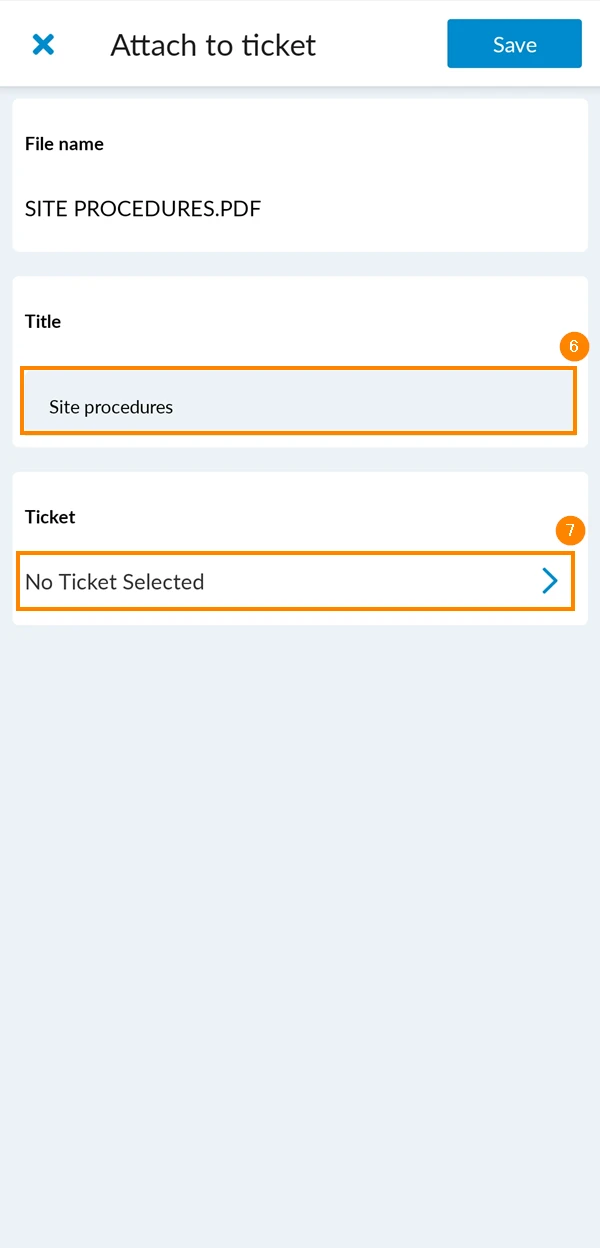
- Select the ticket you want to attach the report to
- Tap Save to confirm ticket selection
- Tap Save in the top right corner to attach the report to the ticket
Attach Project Reports to Tickets
To attach a project report to a ticket:
In the Webapp you currently need to download the submitted project report and upload it like any other ticket attachment:
- Download the PDF as described in Download Project Reports.
- Add the PDF as an attachment to a ticket as described in Add Attachments to Tickets.
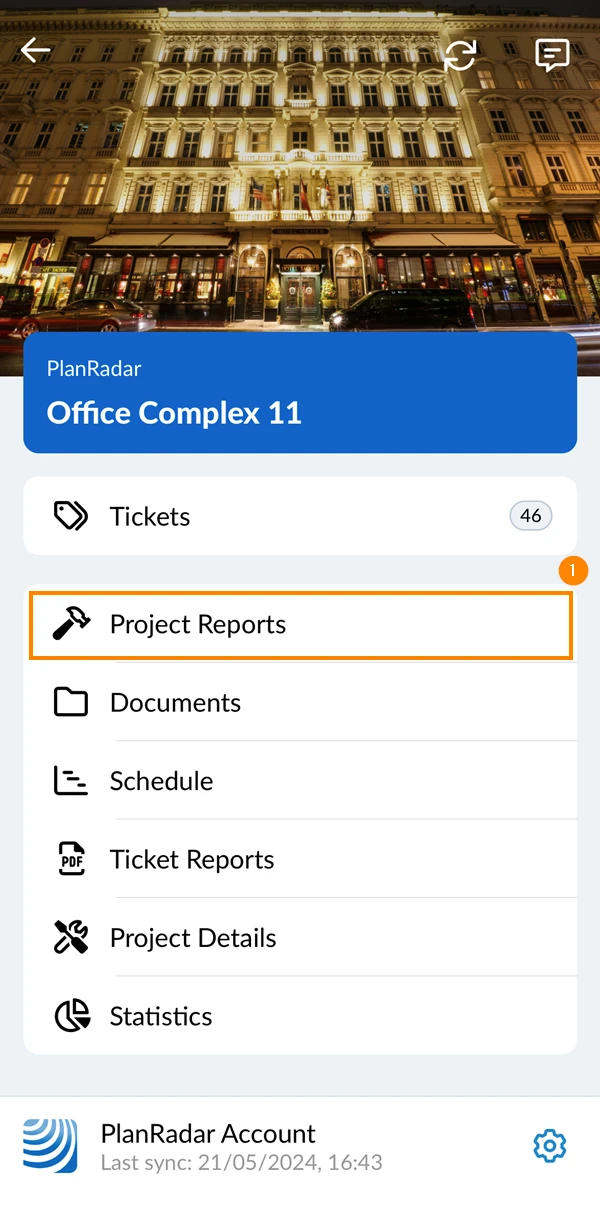
- Tap Project Reports
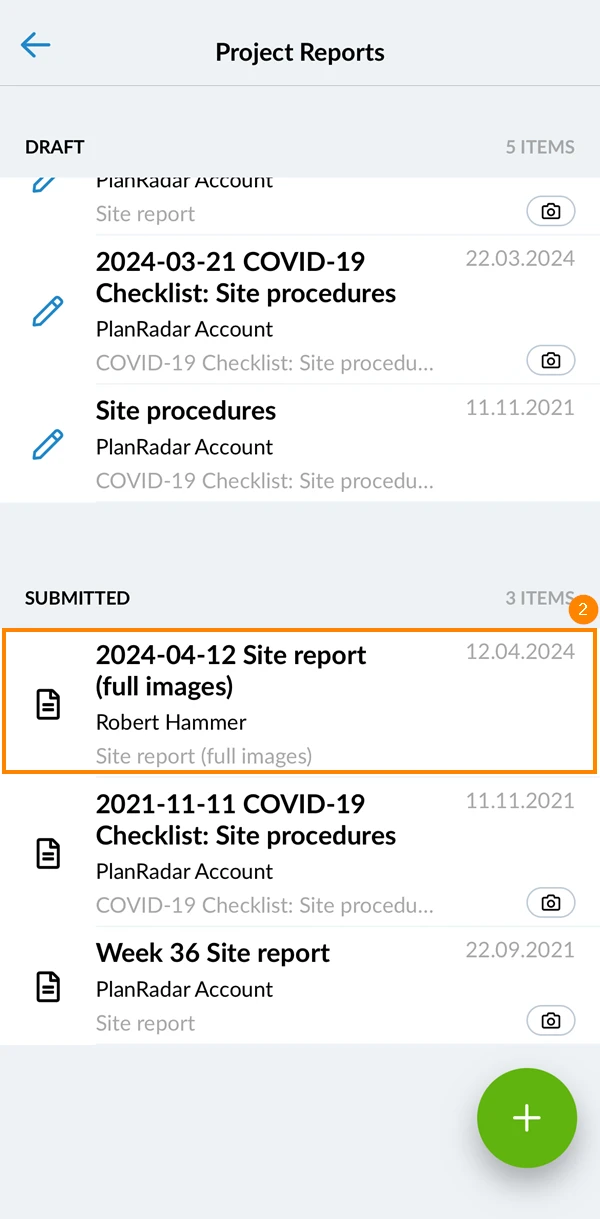
- Open the report you want to attach to a ticket
- Tap the share icon
- Tap Attach to ticket
- Optional: Enter a report title
- Tap Select a ticket
- Select the ticket you want to attach the report to
- Tap Done in the top right corner
- Tap Project reports
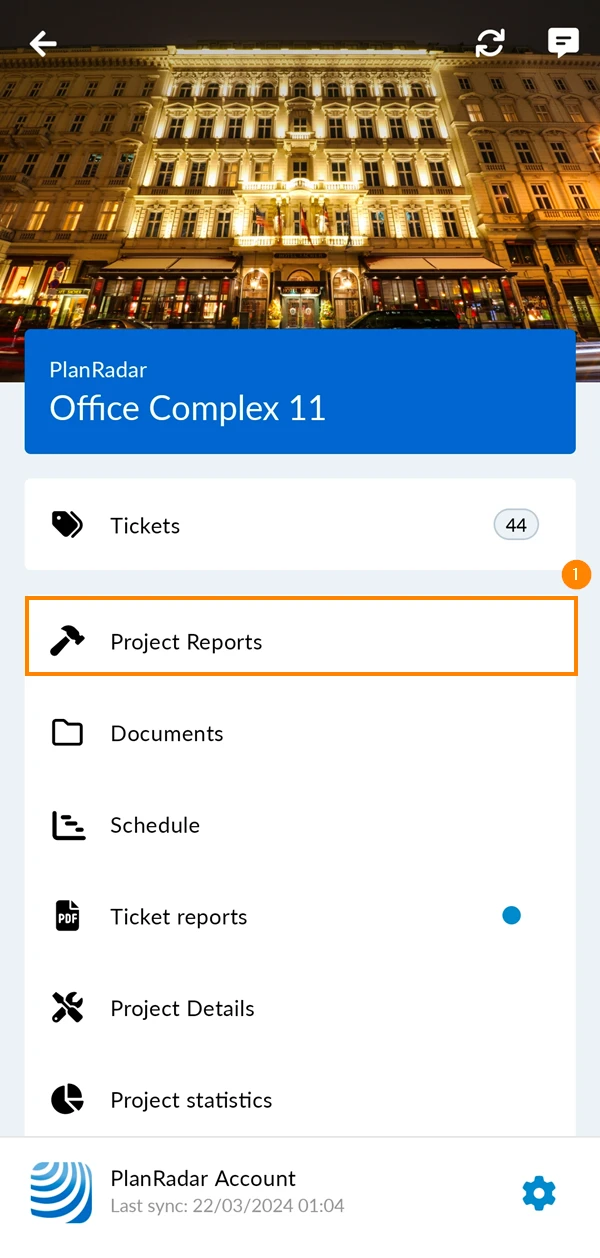
- Open the report you want to attach to a ticket
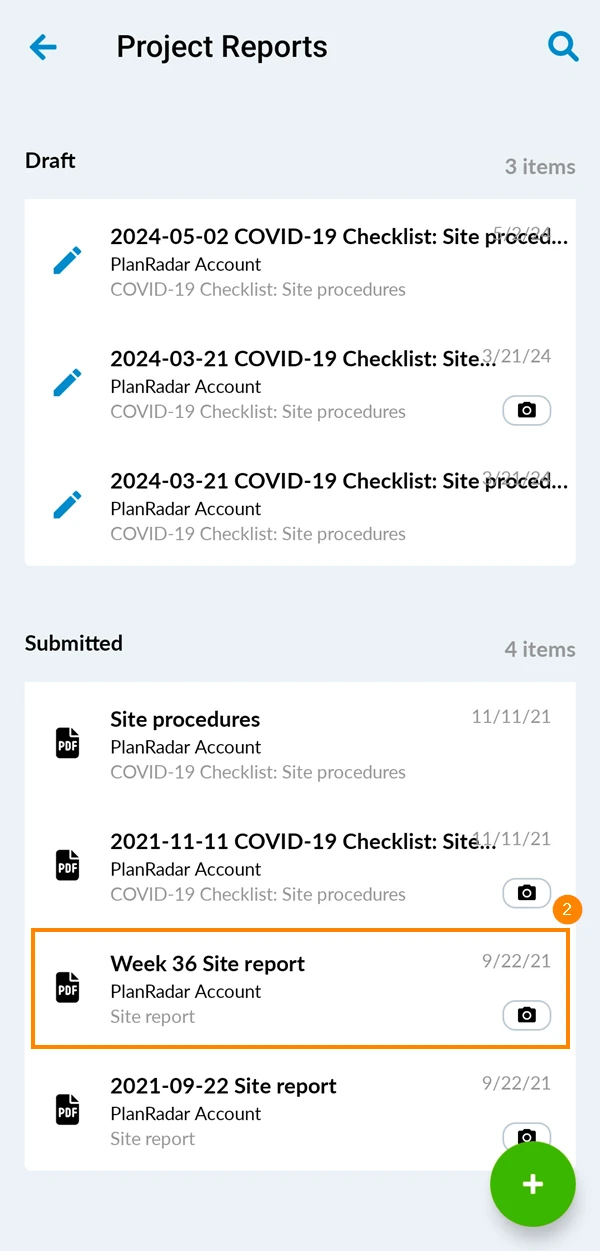
- Tap the more menu in the top right corner
- Tap Share
- Tap Attach to ticket
- Optional: Edit the report title
- Tap to select a ticket
- Select the ticket you want to attach the report to
- Tap Save to confirm ticket selection
- Tap Save in the top right corner to attach the report to the ticket
Updated December 18, 2024