

 Deutsch
 Español
 Français
 Hrvatski
 Italiano
 Polski
 Português (BR)
Sign, Annotate & Share Ticket Reports in the Mobile App
Overview
Add signatures, make annotations, and share reports directly from your mobile device.
All options are also available for Project Reports.
Access & Permissions
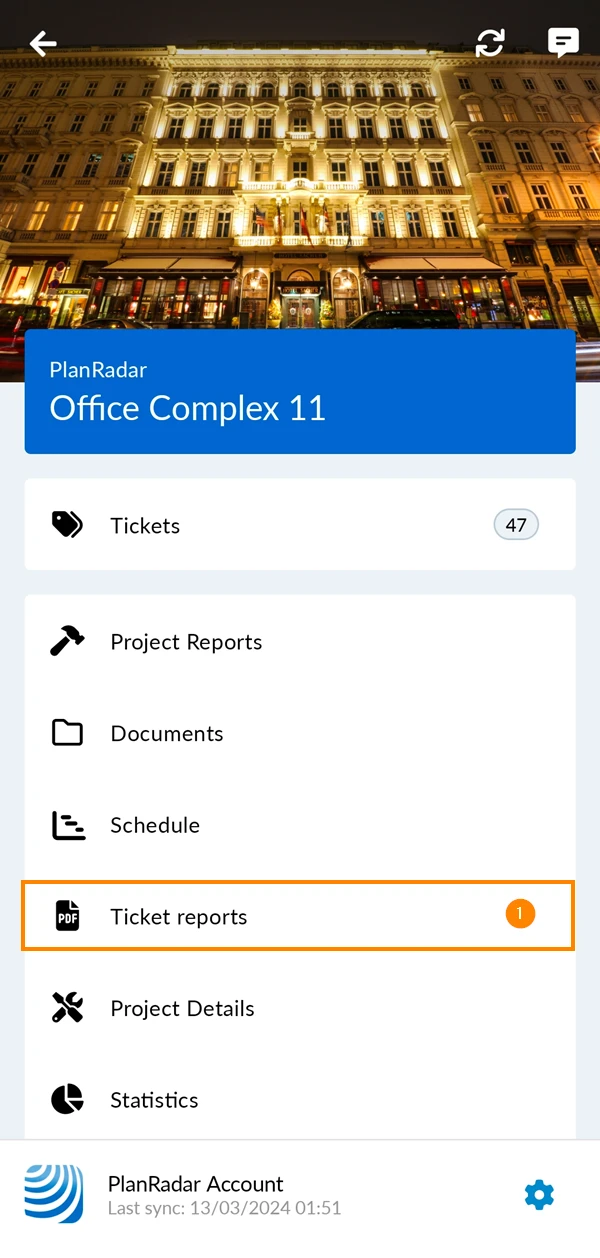
How to Access Ticket Reports
- Tap Ticket Reports
Sign a Ticket Report
Add a Signature
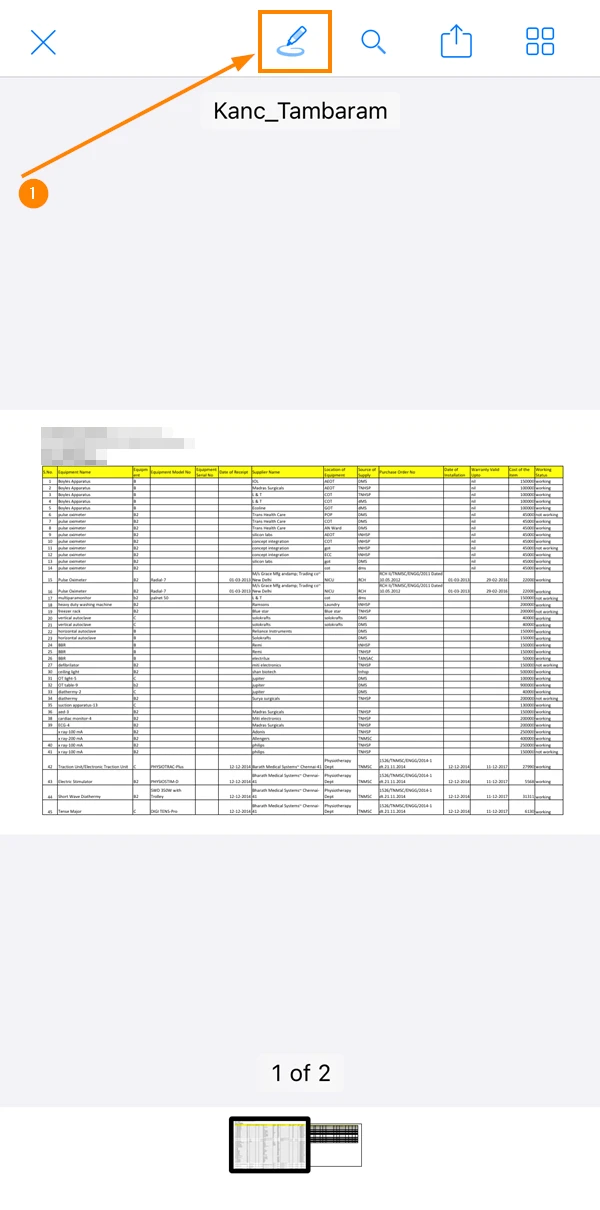
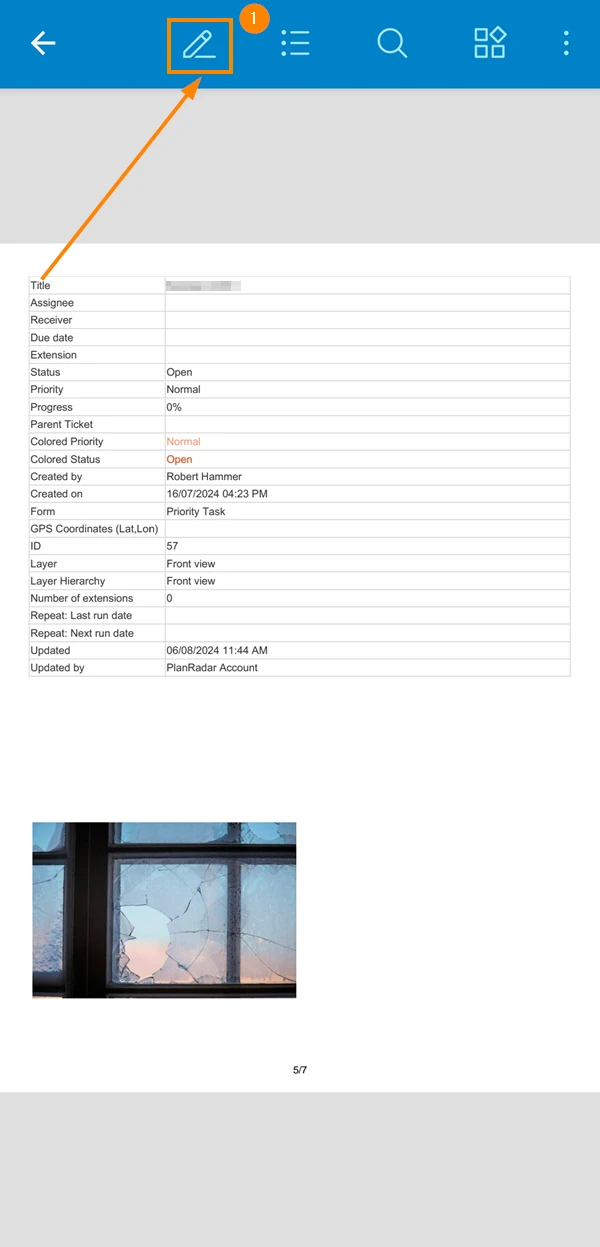
To sign a ticket report. Open the report, then:
- Tap the pen icon
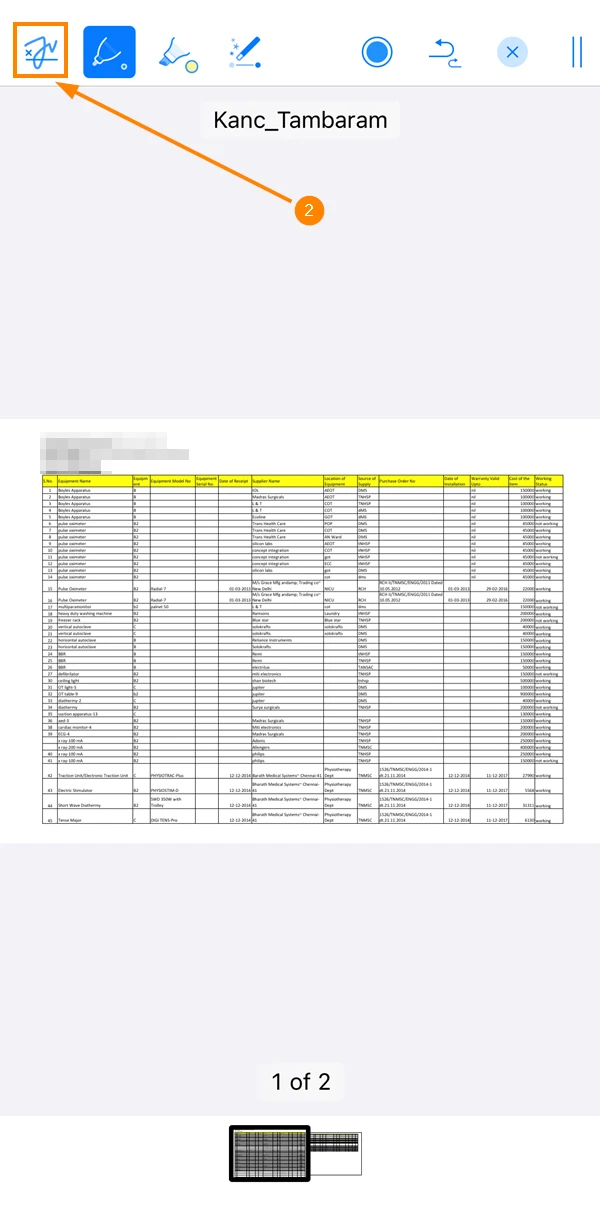
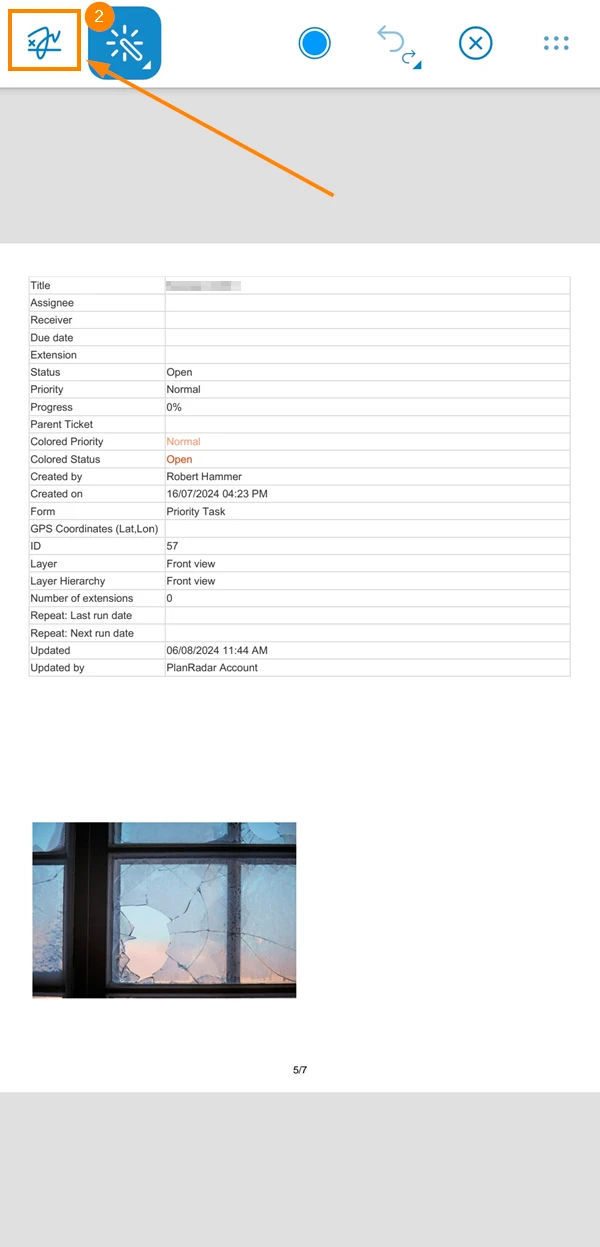
- Tap the signature icon
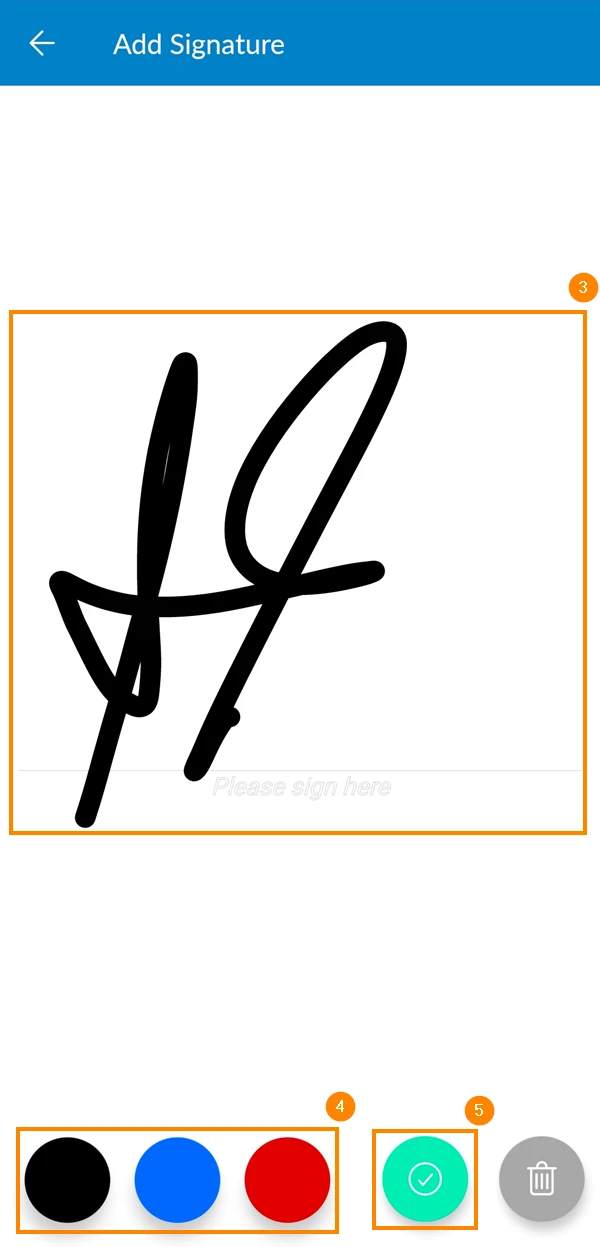
- Sign
- Optional: select signature colour
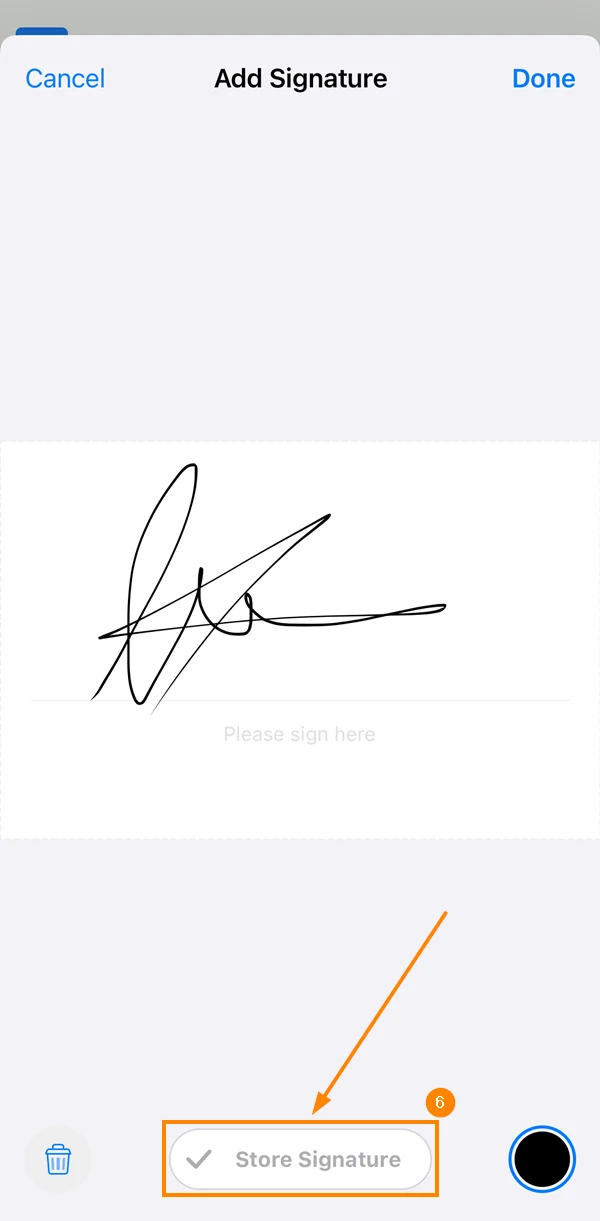
- Tap Done
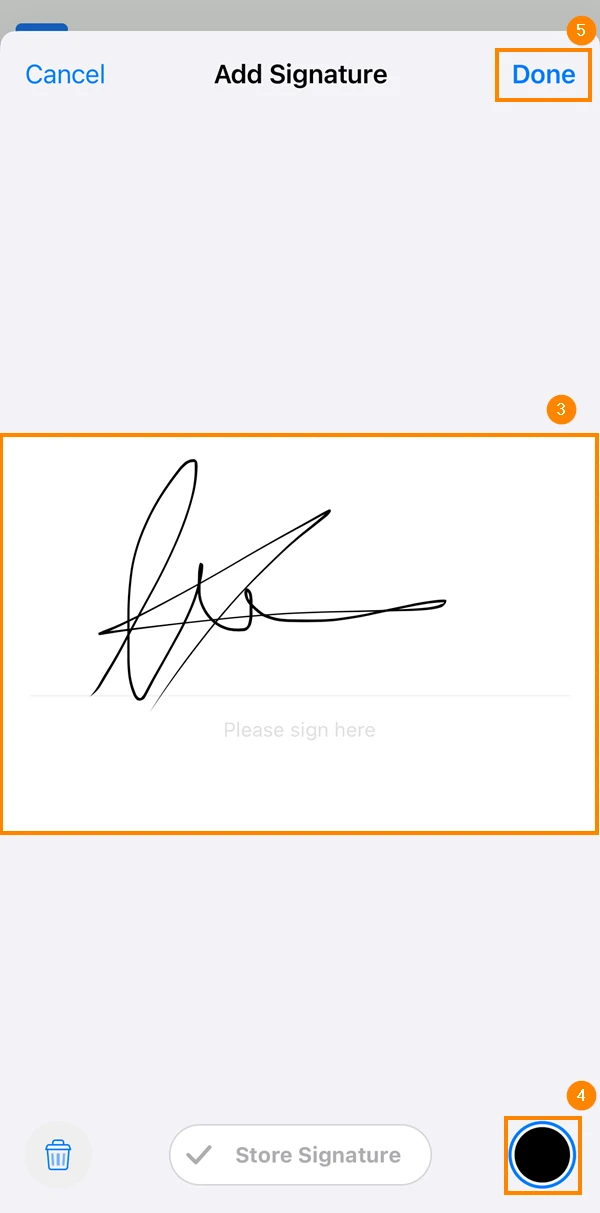
- You can save the signature for future use by tapping Store Signature

- Tap the pen icon
- Tap the signature icon
- Sign
- Optional: select signature colour
- Tap ✔
Move and Format a Signature
To format a signature after adding it:
- Tap the signature and hold it for a second
- Tap Inspector
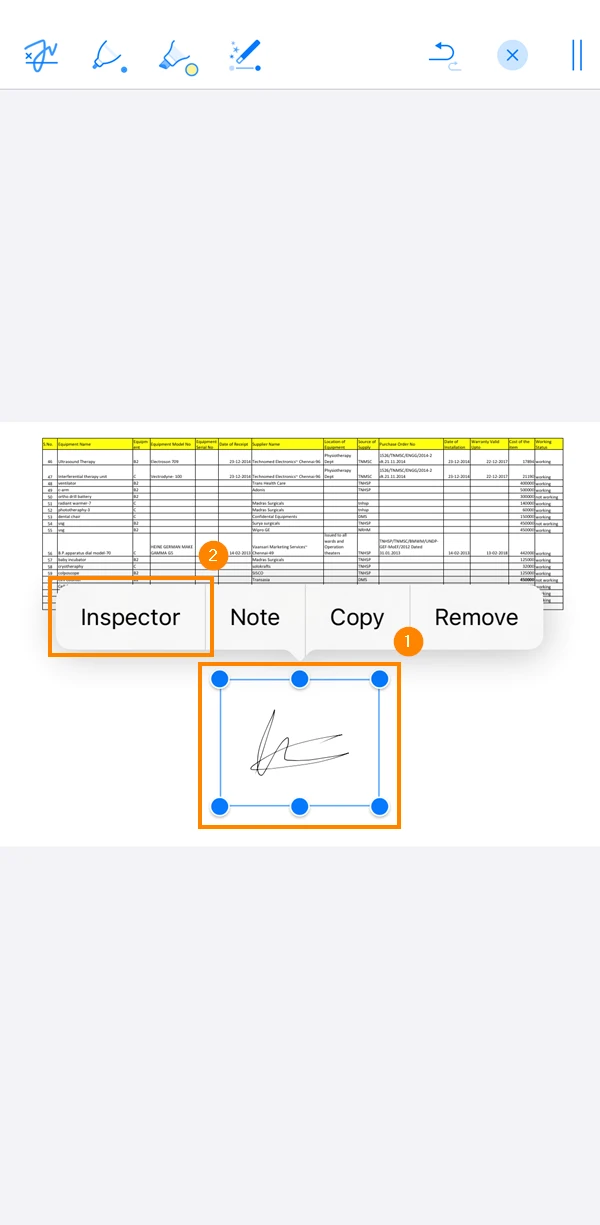
- Format the signature
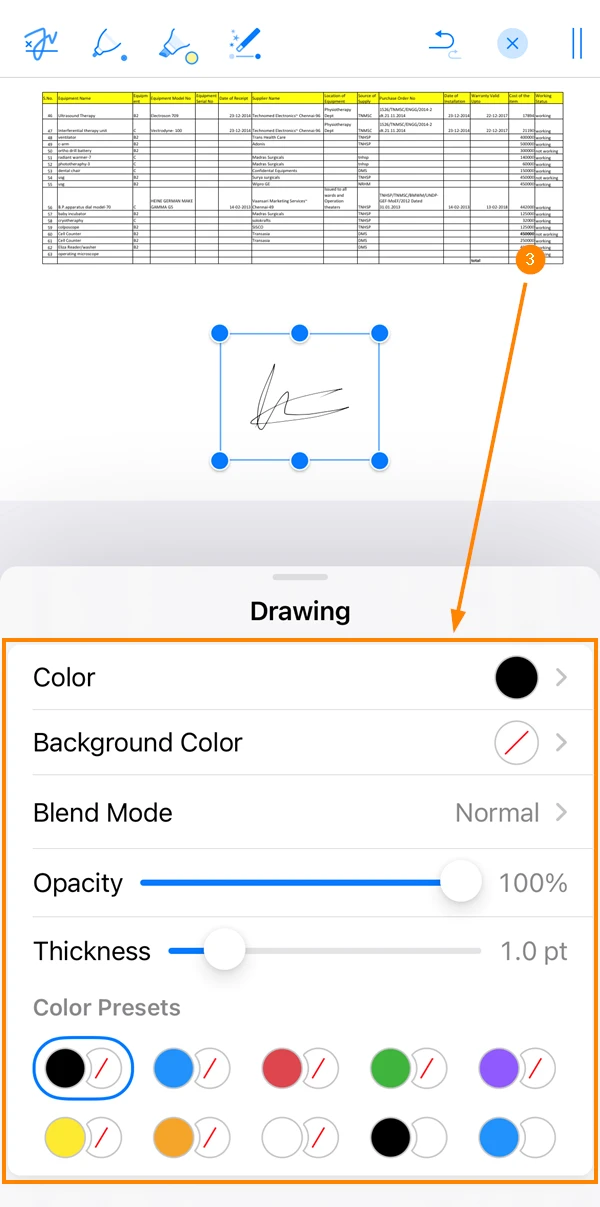
- You can also move the signature around the report by holding and dragging it
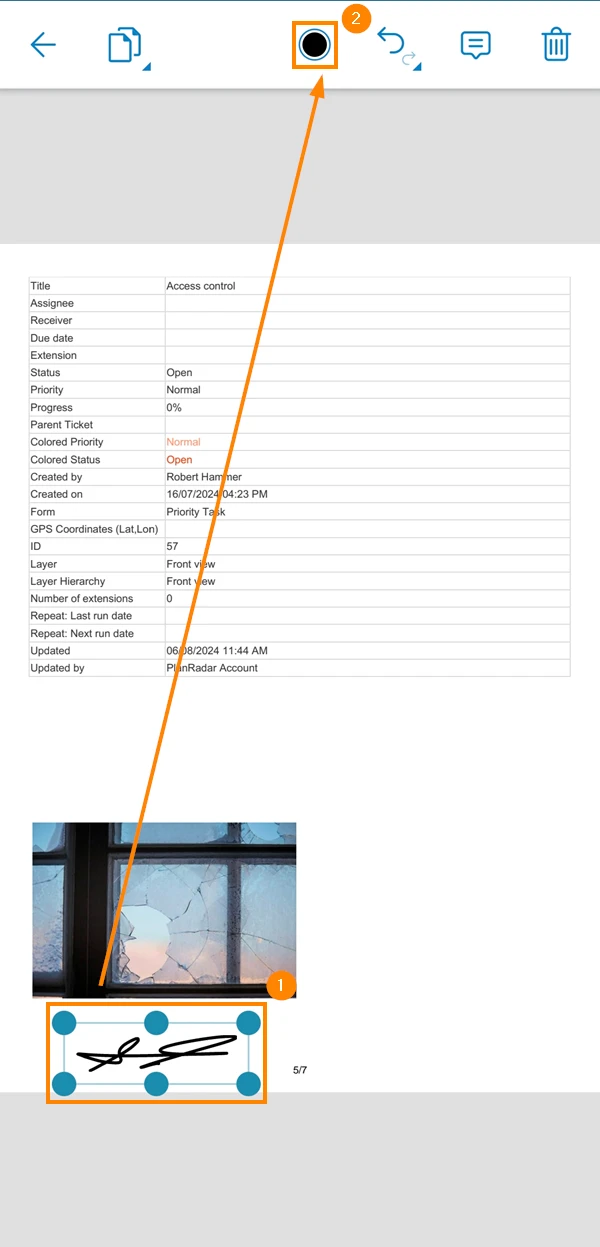
- Tap the signature
- Tap the colour icon at the top
- Format the signature
- Tap X
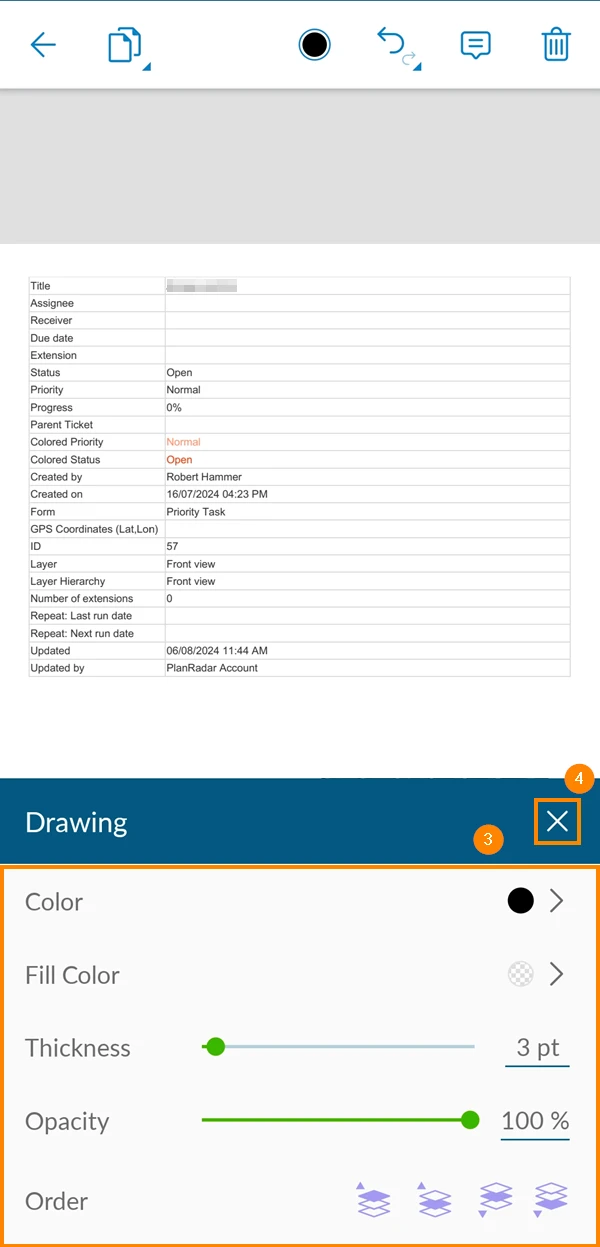
- You can also move the signature around the report by holding and dragging it
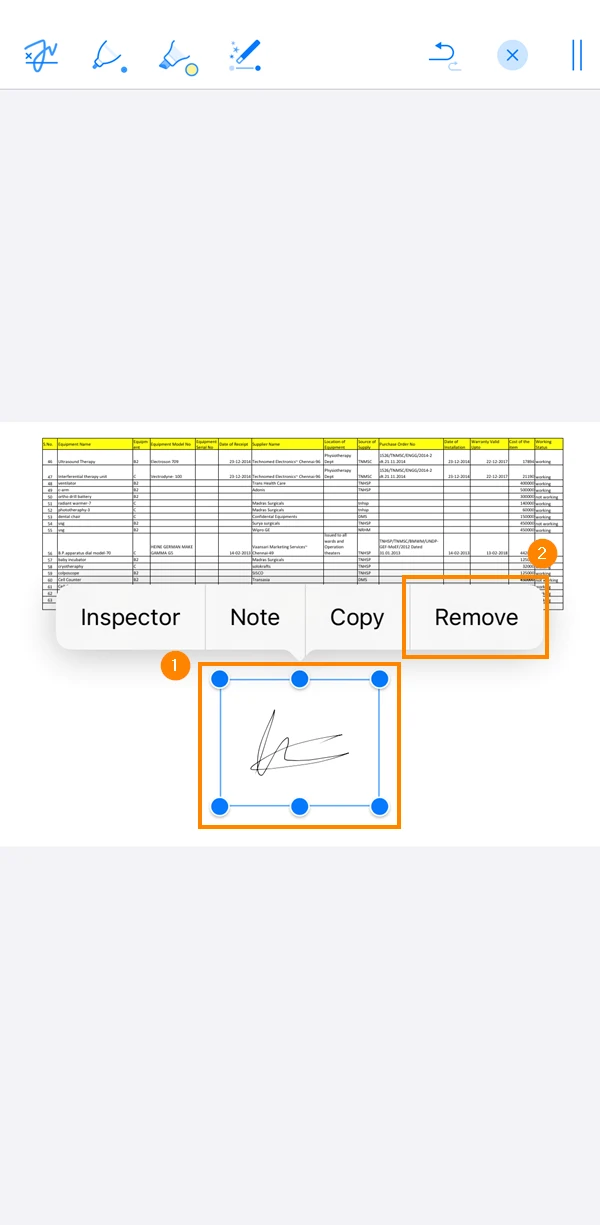
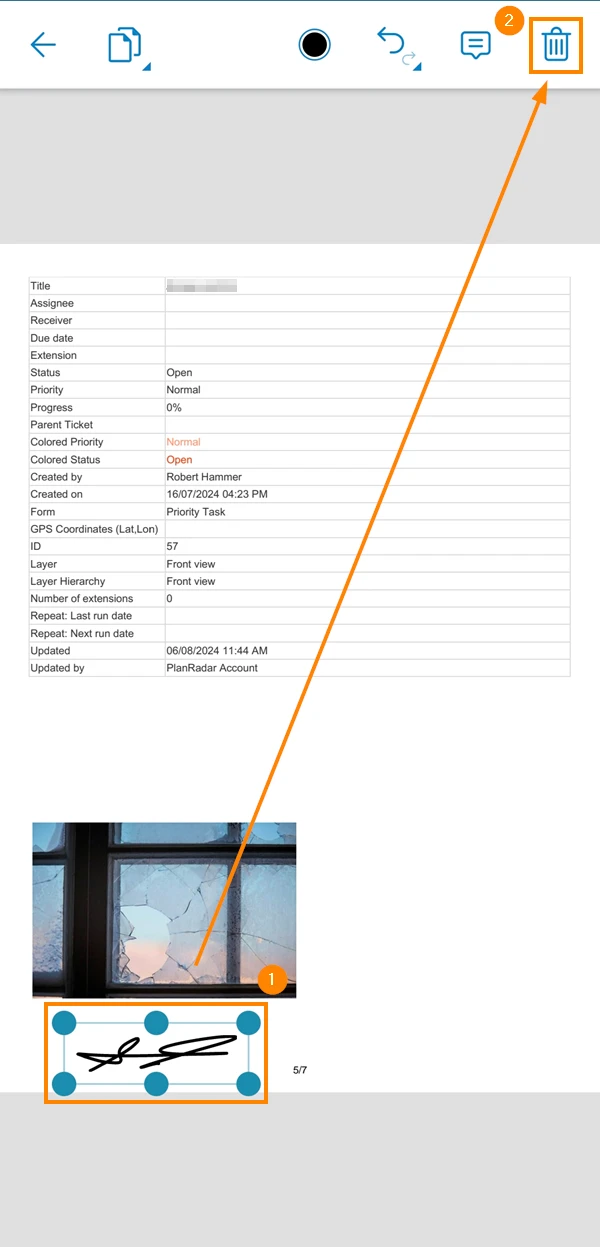
Delete a Signature
To remove a signature after adding it to the report:
- Tap the signature and hold it for a second
- Tap Remove
- Tap the signature
- Tap the trash icon
Add Annotations
You can add annotations to your ticket report to highlight some parts without the need to use external tools.
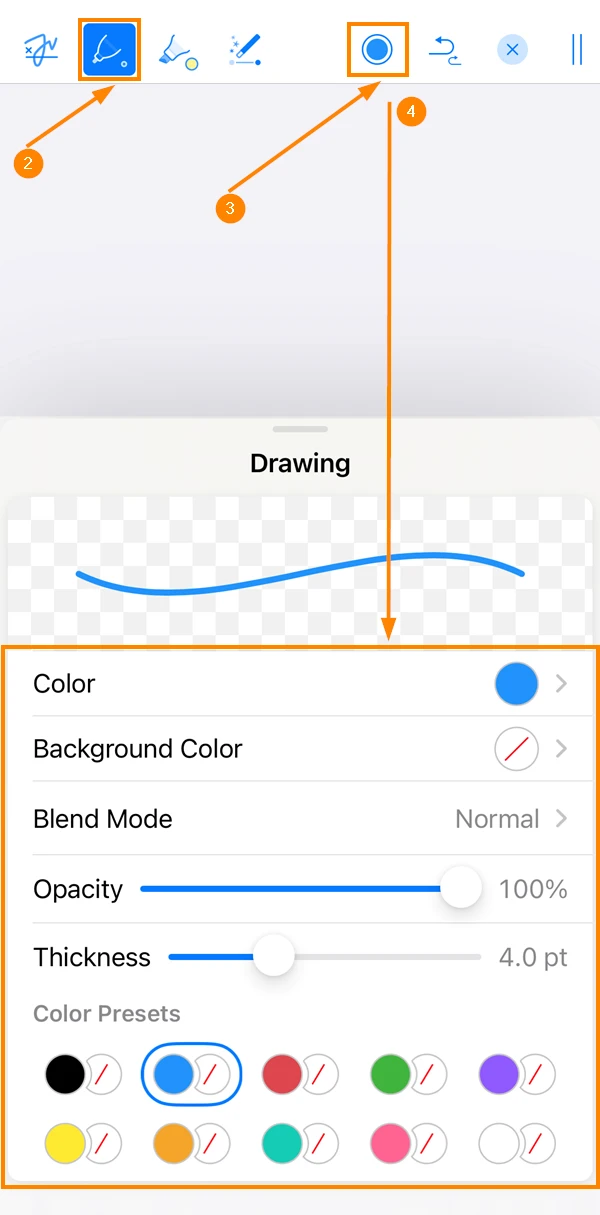
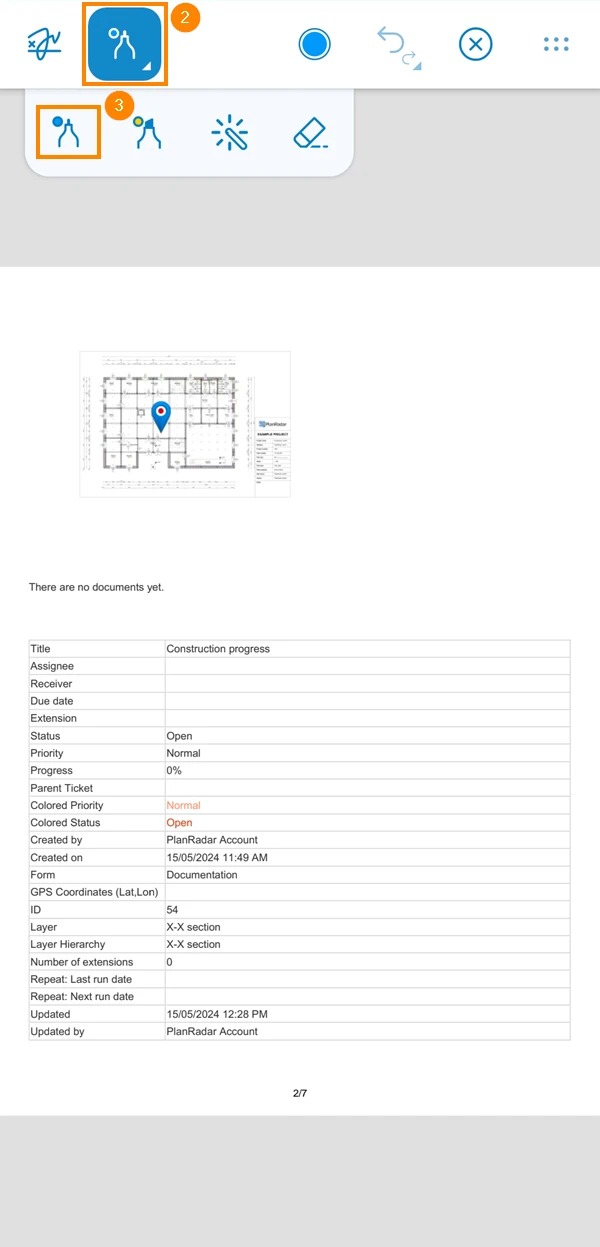
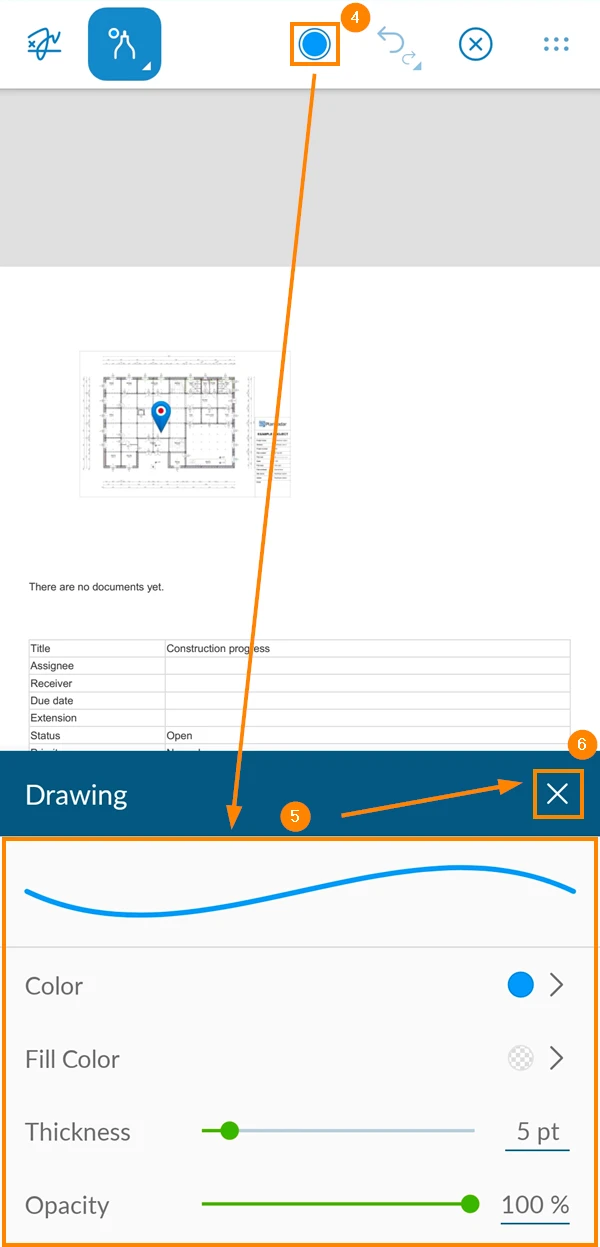
Add Drawings
To add drawings to the ticket report:
- Tap the pen icon
- Tap the pen icon
- Tap the colour icon
- Customise your pen colour, size, opacity, and more
- Tap the pen icon
- Tap and hold the pen icon
- Select the drawing pen
- Tap the colour icon
- Customise your pen colour, size, opacity, and more
- Tap X
Add Highlight
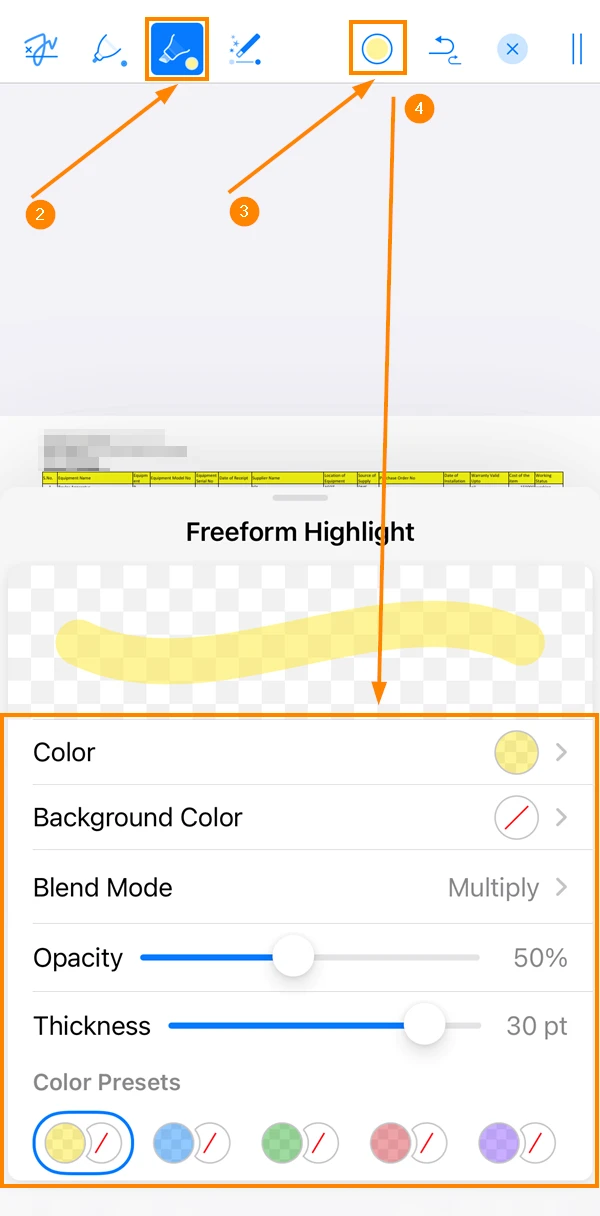
You can highlight parts of your ticket report using the different highlighting colours. To do so:
- Tap the pen icon
- Tap the highlighter icon
- Tap the colour icon
- Customise your highlight colour, size, opacity, and more
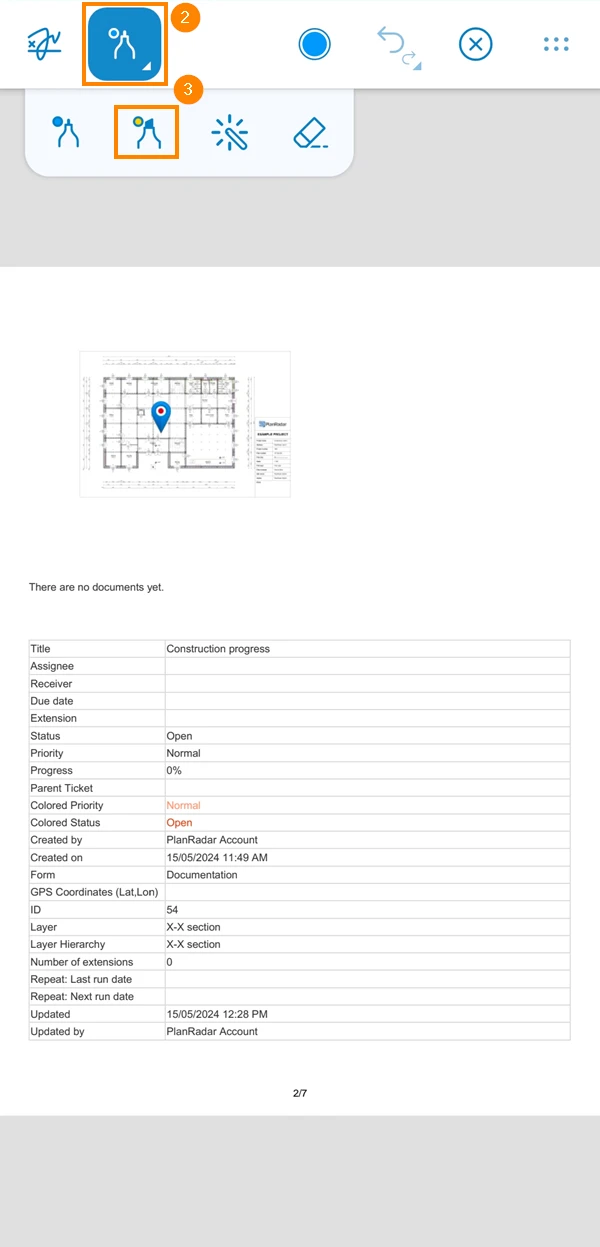
- Tap the pen icon
- Tap and hold the pen icon
- Select the highlighting pen
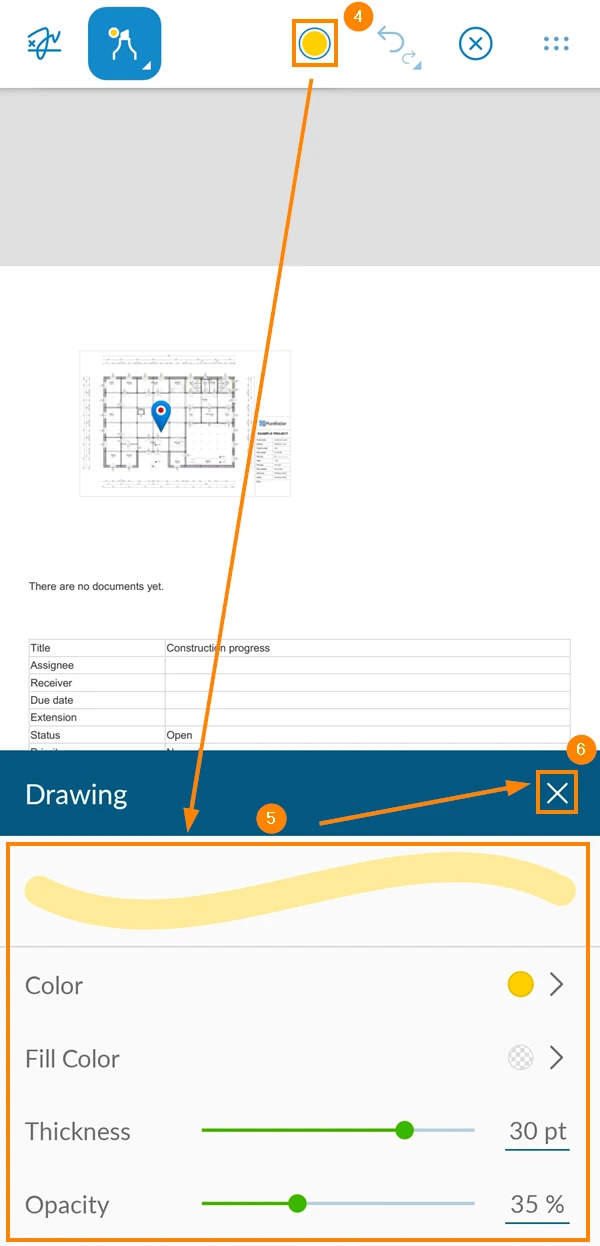
- Tap the colour icon
- Customise your highlighter colour, size, opacity, and more
- Tap X
Share a Ticket Report
To share a ticket report:
- Tap the share icon
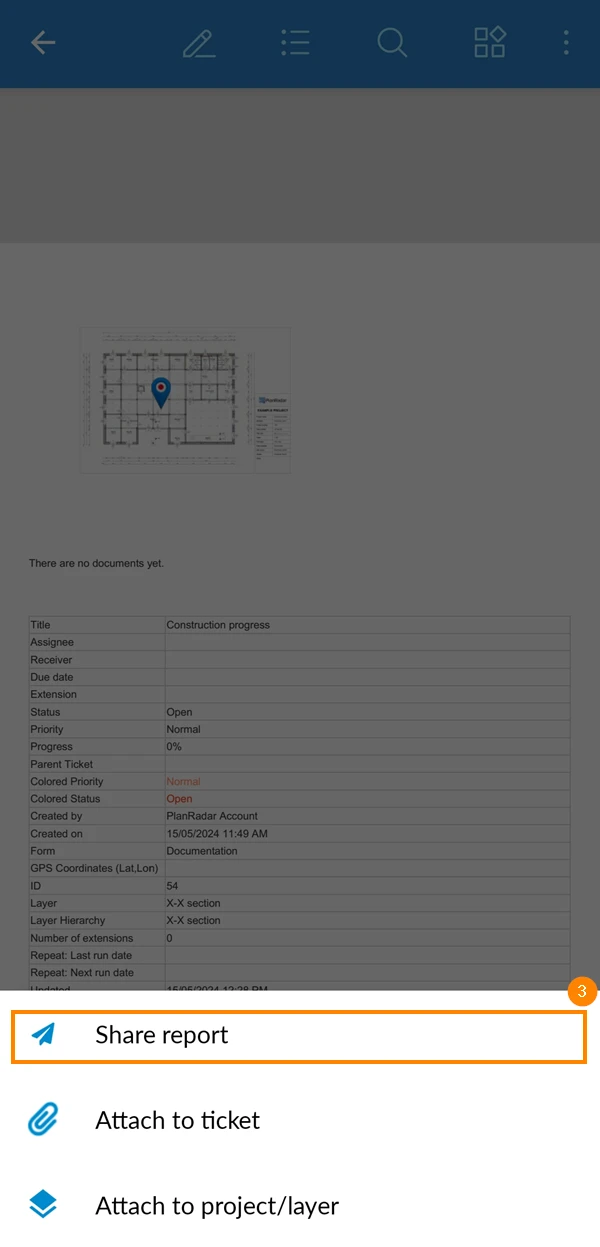
- Tap Share report
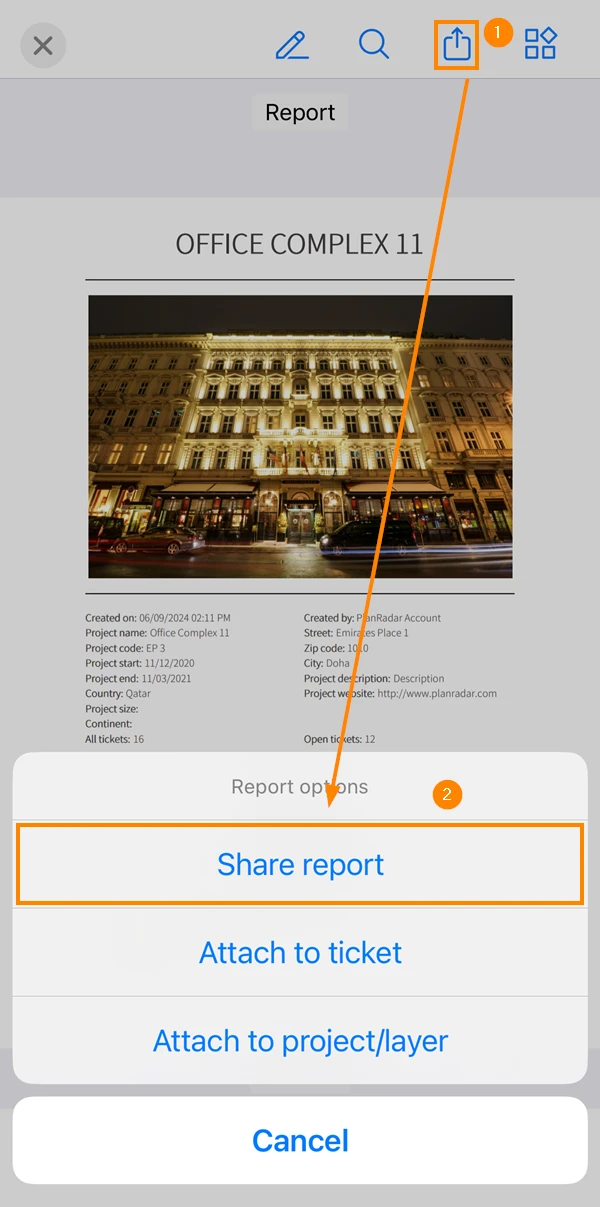
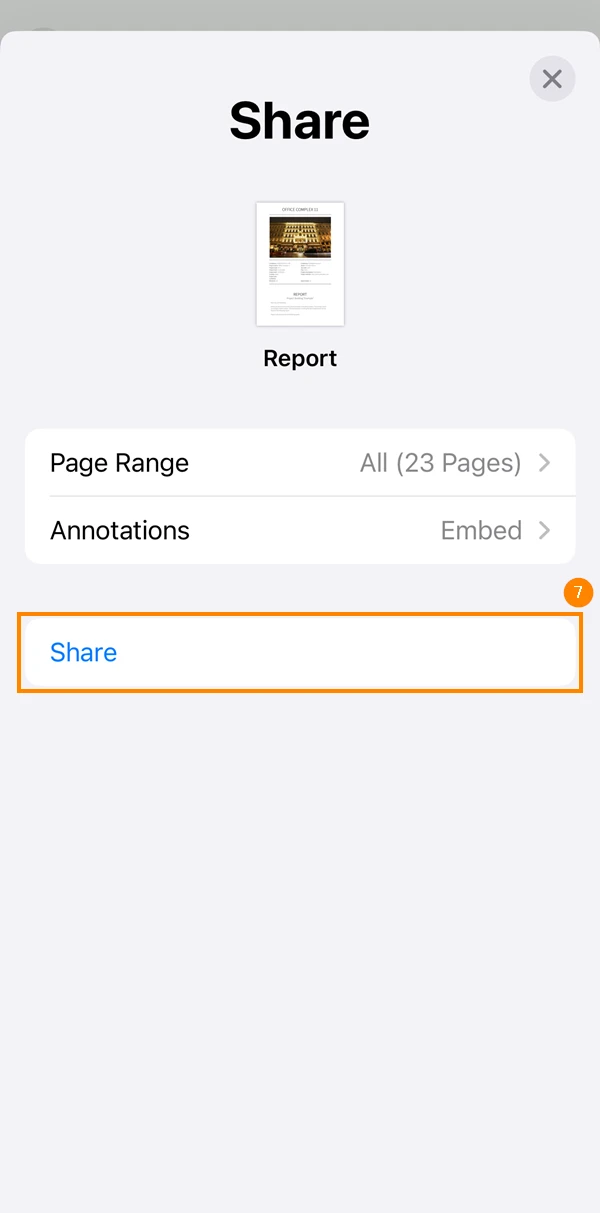
- Tap Page Range to select the pages you want to share
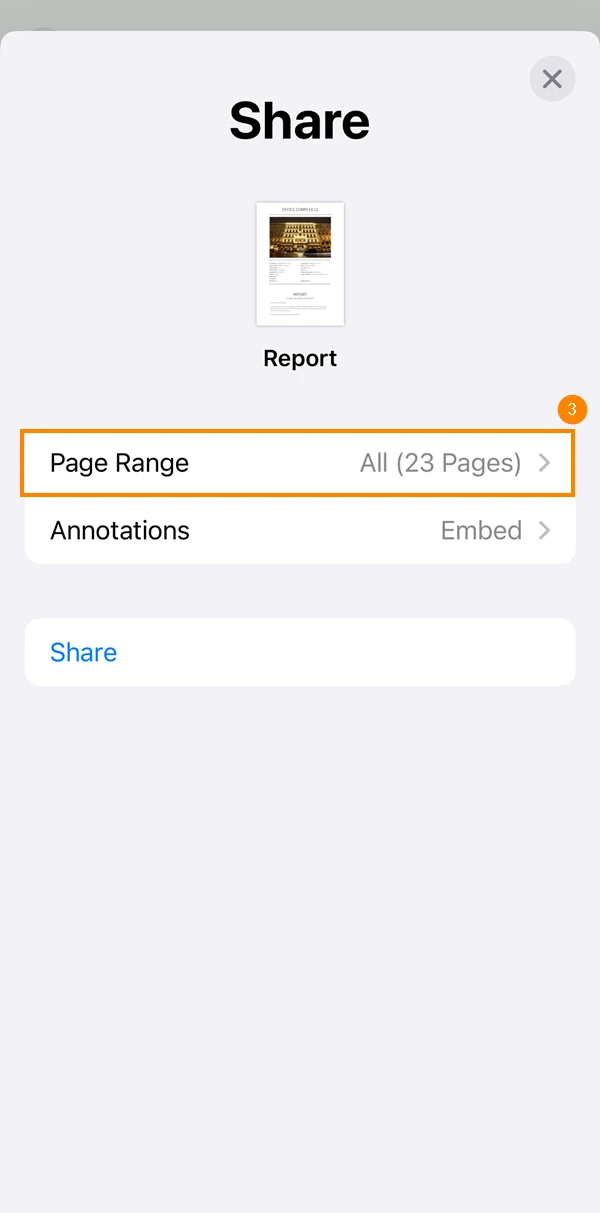
- Select which pages to include
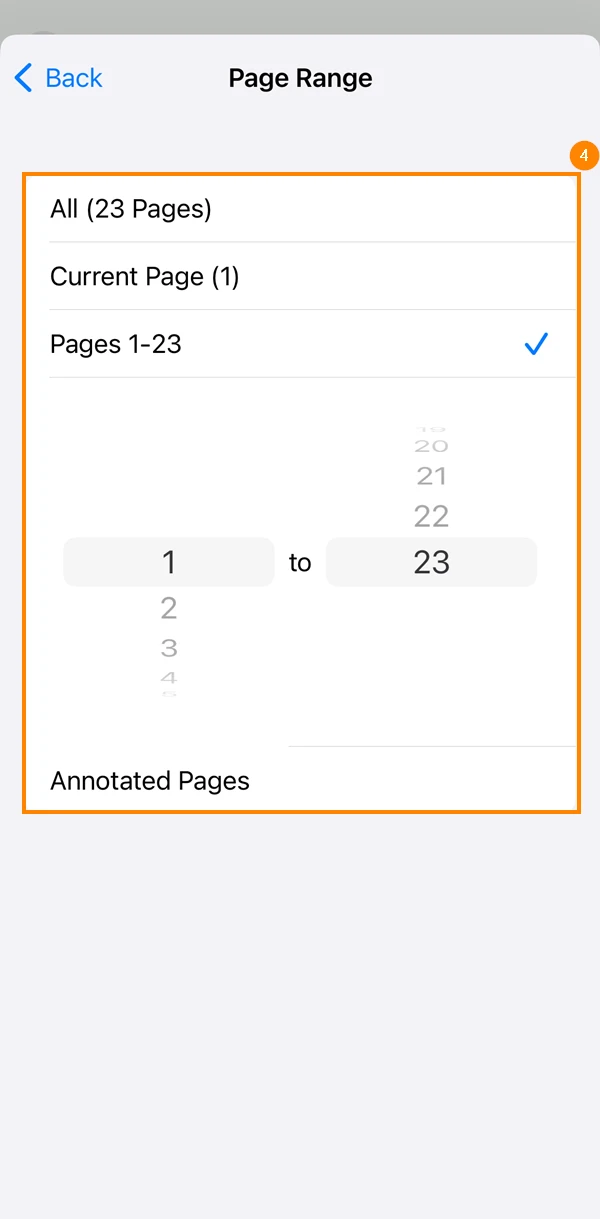
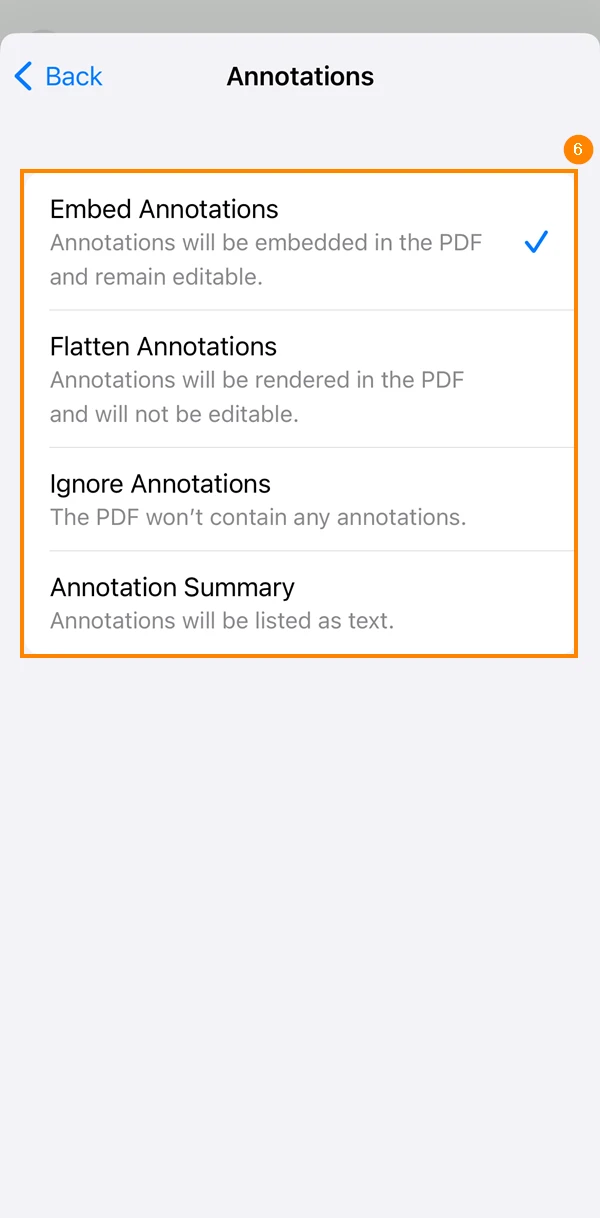
- Tap Annotations to select how to include annotations in your report or to ignore them
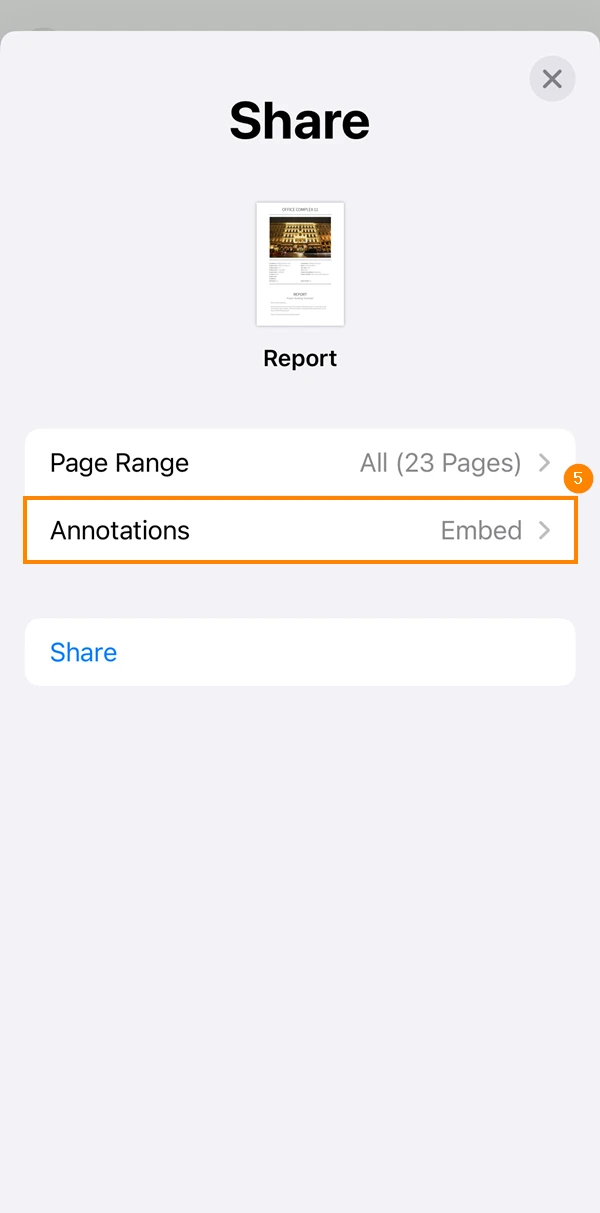
- Select how you want the annotations to appear
- Tap Share
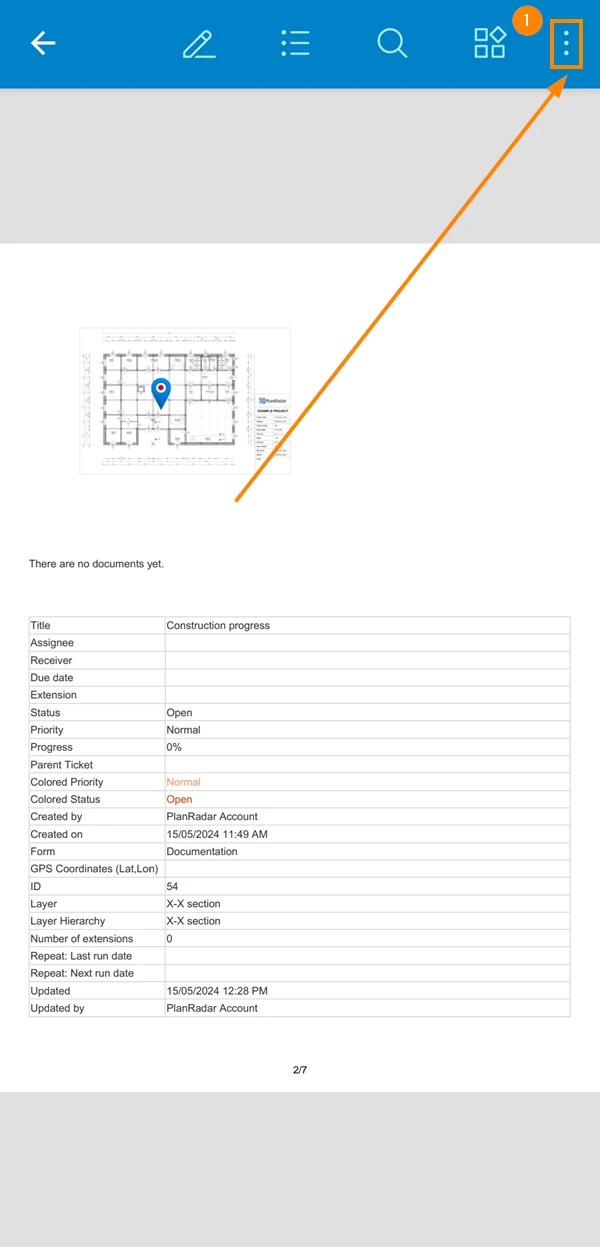
- Tap the more menu
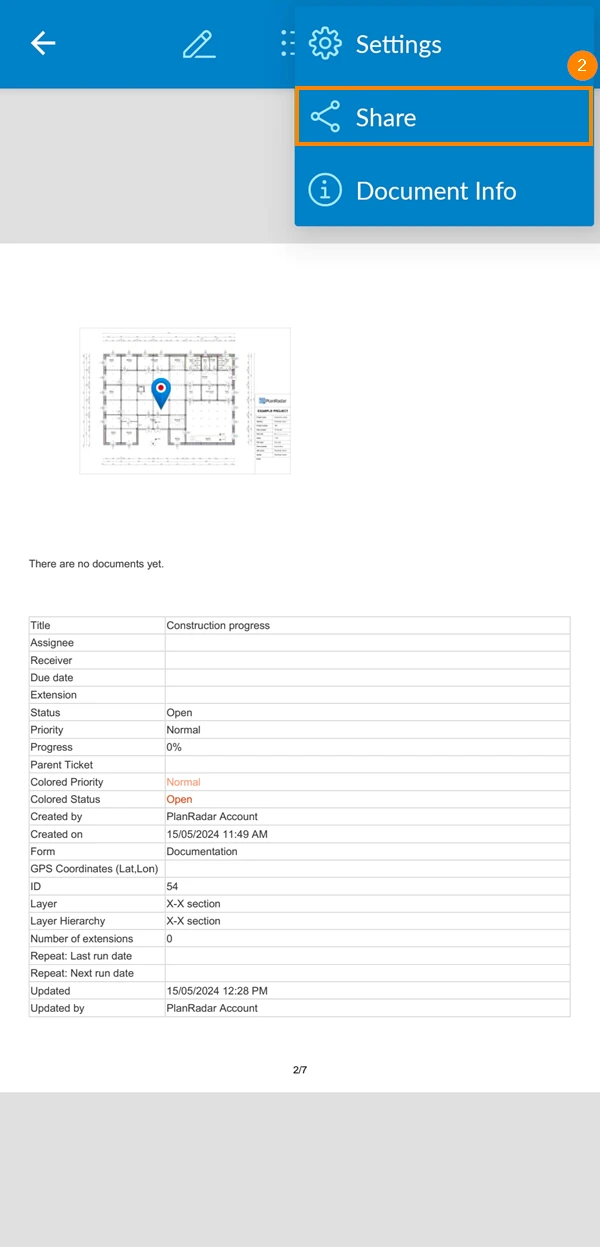
- Tap Share
- Tap Share report
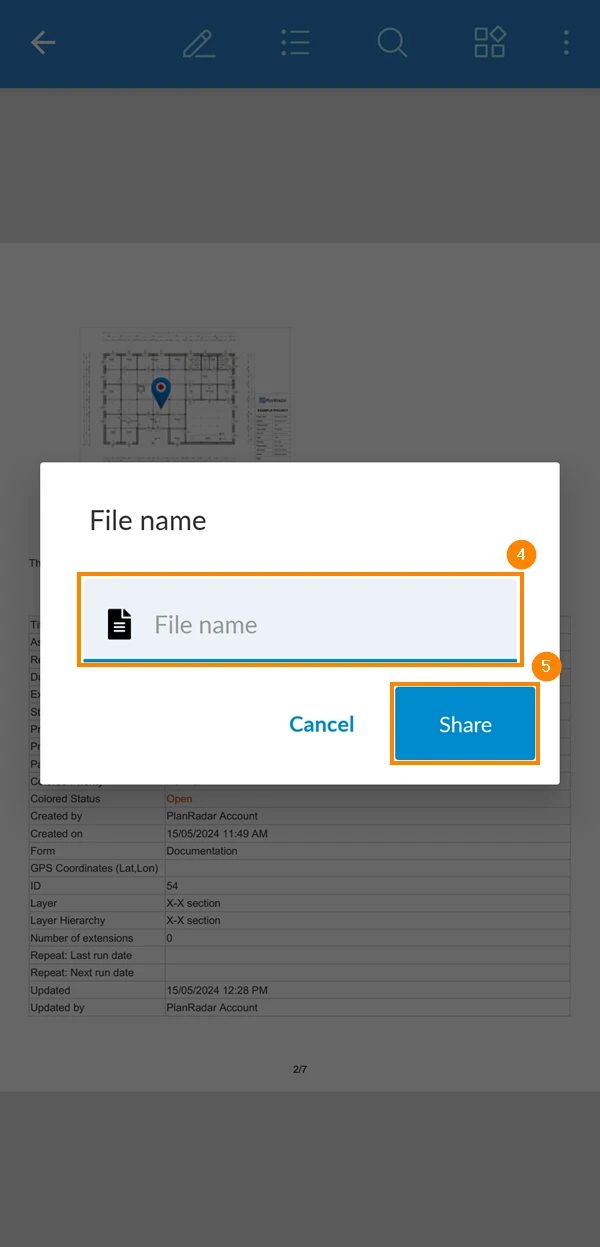
- Type the file name
- Tap Share
Updated December 18, 2024