

 Deutsch
 Español
 Français
 Hrvatski
 Italiano
 Polski
 Português (BR)
Create & Edit Lists
Overview
A list in PlanRadar is a set of values assigned to a list-type form field providing the user with a drop-down menu from which to select values in the ticket. Lists can save you time when filling out ticket forms and ensure consistent data entry.
Access & Permissions
Global Lists vs. Project Lists
When creating a list, first consider whether you want to use it in multiple projects or only within a single project.
- Global lists are created for the whole account and can be assigned to multiple projects.
- Project lists are created within a project and cannot be used in other projects.
How to access
To access global lists:
- Click Forms and Lists
- Click Lists
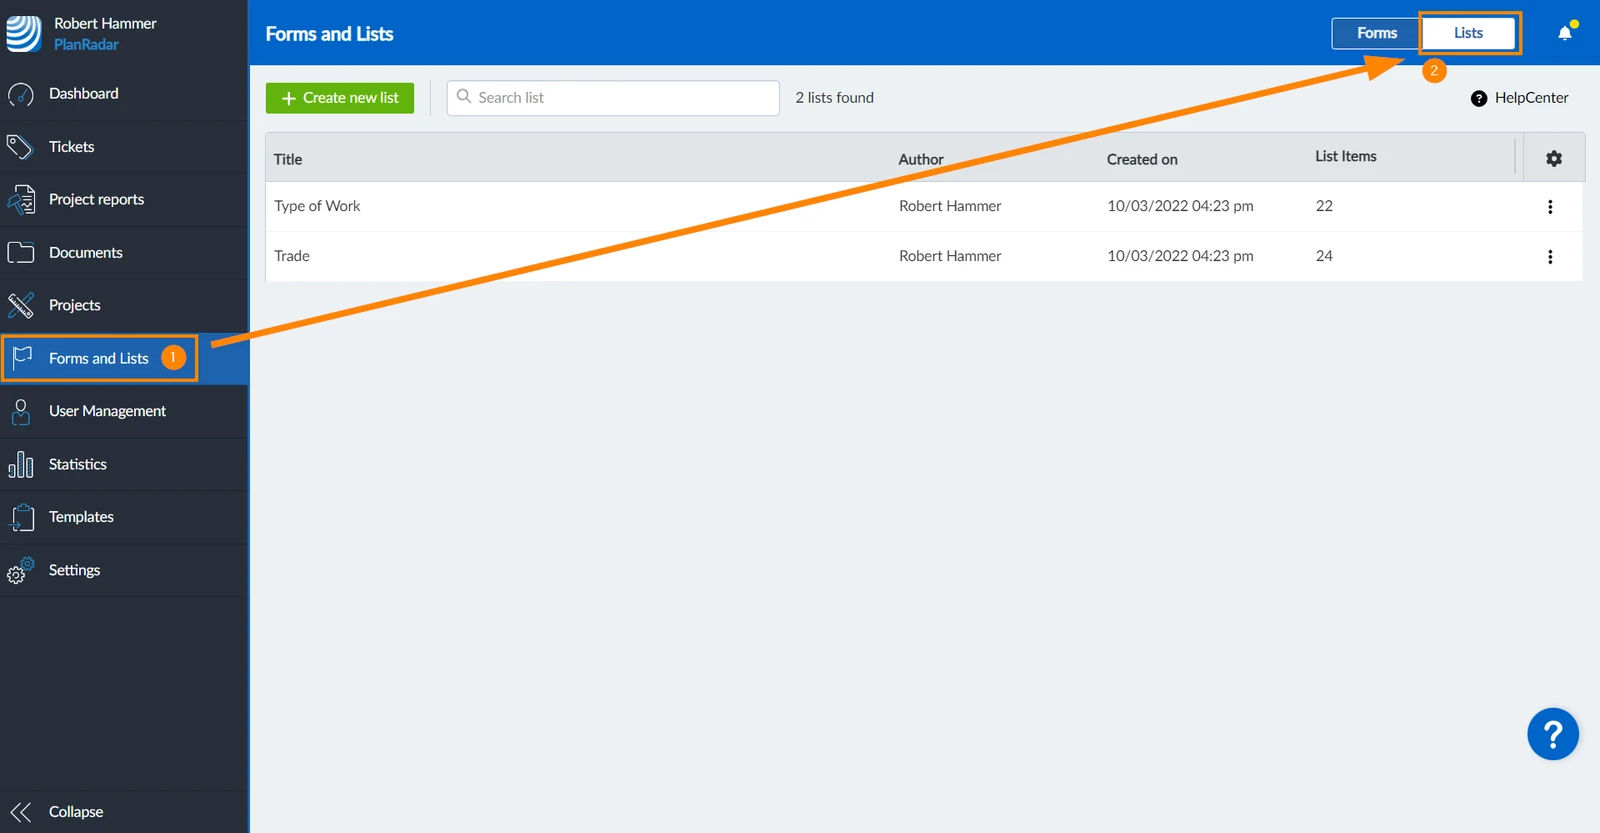
To access project lists:
- Click Projects
- Select the project from the list
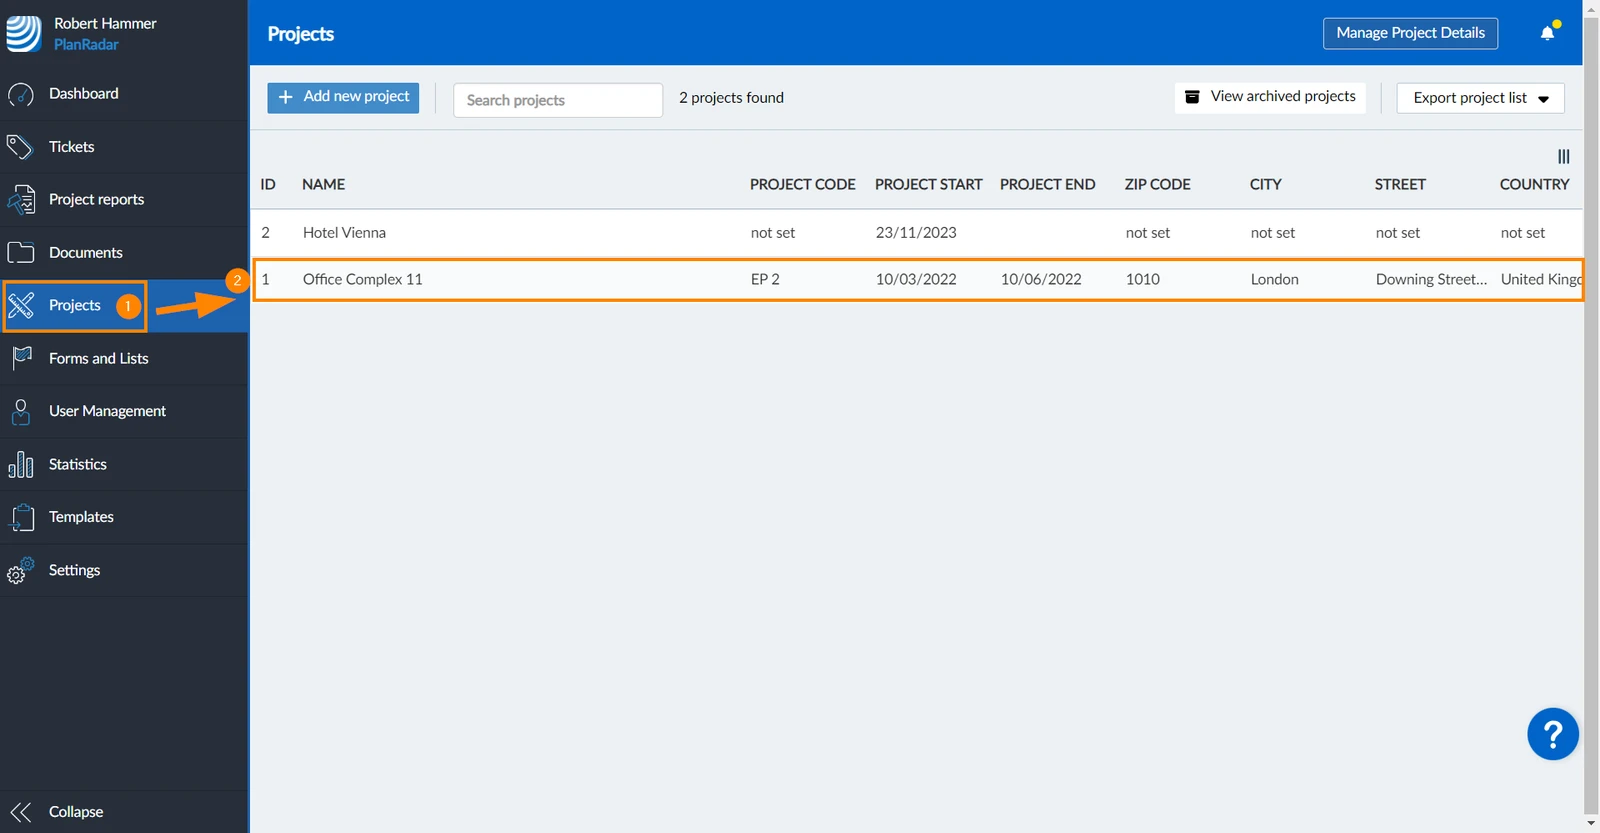
- Click Lists
- Click + Create new project-list
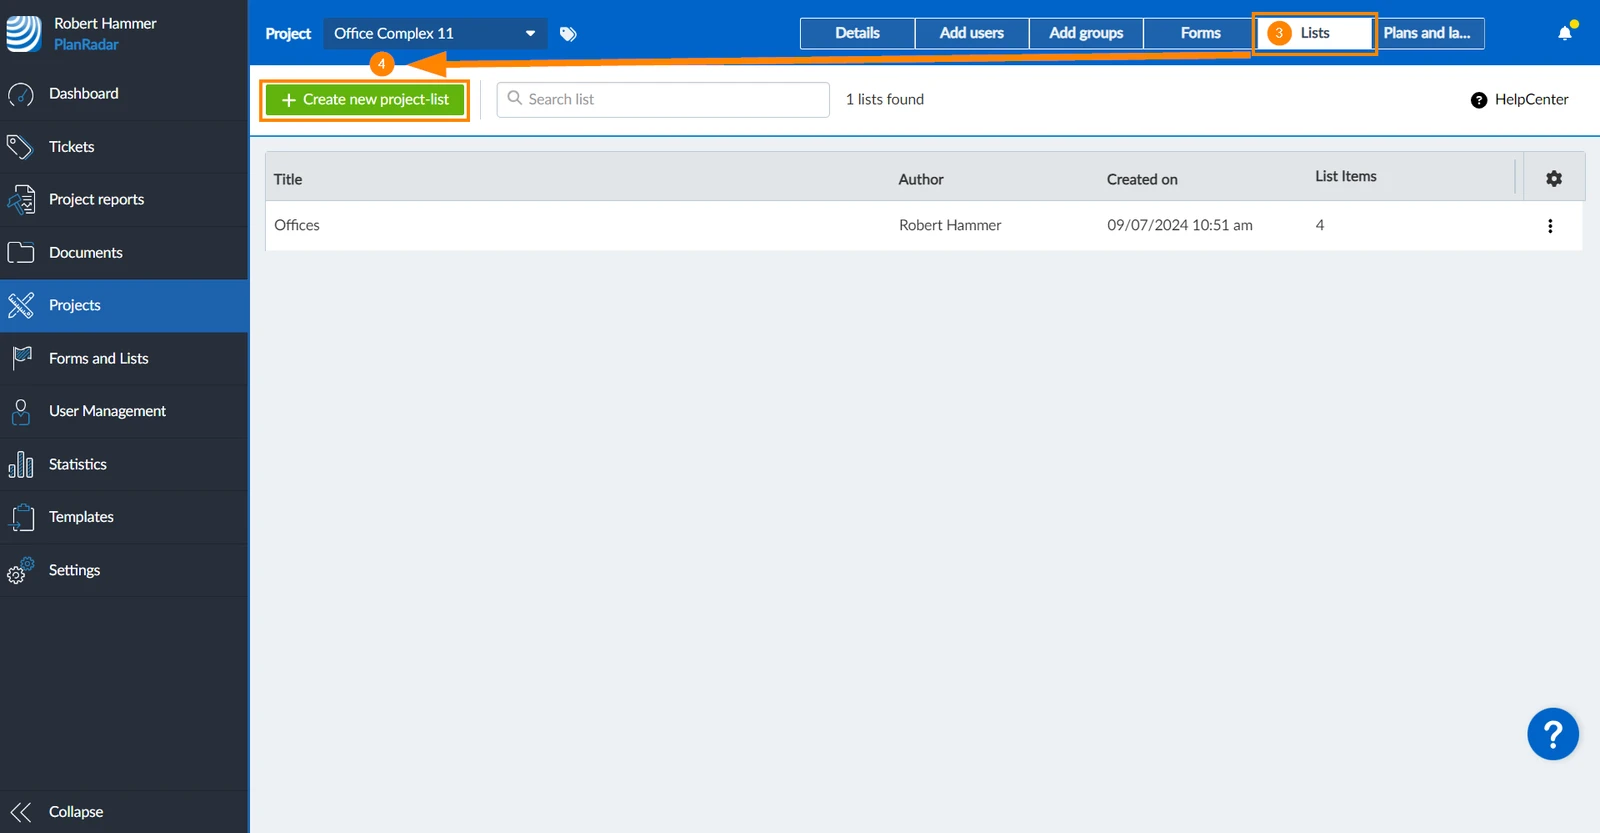
- Then follow the instructions below like for global lists.
Create Lists & Add List Items
To create a list:
- Click + Create new list

- Type the list name
- Click Apply
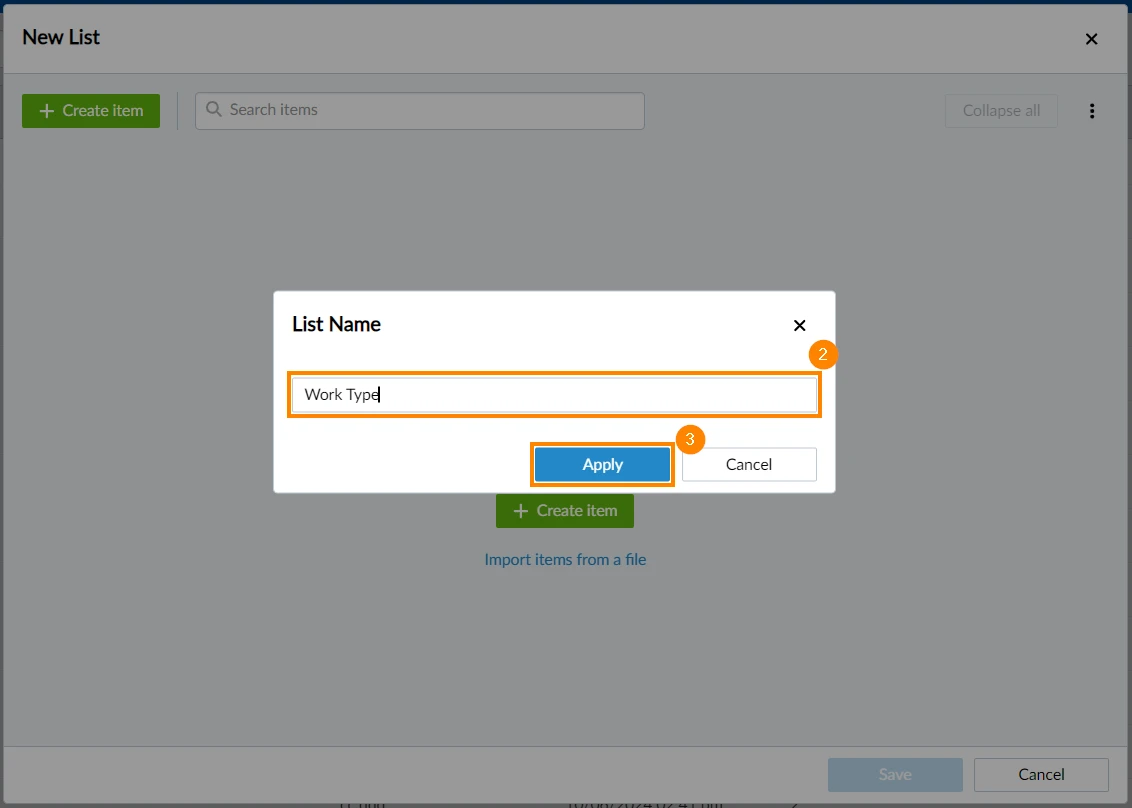
- Click + Create item
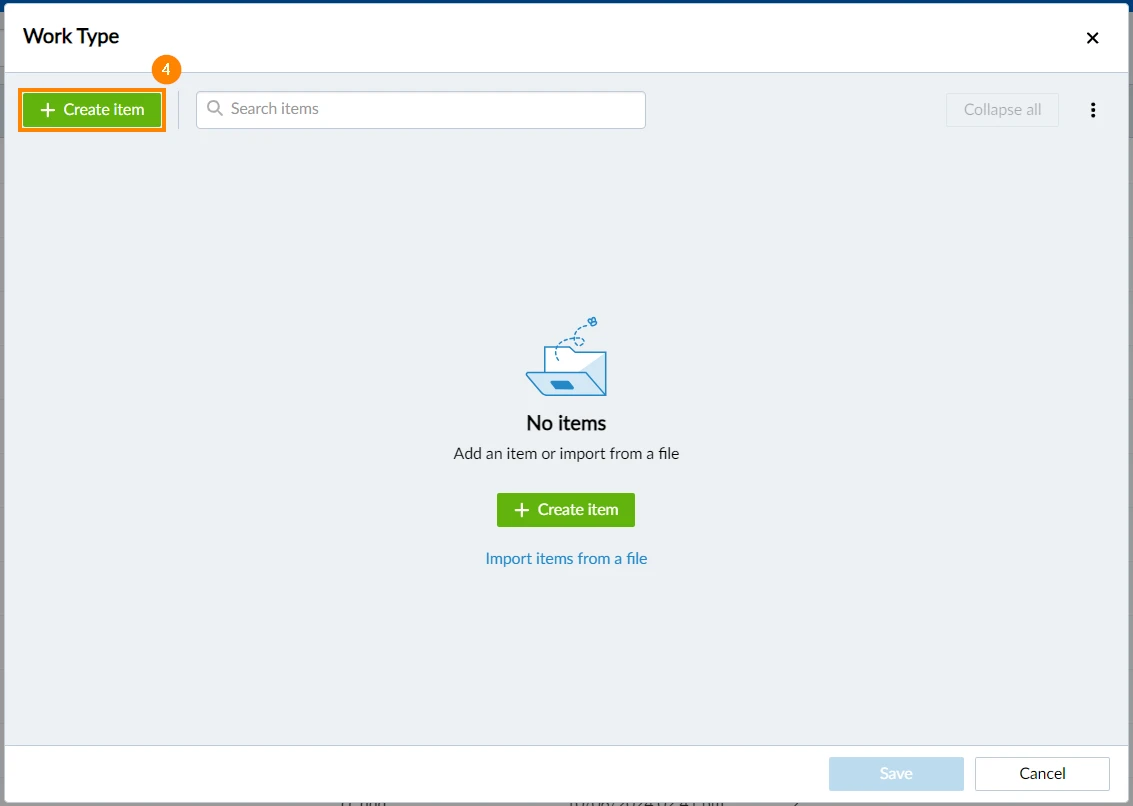
- Type the item's name
- Click ✔ to add the item to the list
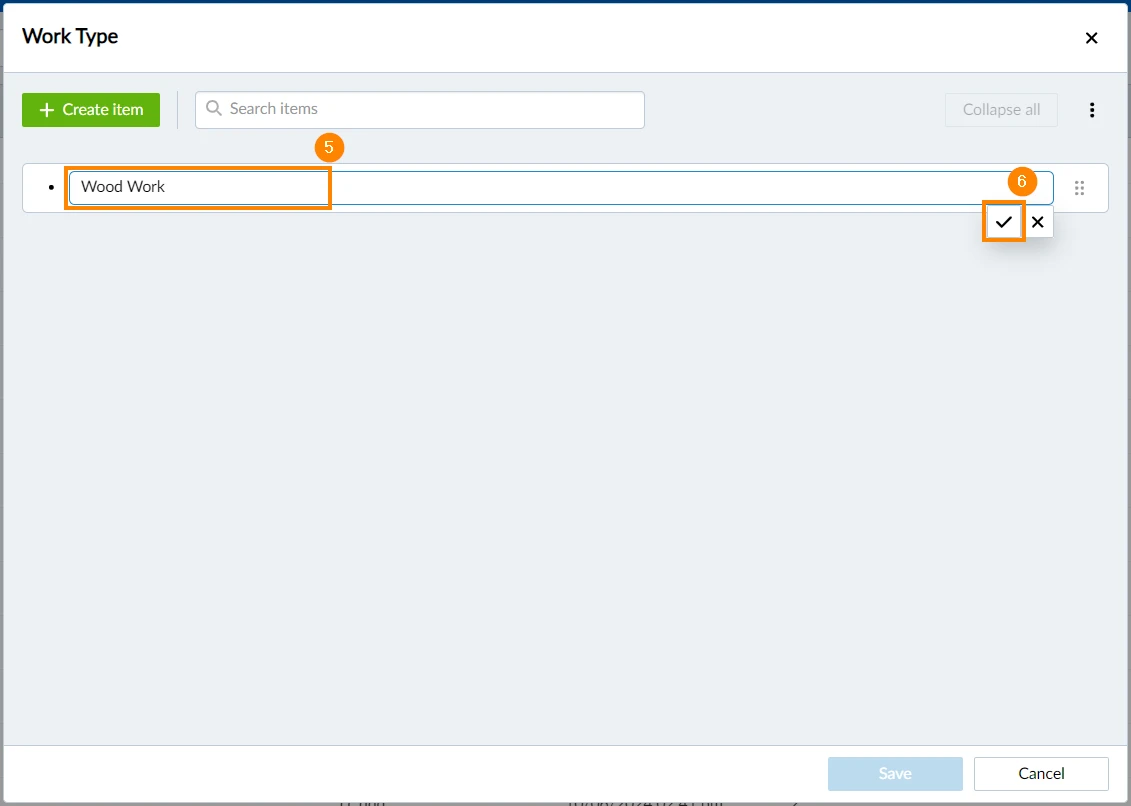
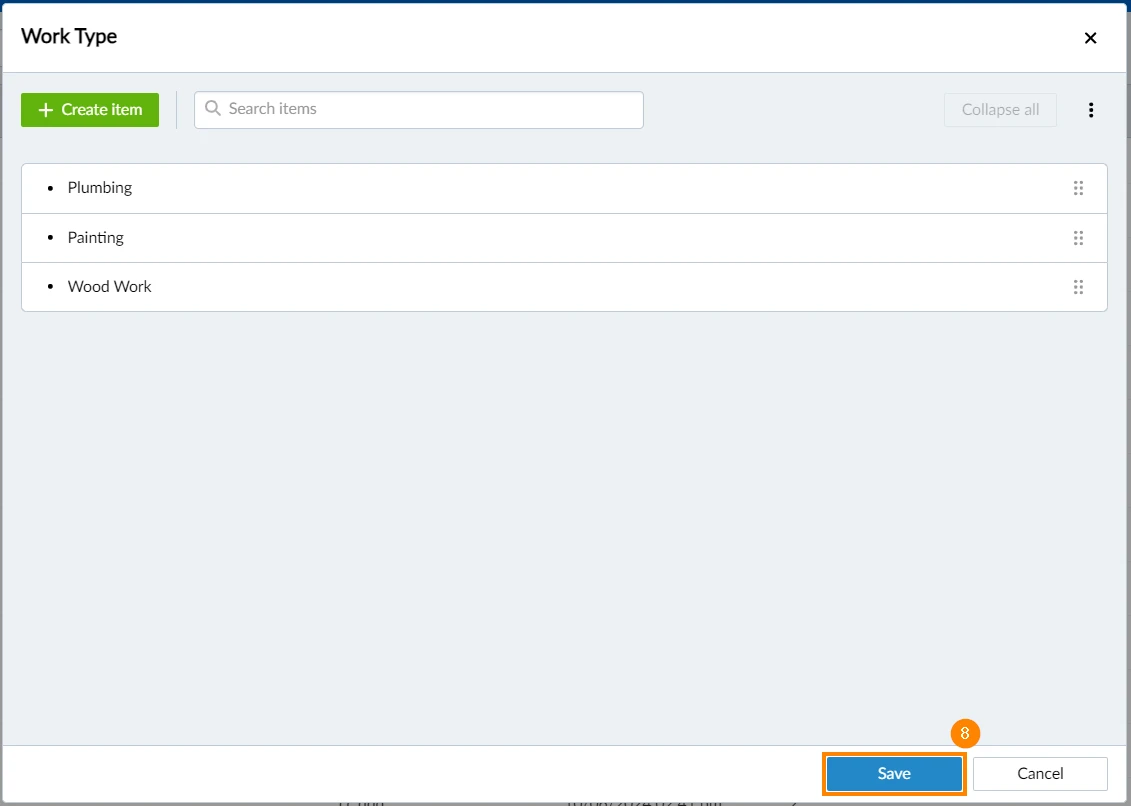
- Repeat steps 4, 5, and 6 for each list item you want to add
- Click Save
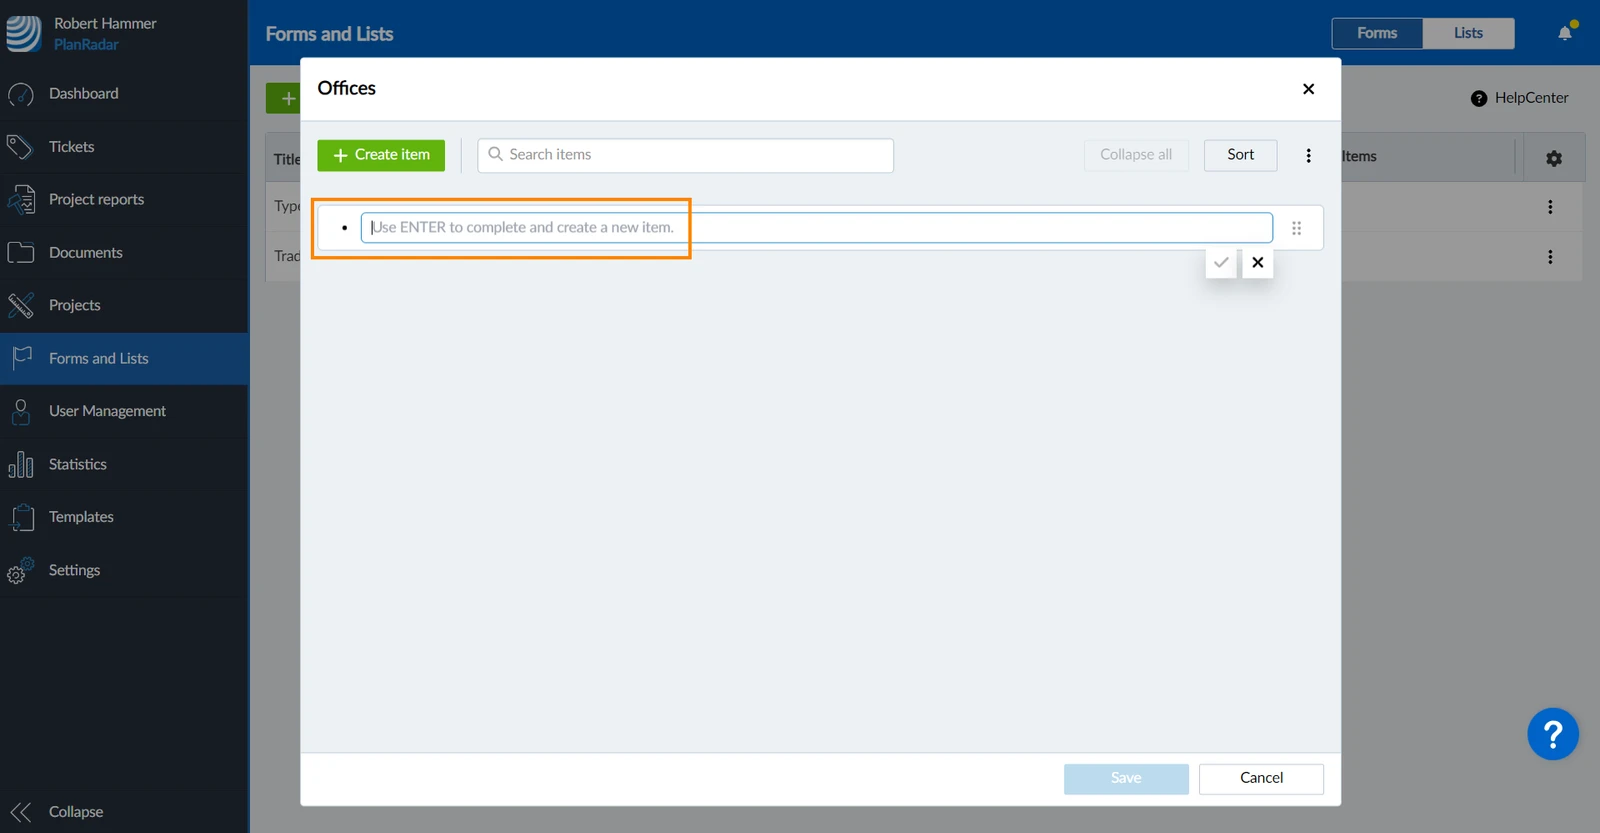
To quickly add multiple list items, press ENTER on your keyboard to confirm the item name and enter the next one below:
Edit Lists
To edit a list:
- Click on the list
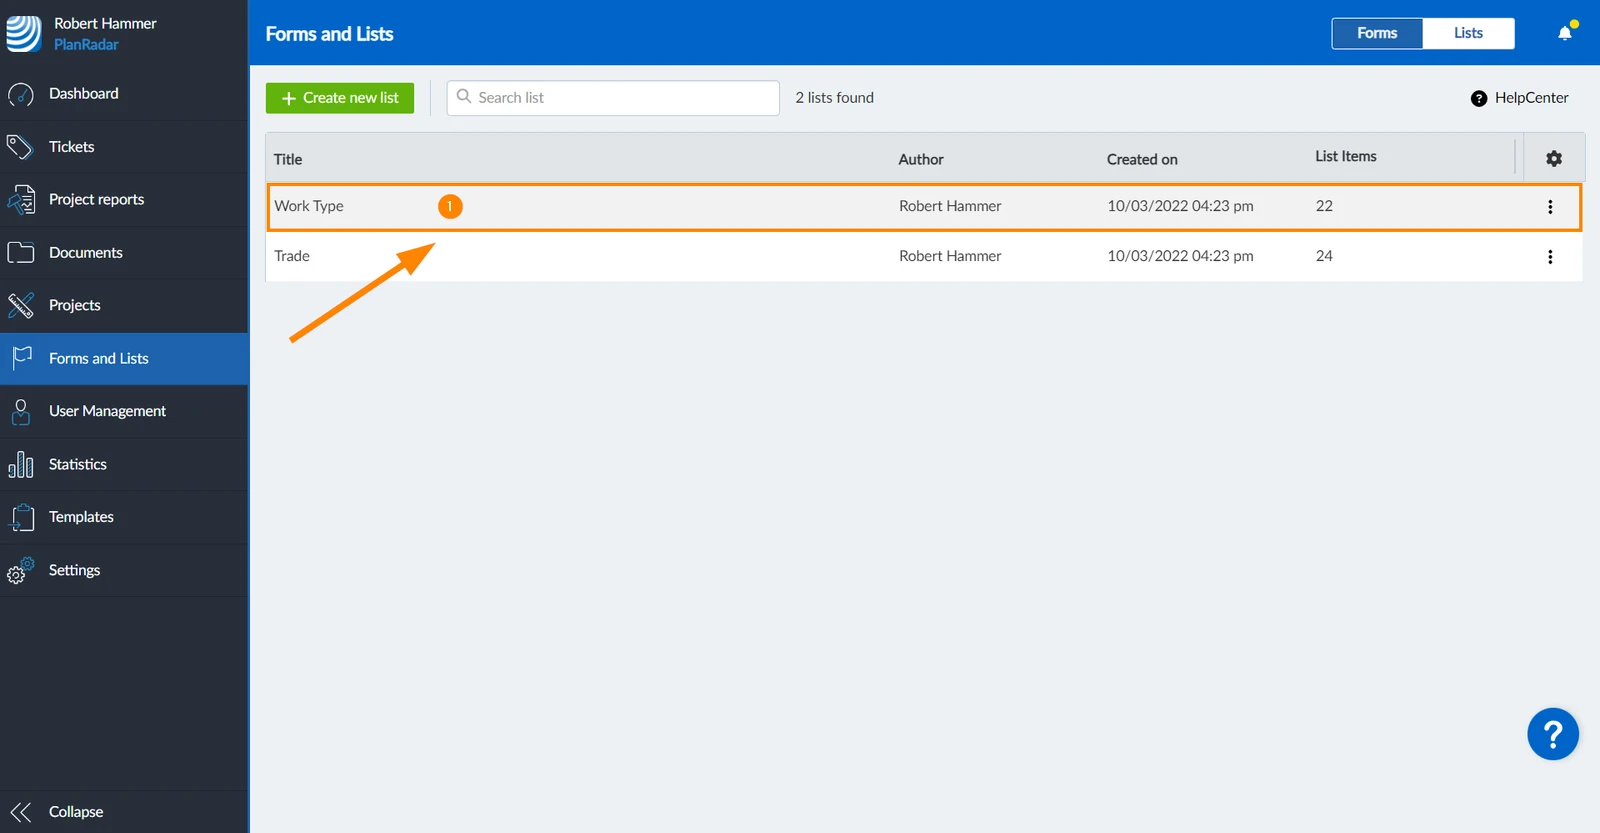
- Click Edit list
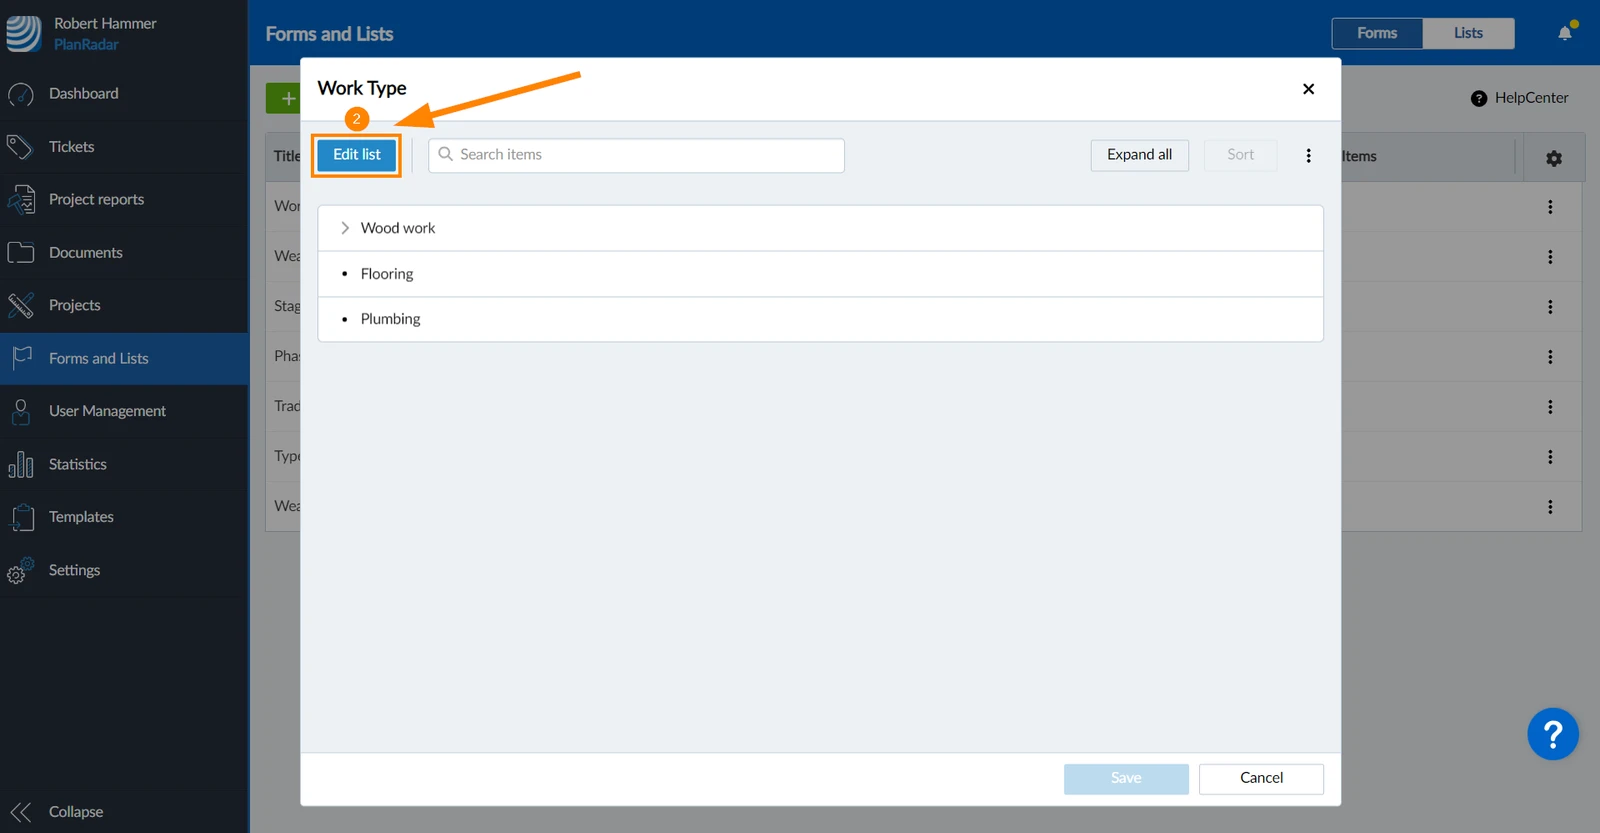
- Make your changes as described below, such as sorting, renaming or deleting list items, and add list items as described above in Create Lists & Add List Items.
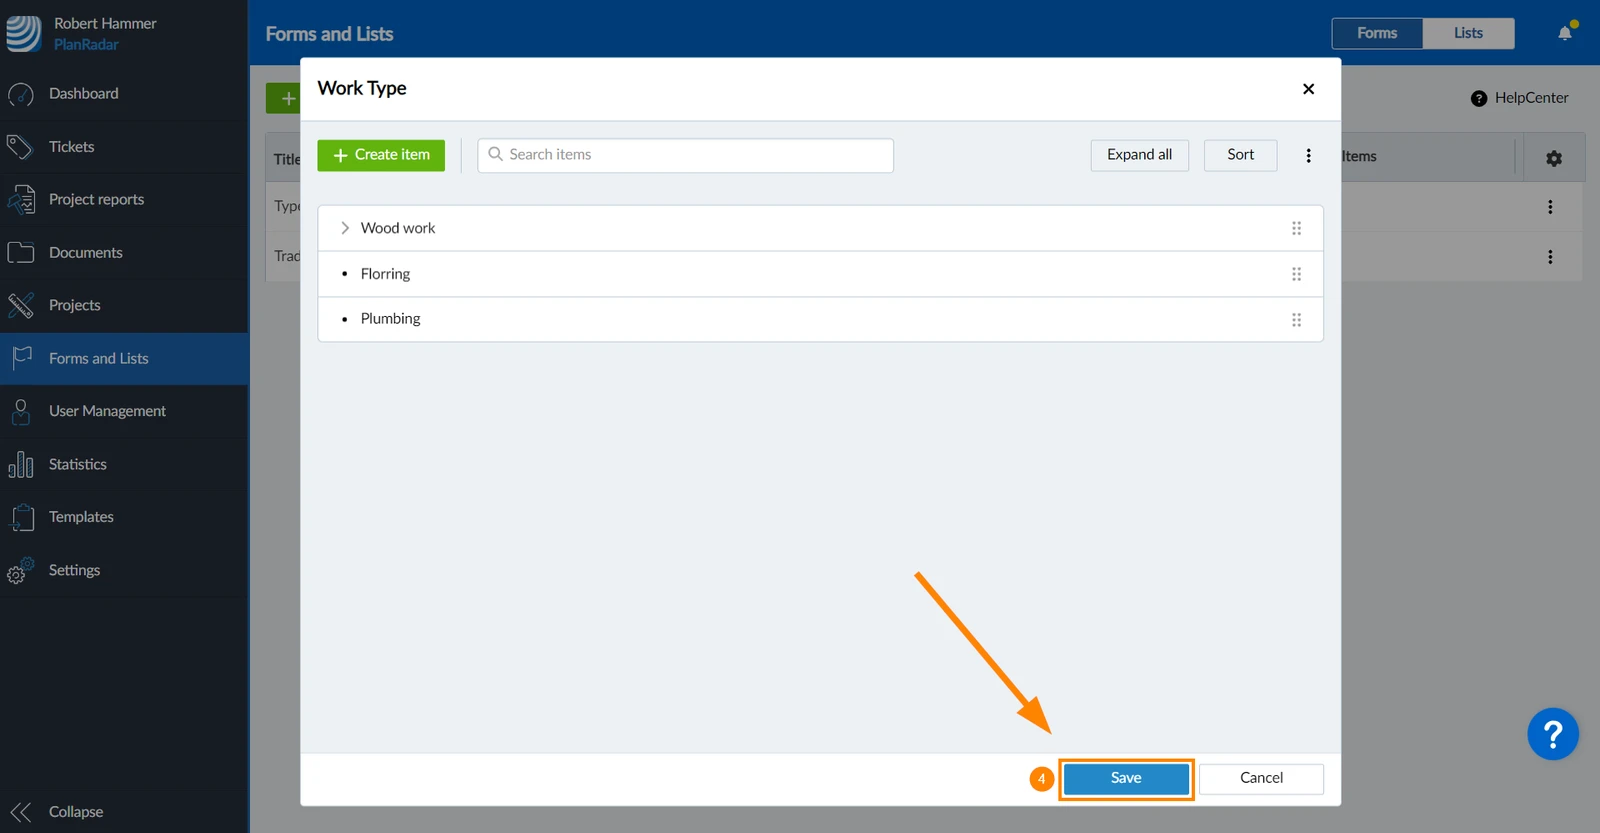
- Click Save
Change the Order of List Items
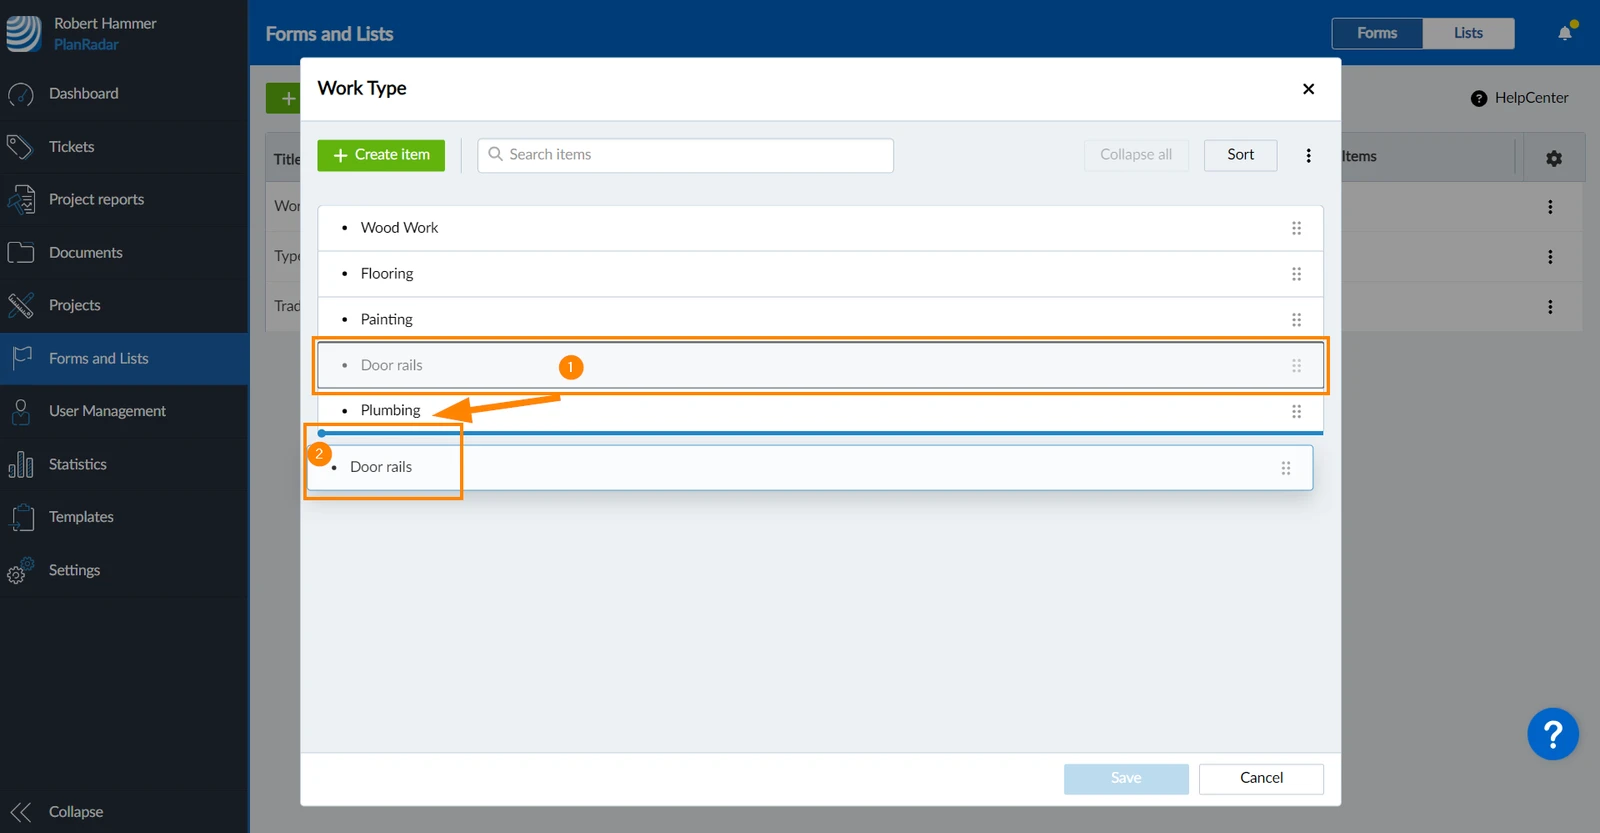
Use drag and drop to change the order of list items:
- Hover over the item that you want to move and drag it while holding down the mouse button.
- Move it to where you want to drop it and release the mouse button.
The blue line and dot on the left indicate the target position.
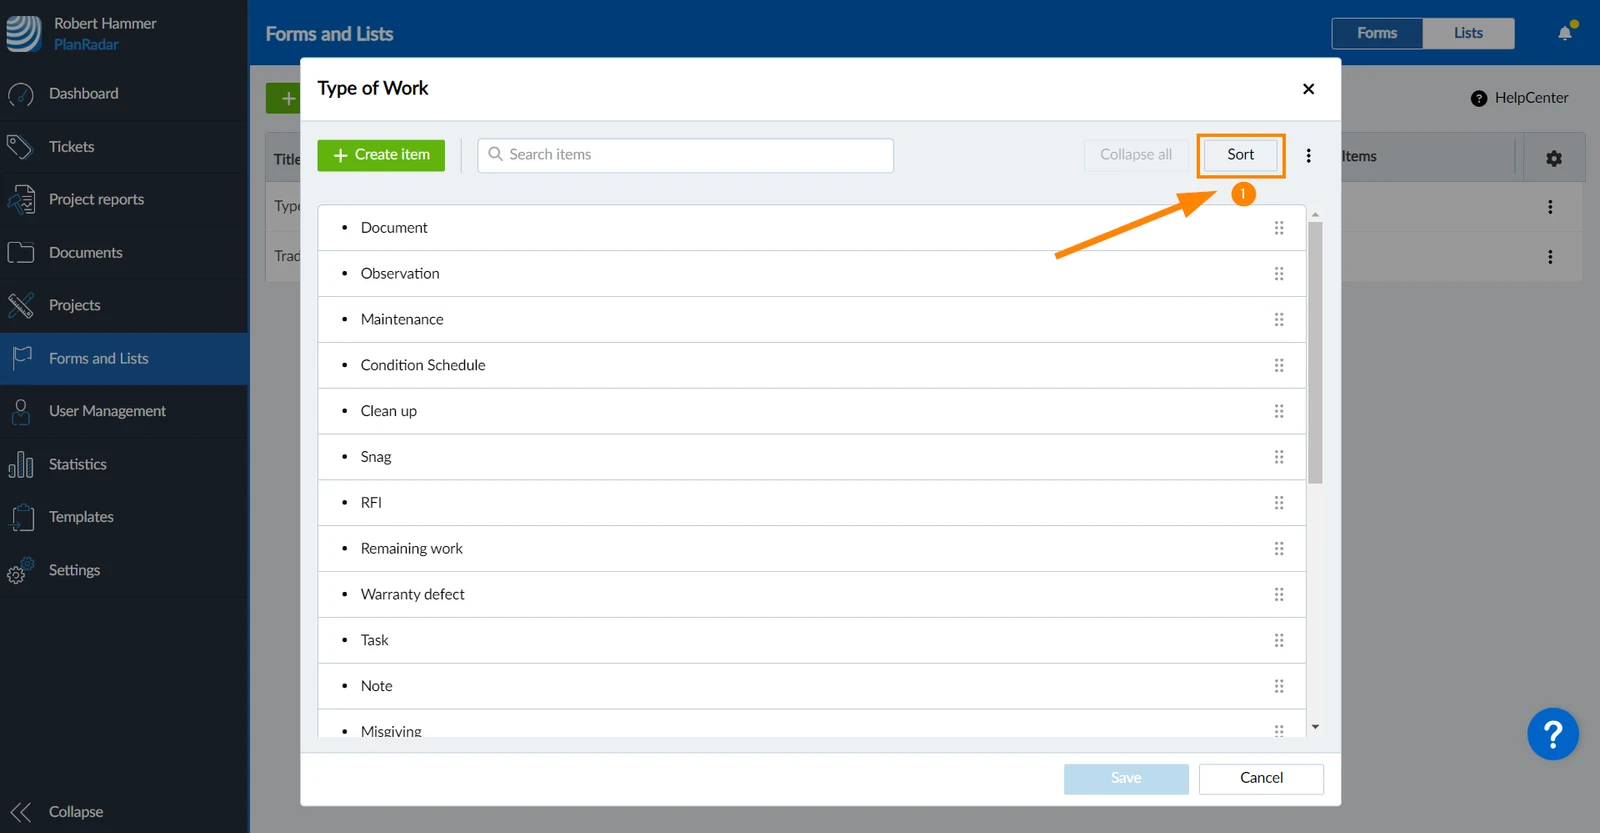
Sort List Items Alphabetically
To sort list items alphabetically:
- Click Sort
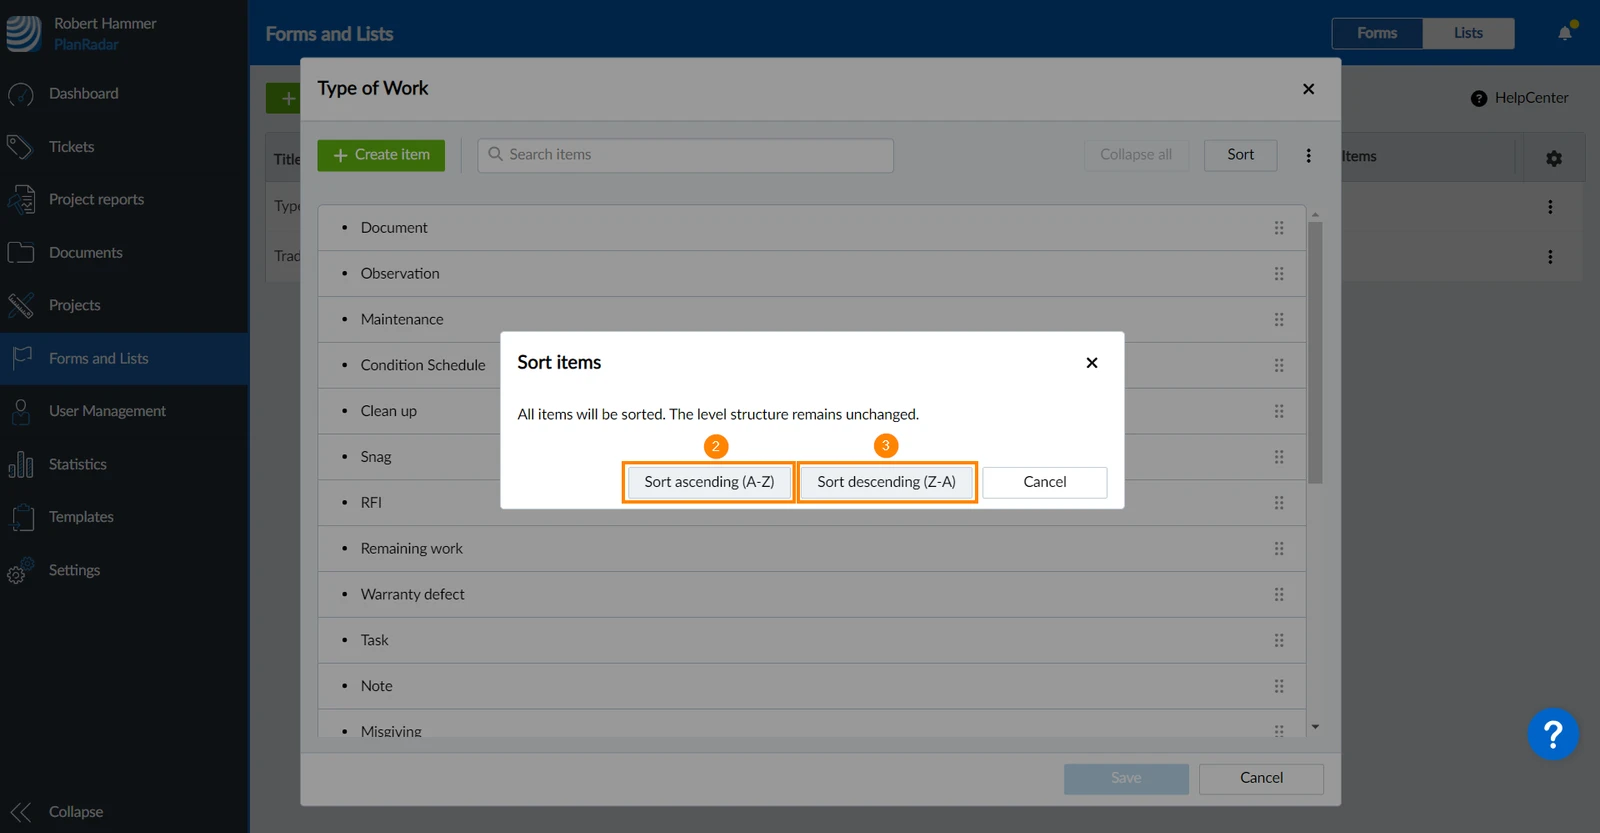
- Click Sort ascending (A-Z)
- OR Click Sort descending (Z-A)
Rename List Items
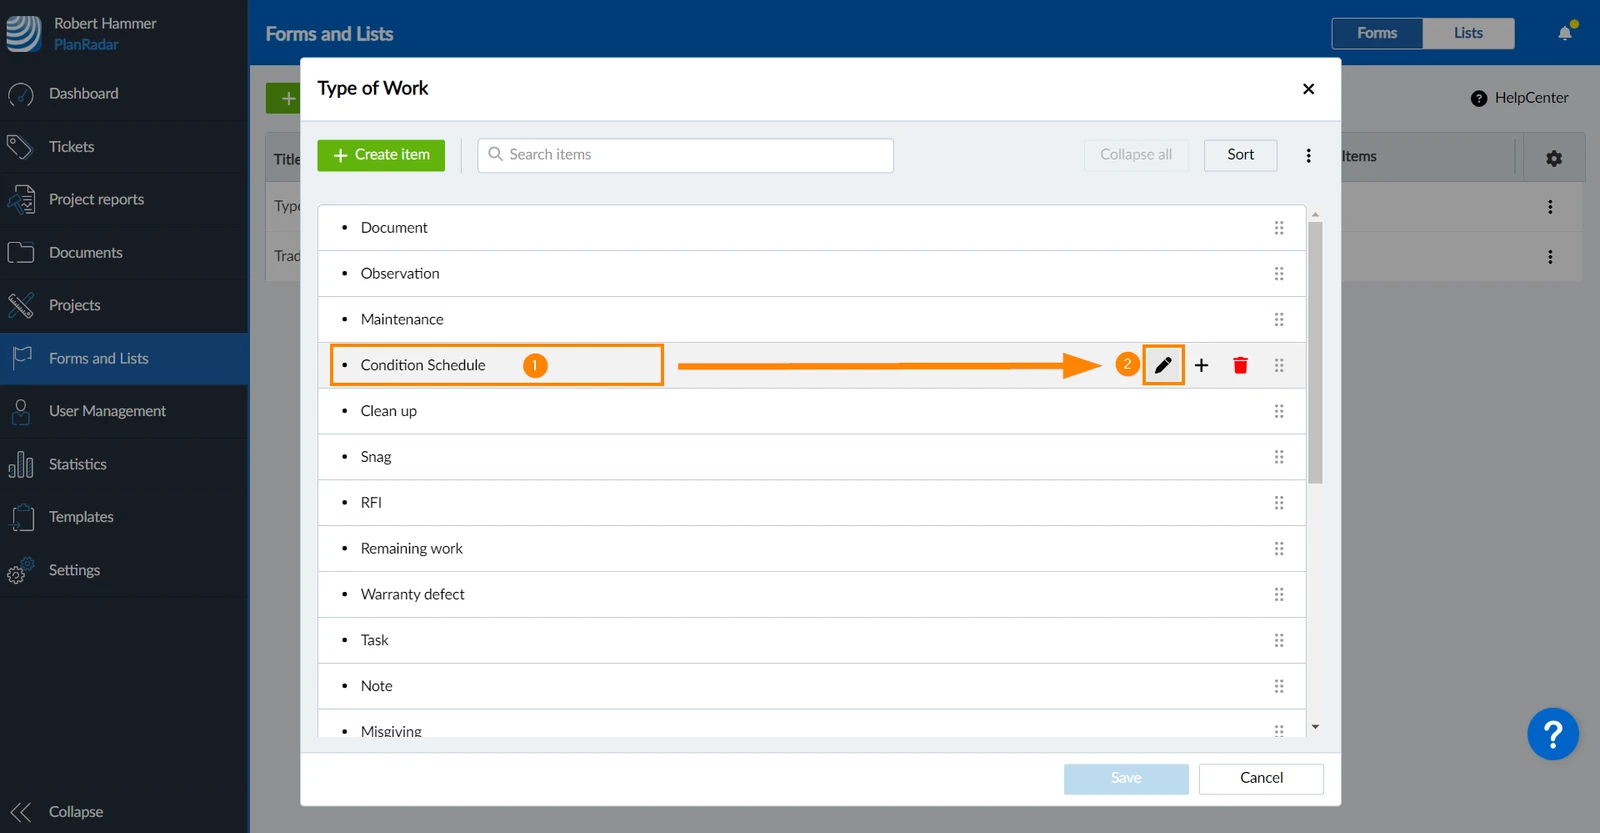
- Hover over the list item
- Click the Edit icon
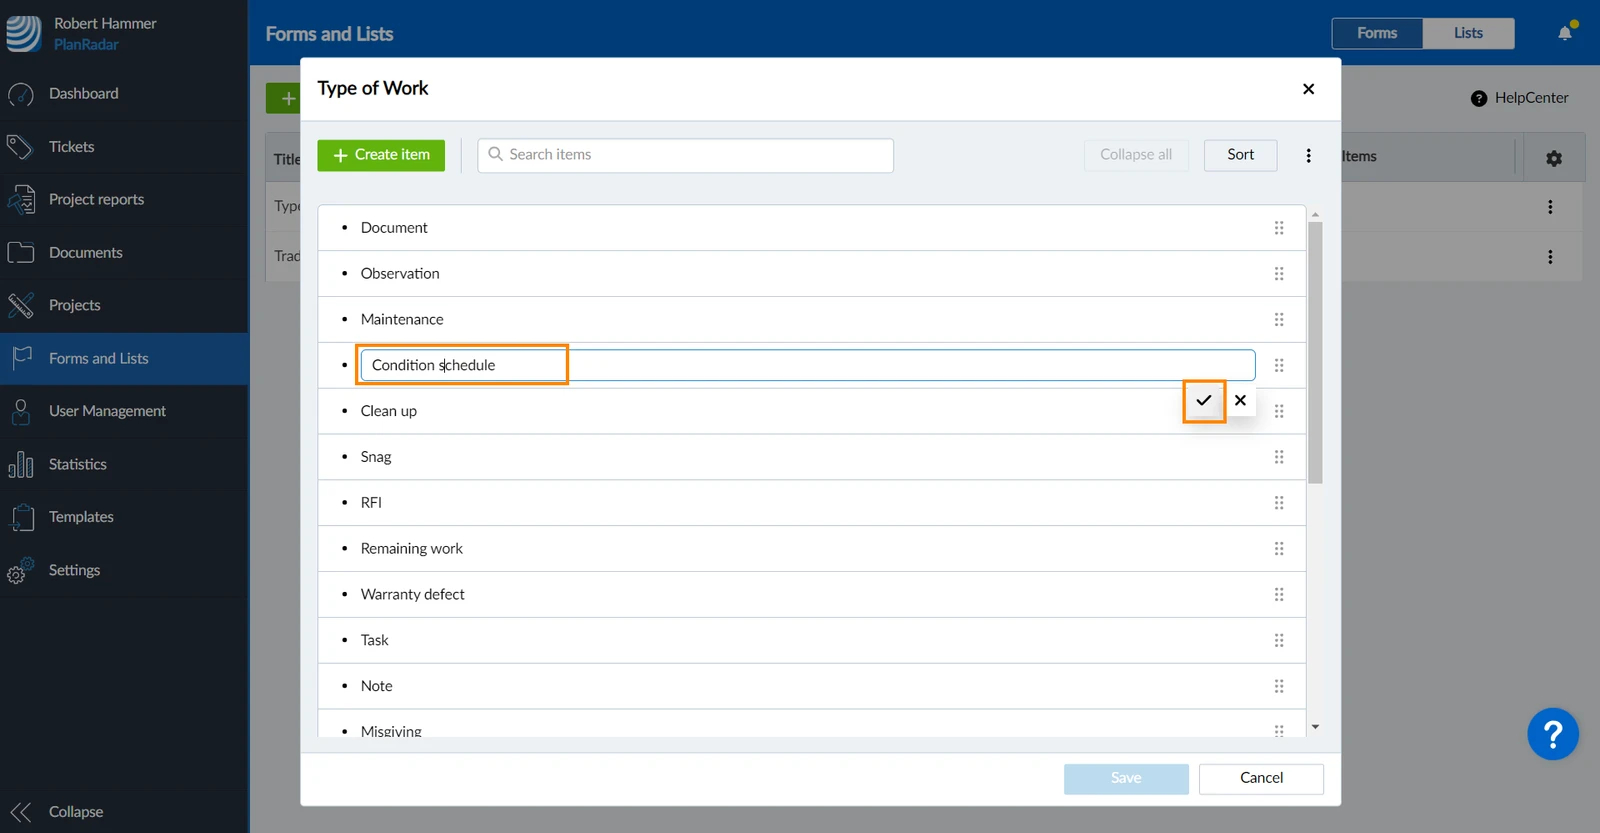
- Enter the new name
- Click ✔ to confirm
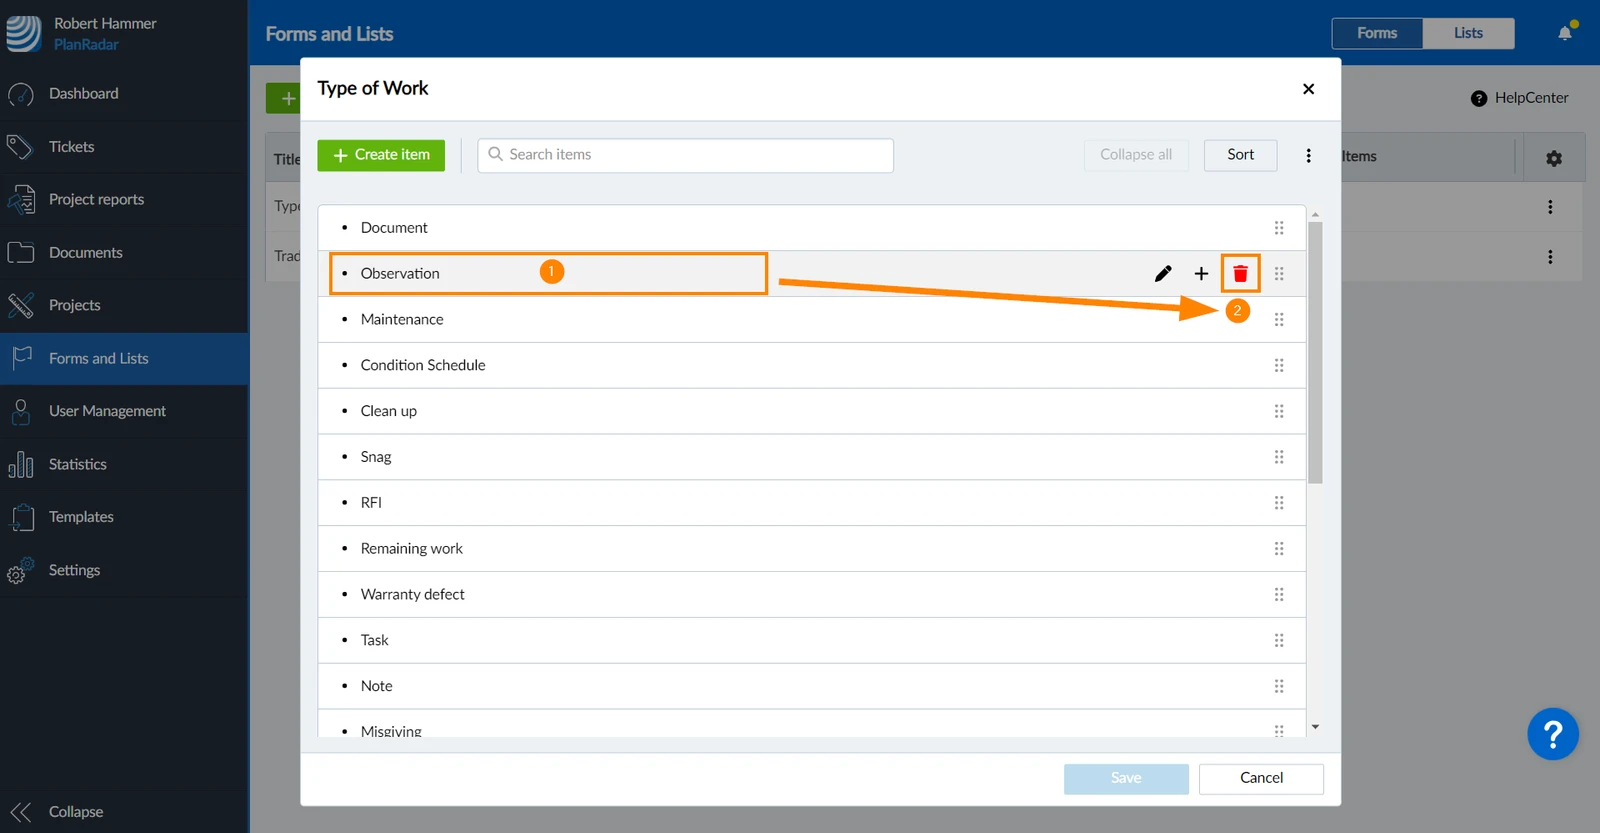
Delete List Items
To delete list items:
- Hover over the list item
- Click the Delete icon
Rename Lists
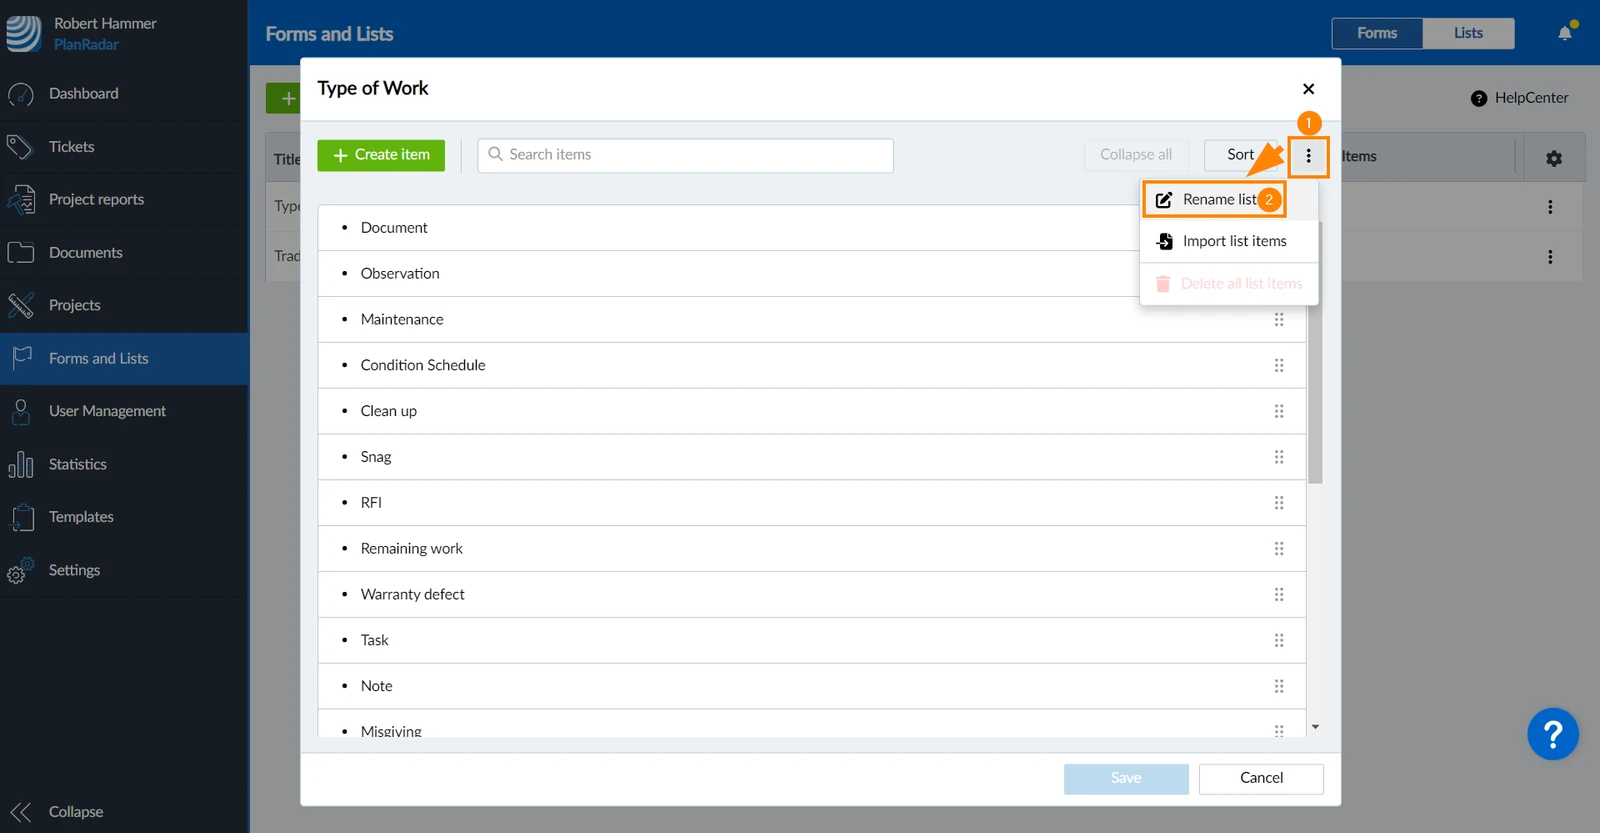
To rename lists:
- Open the More menu
- Click Rename list
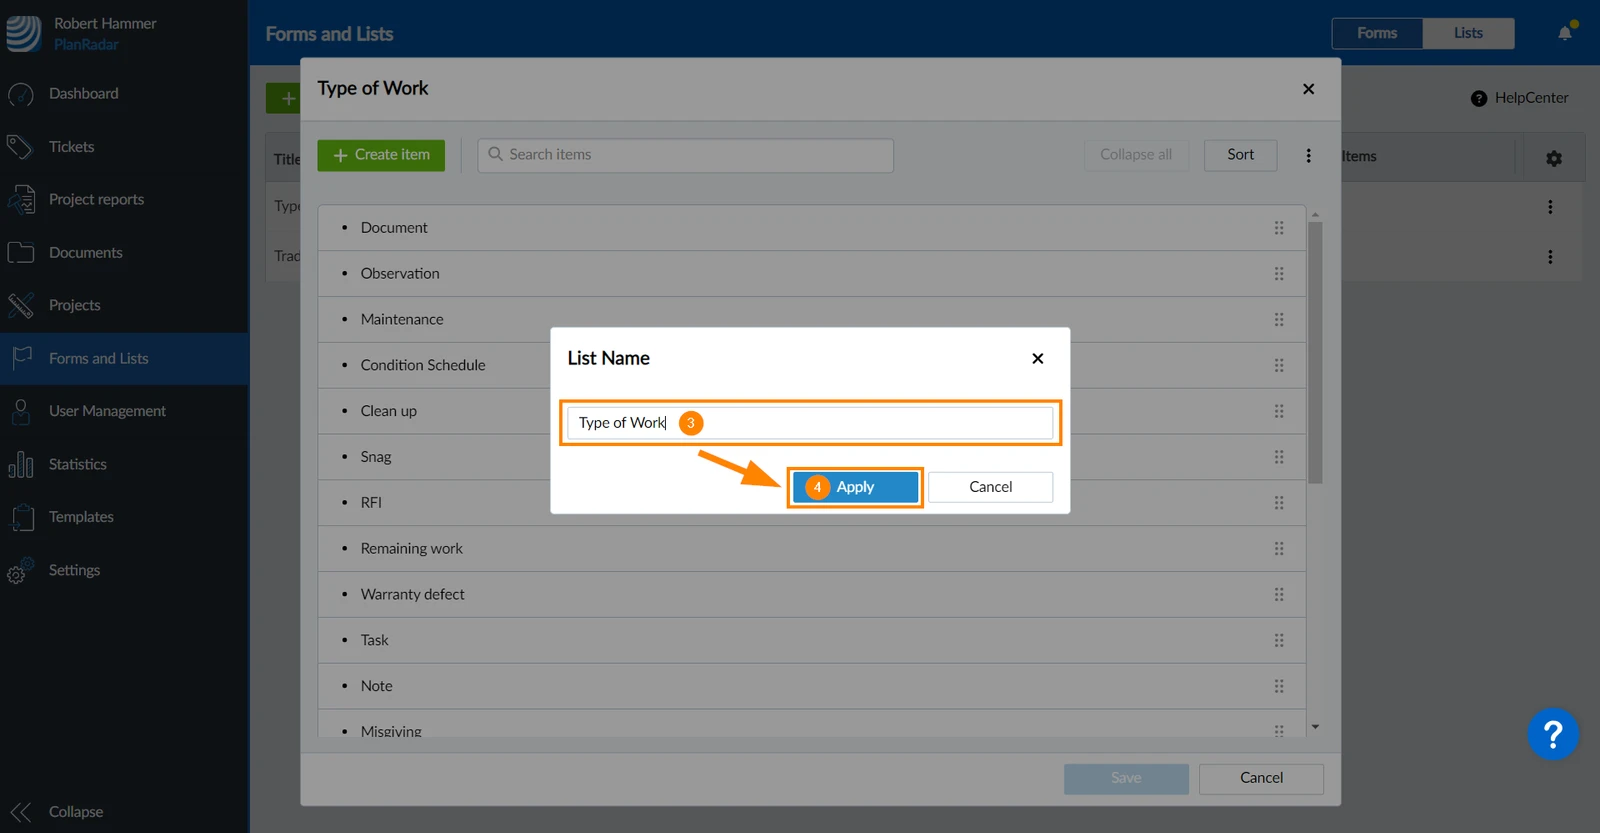
- Enter a new name
- Click Apply
Multilevel Lists
If you have a list with many items, you can structure it into multiple levels to make it easier to find the right values when filling out ticket forms. PlanRadar supports up to 10 levels within each list.
Create Multilevel Lists & Add List Items Under
To create multilevel lists:
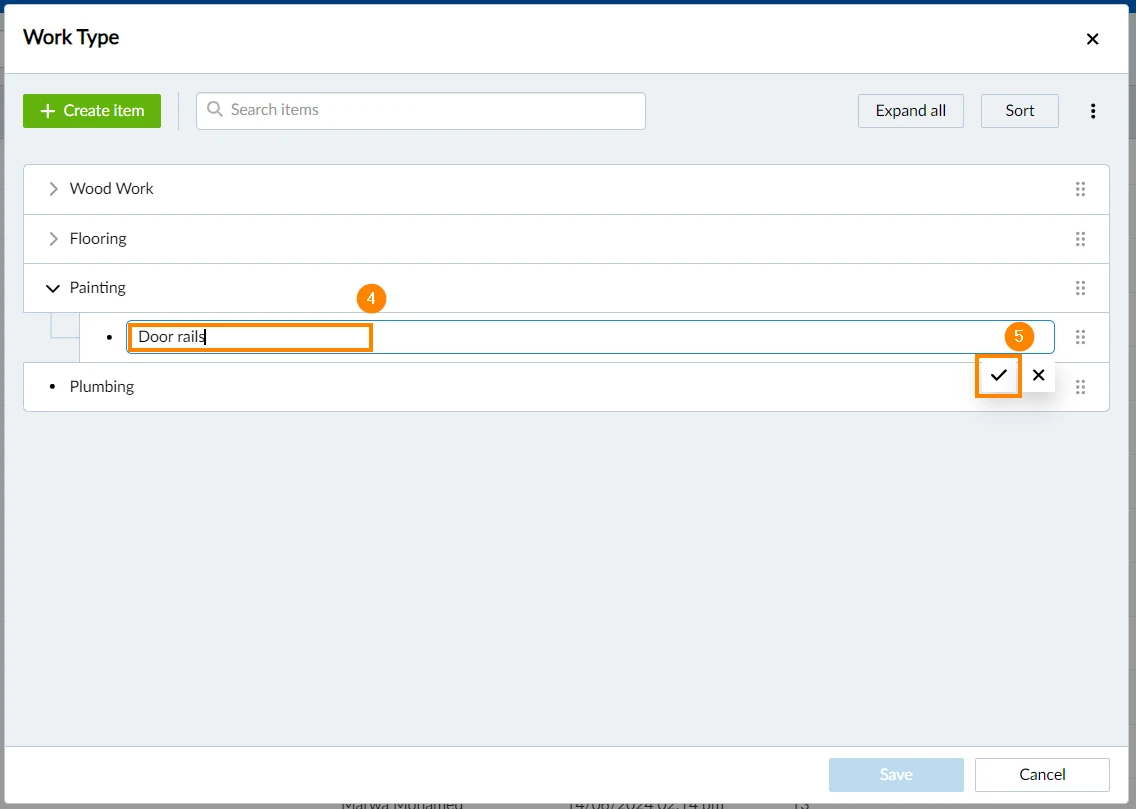
-
Create a list as explained above
-
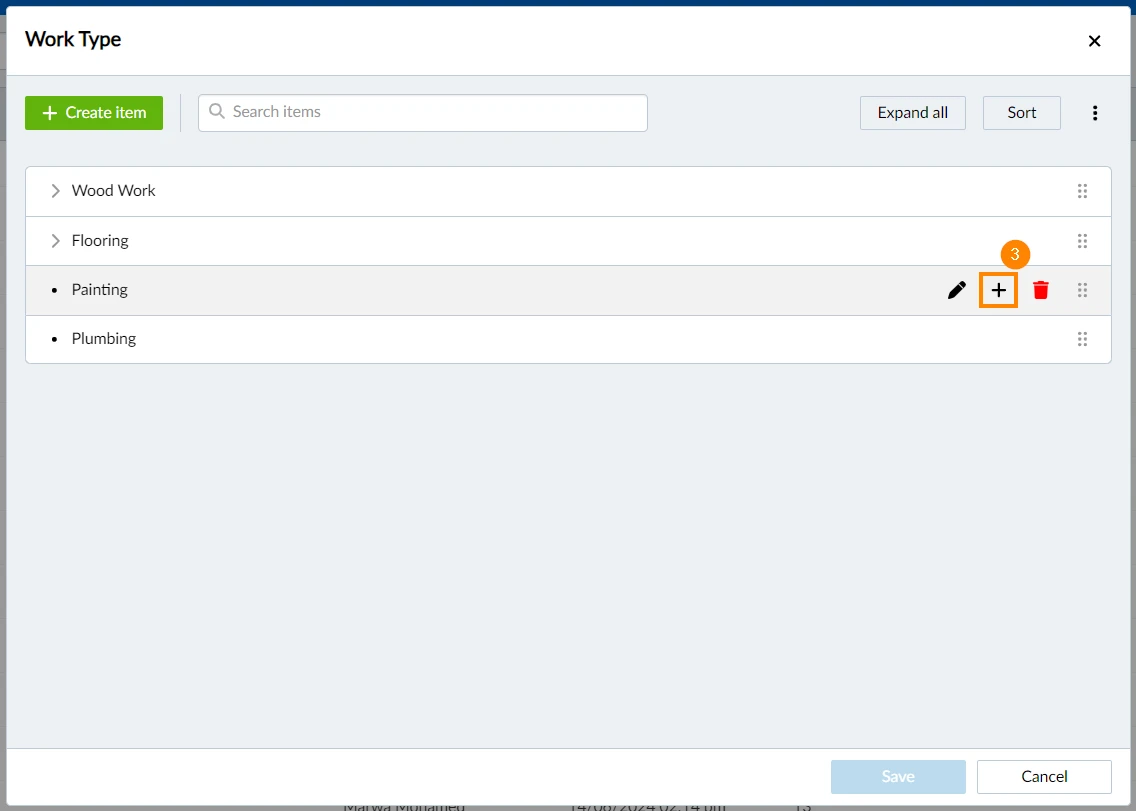
Hover over the list item under which you'd like to add list items
-
Click the + sign next to the item
-
Enter the item's name
-
Click ✔ to confirm
-
Repeat to add as many items as wanted
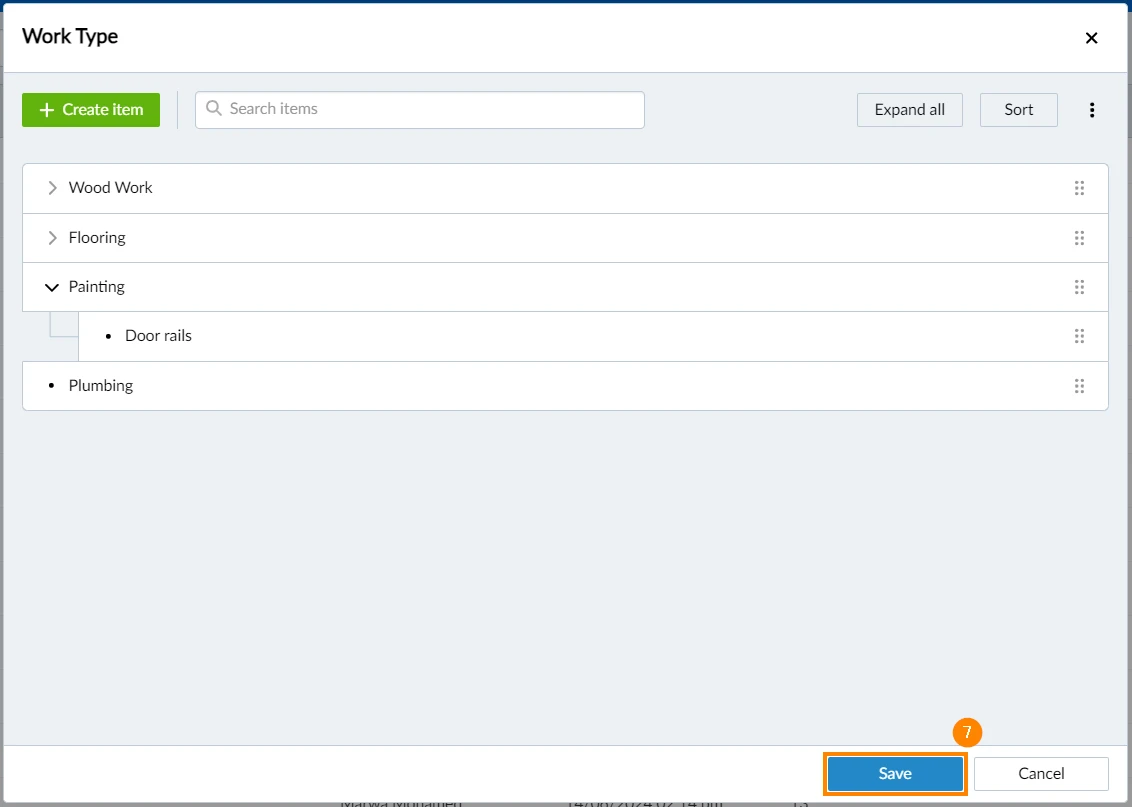
-
Click Save to create your list
Change the Level of List Items
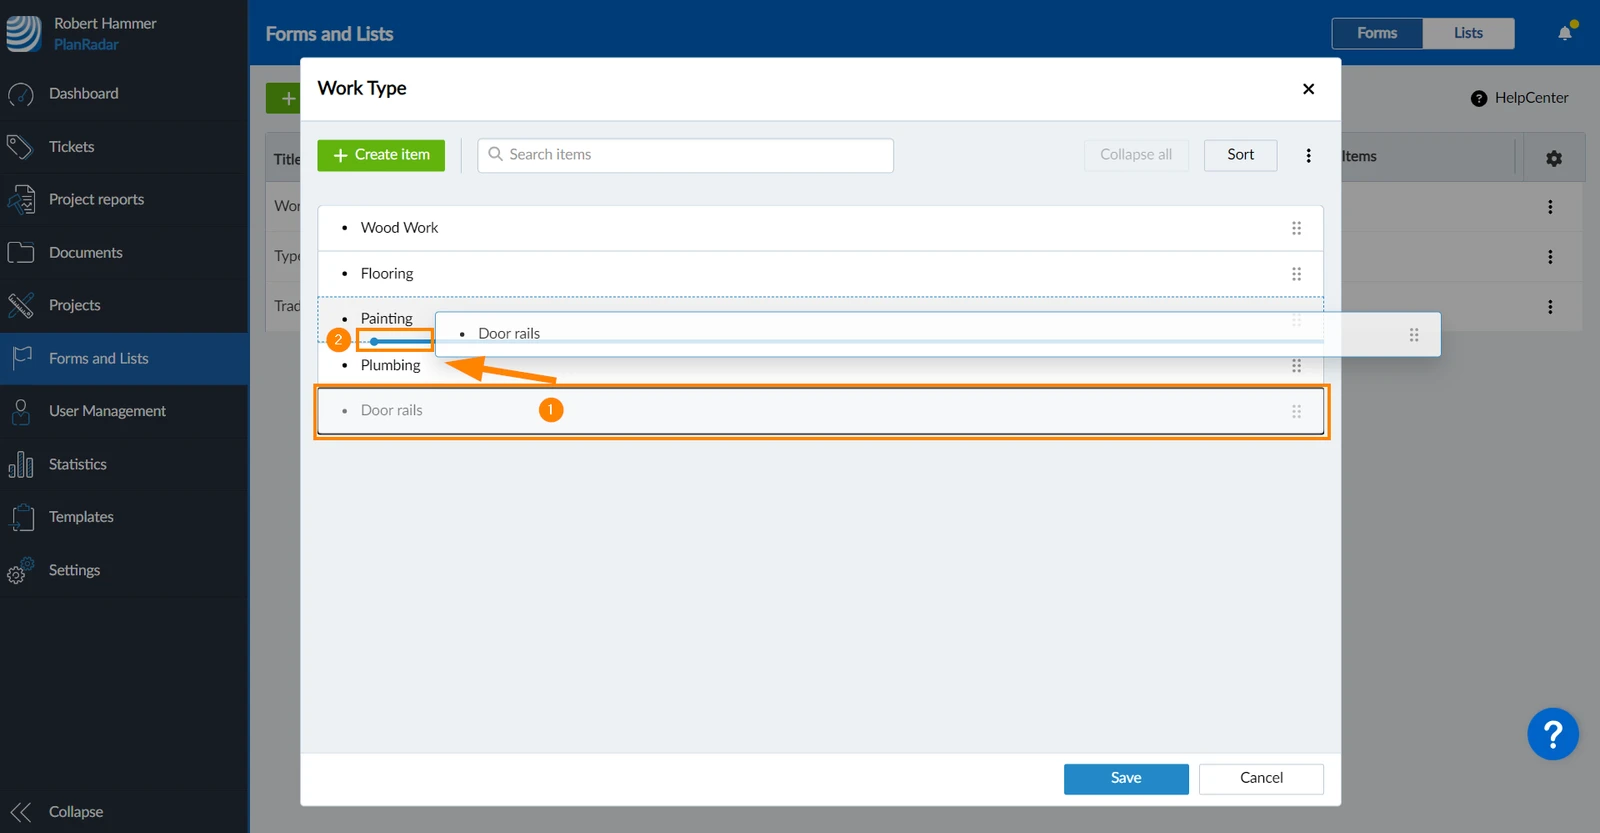
Use drag and drop to change the level of list items:
- Hover over the item that you want to move and drag it while holding down the mouse button.
- Move it to where you want to drop it and release the mouse button.
The blue line and dot below the parent item indicate the target position.
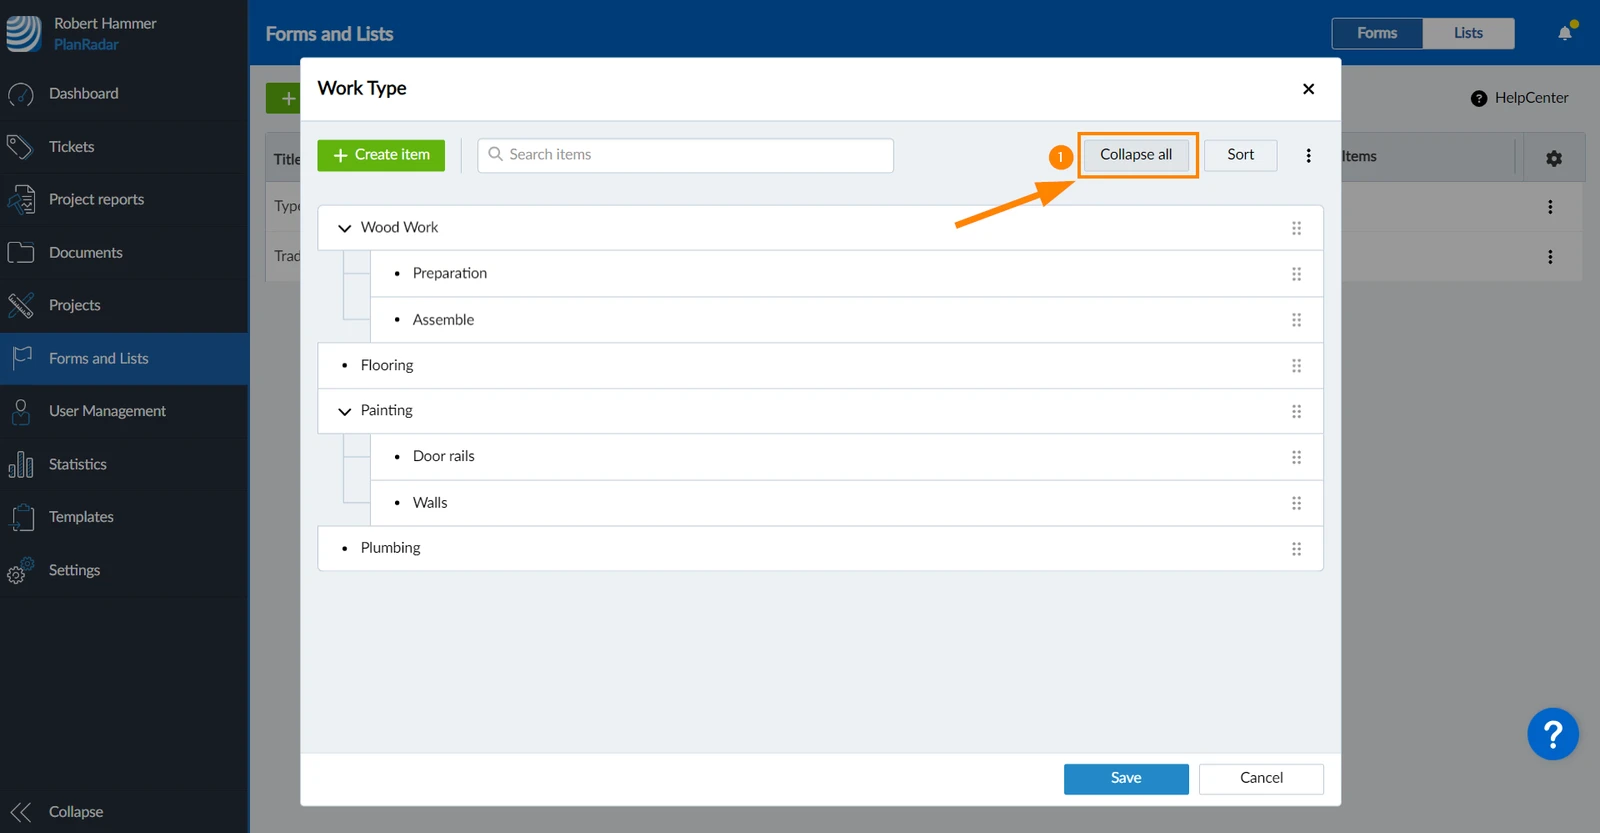
Expand/Collapse All
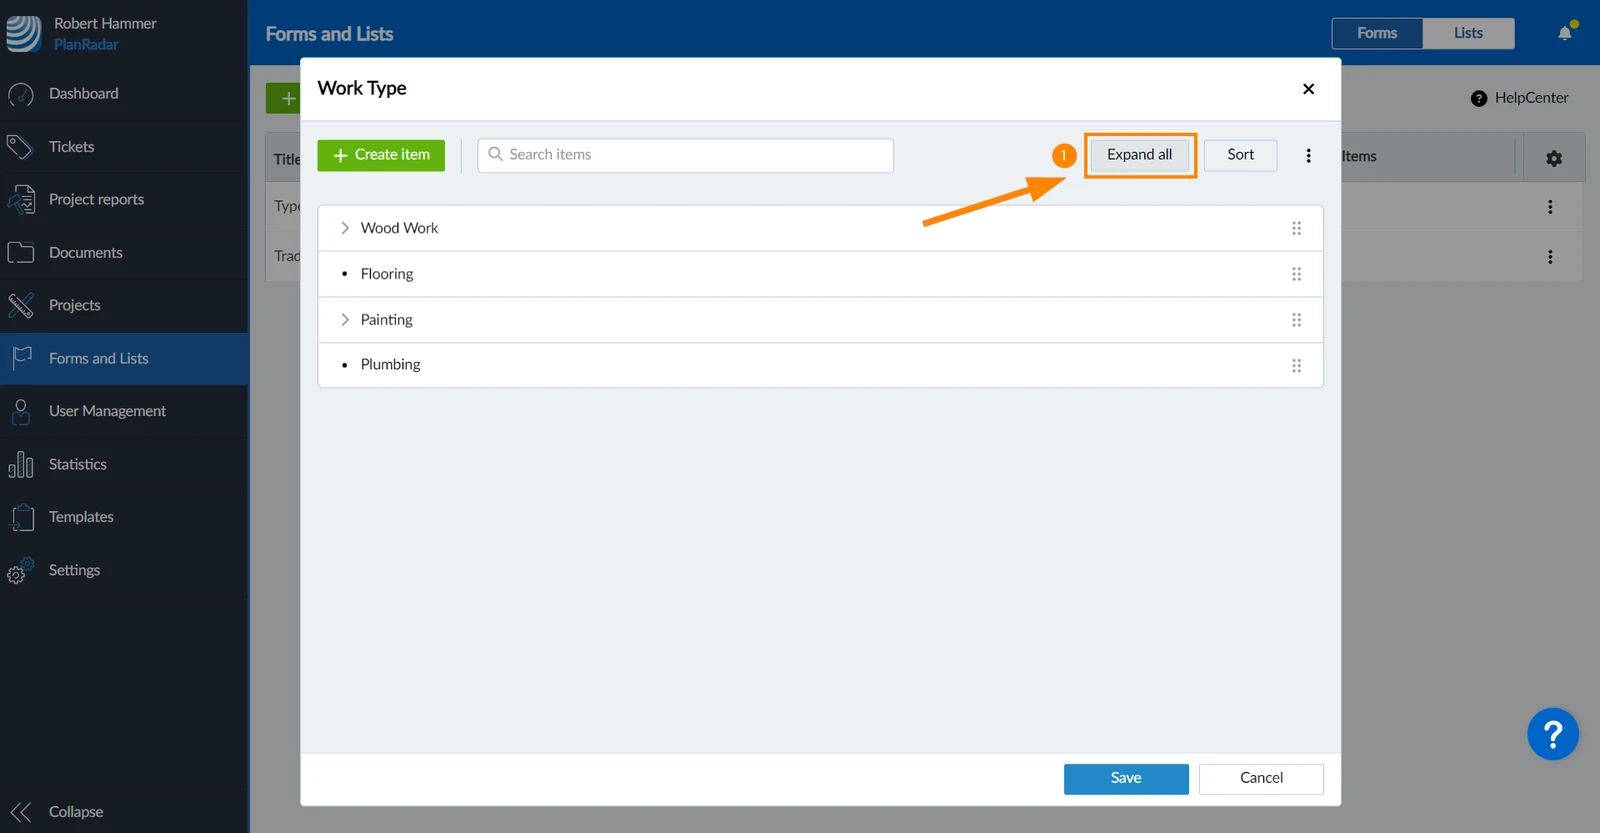
To show all list items of all levels:
- Click Expand all
To show only the first level list items (if all are expanded):
- Click Collapse all
Import Lists Items from Excel
Import list items from an Excel file to save time when creating long lists. The process works the same for flat lists and multilevel lists. The only difference is how you prepare the Excel file.
Prepare the Excel File
Flat Lists
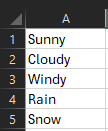
For flat lists, use only column A and put each list value in a row.
Example of a flat list for weather conditions:
Multilevel Lists
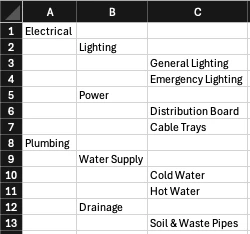
For multilevel lists use column A for level 1, column B for level 2, and so on.
Example of a multilevel list for trade / work package:
Required File Structure
For the import to work correctly, your Excel file must follow this structure:
-
First Sheet — only the first sheet in the Excel file is imported
-
Start in cell A1 — the first item must be in the very first cell
-
One value per row — each row contains exactly one list item
-
Use columns to indicate level — the column position determines the hierarchy:
- Column A = Level 1 (root)
- Column B = Level 2 (child of the item above in column A)
- Column C = Level 3, and so on
-
No header row — the first row must already contain a list item, not a title
-
An empty row marks the end of the list — no values should appear after a fully empty row
Import the Excel File
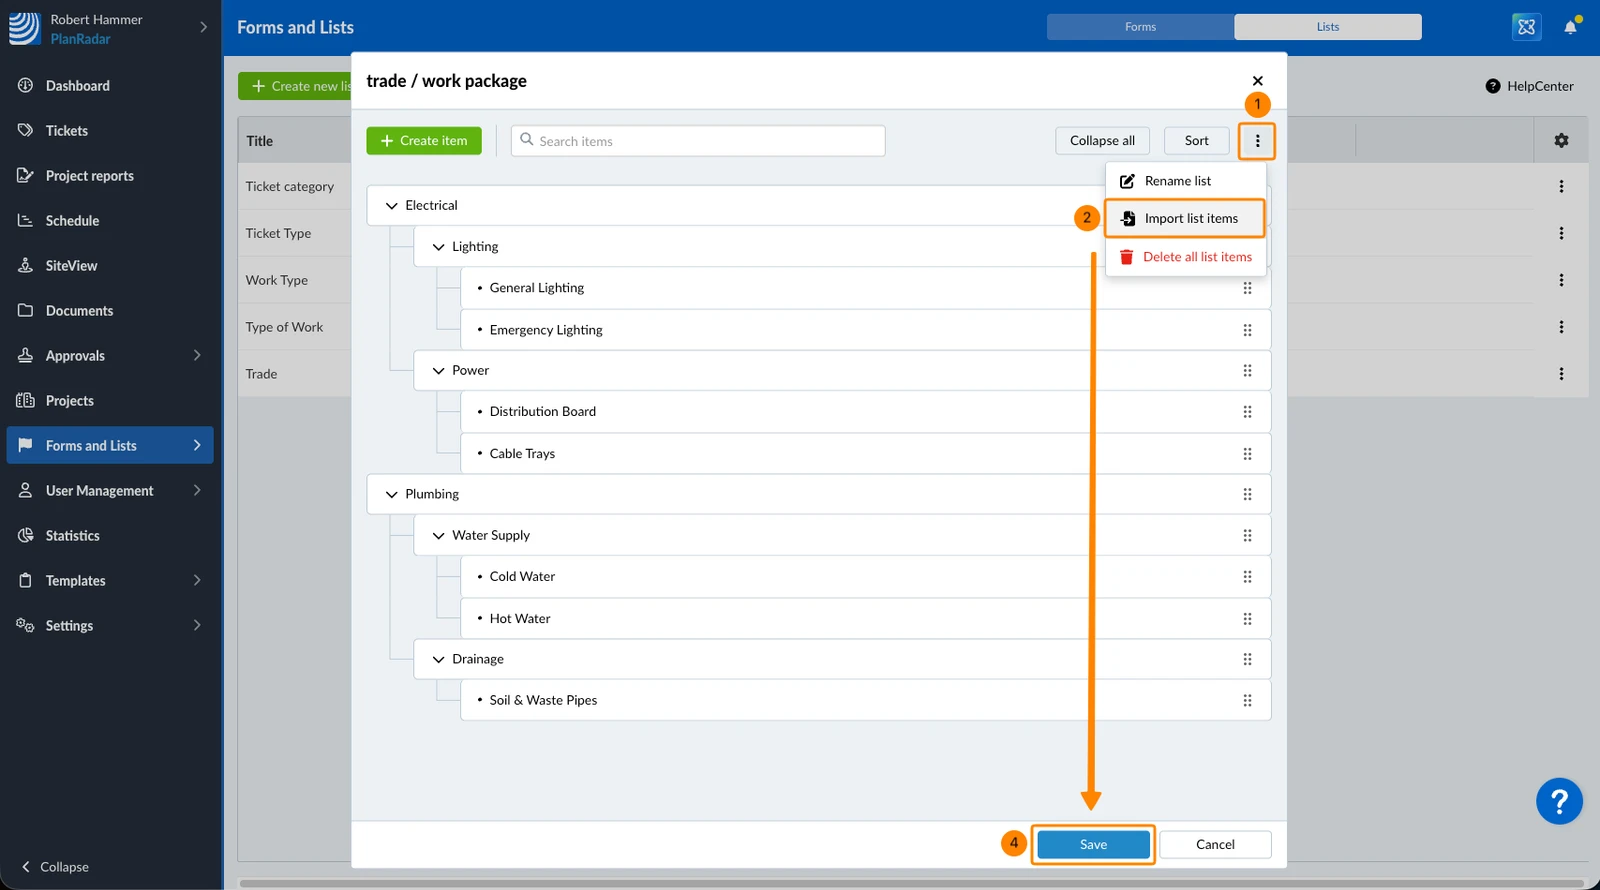
To import list items from an Excel file:
- Open the More menu
- Click Import list items
- Select the Excel file in the file browser
- Click Save
Updated March 27, 2026