In addition to the "TICKETS" page you can add generated ticket tables to custom pages. This can be useful if you want to:
Group tickets of a form by a field (e.g. layer or category)
Add an additional summary table for tickets of a particular form before or after the ticket pages showing more information about each ticket.
Number tickets in a sequence starting from 1.
Dynamically define colours for content based on ticket data (e.g. status colours).
Have a compact table with one ticket per row (and no space in-between).
Each ticket table is based on a ticket form, allowing you to map the form fields to columns in the table and group the tickets by one of those fields.
Access & Permissions
Add a Ticket Table
As described in Create Advanced Ticket Report Templates in detail, when you create or edit an advanced ticket report template, you can navigate to a custom page (or create a new one) and add ticket tables to your content.
To do so:
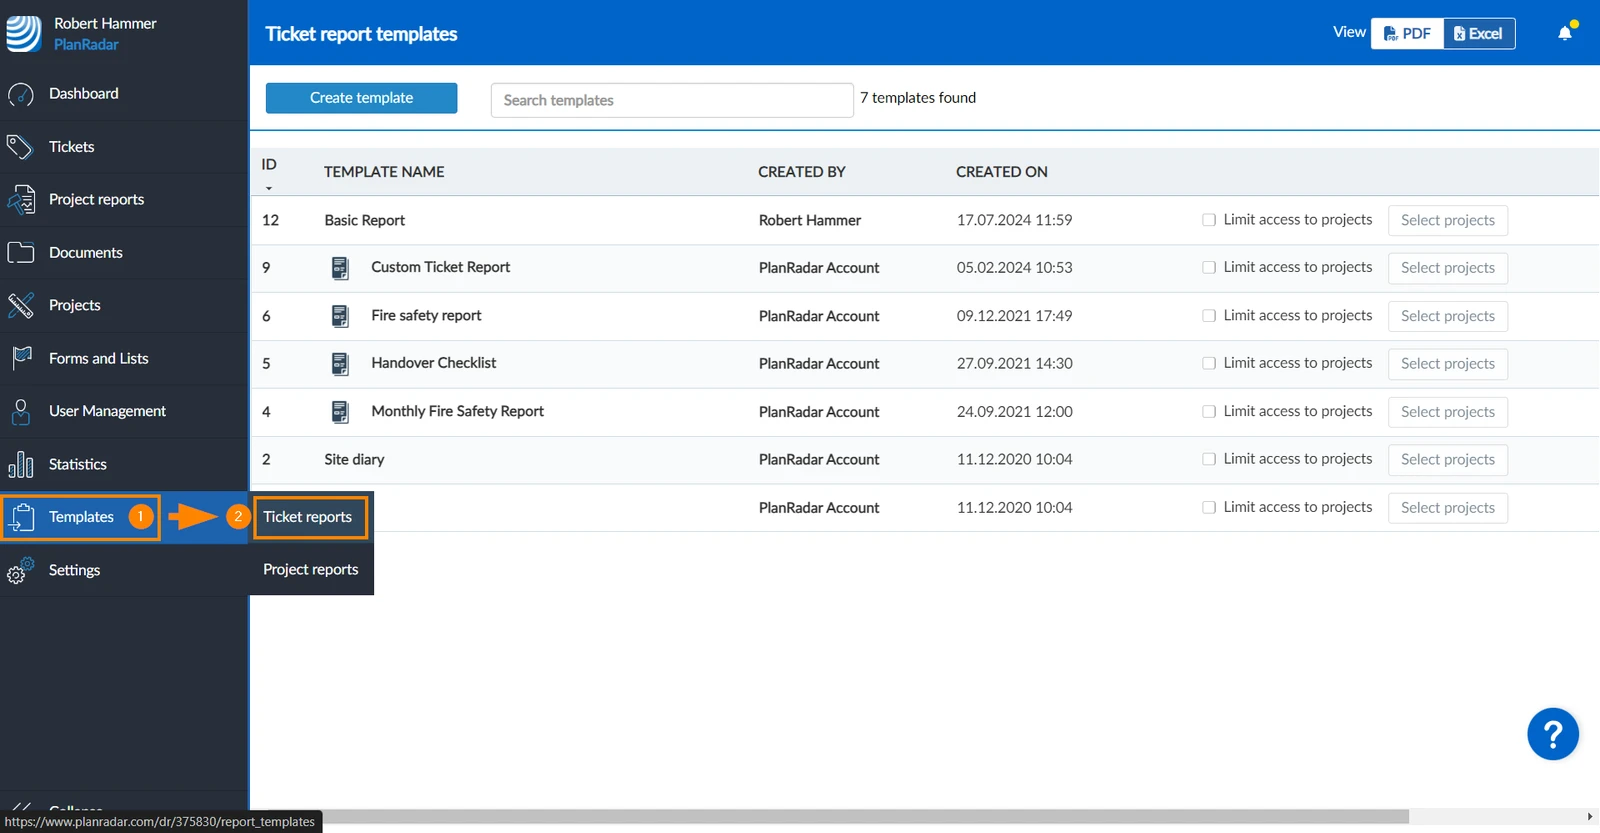
Hover over Templates
Click Ticket Reports
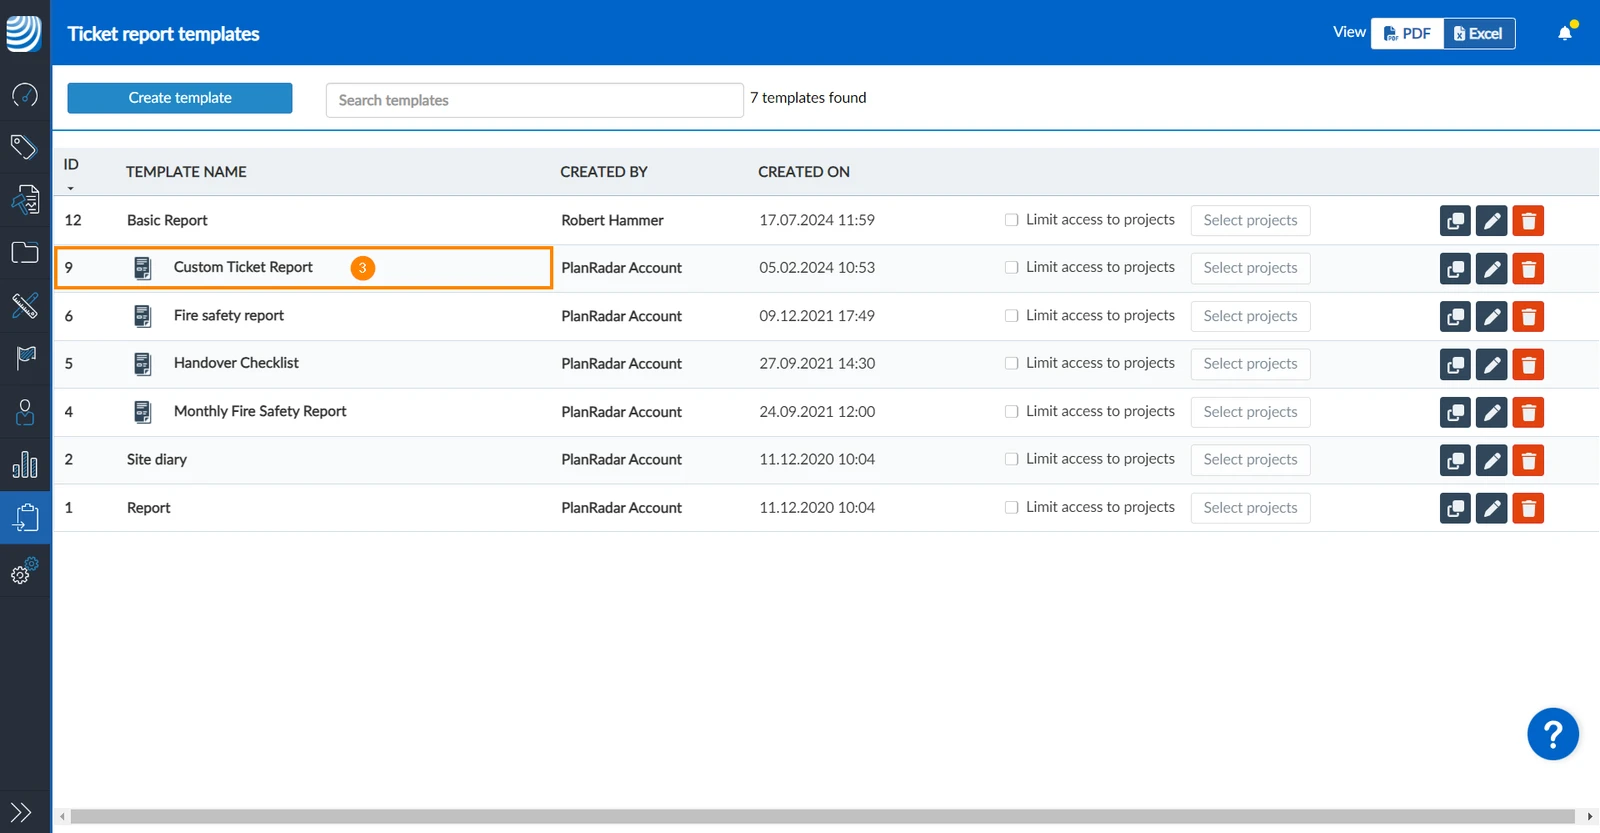
Click on a template to edit it (or create a new one) e.g. Custom Ticket Report
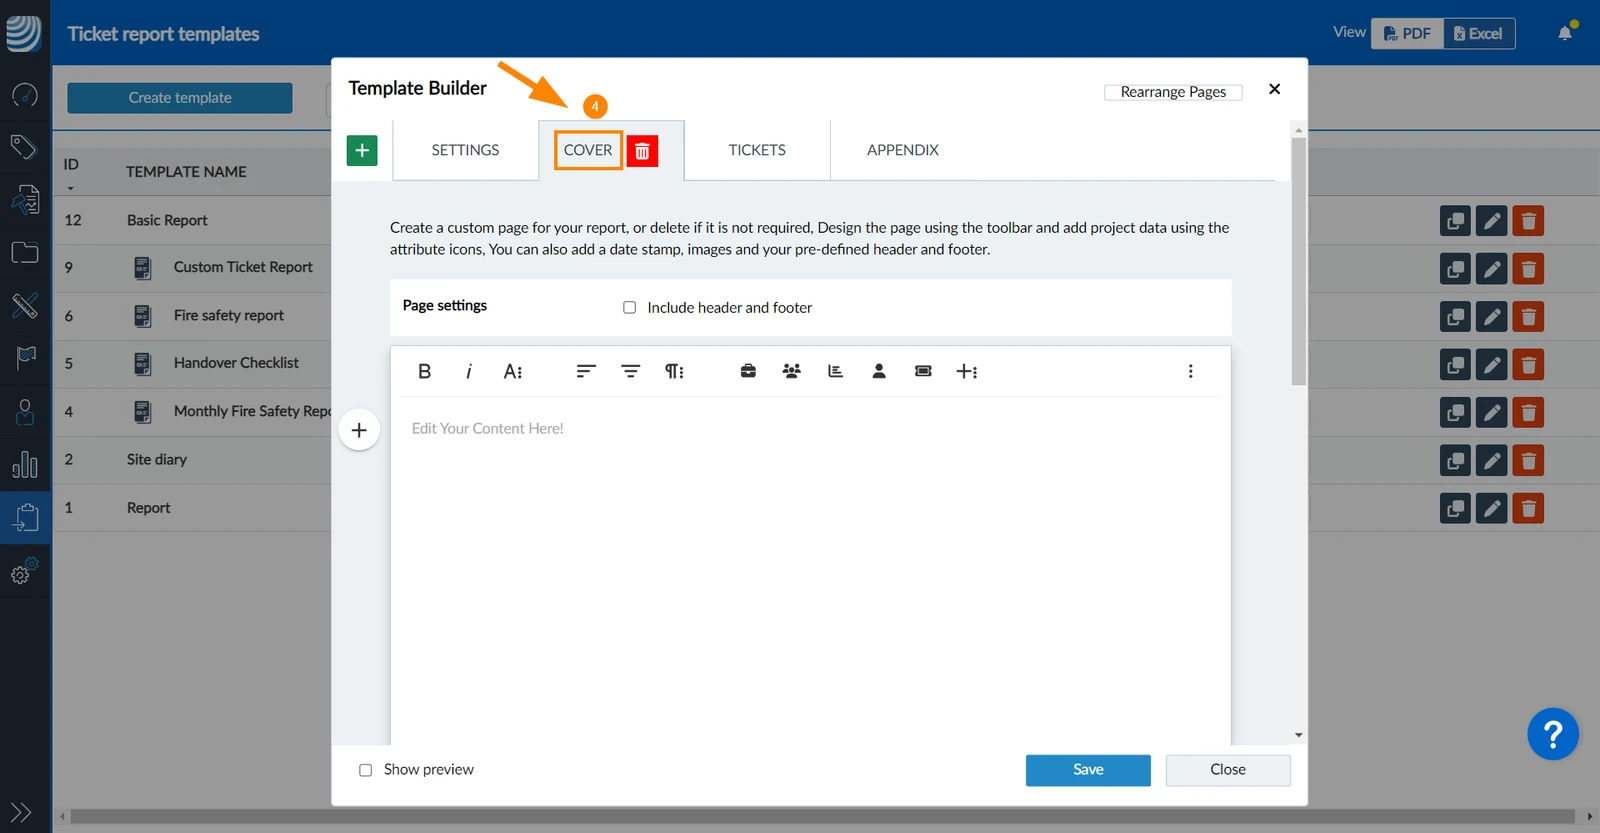
Click on the custom page you want to edit e.g. Cover
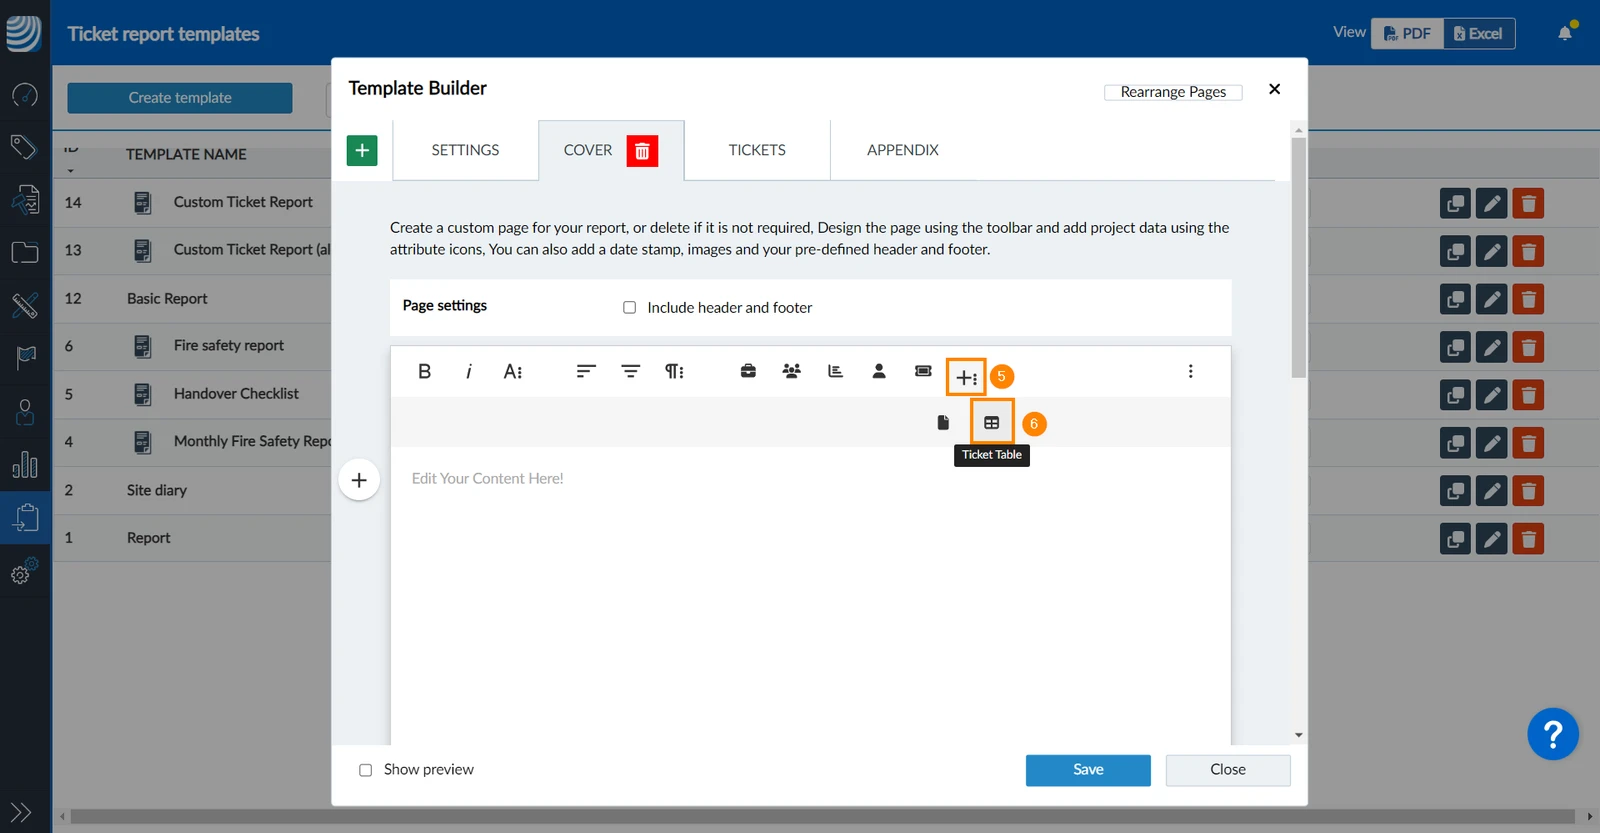
Click More Rich
Click Ticket Table
Configure a Ticket Table
Once you have added a ticket table as described above, you can configure it to define what data is included and how it is displayed.
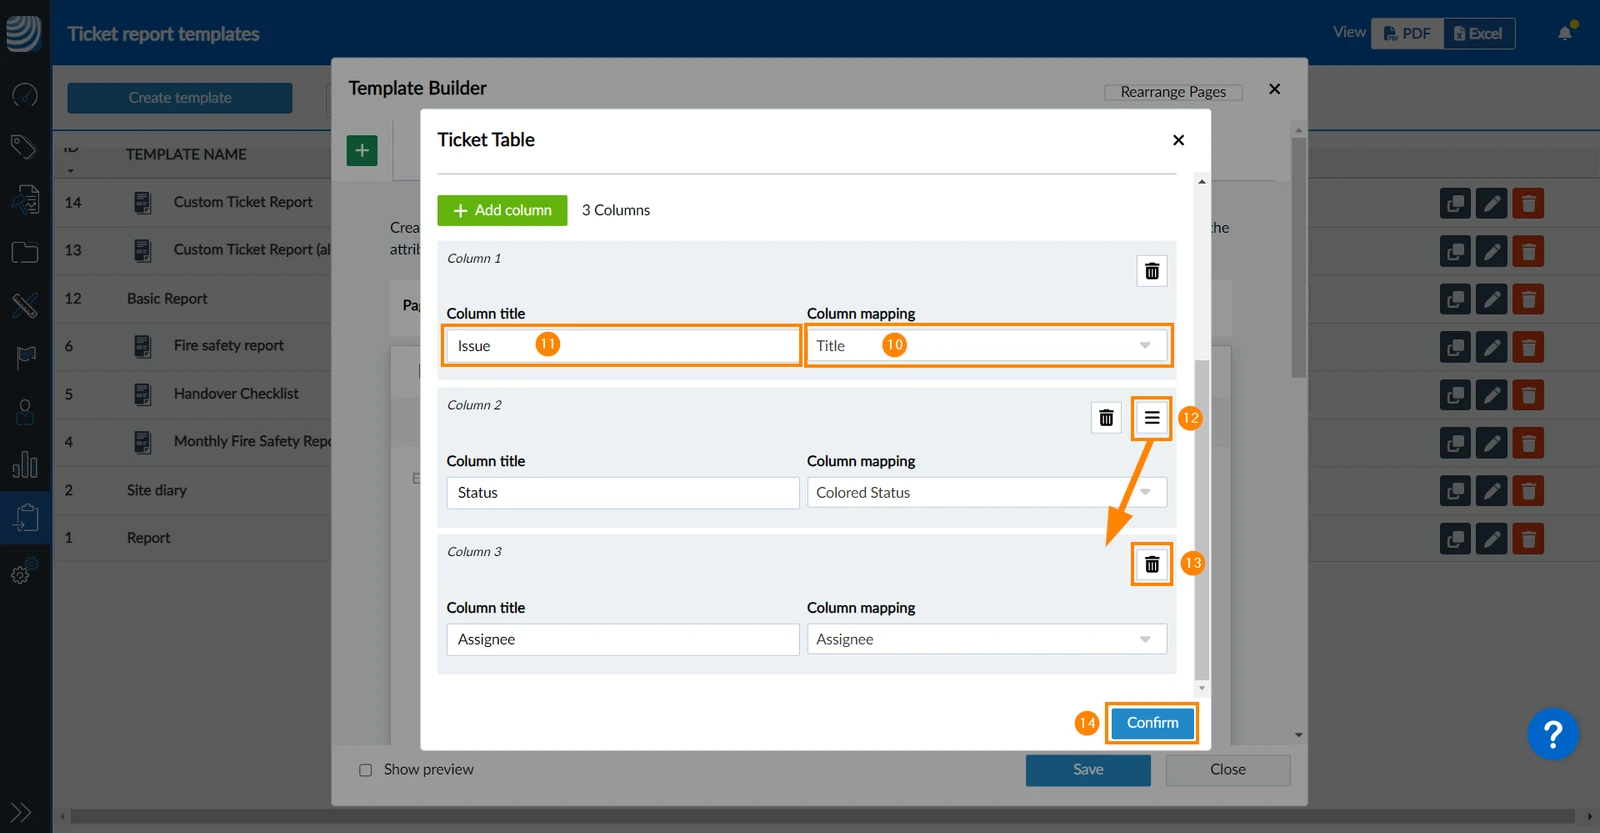
Add multiple columns and map form attributes (e.g. ID, title, author, layer, form, form fields) to each column.
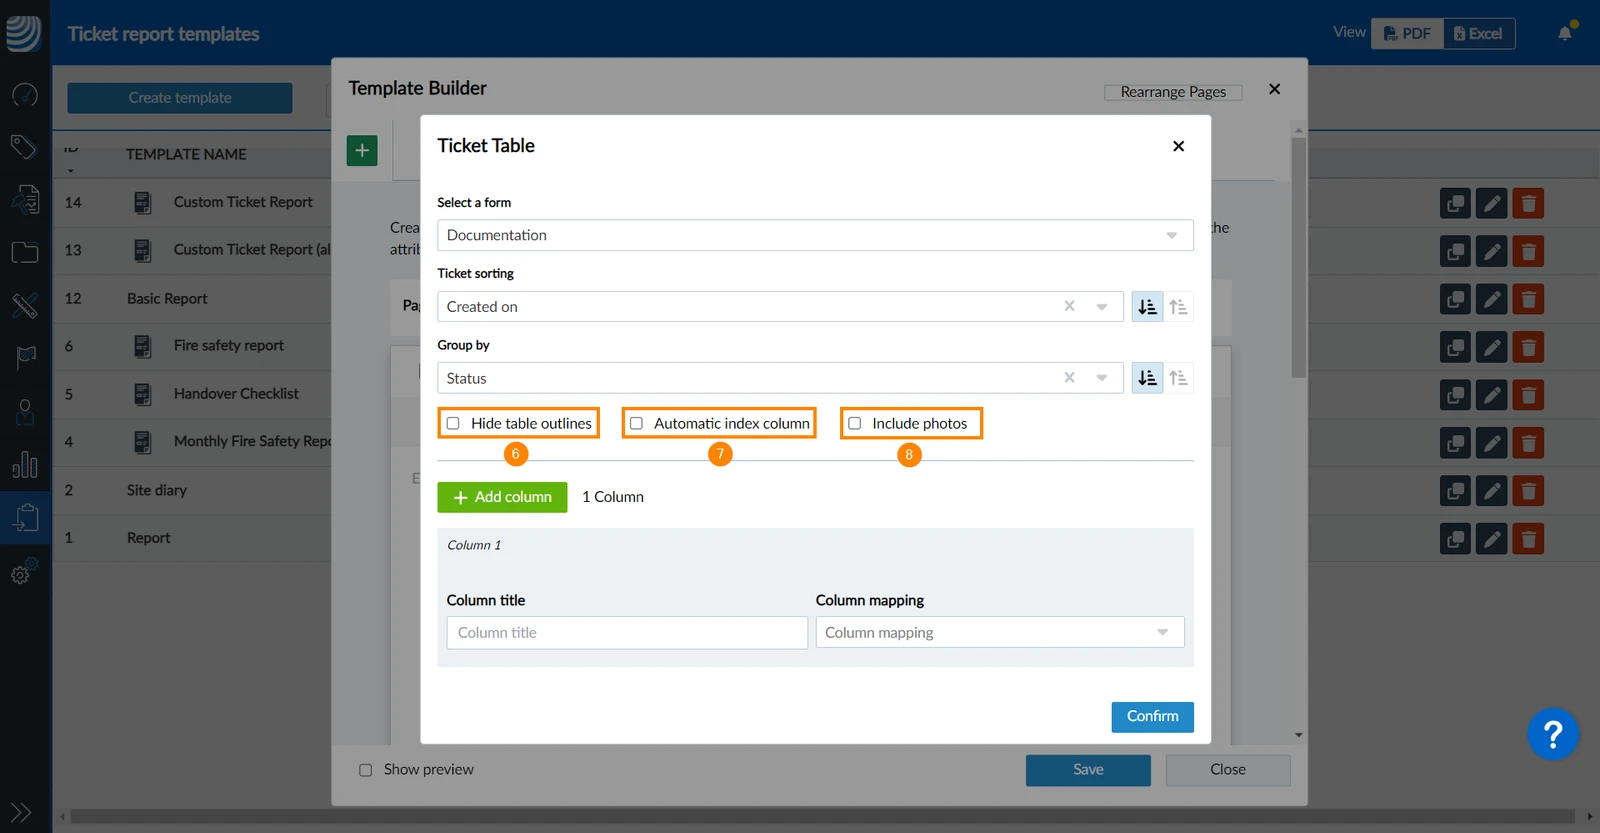
If required, add an automatic index column and append ticket photos below the table.
Table outlines are shown by default but can be hidden.
Define how tickets are grouped and sorted.
To do so:
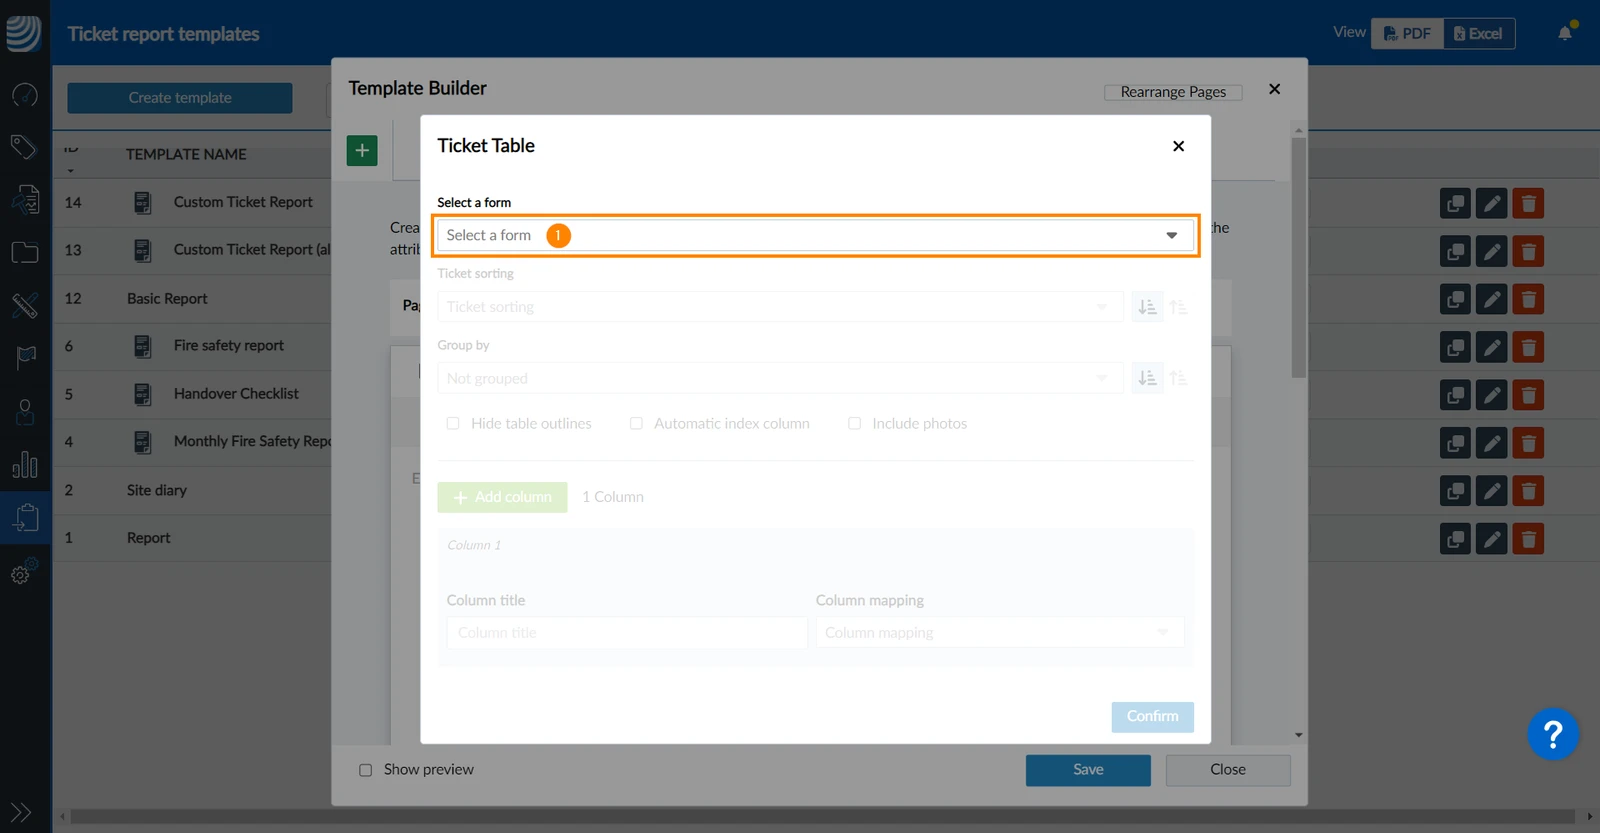
Select a form in the drop-down
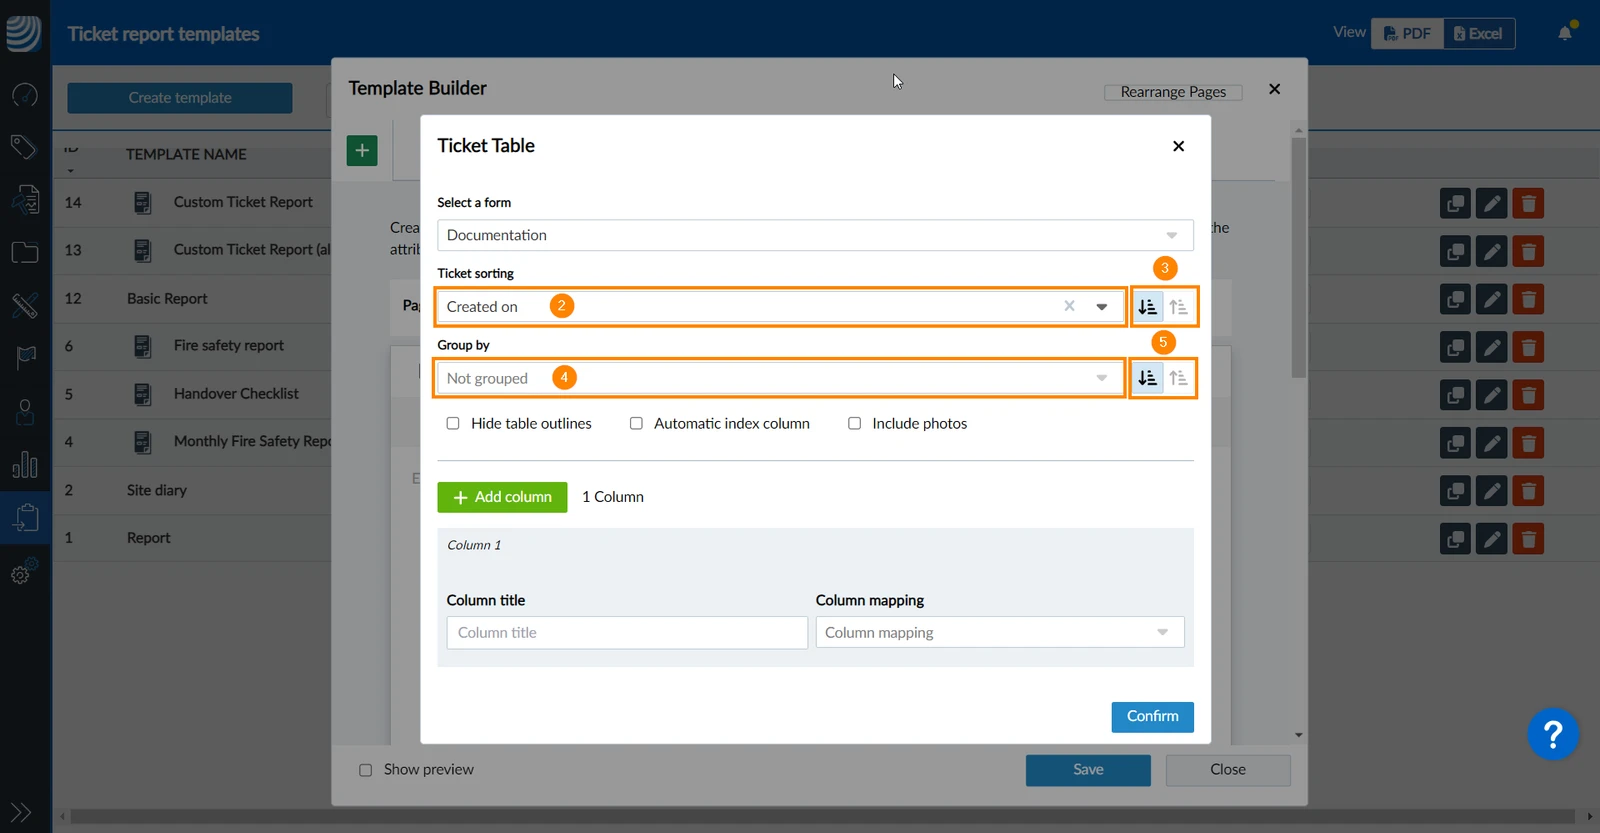
Select a form attribute in the Ticket sorting drop-down to sort tickets within their group.
Switch between Ascending or Descending sorting order for the tickets.
Select a form attribute in the Group by drop-down to group tickets by it.
Switch between Ascending or Descending sorting order for the groups.
Select/clear the Hide table outlines checkbox.
Select/clear the Automatic index column checkbox.
Select/clear the Include photos checkbox.
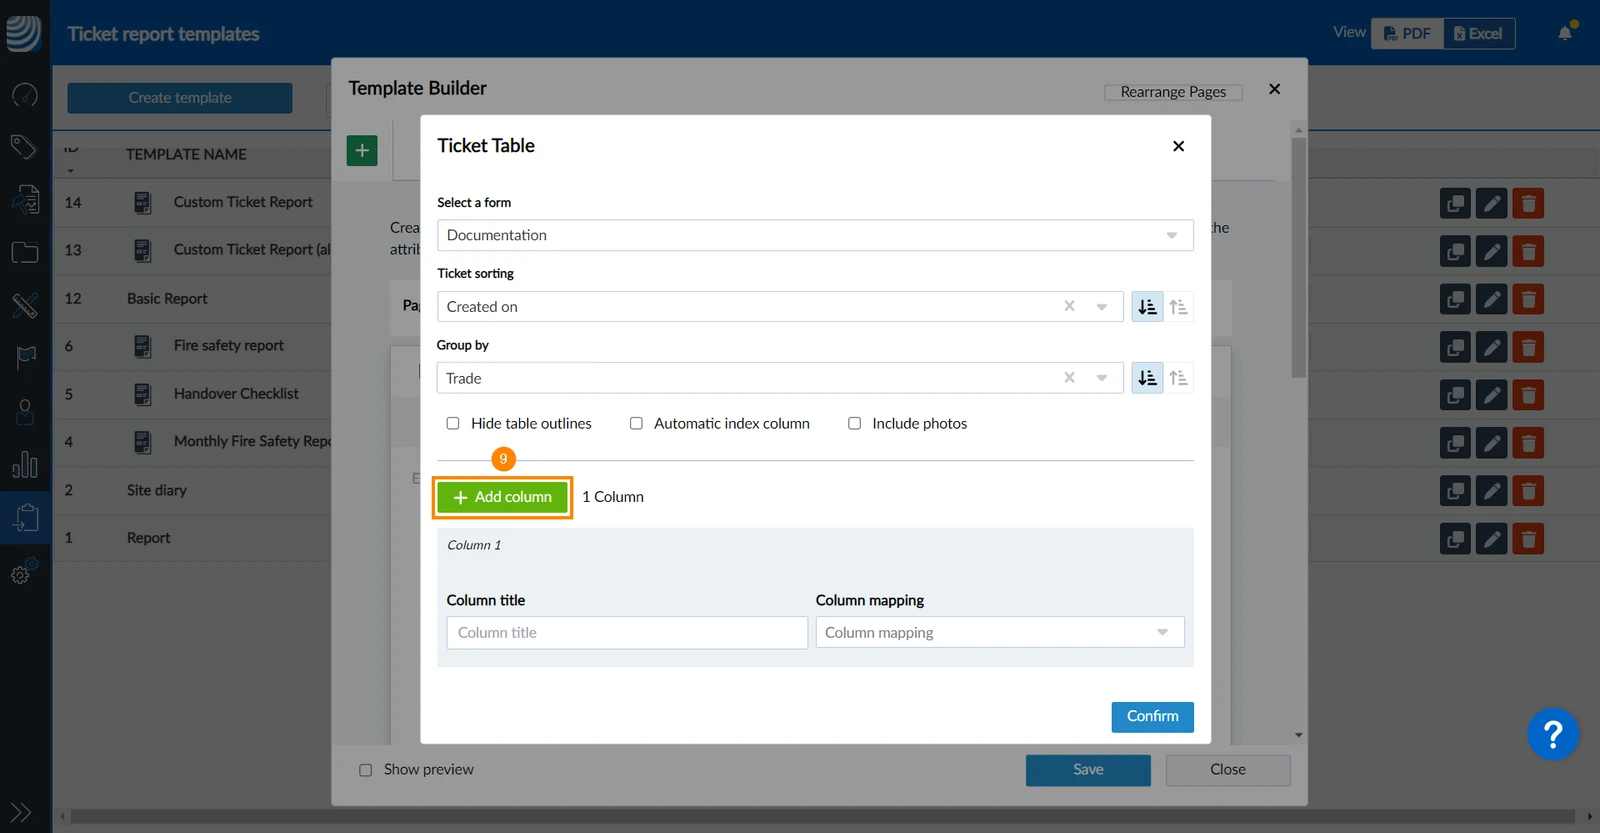
Click + Add column to add one or more columns to your table, which will be placed below the existing columns.
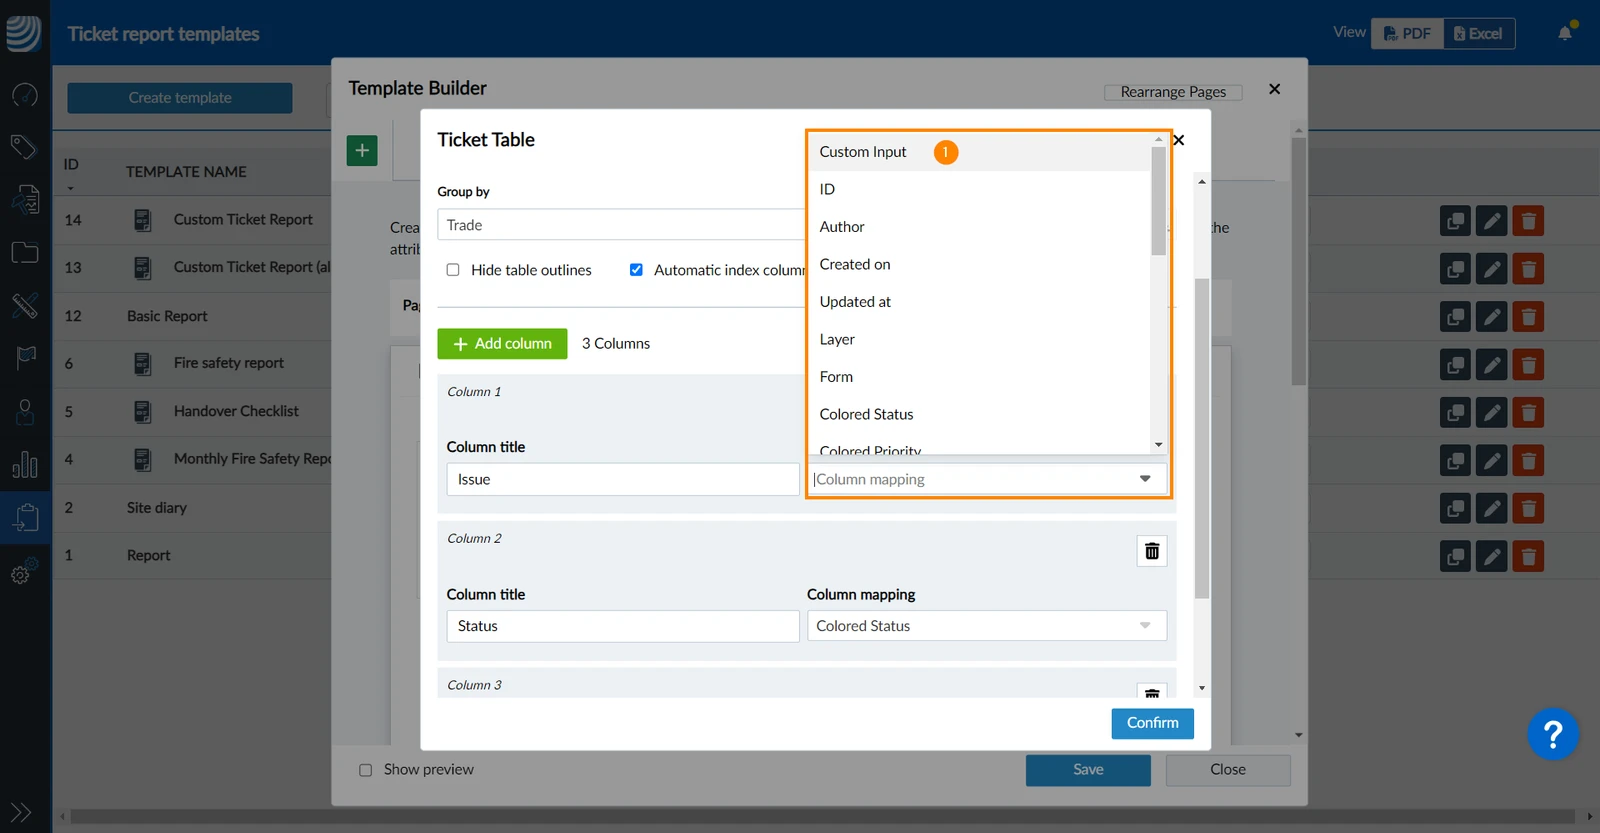
Select a form attribute in the Column mapping drop-down to map its contents to the column.
Optional: Enter a Column title if you don't want to use the form attribute name.
Repeat both of these steps for each column.
Optional: Drag and drop the Order icon to change the order of columns.
Optional: Click the Delete icon to delete a column.
Click Confirm 

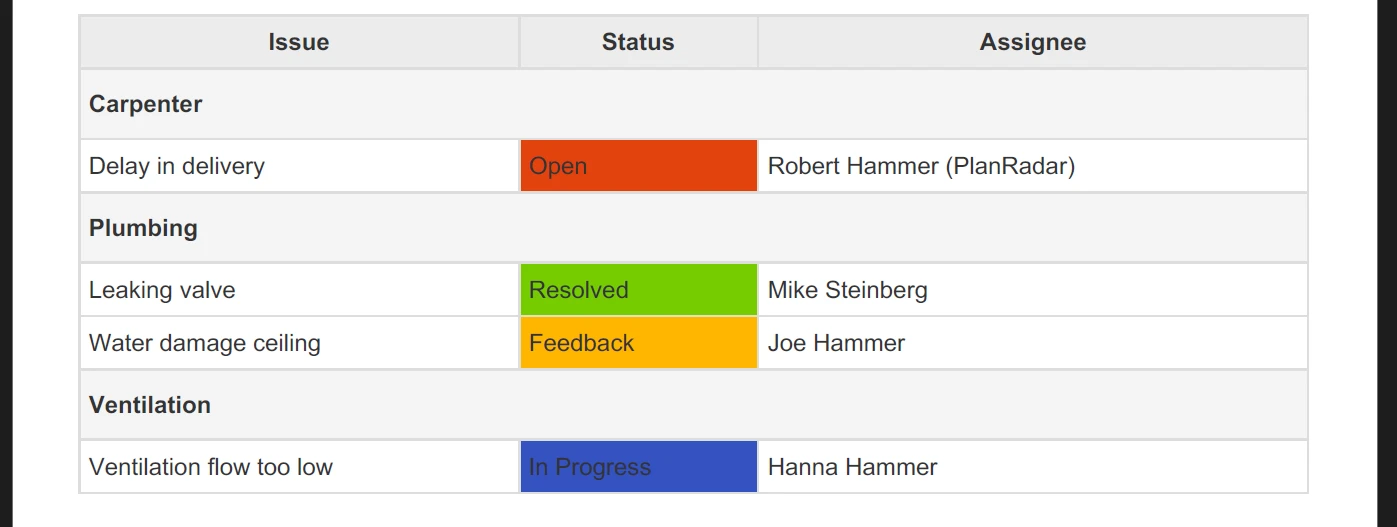
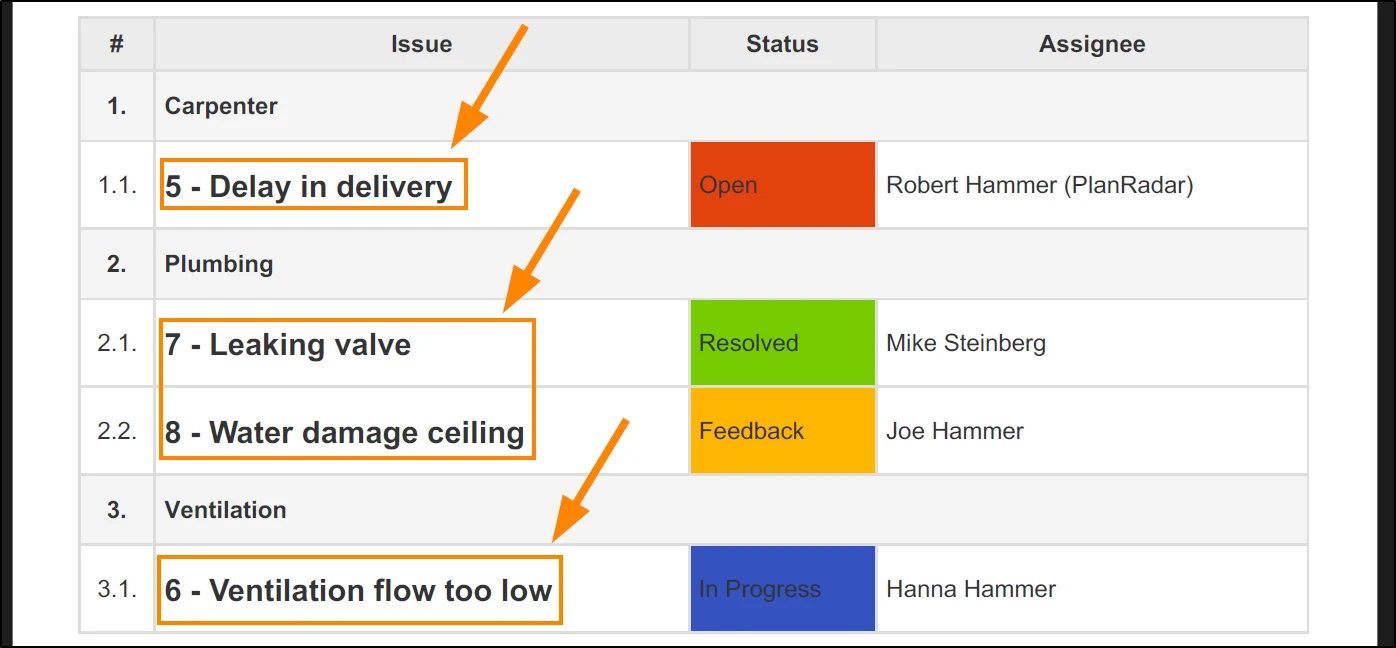
Example of a ticket table as it might look in a report:
Customise Cells
There are more advanced ways to customise your cells than just mapping a form attribute as described above. Custom input allows you to map multiple form attributes to a single cell and add text and HTML tags for formatting if required.
To do so:
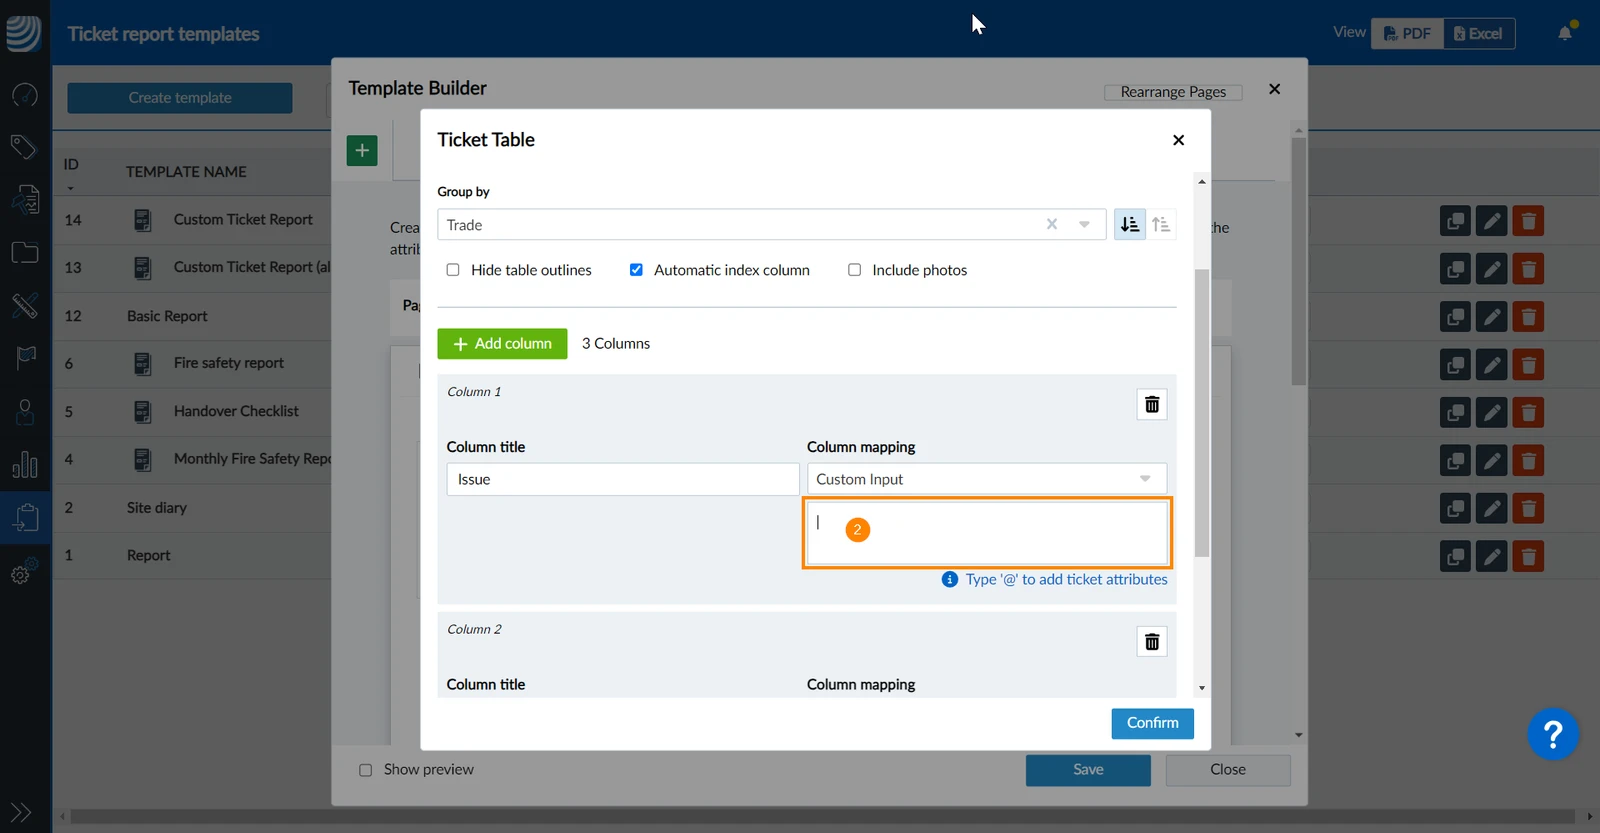
Select Custom Input in the Column mapping drop-down
Use the text input field to specify the content and format of the cell.
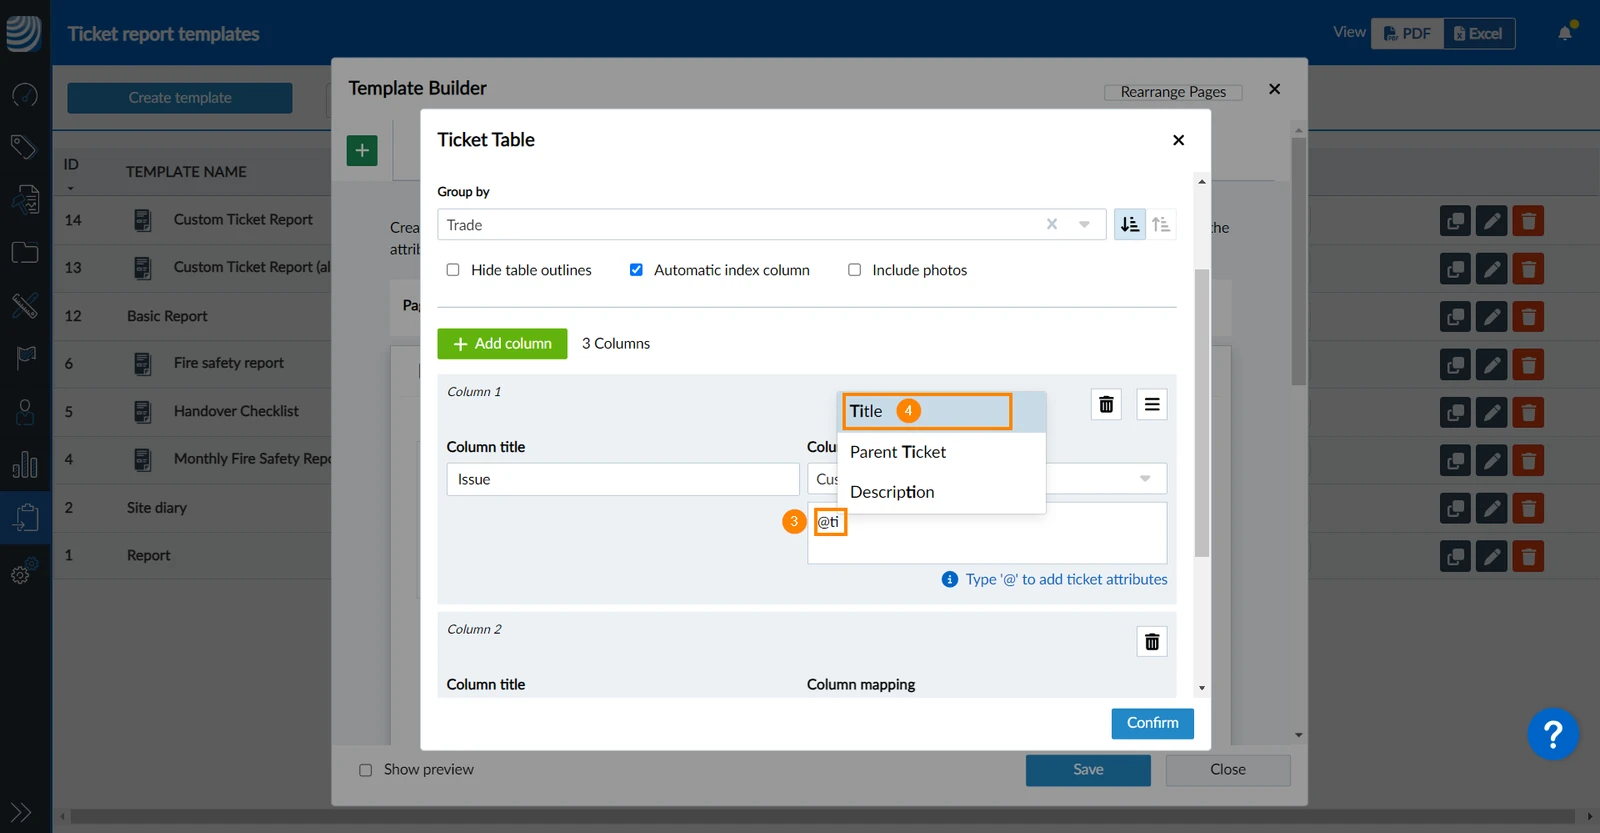
For example type: '@ti' to see a list of all the attributes that match your text input.
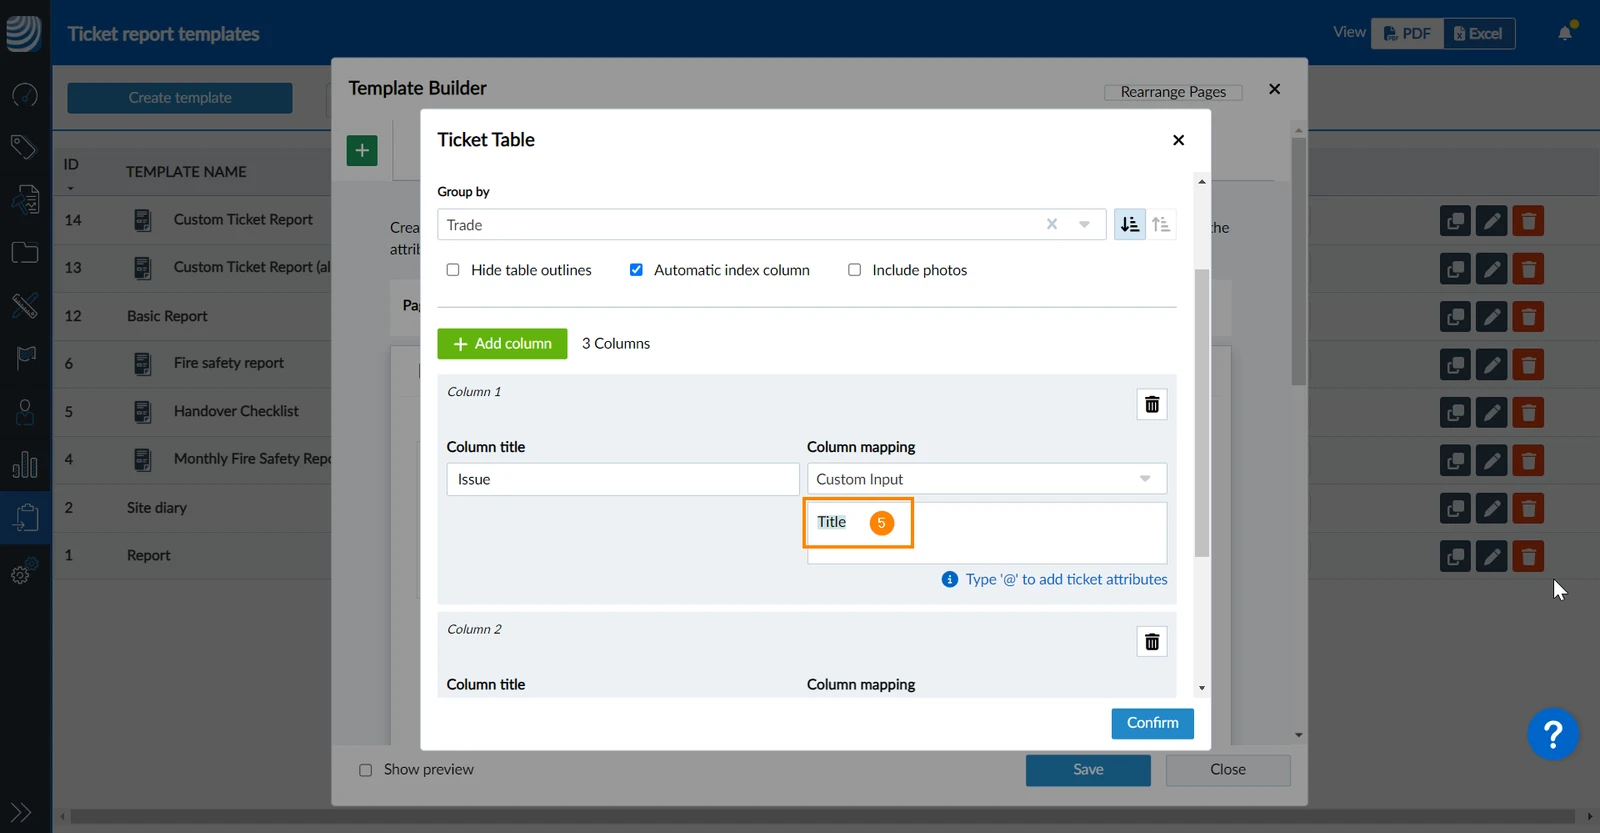
Click on the attribute, e.g. Title, to add it as a placeholder in the text input field.
Placeholders have a blue background.
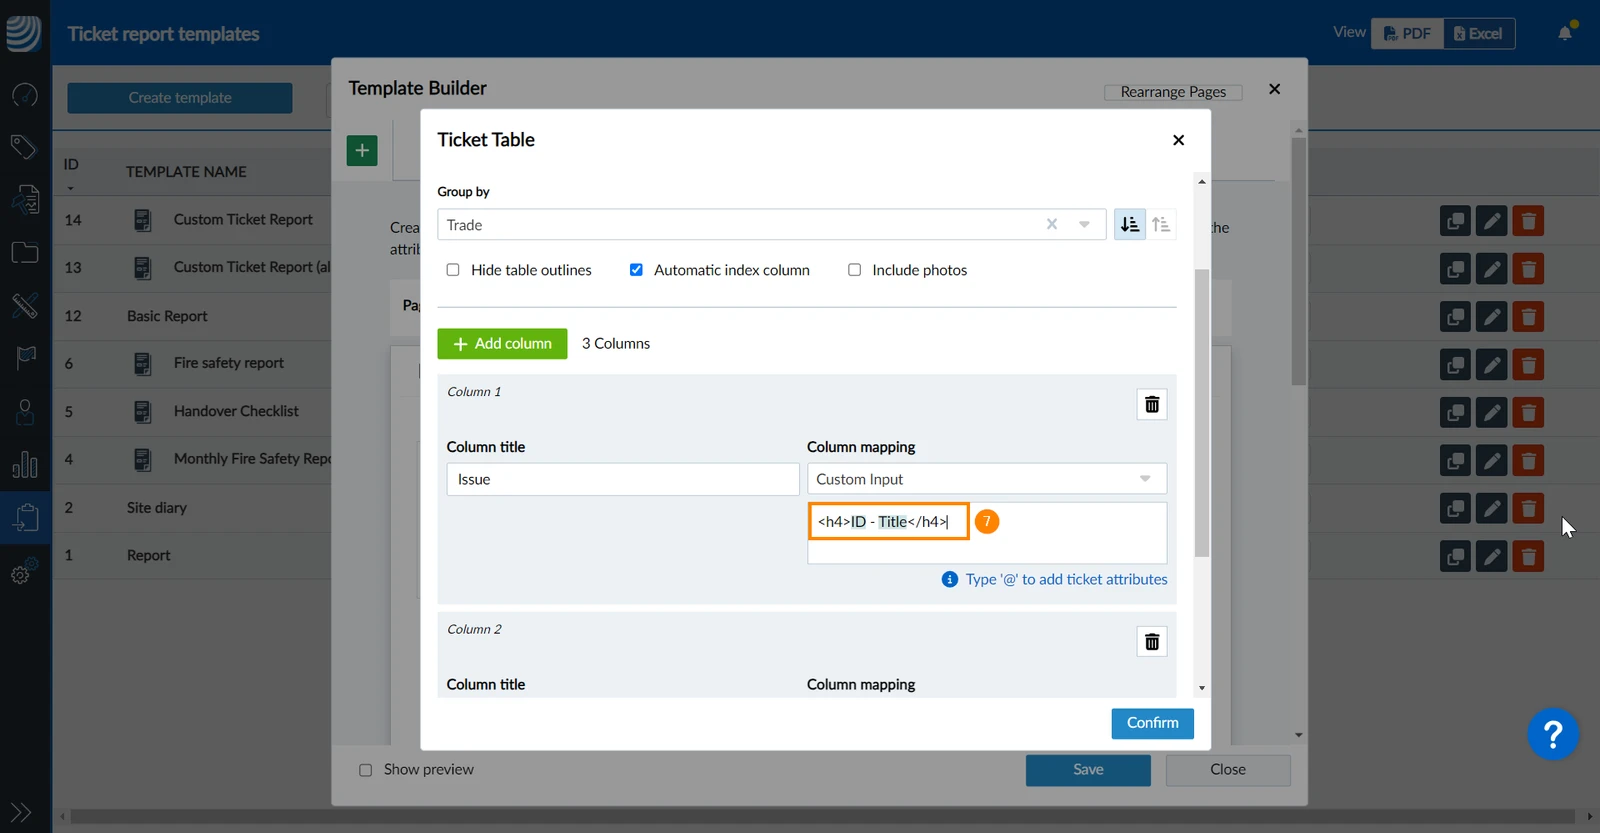
Add additional placeholders, text or HTML tags e.g. like <h4>Text</h4> to apply Headline 4 formatting to your text. You can also add multiple attribute placeholders within a cell.


 Deutsch
 Español
 Français
 Hrvatski
 Italiano
 Polski
 Português (BR)