

 Deutsch
 Español
 Français
 Hrvatski
 Italiano
 Polski
 Português (BR)
Create Excel Templates for Exporting Tickets
Overview
Create an Excel template to define how the Excel file should be created and what data you want to include. However, you can Export Tickets to Excel without a template, which will generate an Excel file as defined by PlanRadar.
Access & Permissions
How to access Excel Templates
- Hover over Templates
- Click Ticket Reports
- Click Excel
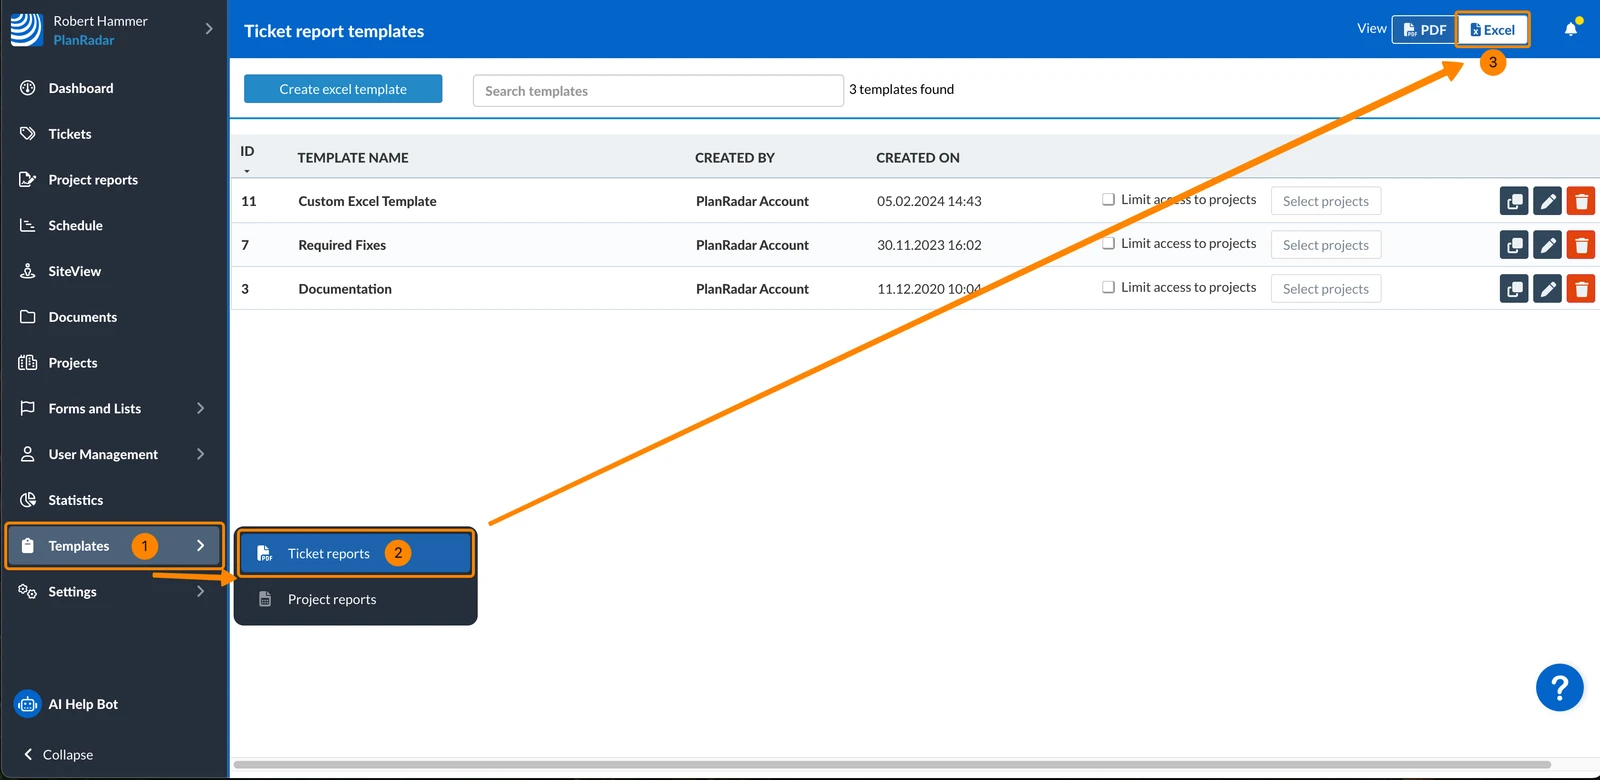
Default Excel Report Layout
If you export tickets to Excel without a template, you will get an Excel file as defined by PlanRadar with all ticket fields, project name column, links to each ticket and without images.
Each line represents a ticket and each column a ticket form field.
If this doesn't suit your needs, you can create an Excel template for exporting tickets as described below.
Create an Excel Template
To create an excel template:
- Click Create excel template
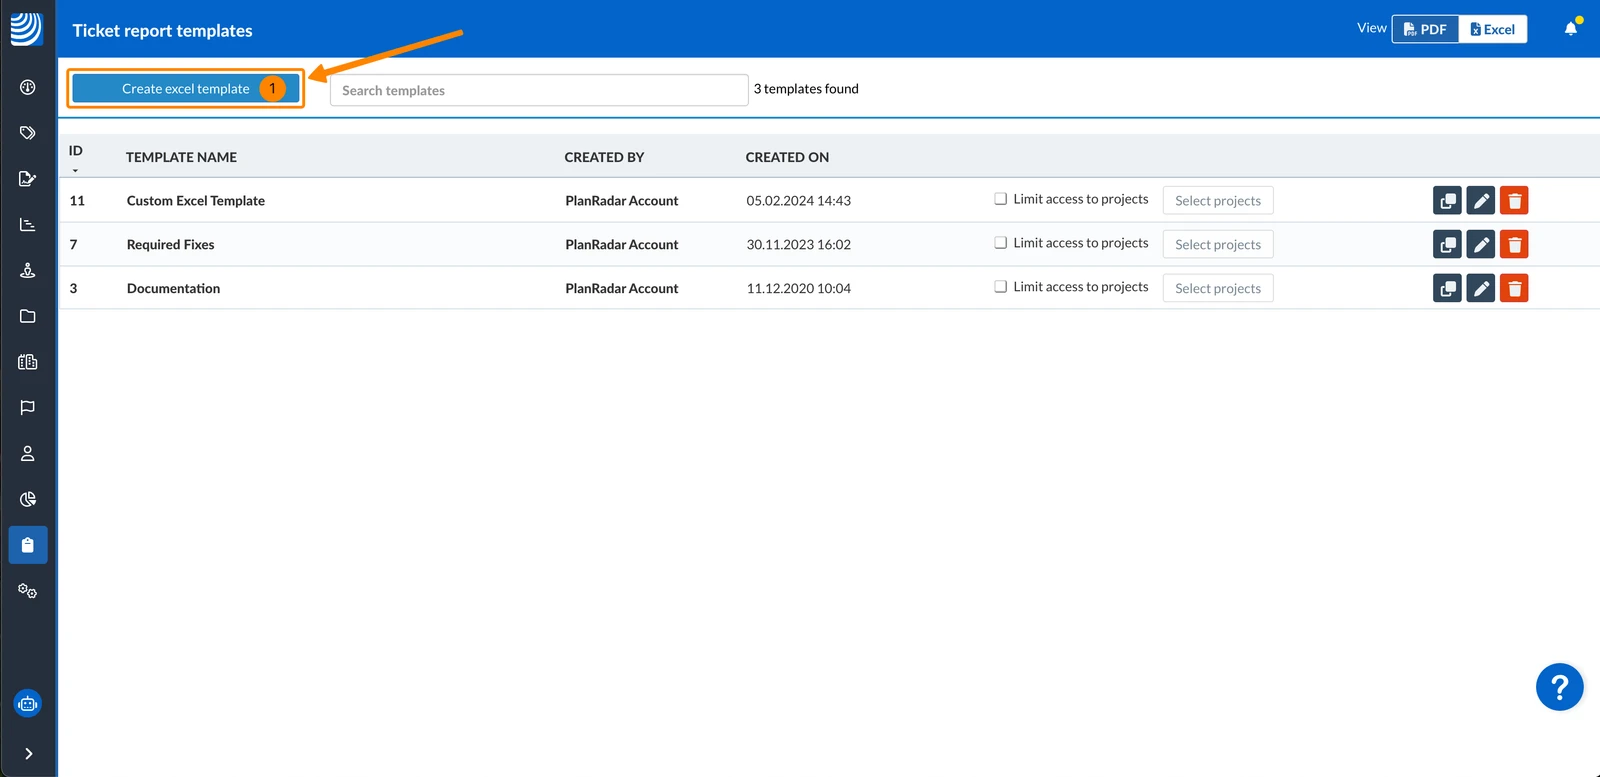
When creating an excel template there are several fields and settings that allow you to customise the template to your needs. These are described in the following sections.
Name
The name of the template is used to identify it when creating excel exports.
- Enter Name
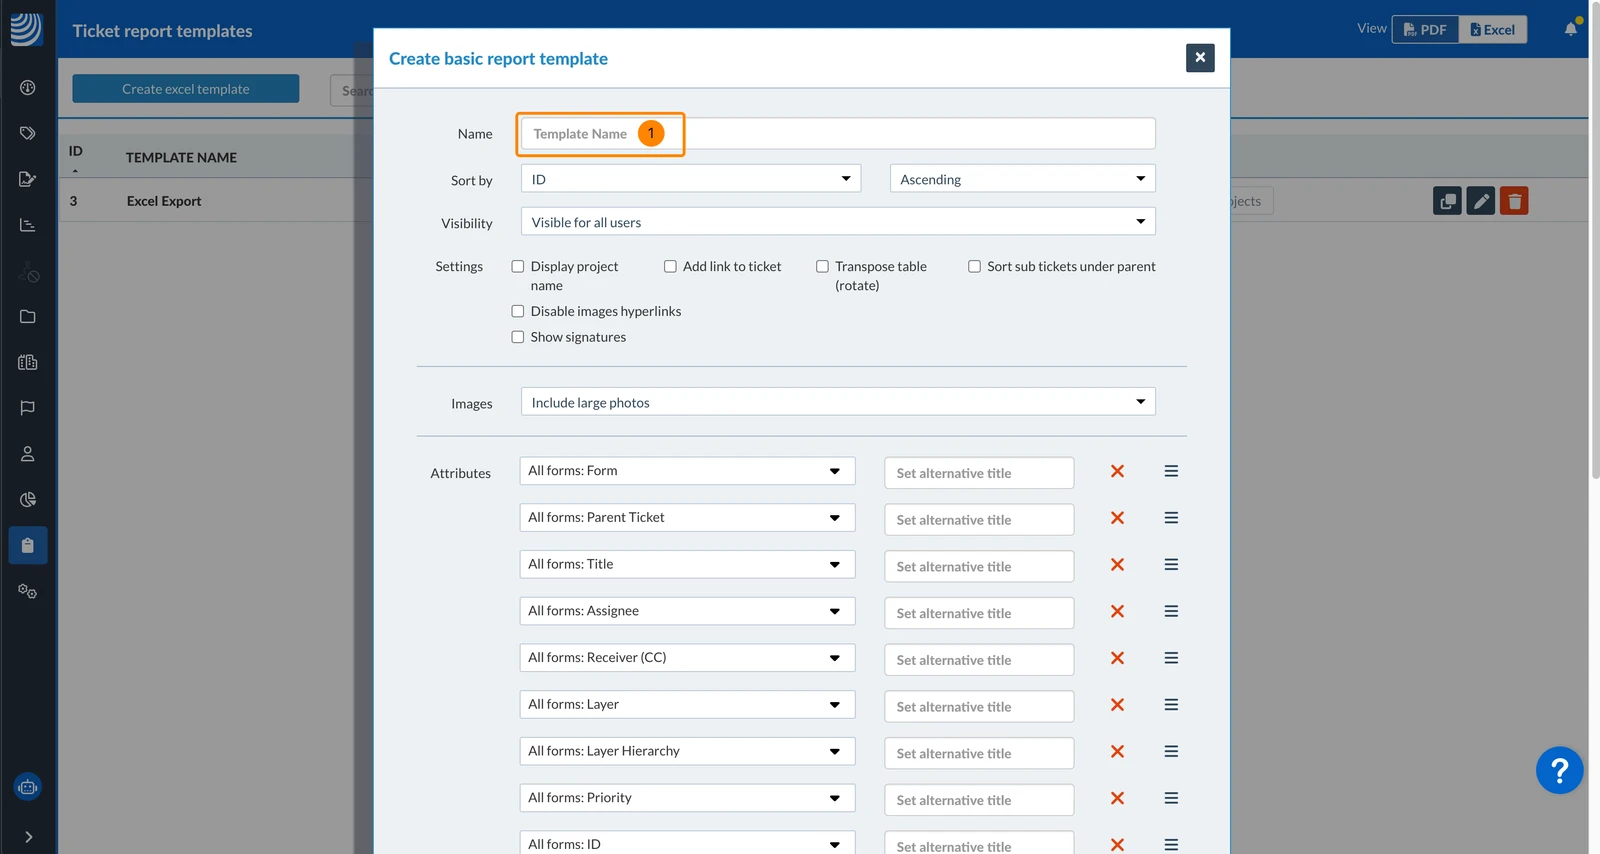
Sort by
By default, tickets are sorted by Ticket ID in ascending order. To change that:
- Select a ticket form field in the Sort by drop-down
- Select Ascending or Descending in the second drop-down
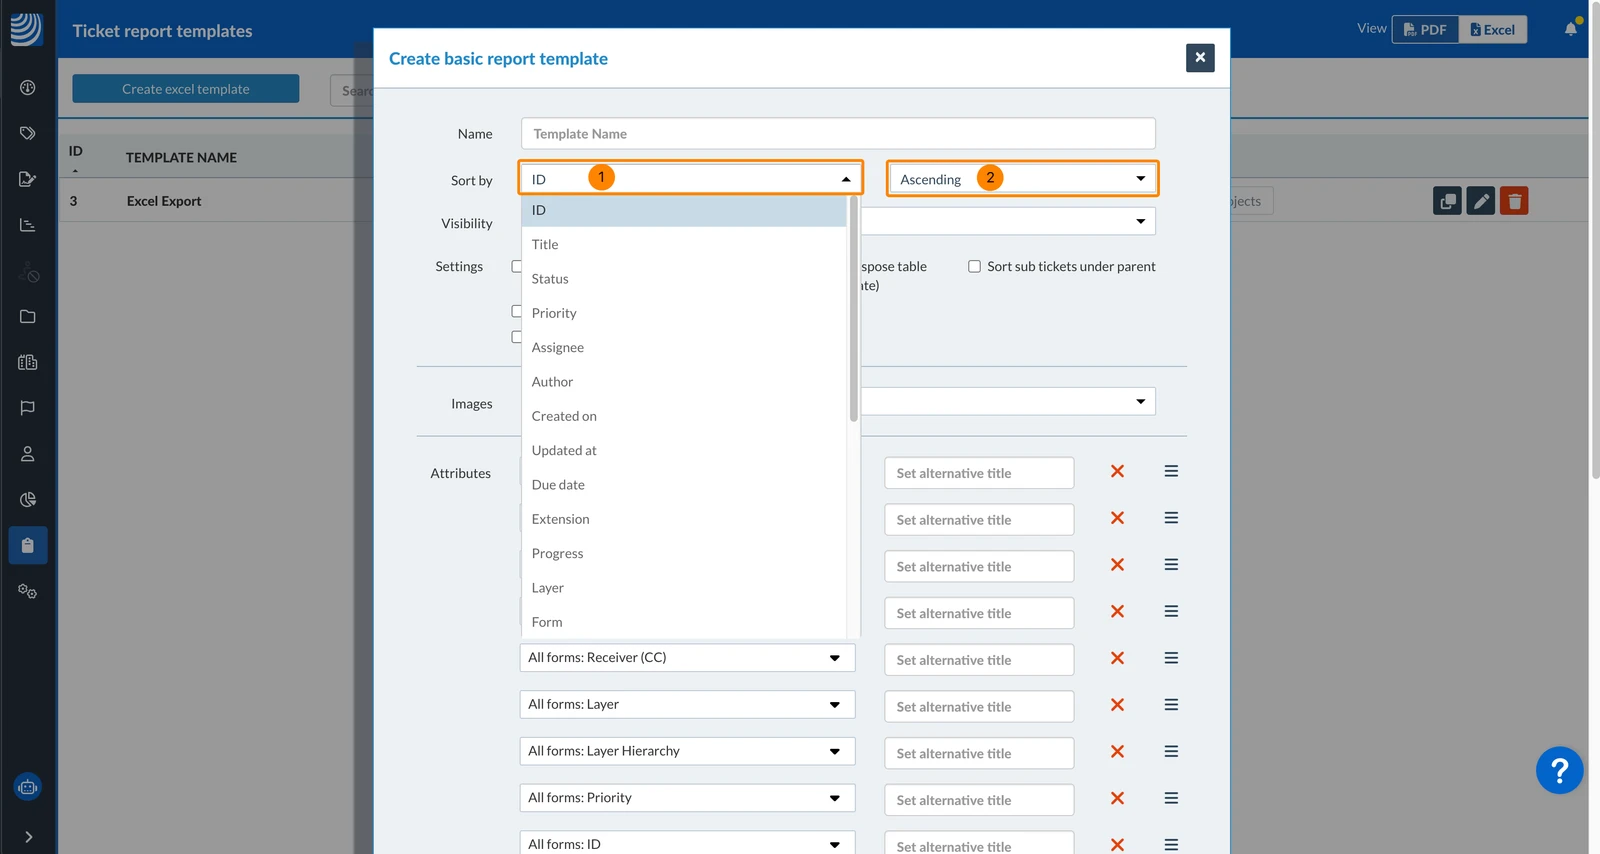
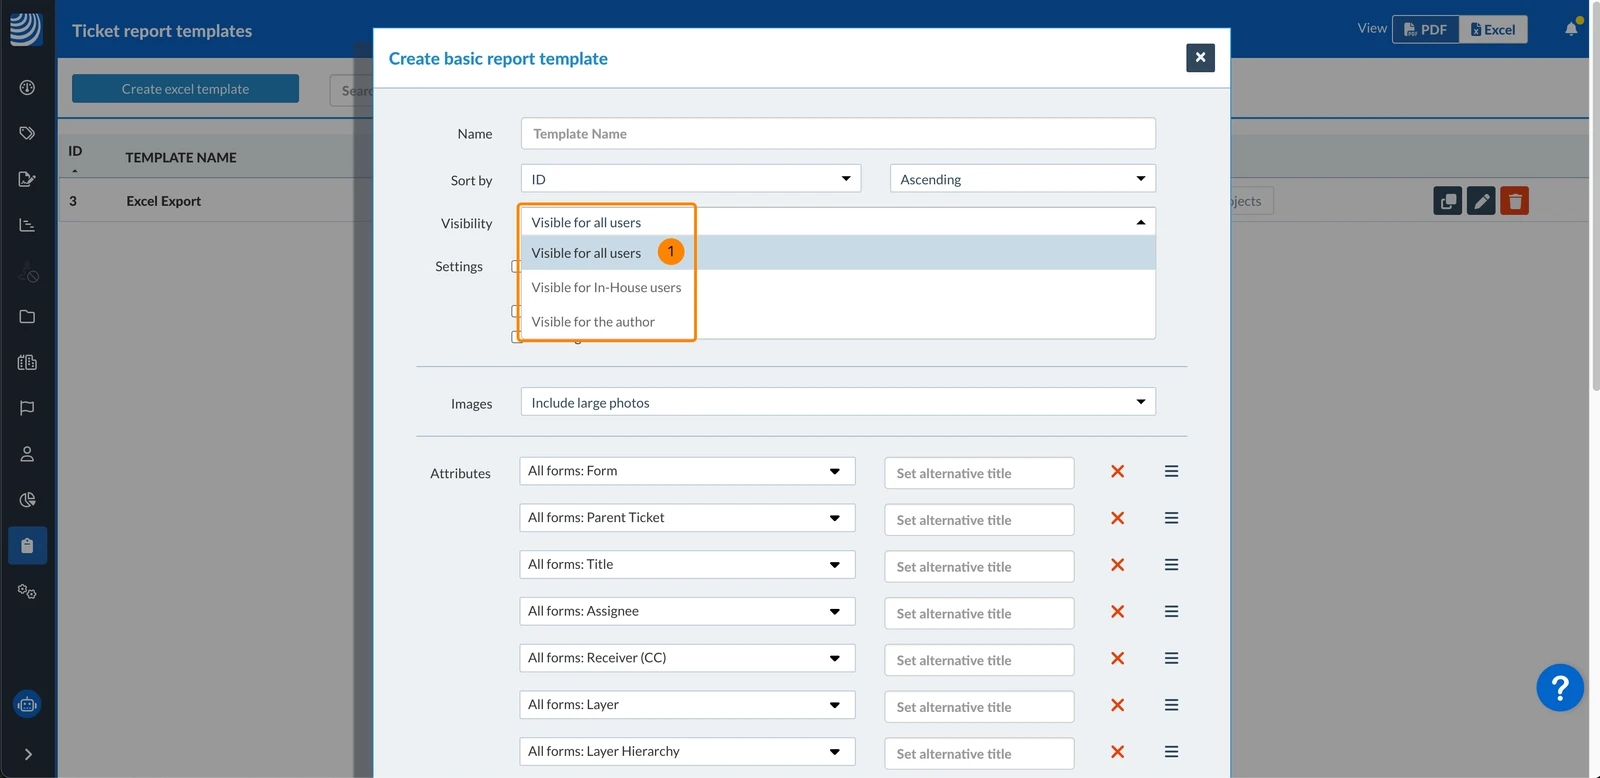
Visibility
By default, Visibility for all users is selected. To change that:
- Select Visible for In-House users to hide it from subcontractors and watchers
OR select Visible for the author to hide if from everyone else.
Settings
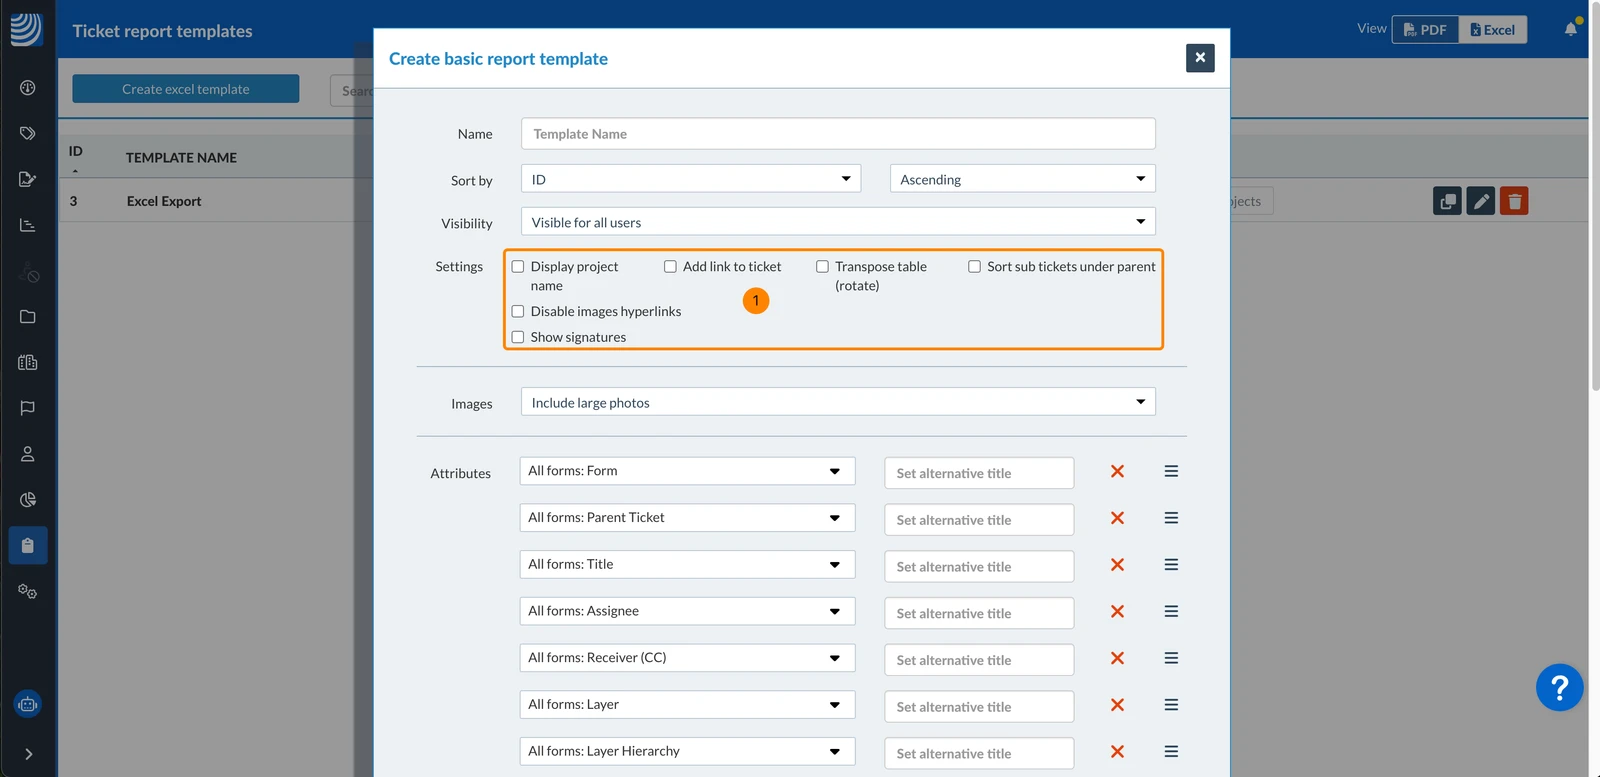
By default, all settings are disabled. To change the settings:
- Select/clear the following checkboxes
Available settings:
- Display project name = First column with project name of each ticket.
- Add link to ticket = Last column with a link to open each ticket in PlanRadar.
- Transpose table (rotate) = Each column represents a ticket and each line a ticket form field.
- Show Sub-Tickets under ticket = Sub-tickets are listed under their parent ticket. Sub-tickets that don't match the filter when you create the export will not be included.
- Disable images hyperlinks = Clicking on included images will not open them in PlanRadar. This setting is irrelevant if no images are included.
- Show signatures:
If enabled, the signer's names and respective timestamps will be displayed in the 'Signature' column. Read more in Sign a Ticket.
Images
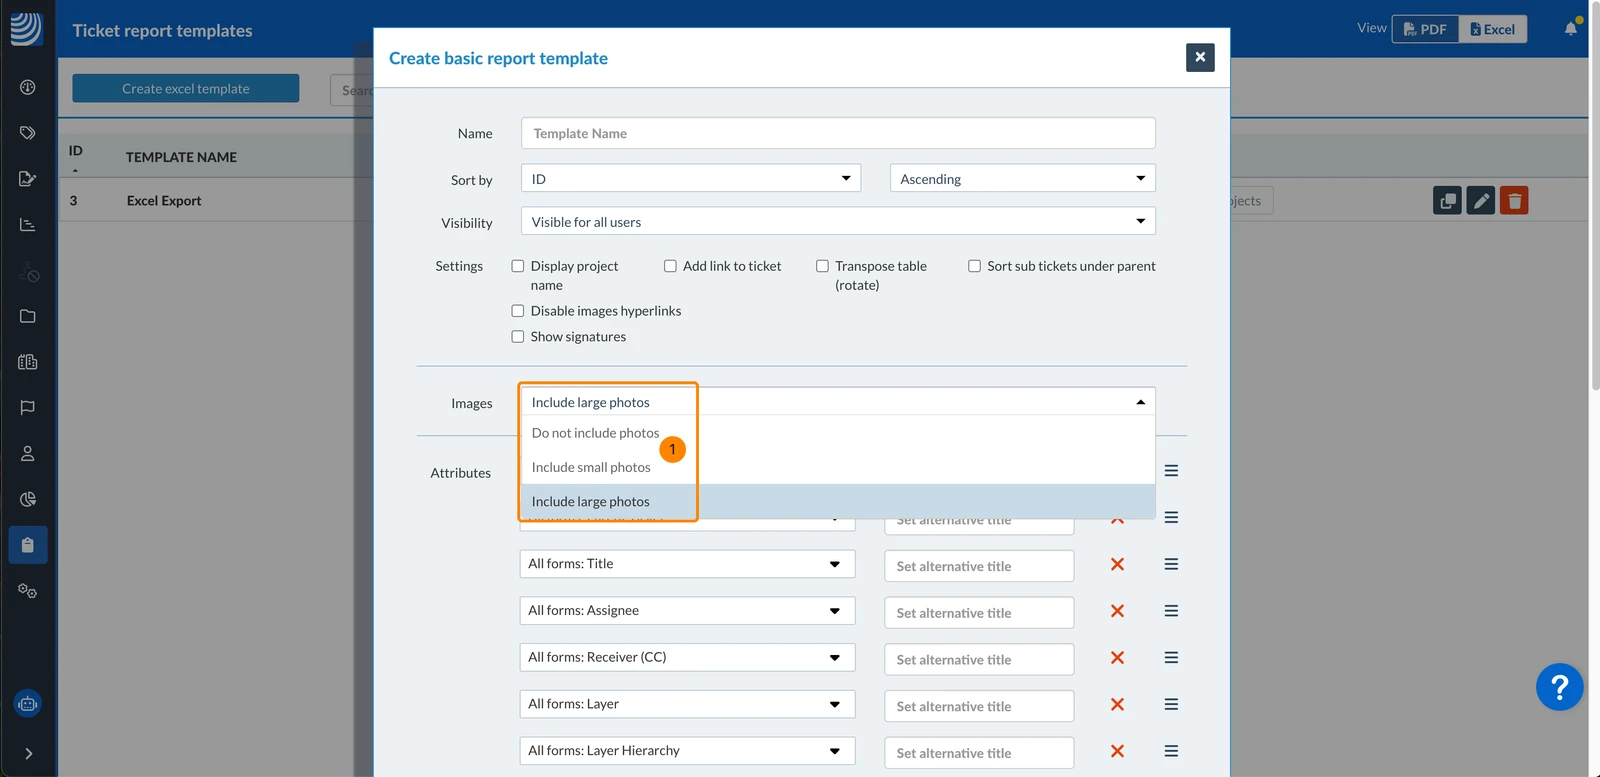
By default, Include large photos is selected. To change that:
- Select Include small photos
OR select Do not include photos
Attributes
By default, the attributes include the default ticket form fields and related data. It is also possible to add custom ticket form fields, change the order or set alternative titles.
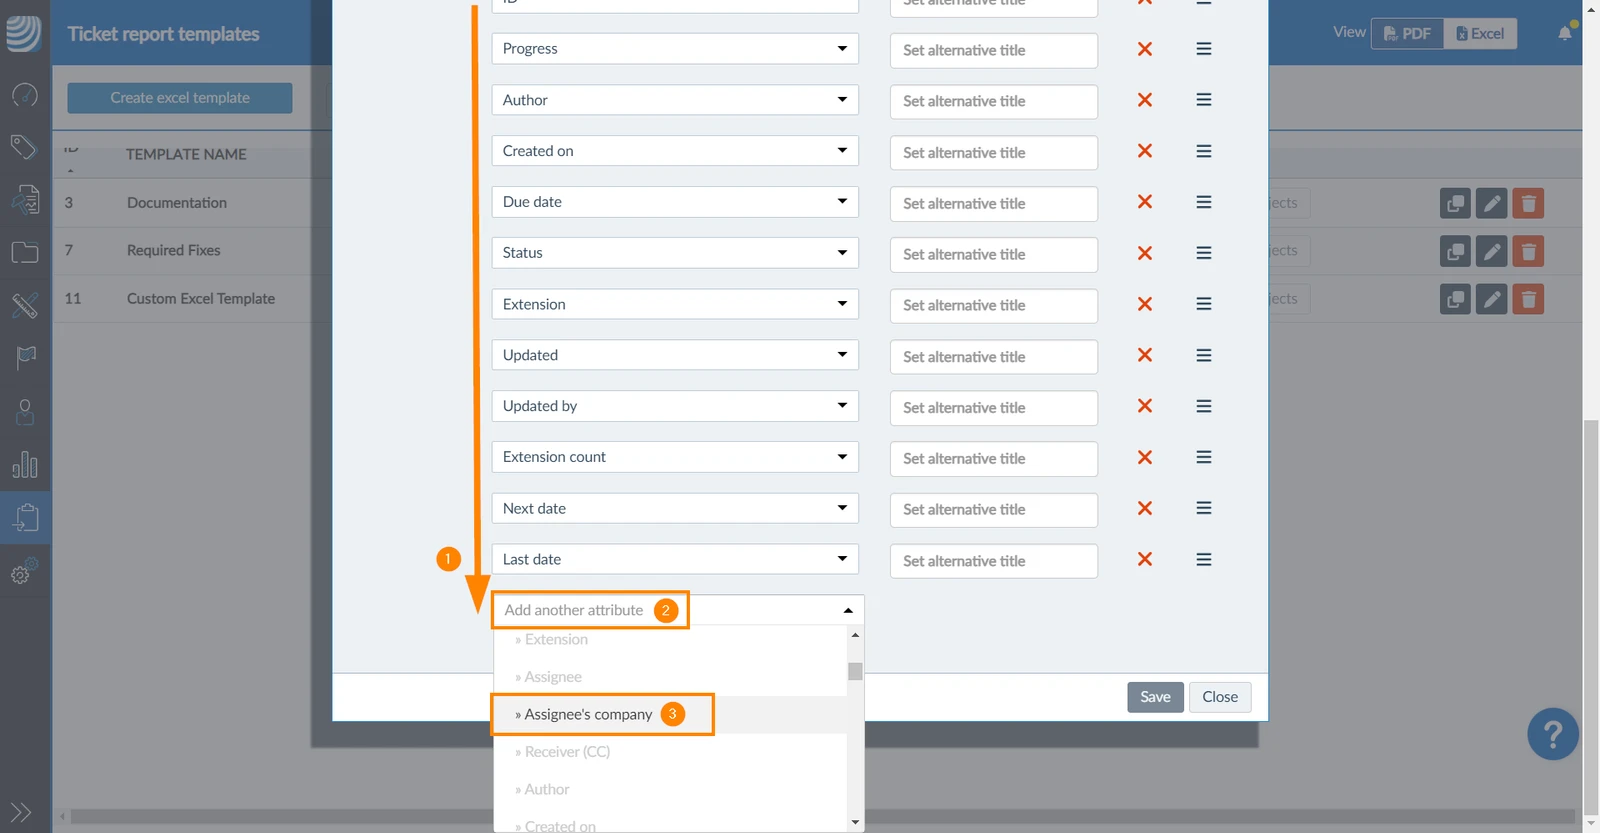
To add another attribute:
- Scroll down in the list of attributes
- Open the Add another attribute drop-down
- Select an attribute e.g. Assignee's company
OR select a form to add all of its attributes at once.

To set an alternative title:
- Click Set alternative title next to the desired attribute and enter a title
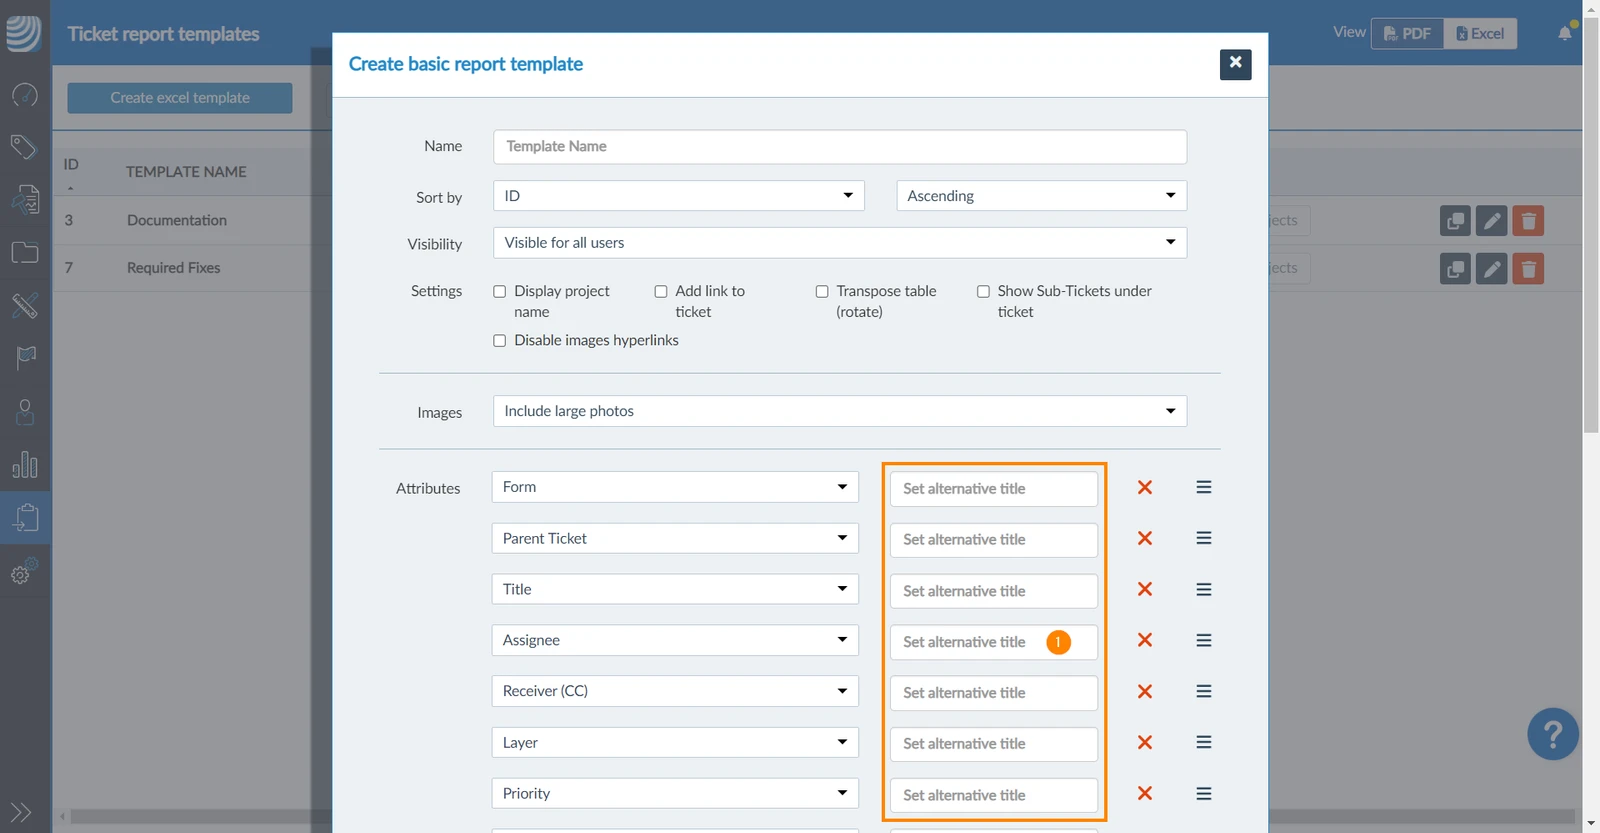
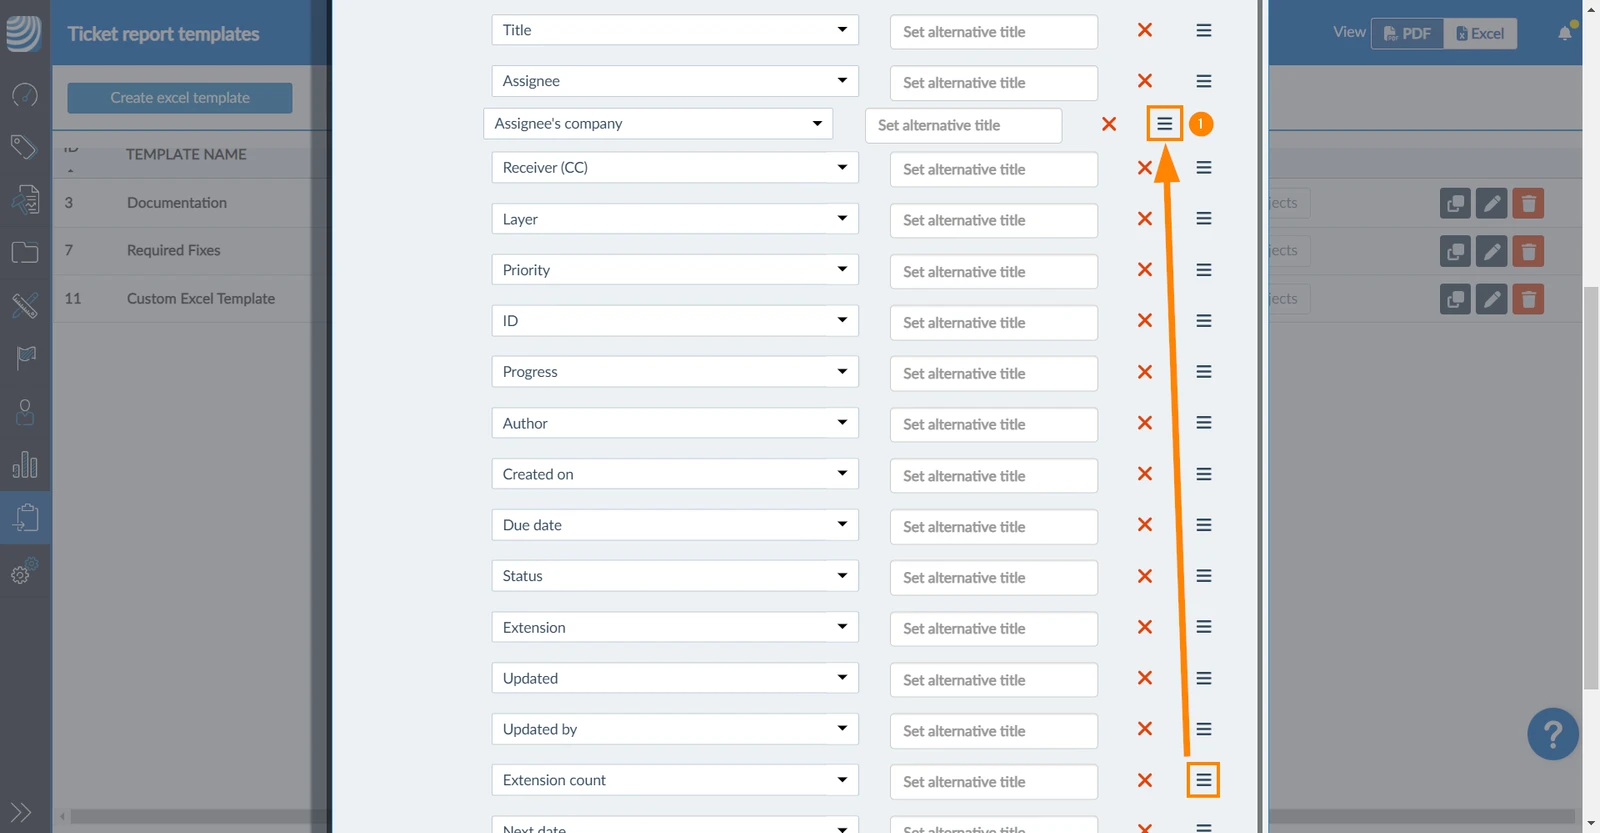
To change order of attributes:
- Hover over the sorting icon and use drag & drop
To remove an attribute:
- Click the X button next to the desired attribute
Save Excel Template
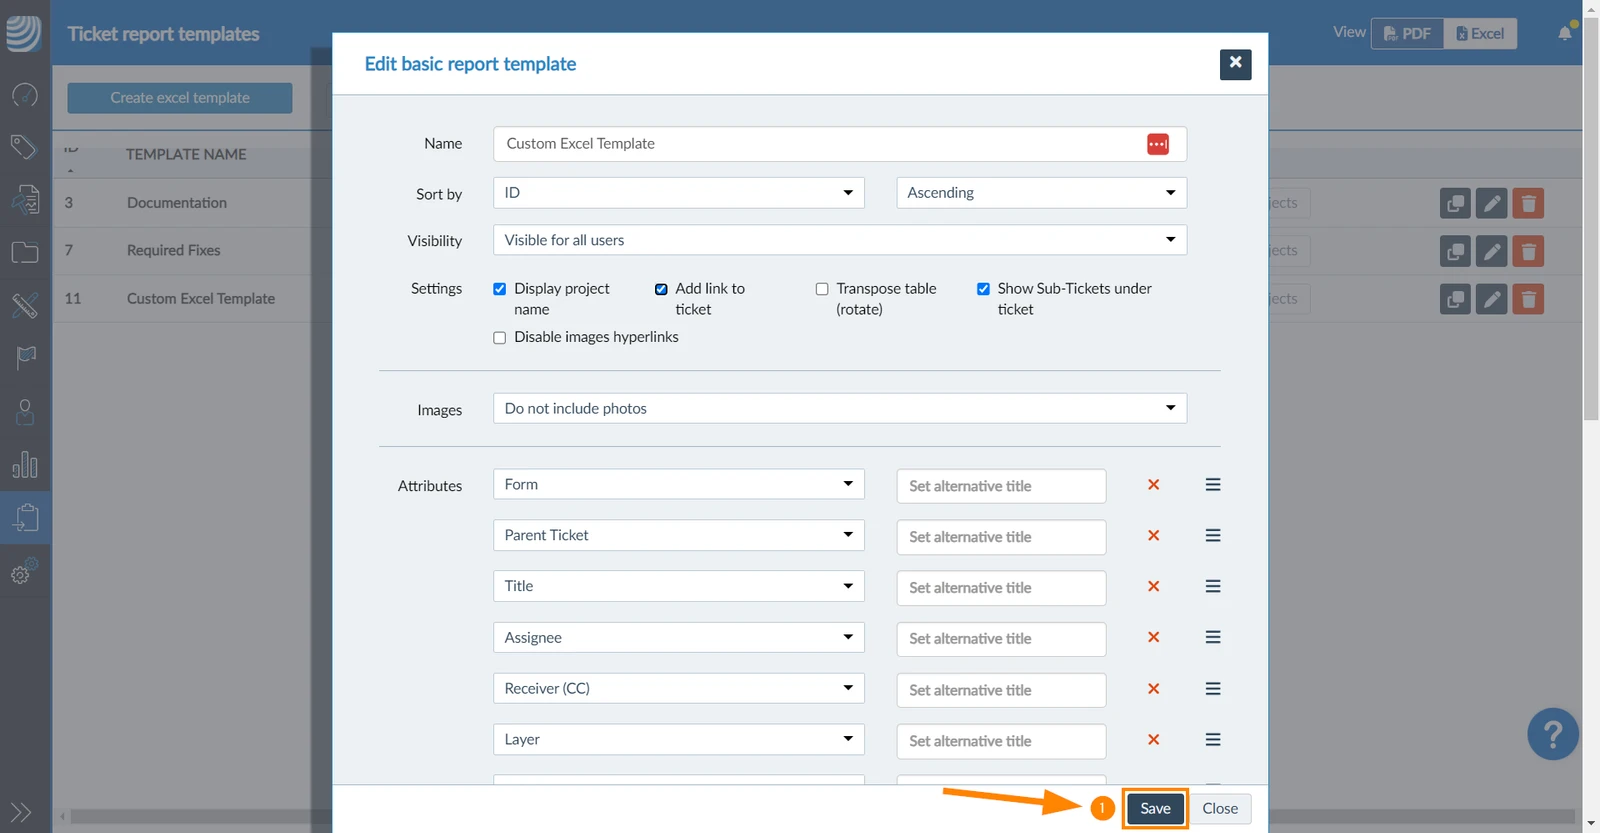
To save a new Excel template only the name is mandatory:
- Click Save
Edit Excel Template
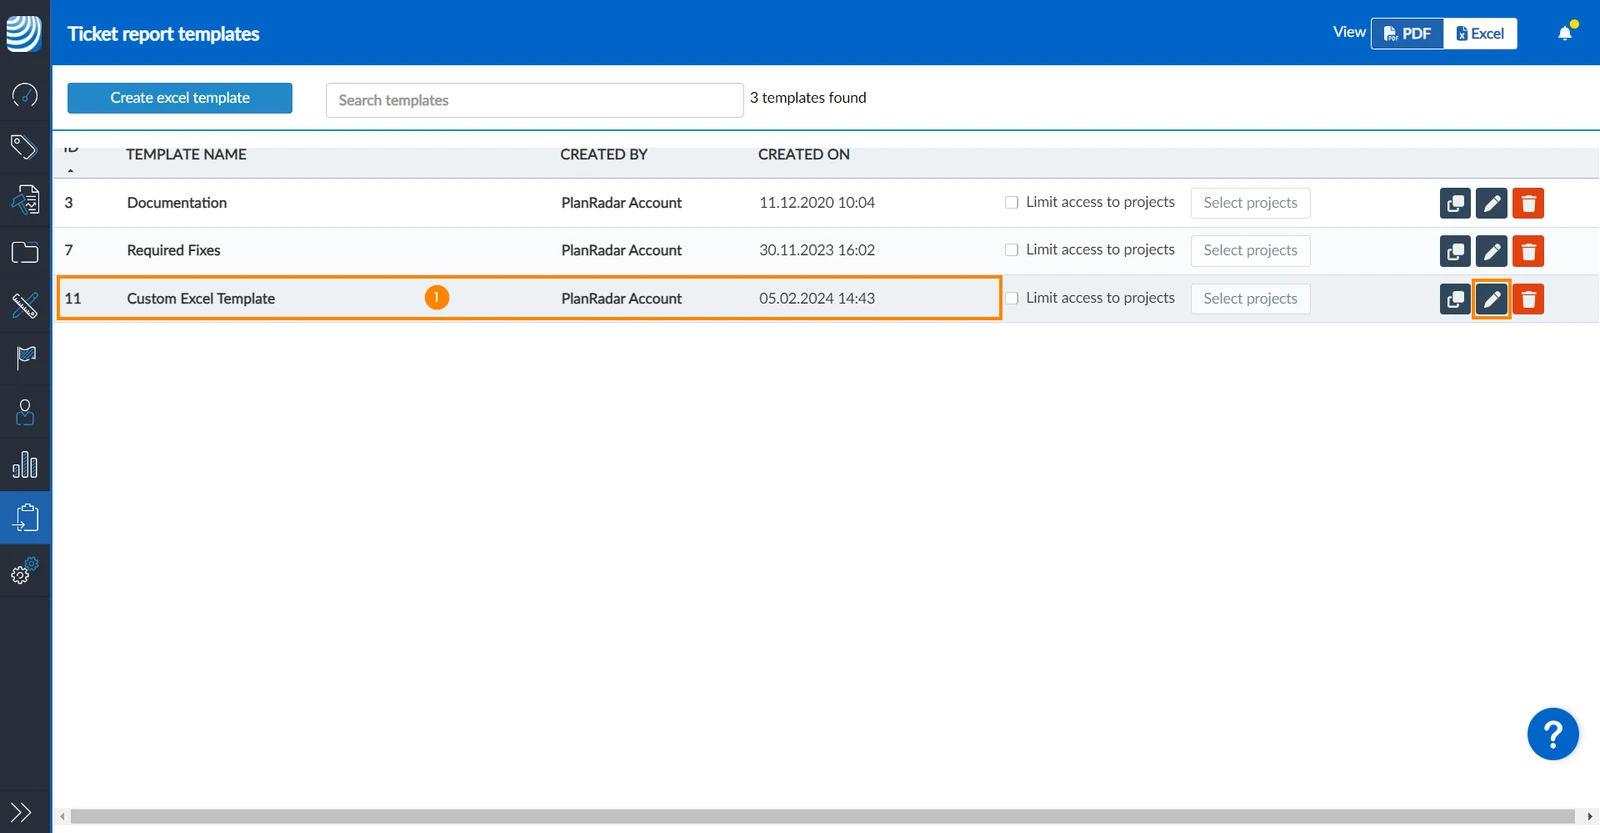
To view or edit an existing Excel template:
- Click on the Excel template in the list
OR click the edit button
When editing an Excel template, you have the same options as described above in Create an Excel Template.
Updated March 5, 2026