

 Deutsch
 Español
 Français
 Hrvatski
 Italiano
 Polski
 Português (BR)
BIM Viewer
Overview
Use the BIM Viewer in PlanRadar when working with BIM models. The viewer allows you to show or hide model elements, view IFC properties, measure distances, angles and areas, creating sections and more.
PlanRadar also supports working with federated IFC models which means viewing multiple IFC models at the same time. For easier navigation within the BIM model, you can switch between free camera and walking modes. Additionally, a 2D overview map allows you to quickly adjust your position and camera orientation.
Access & Permissions
How to access the BIM viewer
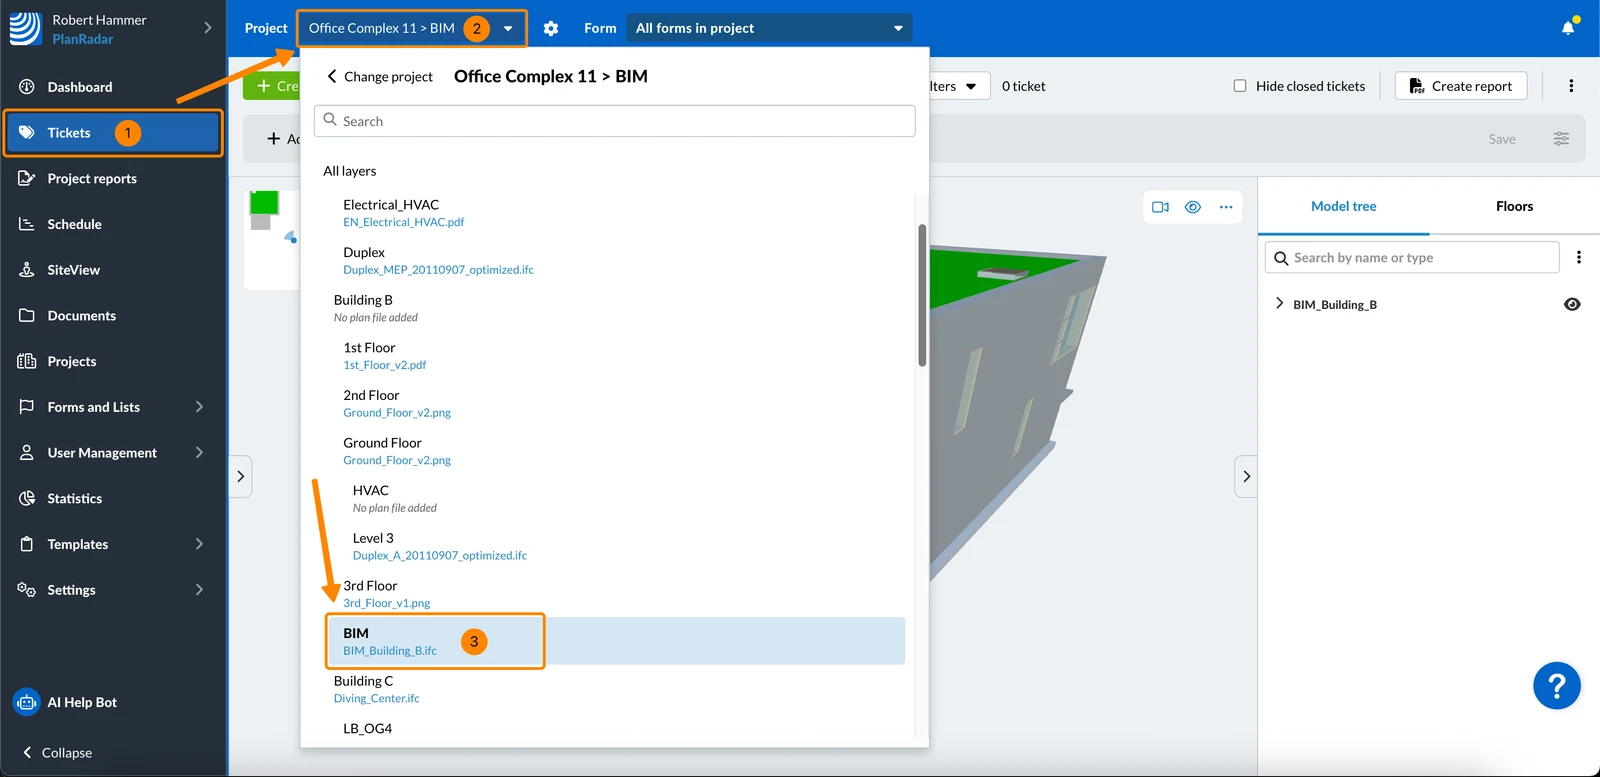
- Click Tickets
- Open the Project drop-down
- Select the project and layer
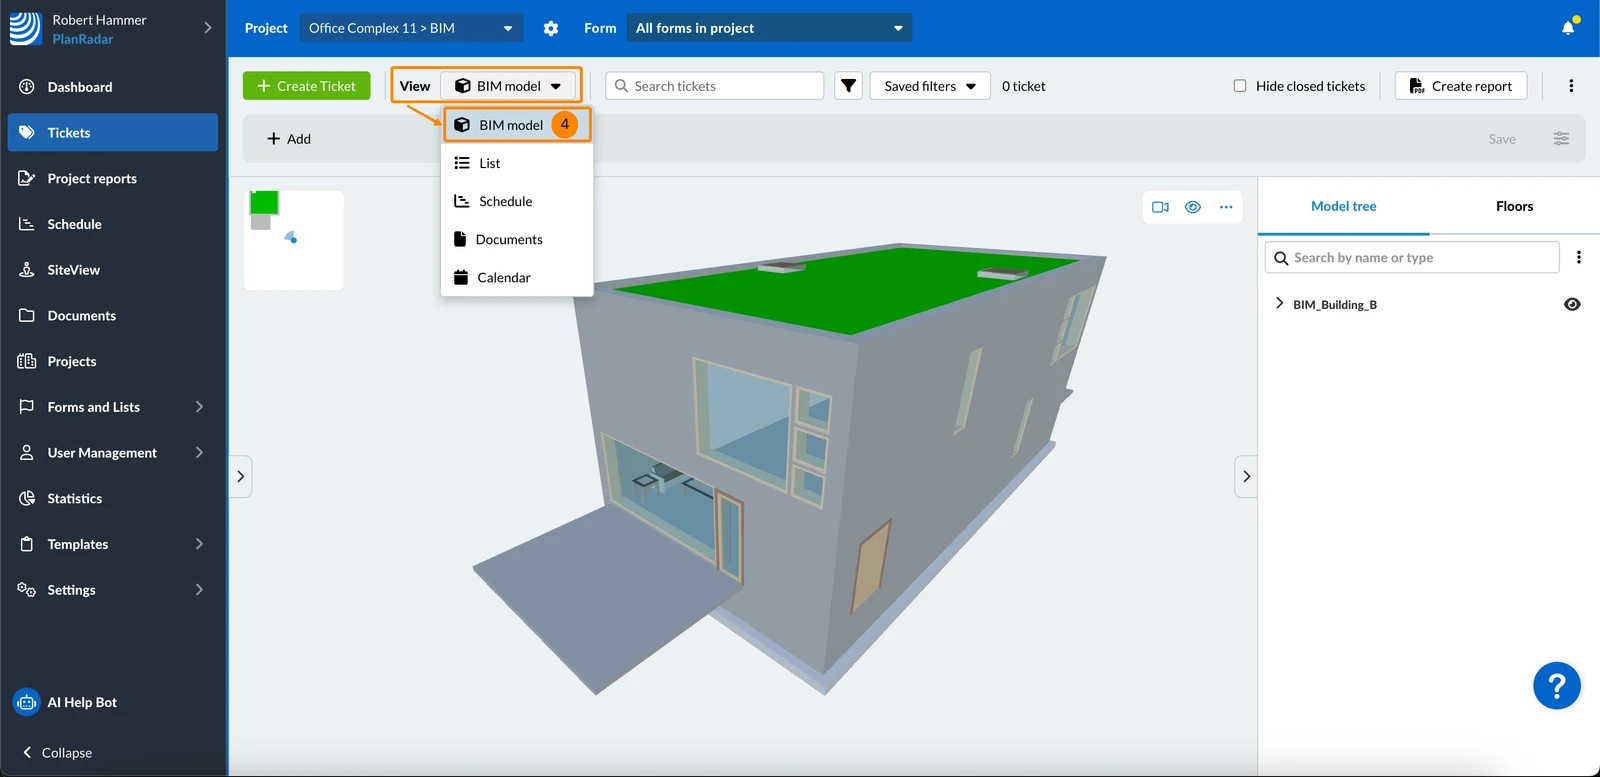
- Click BIM model in the View drop-down
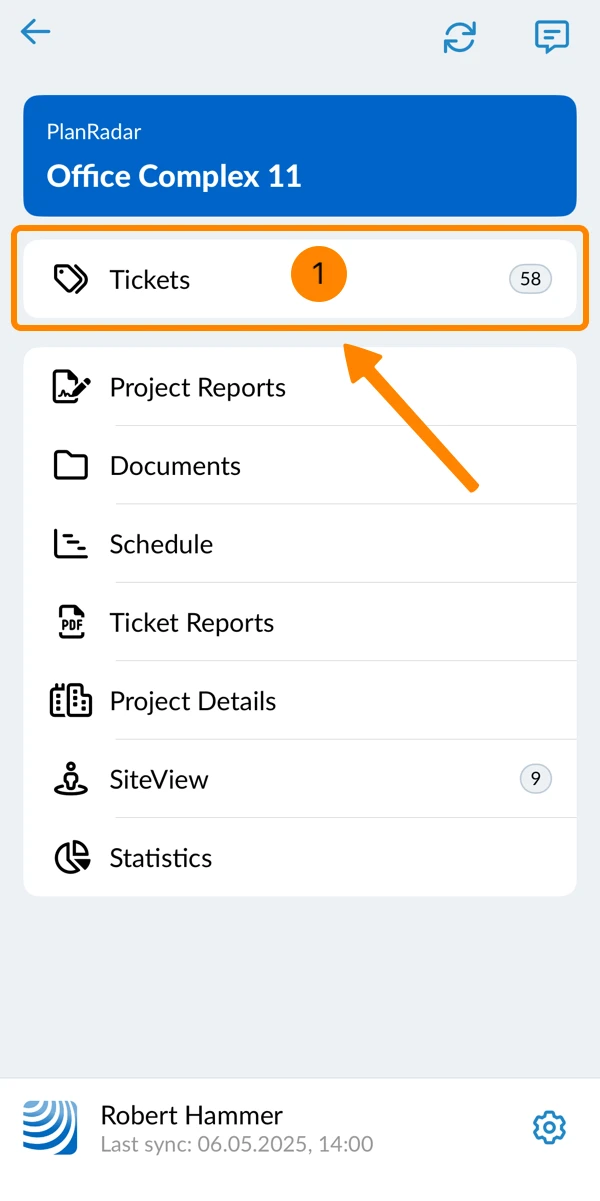
- Tap Tickets
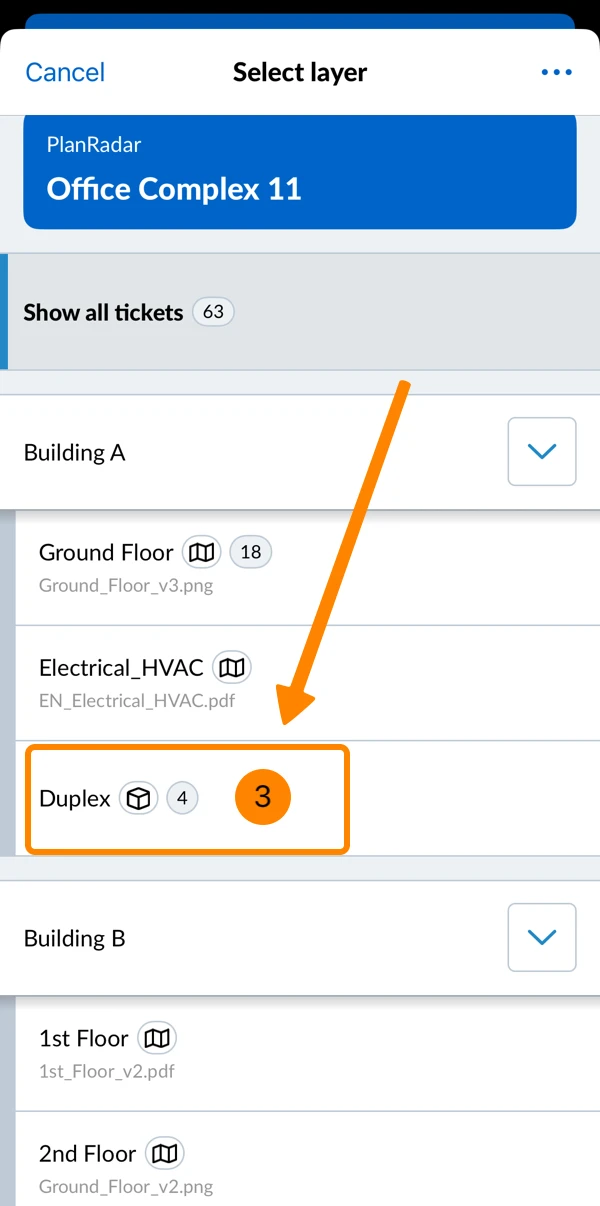
- Open the layer selector
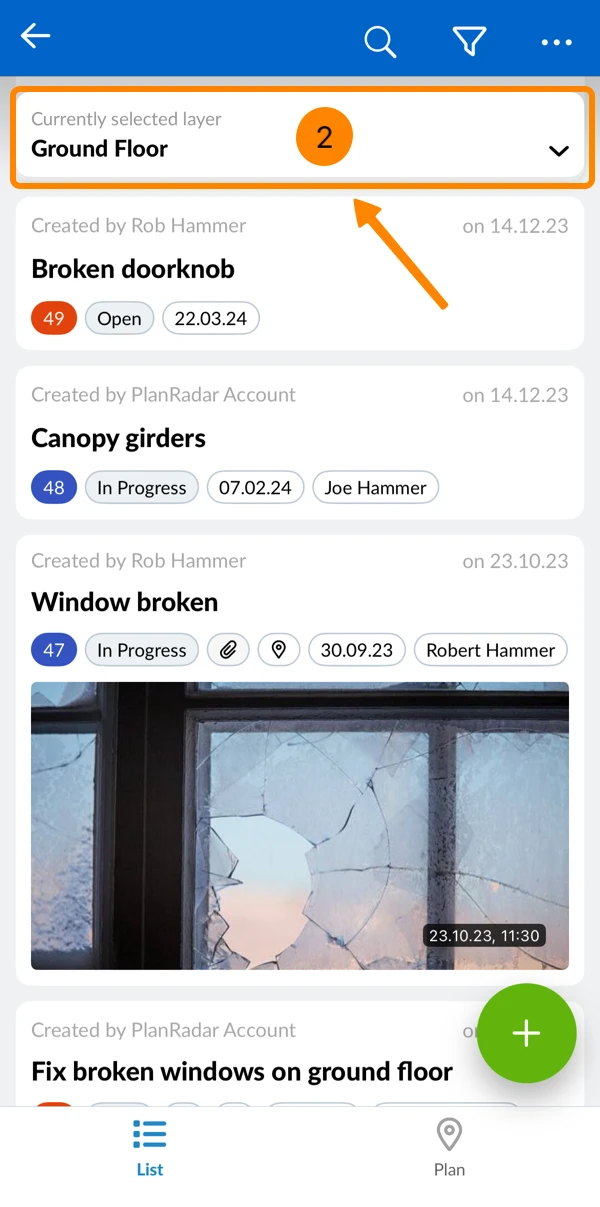
- Tap on a layer with a BIM model (marked by a cube icon)
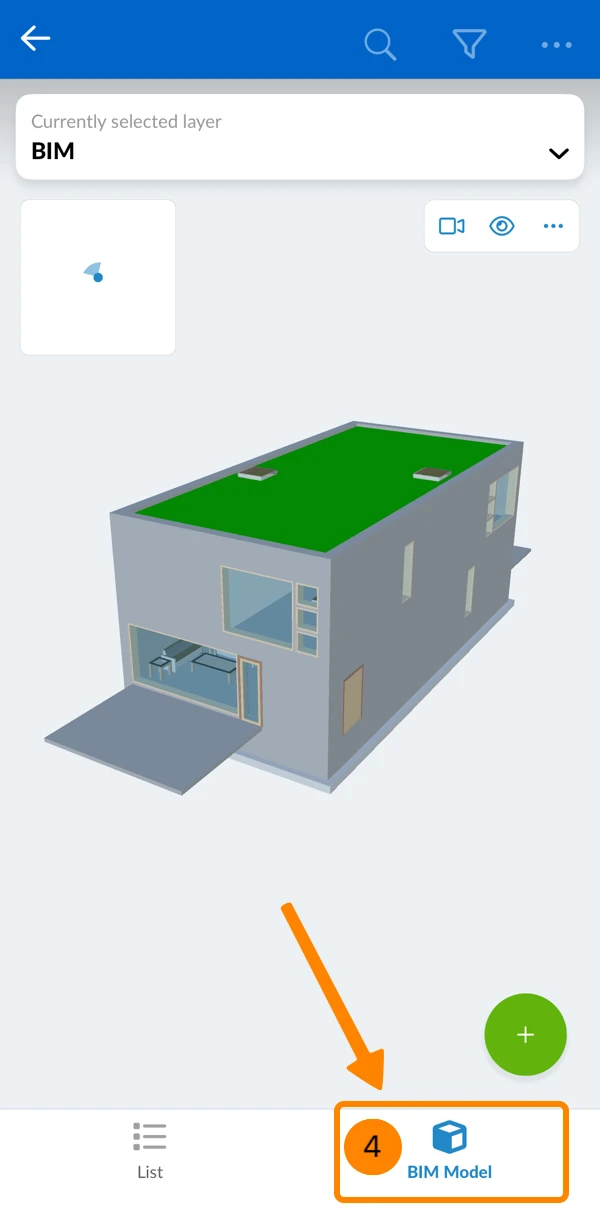
- Tap BIM Model
Model Tree & Floors
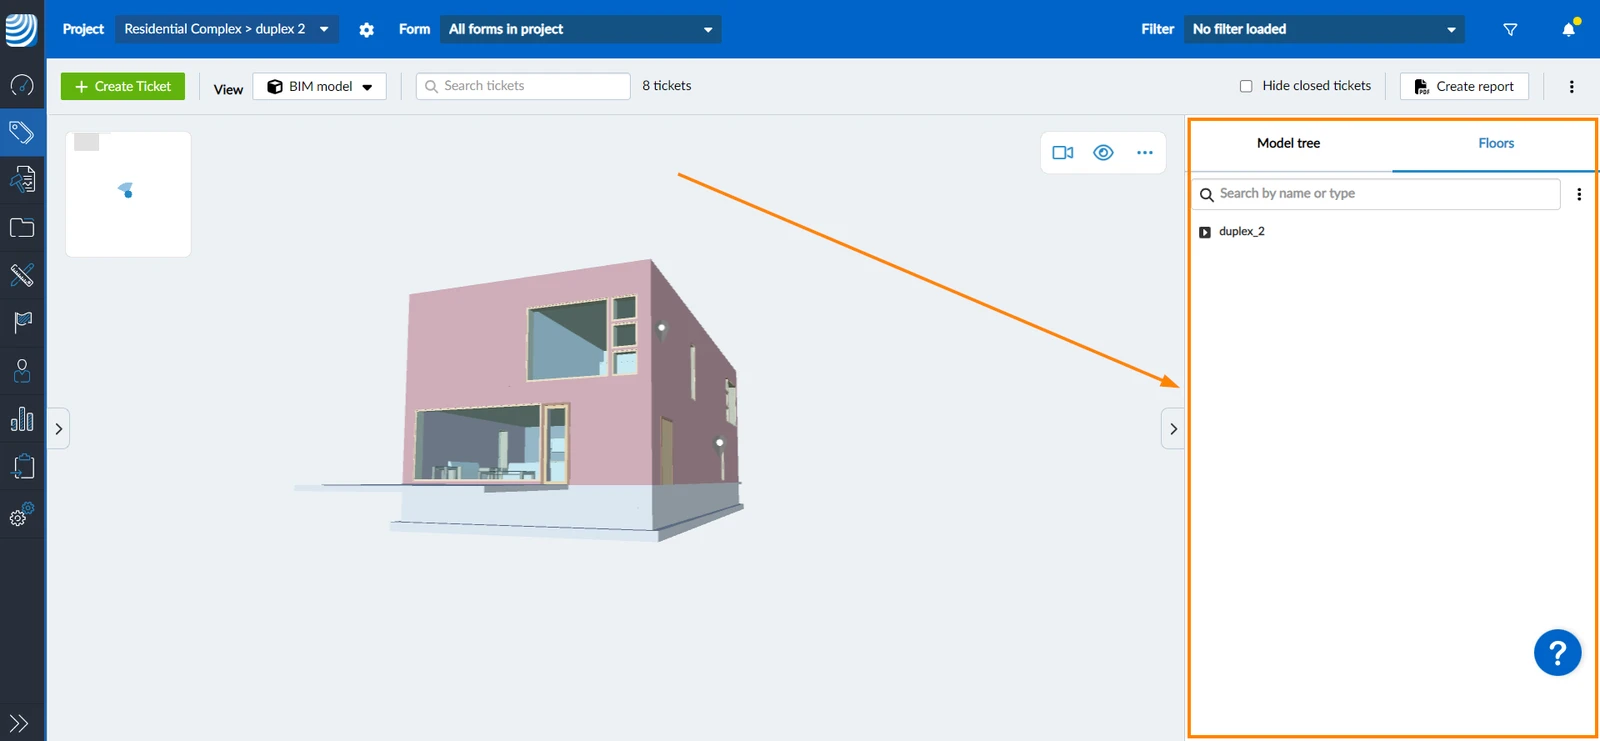
The right sidebar in the BIM model view has two tabs: Model tree lists the components of the model as a tree and Floors lists all levels of the model with a plan preview.
Model Tree
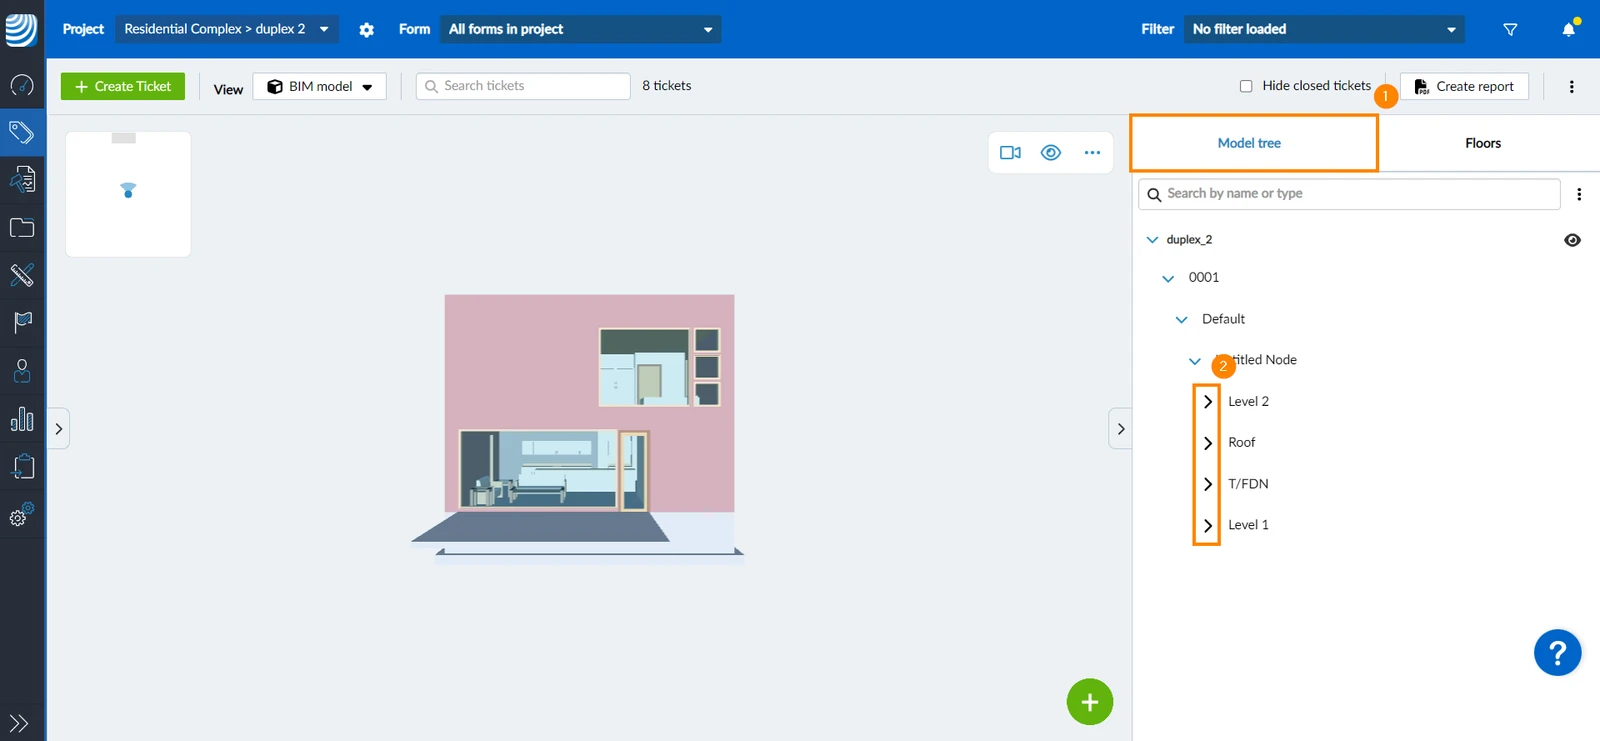
The model tree shows the model components as a tree according to the IFC standard.
To view the model tree:
- Click Model tree
- Click the side arrow next to the component to expand it and reveal the related elements.
Show Element Properties
To show an element's IFC properties:
- Click on the element either in the model tree or in the 3D view
- The IFC properties will appear in the sidebar under the model tree
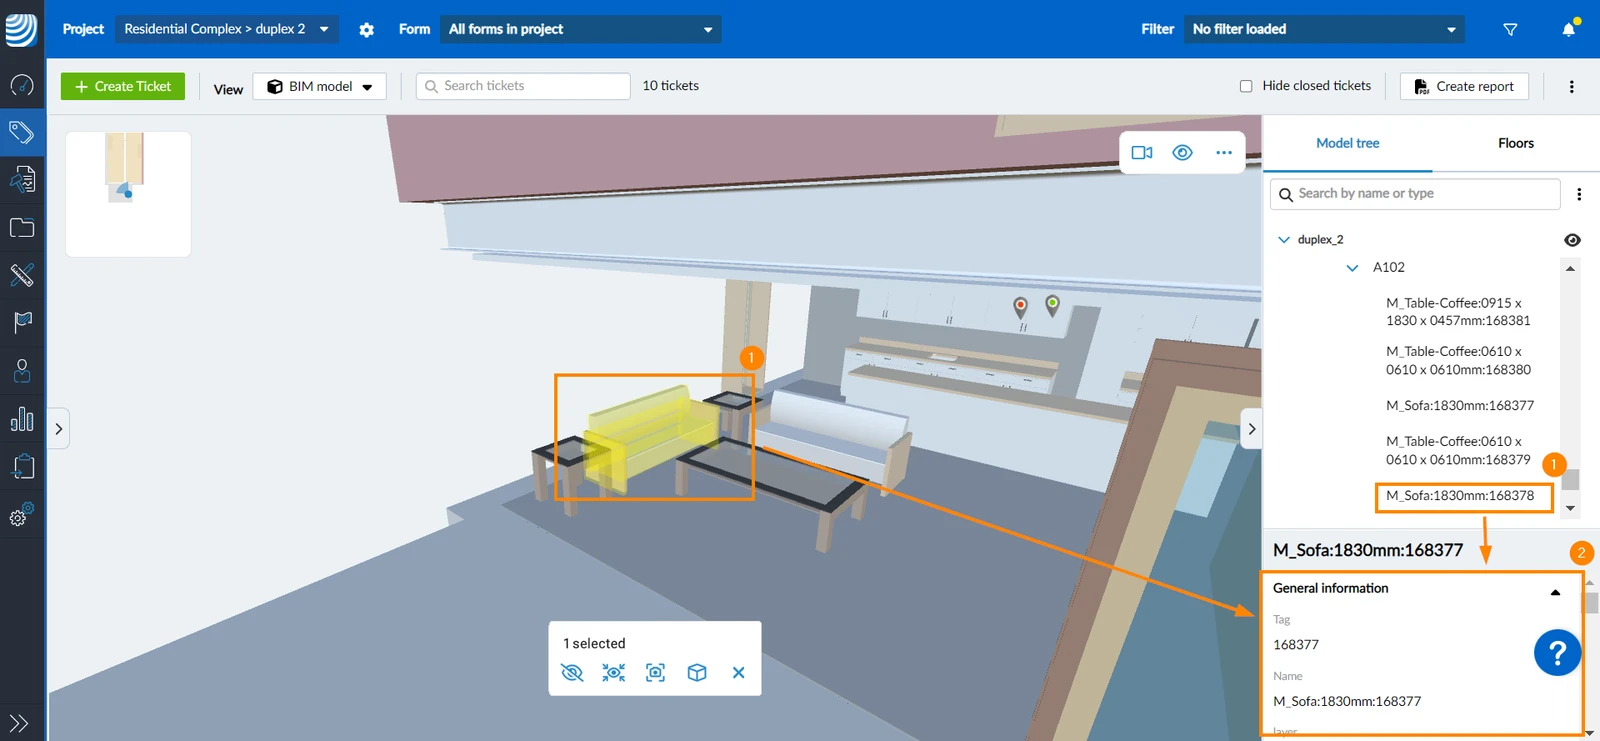
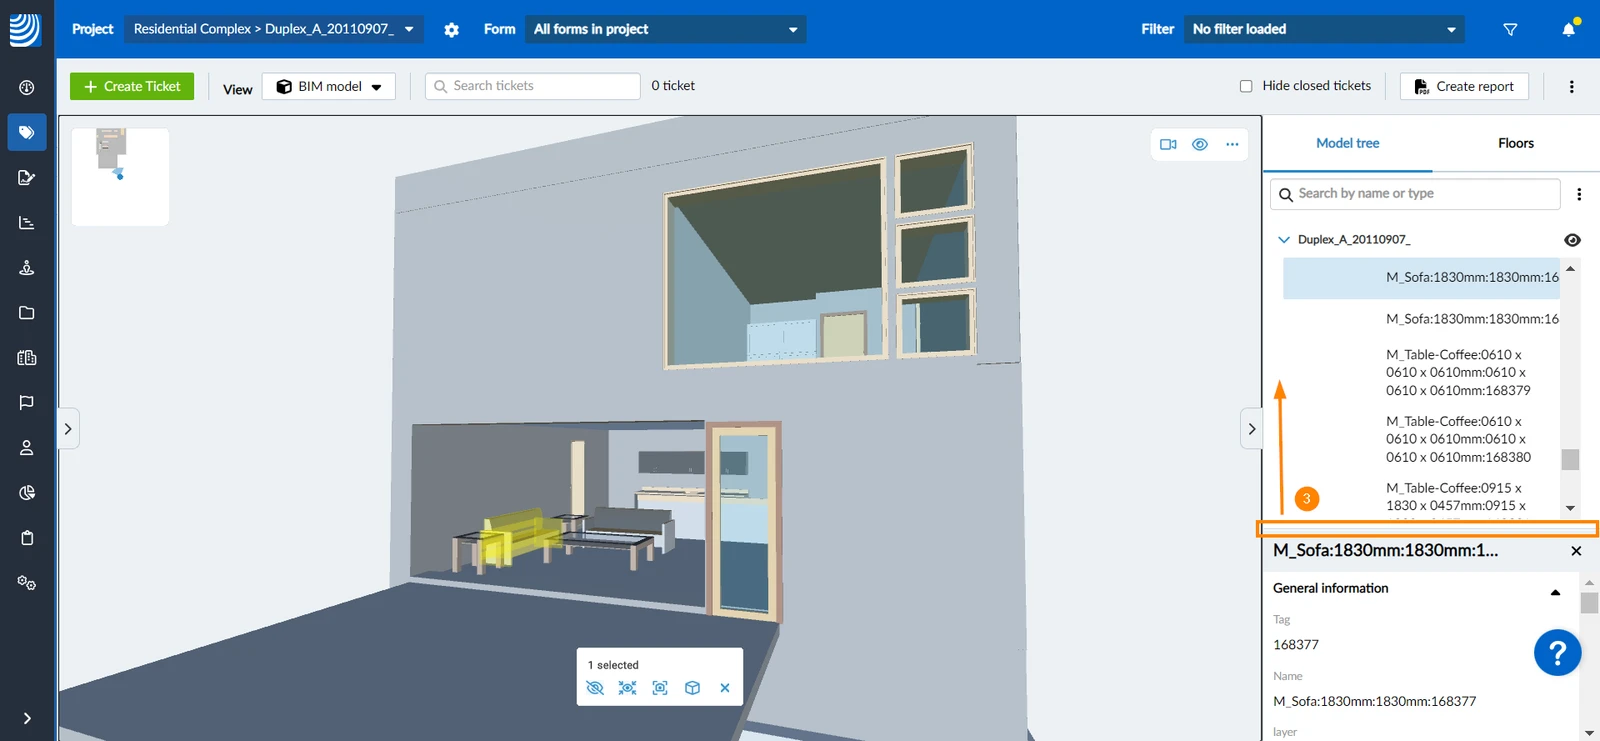
- Optional: drag the top of the properties panel to resize it
Search an Element
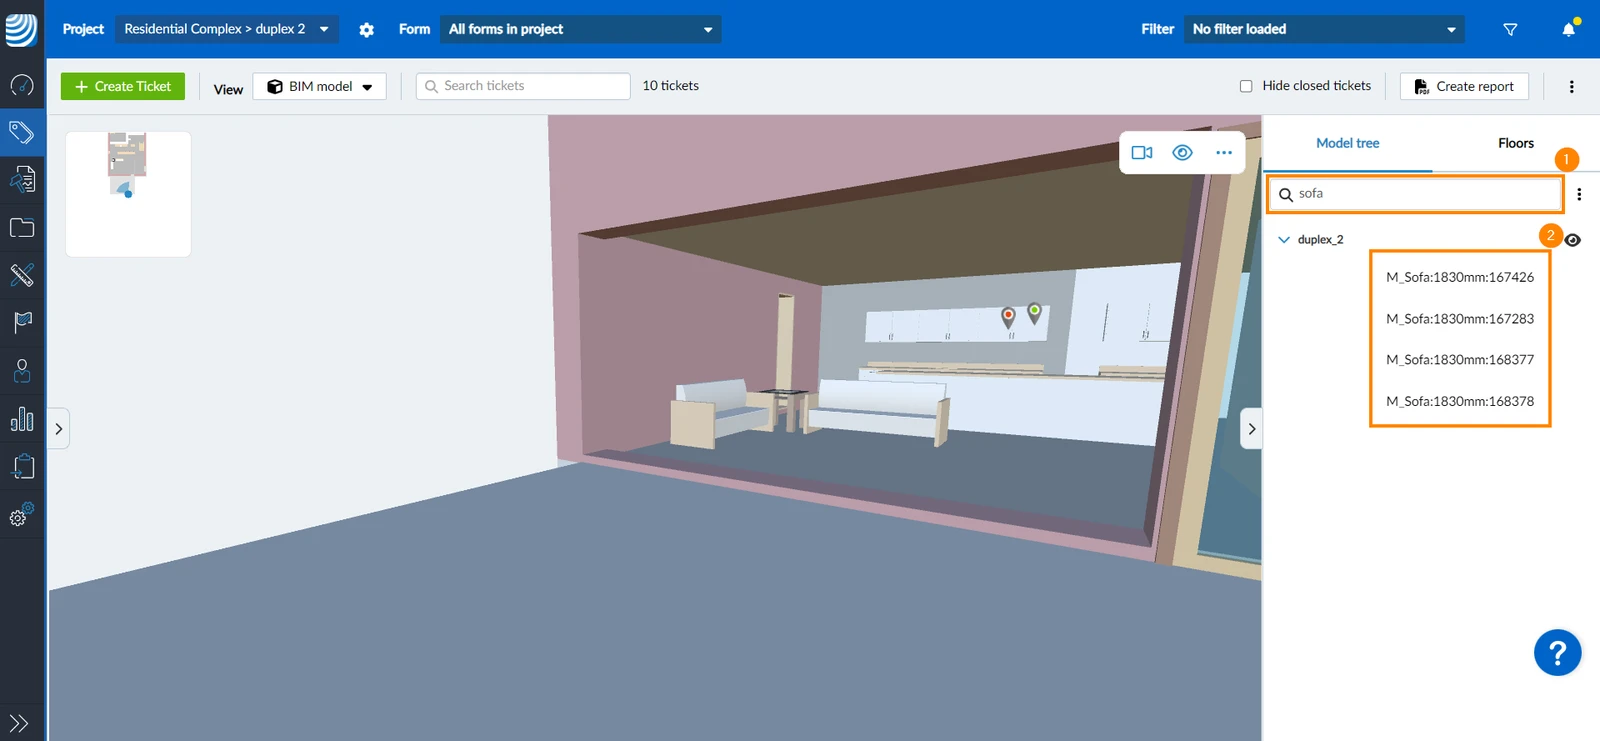
You can find an element by searching for it in the model tree. To search for an element:
- Type the element's name in the search bar
- The elements matching the search phrase will appear in the model tree
Floors
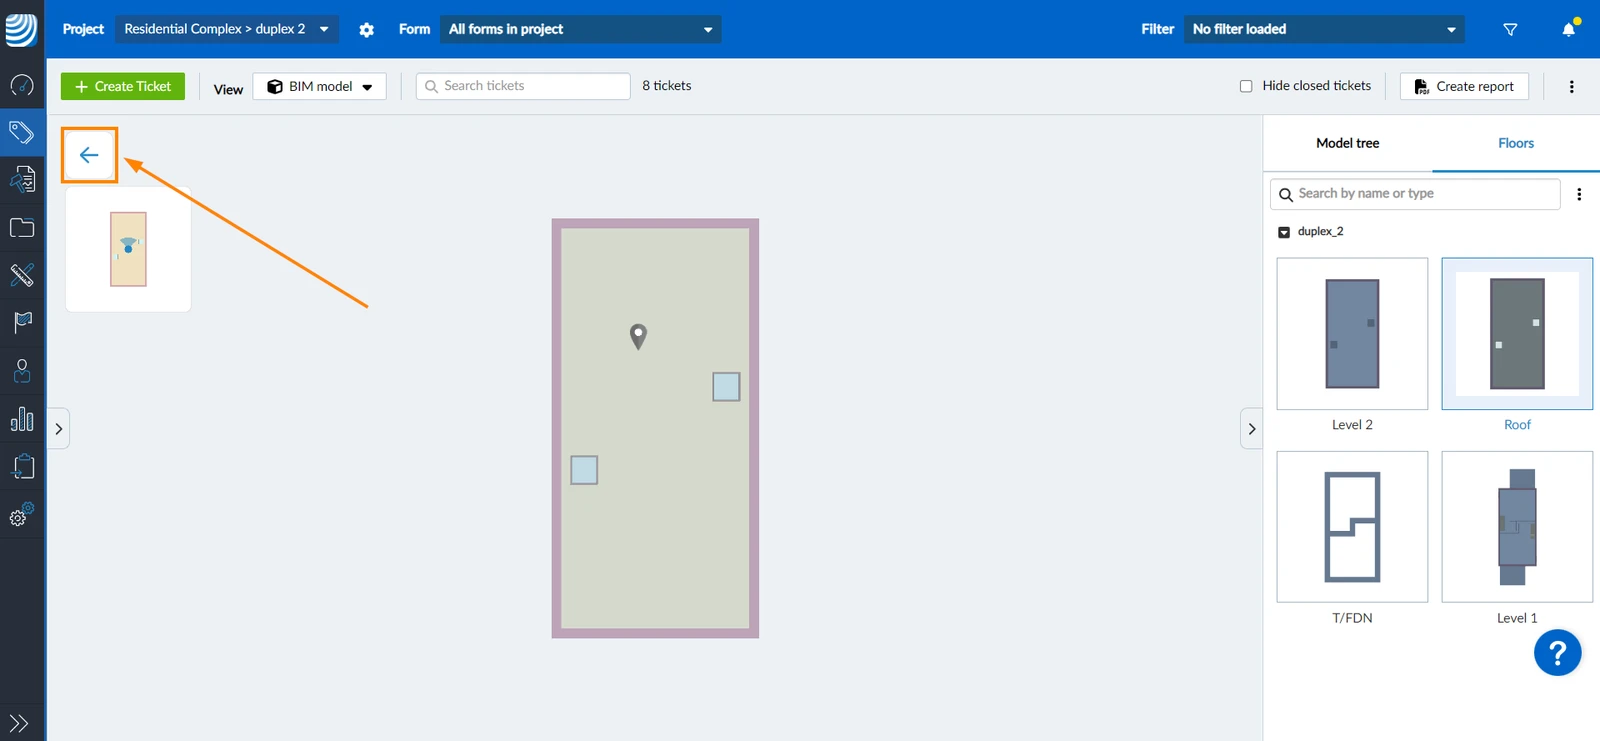
The floors section lists all floors of the model with a plan preview. To show a floor in an orthographic plan view:
- Click Floors
- Click the model name to expand it and show the different floors
- Click the floor you want to view in an orthographic plan view
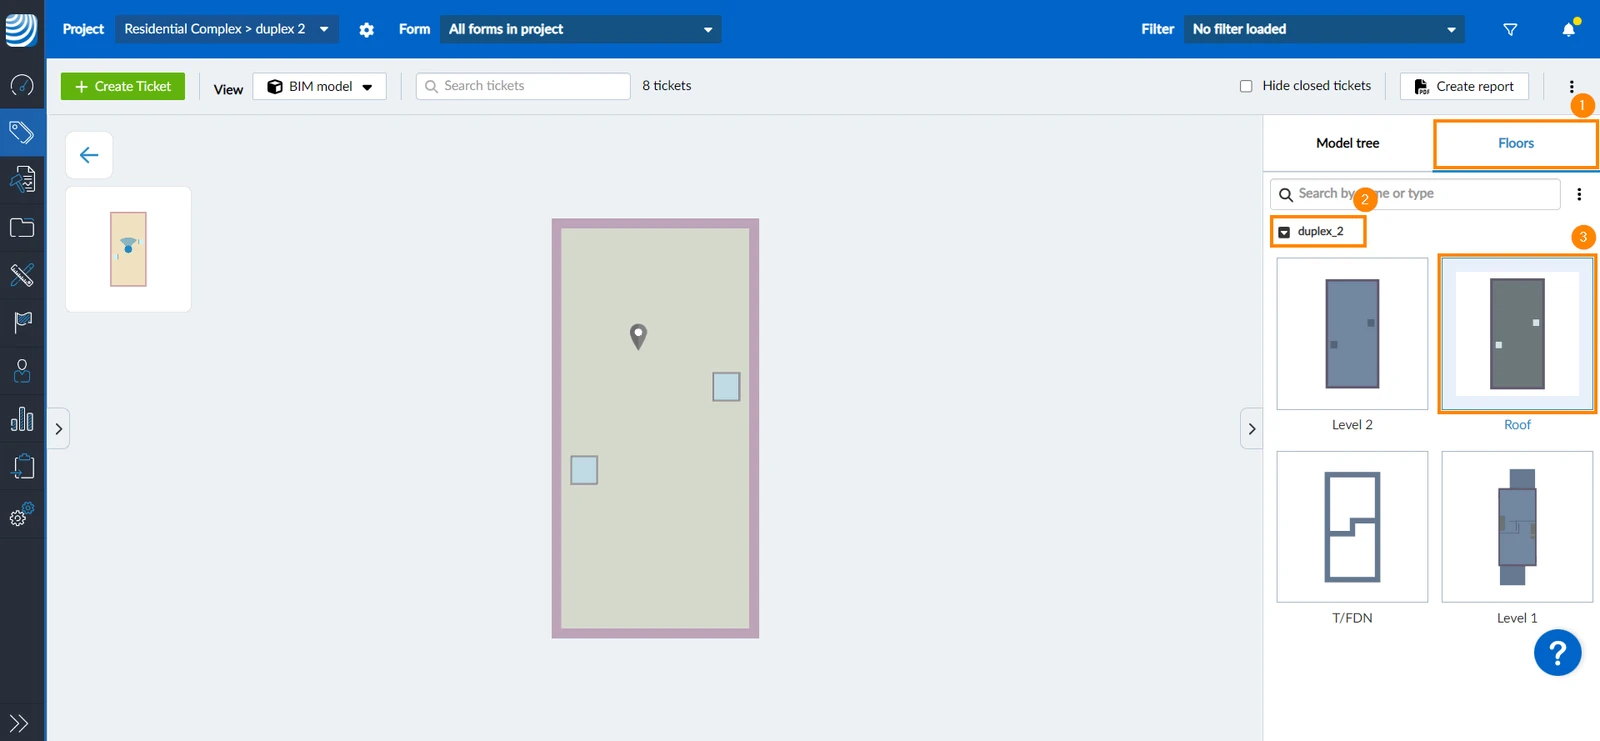
- To go back to showing the 3D model, click the back button
Model Tree
The Model Tree allows you to navigate through the components of the IFC Model Tree to display IFC properties, centre the viewer on that element or hide all others.
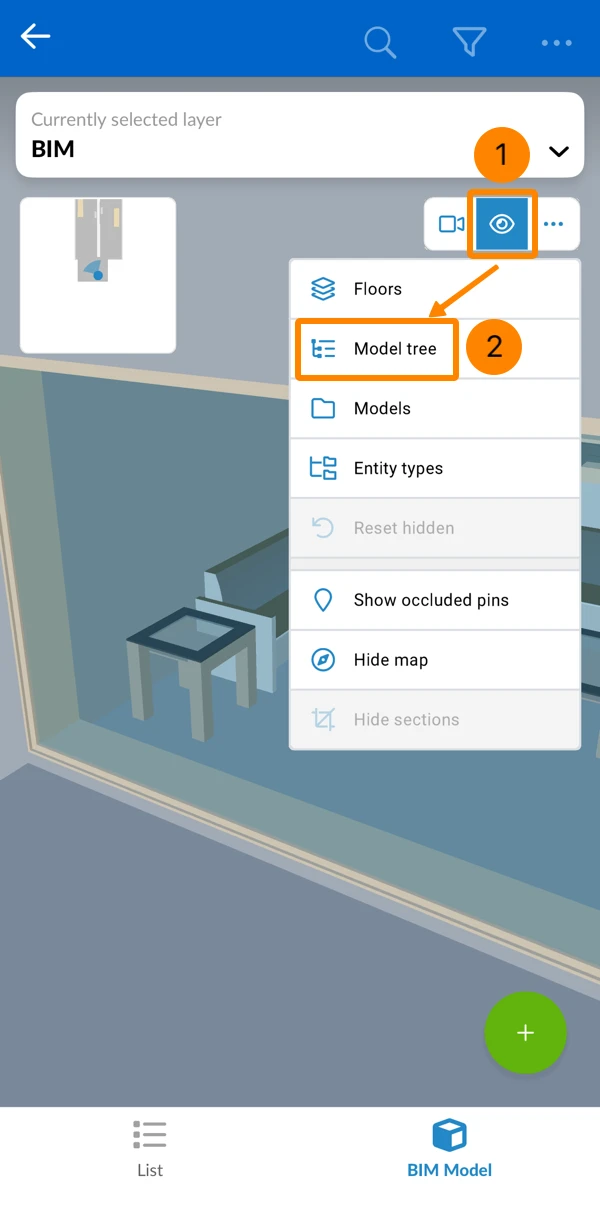
To navigate in the model tree:
- Tap the eye icon
- Tap Model tree
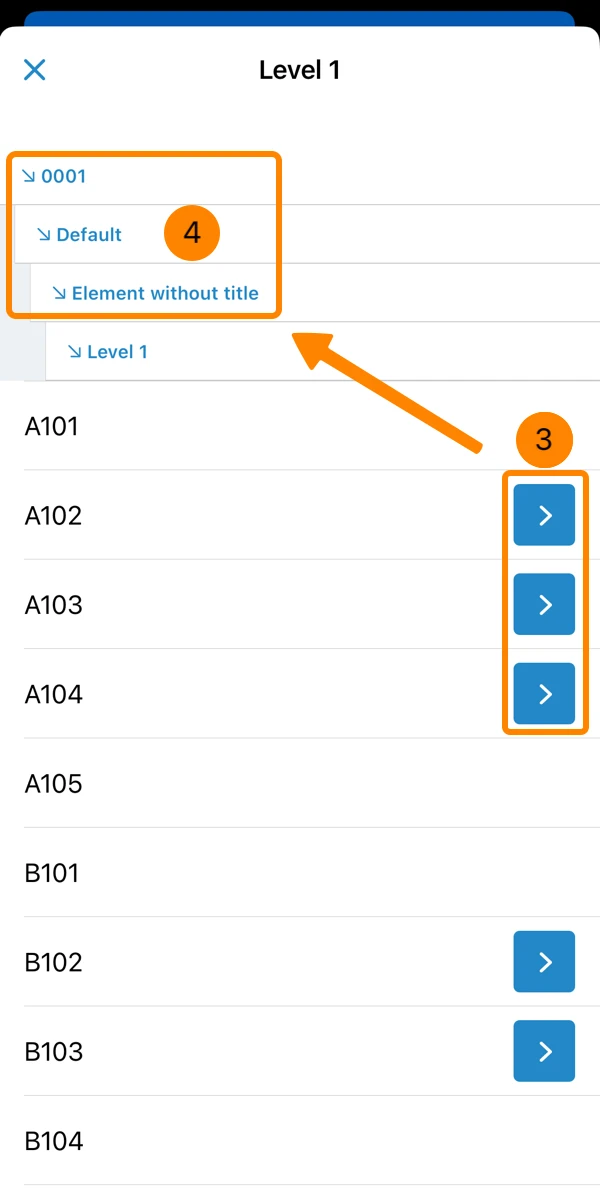
- Tap the arrow icons to go one level down
- Optional: Tap the previous level to go back up in the structure
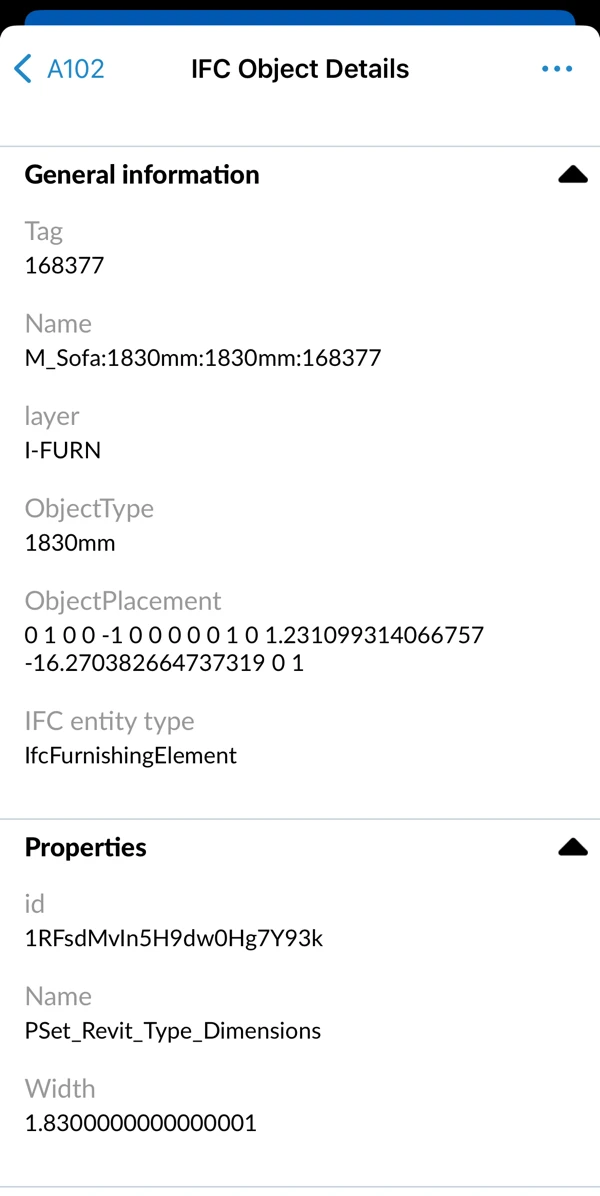
To show an object's IFC properties:
- Navigate to a level with objects (as described above)
- Tap an object e.g. M_Sofa
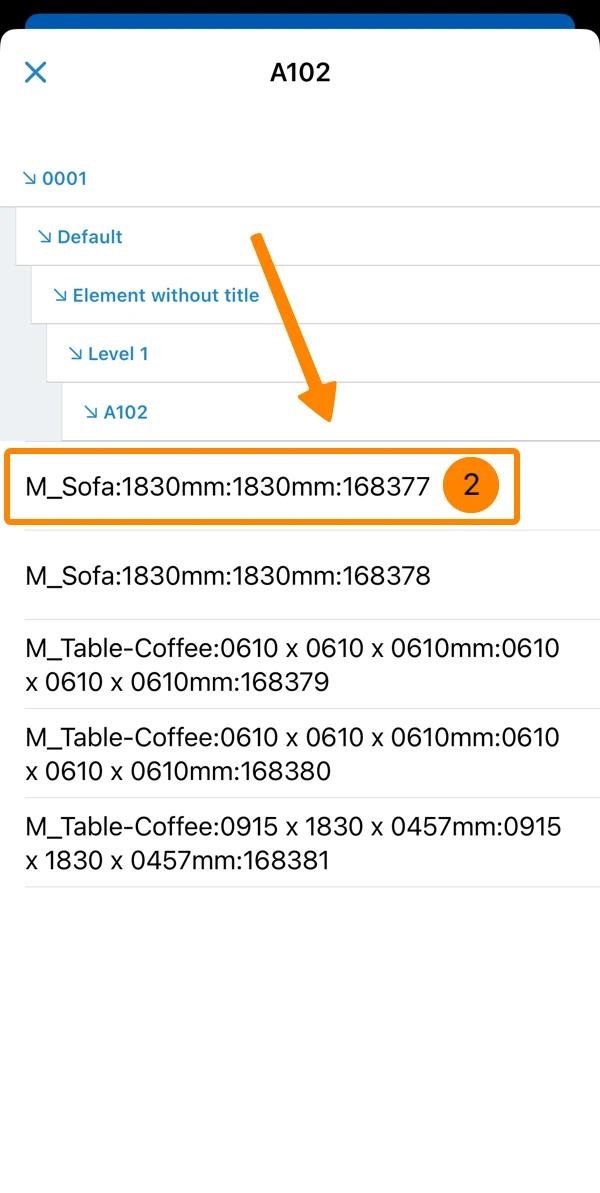
- View the IFC properties by scrolling down
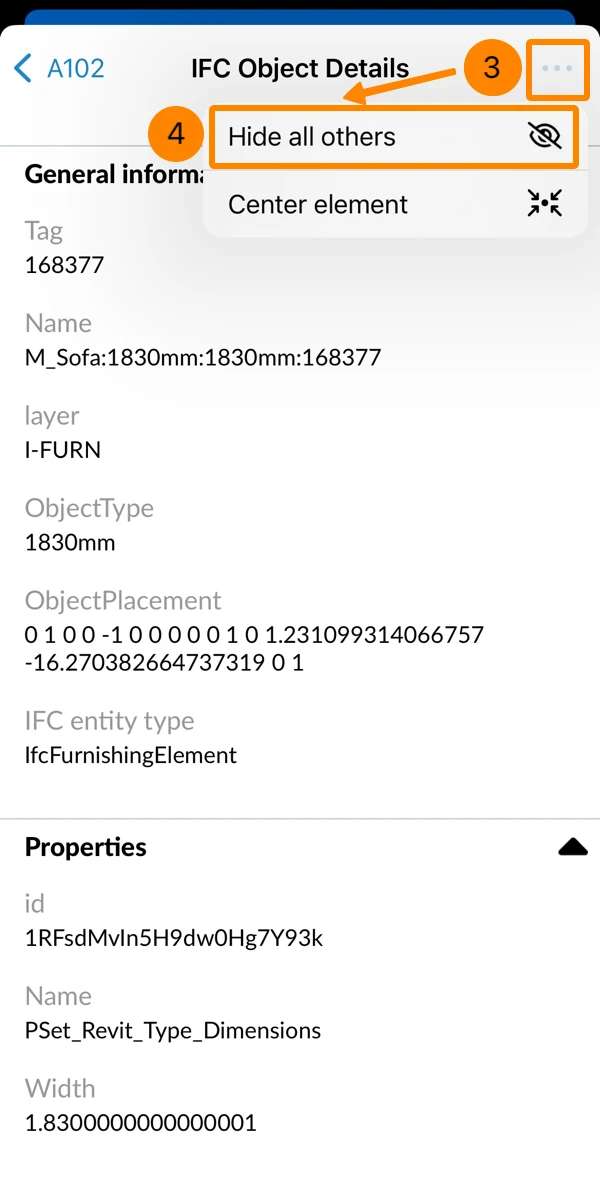
To display an object in the BIM viewer and hide all other objects:
- Navigate to a level with objects (as described above)
- Tap an object e.g. M_Sofa
- Open the More menu
- Tap Hide all others
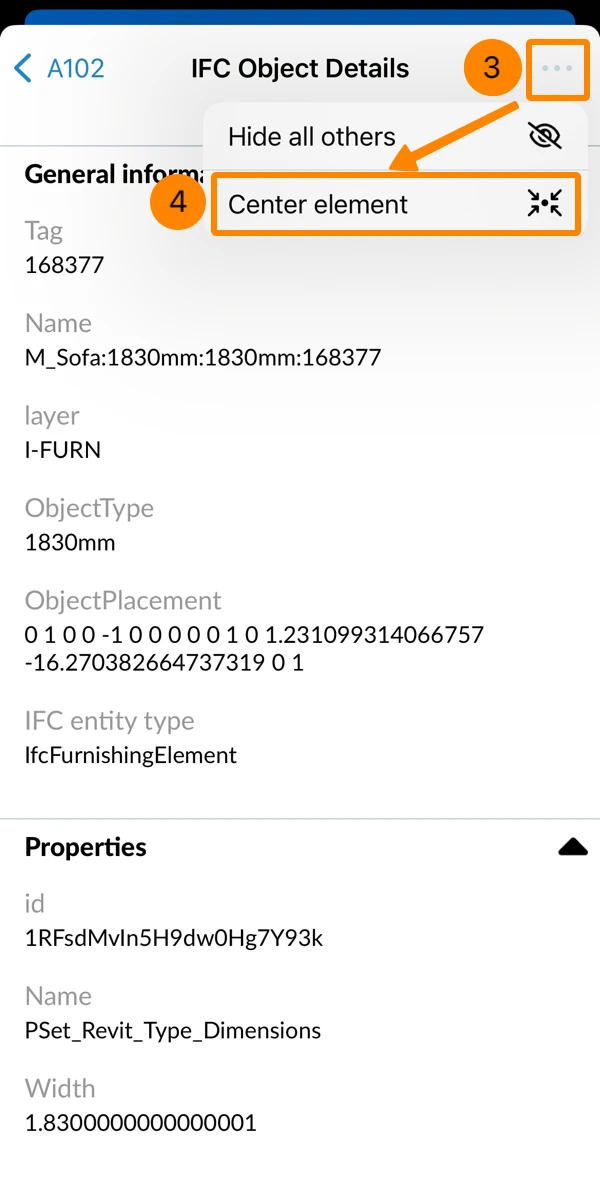
To center on an object in the BIM viewer:
- Navigate to a level with objects (as described above)
- Tap an object e.g. M_Sofa
- Open the More menu
- Tap Center element
Floors
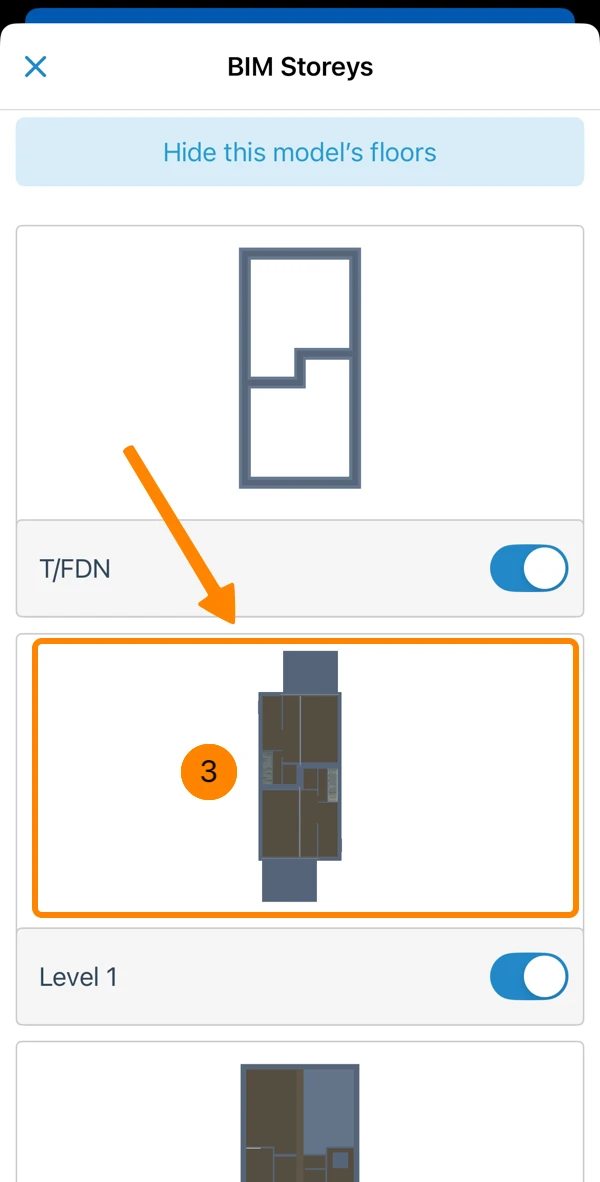
To show a floor in an orthographic plan view:
- Tap the eye icon
- Tap Floors
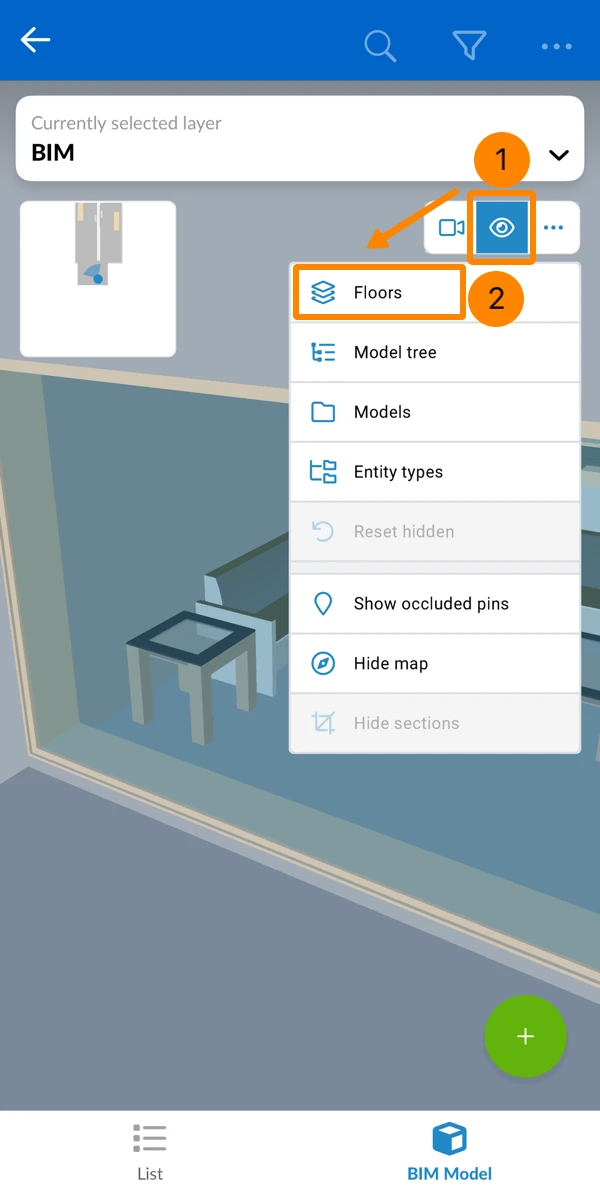
- Tap on a floor
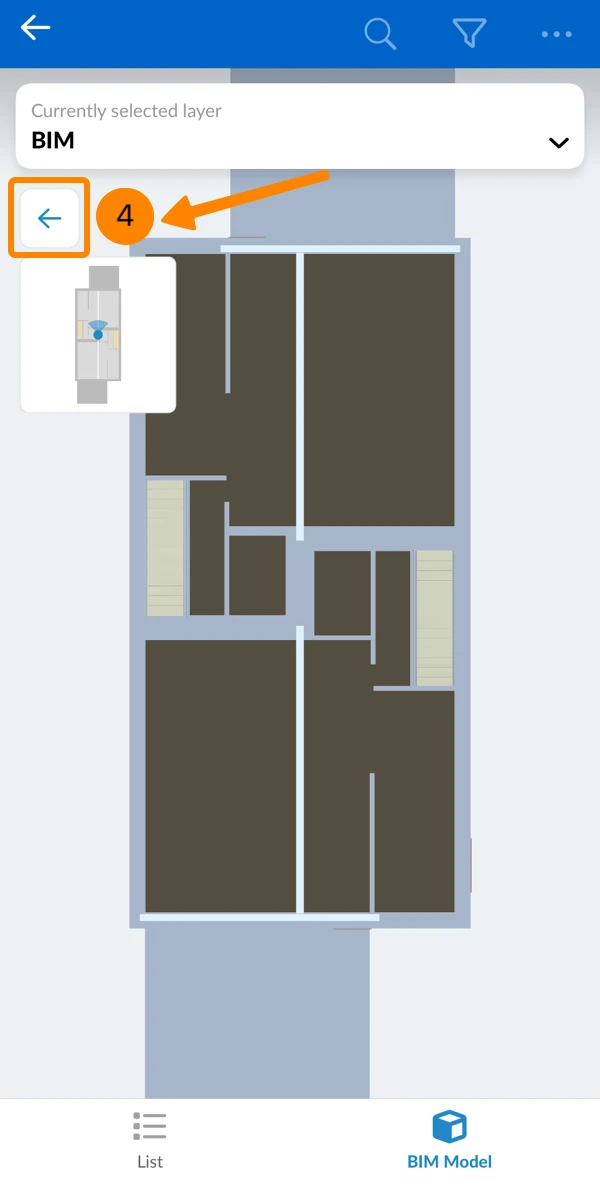
- Tap the back button to close the orthographic plan view
Camera Navigation
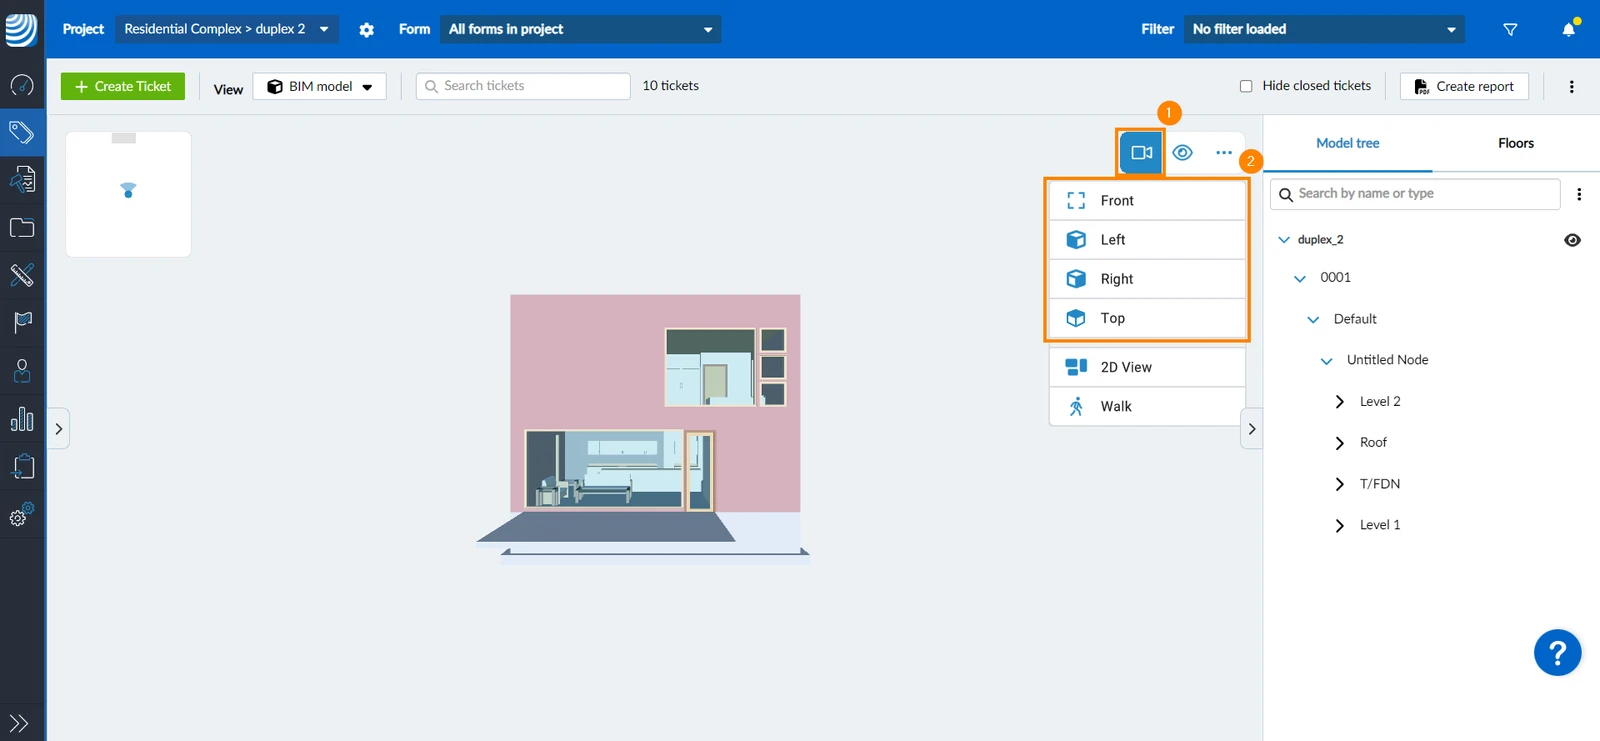
The 3D model is initially displayed from the front. There are three other predefined views to quickly view the whole model from the left, right or top.
Initially you are in free camera mode, which allows you to fly around the model and through elements. You can switch to walking mode at any time to activate gravity and wall collision, which allows for better indoor navigation, as you may be familiar with from PC games.
Select a Predefined View Orientation
To view the whole model from front, left, right or top:
- Click/tap the camera icon
- Click/tap Front, Left, Right, or Top
Free Camera Mode
The free camera mode allows you to fly around the model and through elements. It is active by default.
Navigating in the free camera mode, you can use the arrow and the WASD keys on the keyboard as well as the mouse/touchpad or a touch screen.
It is best to use a combination of mouse and keyboard controls, if available.
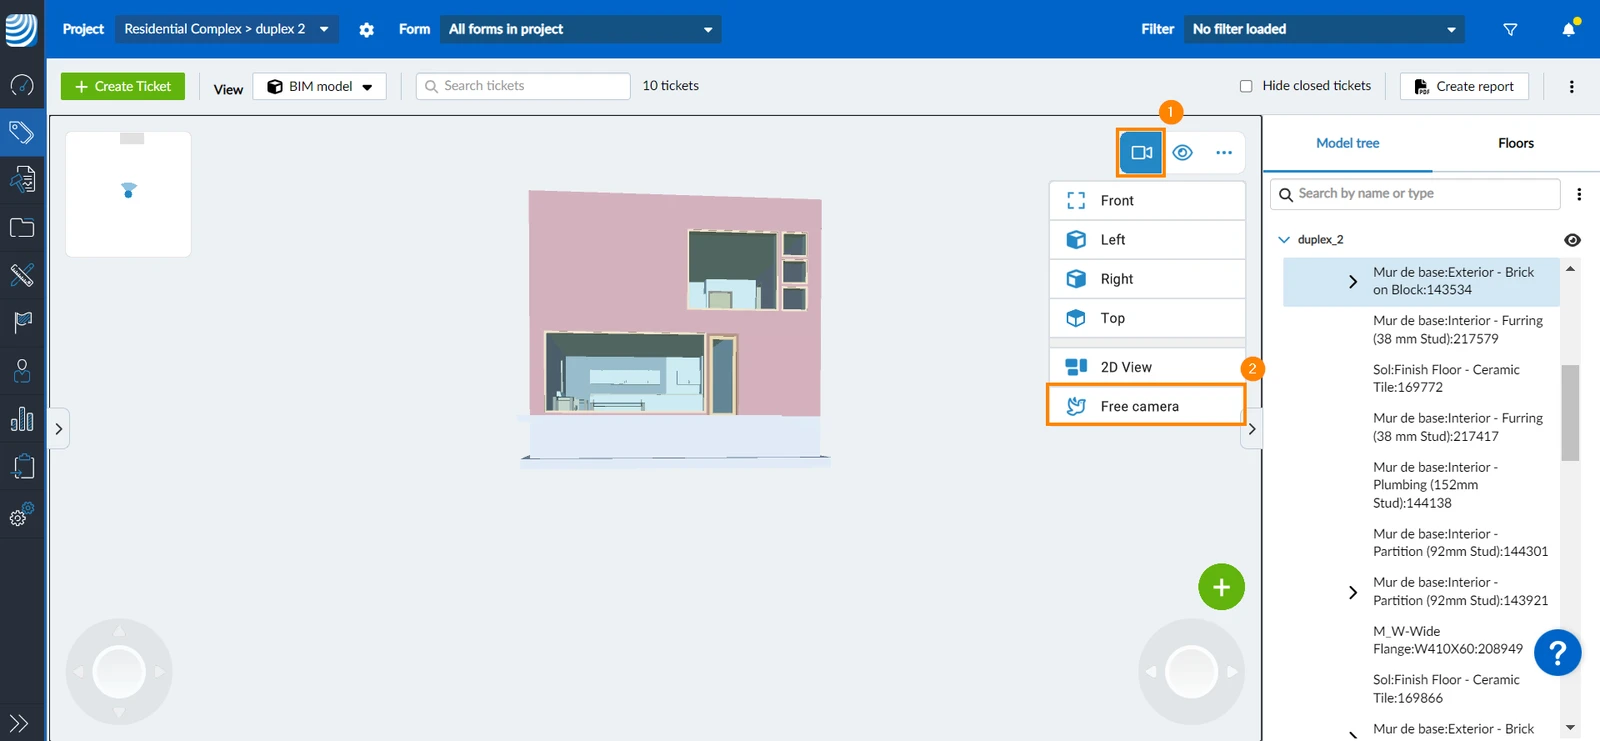
To set the mode to Free camera (while you are in walking mode):
- Click the camera icon
- Click Free camera
- You can Rotate the Camera around a Point, Move the Camera Forwards/Backwards, Move the Camera Sidewards and Up/Down, and Center the Camera on a Selected Element as explained below.
To set the mode to Free camera (while you are in walking mode):
- Tap the camera icon
- Tap Free camera
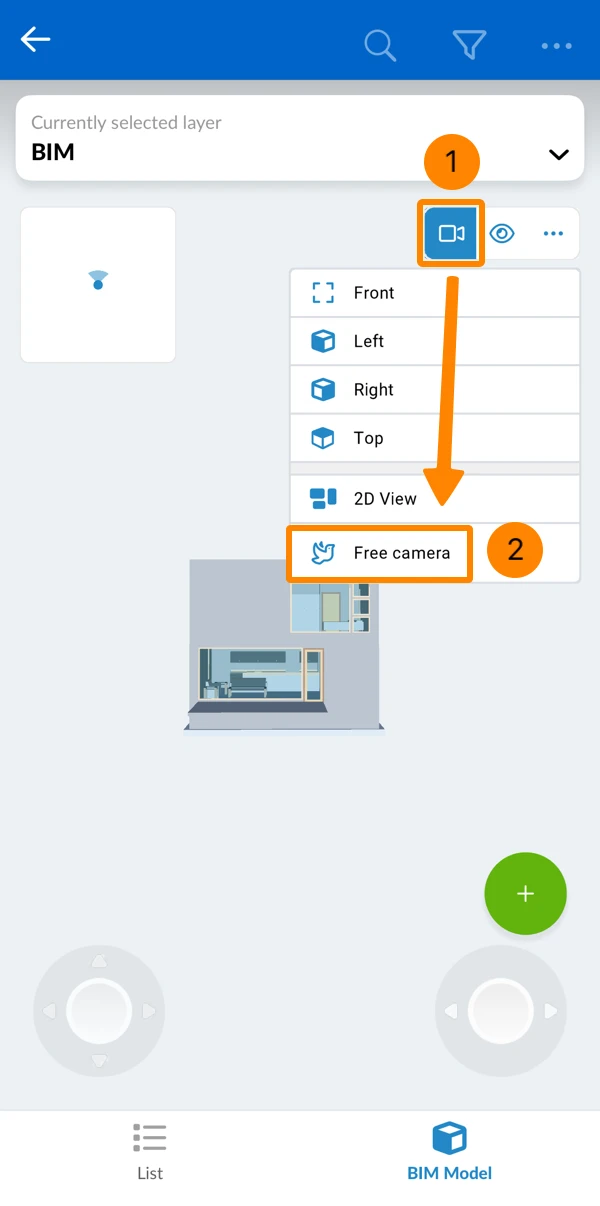
Rotate the Camera around a Point
- Click and hold anywhere on the model to set the pivot point
- Drag the mouse cursor to tilt and rotate the model accordingly
Or use the arrow keys on your keyboard instead:
- Press right to rotate the 3D model counterclockwise
- Press left to rotate the 3D model clockwise
- Press up to tilt the model backward, showing more of its bottom side
- Press down to tilt the model forward, revealing more of its top side
- Tap and hold anywhere on the model to set the pivot point
- Drag your finger to tilt and rotate the model accordingly
Move the Camera Forwards/Backwards
- Scroll up with your mouse wheel to move forward
- Scroll down with your mouse wheel to move backward
- Spread two fingers to move forward (like zooming in)
- Pinch in two fingers to move backward (like zooming out)
Move the Camera Sidewards and Up/Down
- Right-click and hold
- Drag your mouse in the direction where you want to move the camera
Alternatively, use the WASD keys:
- Press W to move the camera up
- Press A to move the camera to the left
- Press S to move the camera down
- Press D to move the camera to the right
- Hold two fingers on the touchscreen
- Move them simultaneously in the direction where you want to move the camera
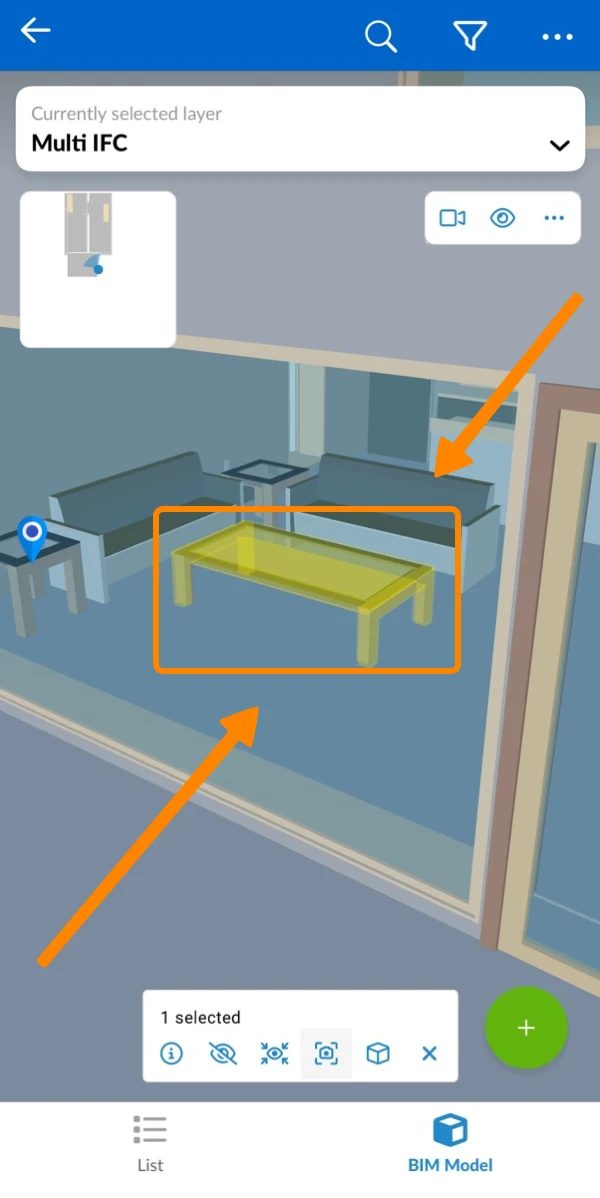
Center the Camera on a Selected Element in the 3D View
- Click on the element on which you want to center the camera
- Click the Center icon
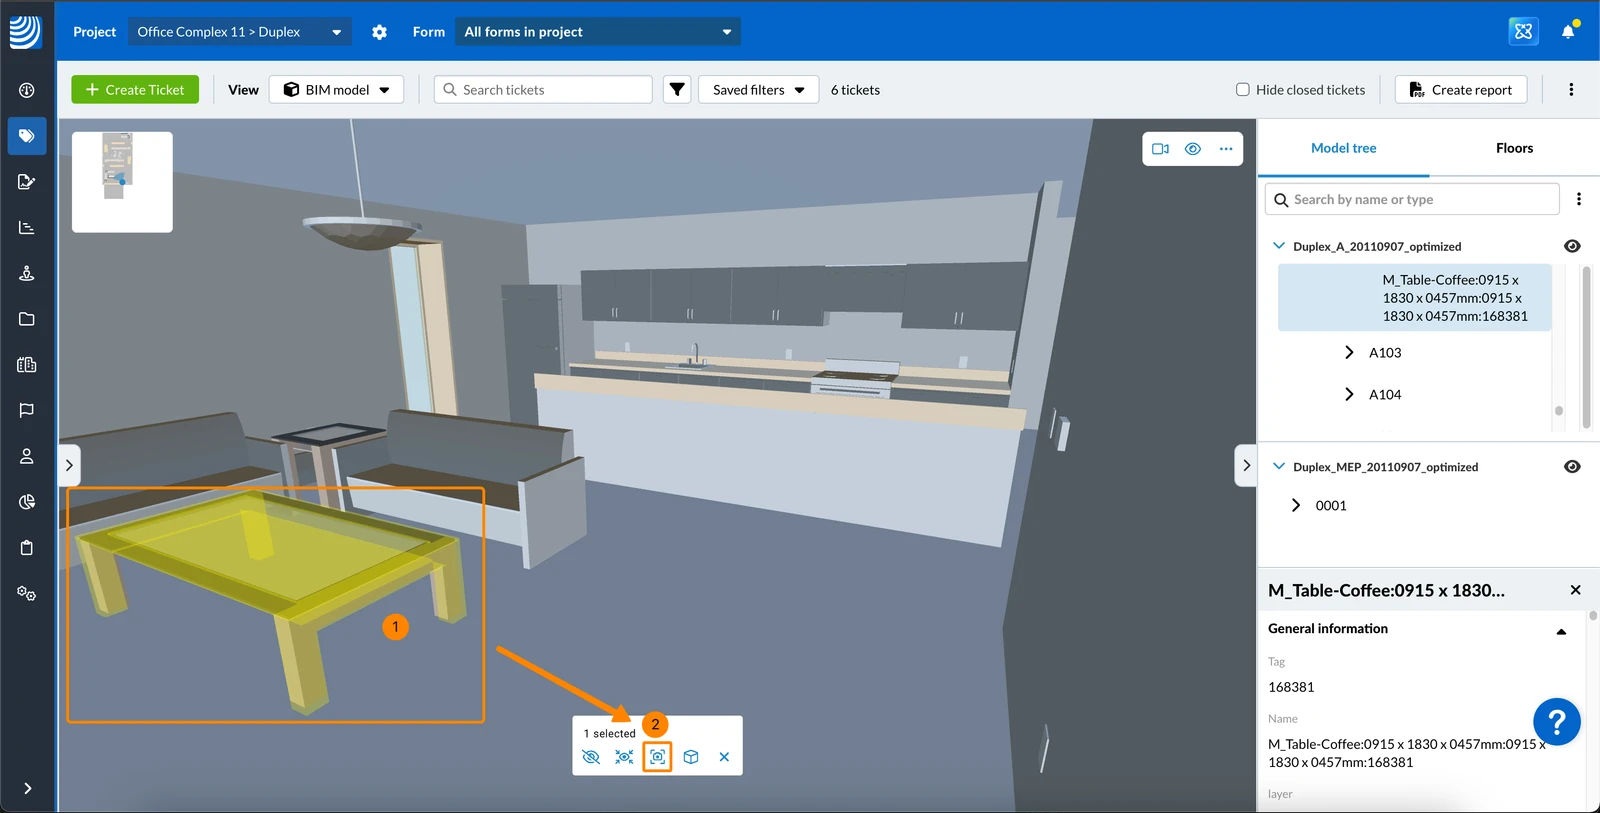
- See the camera centered on the element
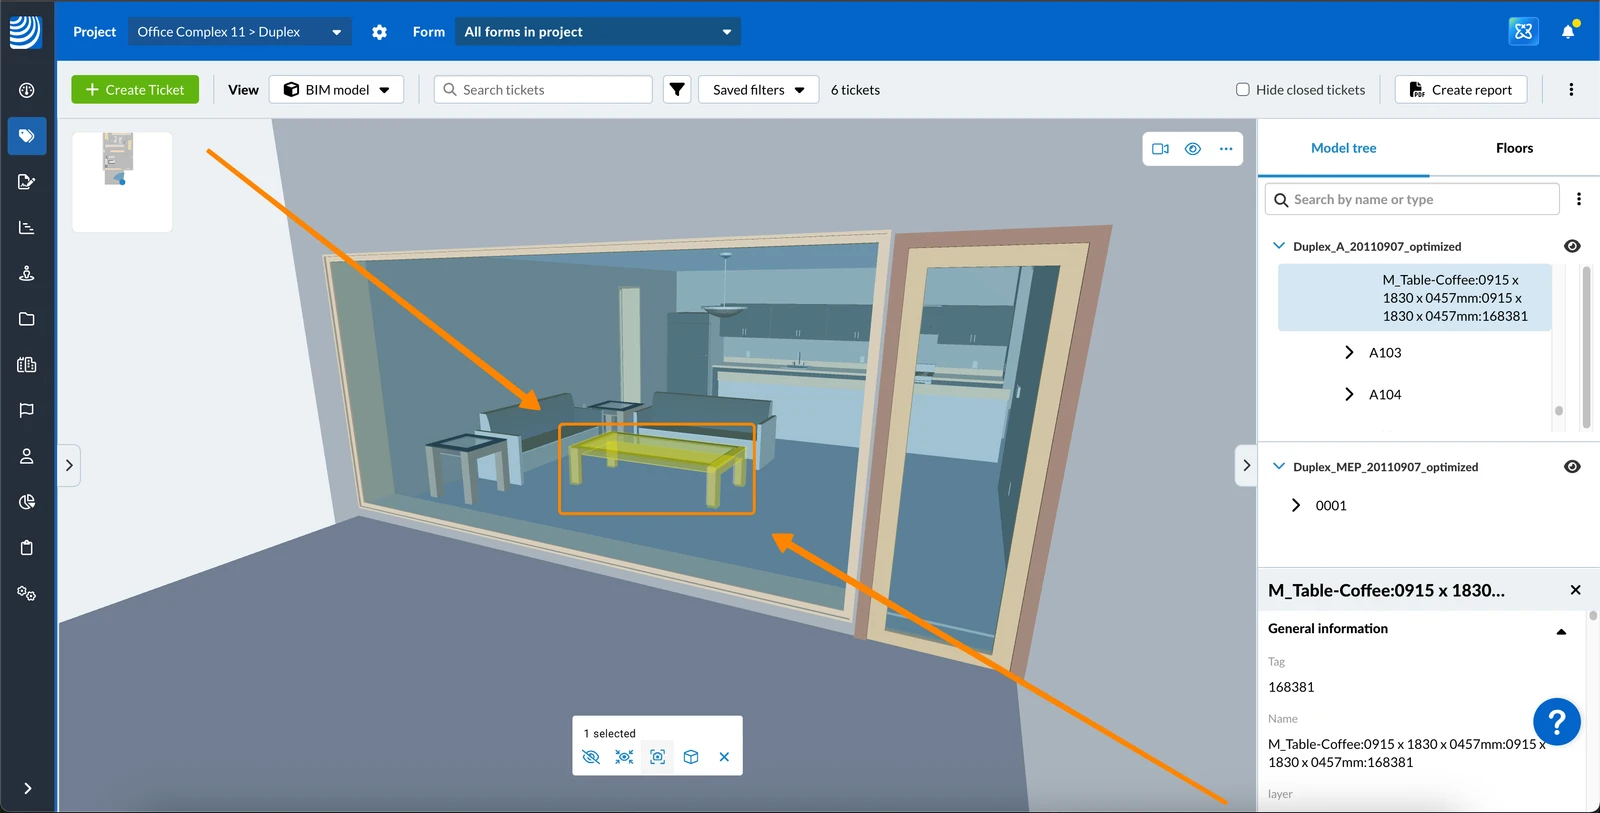
- Tap on the element on which you want to center the camera
- Tap the Center icon
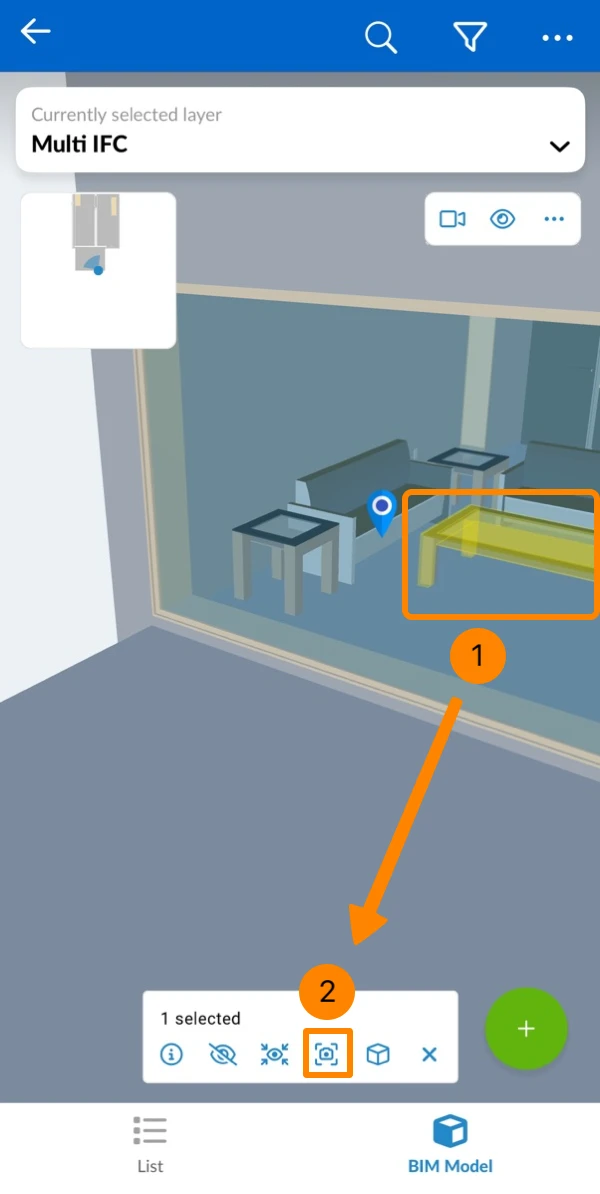
- See the camera centered on the element
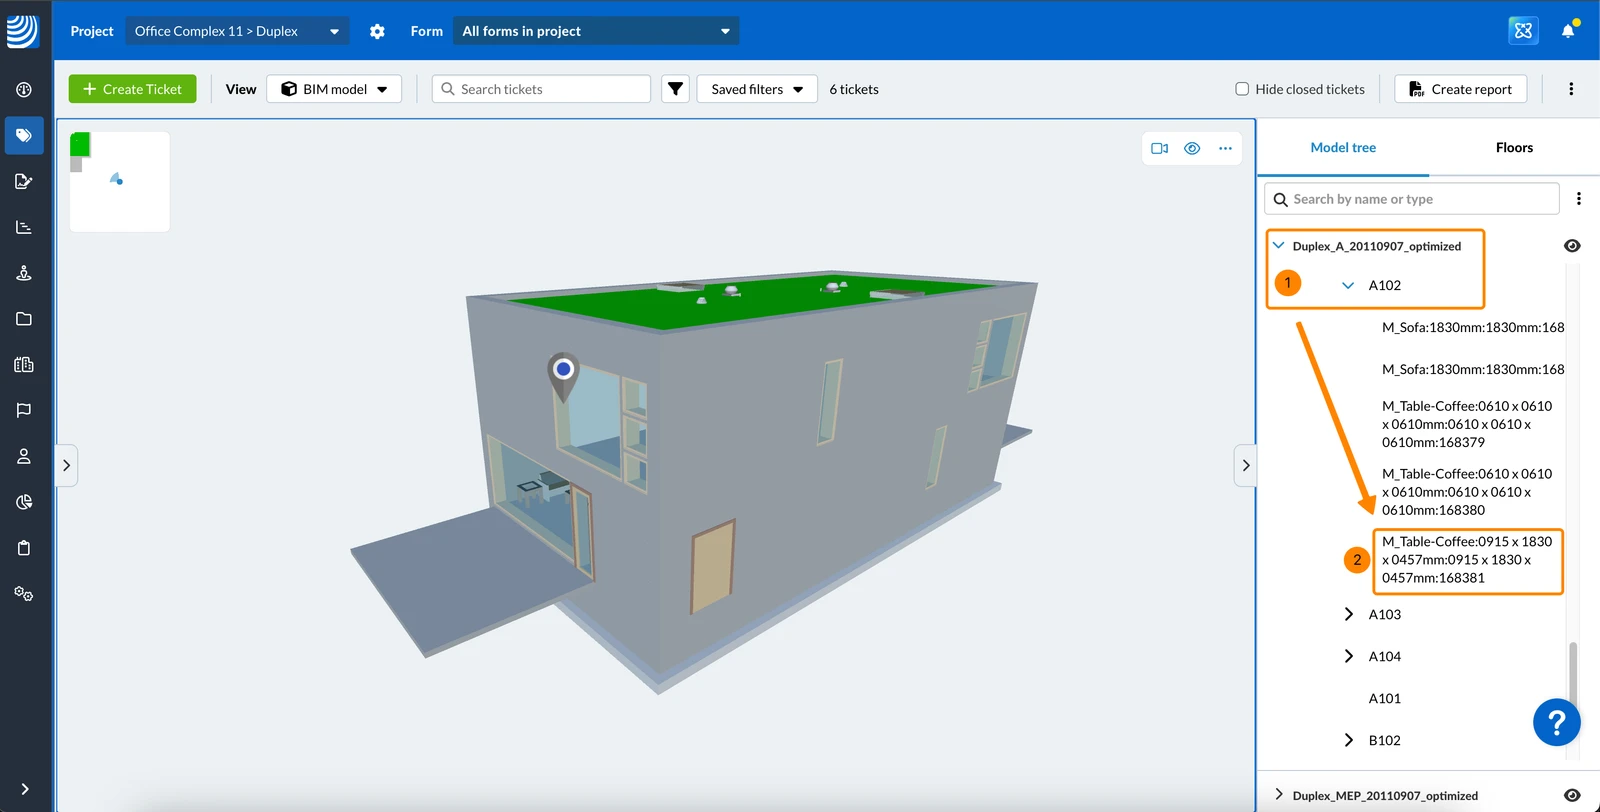
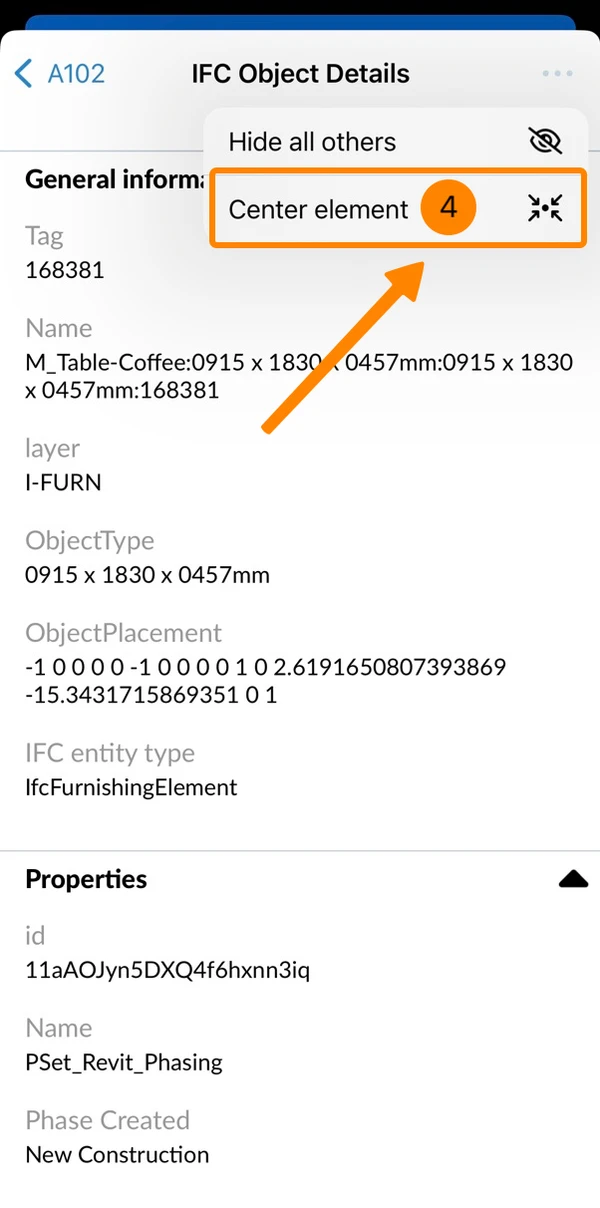
Center the Camera on a Element in the Model Tree
- Navigate to the element in the Model Tree
- Click on the element
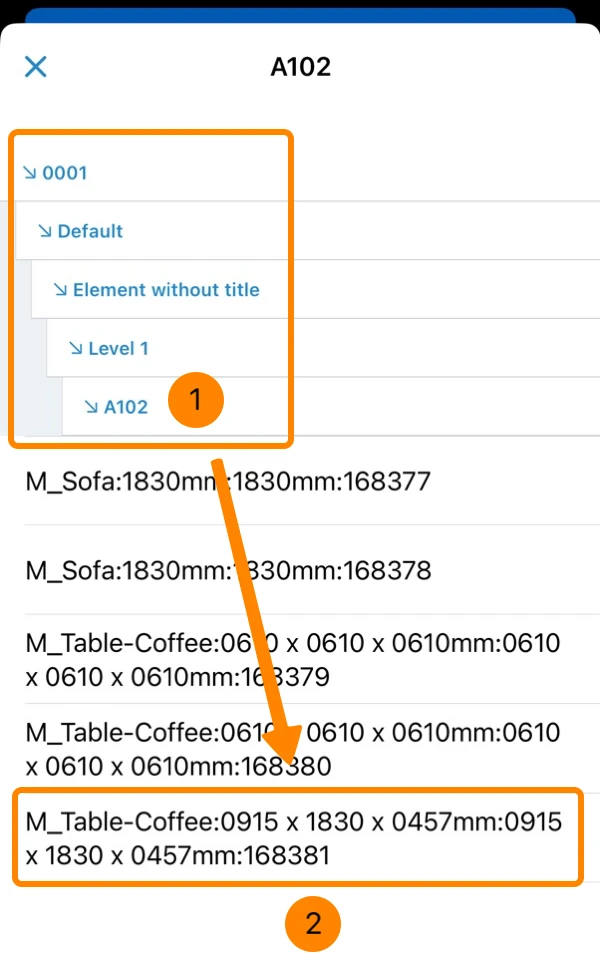
- Navigate to the element in the Model Tree
- Tap on the element
- Open the More menu
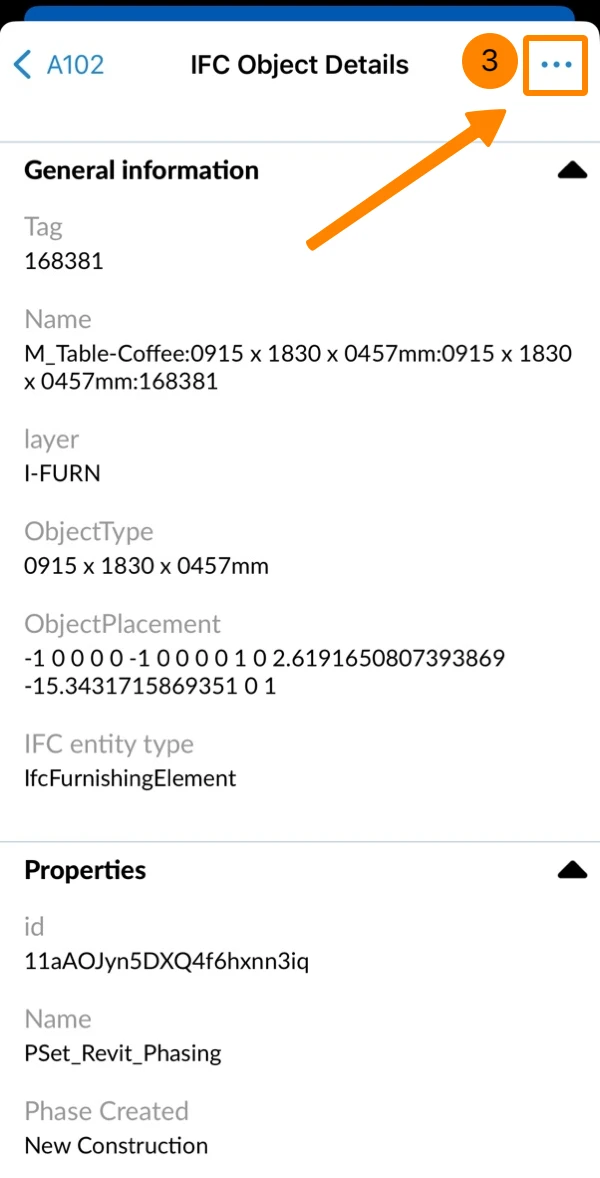
- Tap Center element
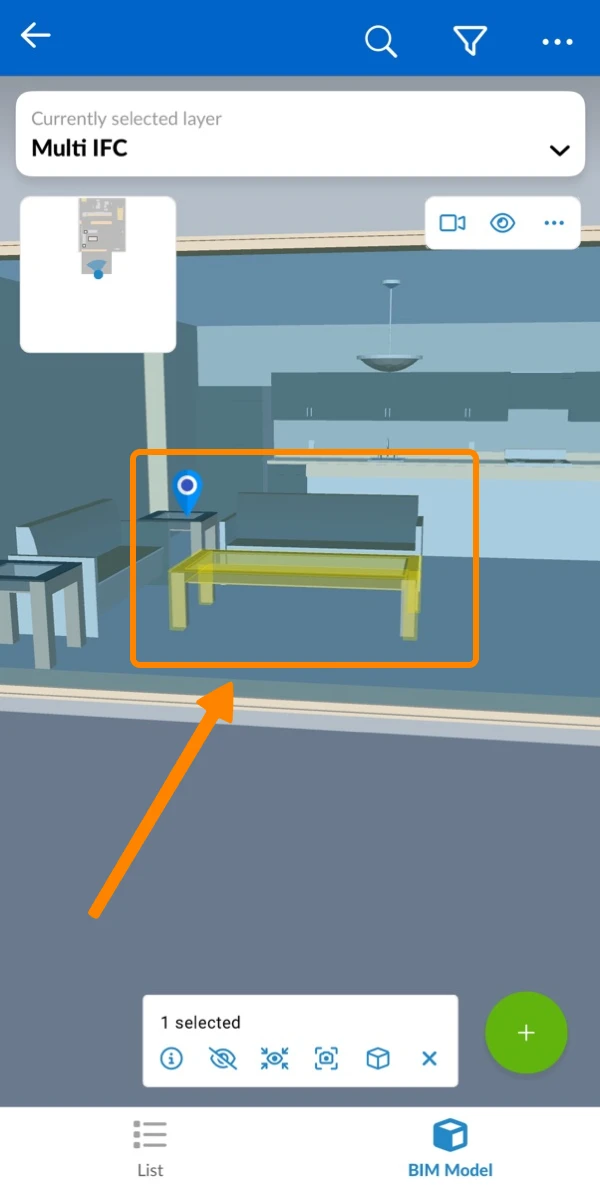
- See the camera centered on the element
Walking Mode
The walking mode is recommended for indoor navigation and has wall collision (you cannot fly through walls) and gravity to keep you on the floor and make it easier to look around as you walk. Staircases are recognised and you can climb them just by walking on them.
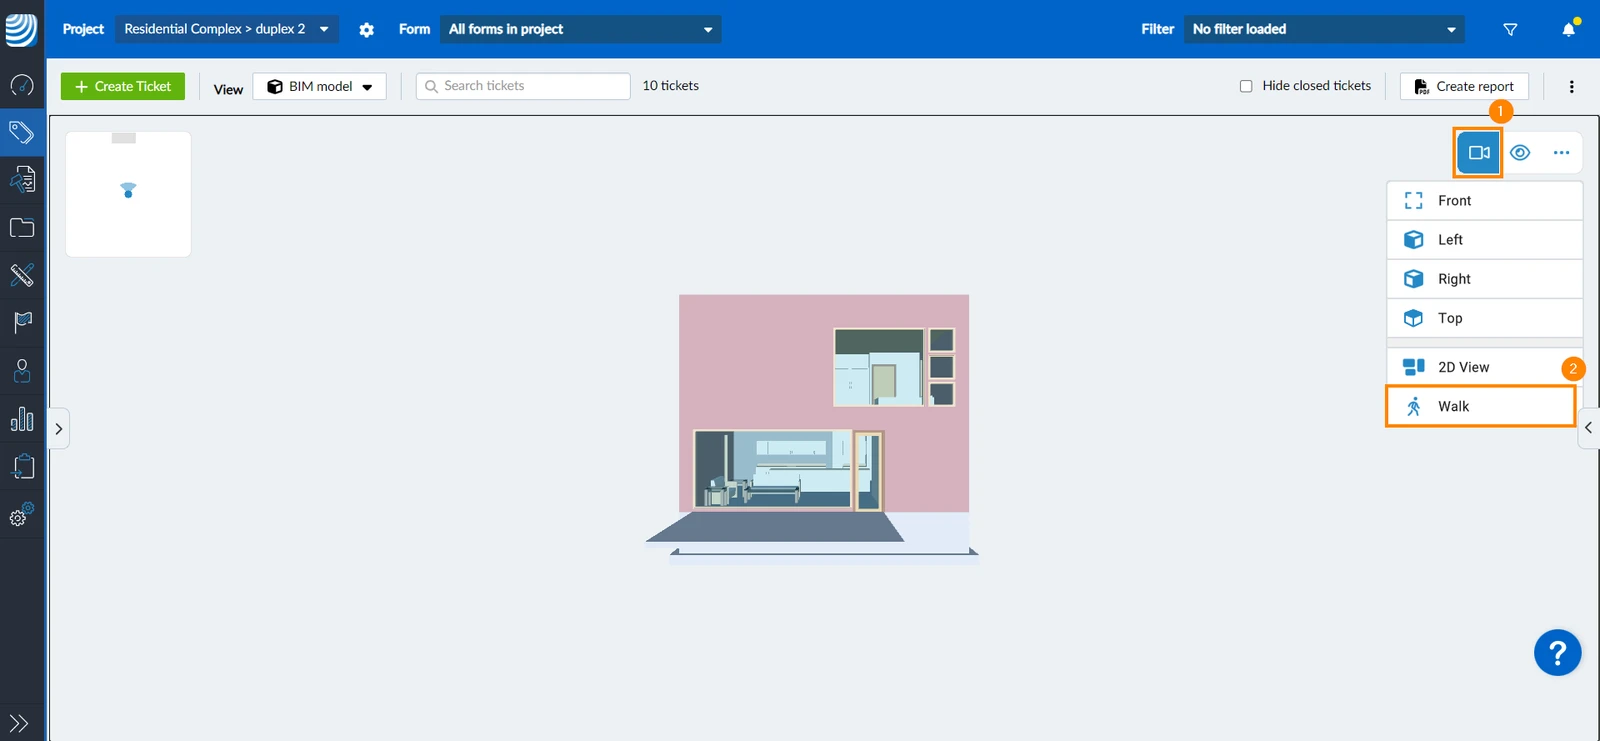
To activate the Walking Mode:
- Click/tap the camera icon
- Click/tap Walk
Walk and Look Around
On a computer we recommend to use a combination of mouse and keyboard controls.
To walk around use the following keys:
- Press W to move forward
- Press S to move backward
- Press A to move sideways to the left
- Press D to move sideways to the right
To turn and look up and down use the mouse:
- Hold down the left mouse button
- Move the mouse in the direction where you want to turn or look
Alternatively, you can use the arrow keys on your keyboard to turn and look around:
- Press right to turn to the right
- Press left to turn to the left
- Press up to look upwards
- Press down to look downwards
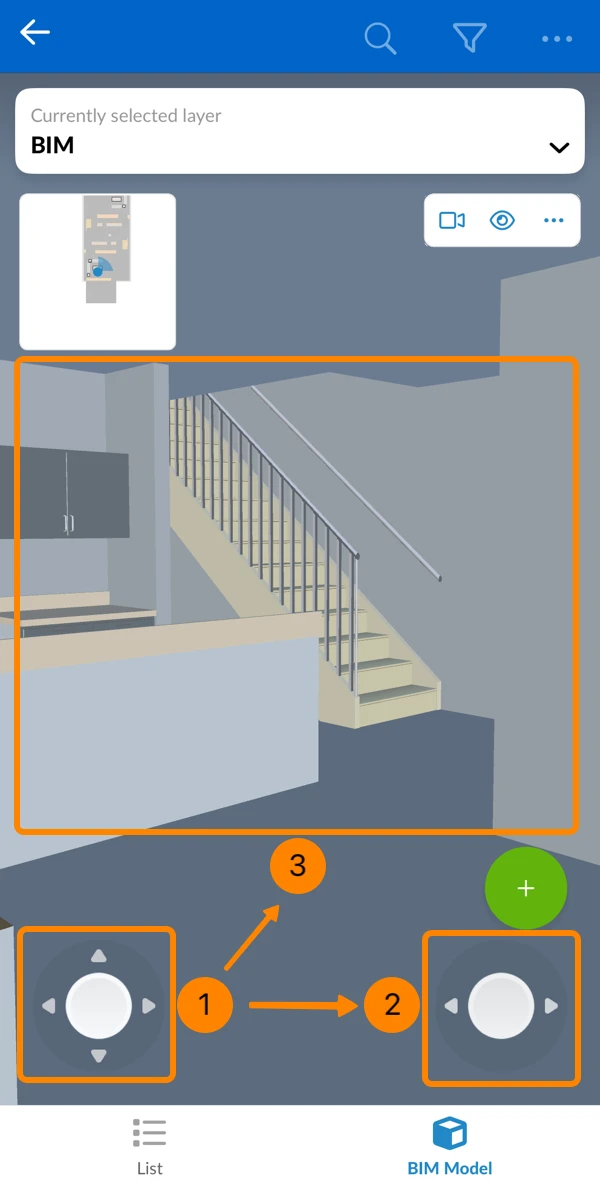
If you have a touchscreen or if you cannot use keyboard and mouse, there are also on-screen joysticks for walking and looking around - as described in the mobile tab.
Once you have set the mode to Walk, two controllers will appear at the bottom of the BIM Viewer:
- Move Around the Space
Use the left joystick to:
- Walk forward or backward
- Move left or right (sideways) - Turn Your View
Use the right joystick to:
- Rotate left or right without changing your vertical view angle (no up/down tilt) - Look Around Freely
Alternatively, you can drag or swipe directly on the screen to:
- Look up or down
- Turn in any direction at the same time
Orthographic Projection Mode (2D View)
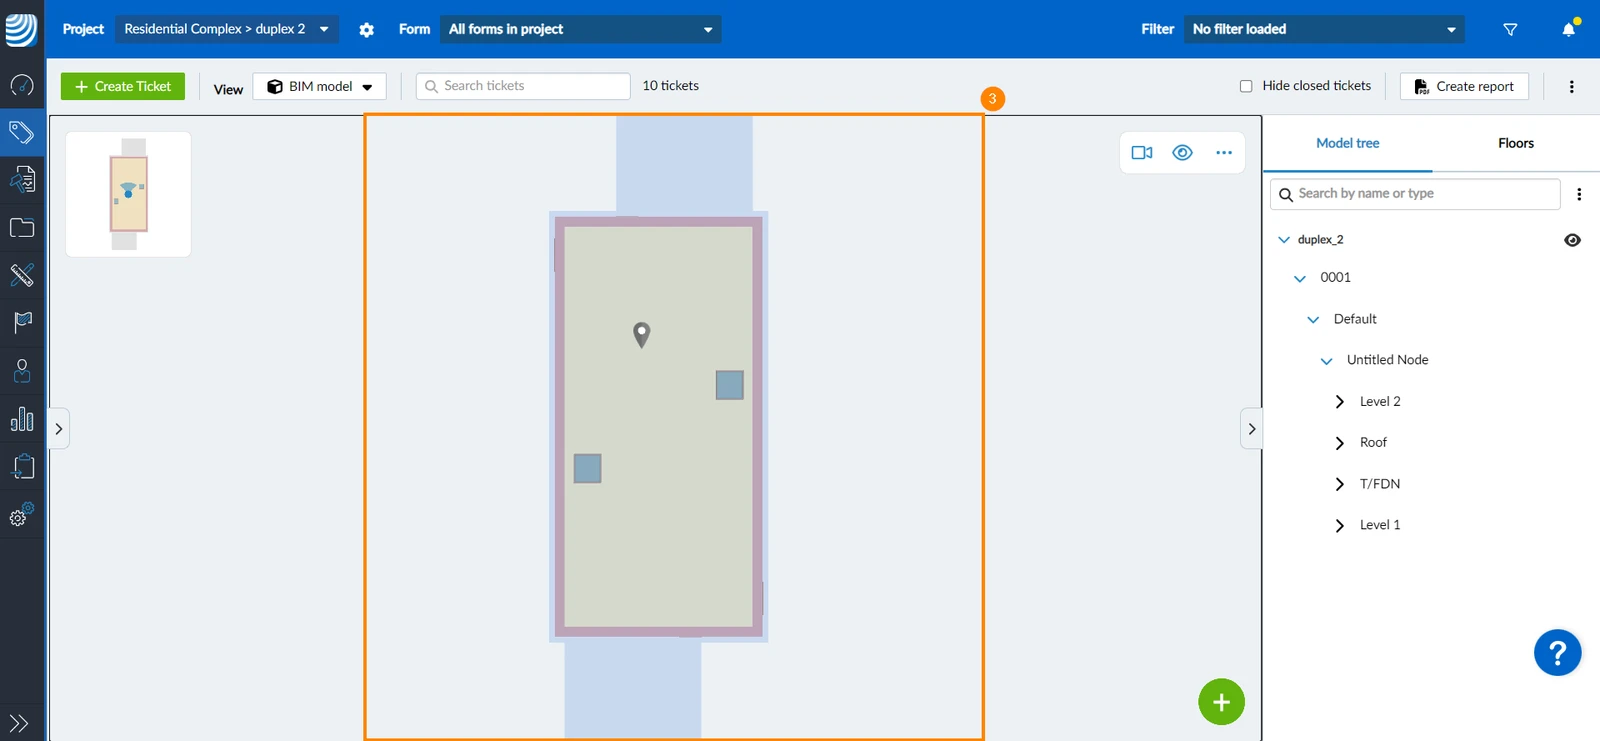
In certain situations, it can be useful to use an orthographic projection instead of perspective. To switch to orthographic projection from above:
- Click/tap the camera icon
- Click/tap 2D View
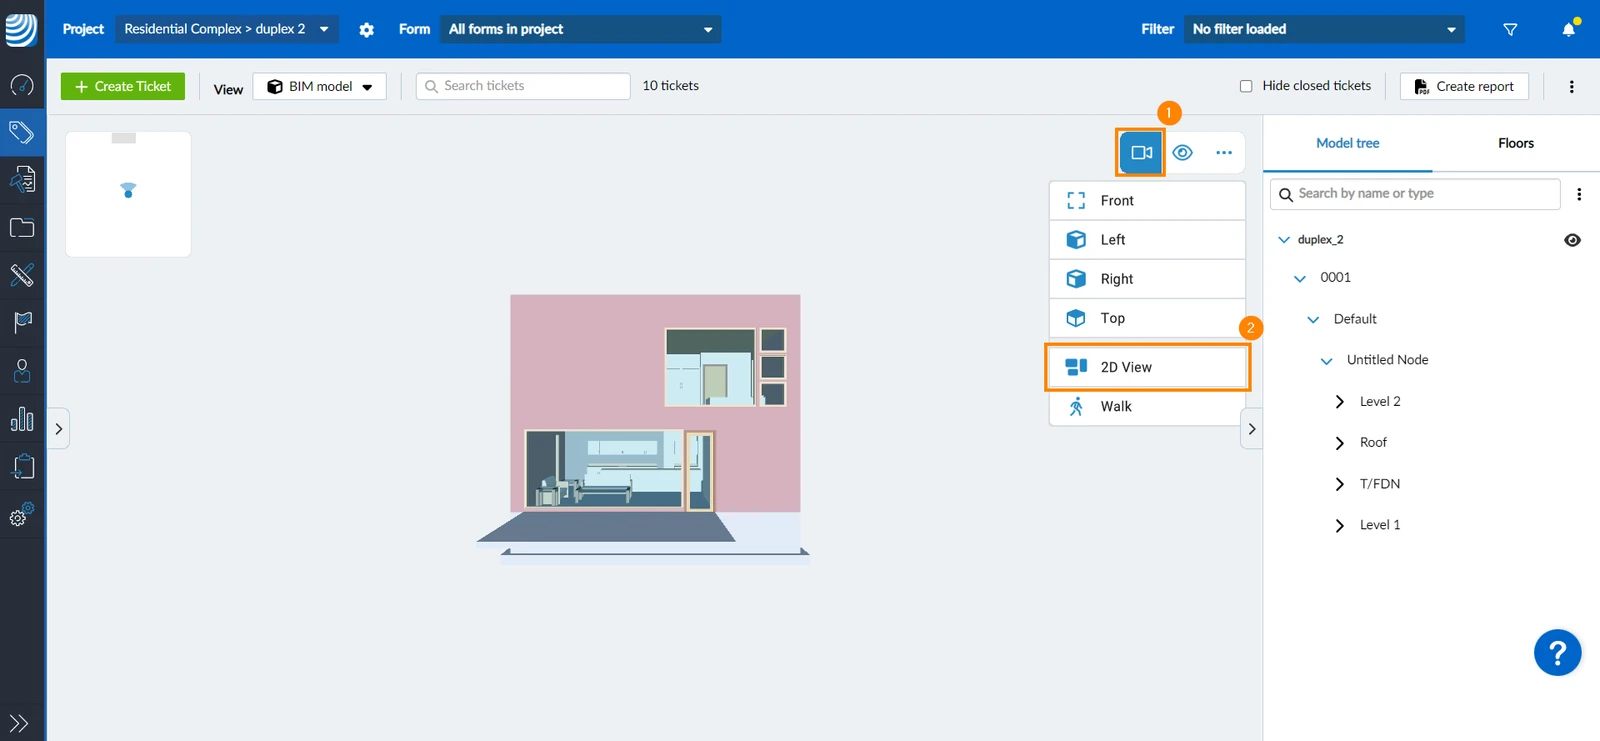
- The viewer switches to a view from above in orthographic projection
Overview map
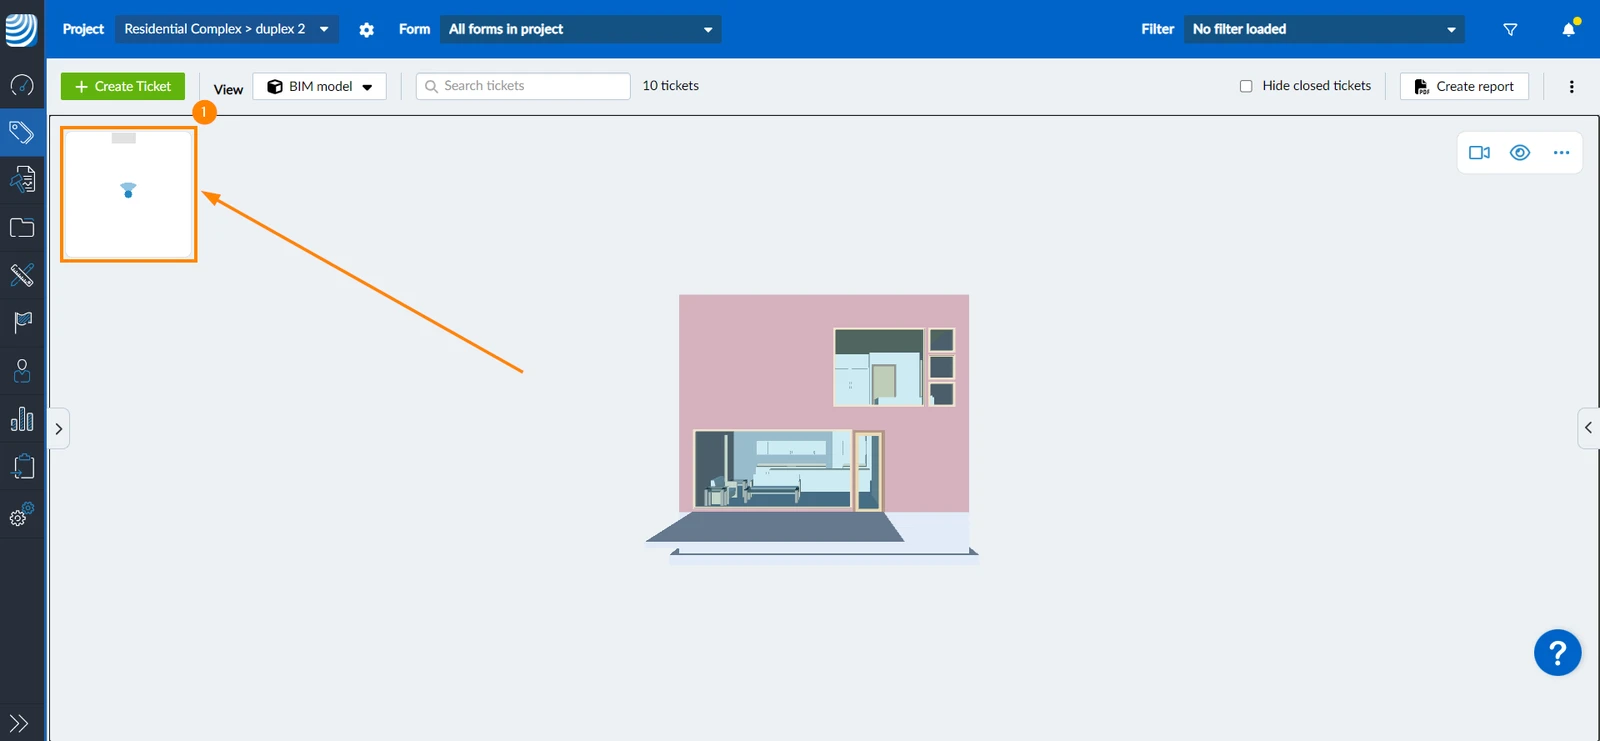
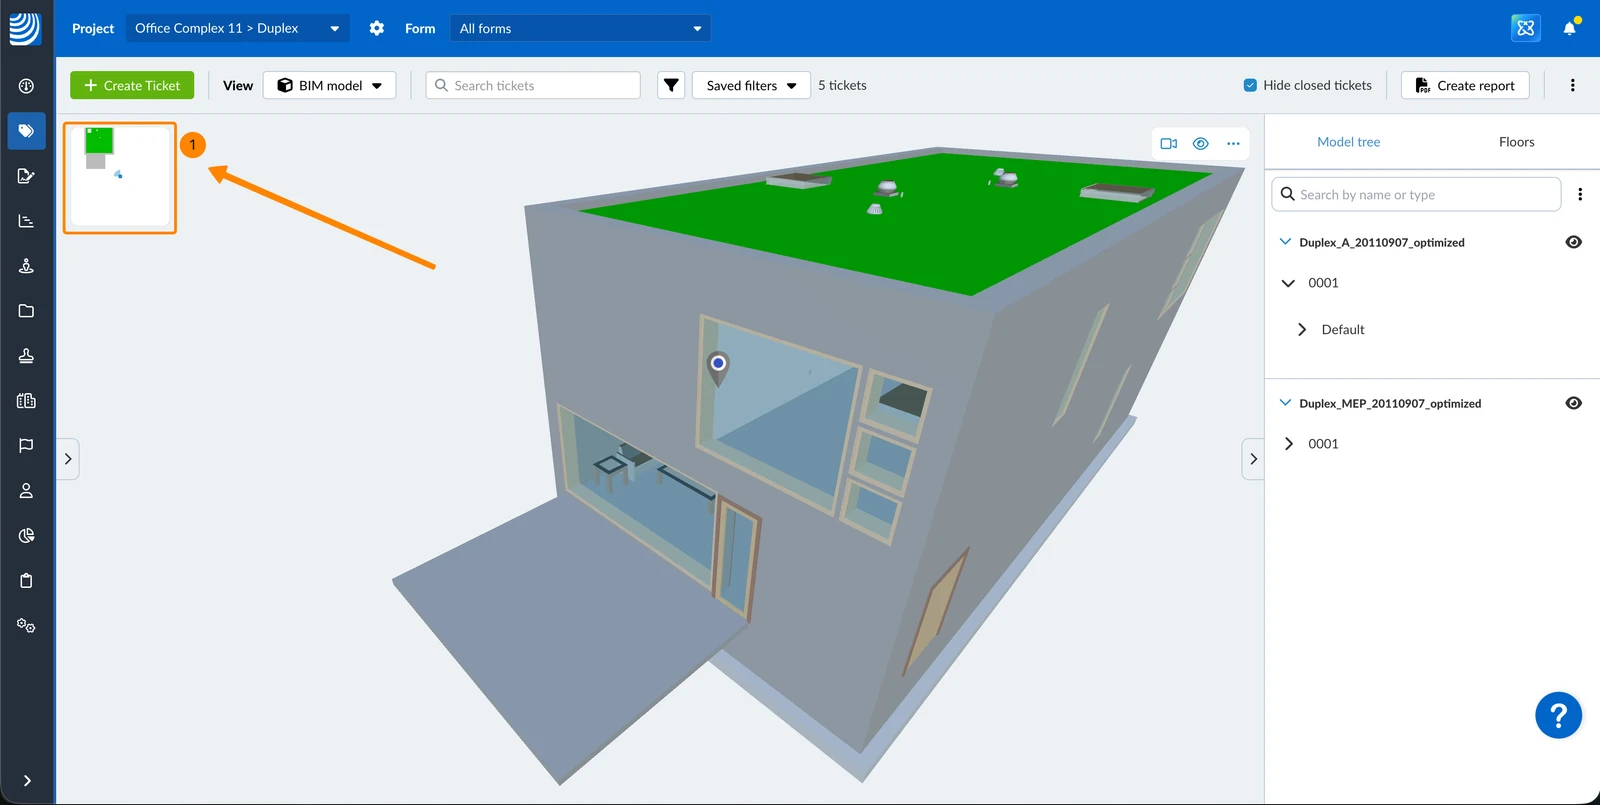
The BIM Viewer features an overview map located in the top left corner, which indicates your current position within the model. Expand the overview map to navigate and change the position and direction of the camera.
Expand the Overview Map
To expand the overview map and allow 2D navigation:
- Click/tap on the overview map
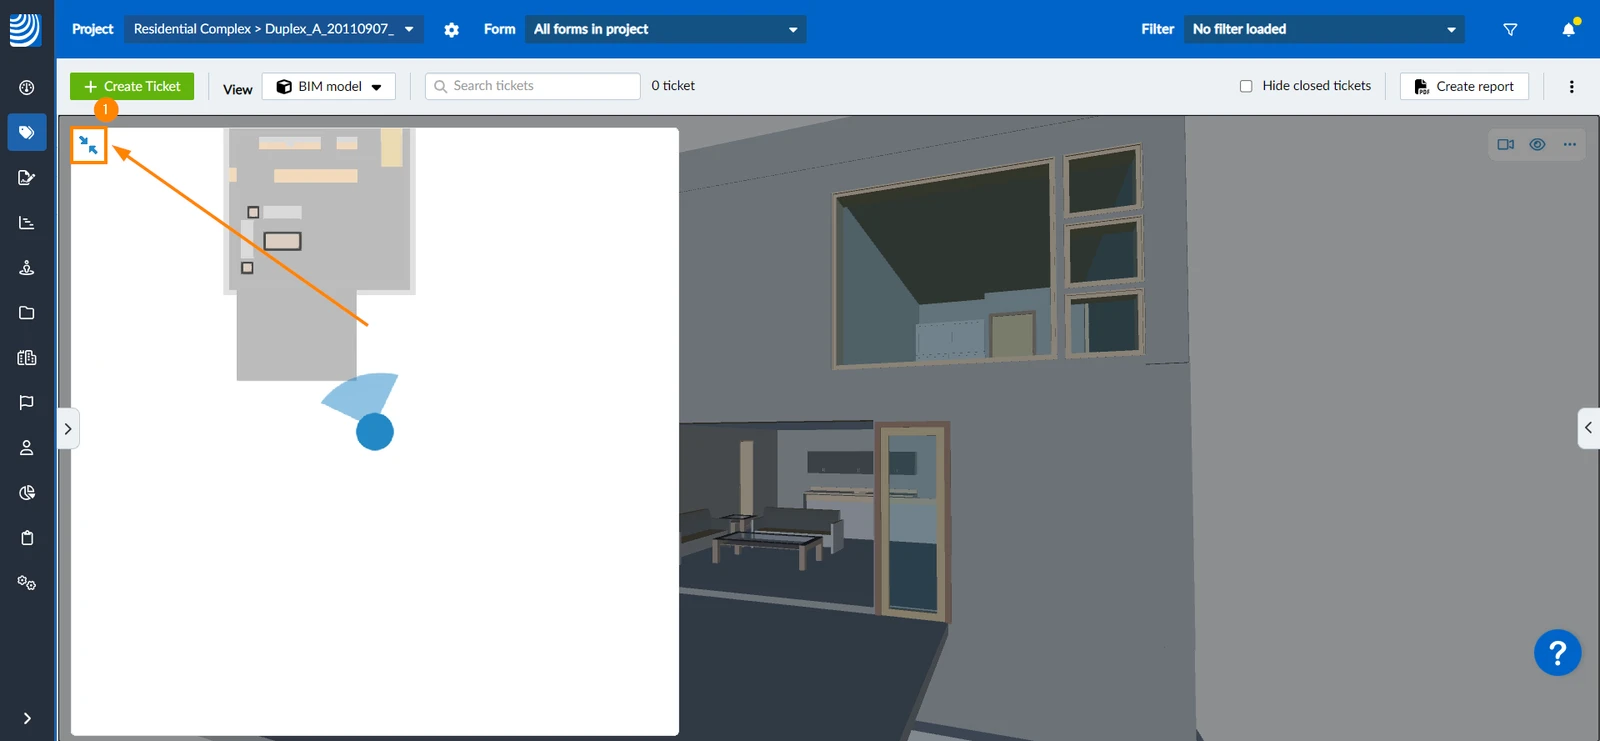
To collapse the overview map and make it small again:
- Click/tap the collapse icon
Navigate Between Floors
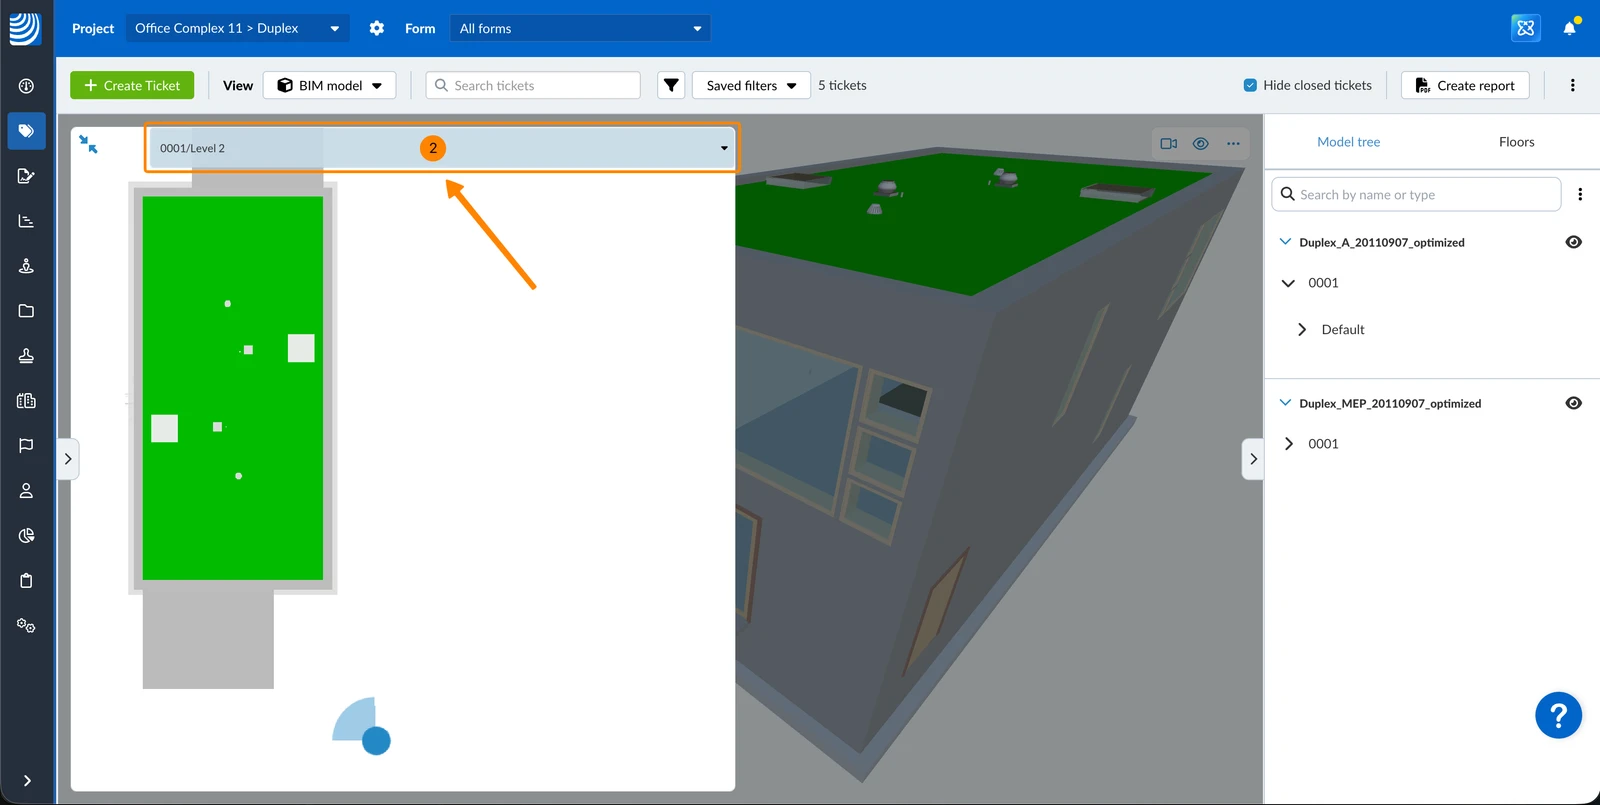
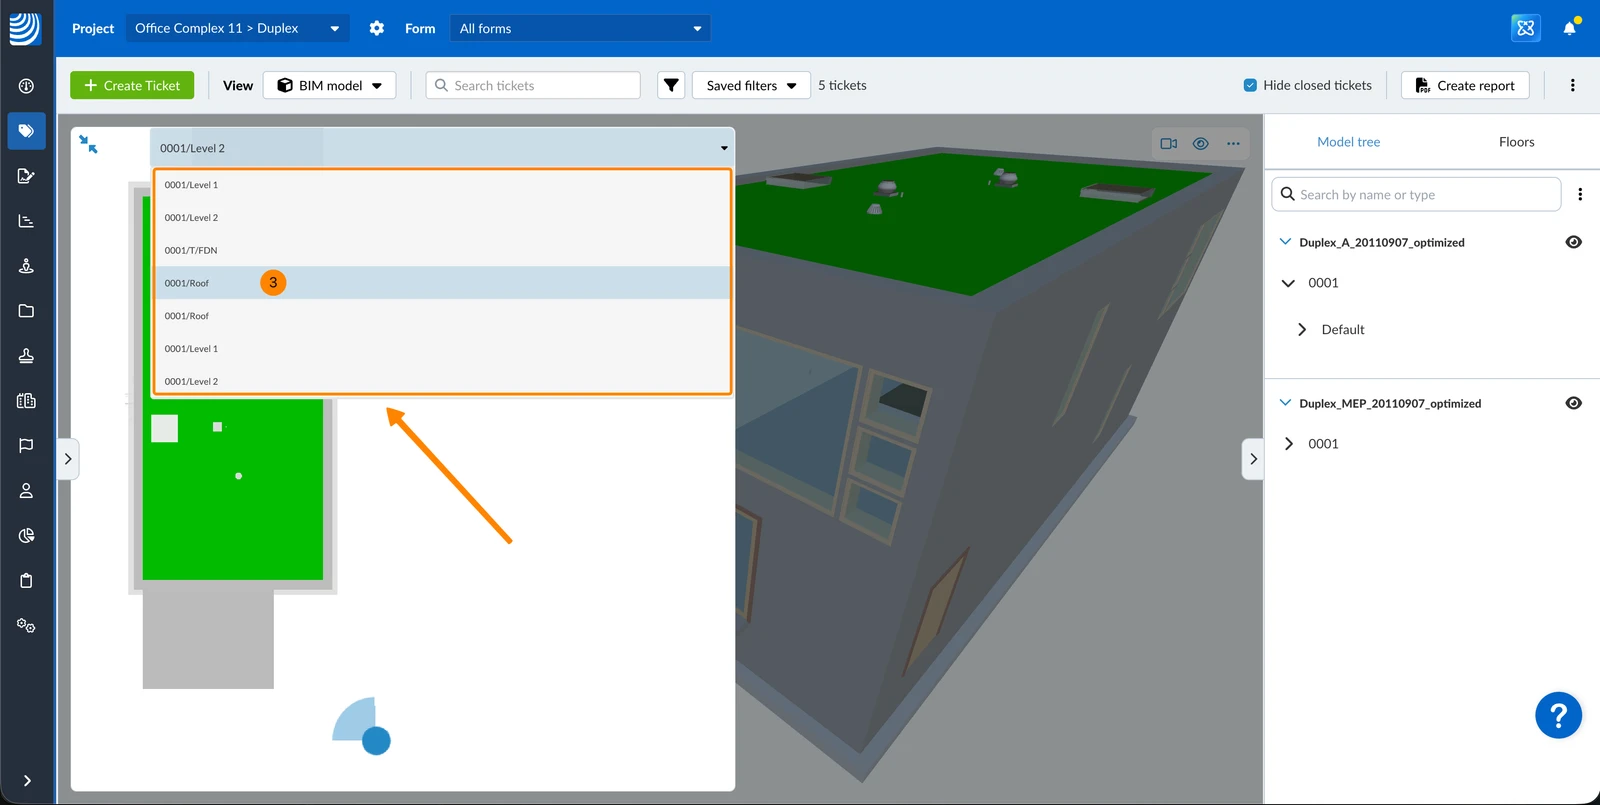
To quickly navigate between floors on the overview map and the BIM model simultaneously:
- Click/tap on the overview map to expand it.
- Click/tap on the drop-down menu which shows the current floor.
- Click/tap on the floor to which you want to navigate.
Move the Overview Map
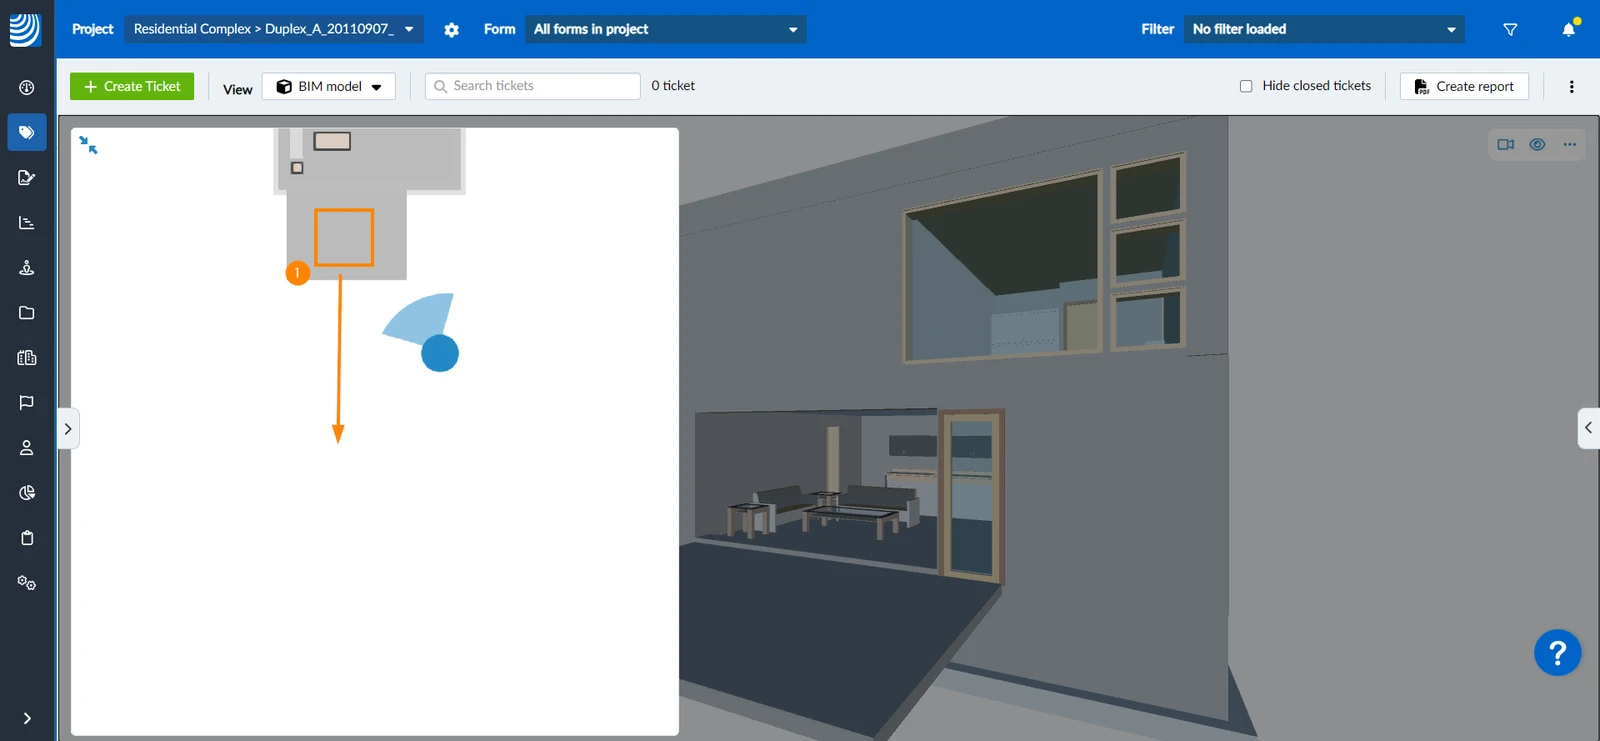
To move the visible area of the overview map:
- Click/tap on the map and use drag & drop
Change Camera Direction
To change the camera direction in the overview map:
- Click/tap and drag the ray around the point
- OR in the Webapp you can right-click on the map and the camera will look in that direction.
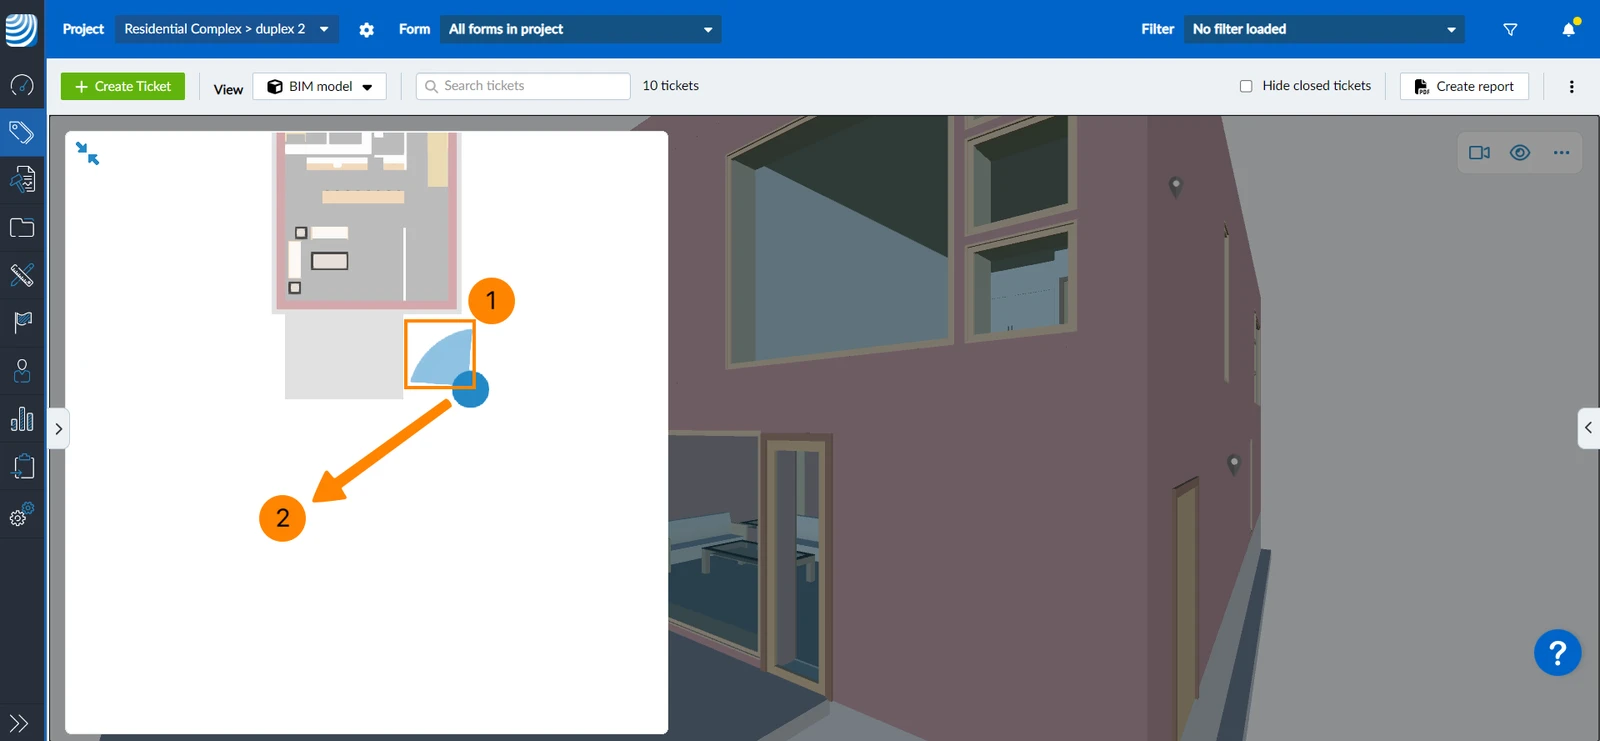
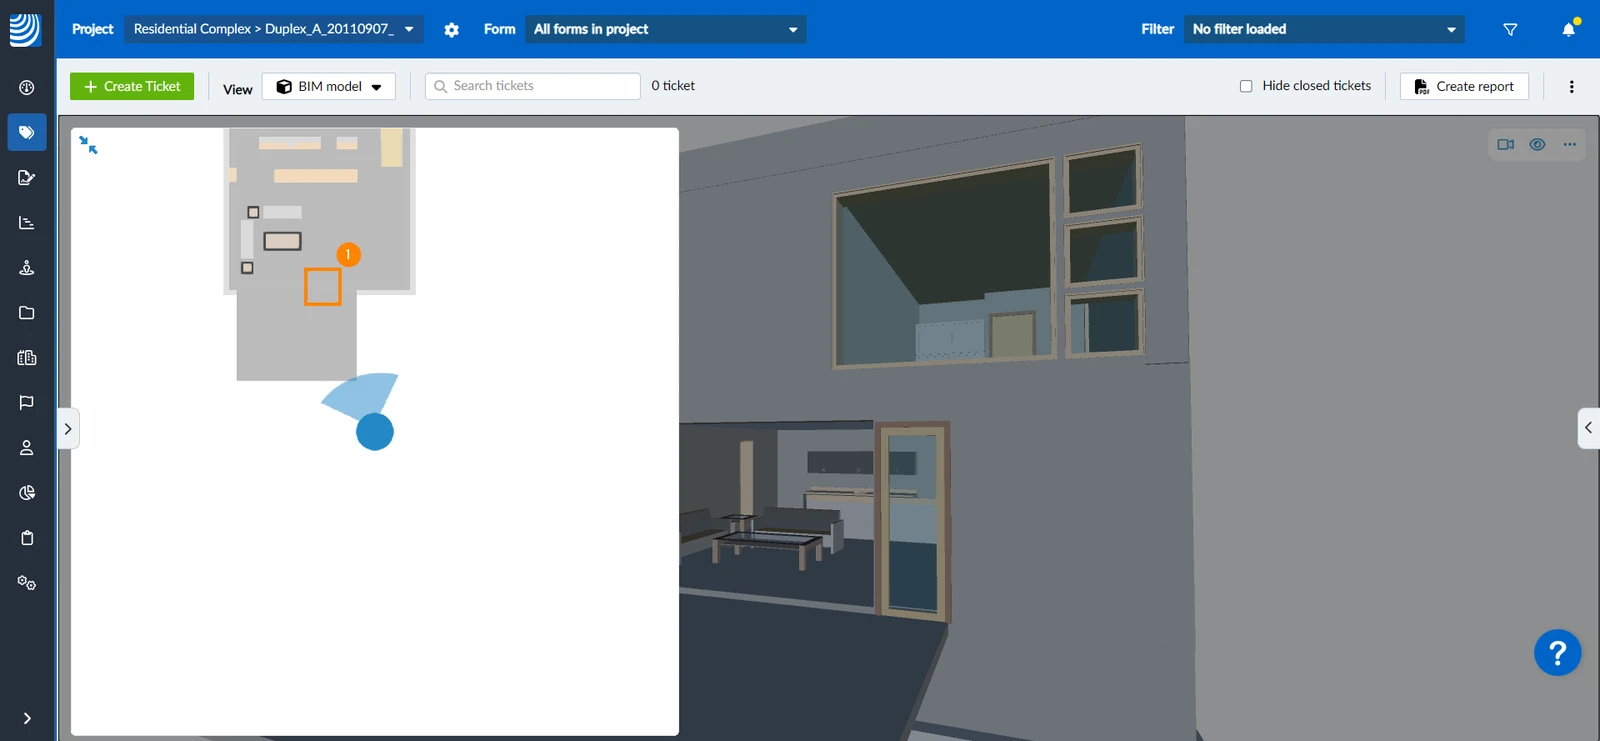
Change Camera Position
To change your camera's position in the 3D model:
- Click/tap the location you want to jump to
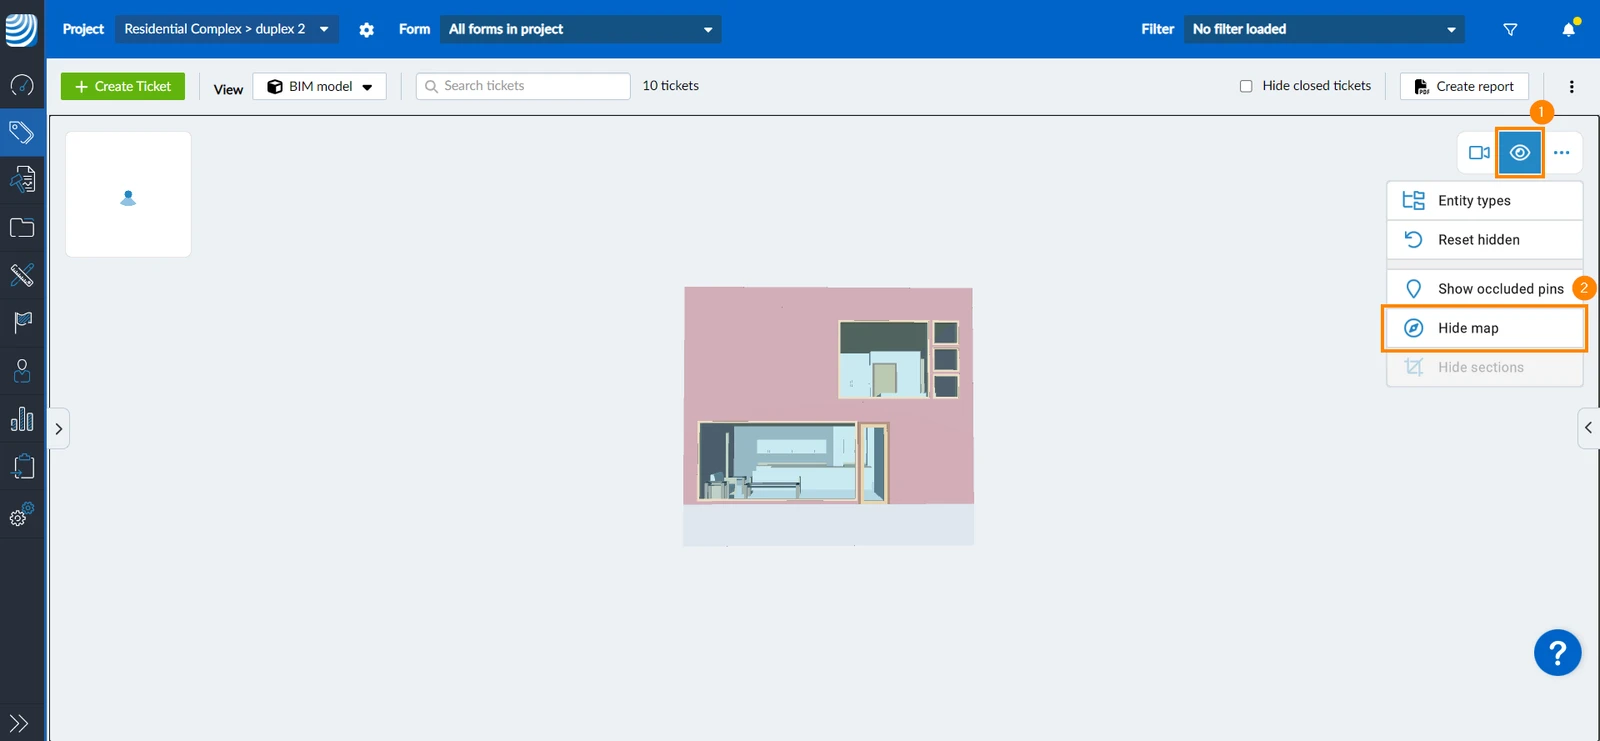
Hide Overview Map
To hide the overview map and have more space for the 3D content
- Click/tap the eye icon
- Click/tap Hide map
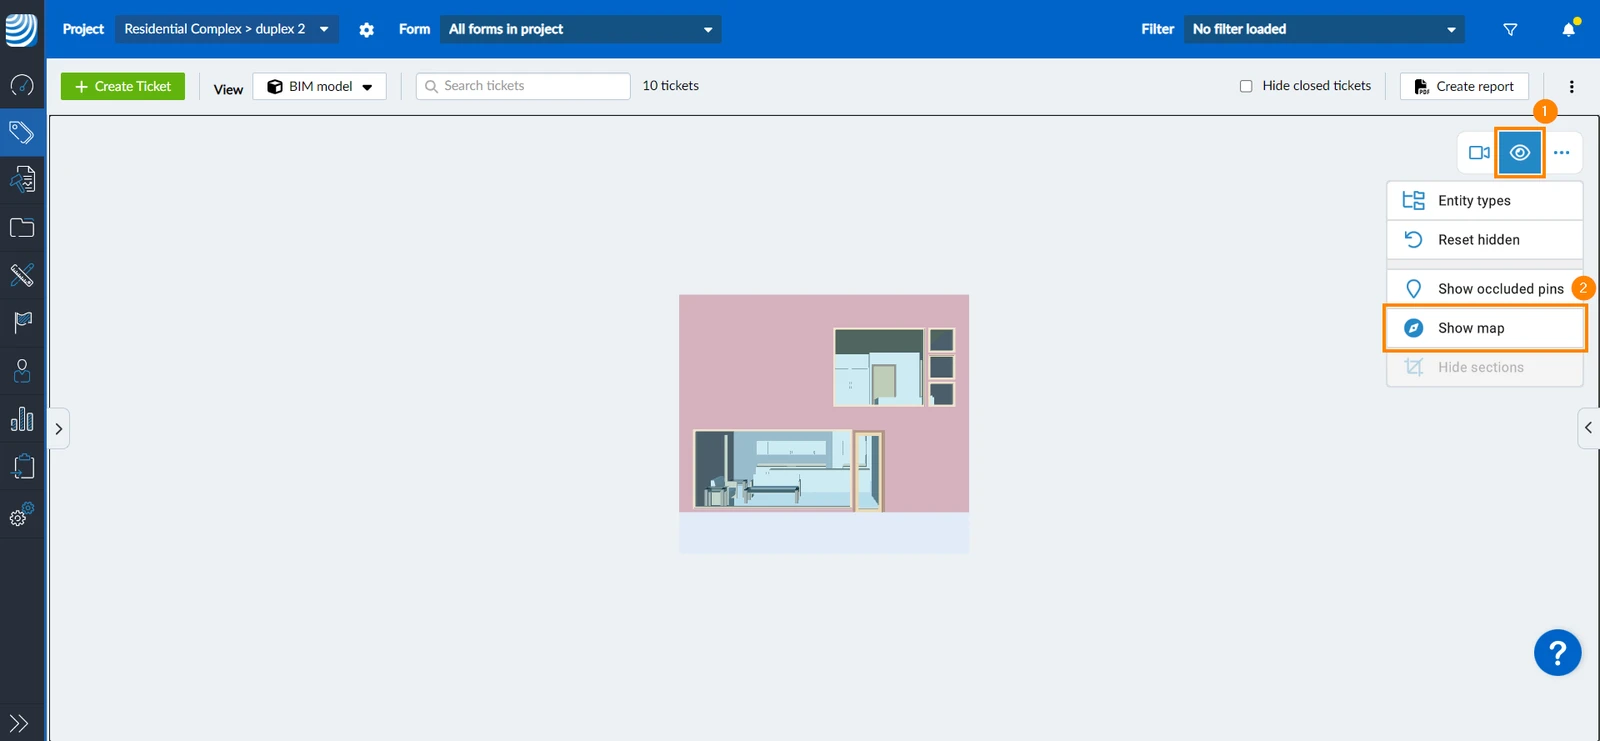
To show the overview map again:
- Click/tap the eye icon
- Click/tap Show map
Select Elements
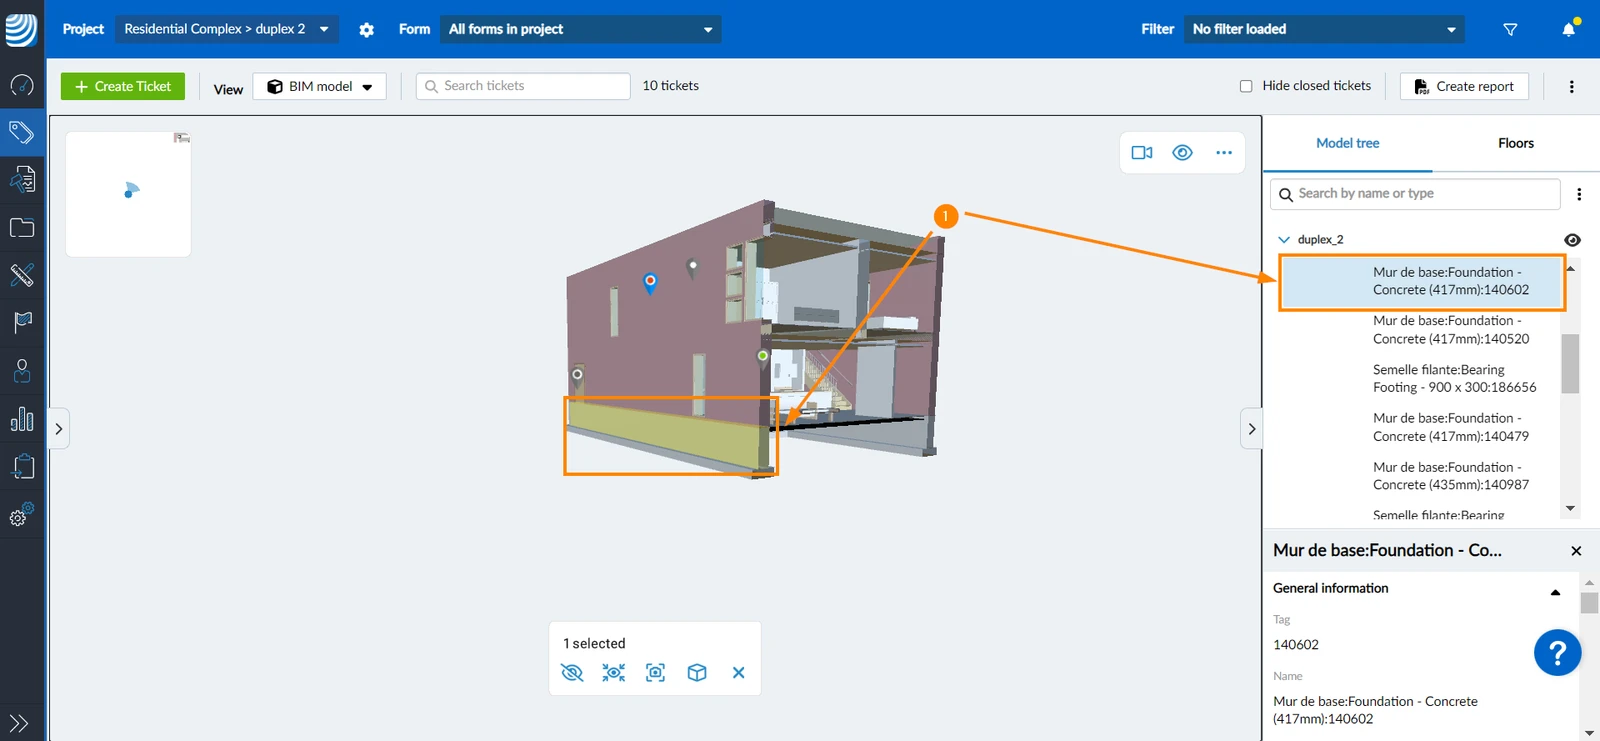
Select a Single Element
To select an element:
- Click/tap the element in the 3D model OR click the element name in the model tree.
Select Multiple Elements
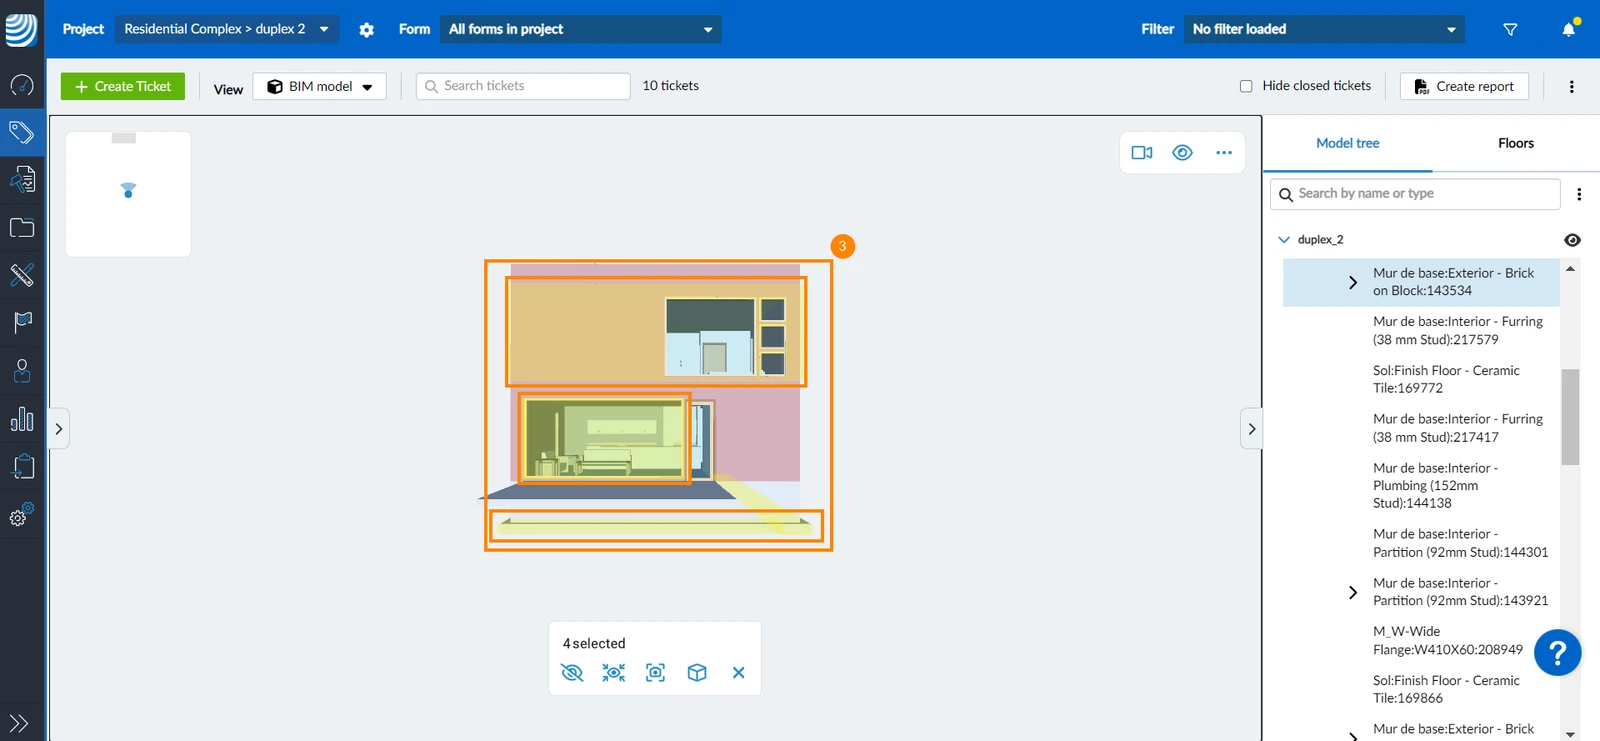
To select multiple elements in the BIM model:
- Click/tap the more menu
- Click/tap Multi-select
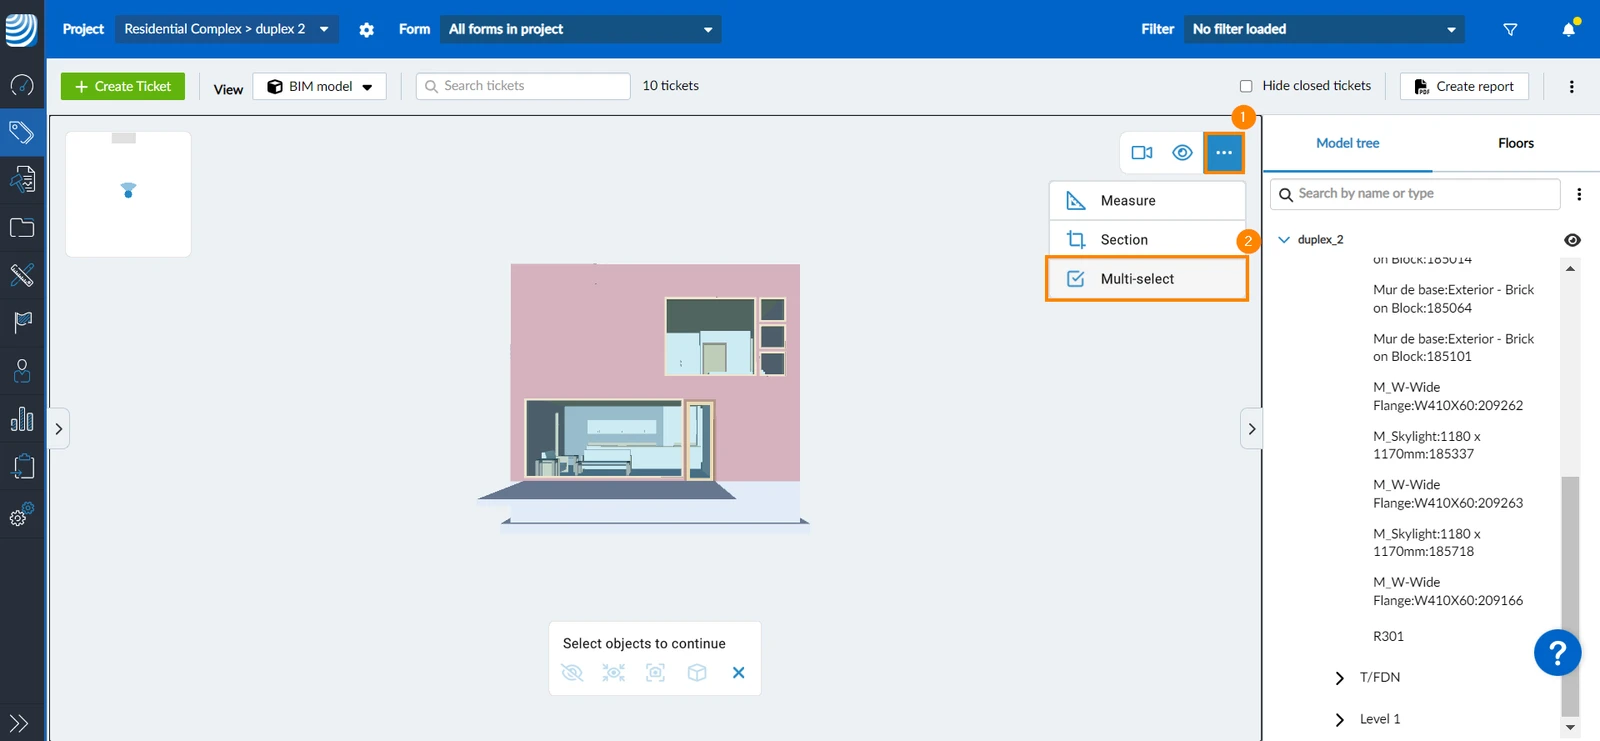
- Click/tap on the elements you want to select in the model
Another way for selecting multiple elements is to:
- Click/tap and hold on an element in the BIM model until the selected elements bar appears on the screen
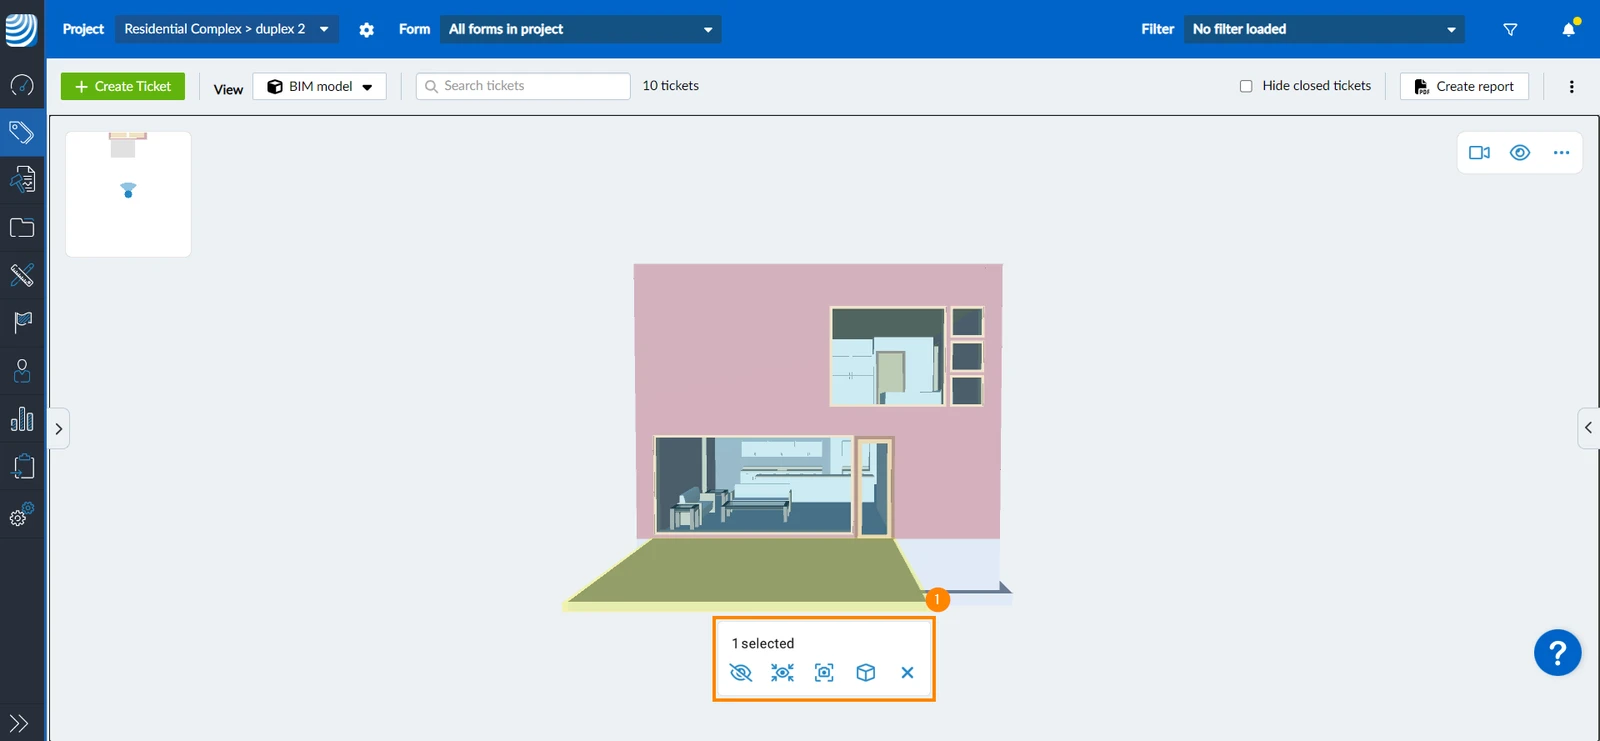
- Click/tap on the elements you want to select
Show/Hide IFC Elements
Show and hide IFC elements to focus on the parts of the BIM model that are relevant to you. You can do this with individually selected elements or based on the entity types of elements e.g. by showing or hiding all walls, windows or stairs and so on.
Another alternative to focus on parts of the model are section planes or boxes as explained in Work with Section Planes & Section Boxes.
Show/Hide Individual Element(s)
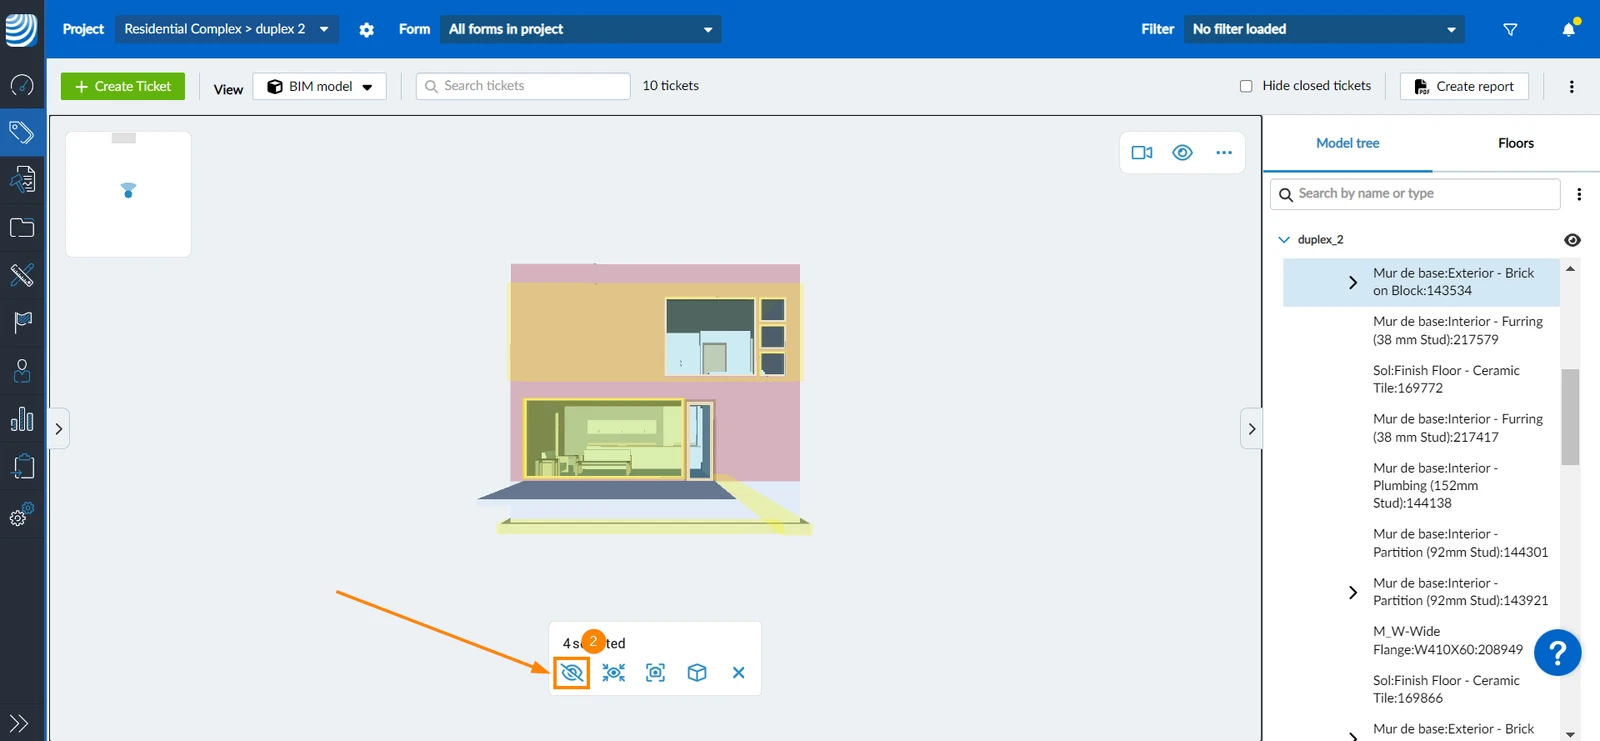
To hide element(s) from the 3D model:
- Select Element(s) you want to hide
- Click/tap the crossed eye icon
Isolate Elements
You can isolate elements in your 3D model by hiding all other elements except those you wish to focus on. To do so:
- Select Element(s) you want to isolate
- Click the focused eye icon
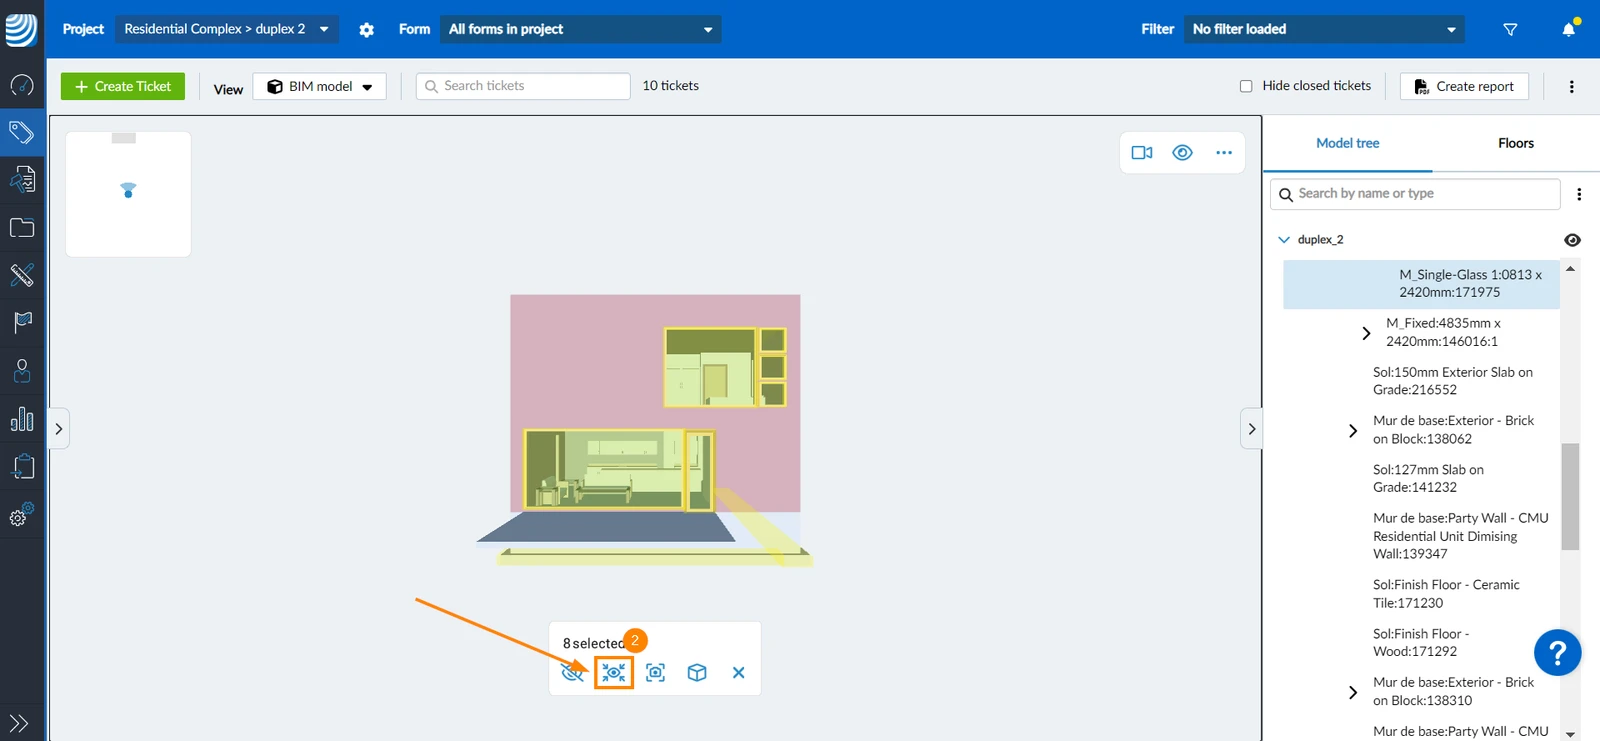
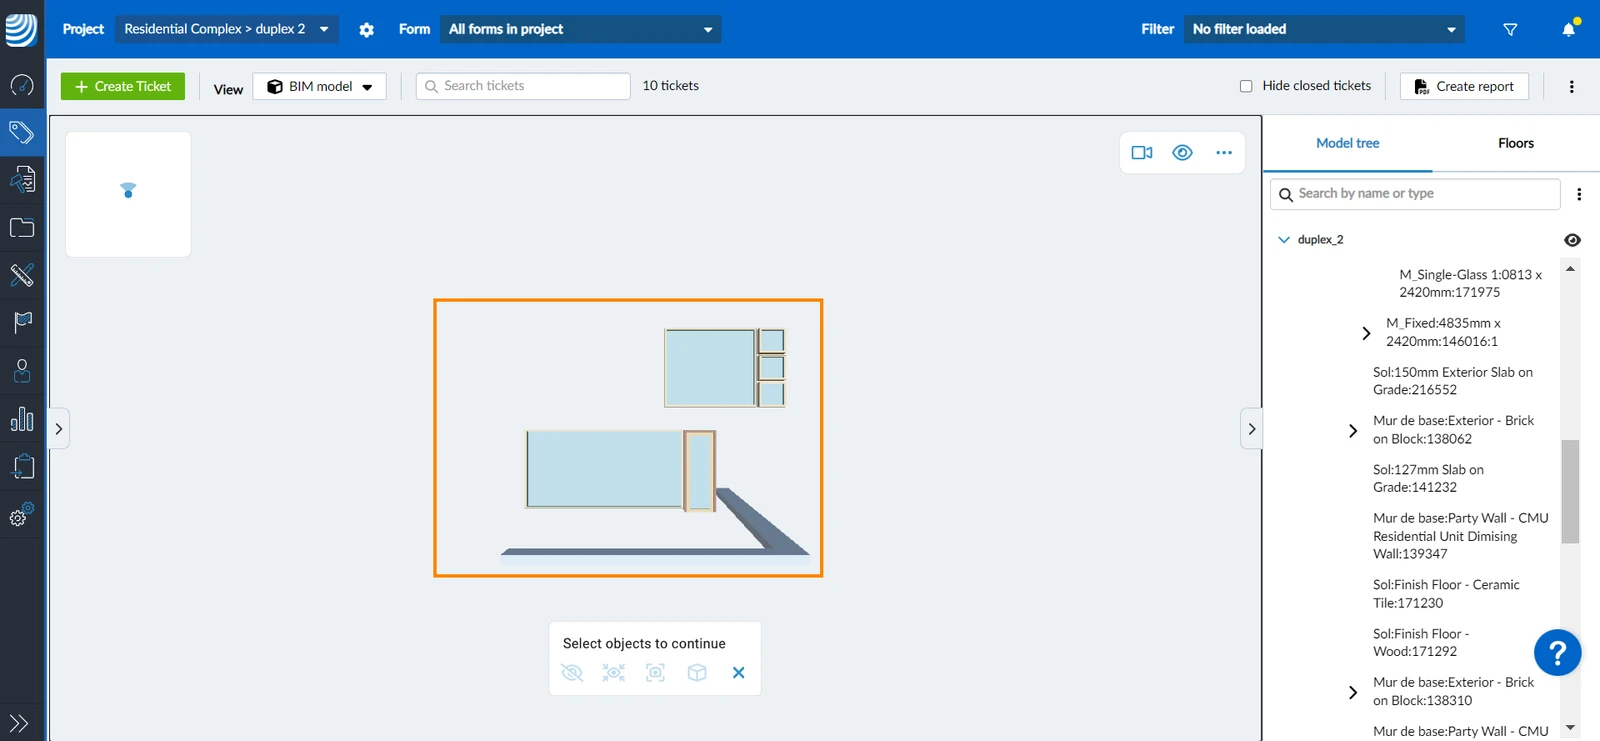
- All elements in the model will be hidden except for the selected one(s)
Show/Hide Entity Types
To hide/show all elements of the same entity type:
- Click the eye icon
- Hover over Entity types
- Select/clear that checkboxes of the entity types in your model
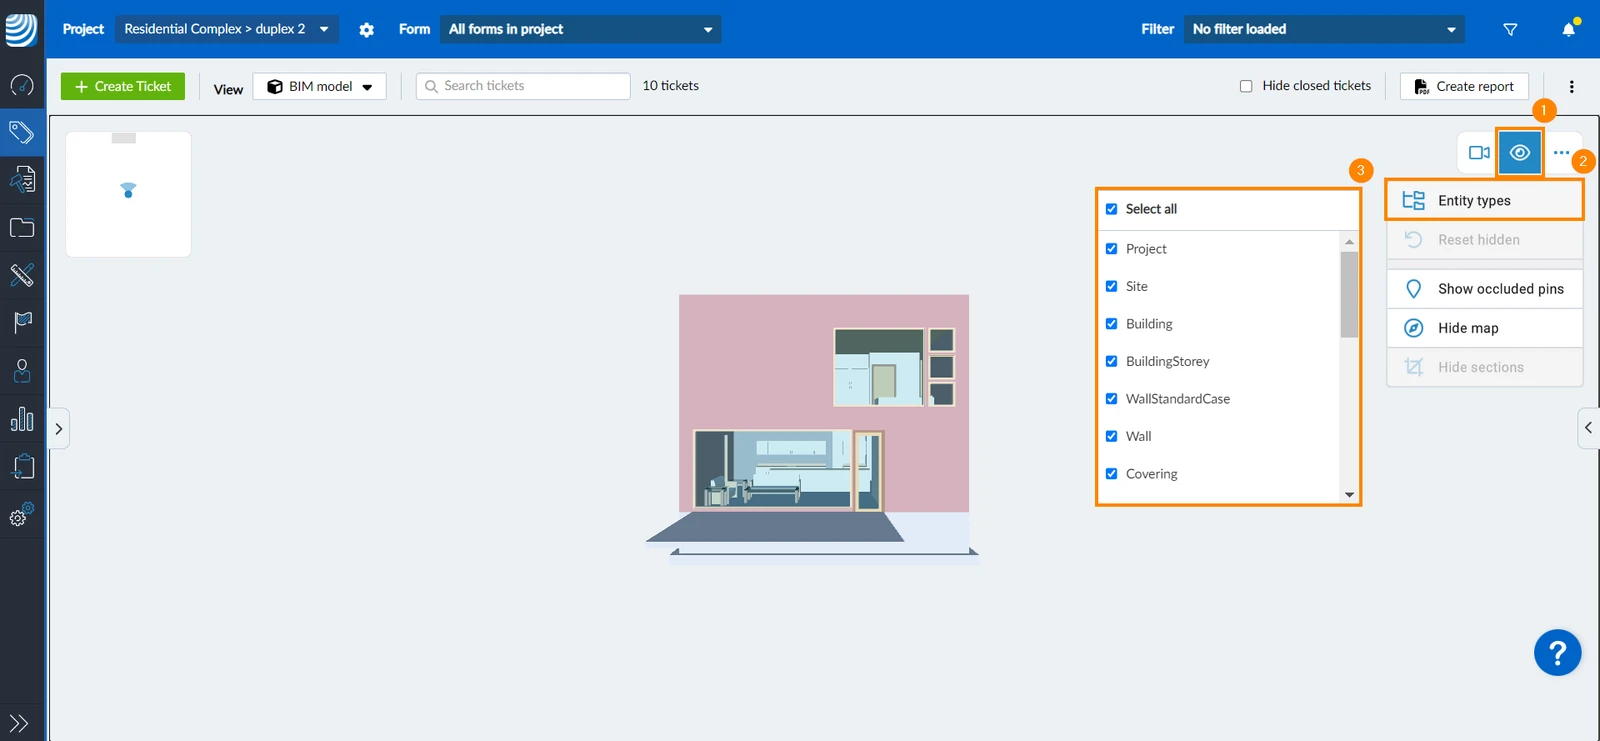
- Tap the eye icon
- Tap Entity types
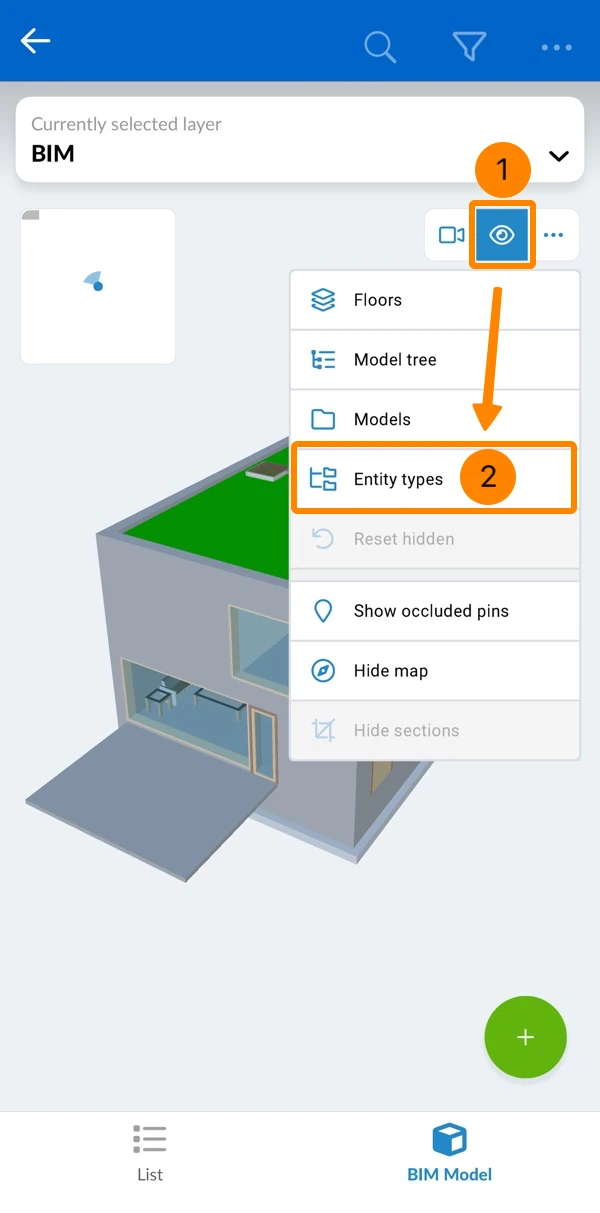
- Select/clear the checkboxes of the entity types that you want to show/hide
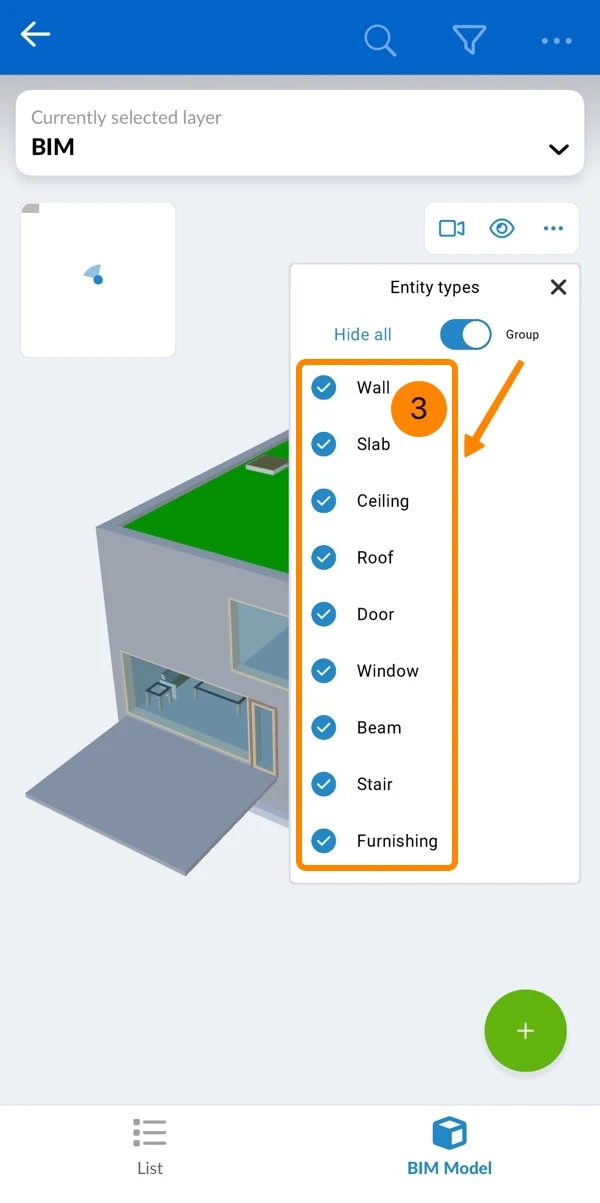
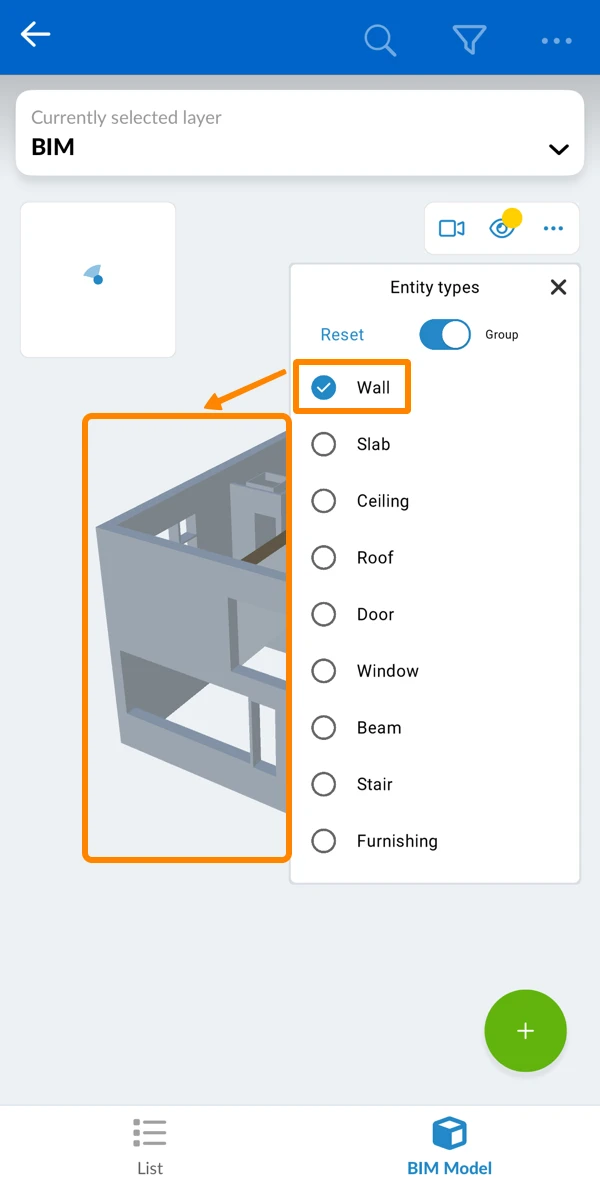
- You see only walls for example
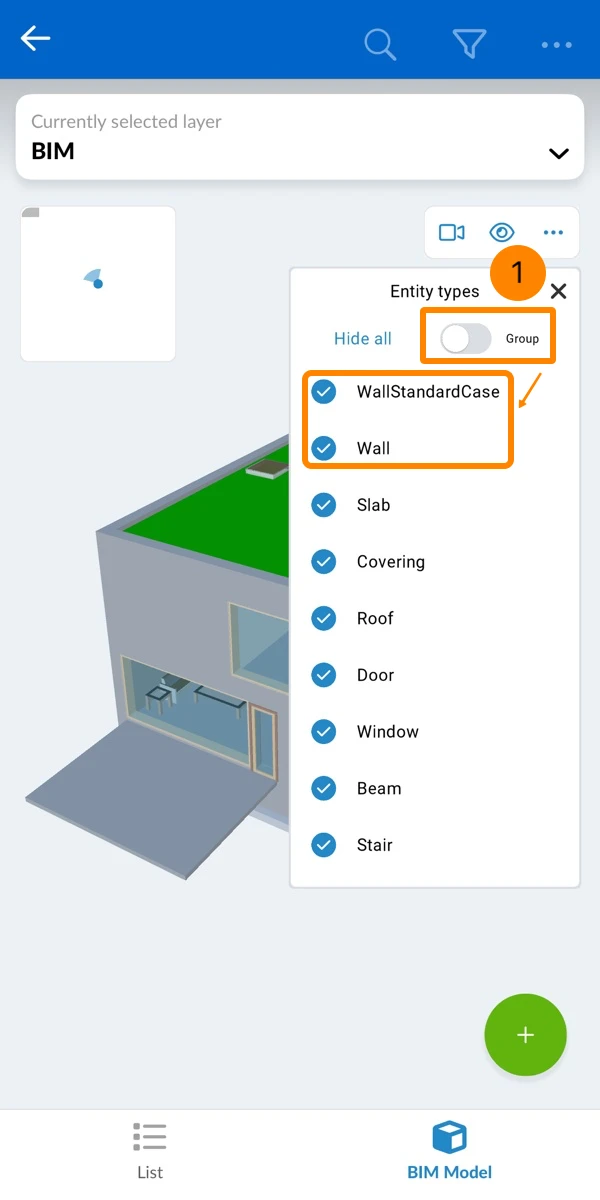
Entity types are grouped by default, to make it easier to show/hide all walls or doors, for example, even if they are saved in multiple entity types for walls for example.
To disable grouping and show all individual entity types as saved in the IFC model:
- Deactivate the Group toggle
- See the full (ungrouped) list of entity types
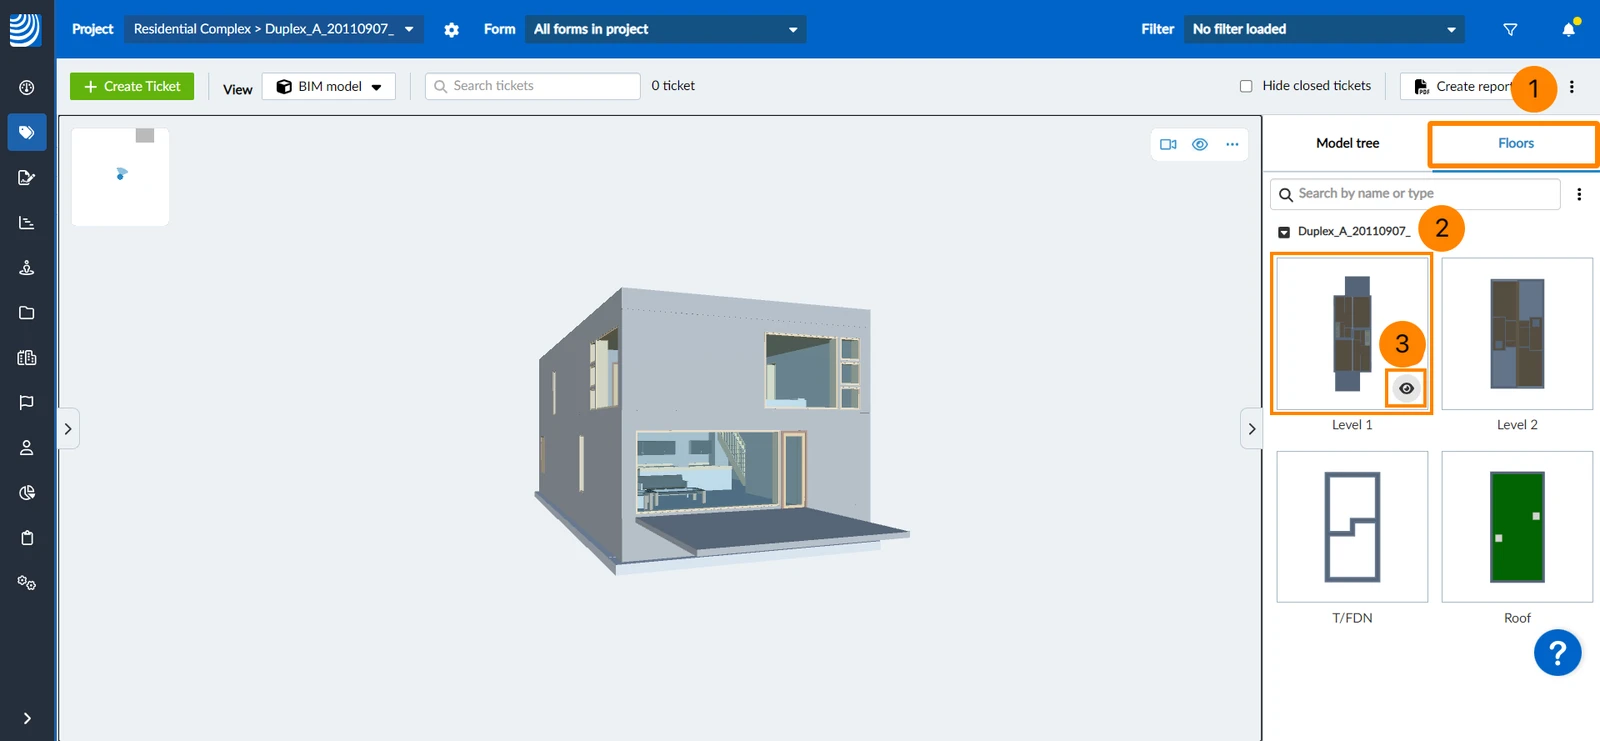
Show/Hide Floors
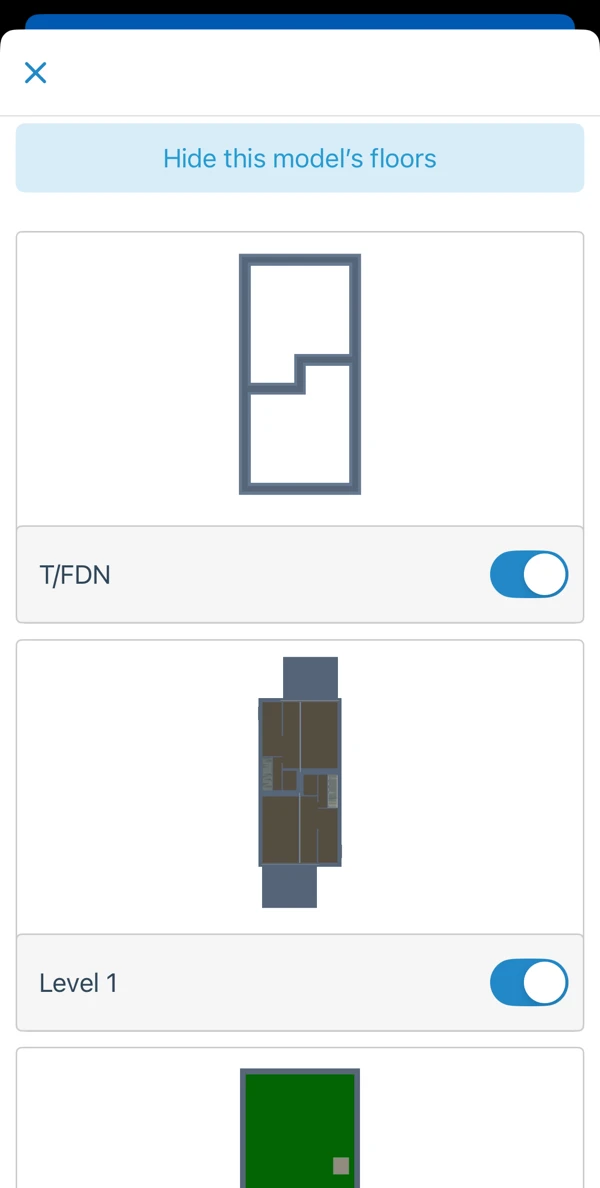
To hide a floor of a model:
- Click Floors
- Hover over the floor you want to hide
- Click the eye icon
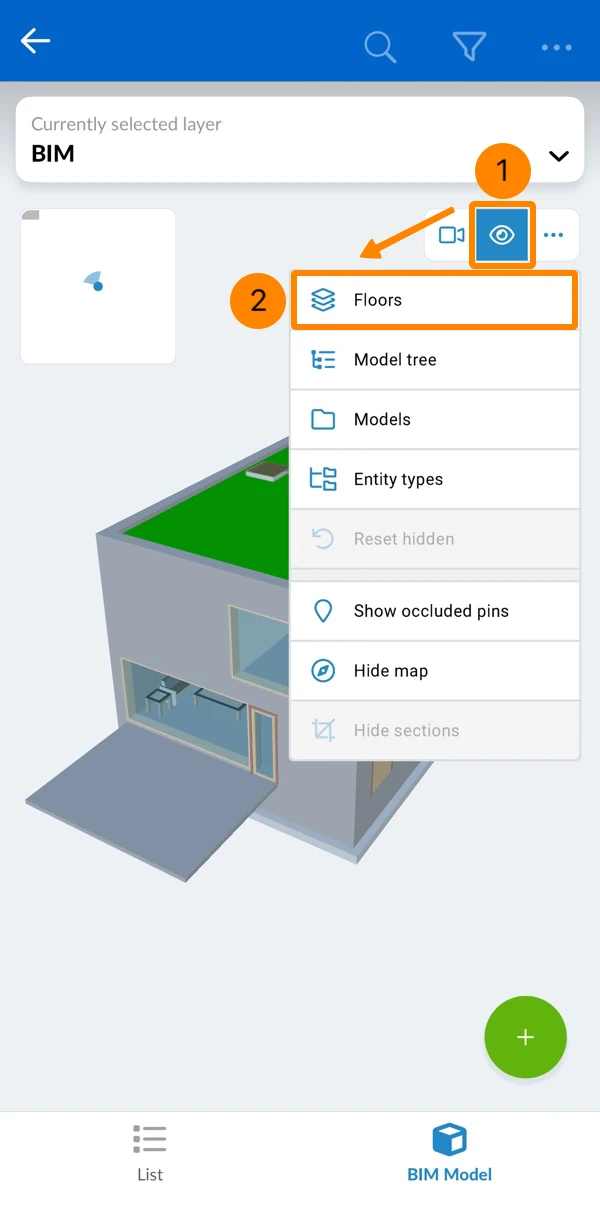
- Tap the eye icon
- Tap Floors
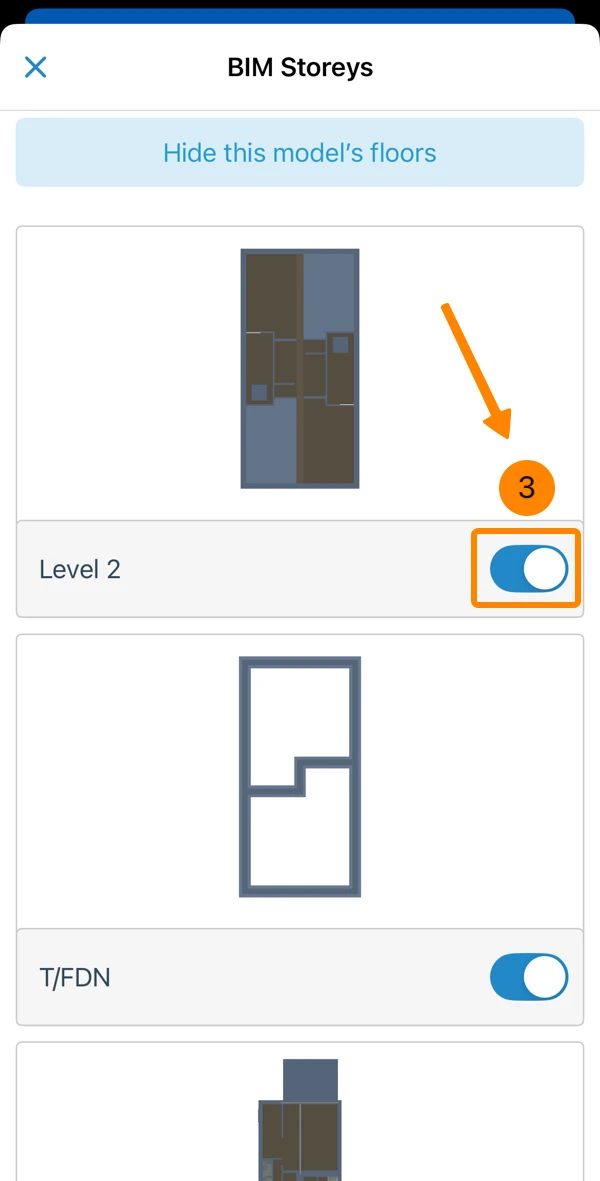
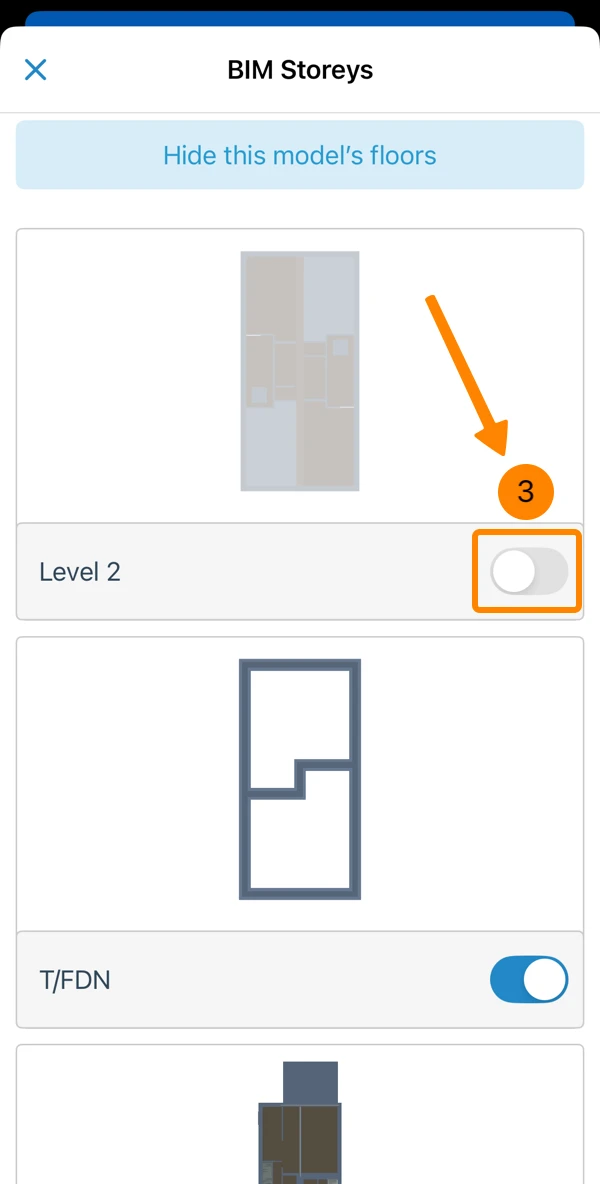
- Deactivate the toggle of each floor e.g. of floor 'Level 2'
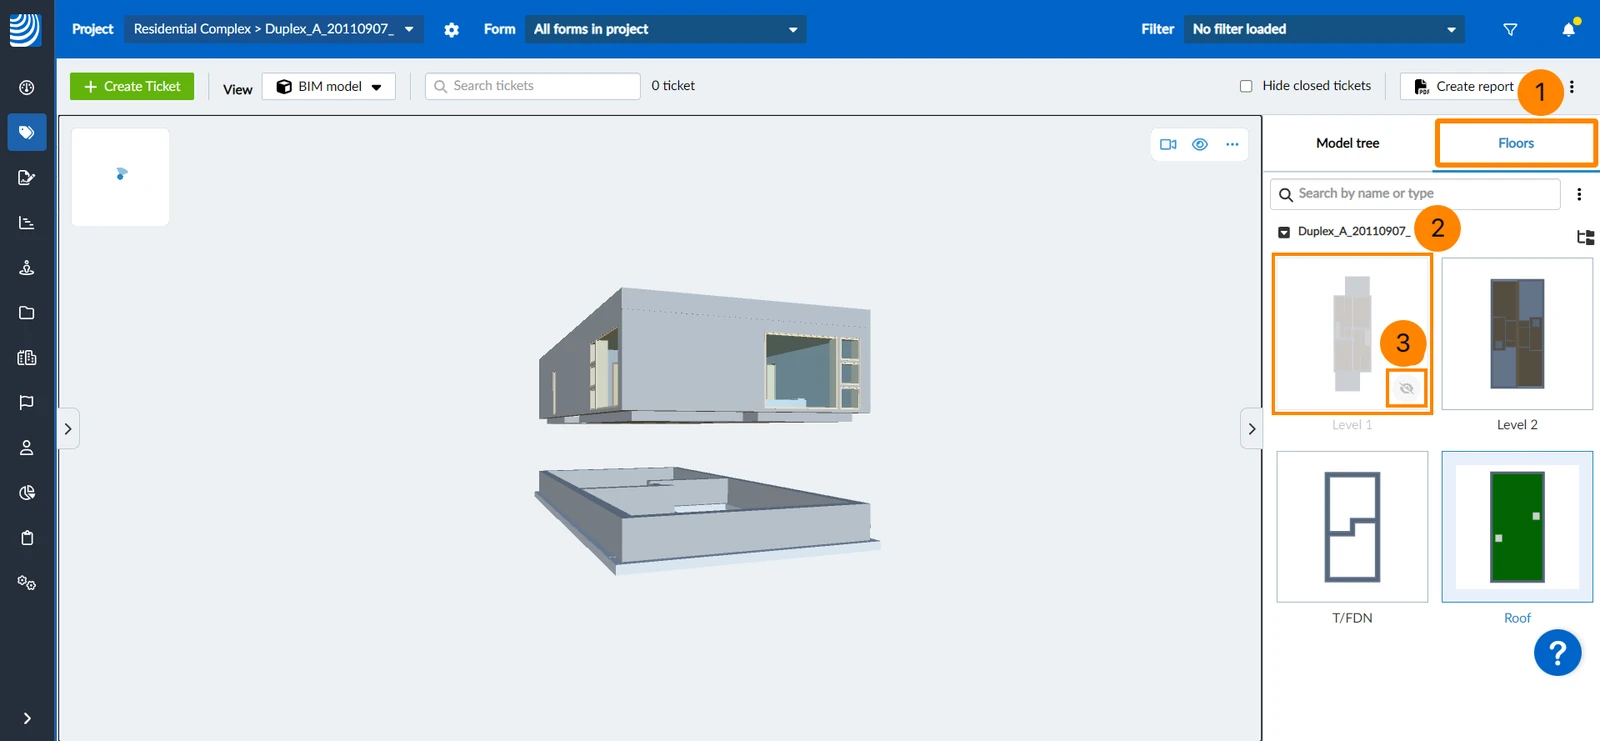
To show a hidden floor:
- Click Floors
- Hover over the floor you want to show
- Click the crossed eye icon
- Tap the eye icon
- Tap Floors
- Activate the toggle of each floor e.g. of floor 'Level 2'
To hide all floors:
- Click Floors
- Open the More menu
- Click Hide all
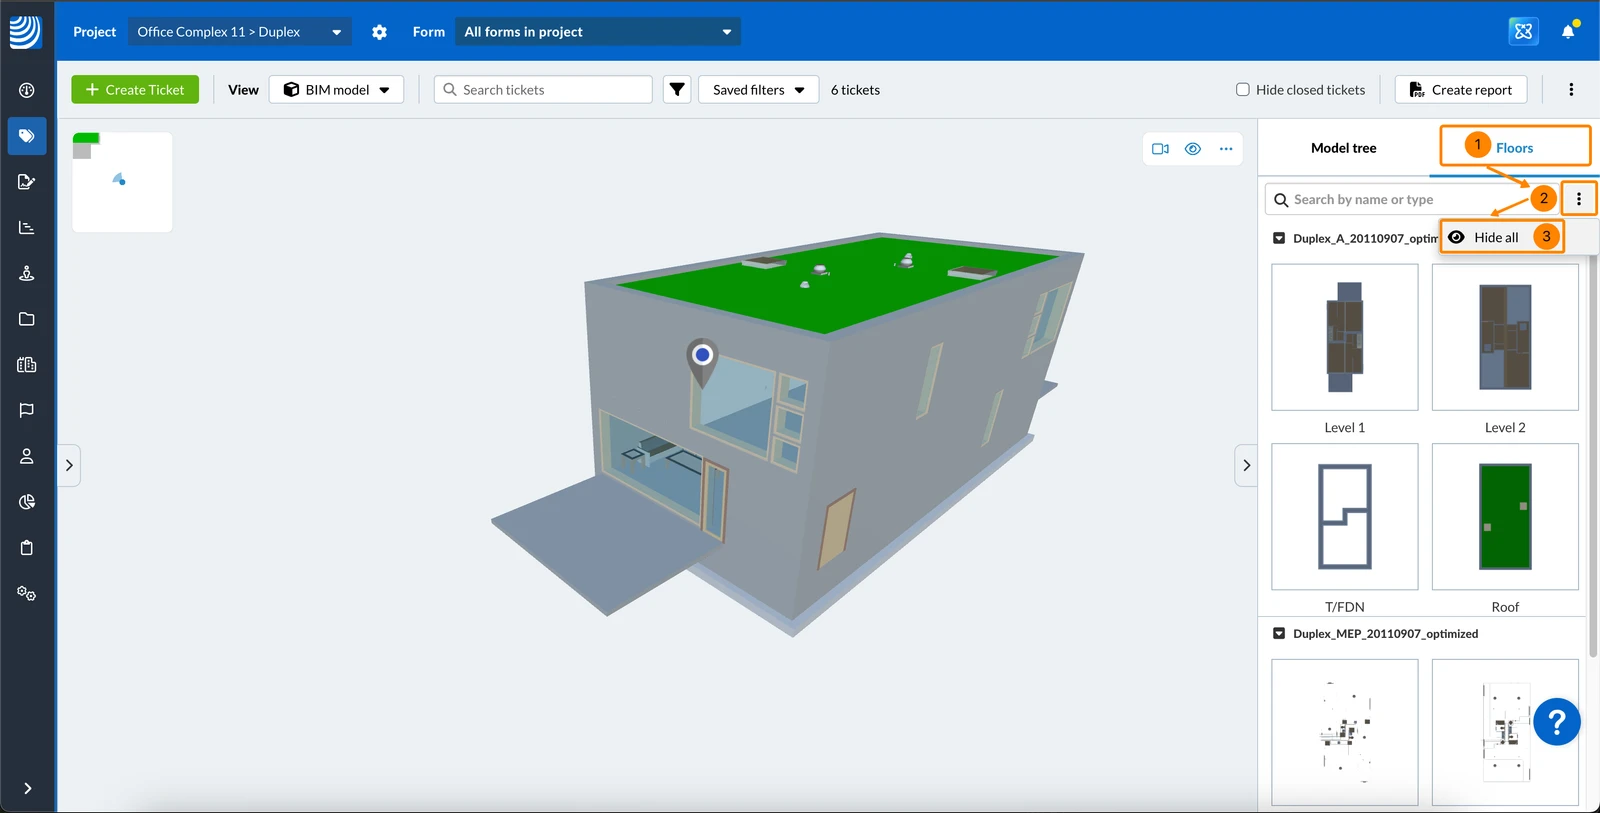
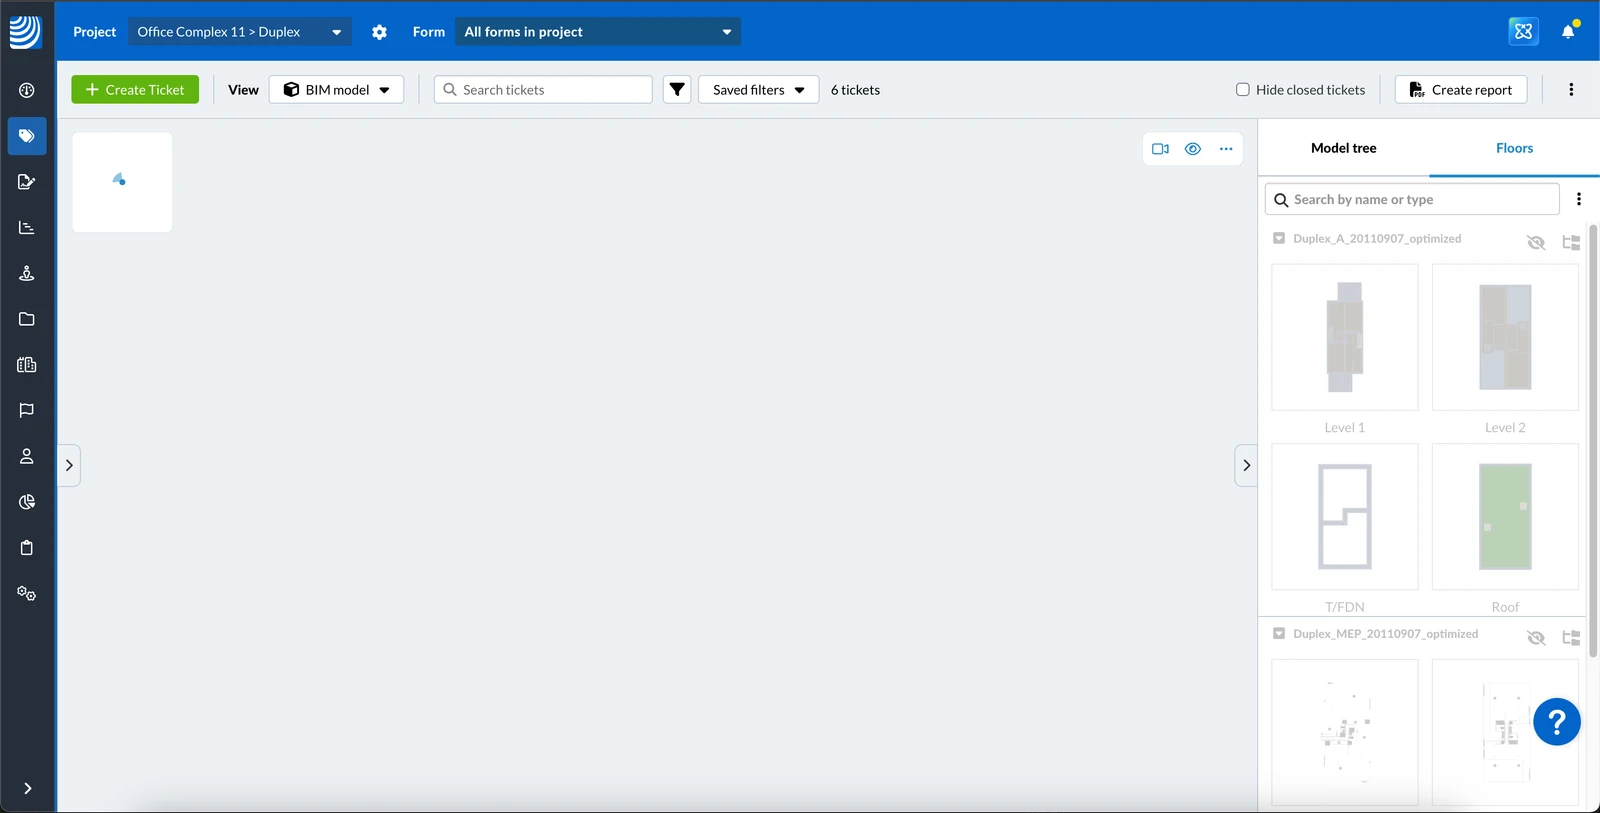
- See all floors are hidden
- Tap the eye icon
- Tap Floors
- Tap Hide this model's floors
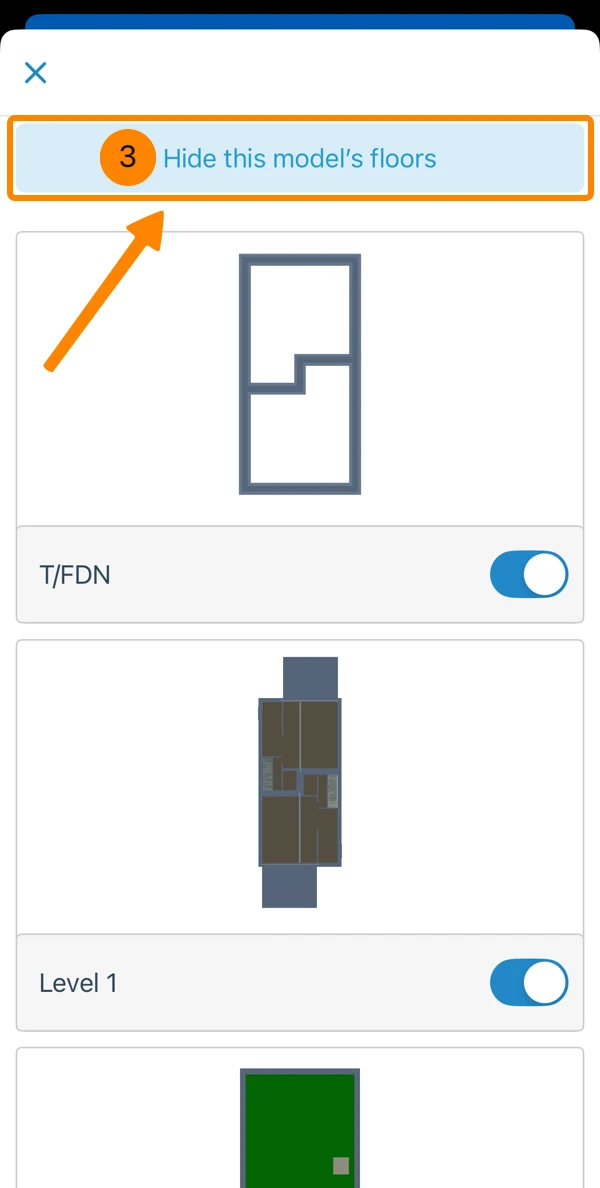
- See all floors are hidden
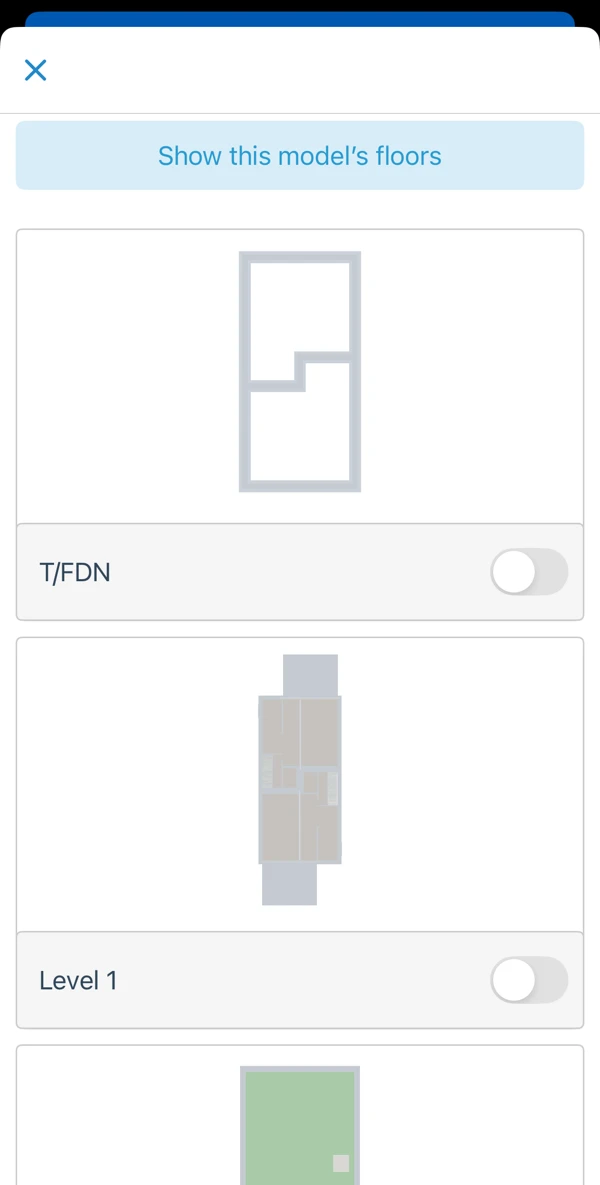
To show all hidden floors:
- Click Floors
- Open the More menu
- Click Show all
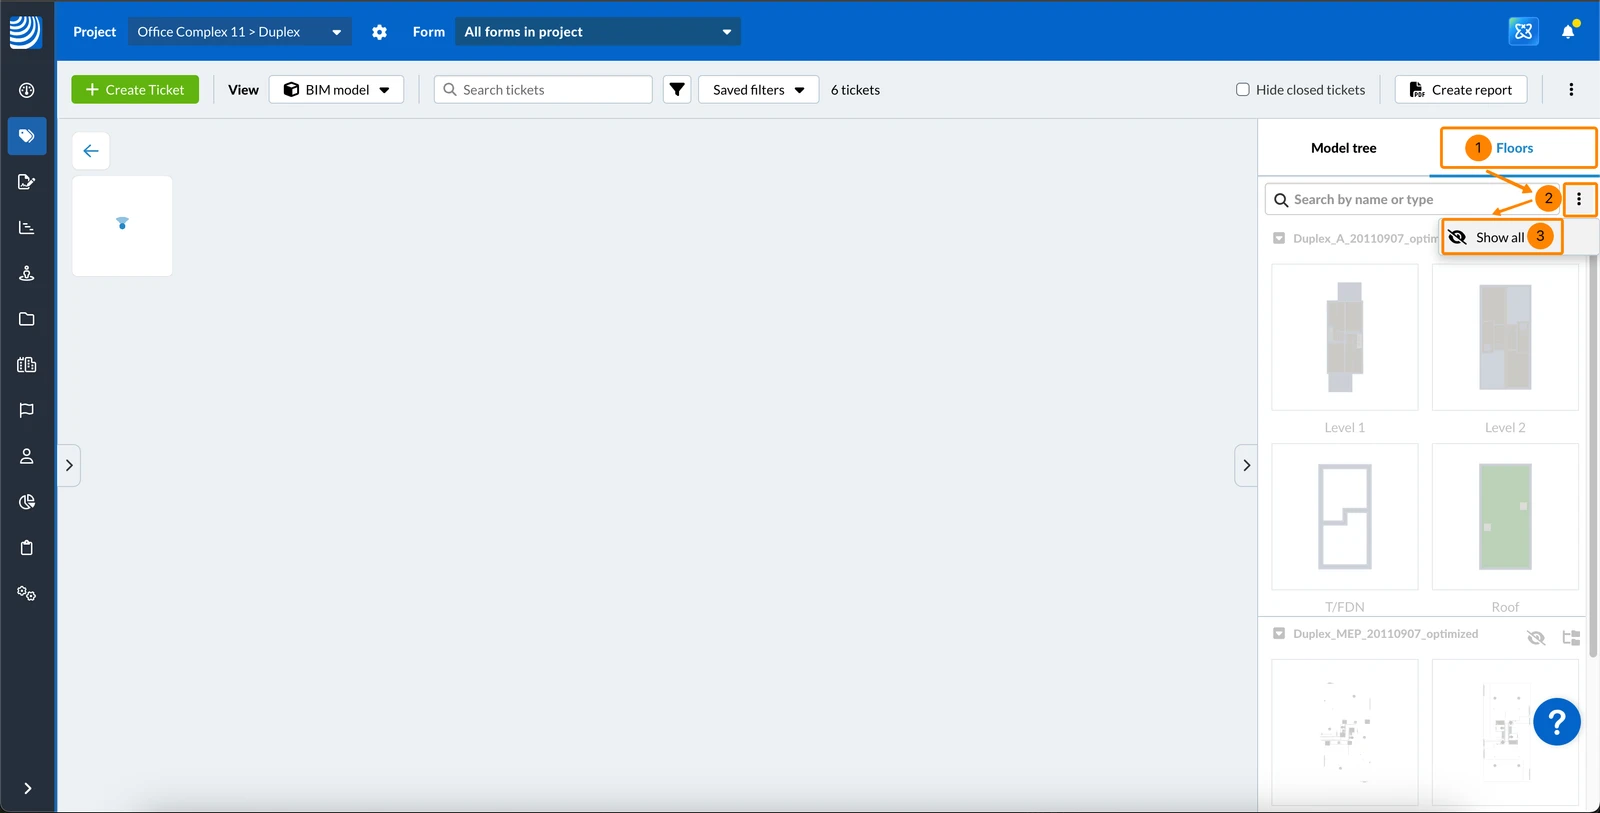
- See all floors again
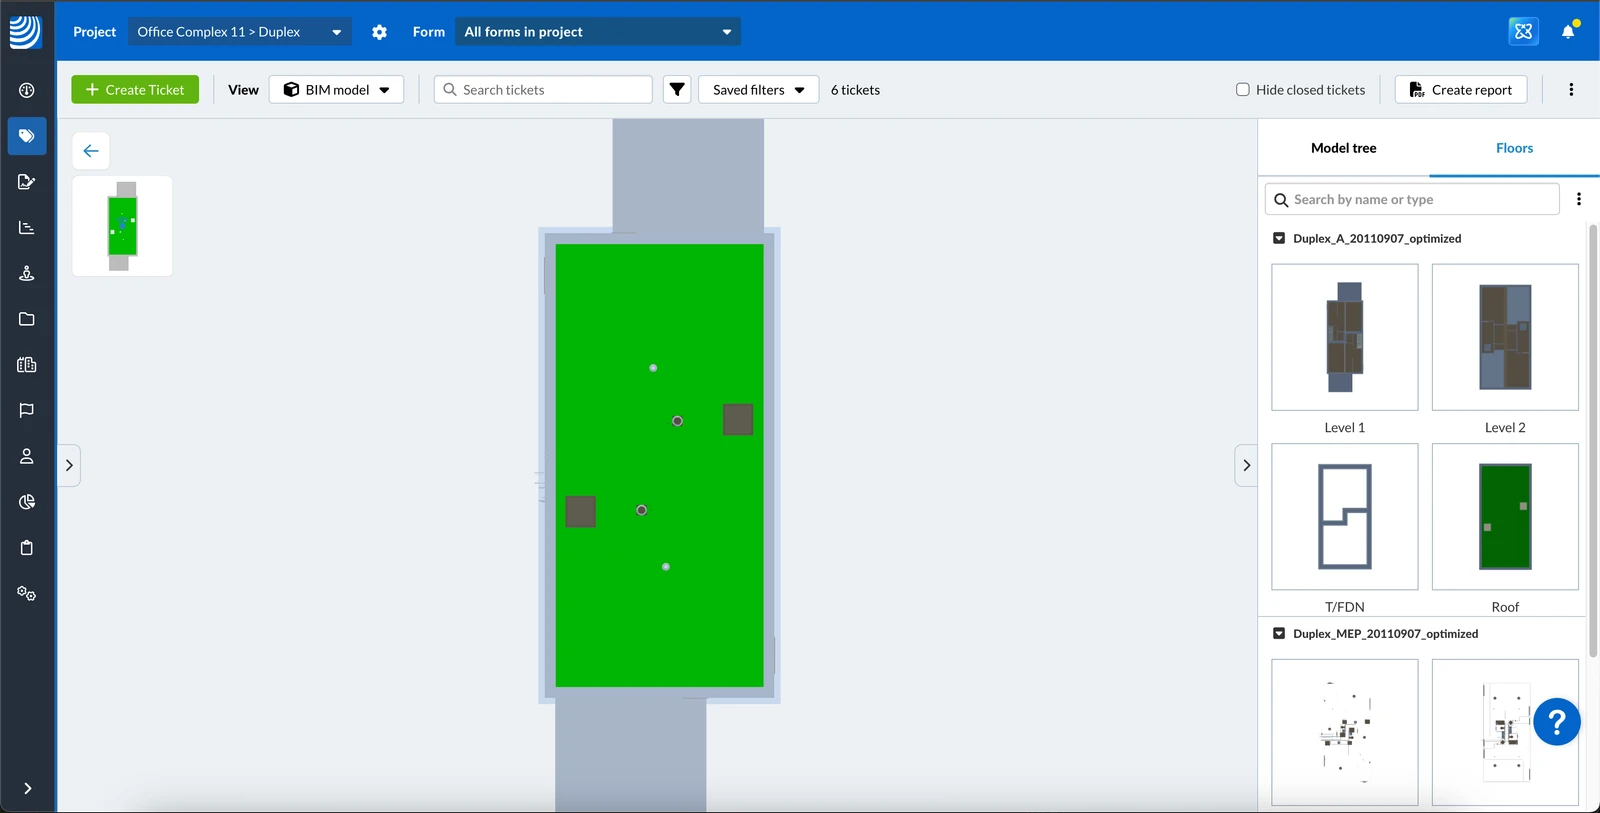
- Tap the eye icon
- Tap Floors
- Tap Show this model's floors
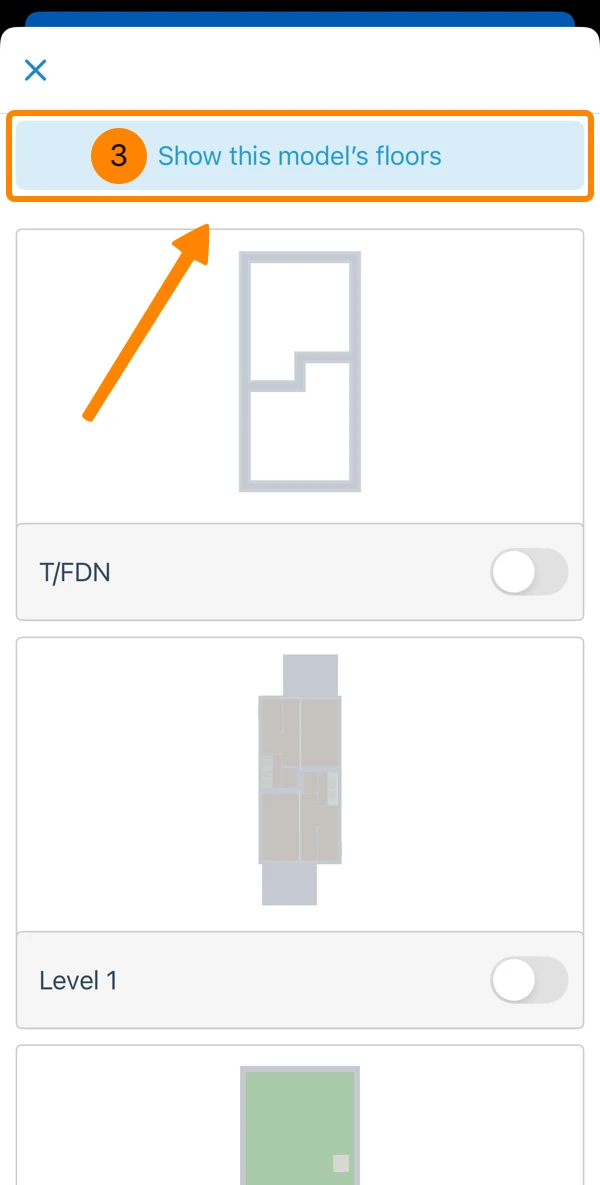
- See all floors again
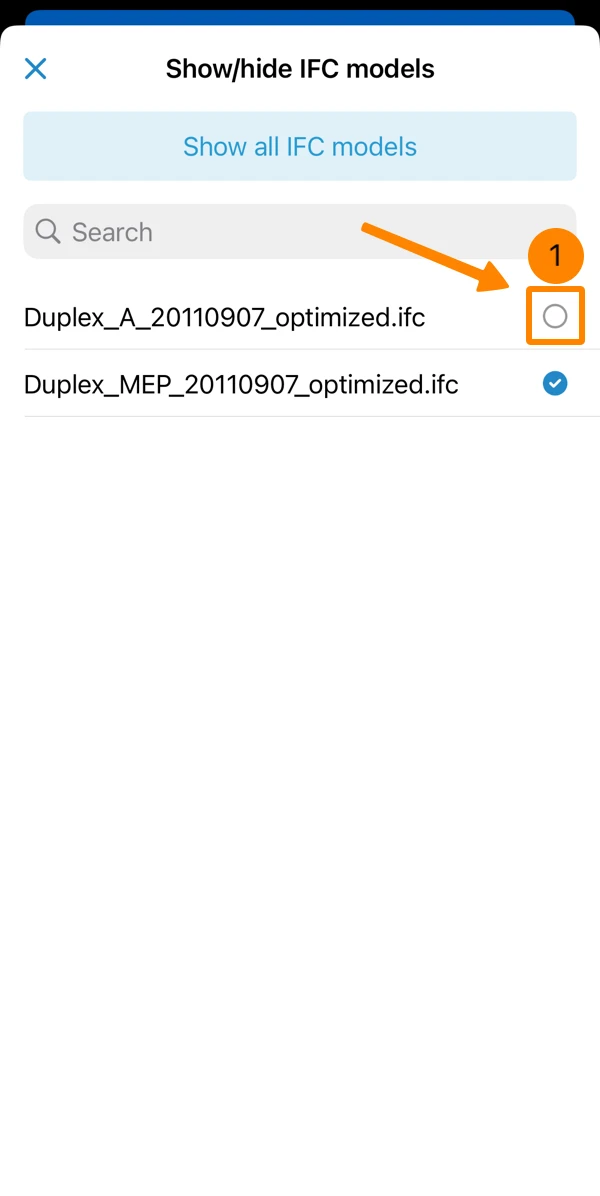
Show/Hide IFC Models
When using federated models where model data is split into several IFC files you can decide which models to show simultaneously.
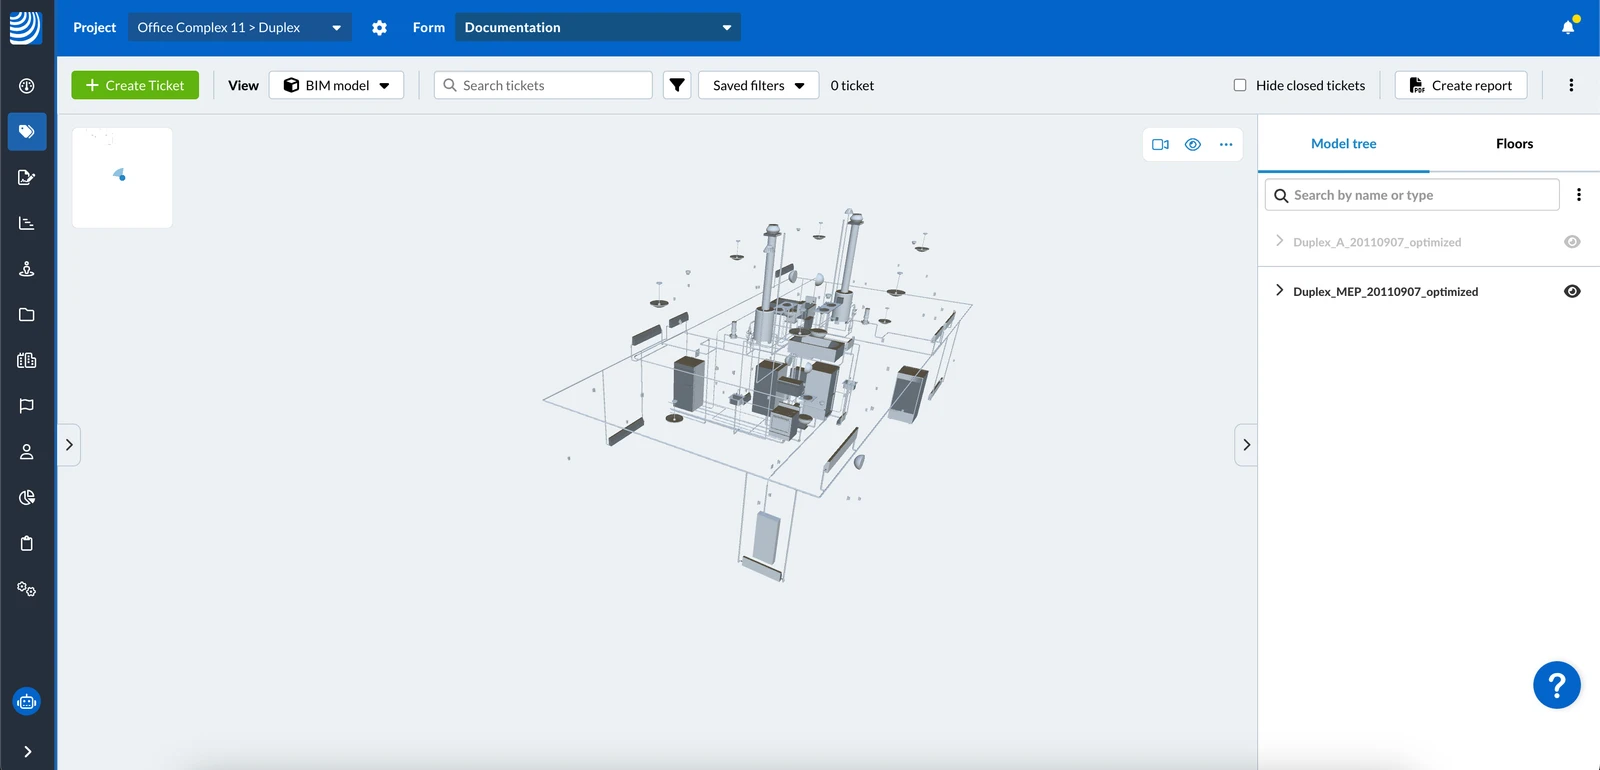
To hide an IFC model:
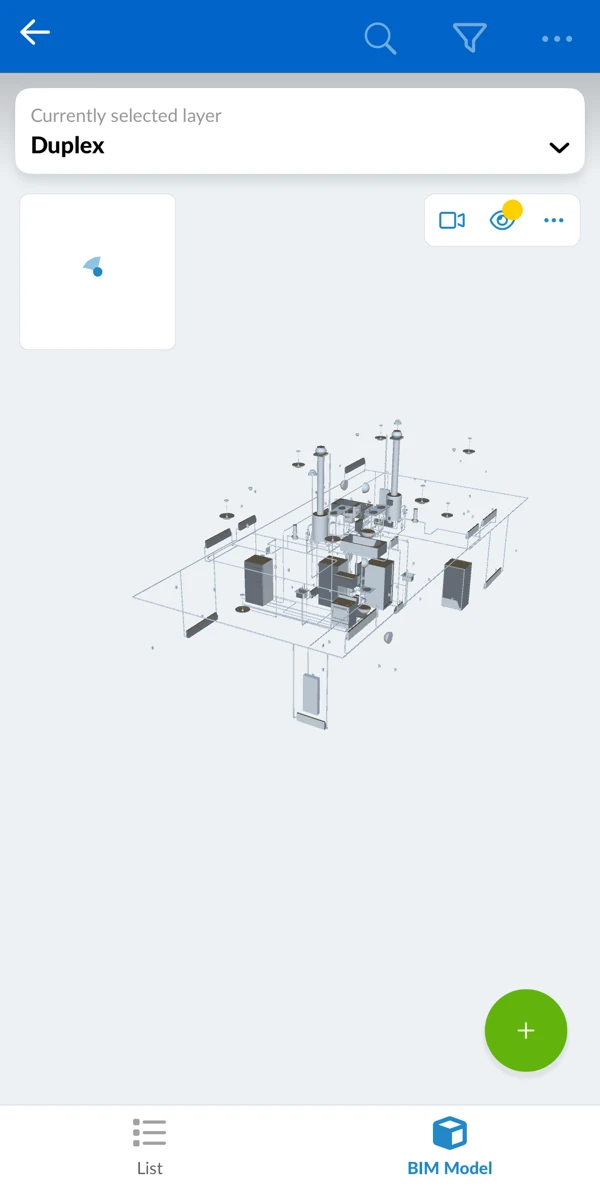
- Click Model tree
- Click the eye icon next to the model that you want to hide
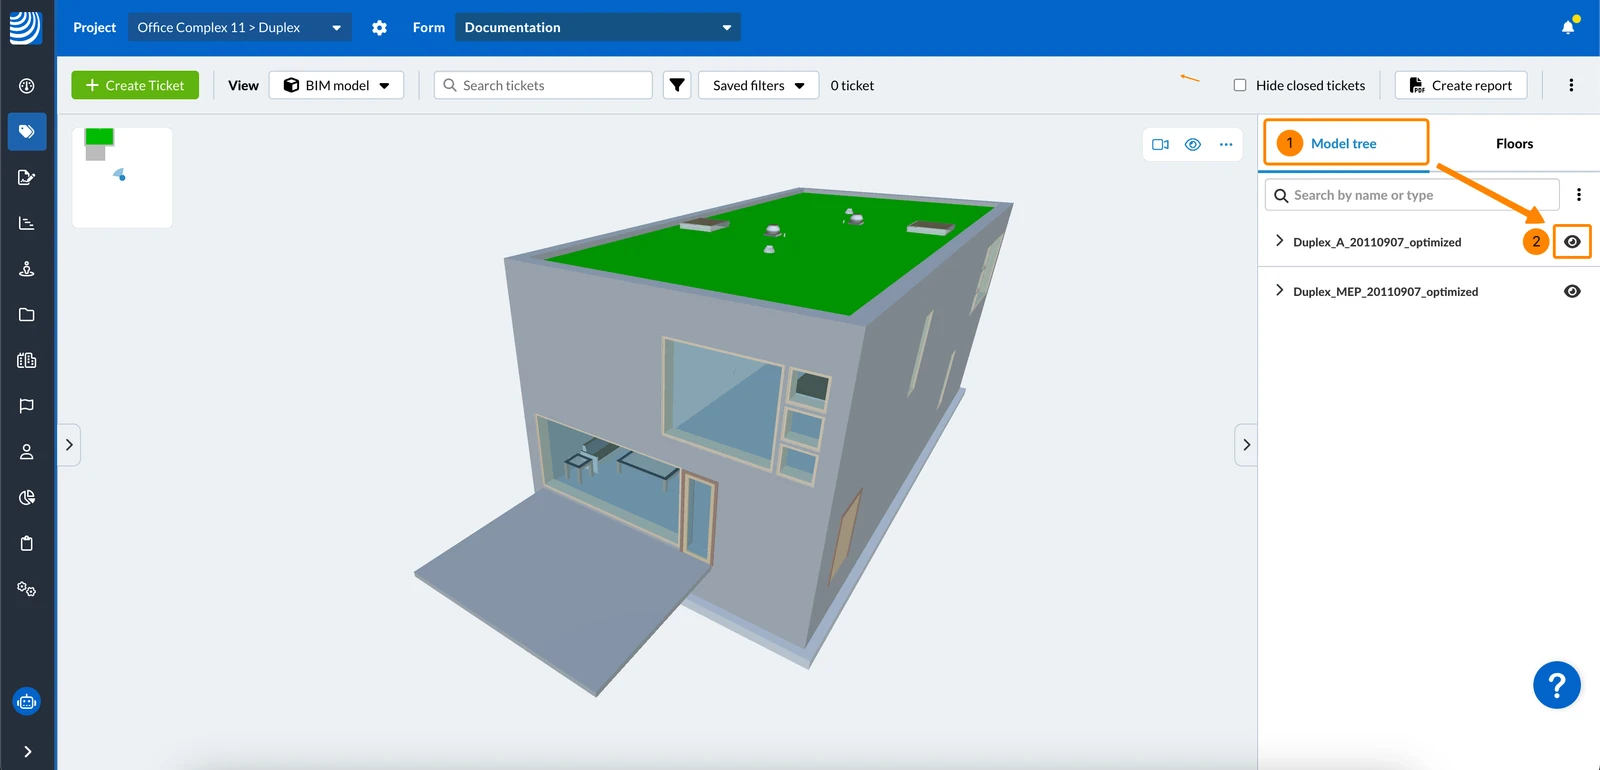
- You see only the selected models
- Tap the eye icon
- Tap Models
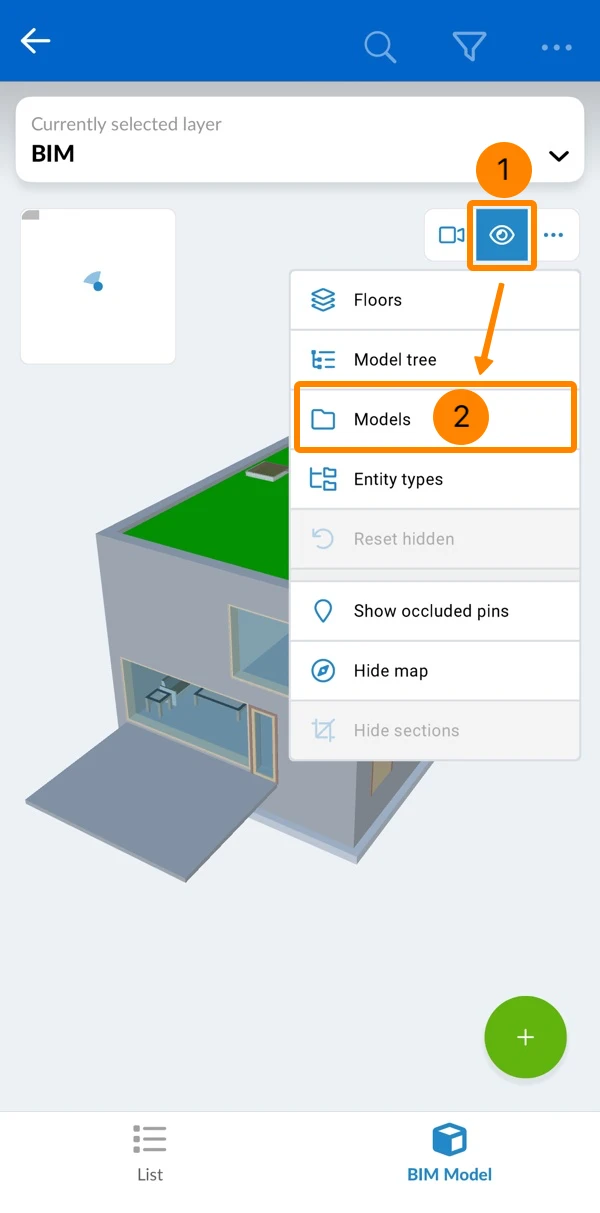
- Disable the checkboxes of the models you want to hide
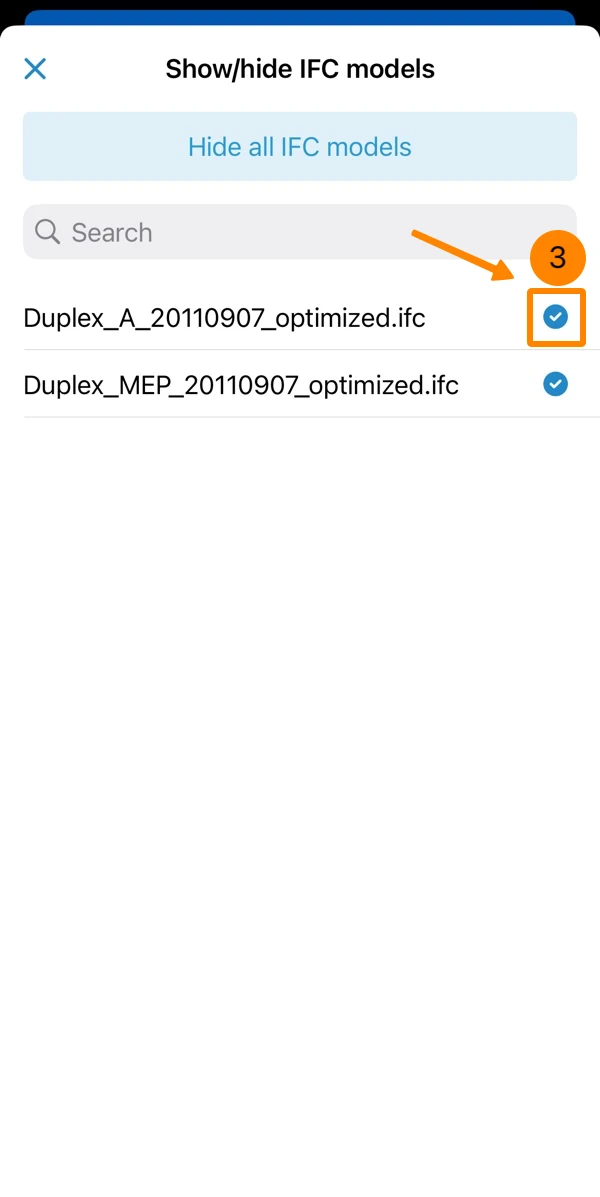
- You see only the selected models
To show the model again:
- Click Model tree
- Click the crossed eye icon next to the model that you want to show again
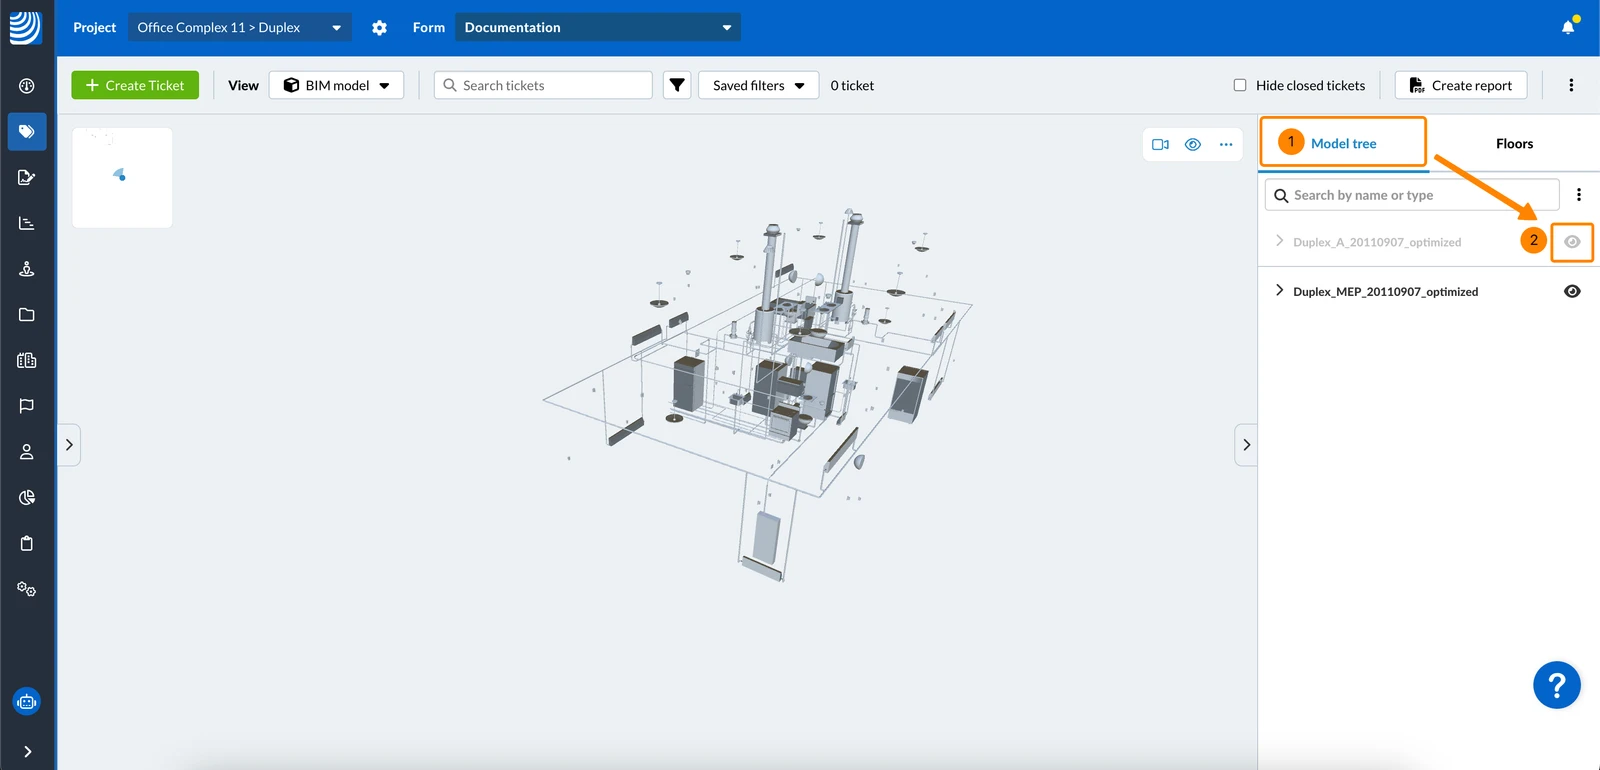
- Tap the eye icon
- Tap Models
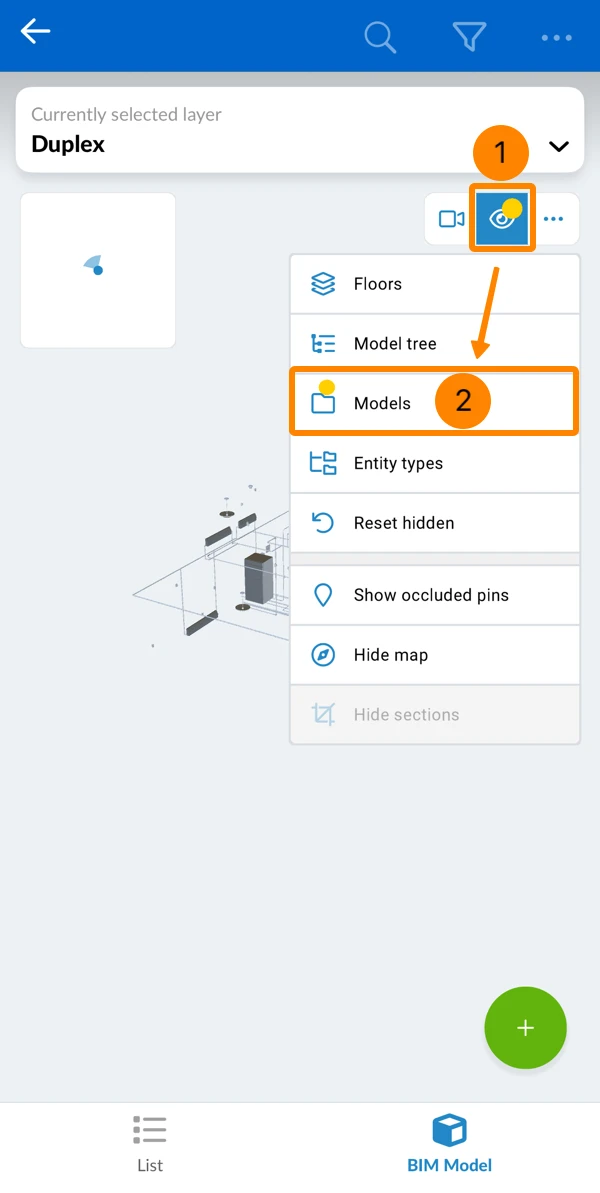
- Select the checkboxes of the models that you want to show again
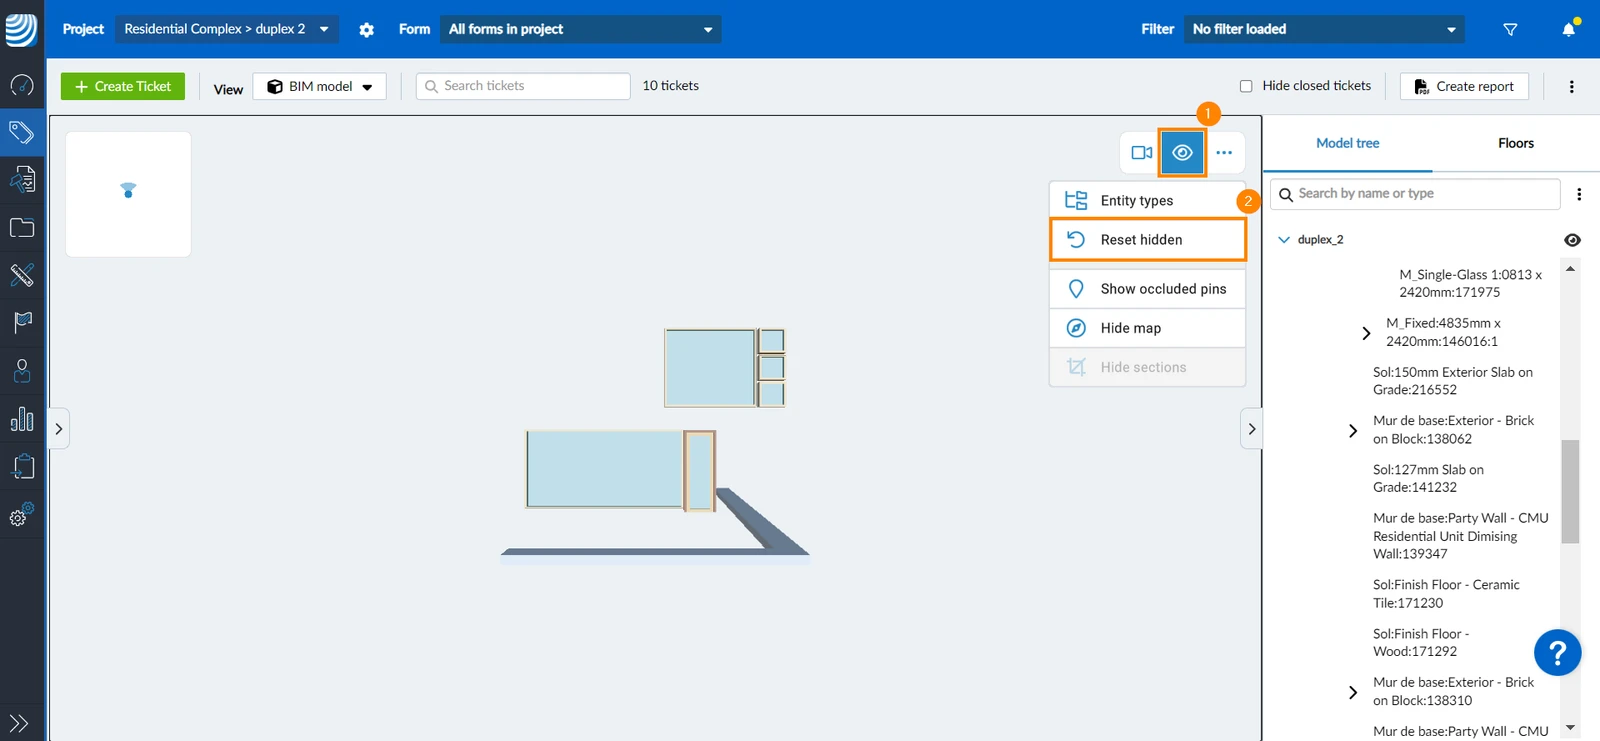
Reset View to Show All Elements
You can reveal all elements that have been hidden, whether by entity types or individually as elements. To do so:
- Click/tap the eye icon
- Click/tap Reset hidden
Show/Hide Occluded Pins
Ticket pins that are covered by walls and other elements are of course not visible. However, you can still display all ticket pins, including those that are covered. See Tickets BIM View > Show/Hide Occluded Pins.
Measurement Tool
Use the measurement tool to measure distances, angles and areas.
Section Planes & Section Boxes
The section plane and section box tools allow you to cut through the model for a more detailed view. These features are essential for inspecting interior elements and facilitate measuring and ticket creation within models.
Tickets in BIM Models
Using the BIM viewer, you can create and view tickets within BIM models.
Augmented Reality View Mode
Switch to Augmented Reality (AR) view mode in the BIM viewer in the mobile app to compare your plan with the actual build, look behind walls, verify technical building equipment is installed correctly, etc.
You simultaneously see what your mobile device camera captures live and an overlay of the BIM model.
Updated April 13, 2026