

 Deutsch
 Español
 Français
 Hrvatski
 Italiano
 Polski
 Português (BR)
Work with Section Planes & Section Boxes
Overview
The BIM Viewer supports multiple section planes and a section box, which allow you to focus on specific areas by cutting through the 3D model. Sections allow to position the camera outside and see all relevant information within the model.
Access & Permissions
How to Access the BIM Viewer
-
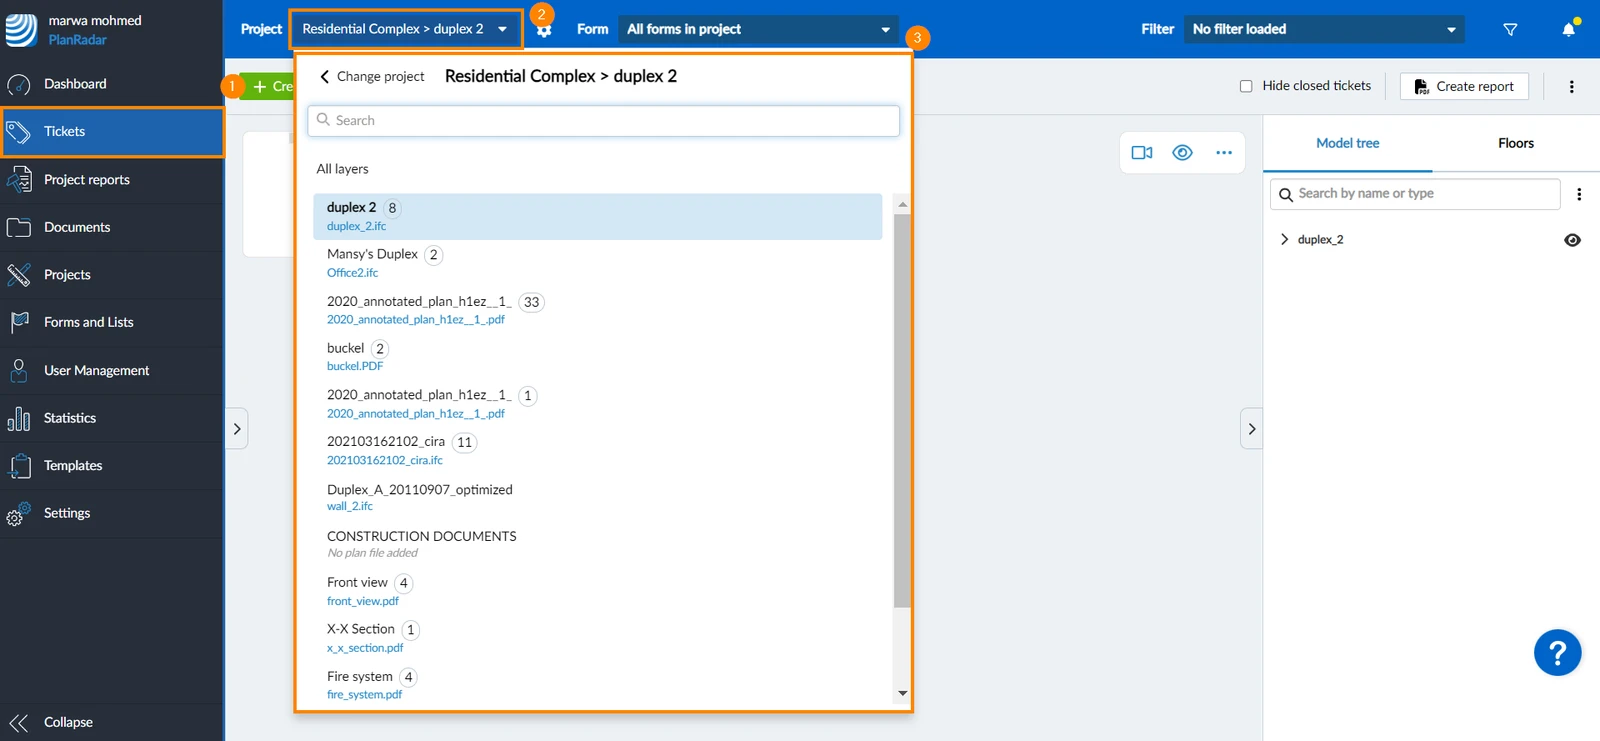
Click Tickets
-
Open the project drop-down
-
Select the project and layer
-
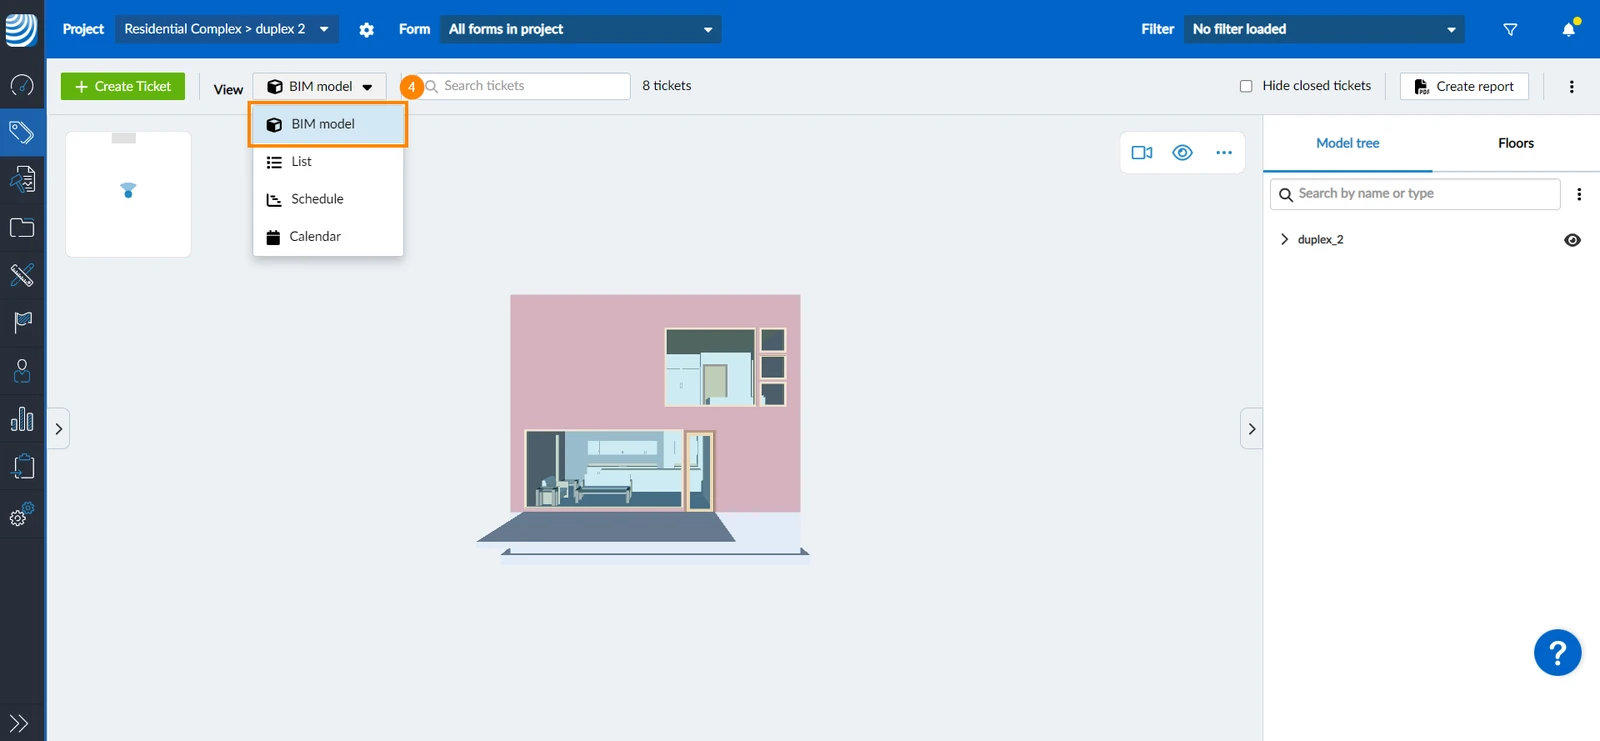
Click BIM model in the View drop-down
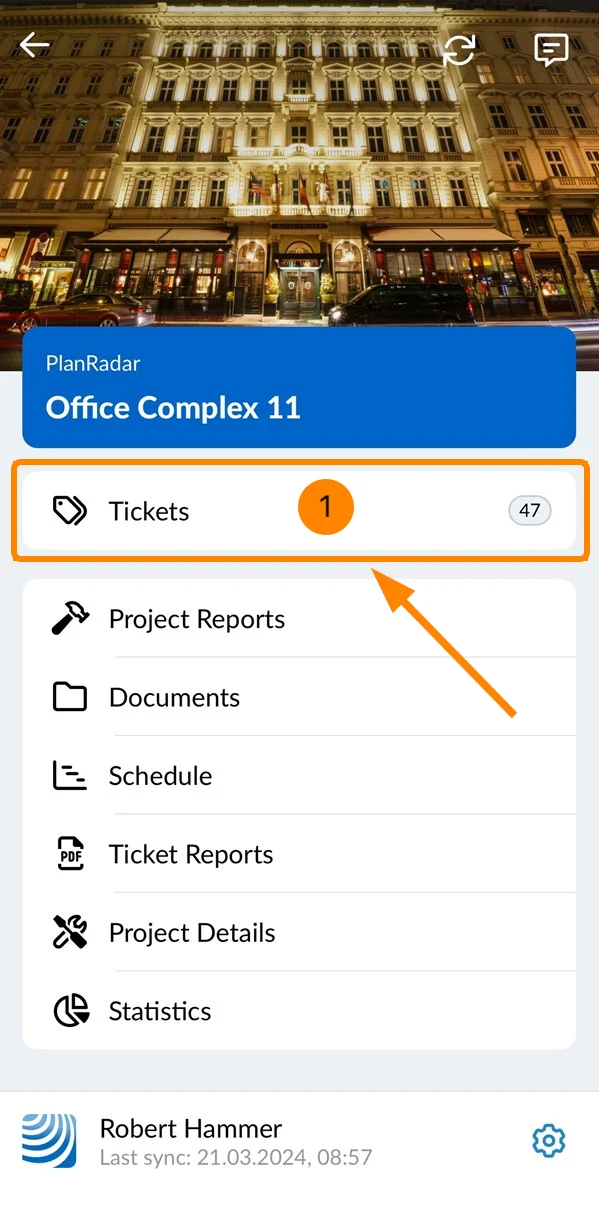
- Tap Tickets in the main menu
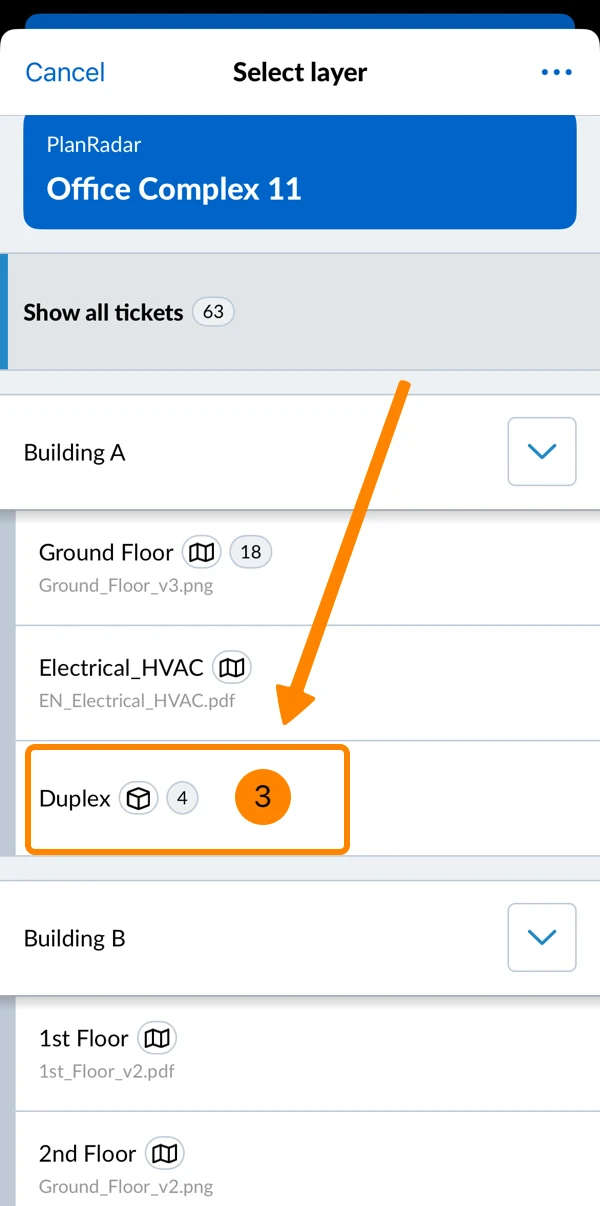
- Open the layer selector
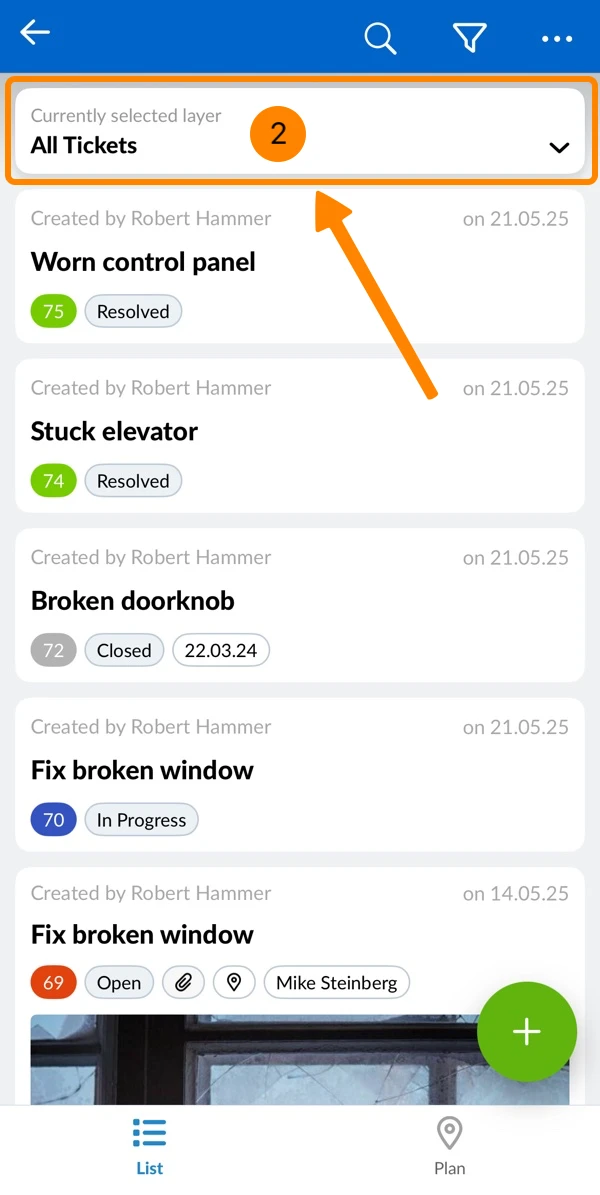
- Tap on a layer with a BIM model (maked by a cube icon)
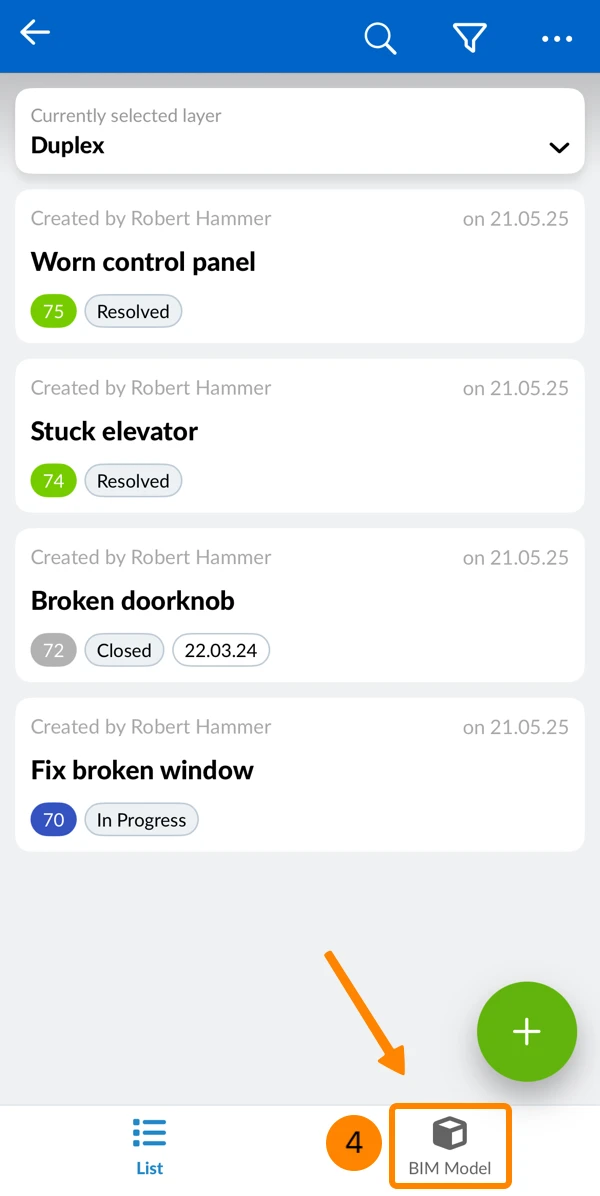
- Tap BIM Model
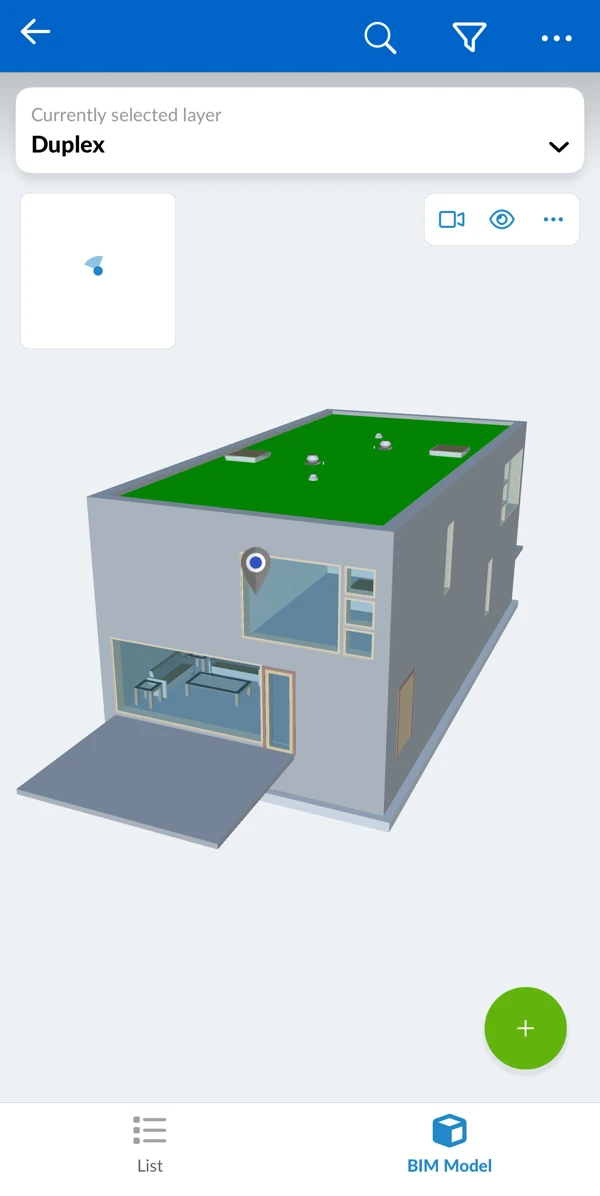
- You see the BIM model
Section Planes
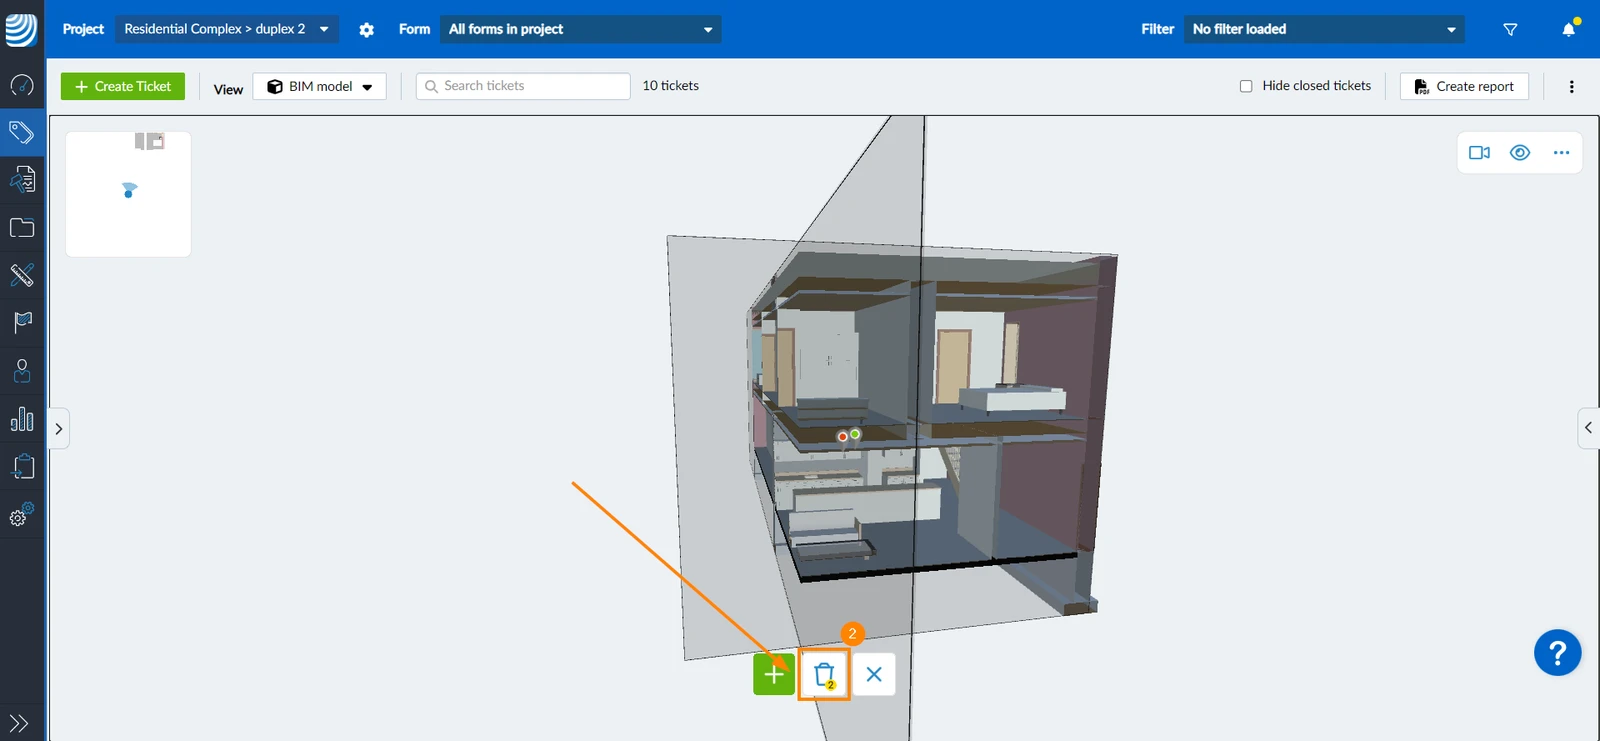
Use section planes to slice the model. You can create up to six section planes.
Create a Section Plane
To create a section plane:
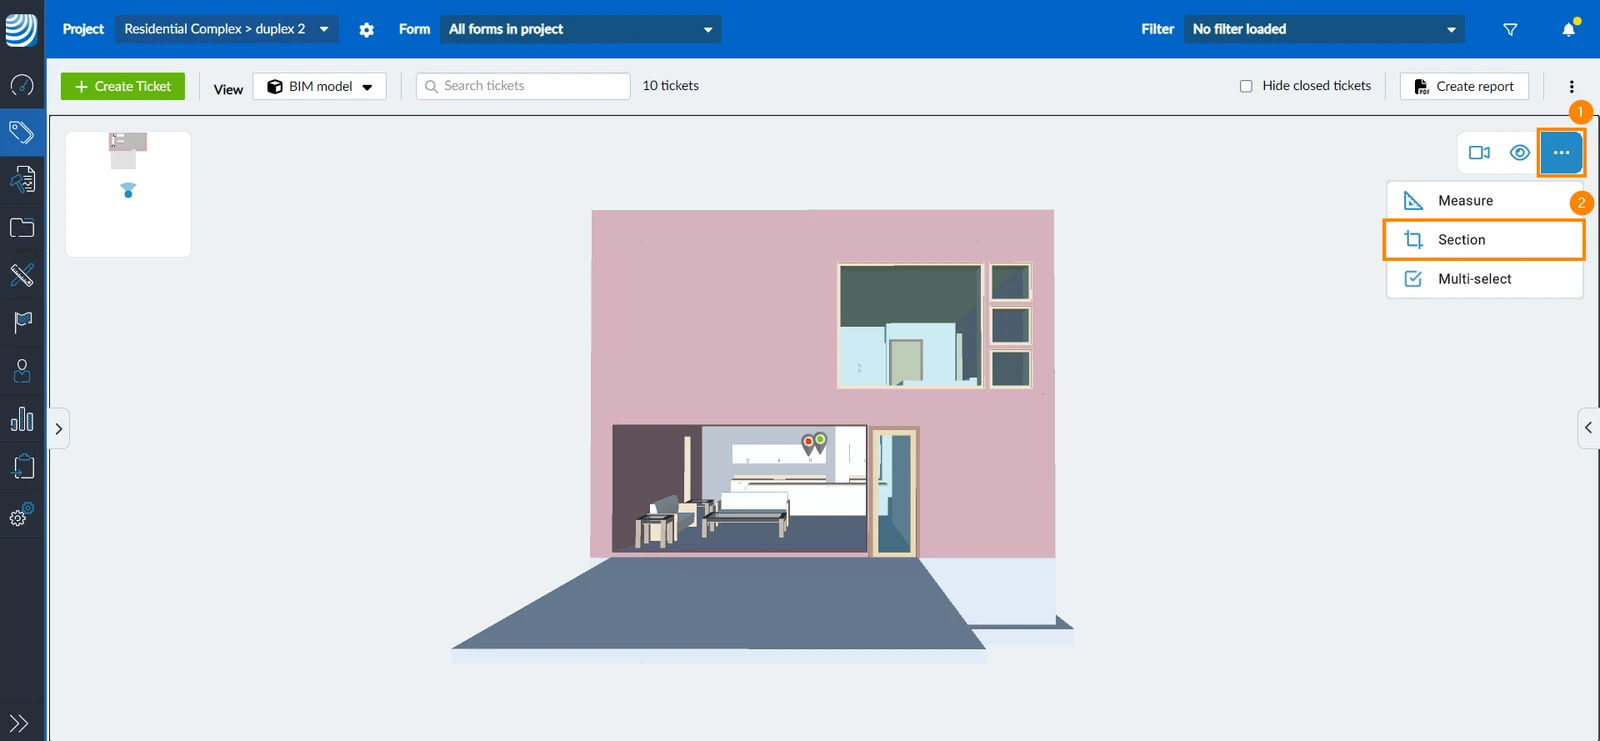
- Click/tap the more menu
- Click/tap Section
- Select a face of an object in your BIM model to start creating a section plane parallel to the face
- Drag and drop the section plane to adjust its position
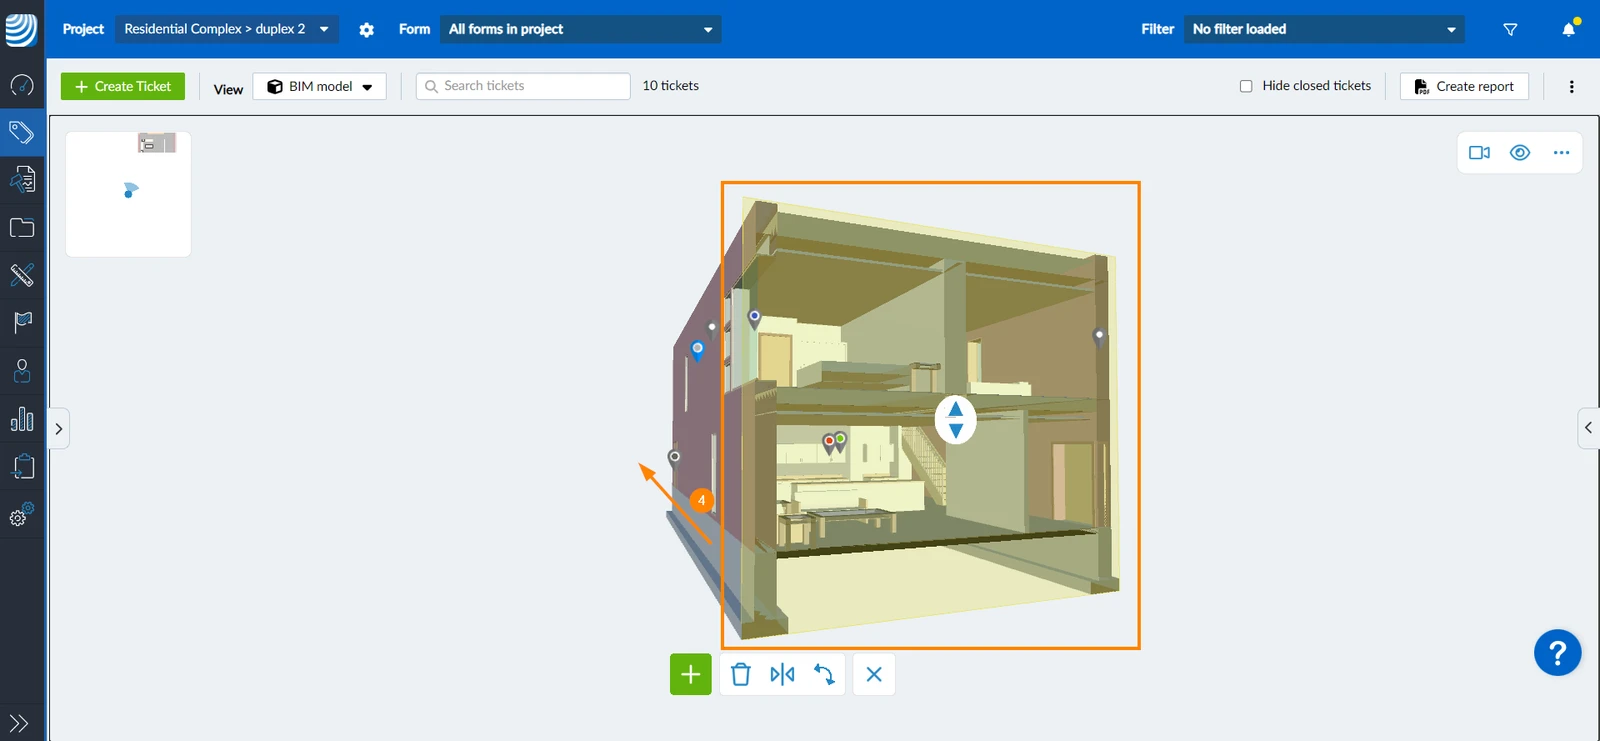
Create Multiple Section Planes
To create additional section planes:
- Click/tap the + sign
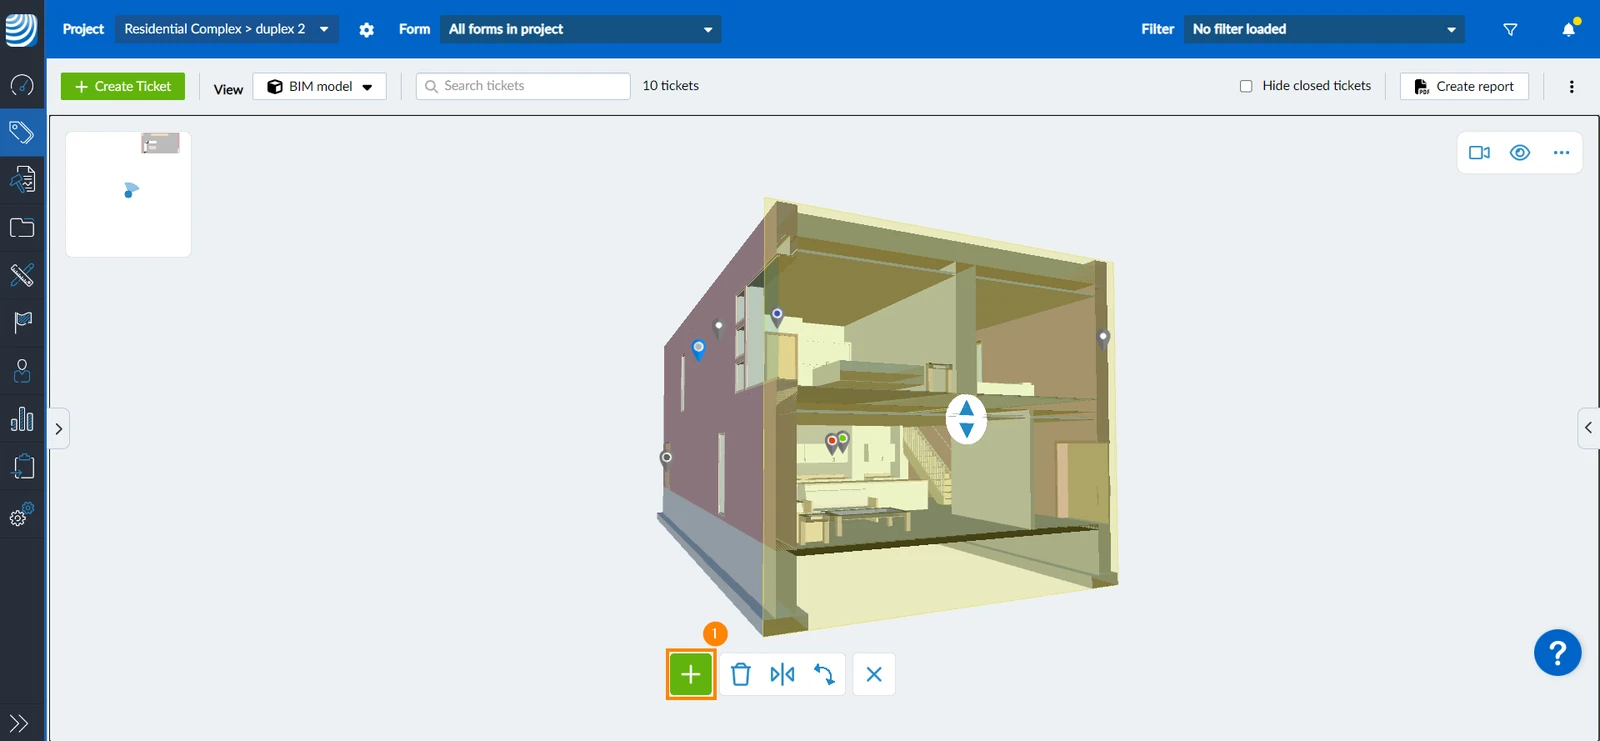
- Crete a new section plane as explained above in Create a Section Plane
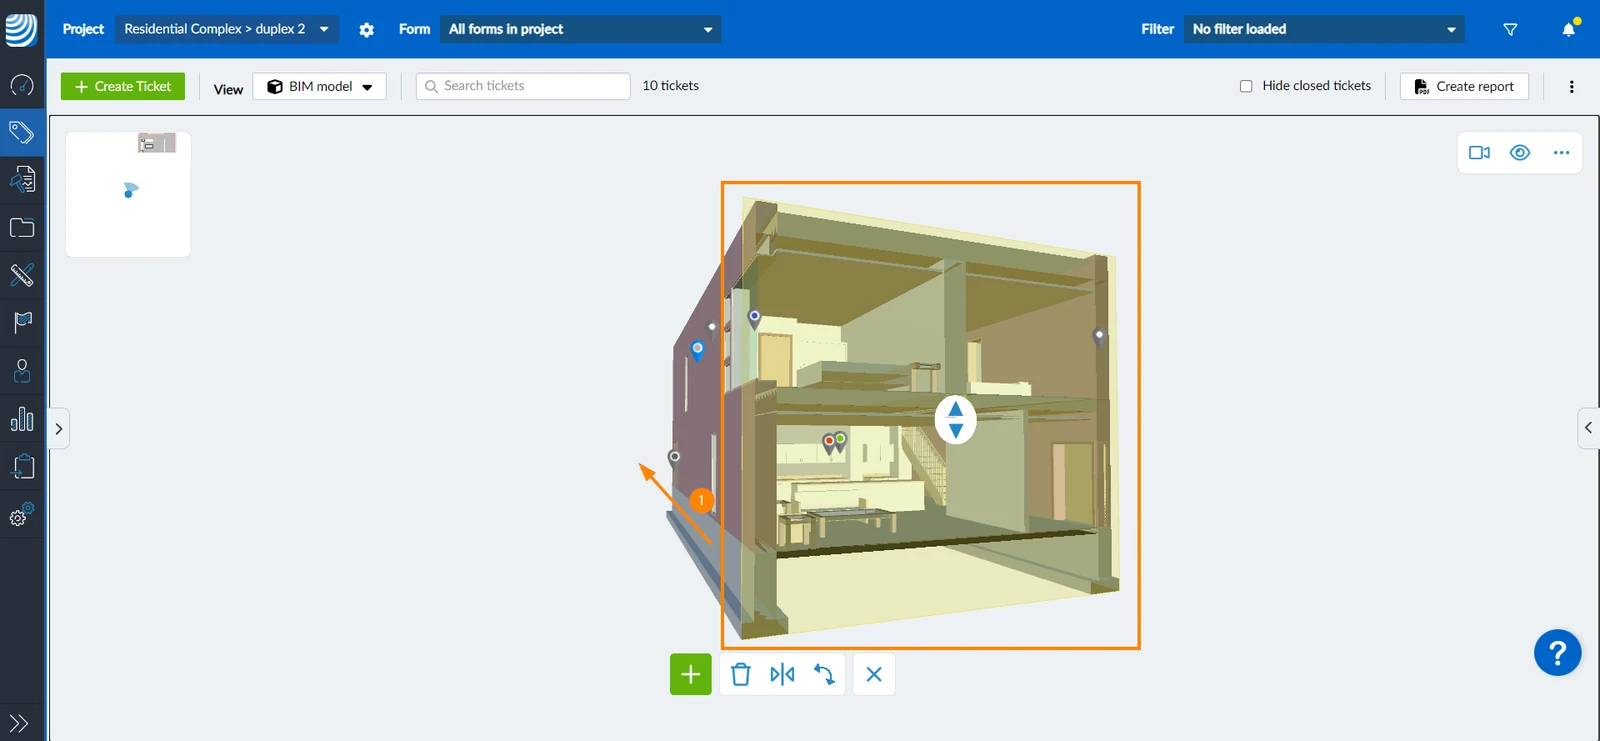
Move Section Plane
- Drag and drop a section plane to adjust its position
Rotate Section Plane
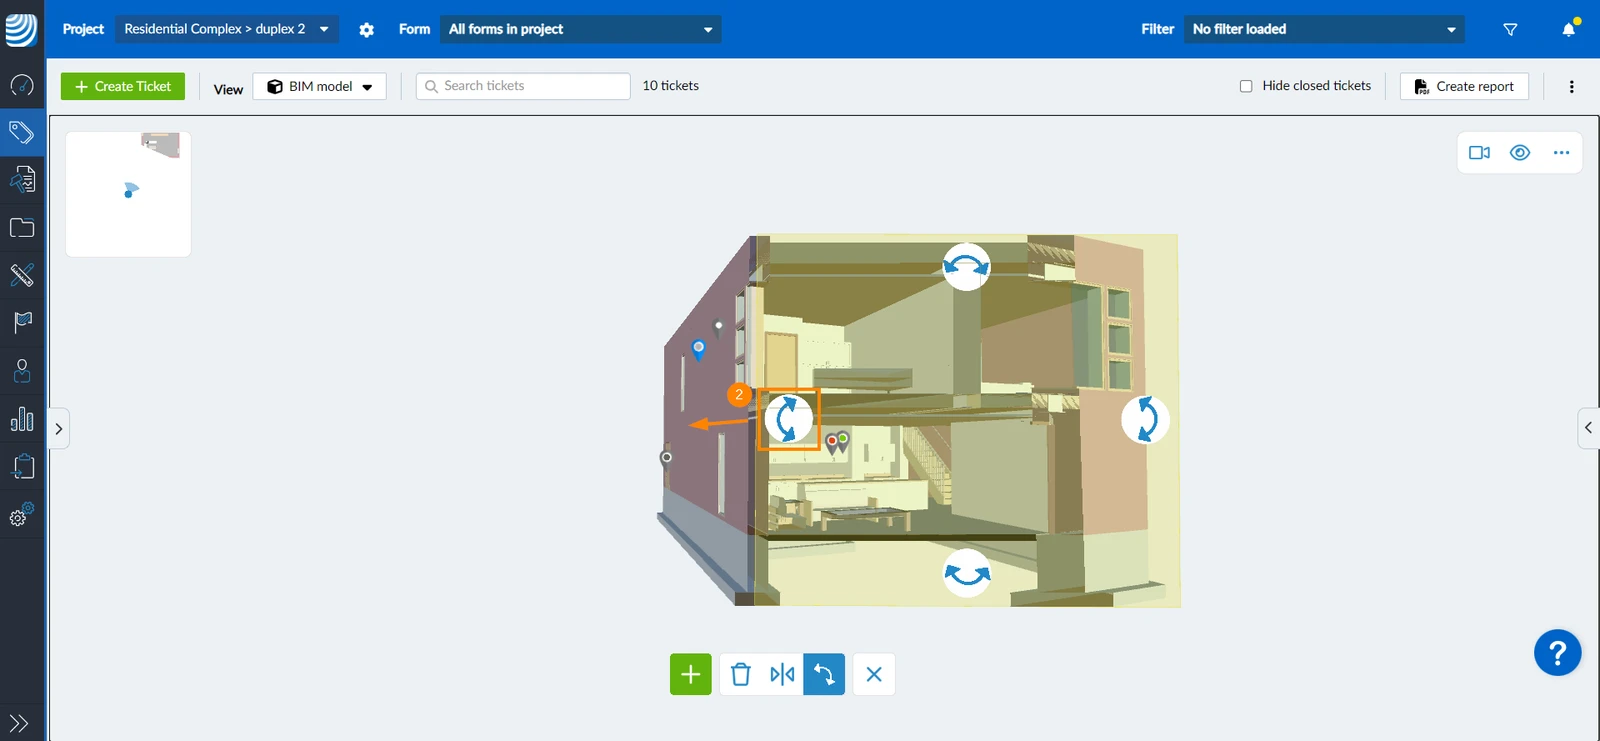
Section planes can be rotated in any direction. To rotate a section plane:
- Click/tap the rotate icon
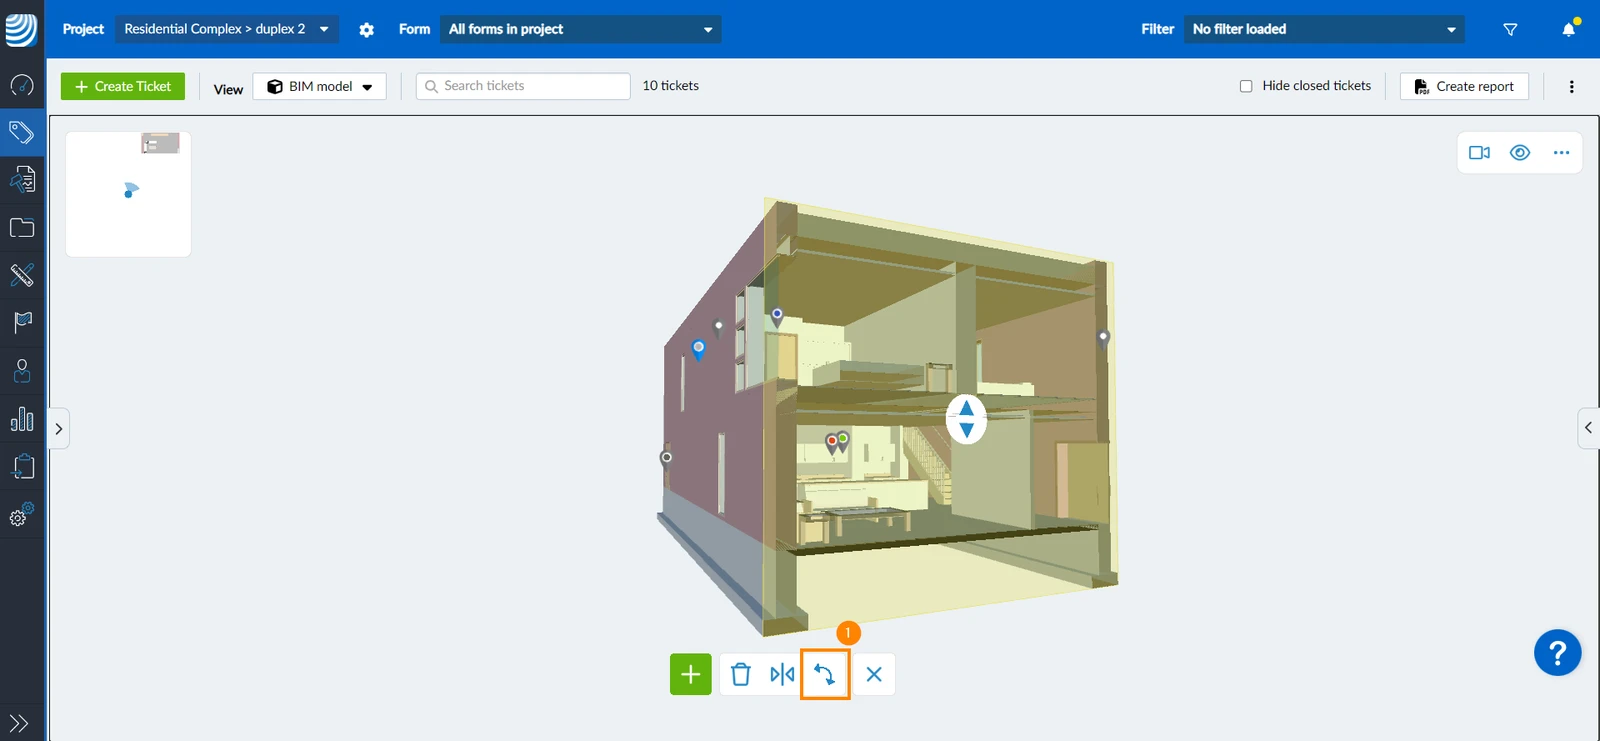
- Move the rotate icon on the model by drag and drop
Flip Section Plane
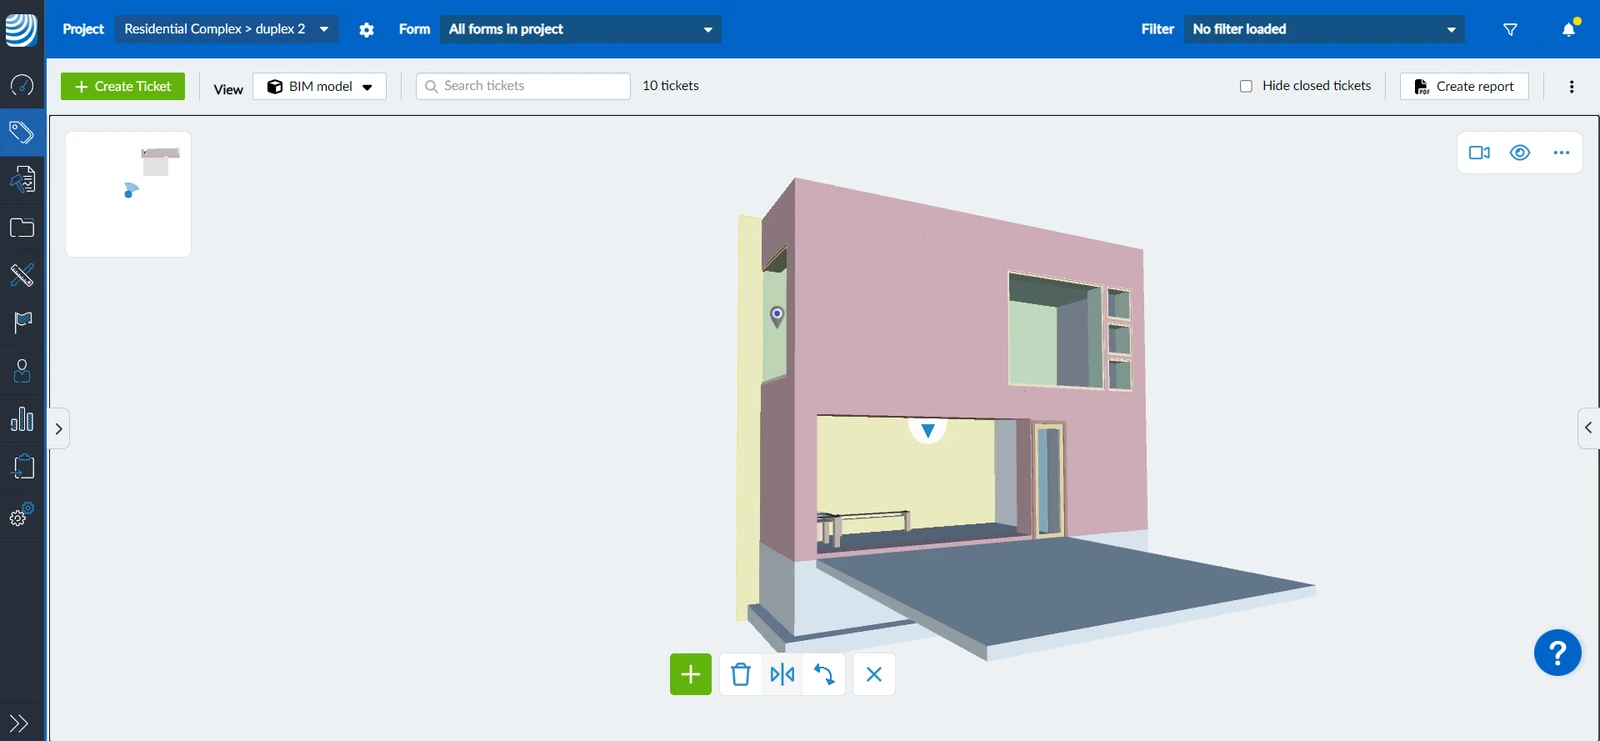
To reverse the cutting direction (i.e. the normal vector) of your section plane:
- Click/tap the Flip icon
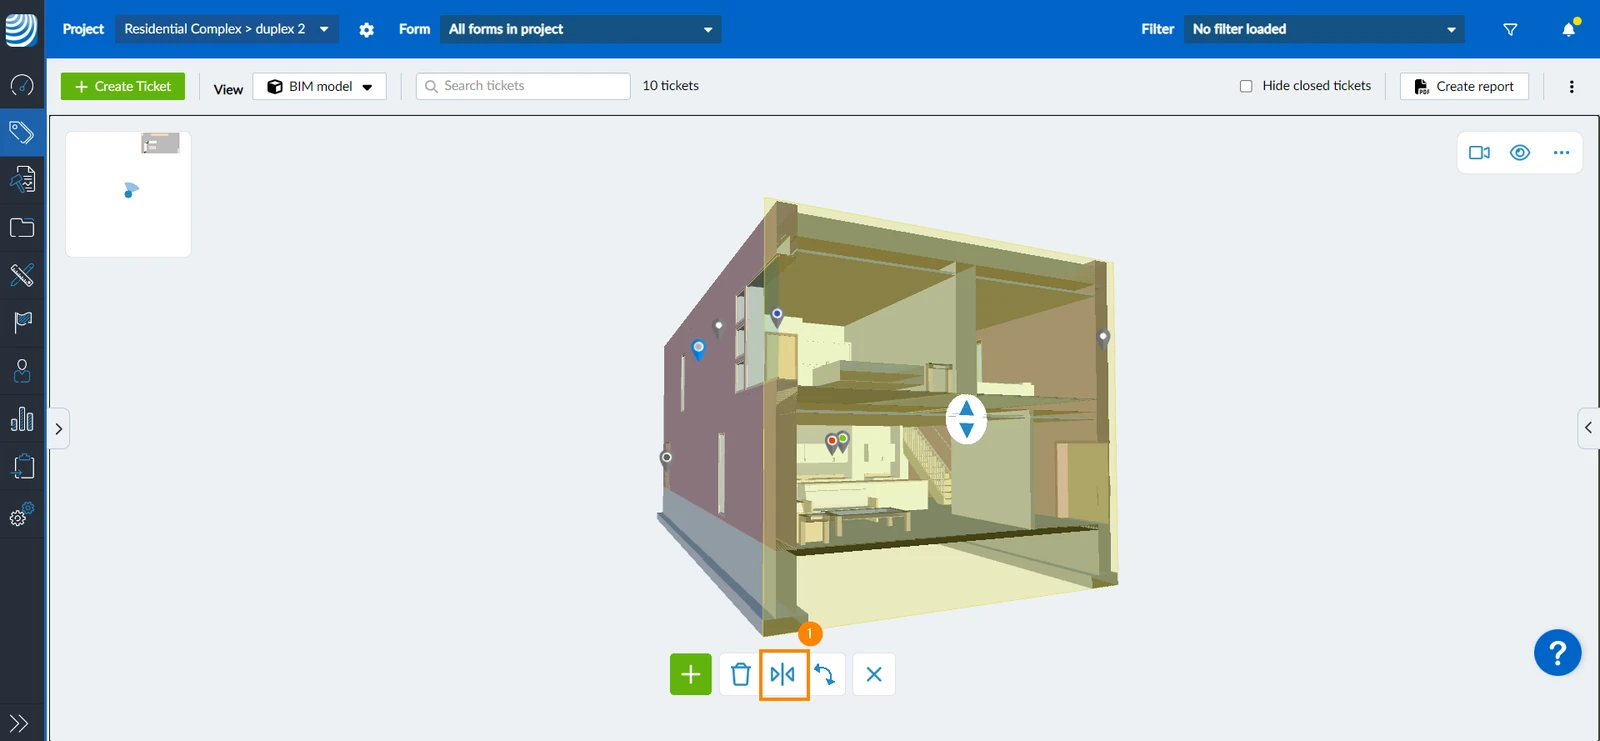
- The section of the plane will be flipped
Delete Section Planes
To delete only one section plane:
- Click/tap on the section plane you want to delete
- Click/tap the delete icon
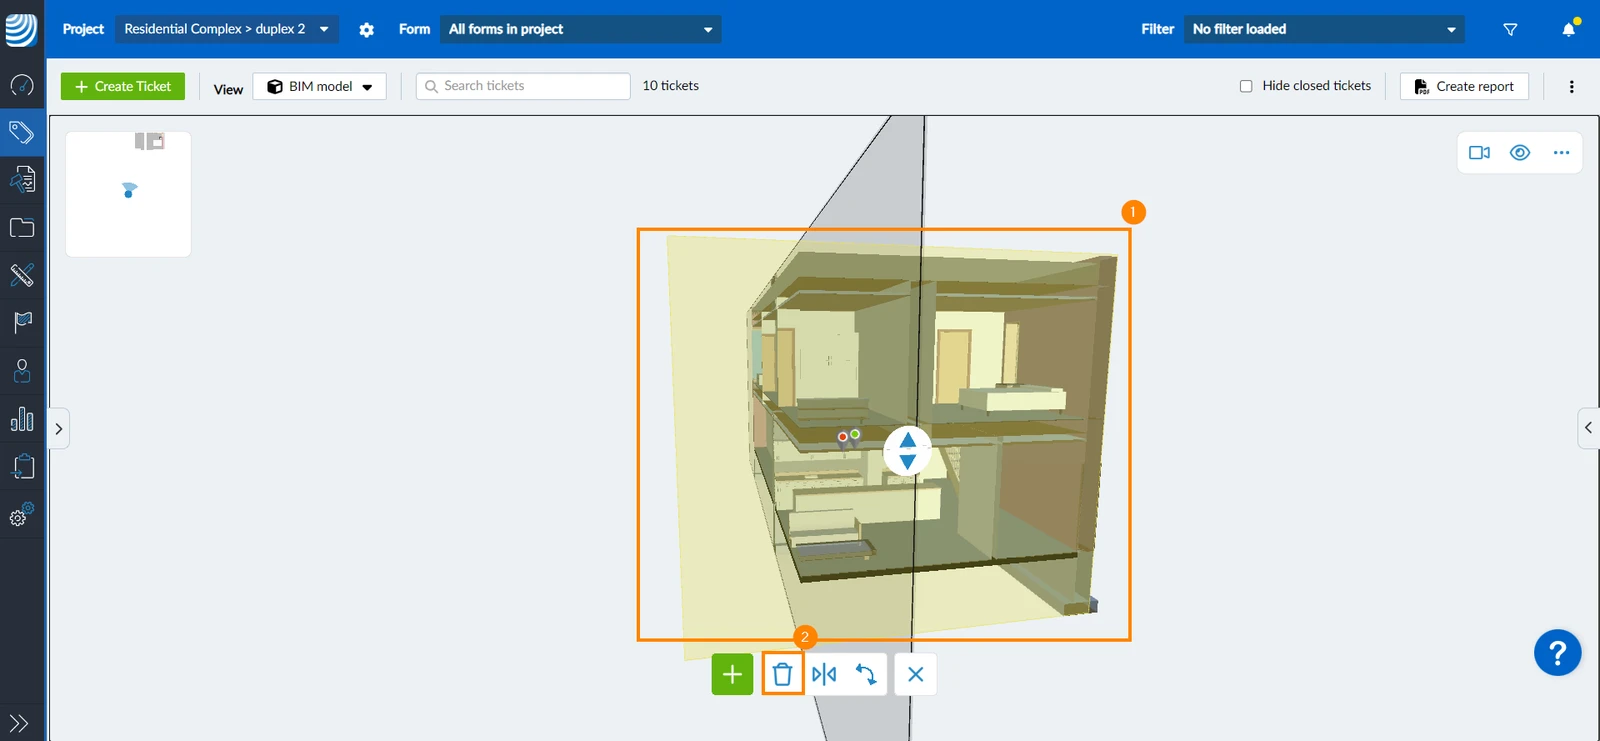
If no section plane is selected, the delete icon shows the number of existing section planes.
To delete all section planes:
- Make sure that no section plane is selected
- Click/tap the delete icon
Section Box
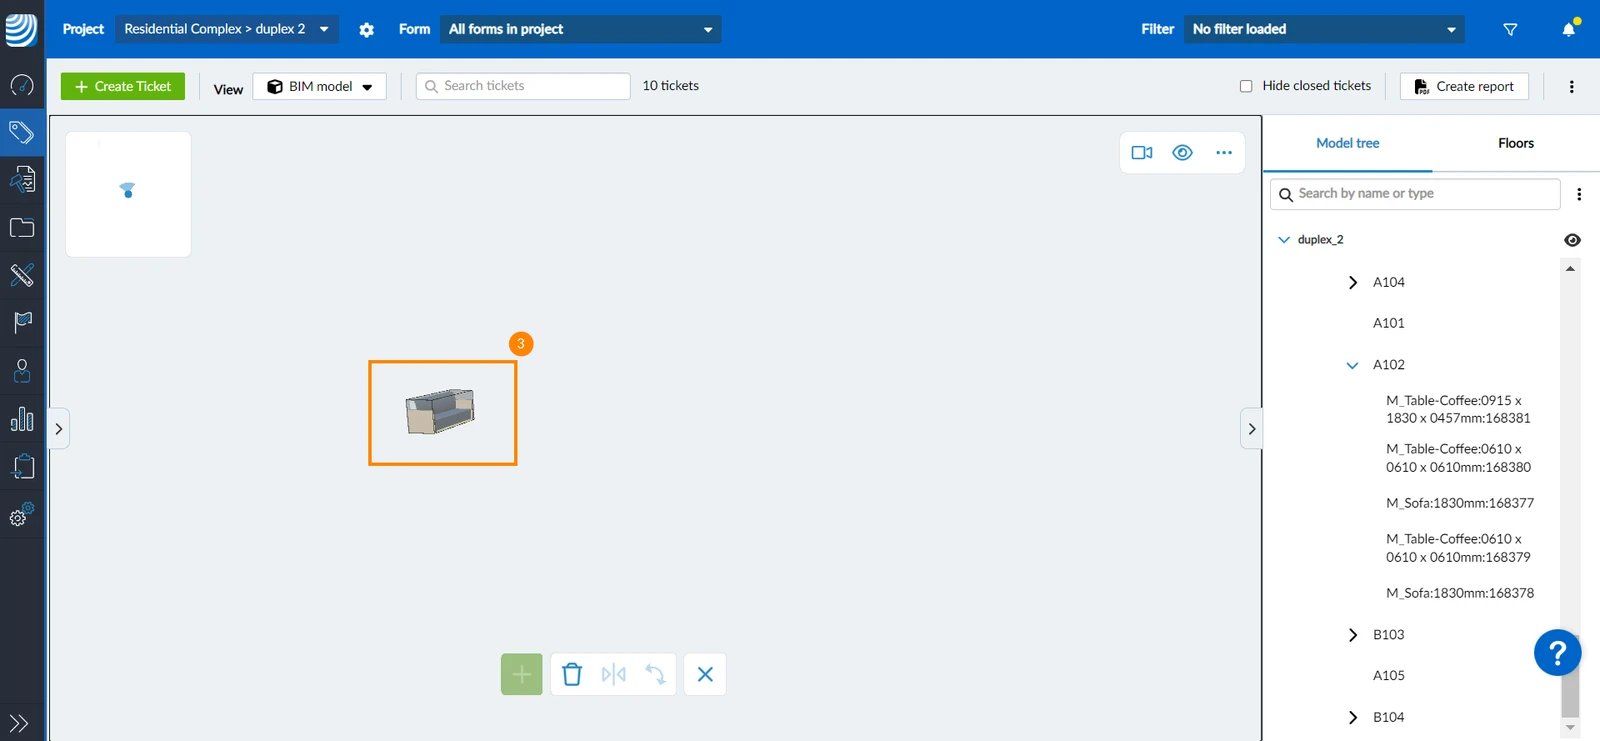
Similar to section planes, the section box allows you to slice the model. The section box will create six section planes around the bounding box of an element. Anything inside the box remains visible, while everything outside is hidden.
Only one section box can be created at a time.
Create Section Box
To create the section box:
- Select the element(s) you want to isolate in the section box
- Click/tap the box icon
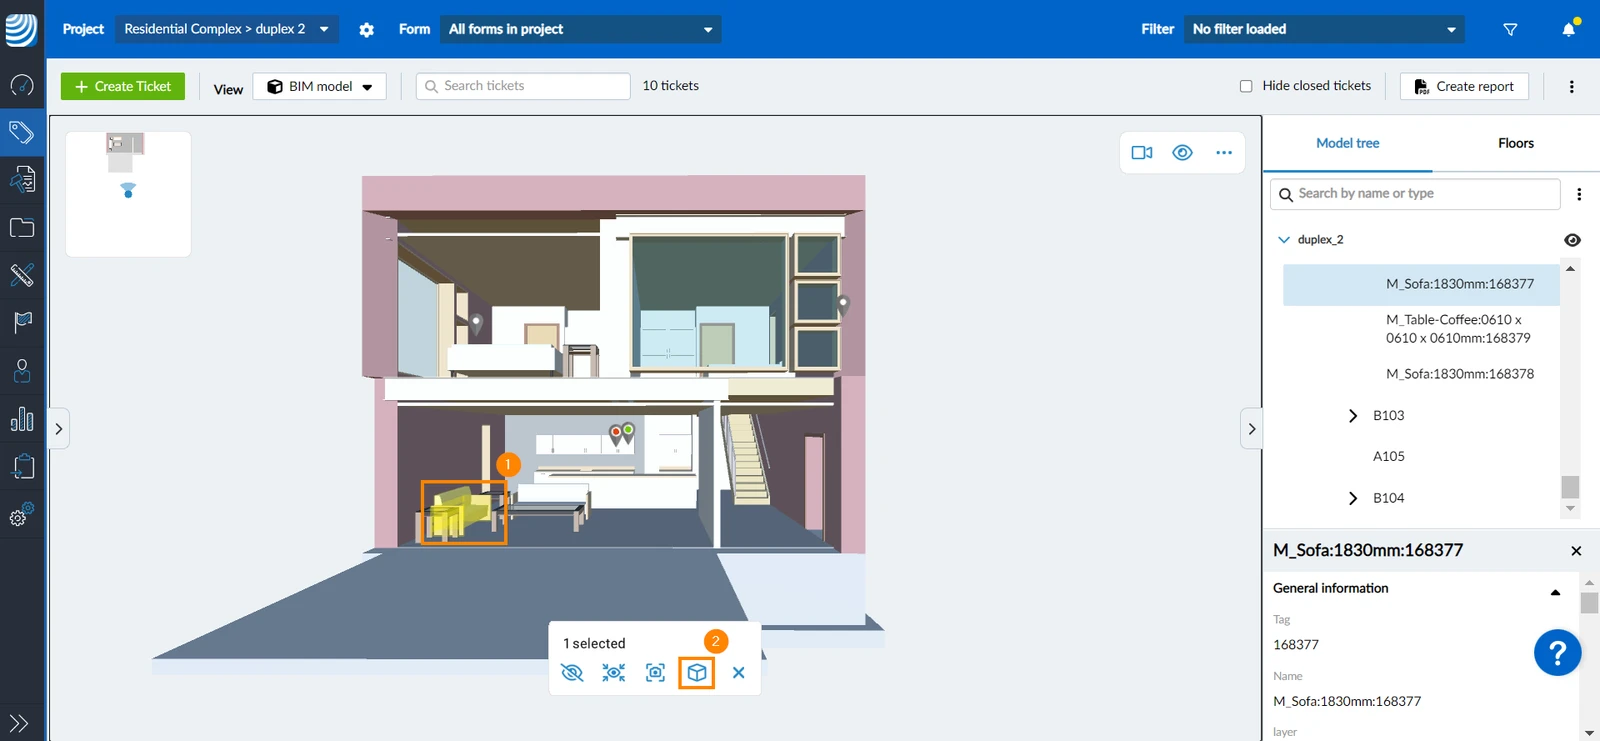
- The element(s) selected will be isolated in a box
Resize a Section Box
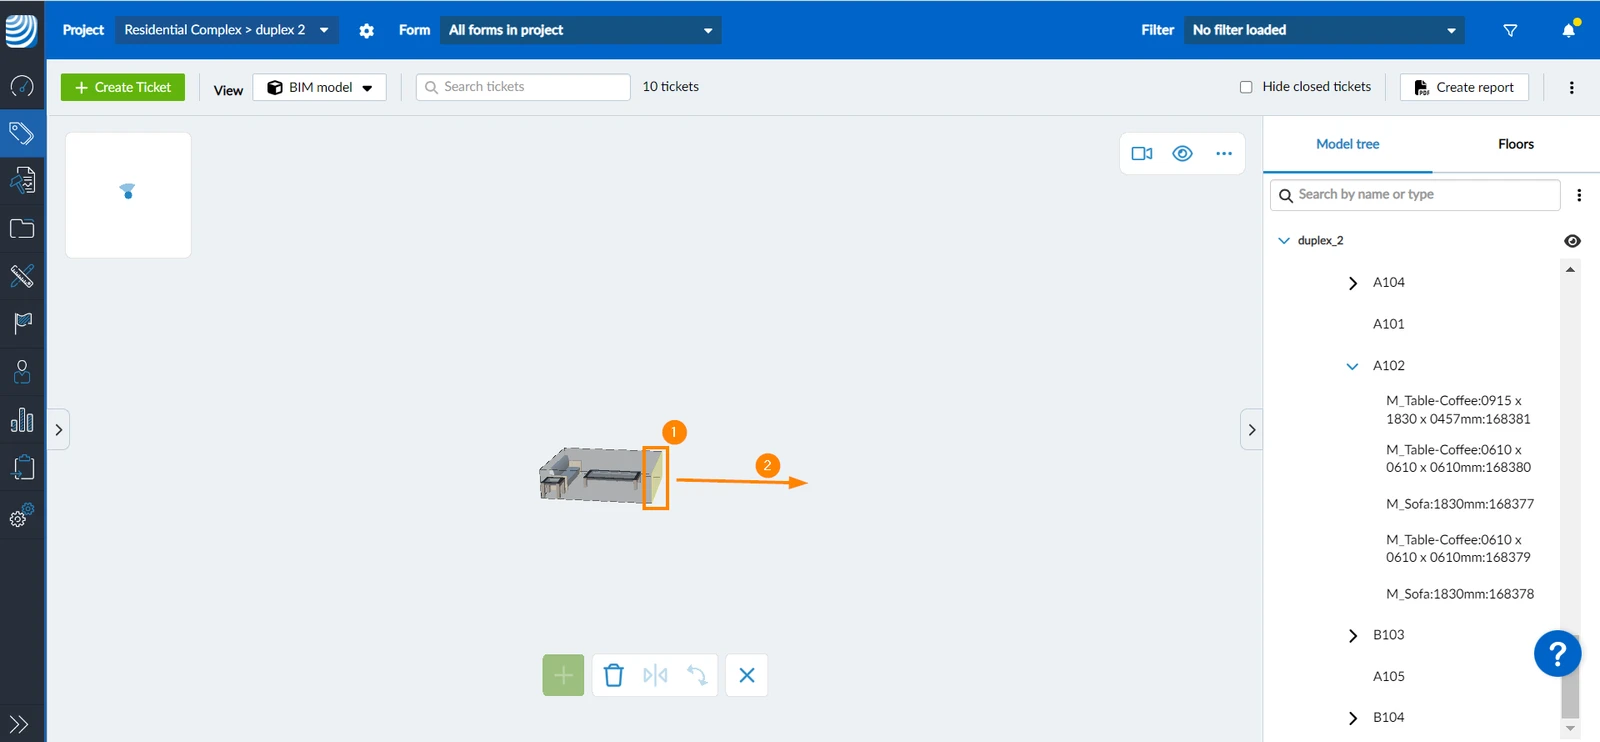
You can adjust the size of the section box by moving each face individually. To do so:
- Click/tap the face of the box of the direction you want to reduce
- Drag the face to expand or reduce the section box
You can also remove a face of the section box to expand the view and reveal the rest of the model from that side. To do so:
- Click/tap the face of the box of the direction you want to expand
- Click/tap the delete icon
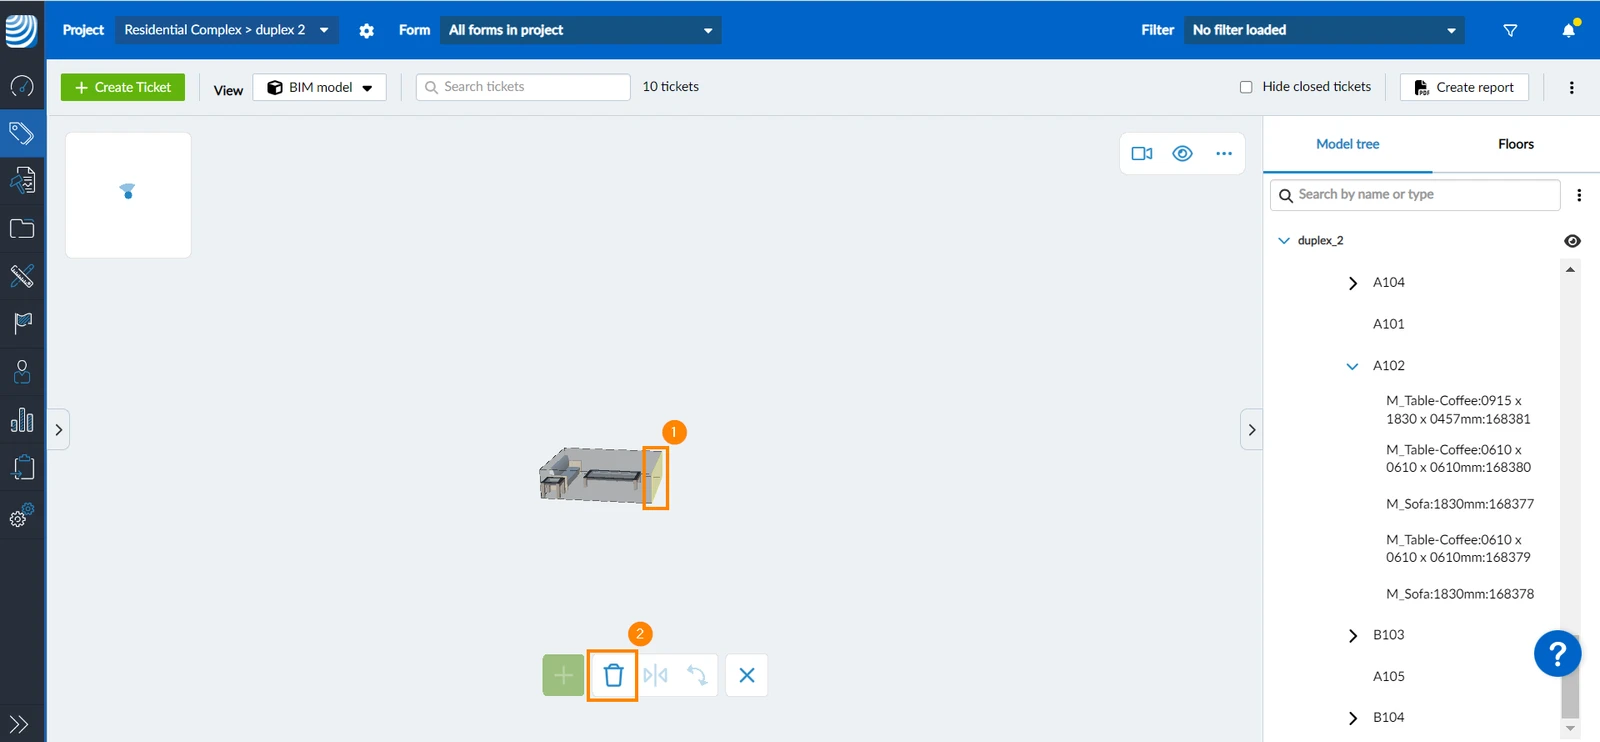
- The rest of the model will be revealed from that side
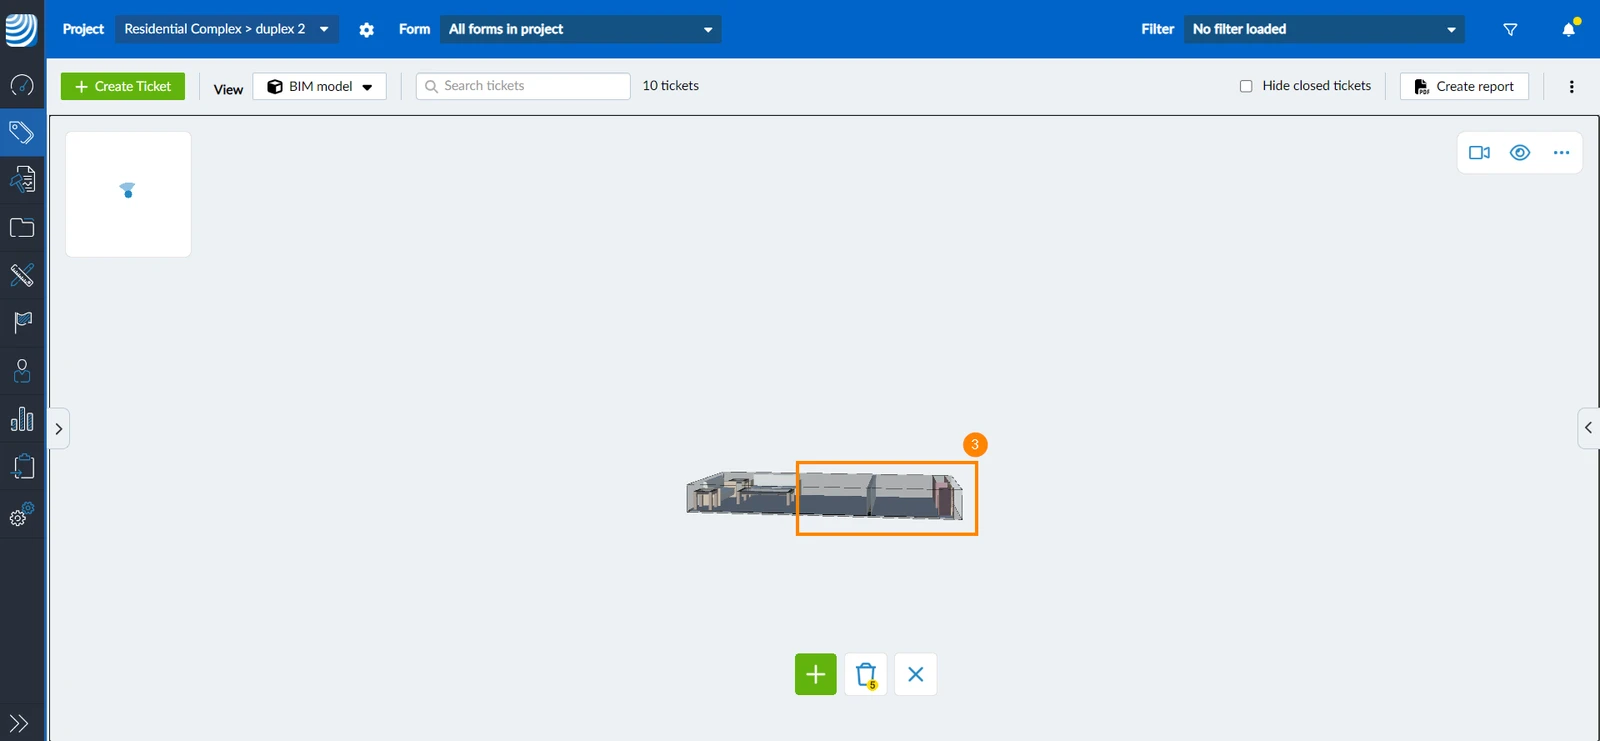
Delete Section Box
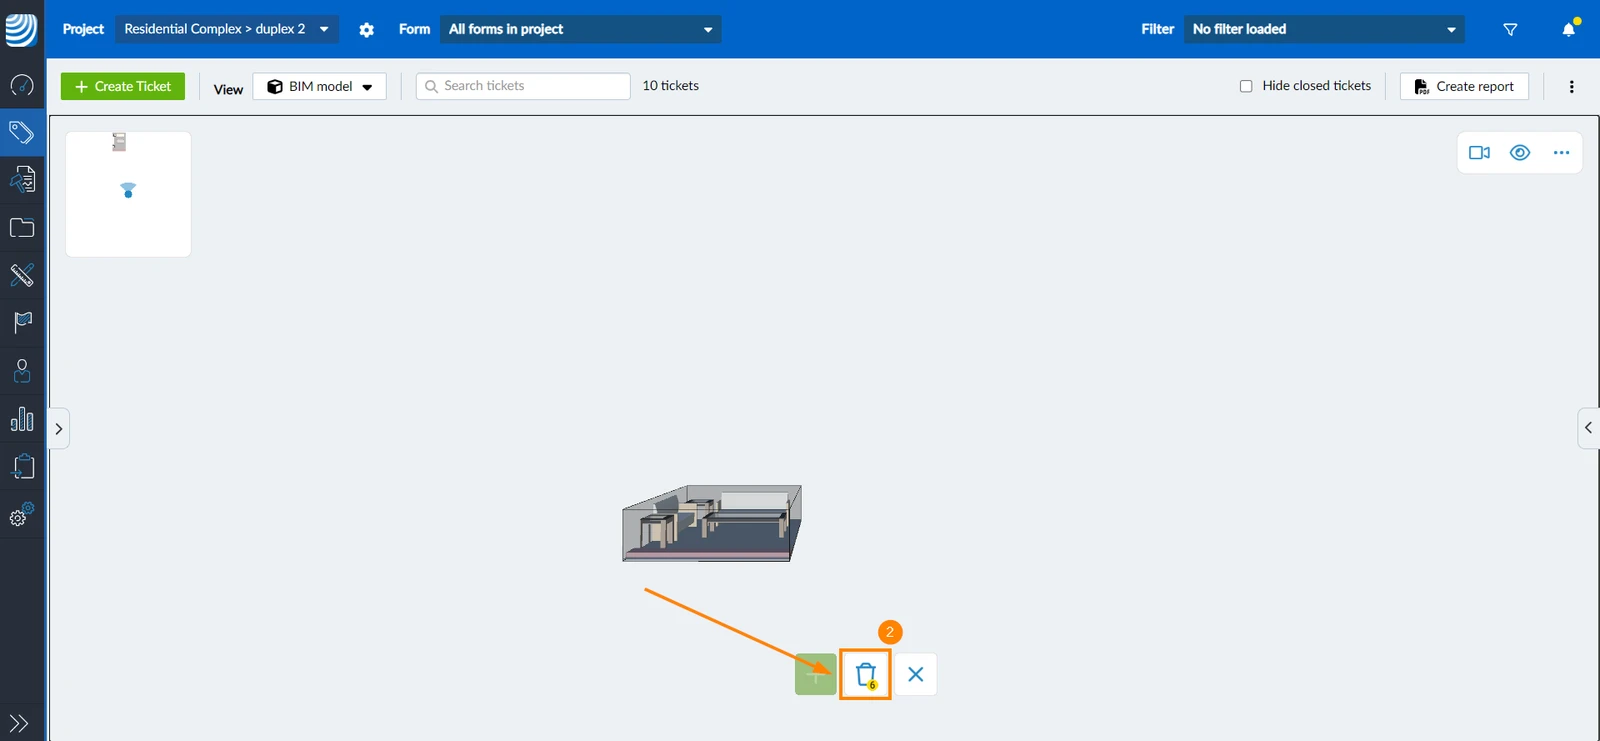
To delete the section box and show the whole model again:
- Make sure you are not selecting any of the section box faces
- Click/tap the delete icon
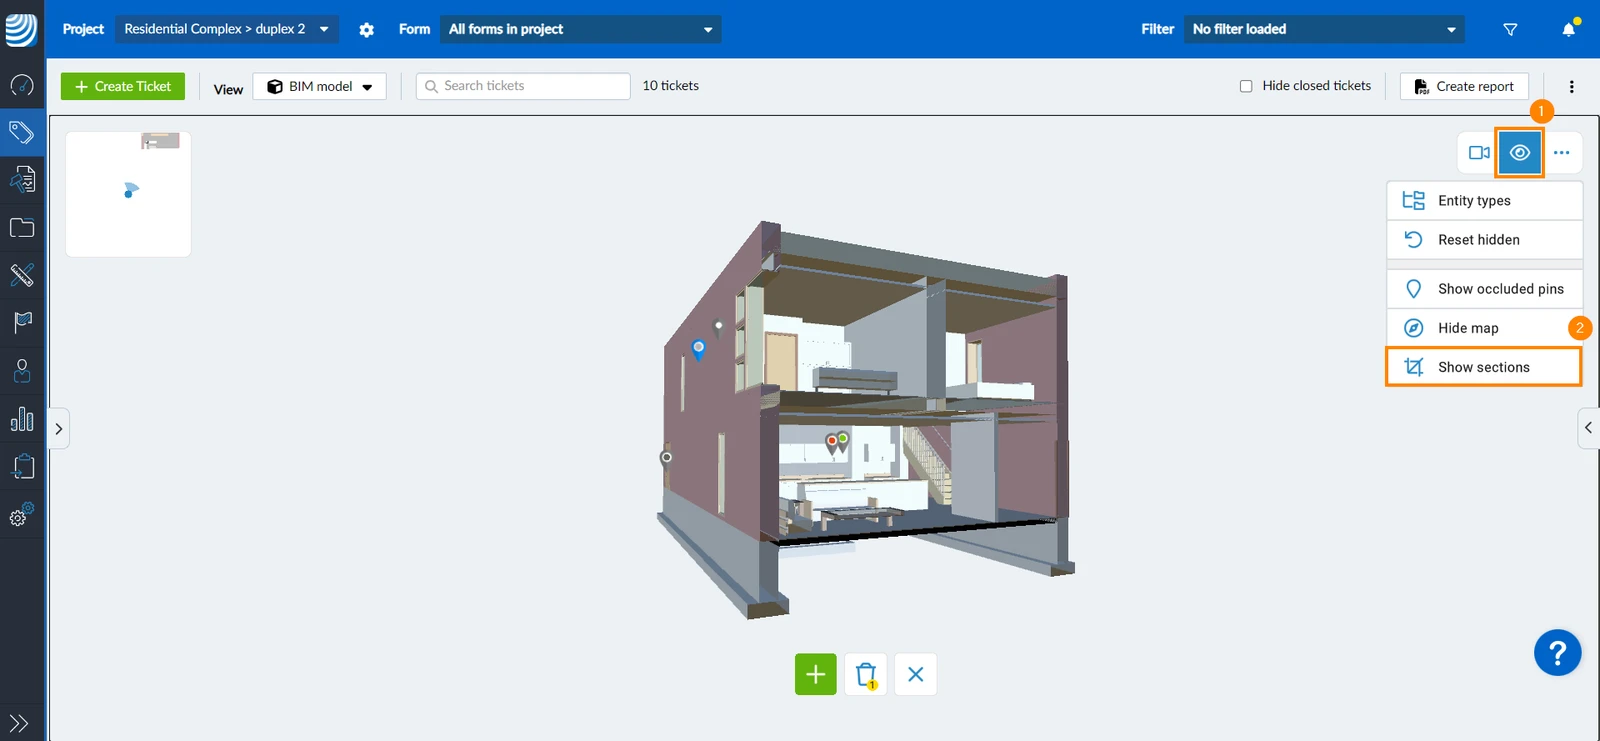
Show/Hide Section Planes and Section Box
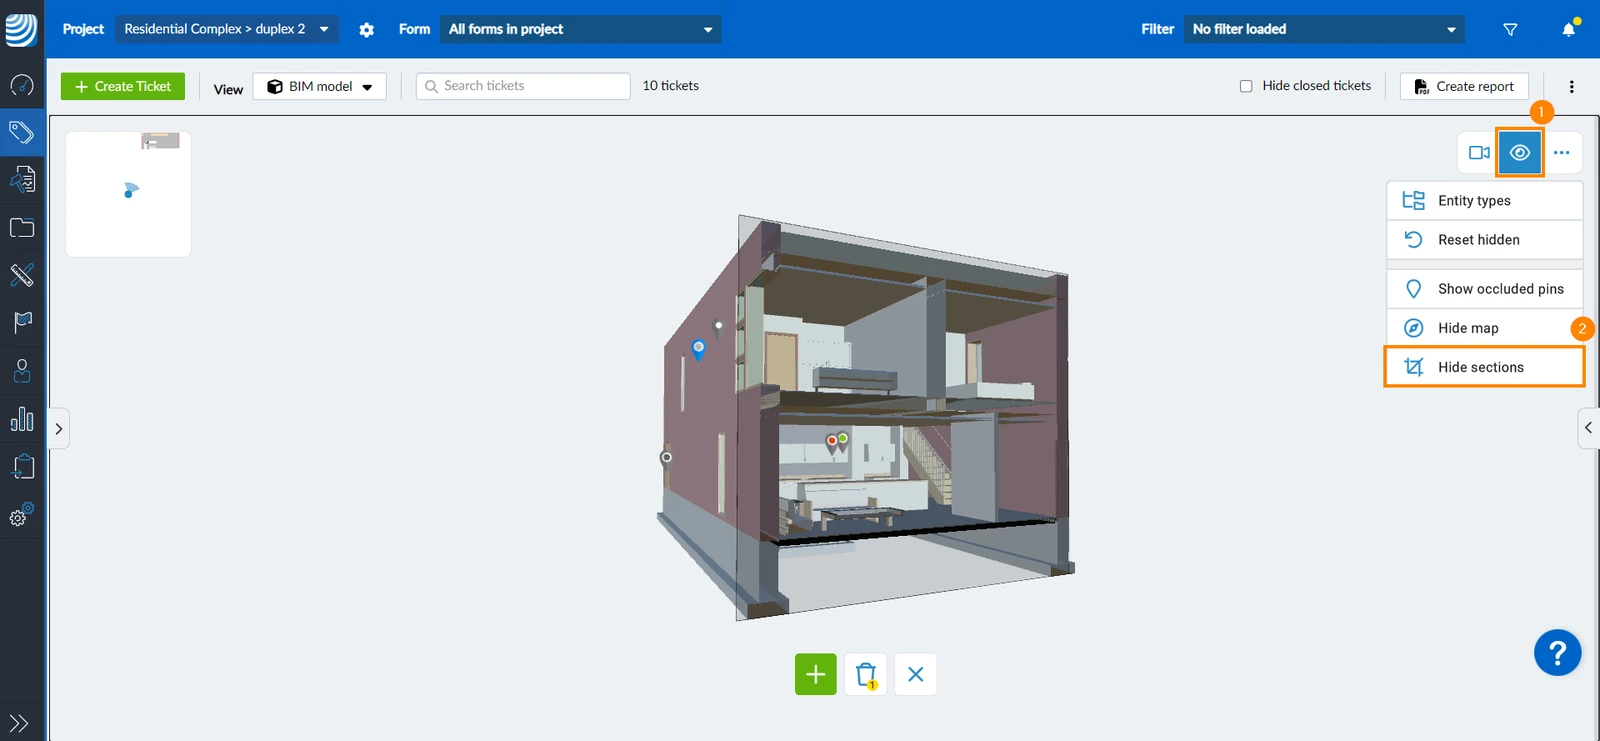
To hide the section plane(s) or section box while the model is still being cut:
- Click/tap the eye icon
- Click/tap Hide sections
To show the section plane(s) again:
- Click/tap the eye icon
- Click/tap Show sections
Updated January 8, 2026