

 Deutsch
 Español
 Français
 Hrvatski
 Italiano
 Polski
 Português (BR)
Define Conditions to Show/Hide Fields
Overview
Conditional form fields let you build dynamic ticket forms that adapt to your needs. They enable new workflows and make data collection more flexible and precise—while keeping the process fast and simple for users.
You can set conditions for individual fields or groups of fields so that they only appear when certain criteria are met. Conditions can be based on other fields in the ticket including the following field types:
- Checkboxes — whether they are checked or unchecked
- Lists — whether they are empty, not empty, or include specific values
- Status — the current status of the ticket
- Attachment — whether the field has attachments or has no attachments
- Checklist — the selected response(s)
There is a limit of 100 conditions per form.

This limit applies to the total number of individual conditions across all fields—not to the number of fields that have conditions. Multiple conditions defined on a single field each count toward this total.
You can also apply the same conditions to show or hide content in your ticket report templates.
Read more in Add Dynamic Attributes to Ticket Reports > Add Conditional Content.
:::
Access & Permissions
How to access
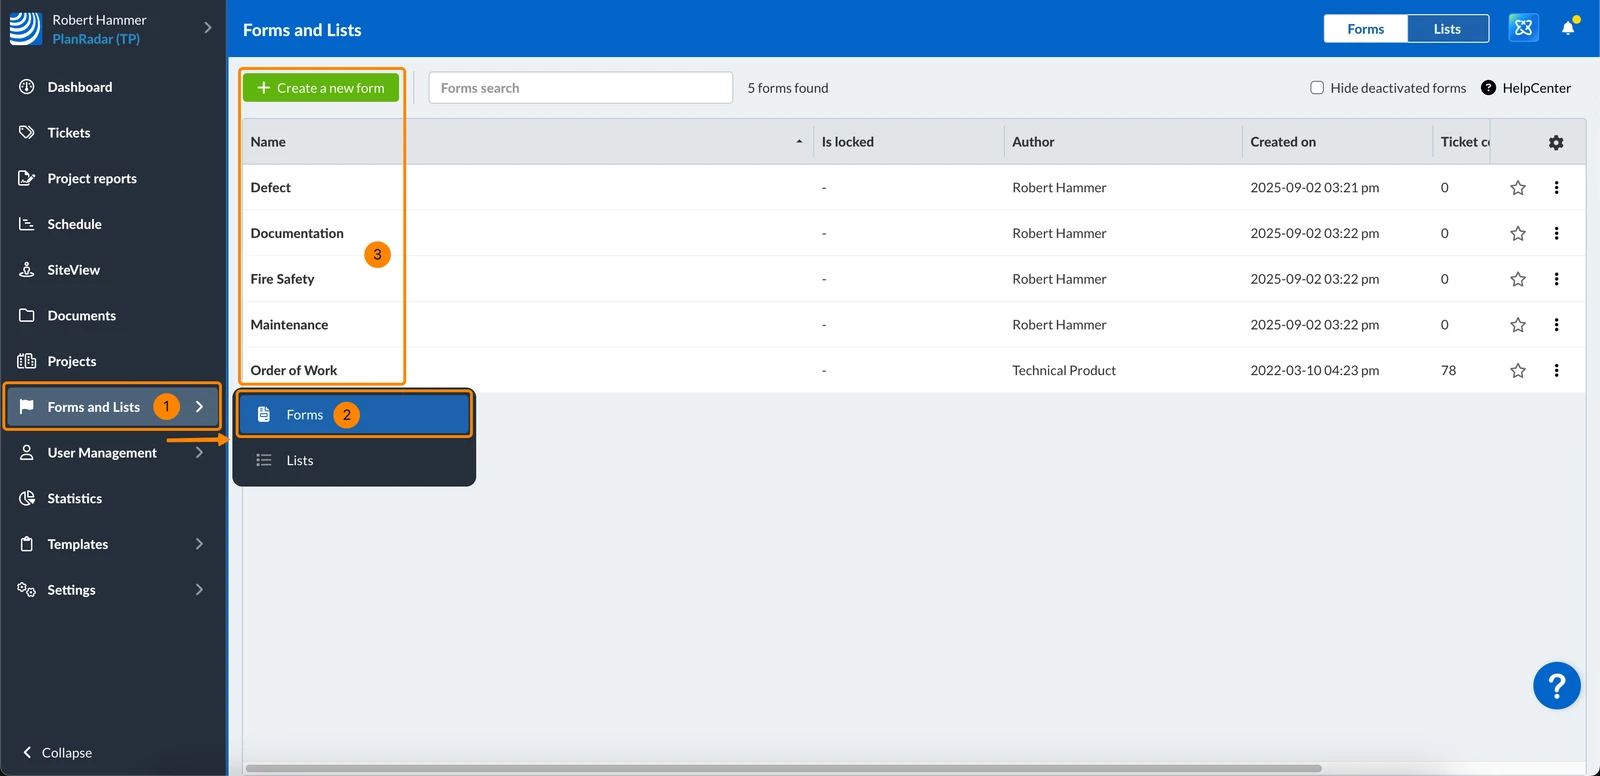
- Click Forms and Lists
- Click Forms
- Open an existing form or create a new one (see Create & Edit Forms).
Configure Conditional Visibility
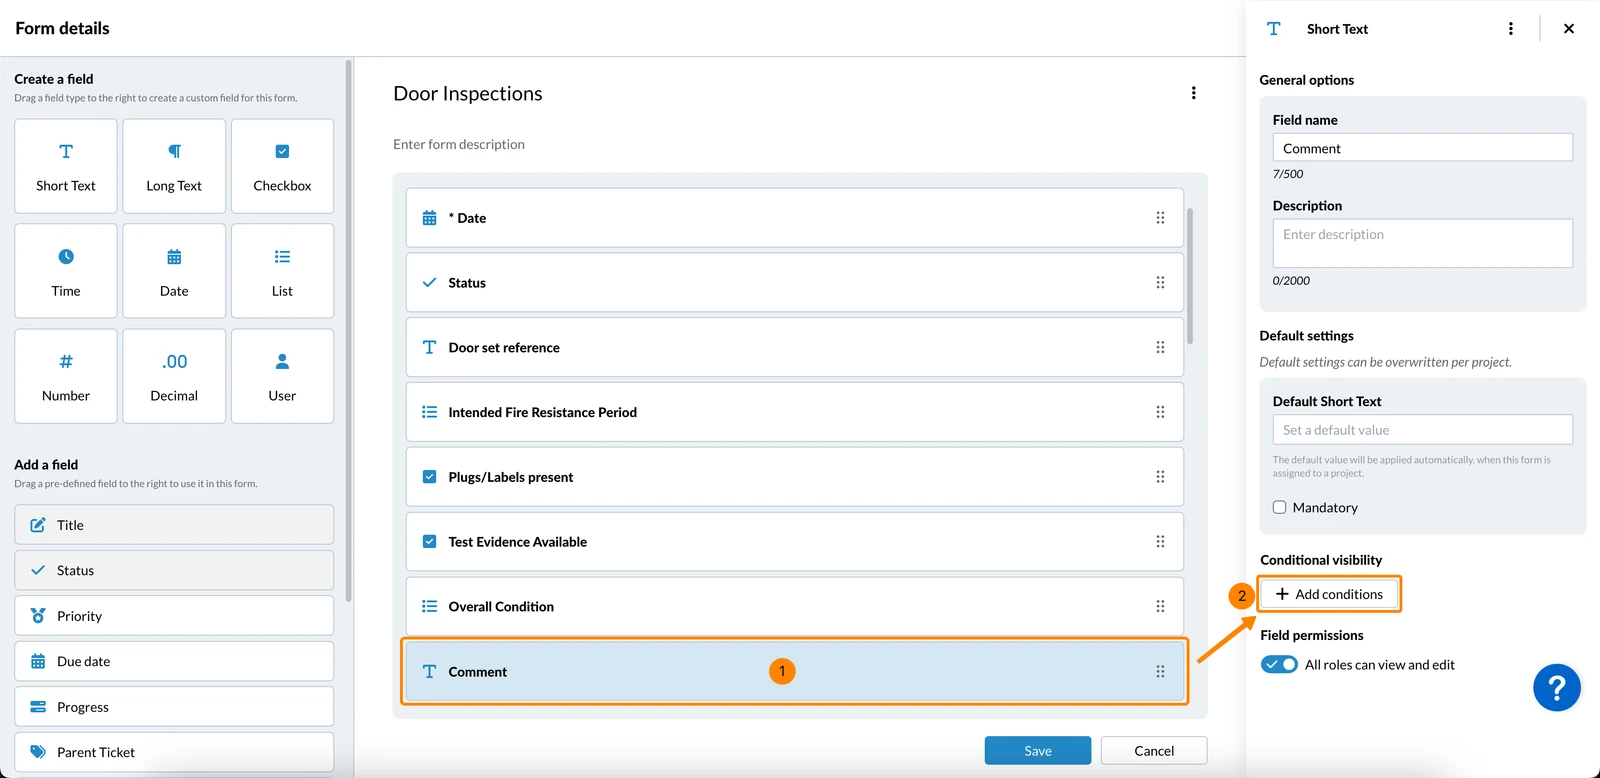
To make a field (or group of fields) visible only when specific conditions are met:
- Select the field or group
- Click + Add conditions
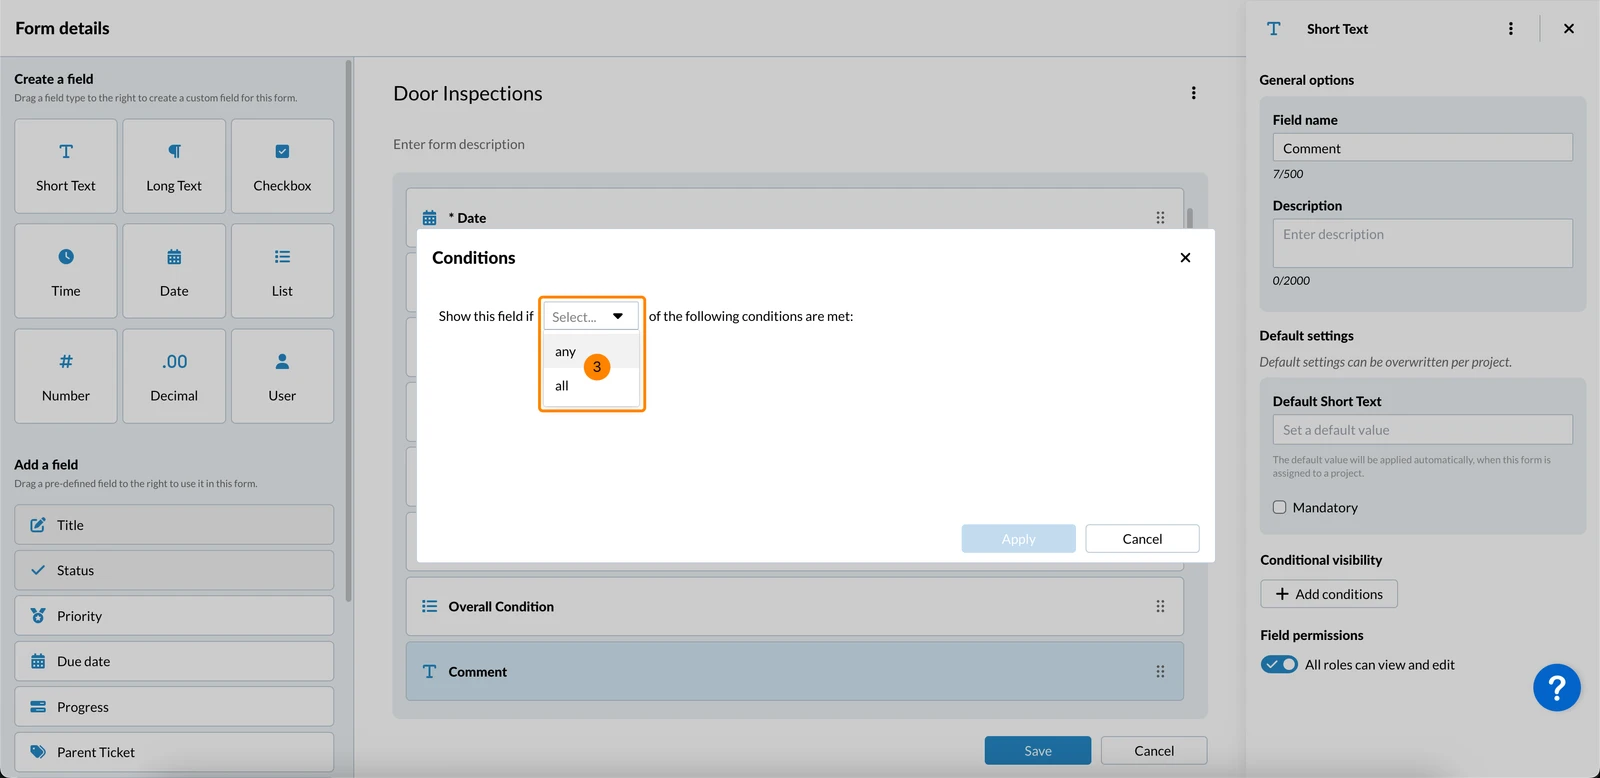
- Select Any or All in the drop-down
Any → the field shows if at least one condition is met.
All → the field shows only if all conditions are met.
- Define a condition (as described below)
- Optional: Click + Add condition and define it. Repeat if needed.
- Click Apply
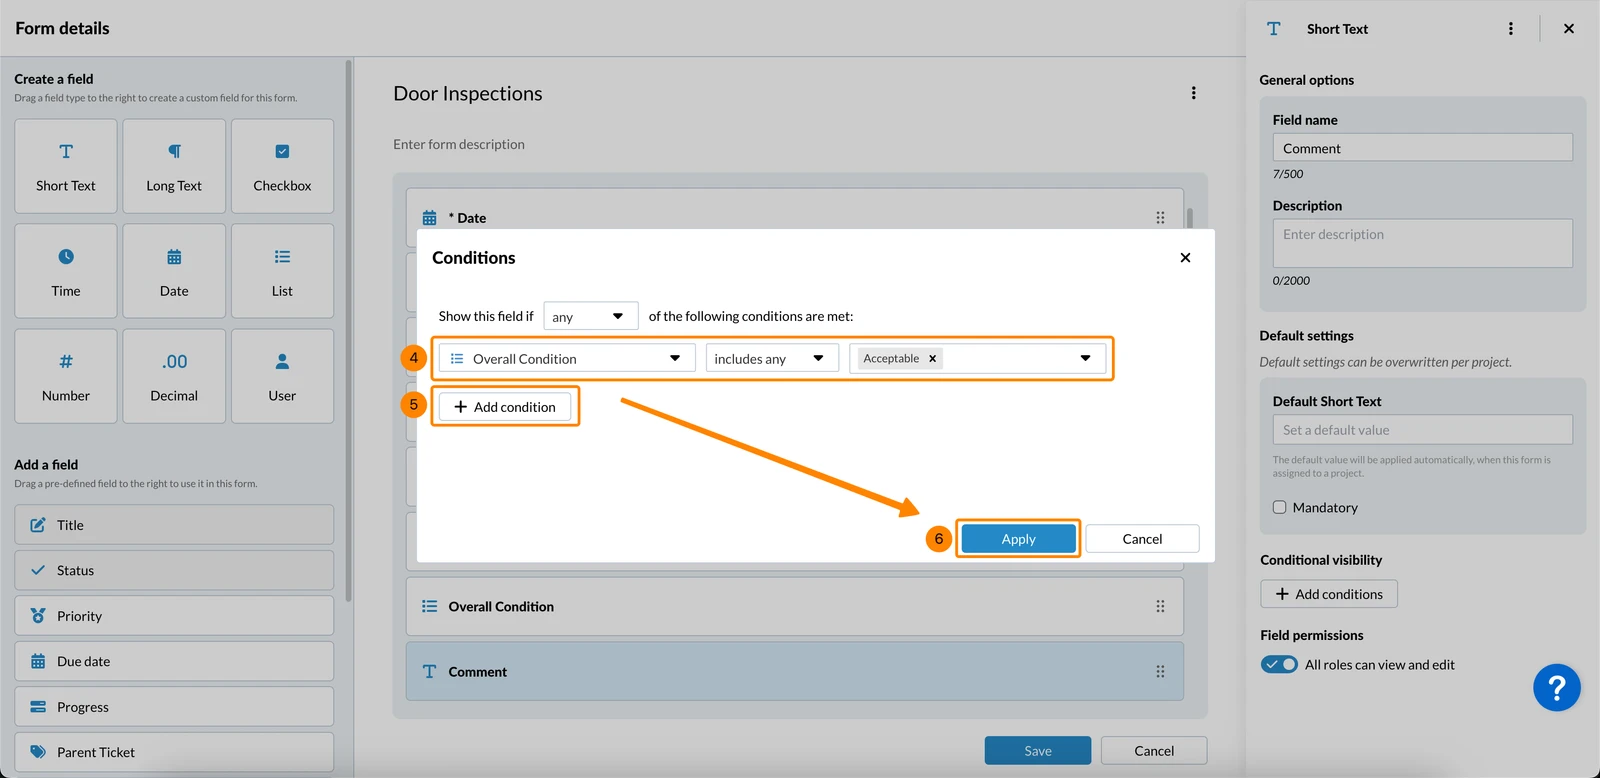
- Click Save
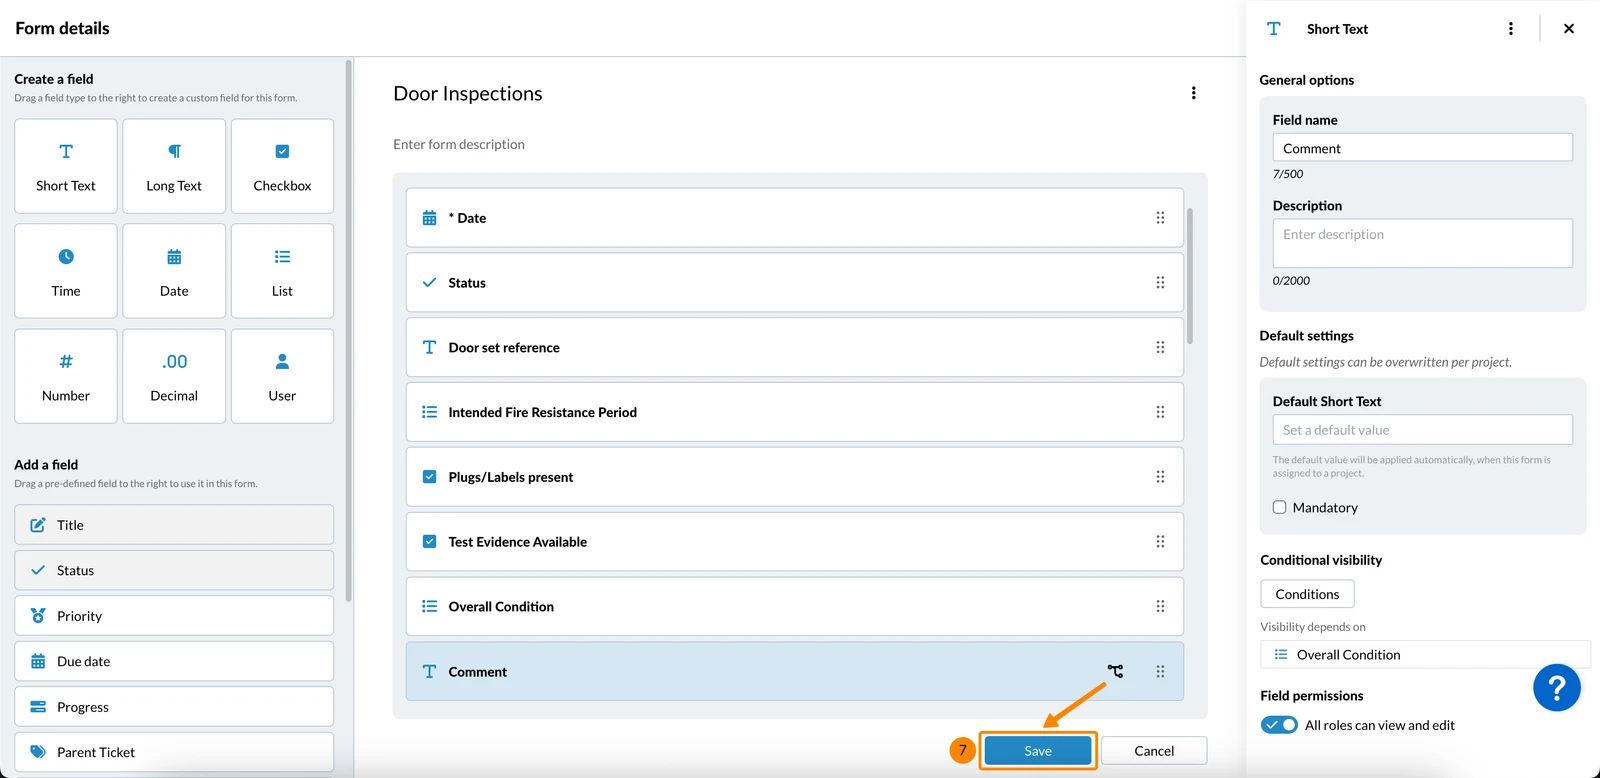
Define a Condition
The options available depend on the type of field you choose. Read more in Field Types.
Based on a Checkbox
Trigger a condition when a checkbox is either checked or not checked.
- Select a checkbox field in the drop-down
- Select is checked OR is not checked in the next drop-down
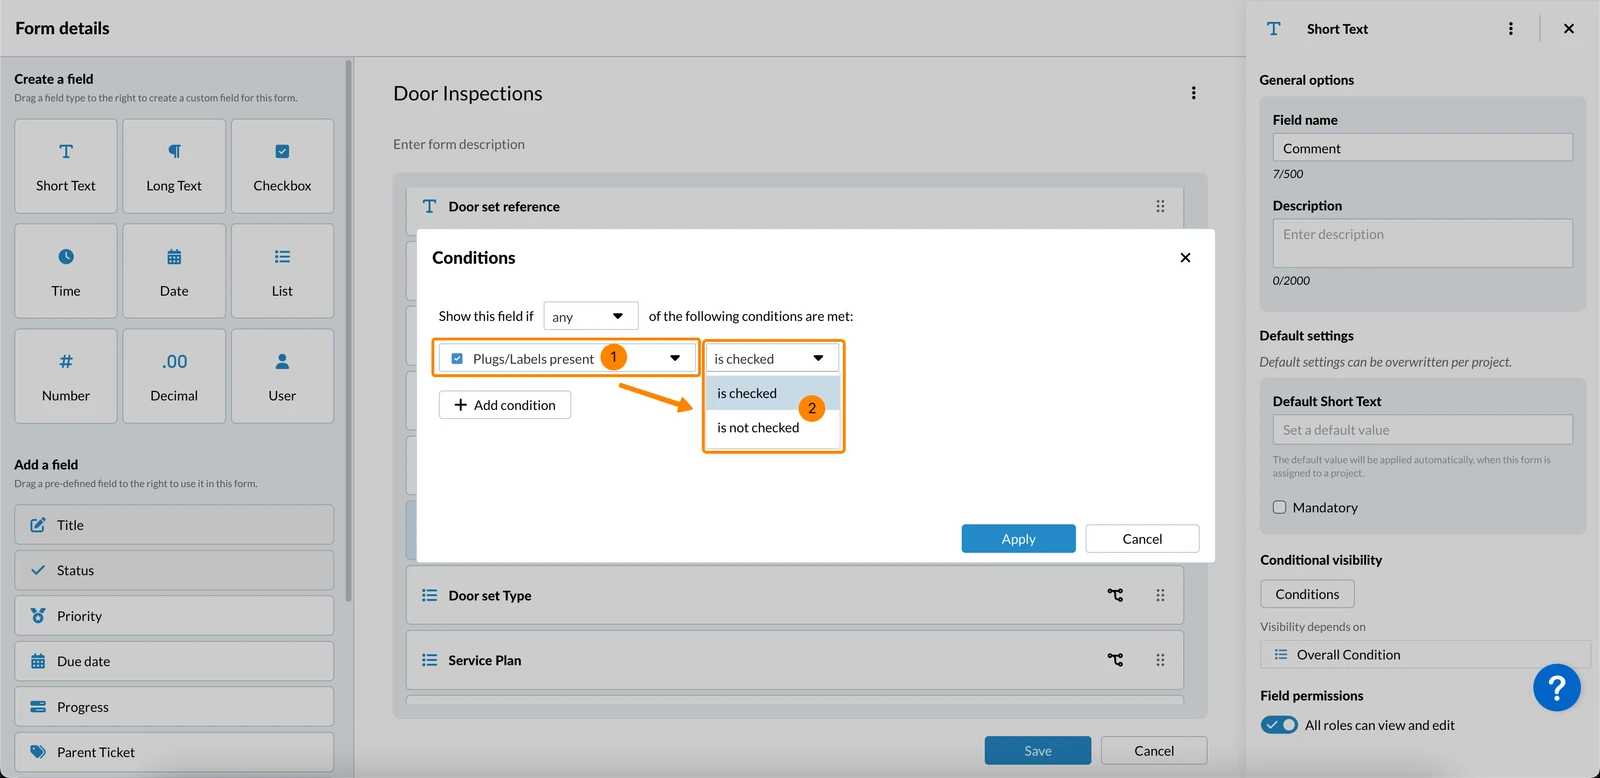
Based on a List
Trigger a condition when a list field is empty or not empty:
- Select a list field in the drop-down
- Select is empty OR is not empty in the next drop-down
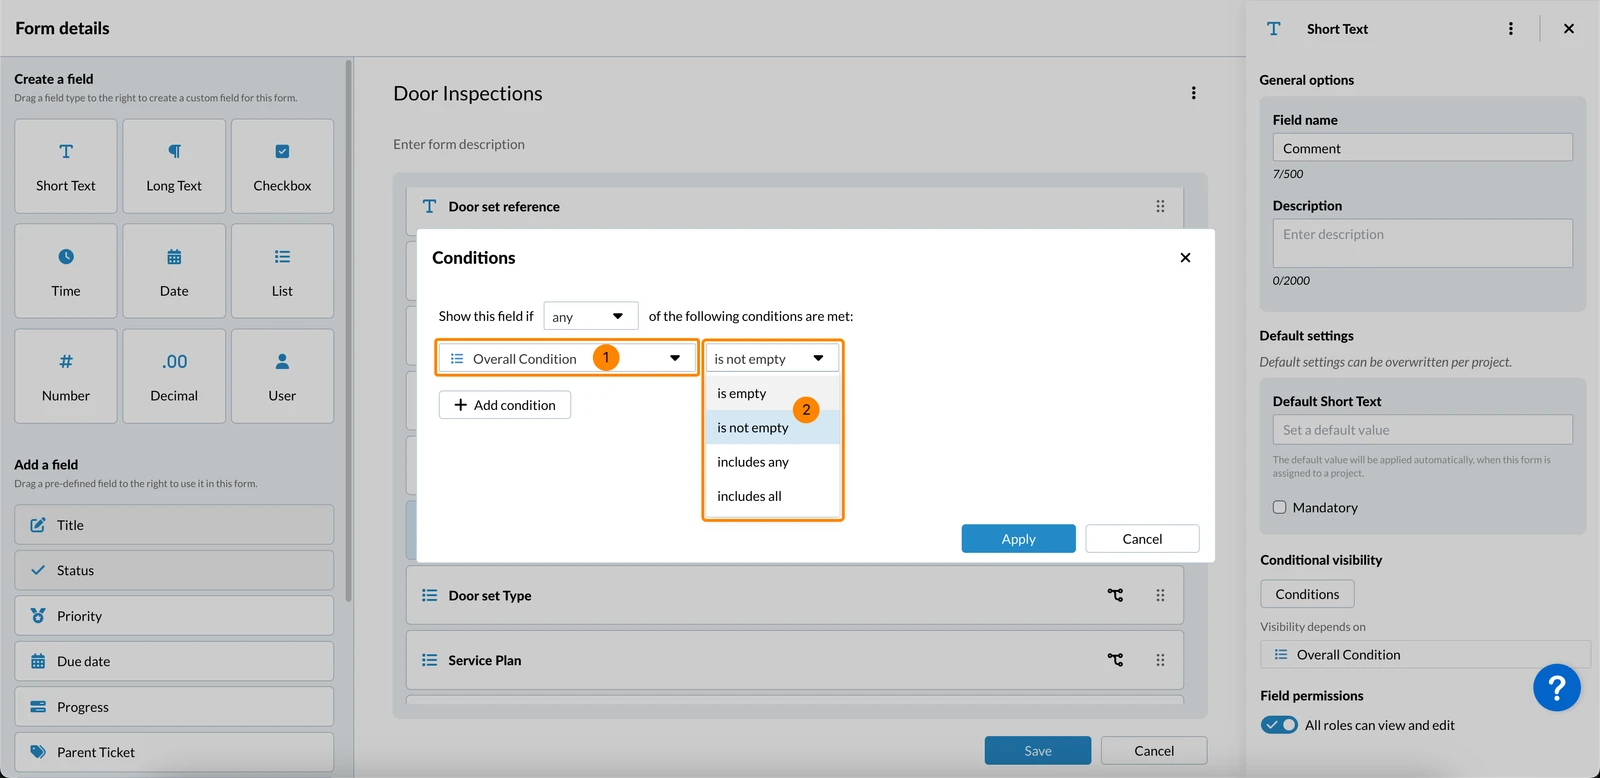
Or trigger a condition when a list field has any or all of the defined values selected:
- Select a list field in the drop-down
- Select includes any OR includes all in the next drop-down
- Select one or more values of the list field in the next drop-down
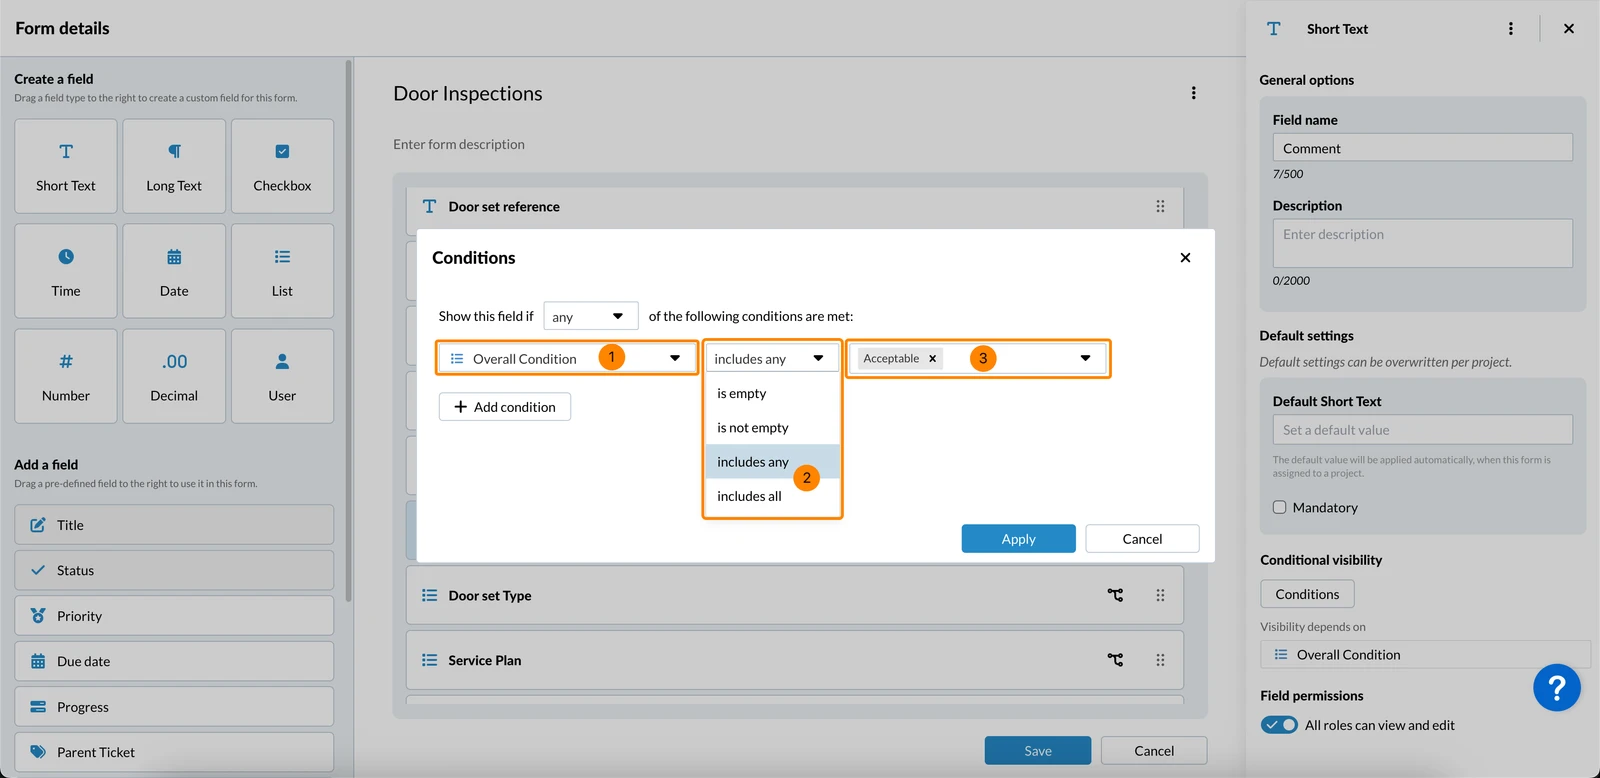
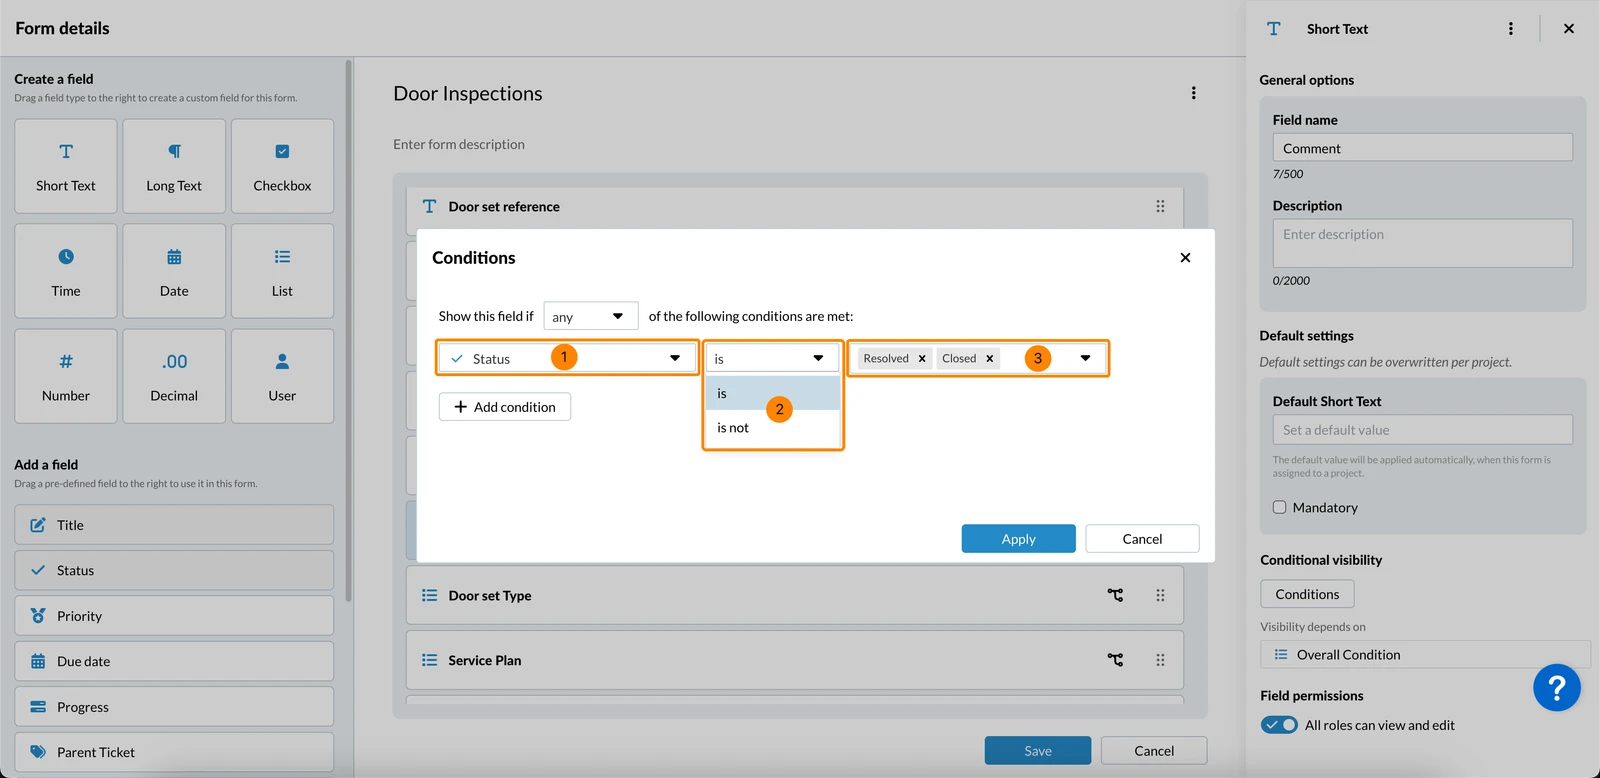
Based on the Status
Trigger a condition based on whether the ticket's status matches or does not match a specific value:
- Select the status field in the drop-down
- Select is OR is not in the next drop-down
- Select the status value in the next drop-down
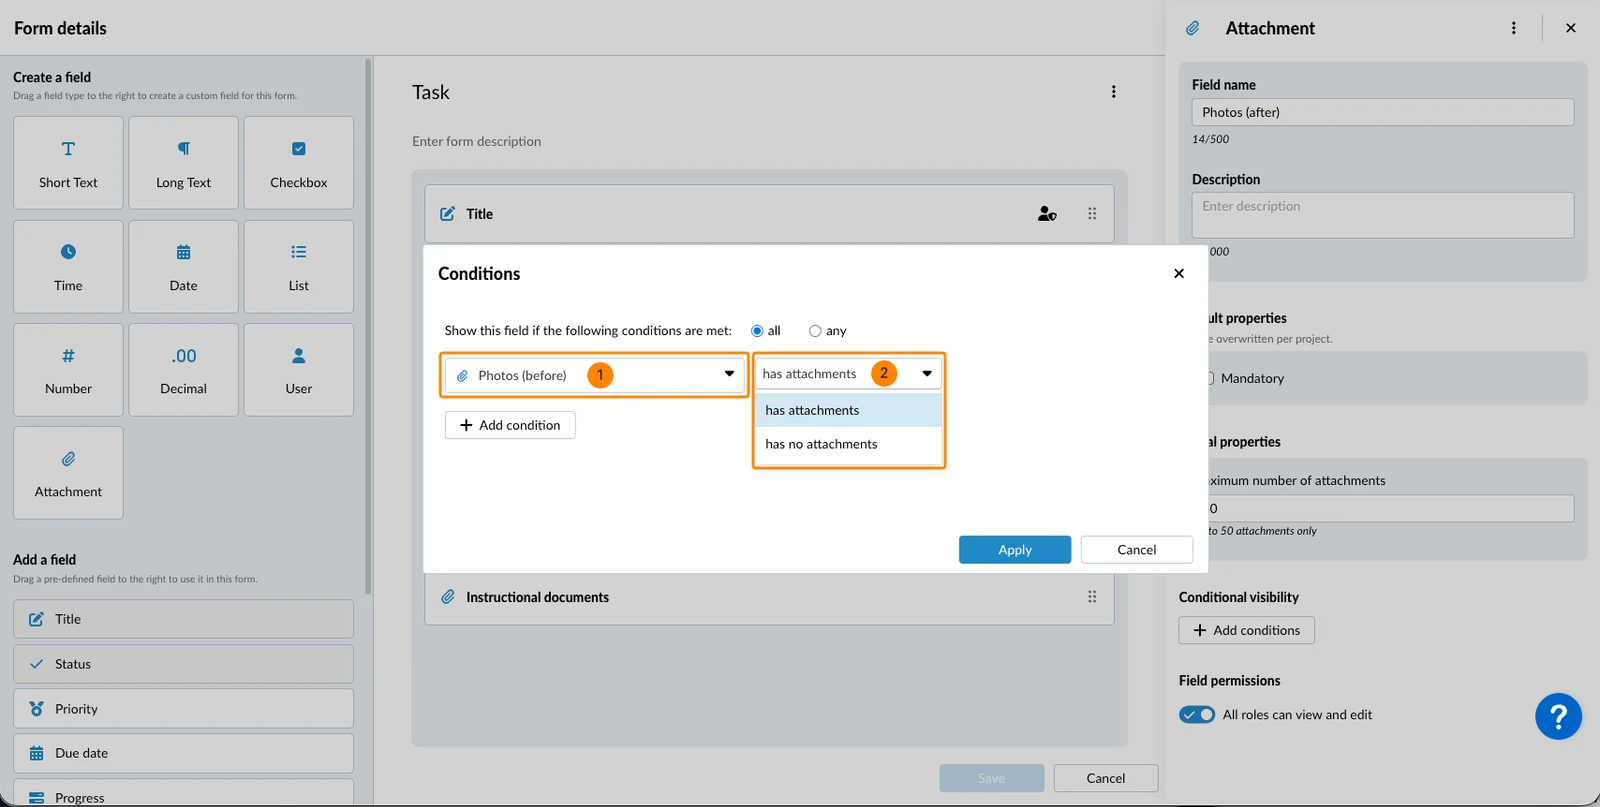
Based on an Attachment Field
Trigger a condition based on whether a custom attachment field has attachments (or has no attachments):
- Select the custom attachment field in the drop-down for example Photos (before).
- Select has attachments OR has no attachments in the next drop-down
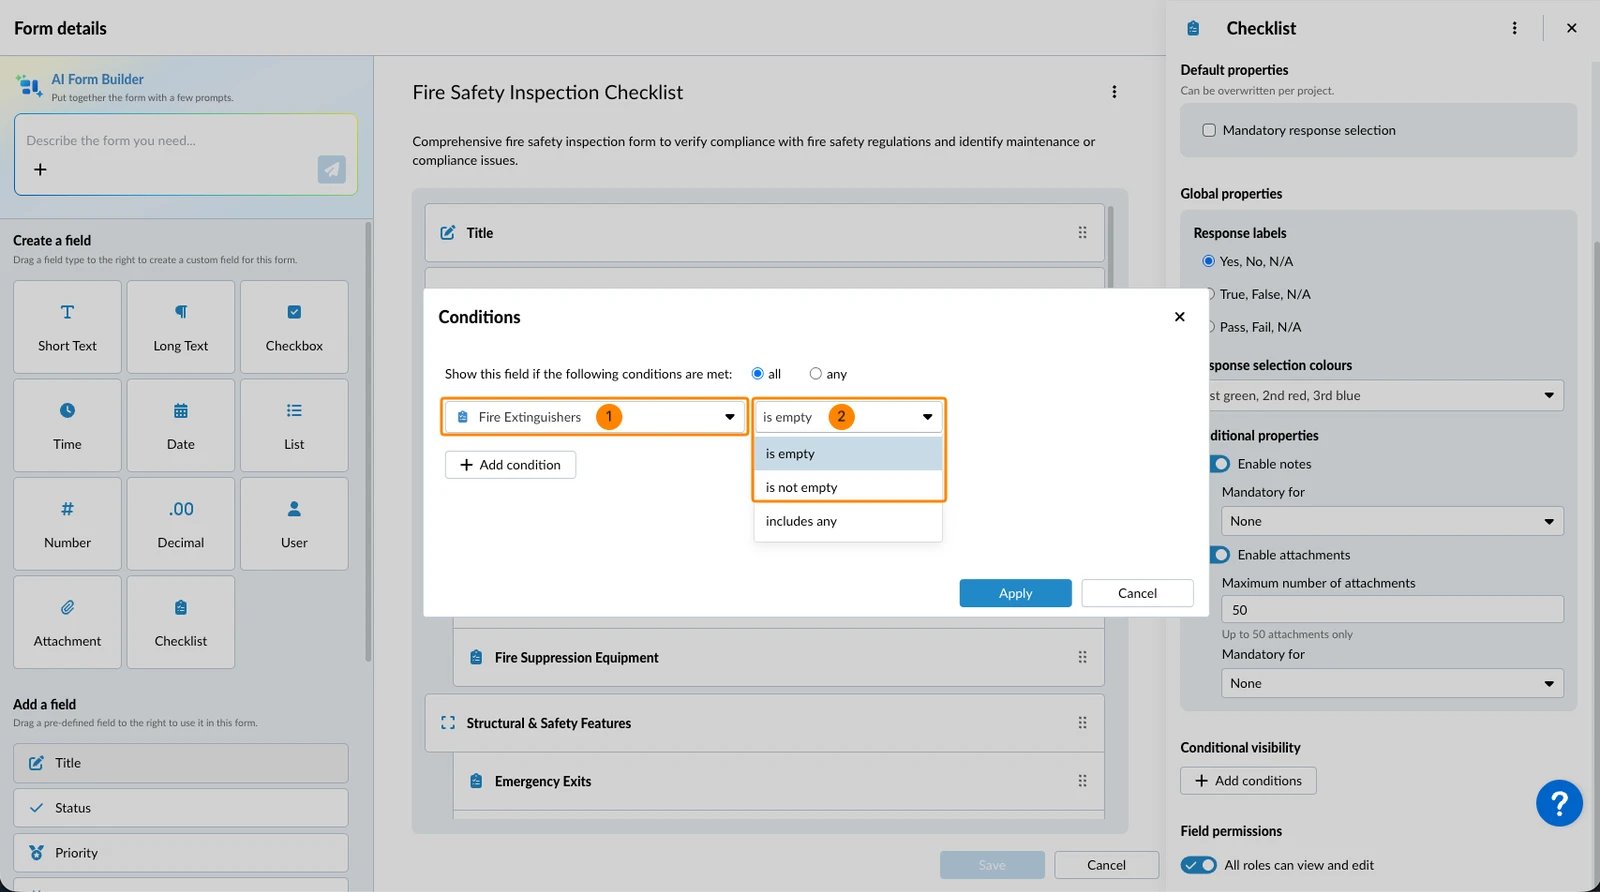
Based on a Checklist Field
Trigger a condition when a checklist field is empty or not empty:
- Select the custom checklist field in the drop-down for example Fire Extinguishers.
- Select is empty OR is not empty in the second drop-down
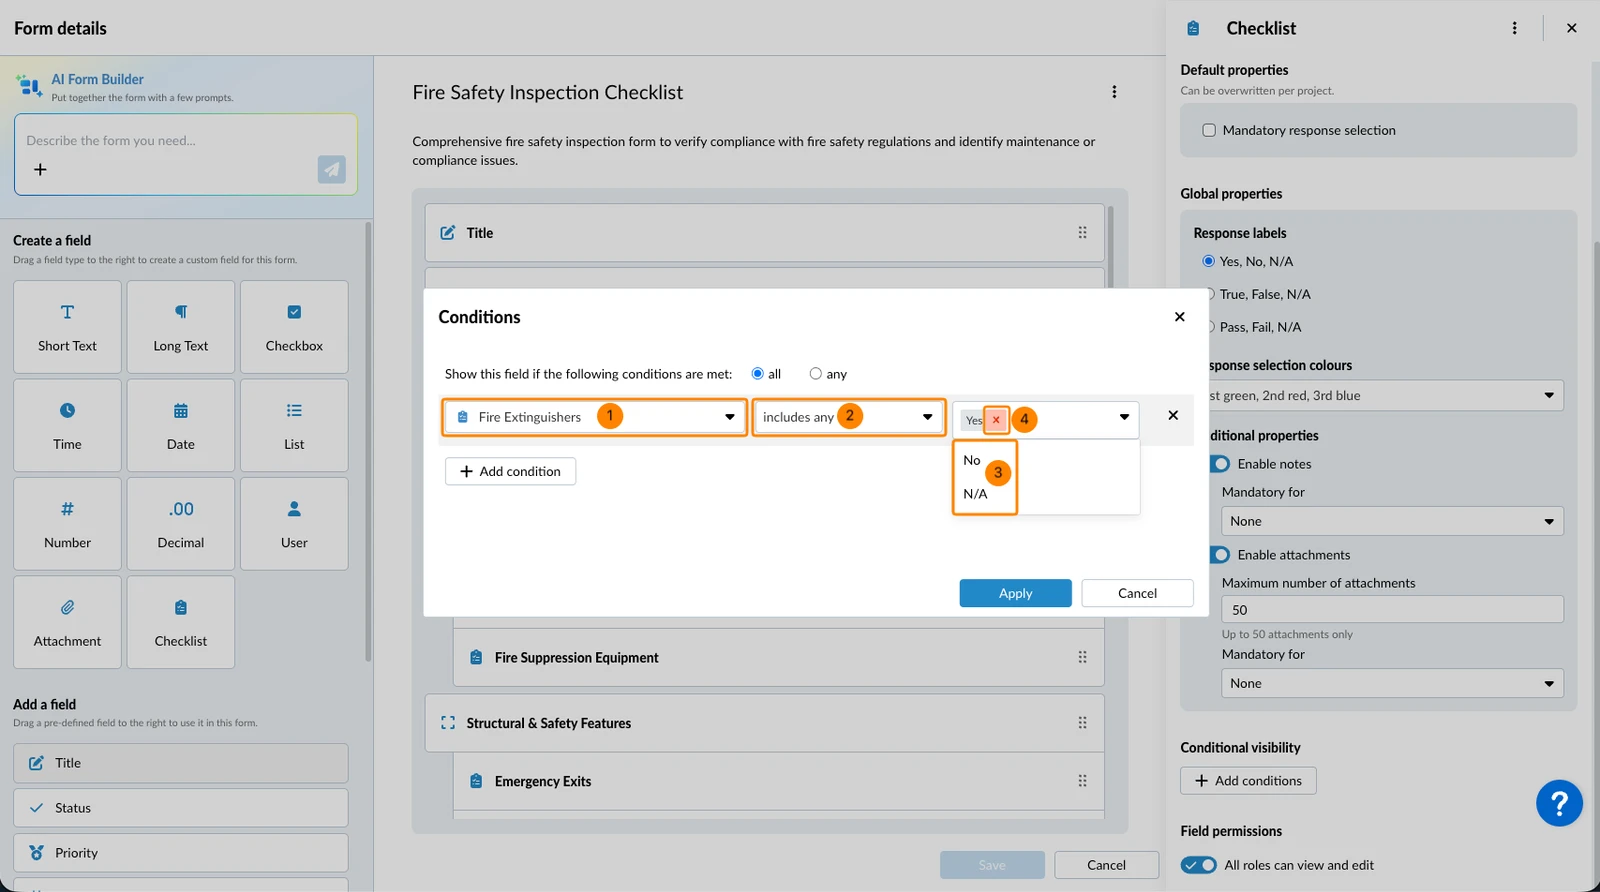
Or trigger a condition based on the selected response(s):
- Select the custom checklist field in the drop-down for example Fire Extinguishers.
- Select includes any in the second drop-down
- Select one or more values in the third drop-down e.g. Yes, No, and/or N/A
- Optional: Click X next to a selected value to remove it
View & Edit Conditions
Fields with conditional visibility are marked with this icon:
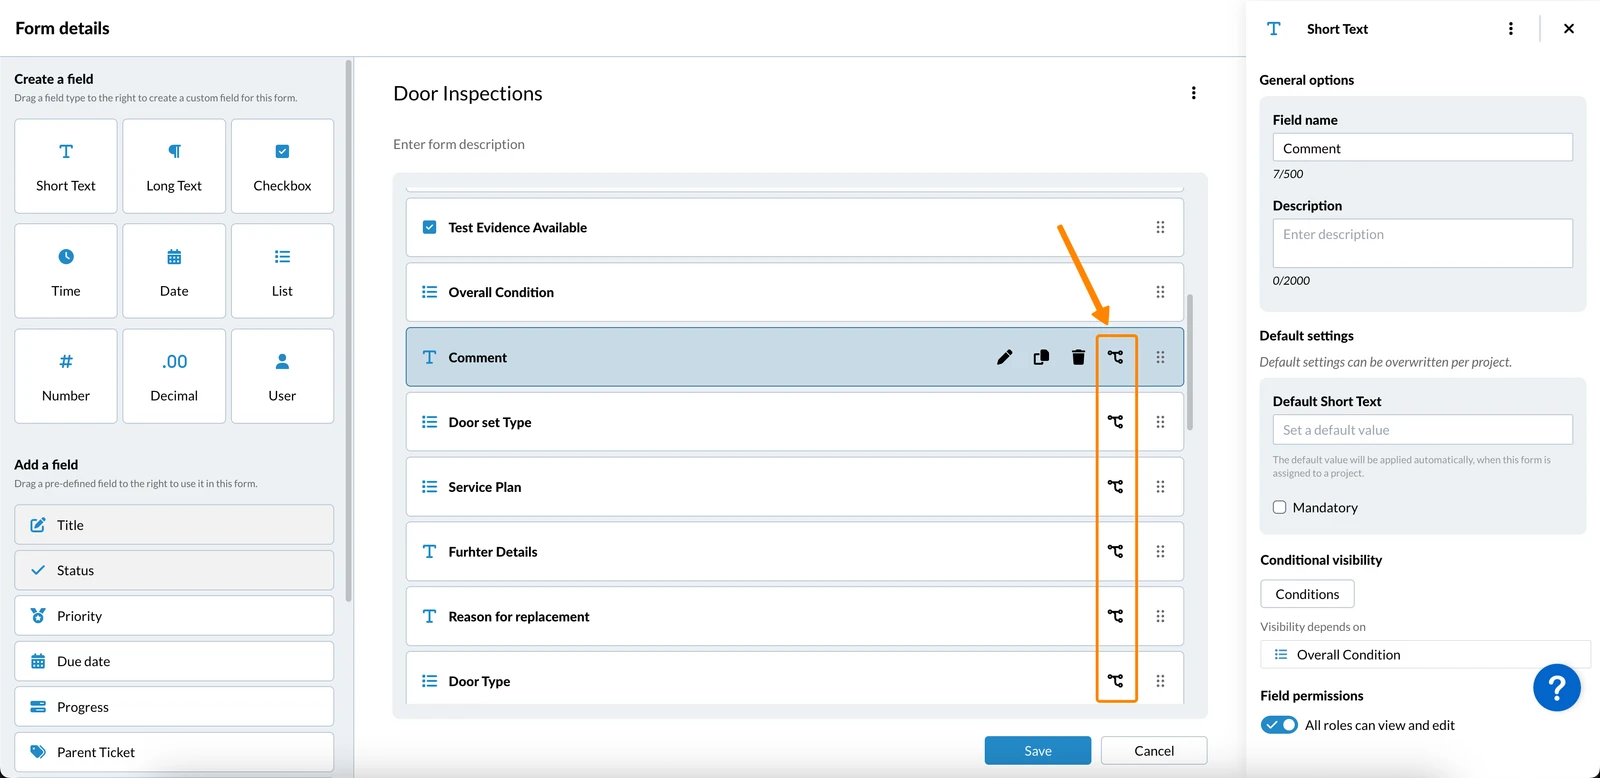
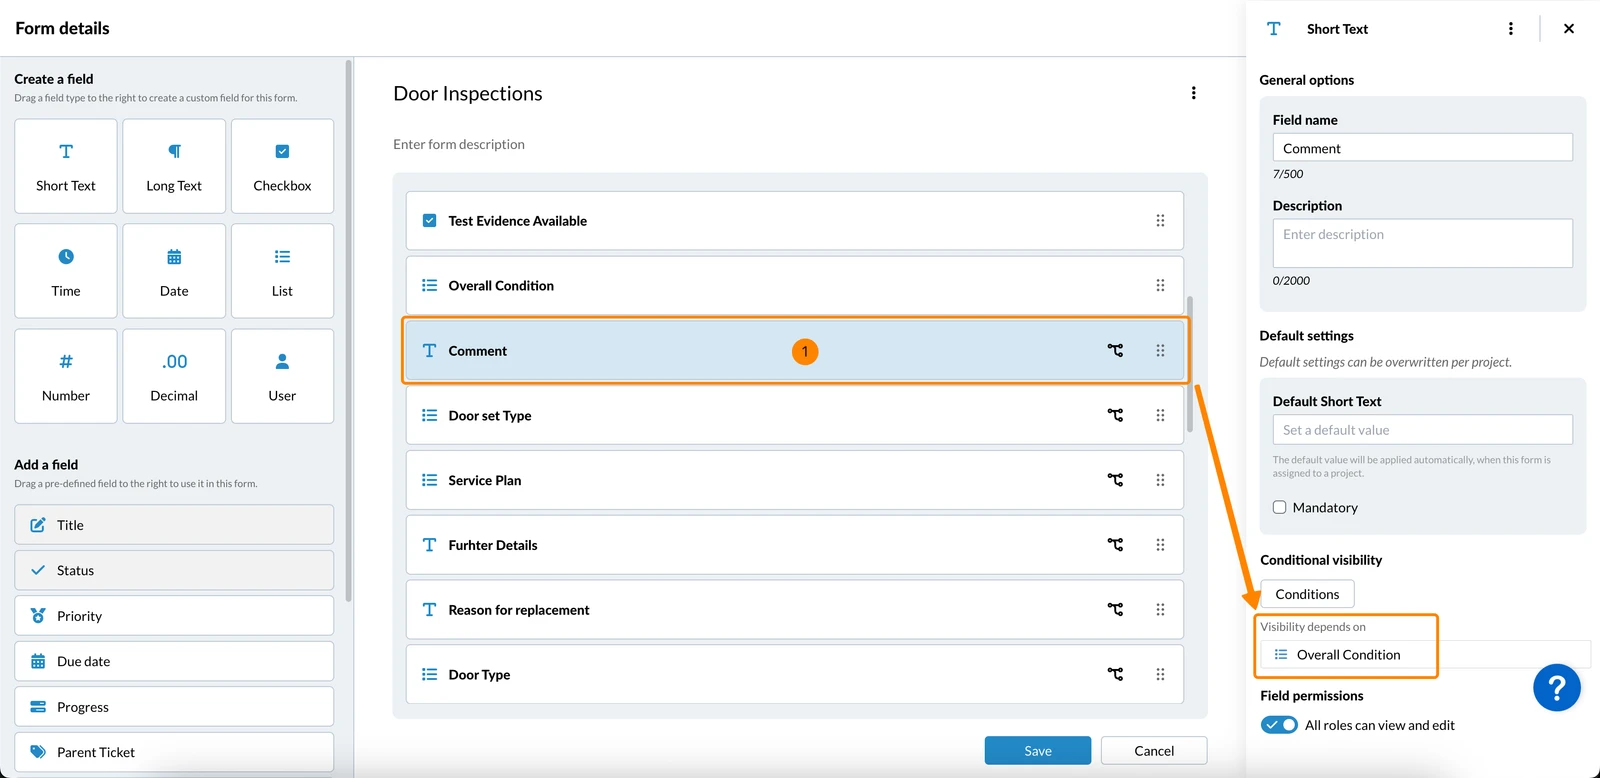
To see a list of all fields that this field's visibility depends on:
- Click on a field to select it
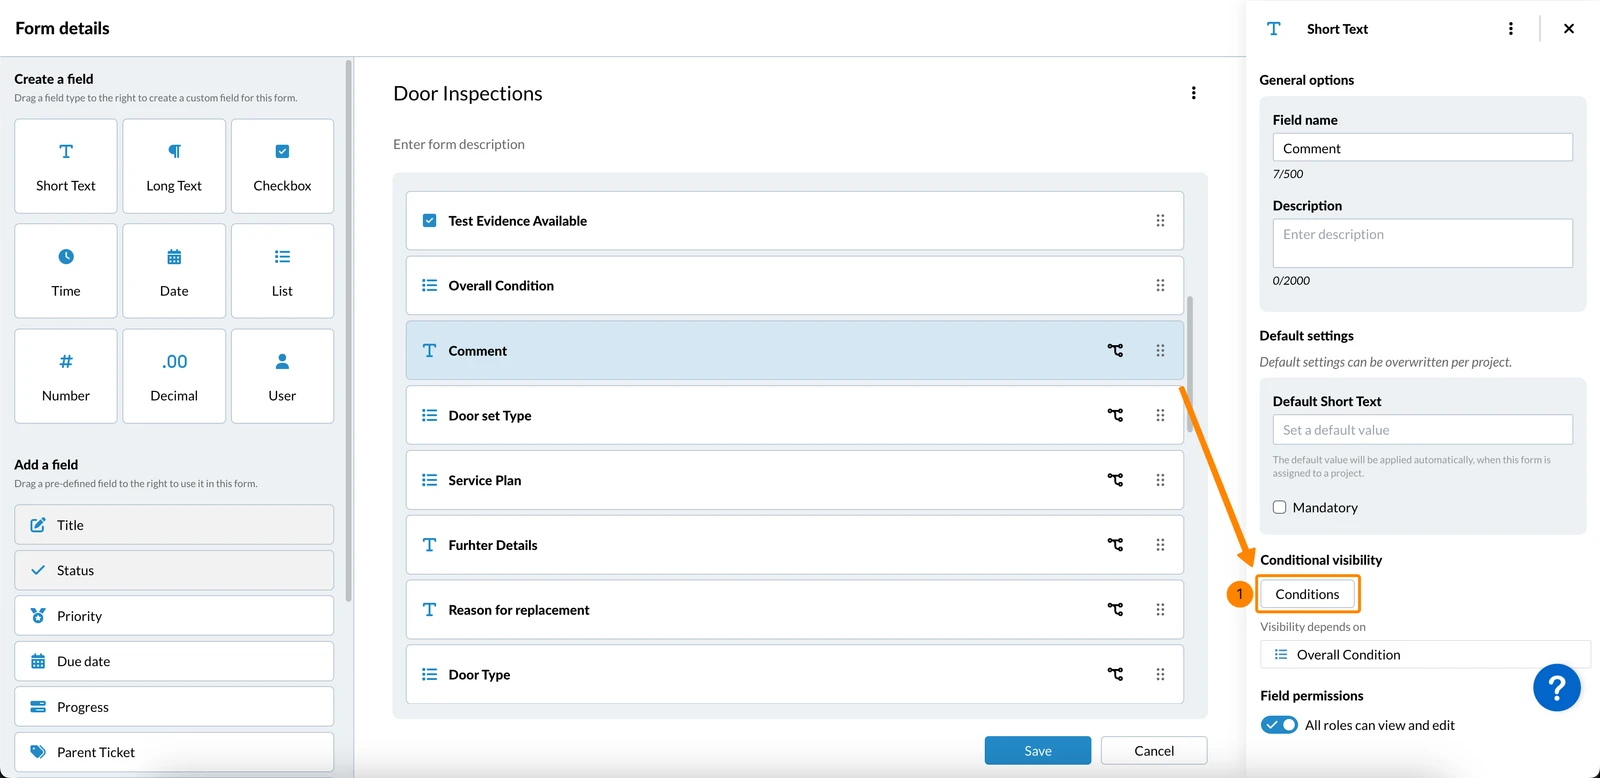
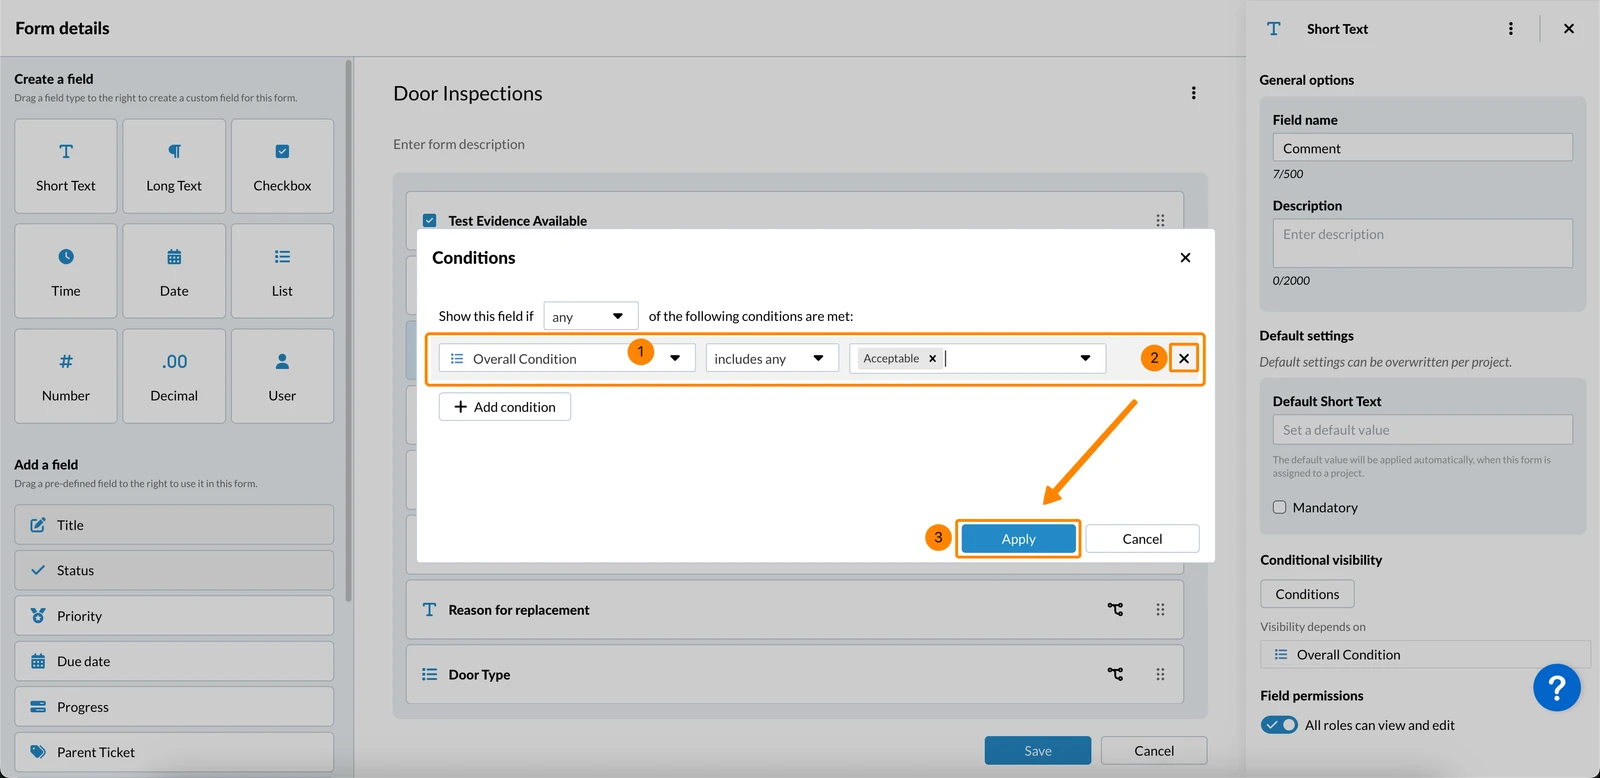
To view and edit all conditions of the selected field:
- Click Conditions
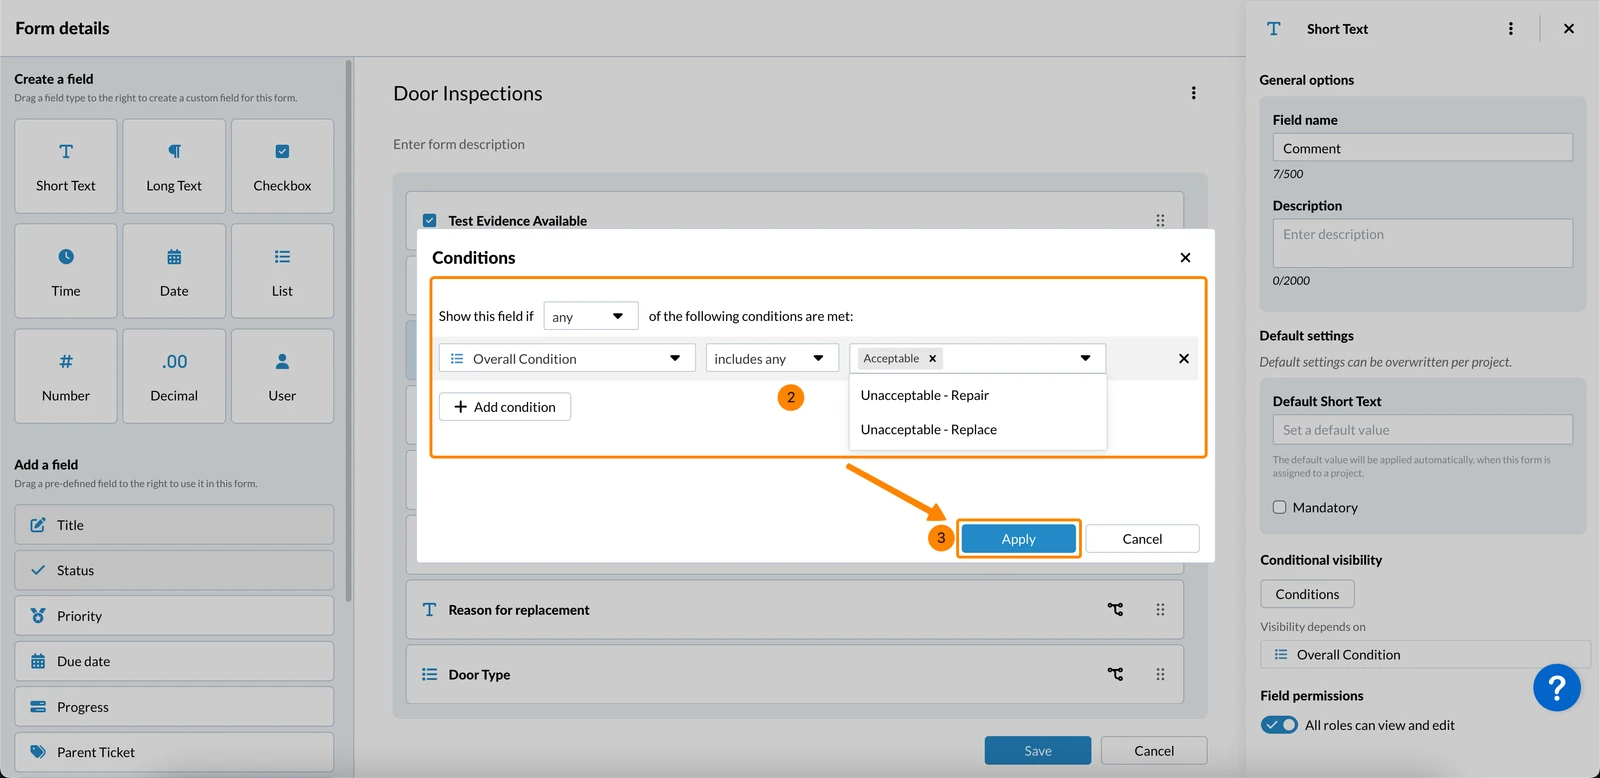
- Make your changes
- Click Apply
To delete a condition:
- Hover over the condition
- Click X
- Click Apply
Updated April 10, 2026