

 Deutsch
 Español
 Français
 Hrvatski
 Italiano
 Polski
 Português (BR)
Create & Edit Forms
Overview
Create custom forms to control which fields are available when users create or edit tickets. Add predefined fields such as Status or Assignee, and create custom fields for more flexibility to meet your specific needs.
Access & Permissions
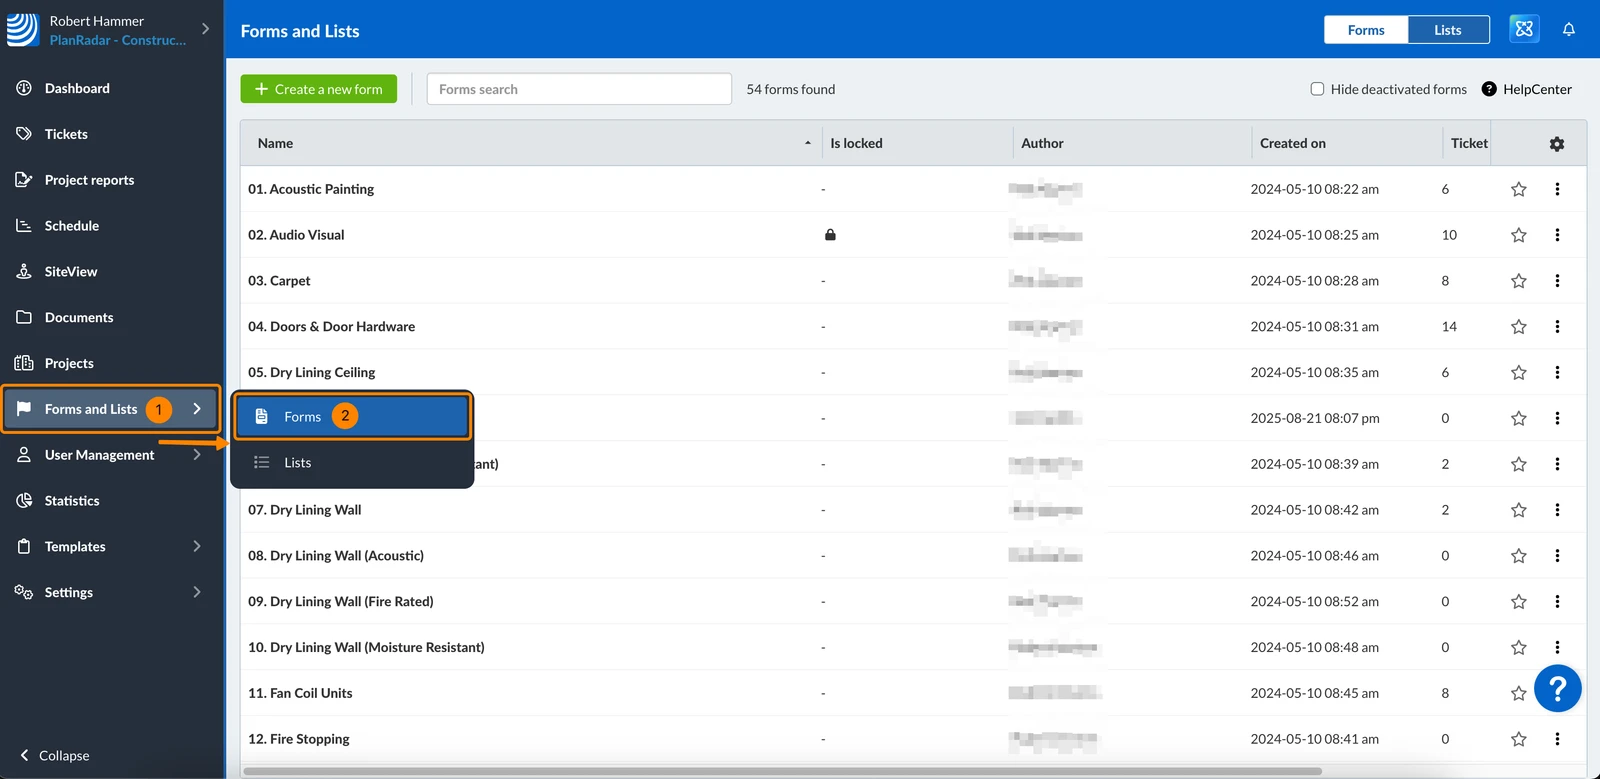
How to access Forms
- Click Forms and Lists
- Click Forms
Create a Form
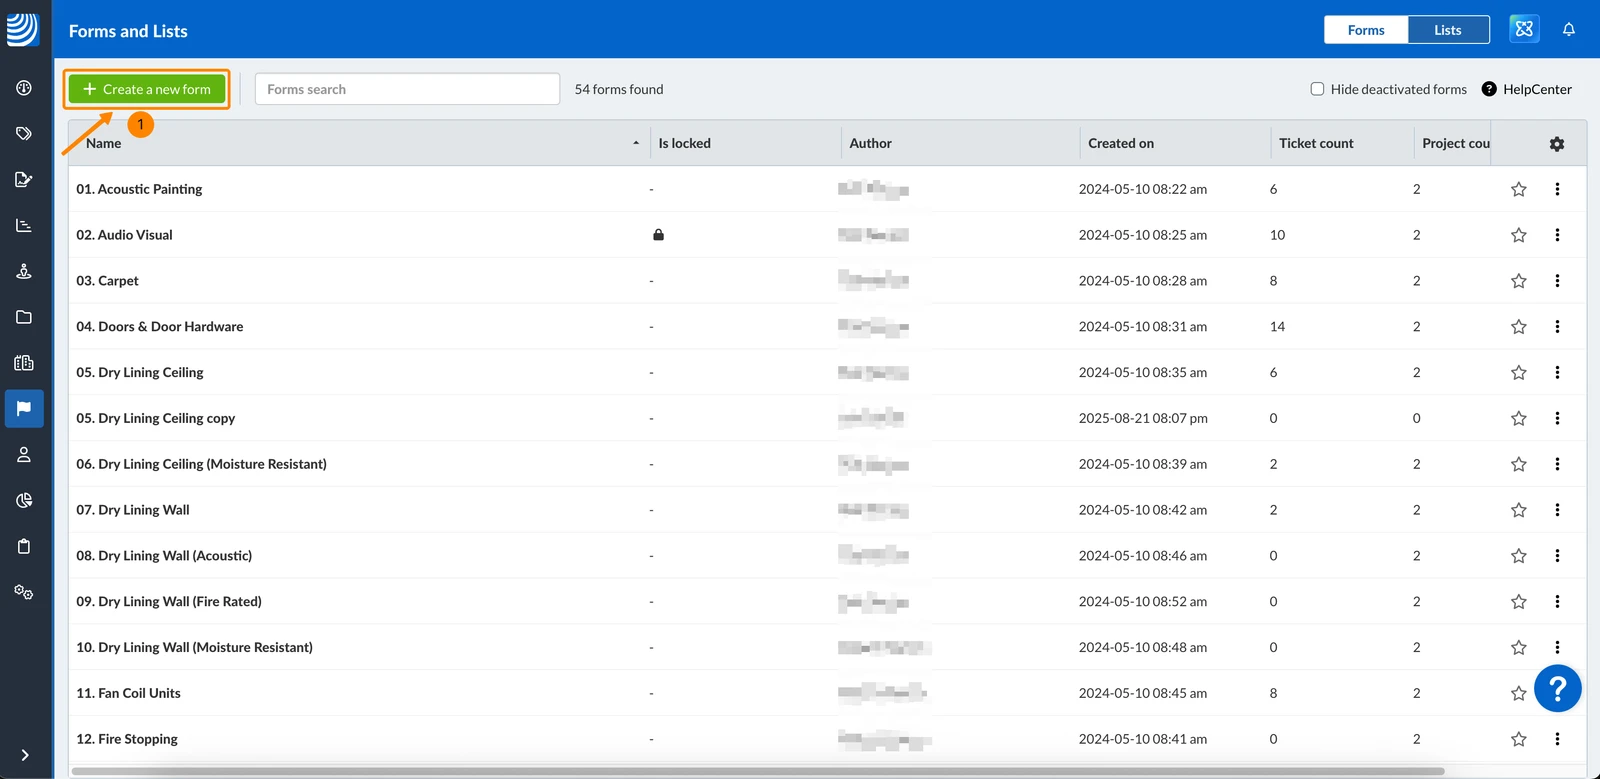
To create a new form:
- Click + Create a new form
Form Name
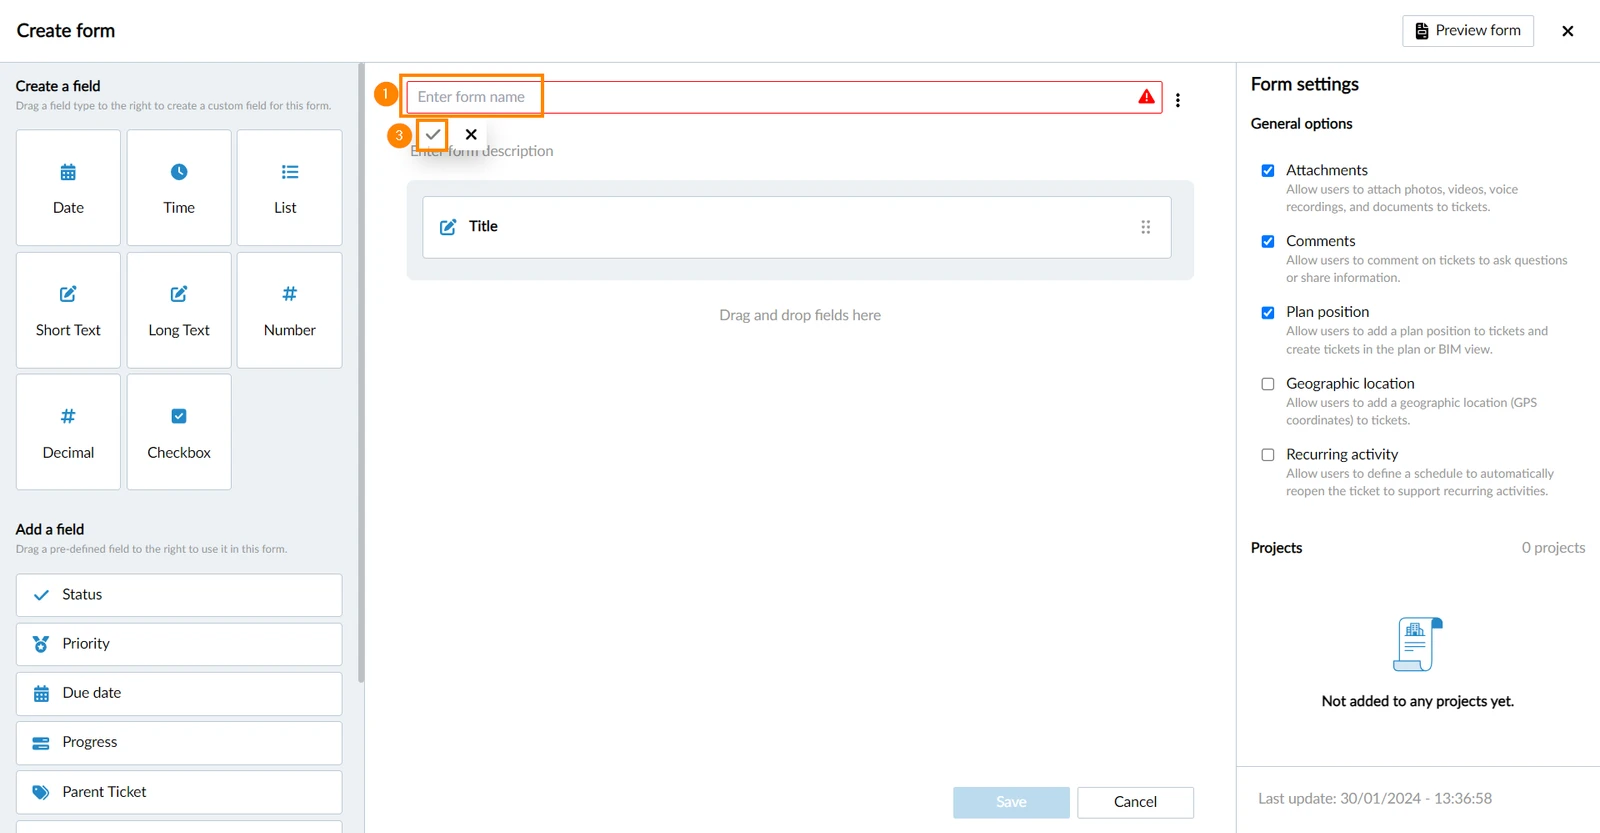
Each form needs a name to identify it, for example when you Create a Ticket later.
To name a form:
- Enter form name
- Click ✔ to confirm
Form Description
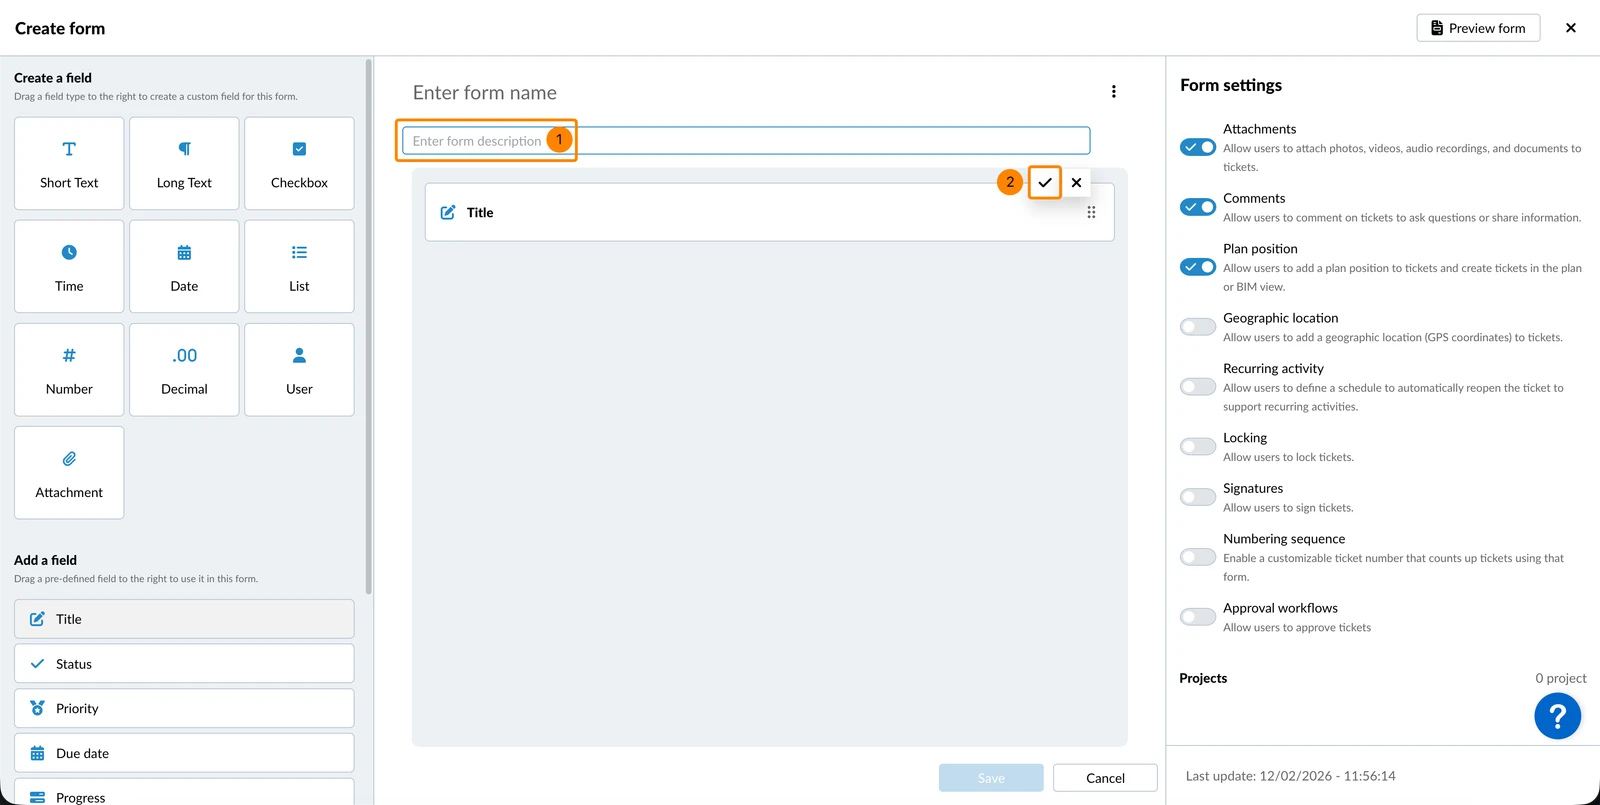
You can add an optional description, for example to explain to other users what this form is meant for.
To add a description:
- Enter form description
- Click ✔ to confirm
Form Settings
Form Preview
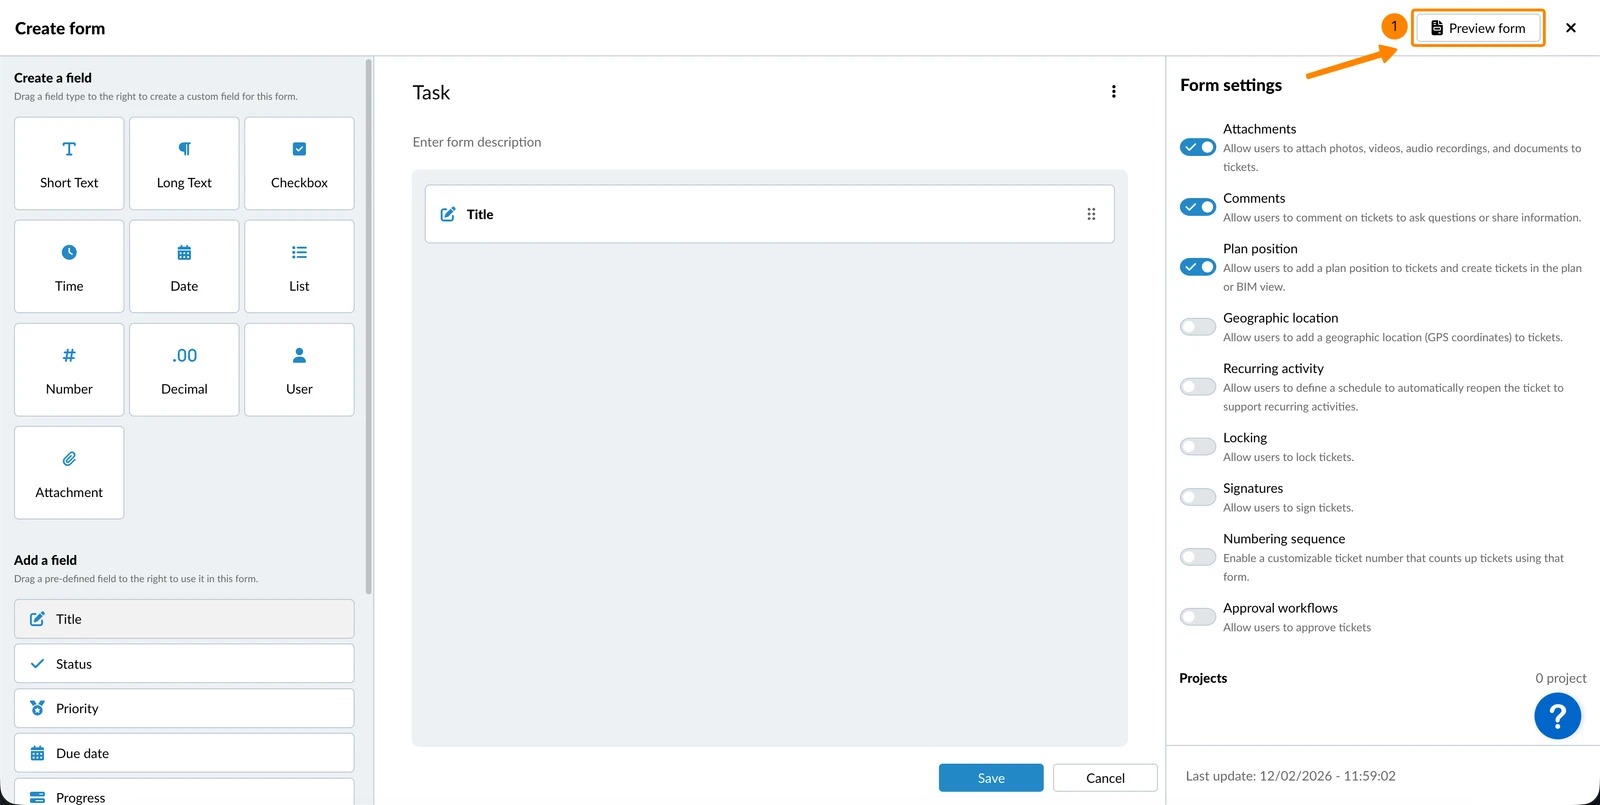
To see what tickets will look like with this form:
- Click Preview form
Save Form
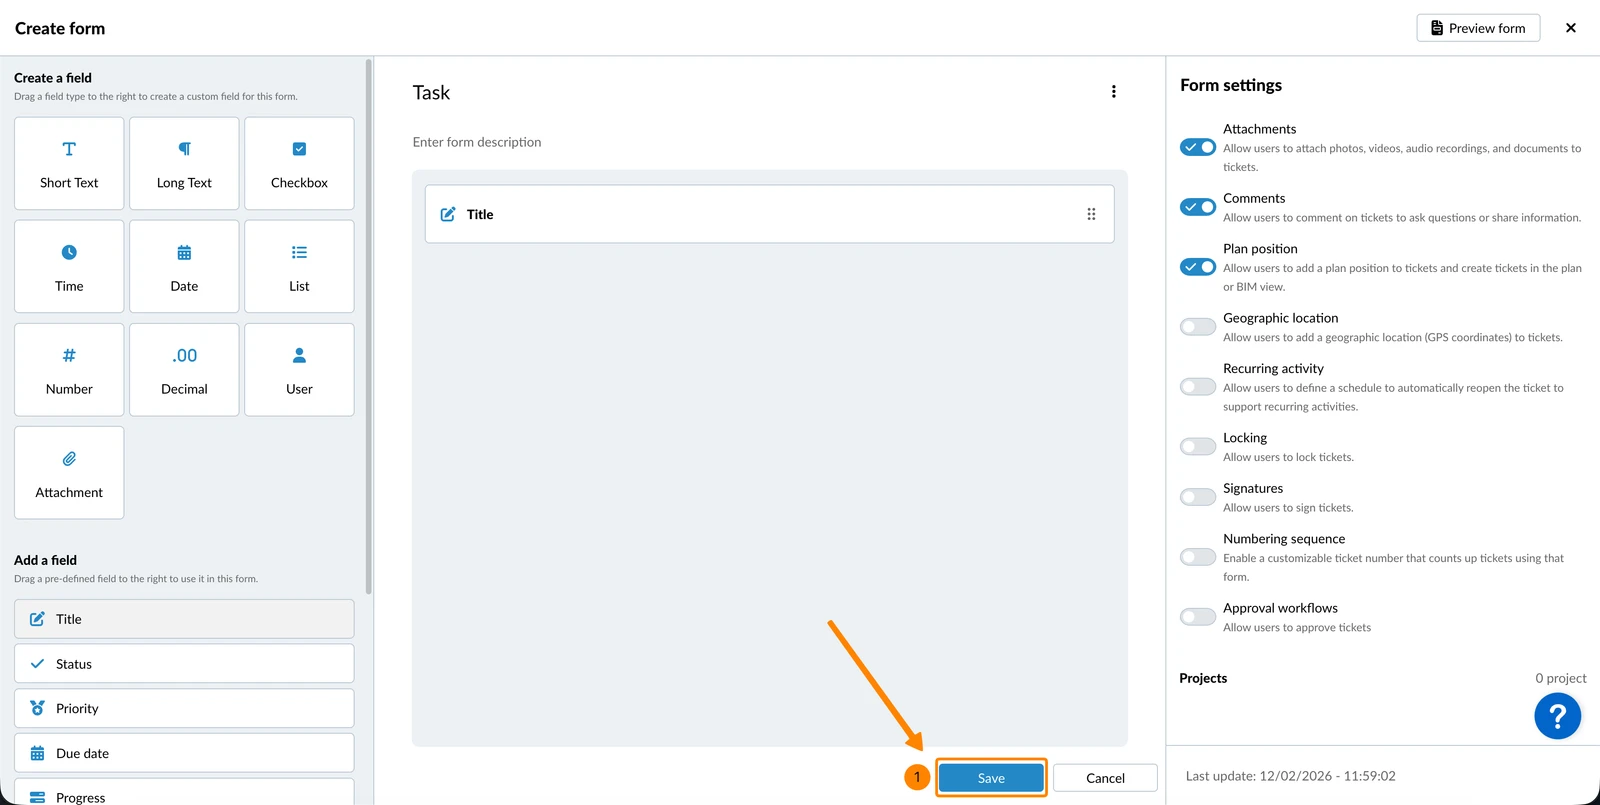
Save your form at any time to ensure your changes are not lost.
To save a form, it needs at least a name:
- Click Save
Field Types
There are two types of fields available:
- Predefined fields: They are predefined by PlanRadar and come with special functionality, including Title, Status, Priority, Due date, Progress, Parent ticket, Receiver, and Assignee.
- Custom fields: You can add your own fields by choosing one of the input types such as Short text, Long text, Checkbox, Time, Date, List, Number, Decimal, User, Attachment, and Checklist.
Add a Predefined Field
There are two different ways to add fields.
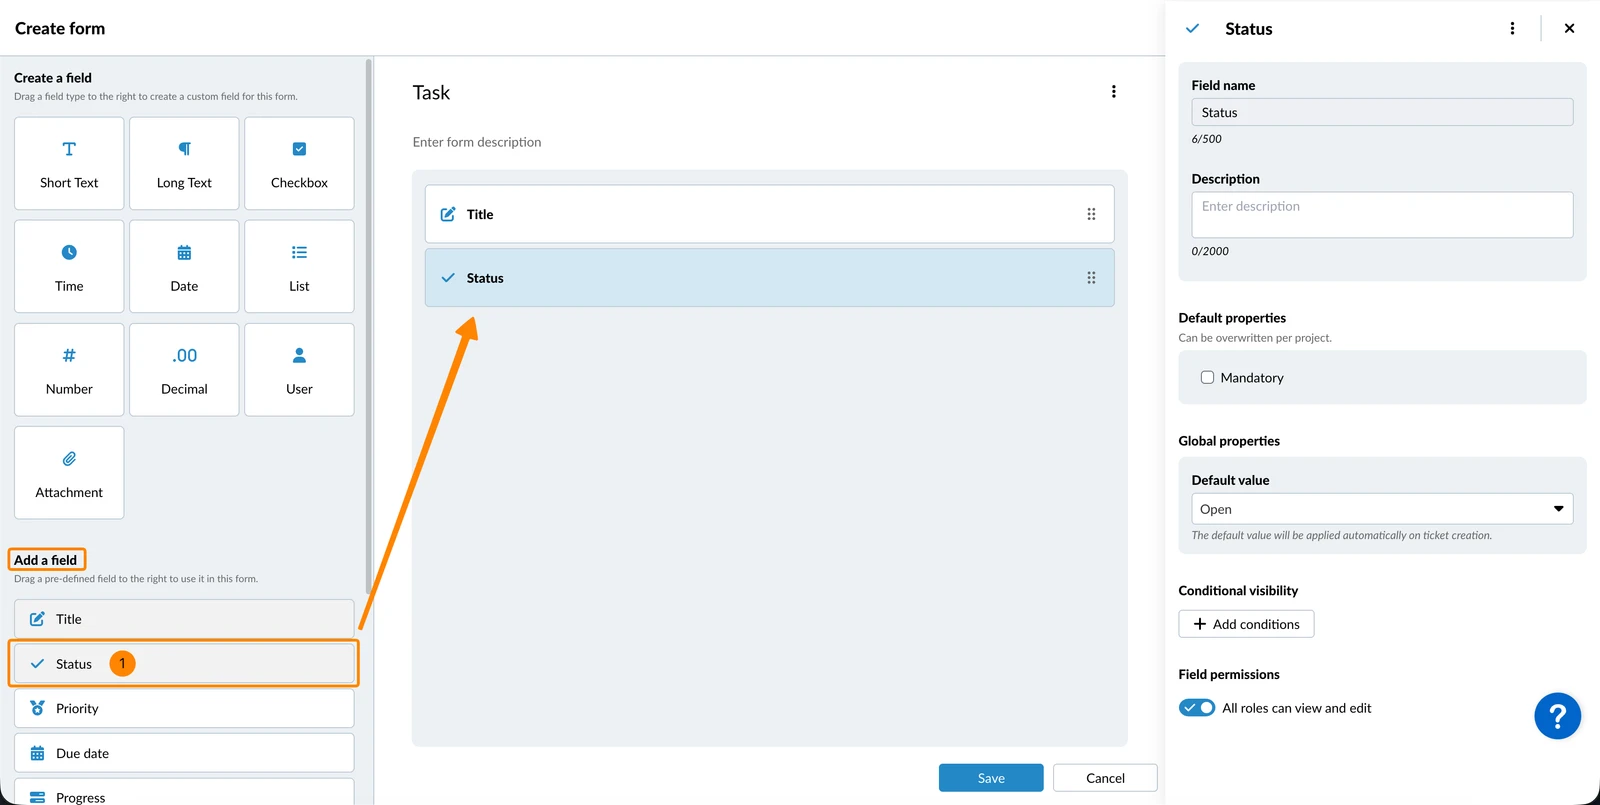
To add a predefined field at the bottom of your form:
- Click on the field, for example Status (under Add a field)
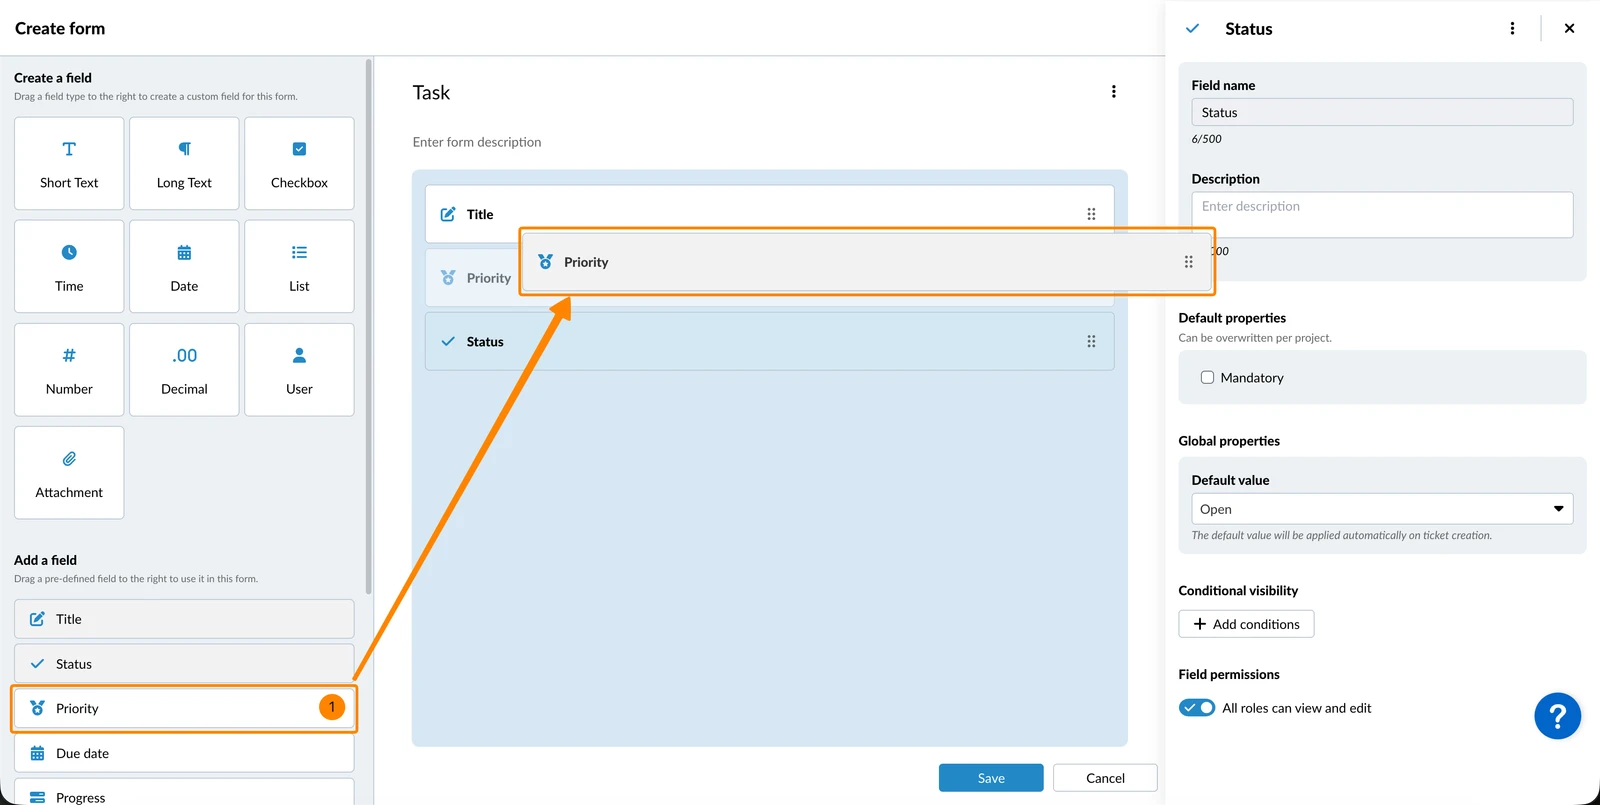
To add a predefined field at a certain position in your form:
- Drag & drop the field, for example Priority to the desired position
Create & Add a Custom Field
There are two different ways to add fields.
To create and add a custom field at the bottom of your form:
- Click on the field type, for example Short Text (under Create a field)
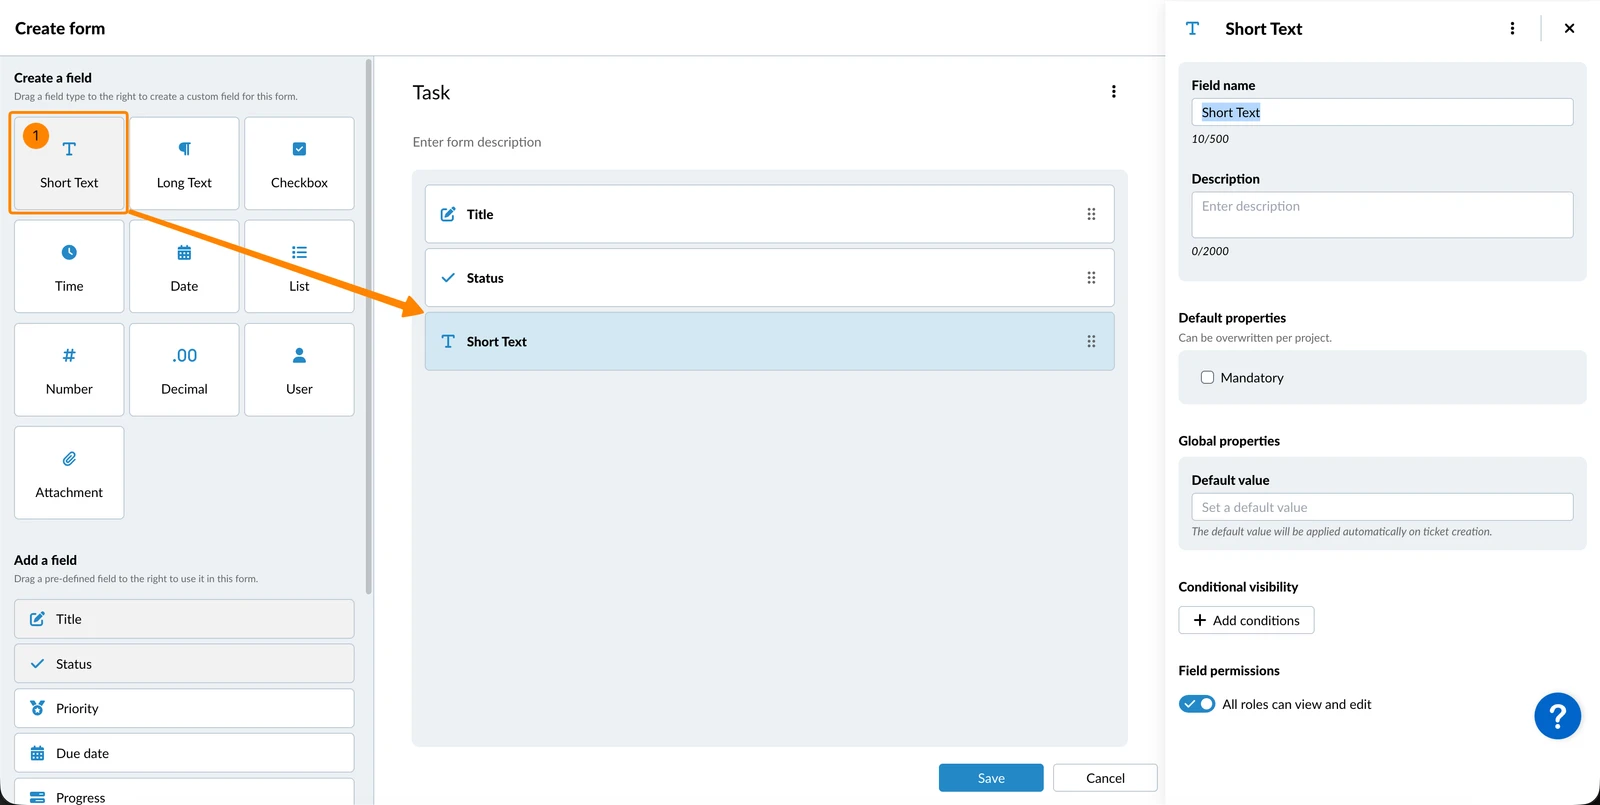
To create and add a custom field at a certain position in your form:
- Drag & drop the field type, for example Date to the desired position
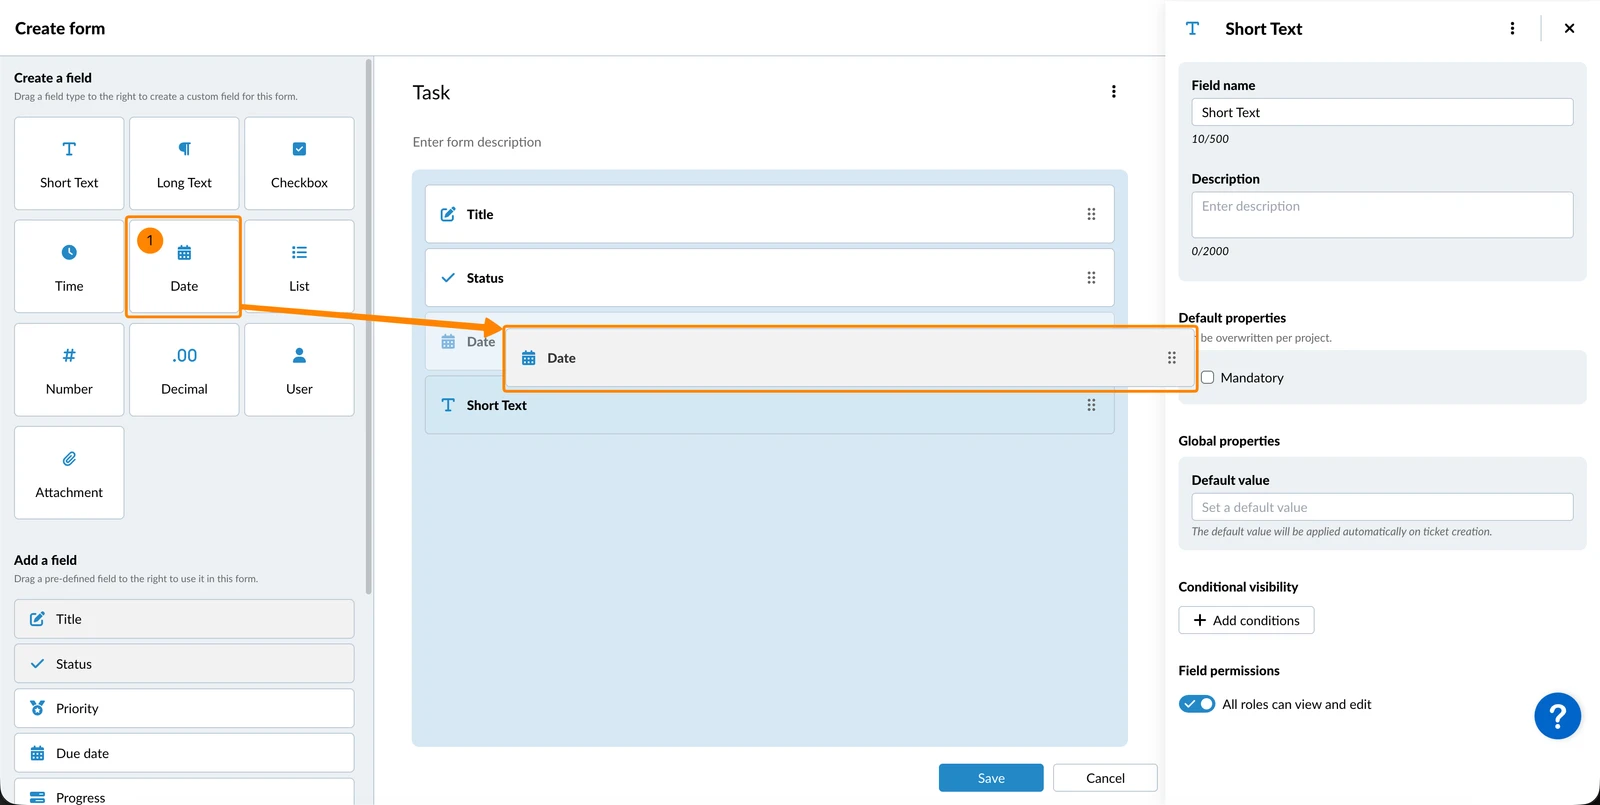
Edit Fields
Click on a field to edit it in the right-hand side panel, including:
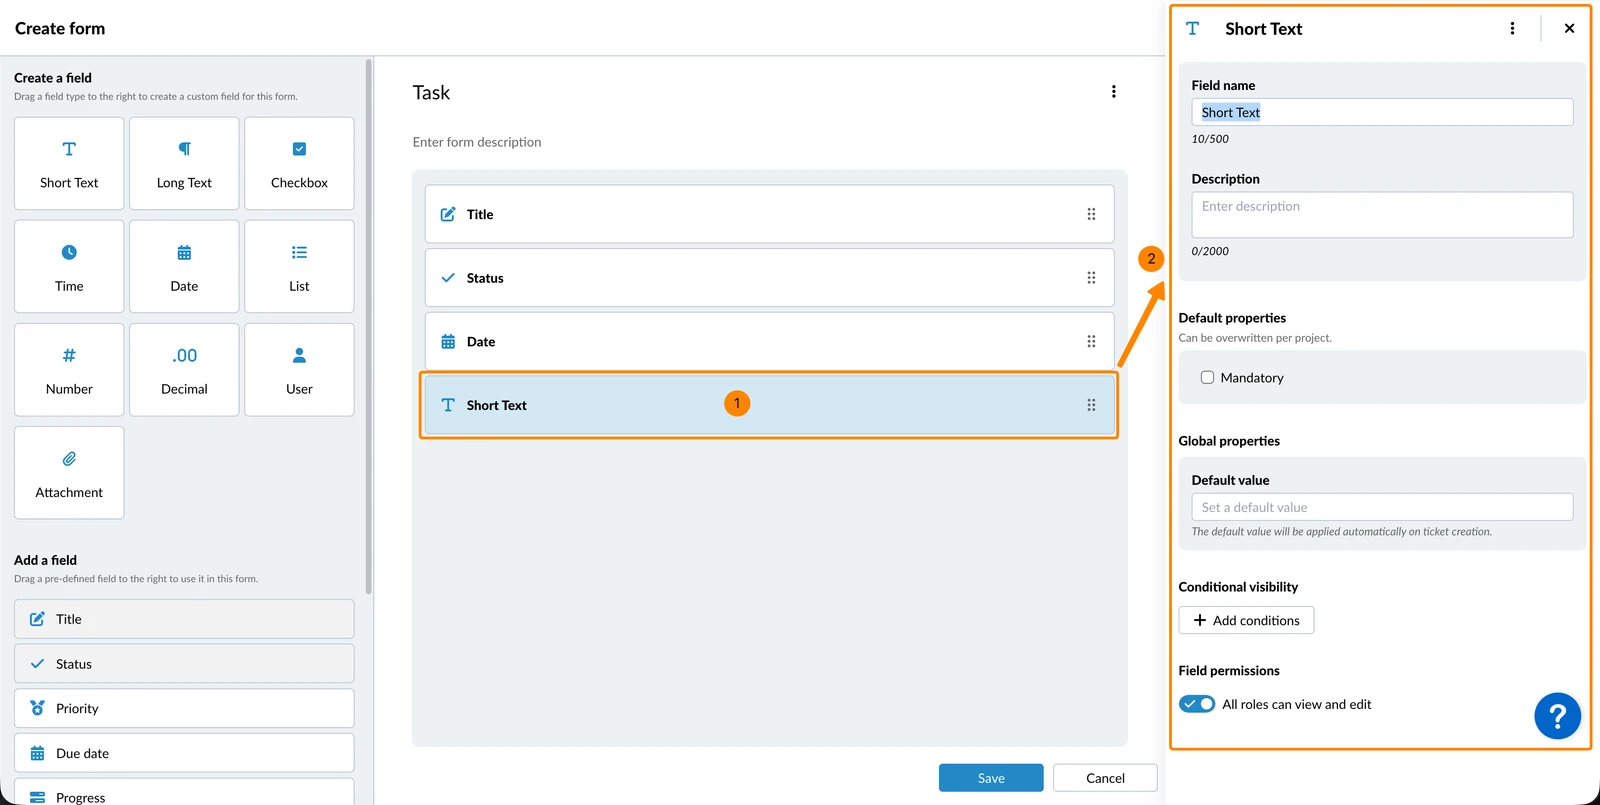
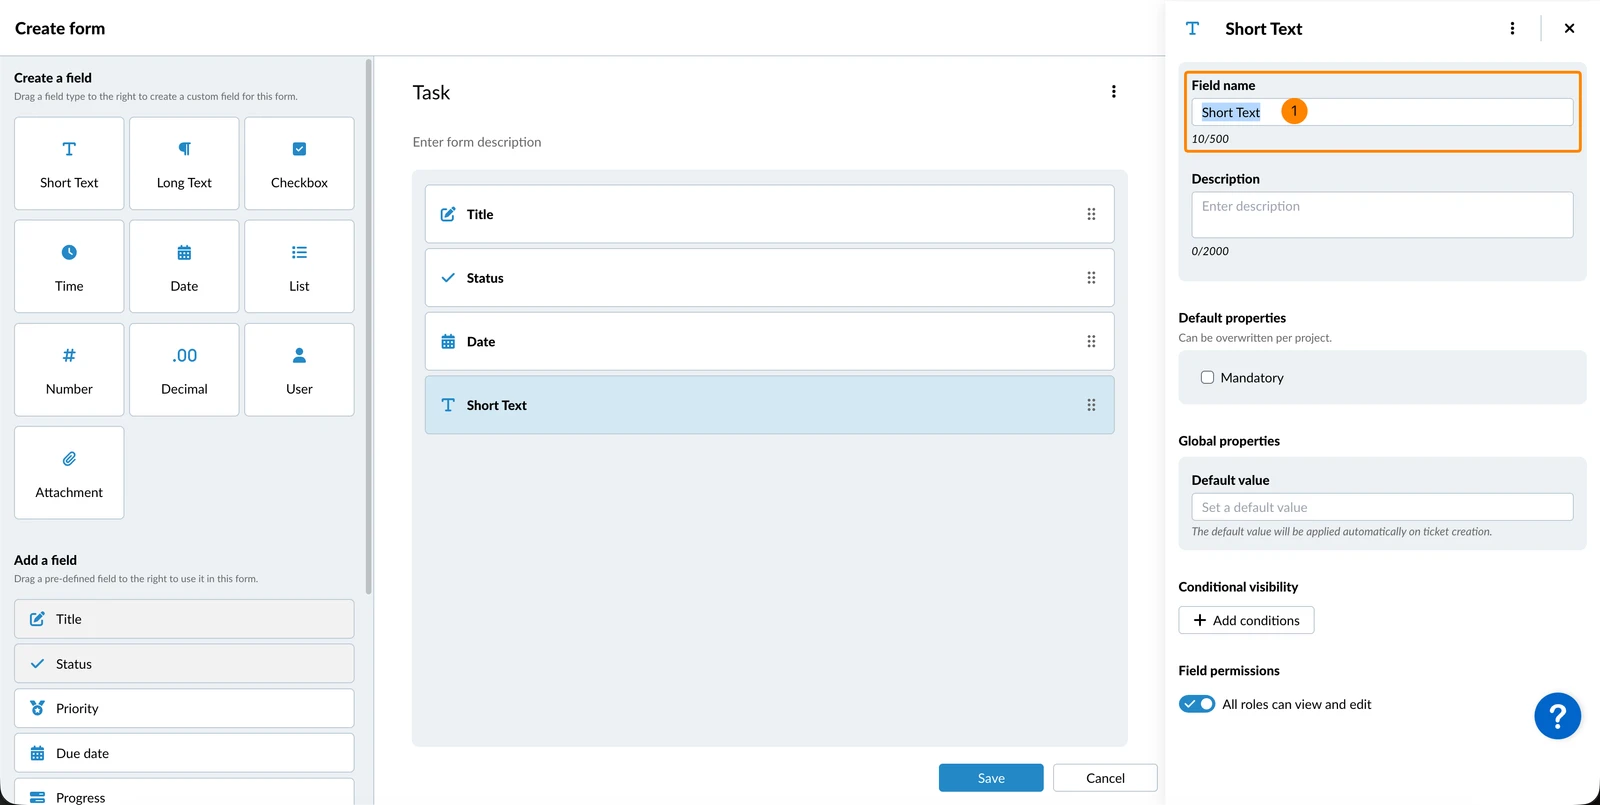
Field Name
The field name is mandatory. Custom fields are named by the field type by default. To change it:
- Enter Field name
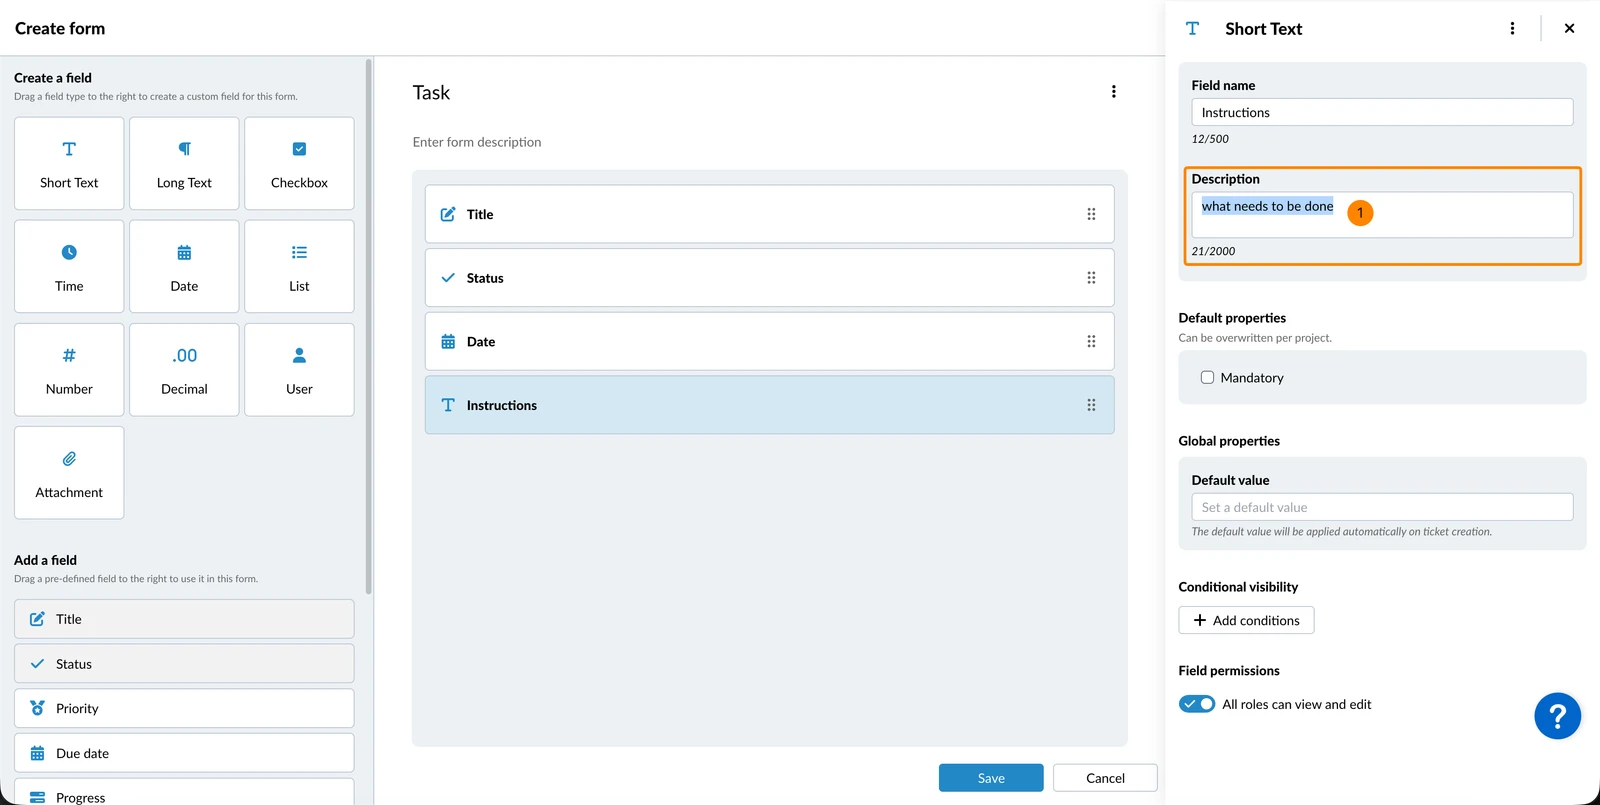
Field Description
The field description is optional. It is intended to help other users fill in ticket fields correctly. To enter it:
- Enter Description
Field Properties
Default properties can be overridden per project. Global properties apply to all projects.
There are different field properties available depending on the field type. You can, for example, make fields mandatory, assign a default list, or set a default value.
Conditional Visibility
You can set conditions for individual fields or groups of fields so that they only appear when certain criteria are met. Conditions can be based on other fields in the ticket including checkboxes, lists, the status field and attachment fields.
Field Permissions
By default, all available roles in the project can view and edit each form field, including roles that are created/added later.
Manage Fields
You can duplicate, remove, or change the order of fields.
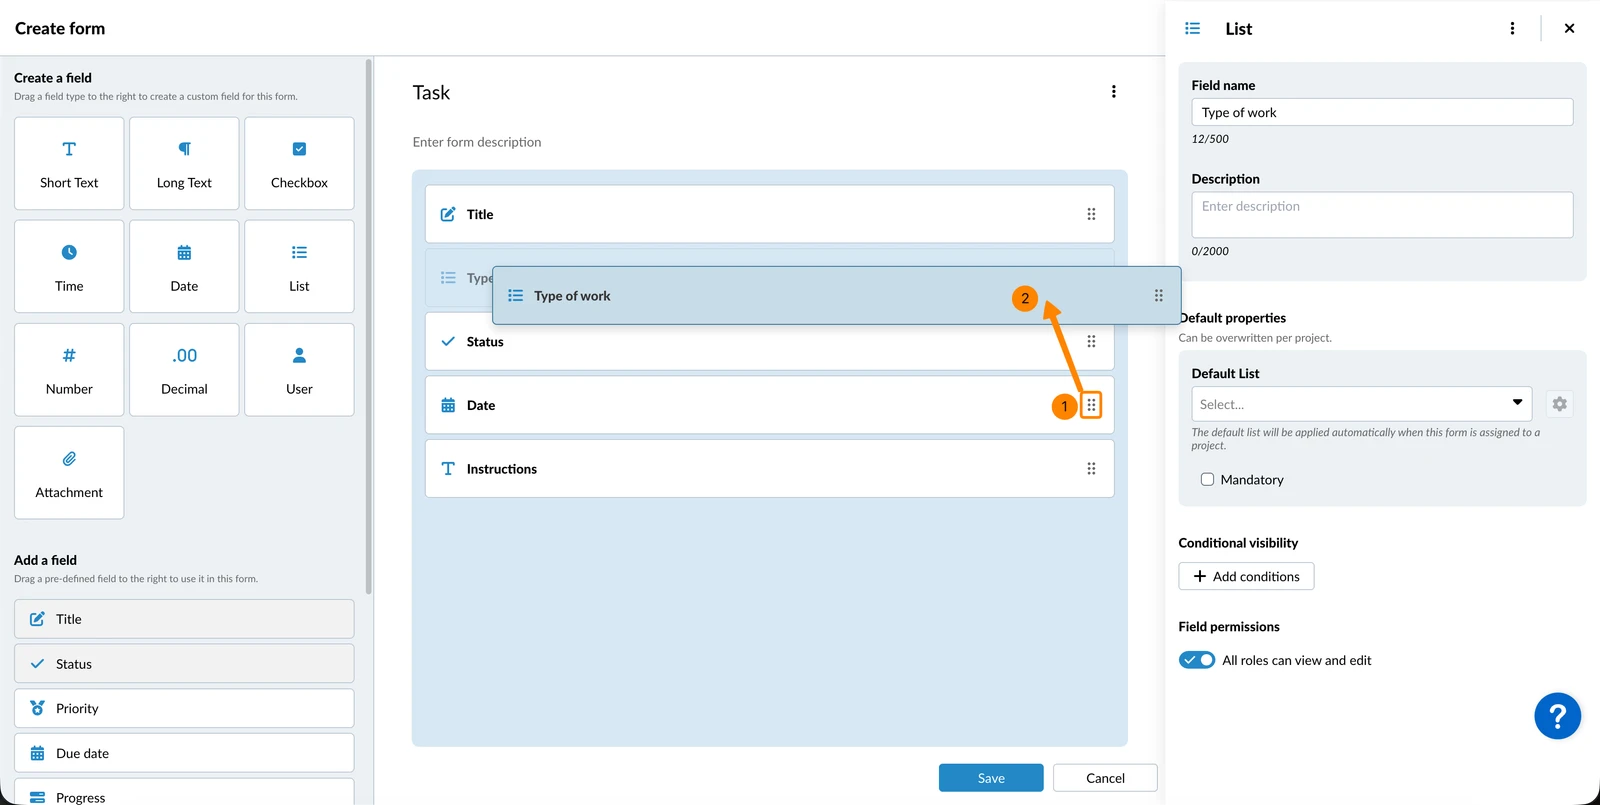
Change the Order of Fields
To change the order of fields in the form:
- Hover over the order (drag handle) icon
- Drag and drop the field to the desired position
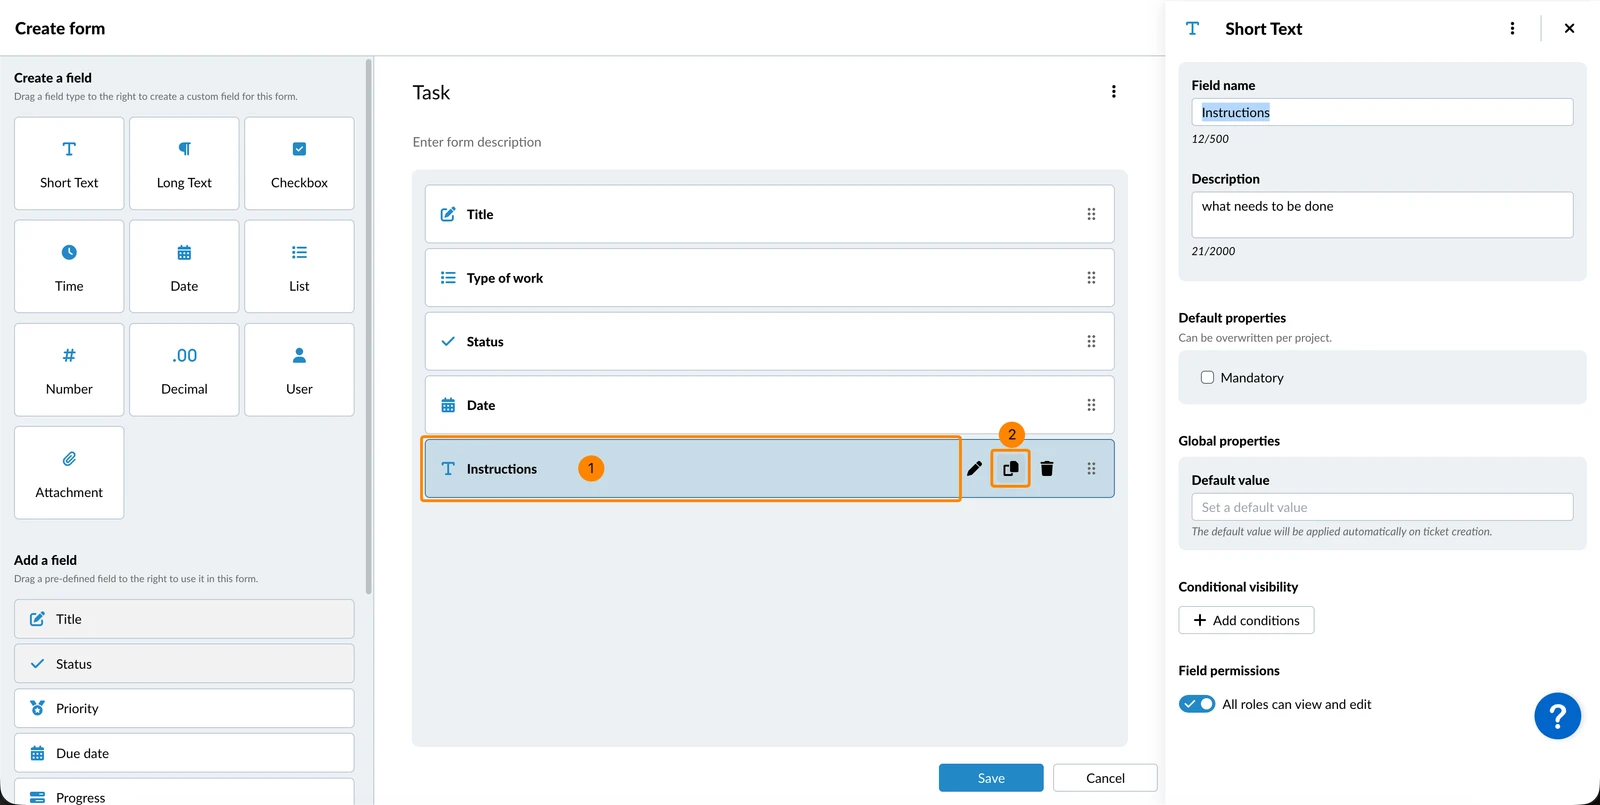
Duplicate Fields
To duplicate a custom field:
- Hover over the field
- Click the duplicate icon
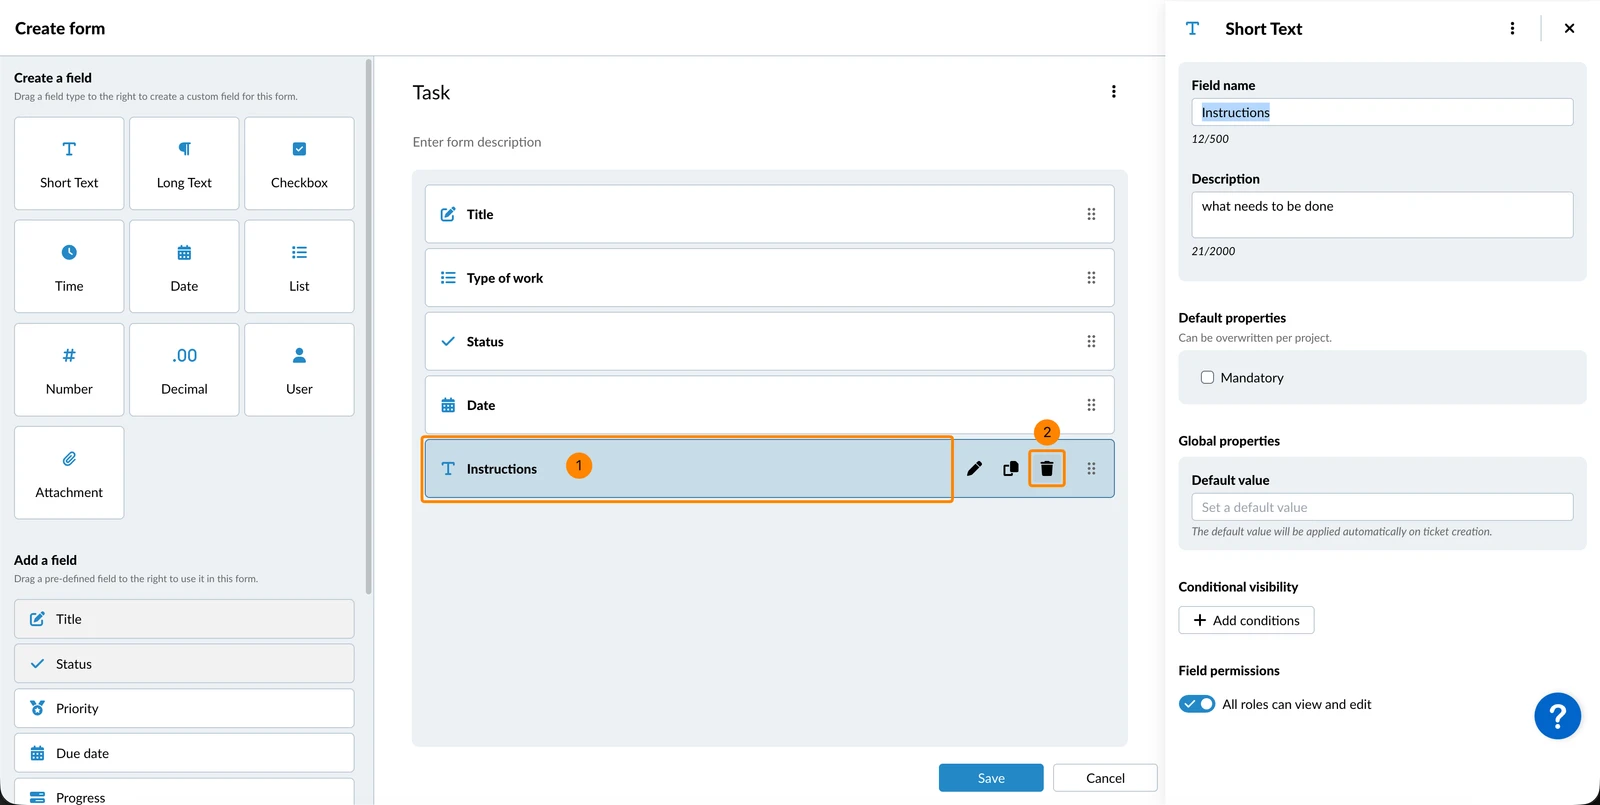
Remove Fields
To remove a field from a form:
- Hover over the field
- Click the remove icon
Layout Elements
There are two elements that help structure your forms:
- Groups allow users to collapse or expand a group in the ticket to hide or show the fields in the group.
- Separators allow you to add a headline (separator name) that indicates the beginning of a section in the ticket.
Both are added and managed like fields. You can add them or change the order by drag & drop, add a description, rename, duplicate or remove them as described above for fields.
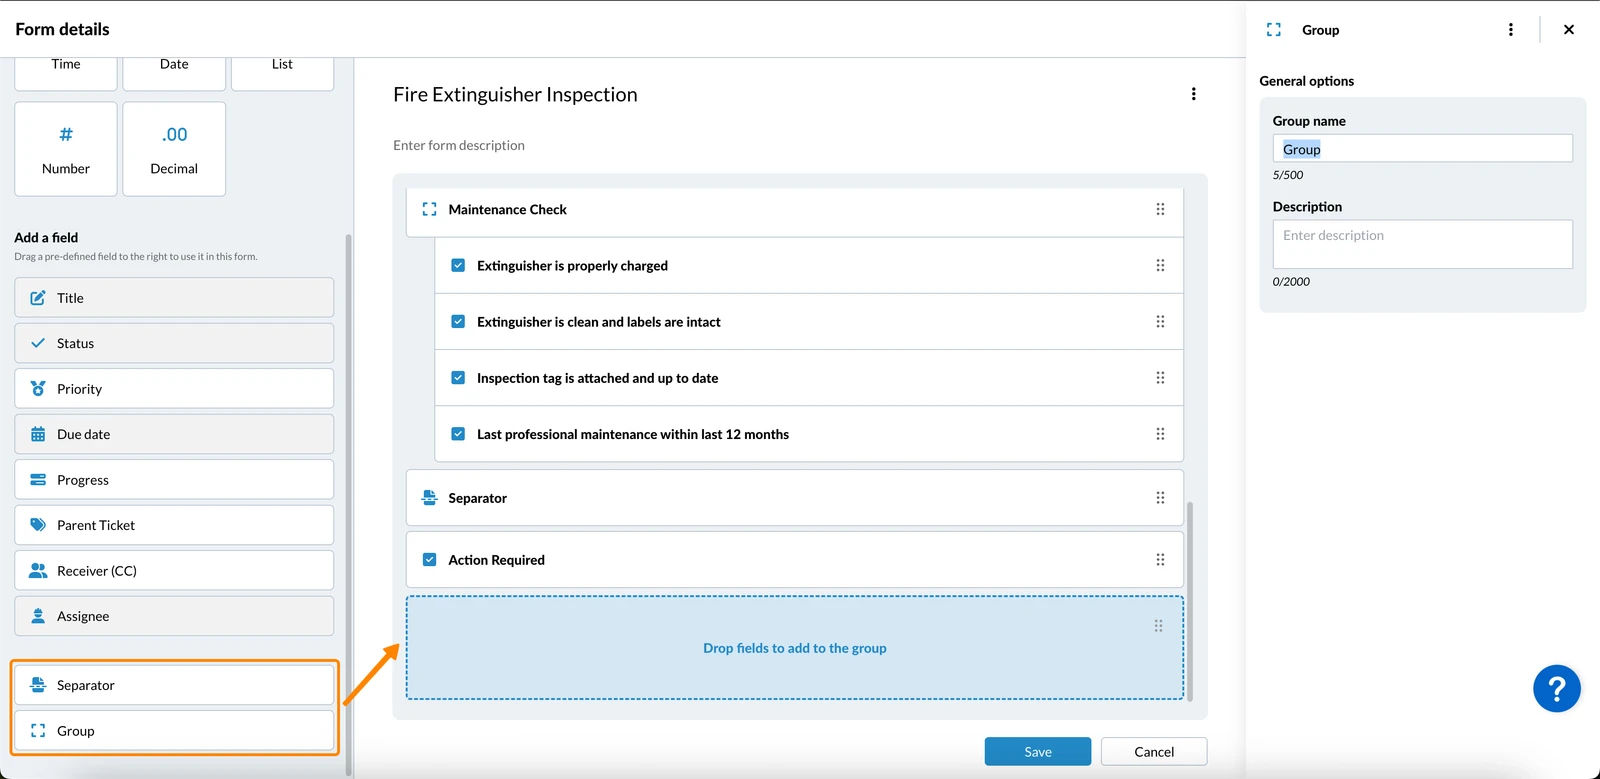
Here's how the expanded and collapsed group states look inside a ticket and a "Separator":
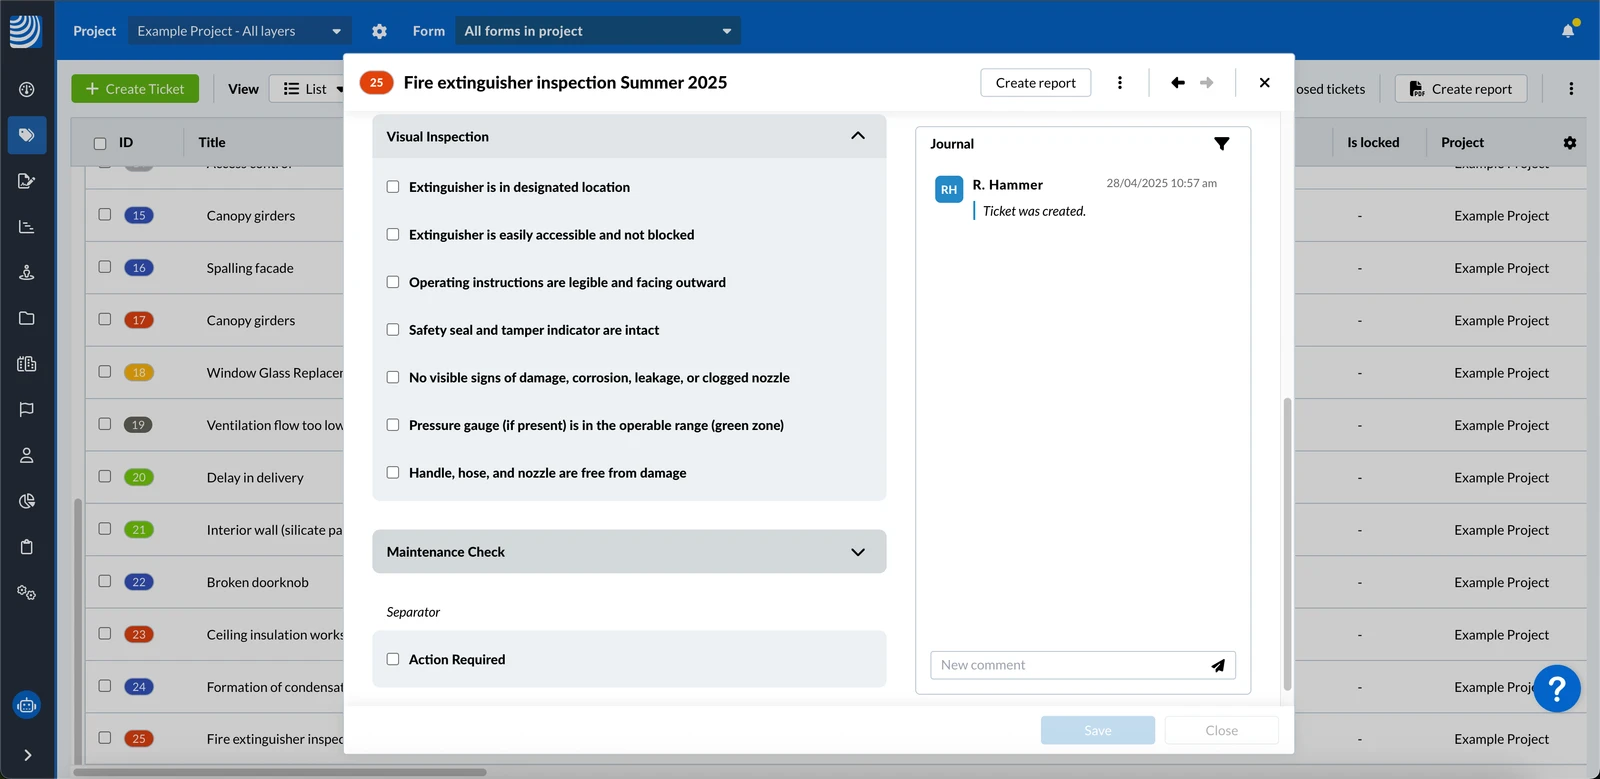
Ticket Field Groups
Groups are added and managed like fields, with the following differences:
- Once you have added a group, you can drag and drop fields into it.
- If you duplicate a group, any custom fields will also be duplicated. You cannot duplicate predefined fields, so they will be skipped.
- If you remove a group, the fields in the group are not removed from the form.
- If a group contains mandatory fields, the group will also display an asterisk (*).
- If a group contains only fields that the user doesn't have permission to view, the entire group will be hidden.
Edit a Form
To edit a previously created form:
- Click on the form
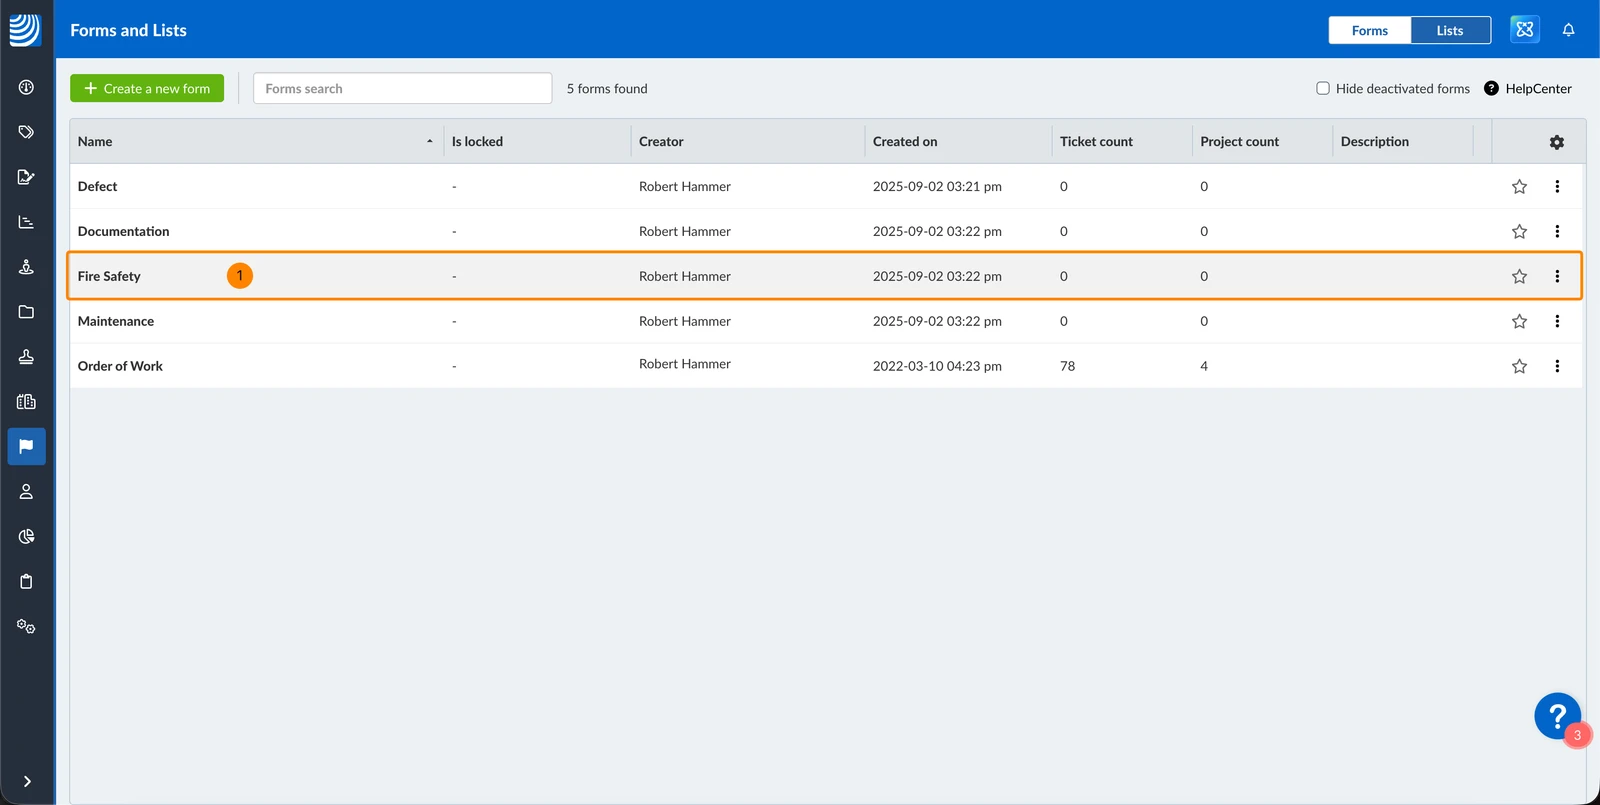
Make your changes as described above and remember to save the Form.
Related Video
This feature is also mentioned in this product update video.
Updated June 12, 2026