

 Deutsch
 Español
 Français
 Hrvatski
 Italiano
 Polski
 Português (BR)
Manage Forms of a Project
Overview
Add forms to your project to enable the creation of tickets. Read more in Create & Edit Forms about creating and customising forms to suit your needs.
Access & Permissions
How to access Forms of a Project
- Click Projects
- Click on the project in the list
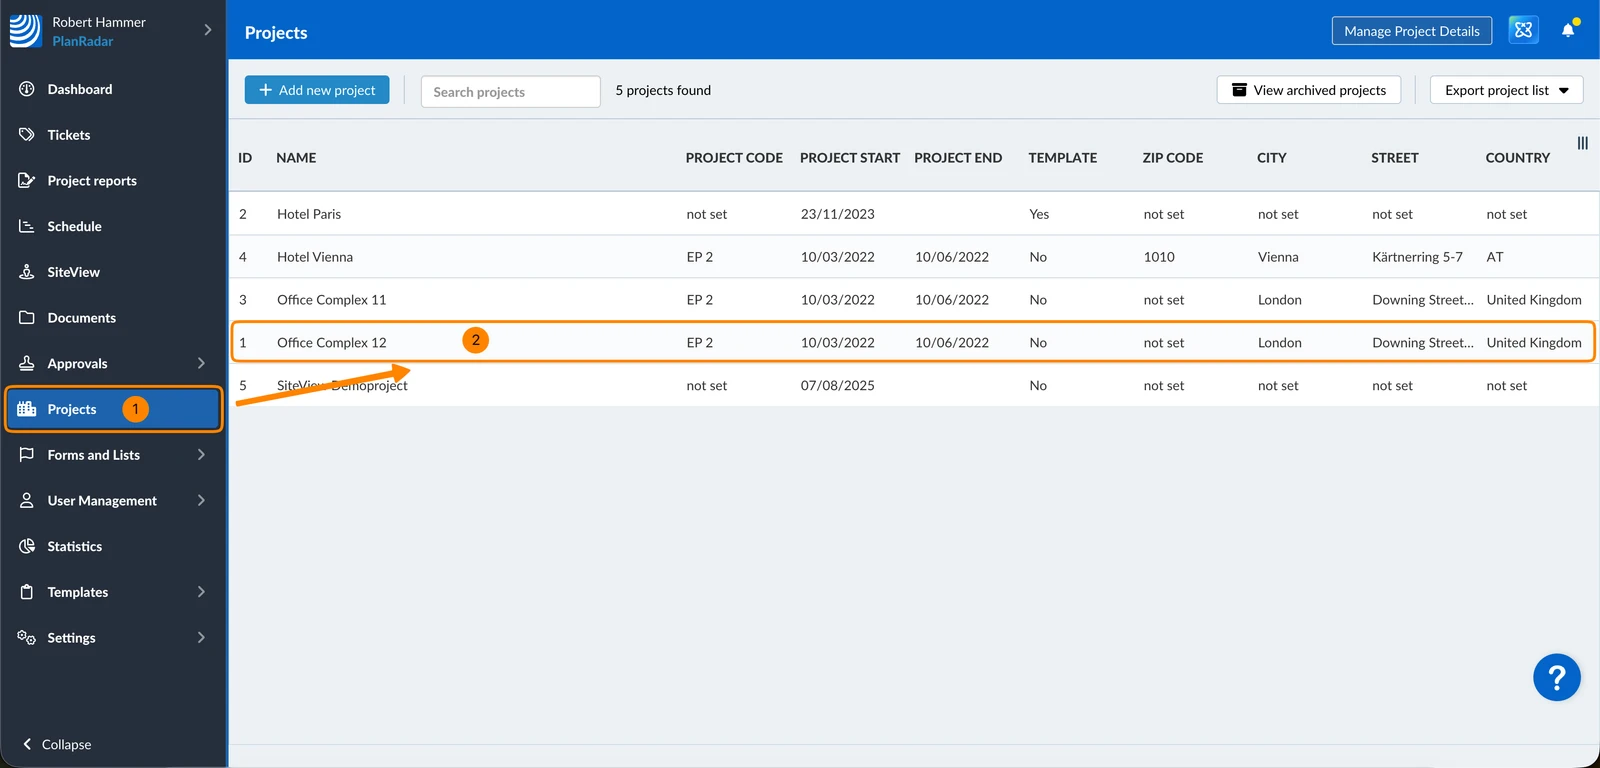
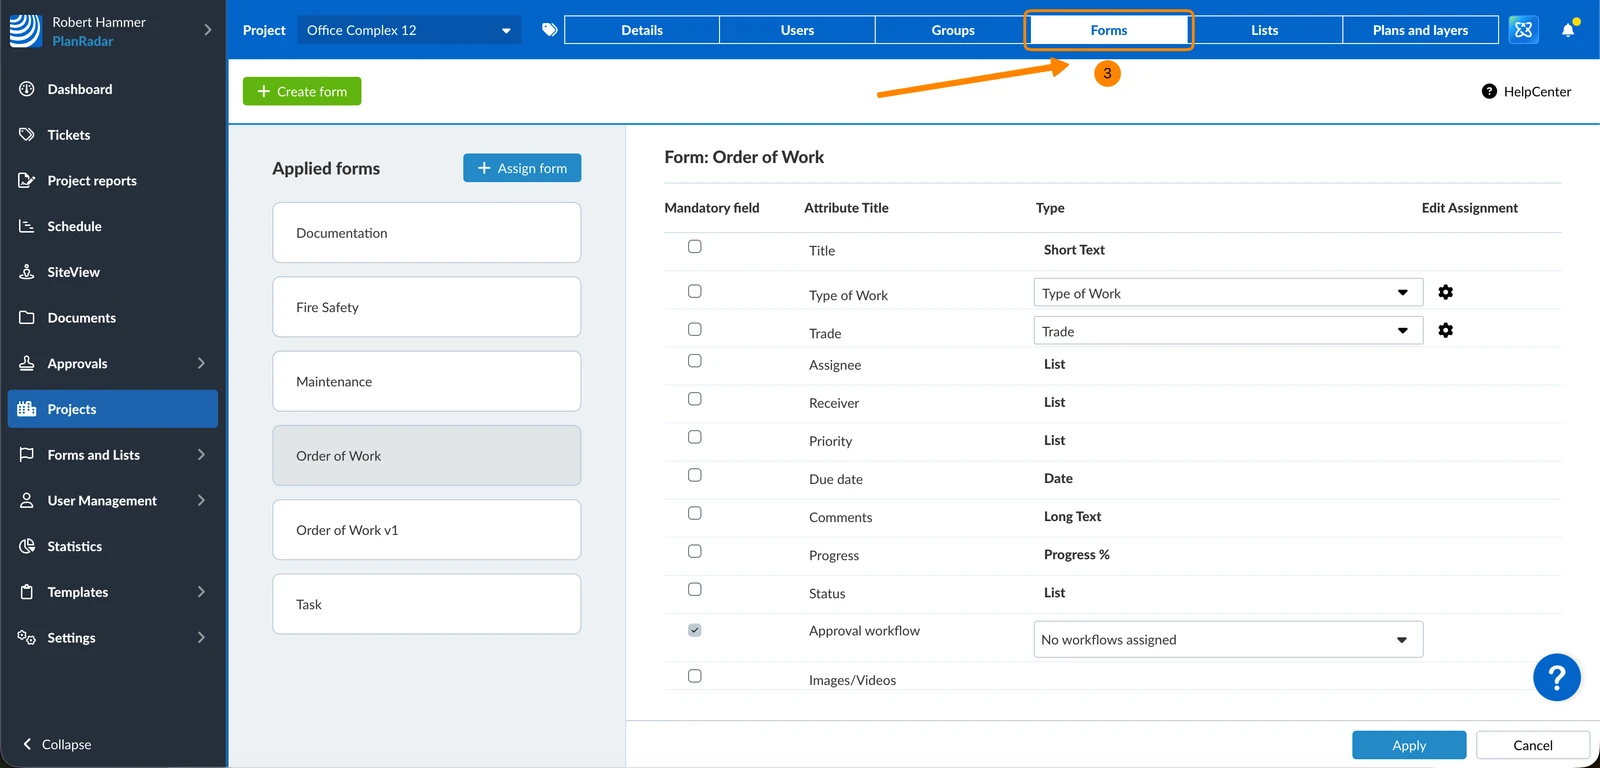
- Click Forms
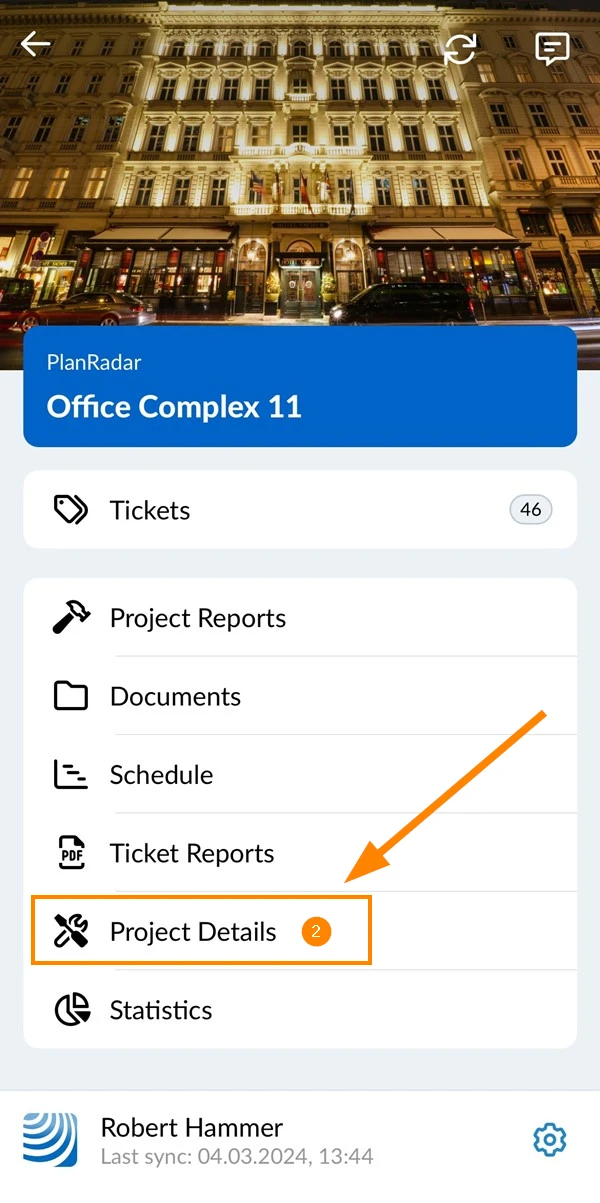
- Go to the main menu
- Tap Project Details
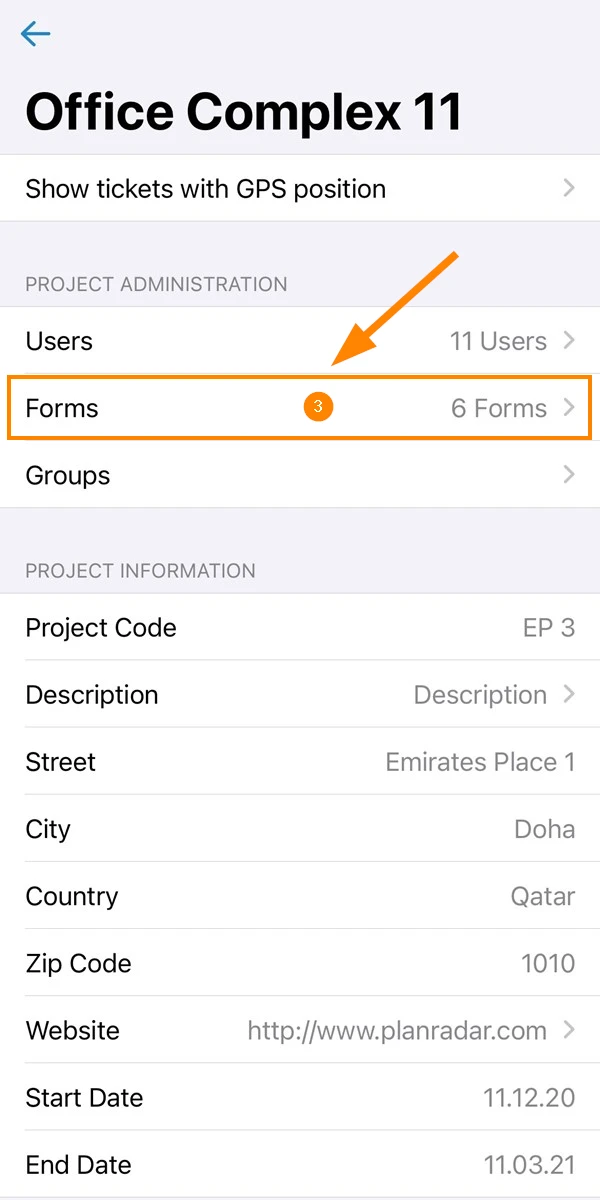
- Tap Forms
Assign a Form to a Project
To assign a form to a project:
- Click + Assign form
- Click + icon next to the desired form
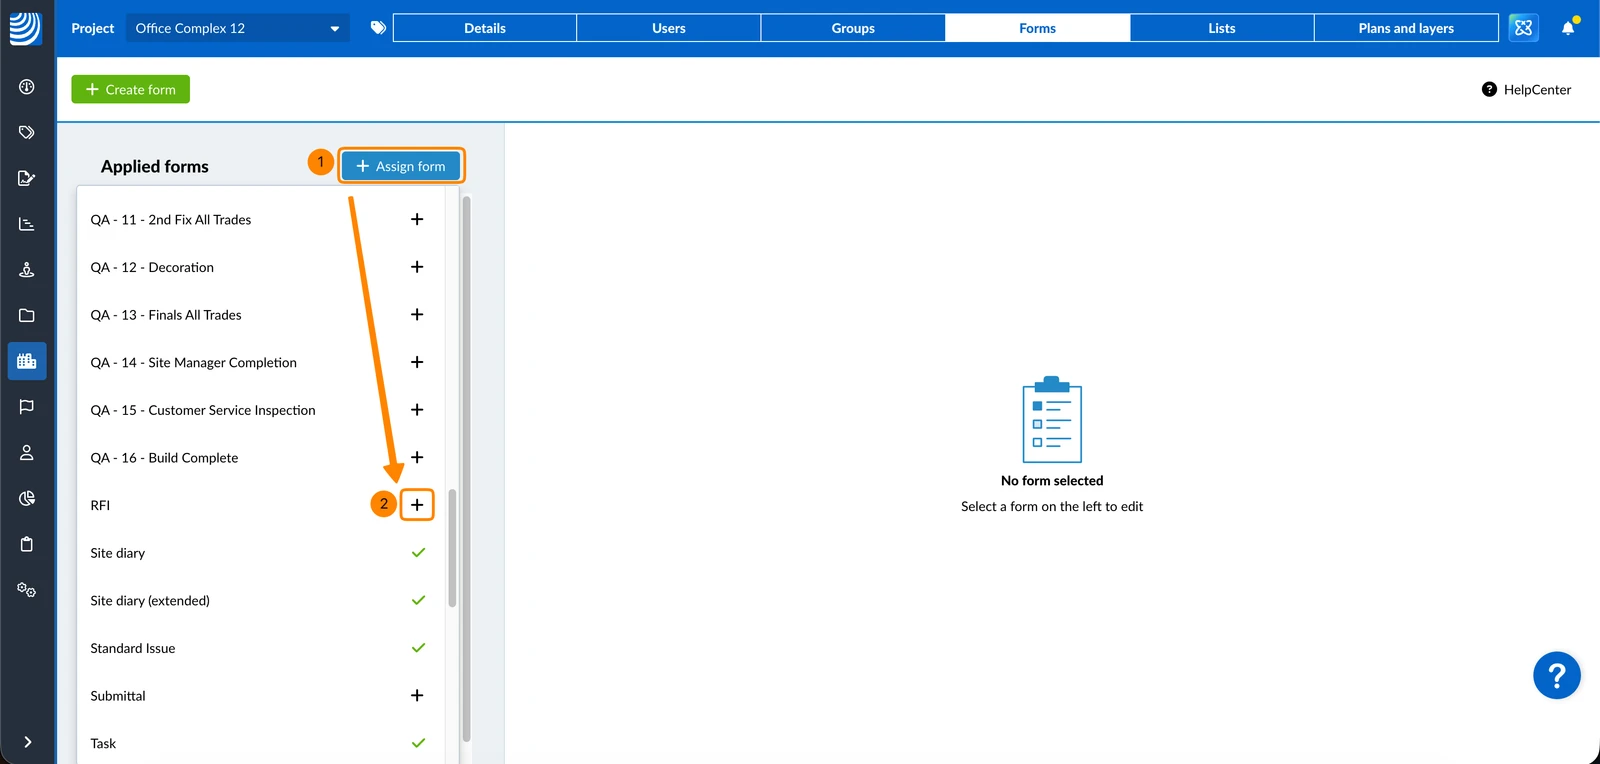
- The form is displayed in the list of applied forms
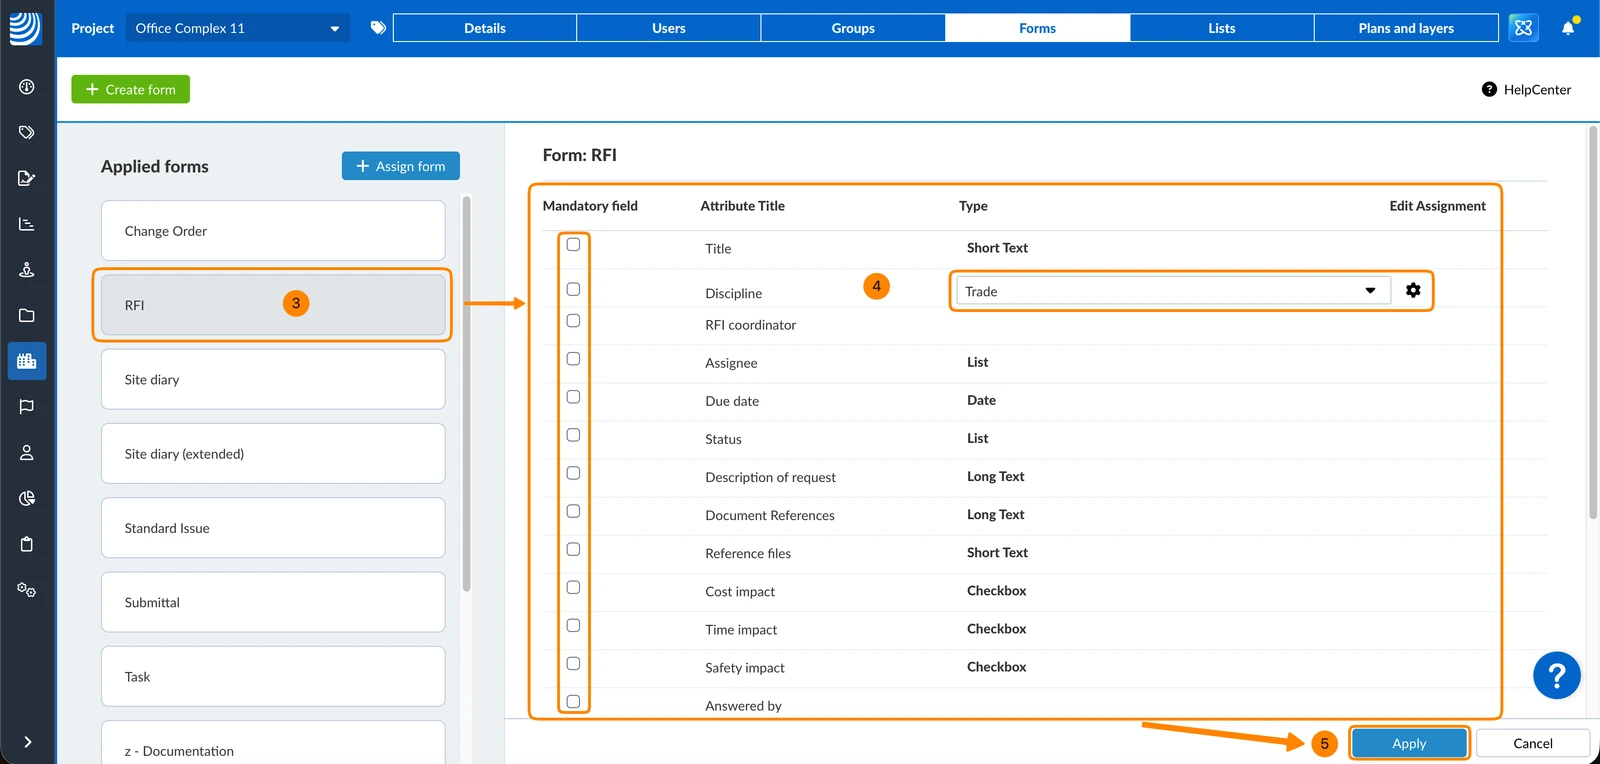
- The default form settings (mandatory fields and assigned lists) are displayed and can be changed as described below in Change Mandatory Field Settings and Assign List.
- Click Apply
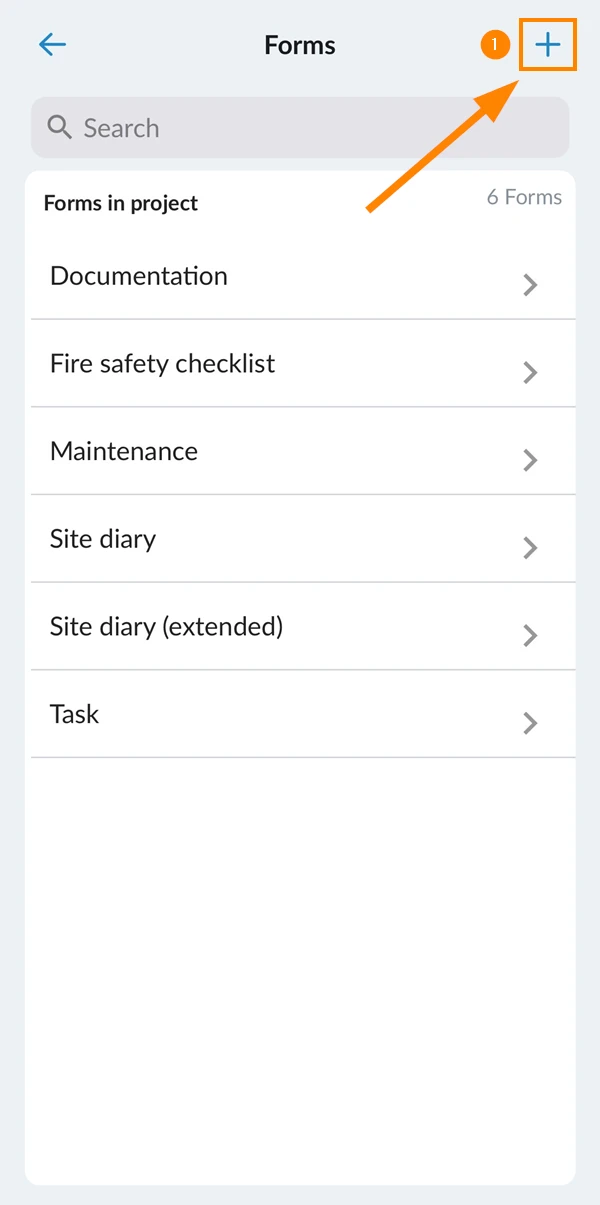
- Tap +
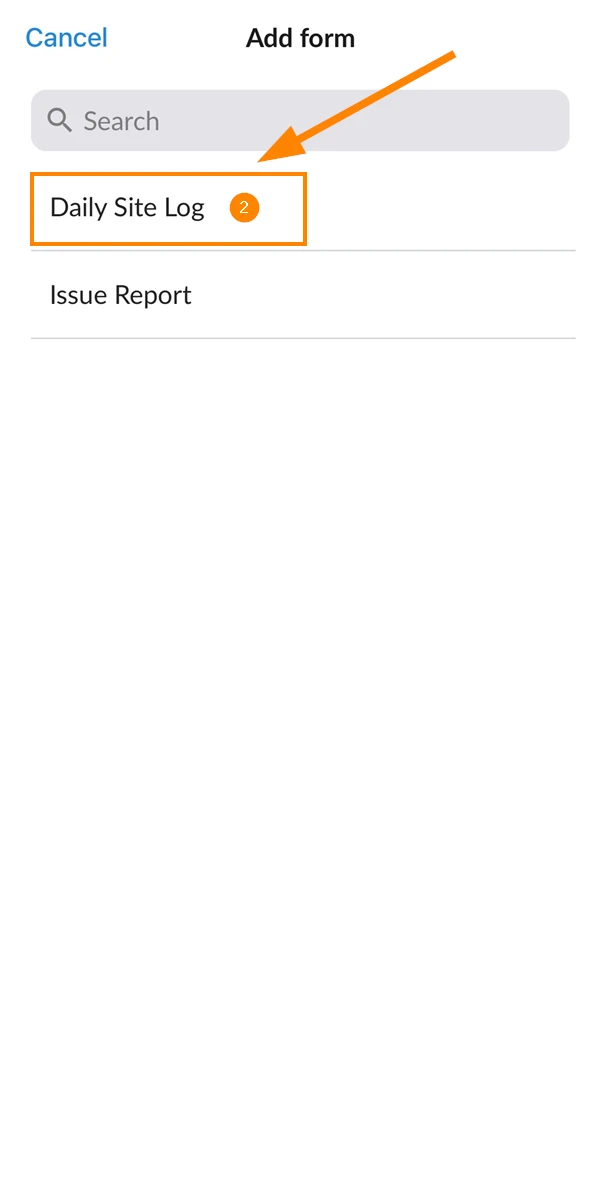
- Tap the form name e.g. Daily Site Log
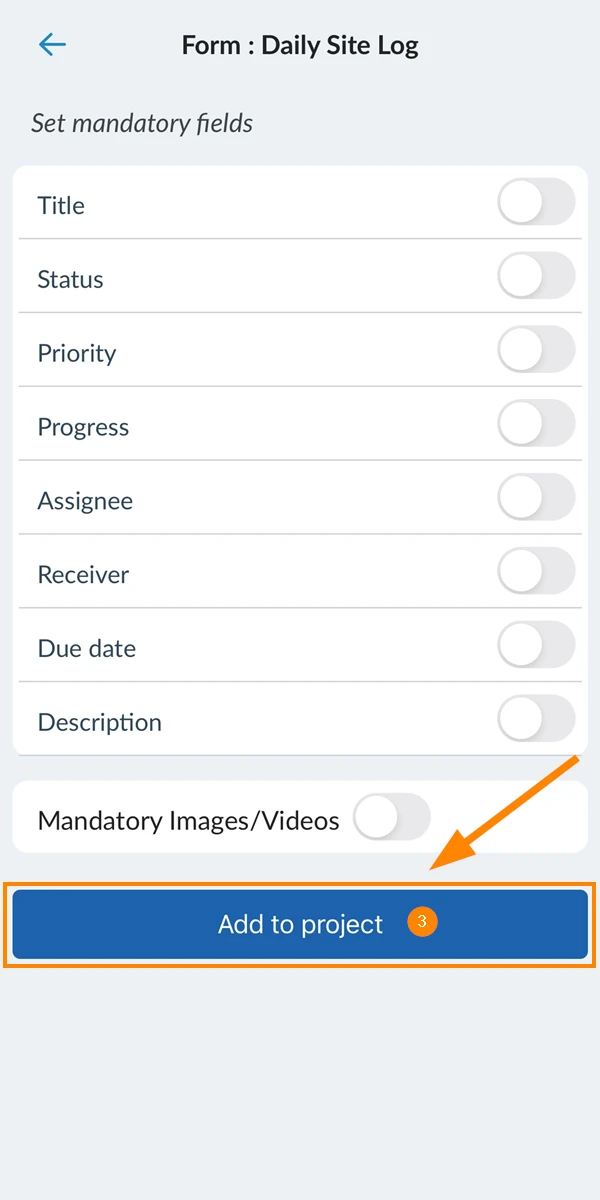
- Optional: Configure mandatory fields and more as explained below in Change Mandatory Field Settings.
Tap Add to project
Remove a Form from a Project
To remove a form from a project:
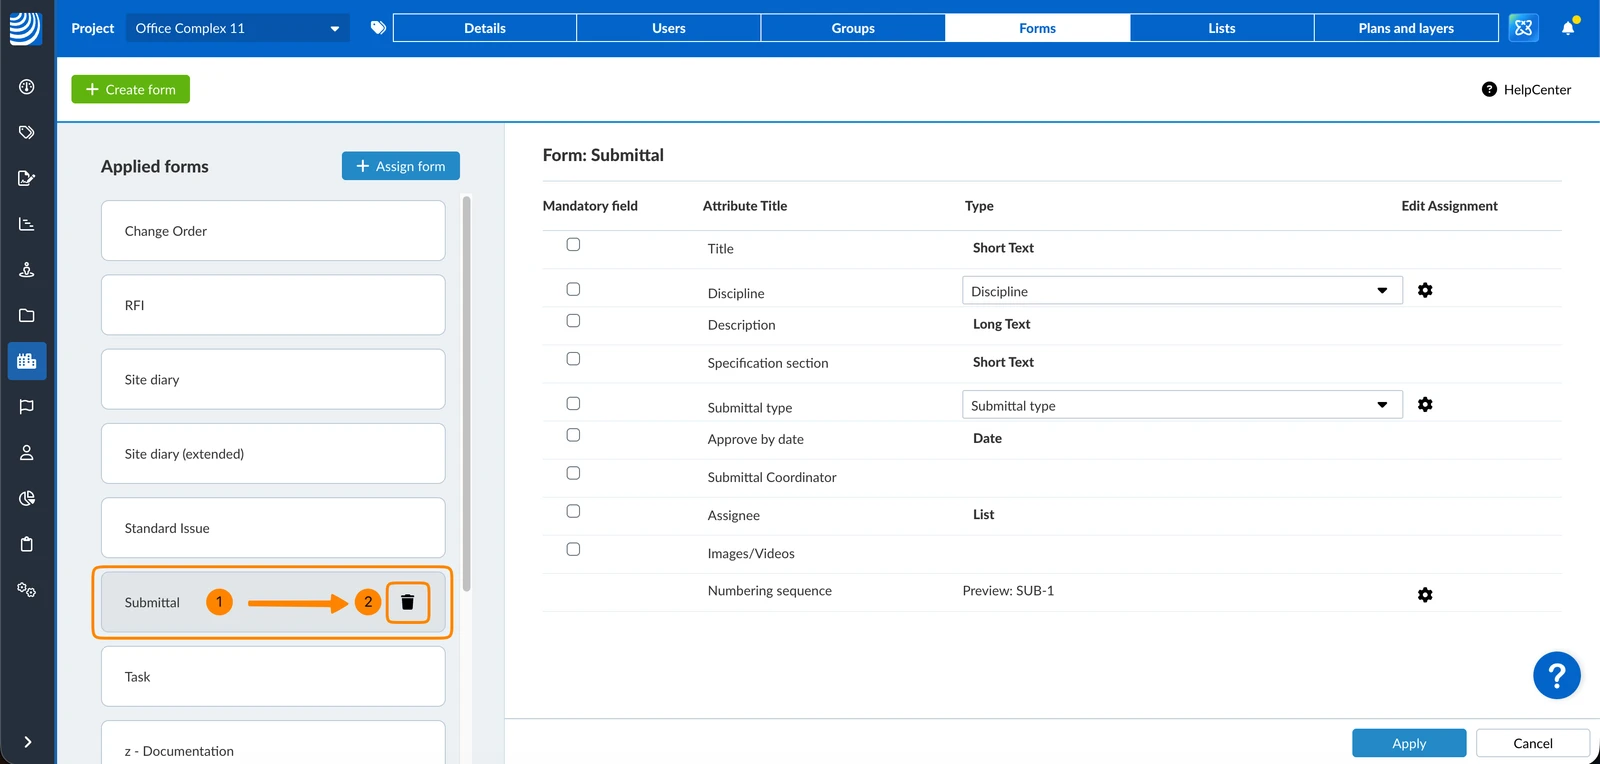
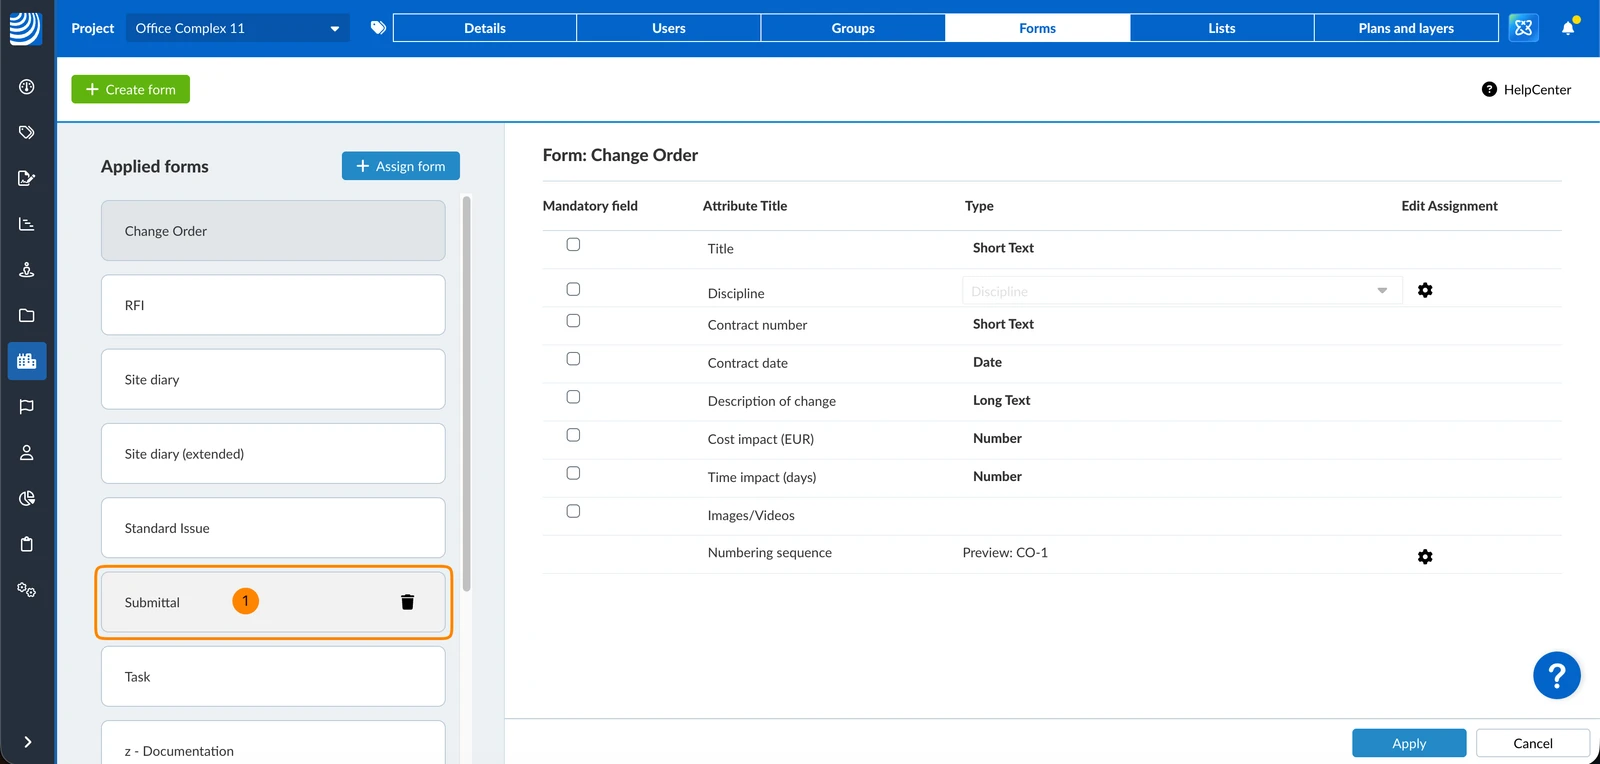
- Hover over the form
- Click the X button
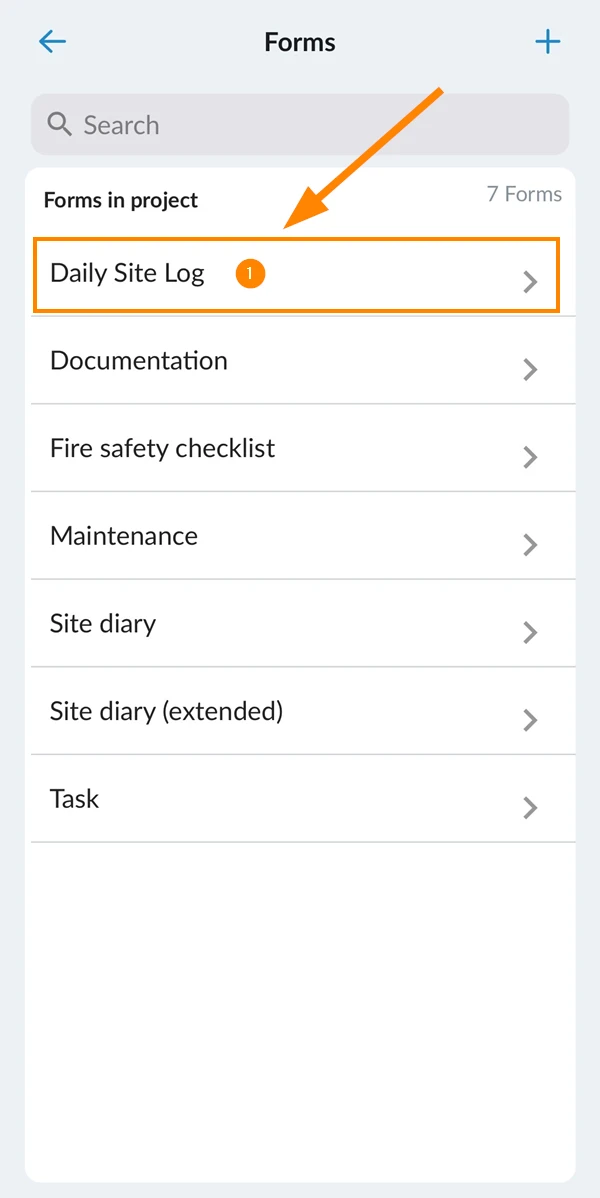
- Tap on the form e.g. Daily Site Log
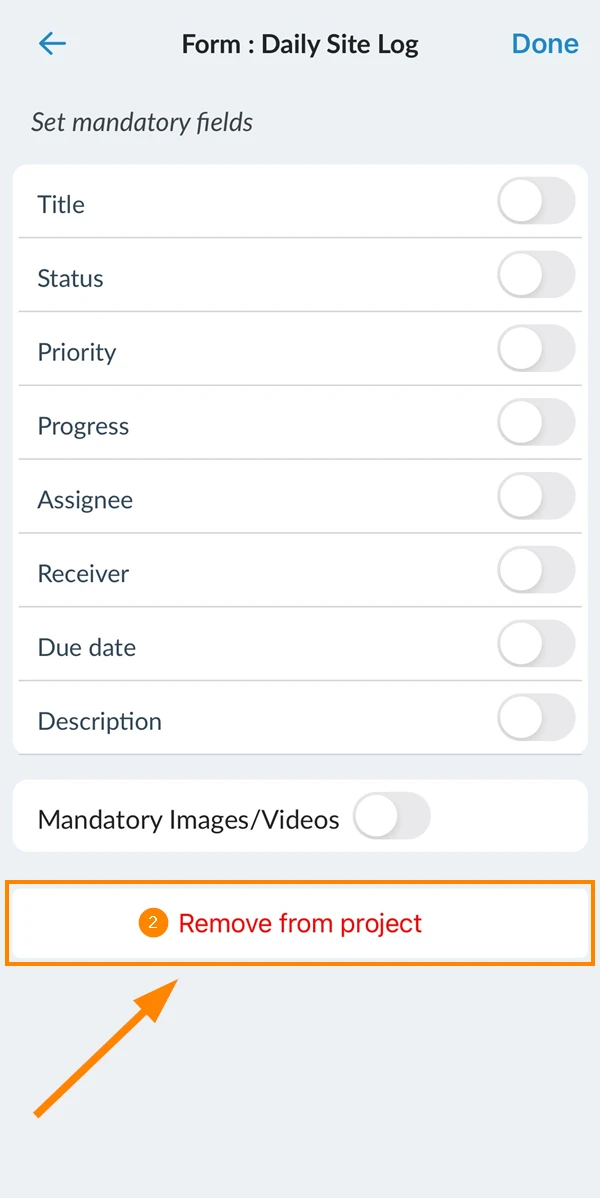
- Tap Remove from project
Edit an Assigned Form
A form may have some default field settings, e.g. some fields may be configured as mandatory, or lists may have already been assigned. Read more in:
You can override any form defaults and configure the form for your project as needed.
To edit an assigned form:
- Click on the form in the list
- Tap on the form e.g. Daily Site Log
Change Mandatory Field Settings
Mandatory fields must be filled with a value before the ticket can be saved.
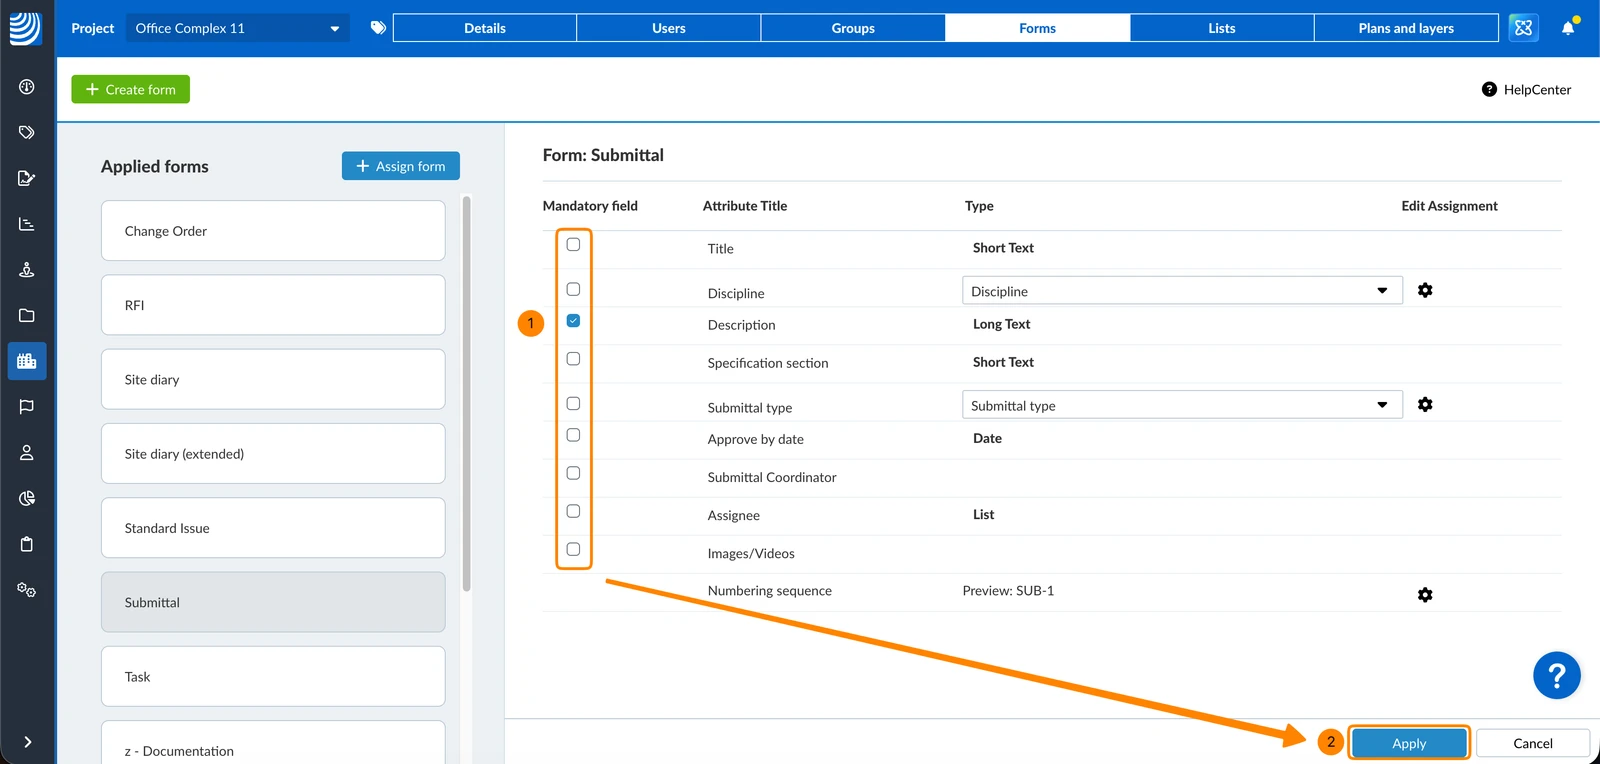
To make a field mandatory:
- Select the checkbox next to the desired field in the Mandatory field column
- Click Apply
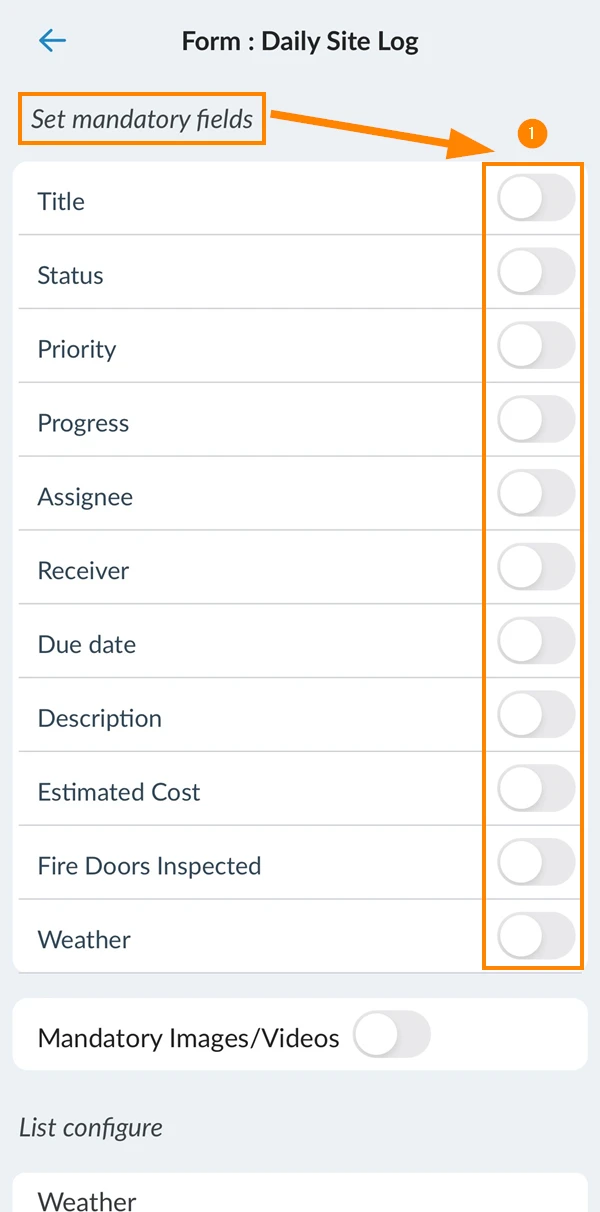
- Activate the toggle(s) under Set mandatory fields
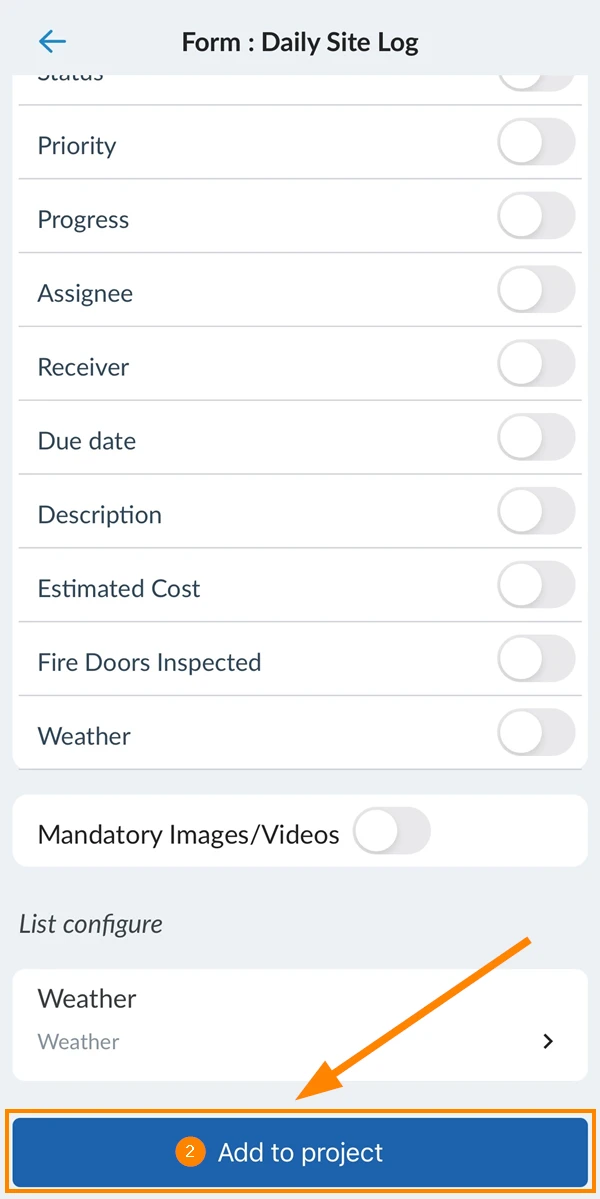
- Scroll down and tap Add to project to apply your changes
Assign List
Lists are used to provide a list of values from which the user can choose when filling out the form of a ticket.
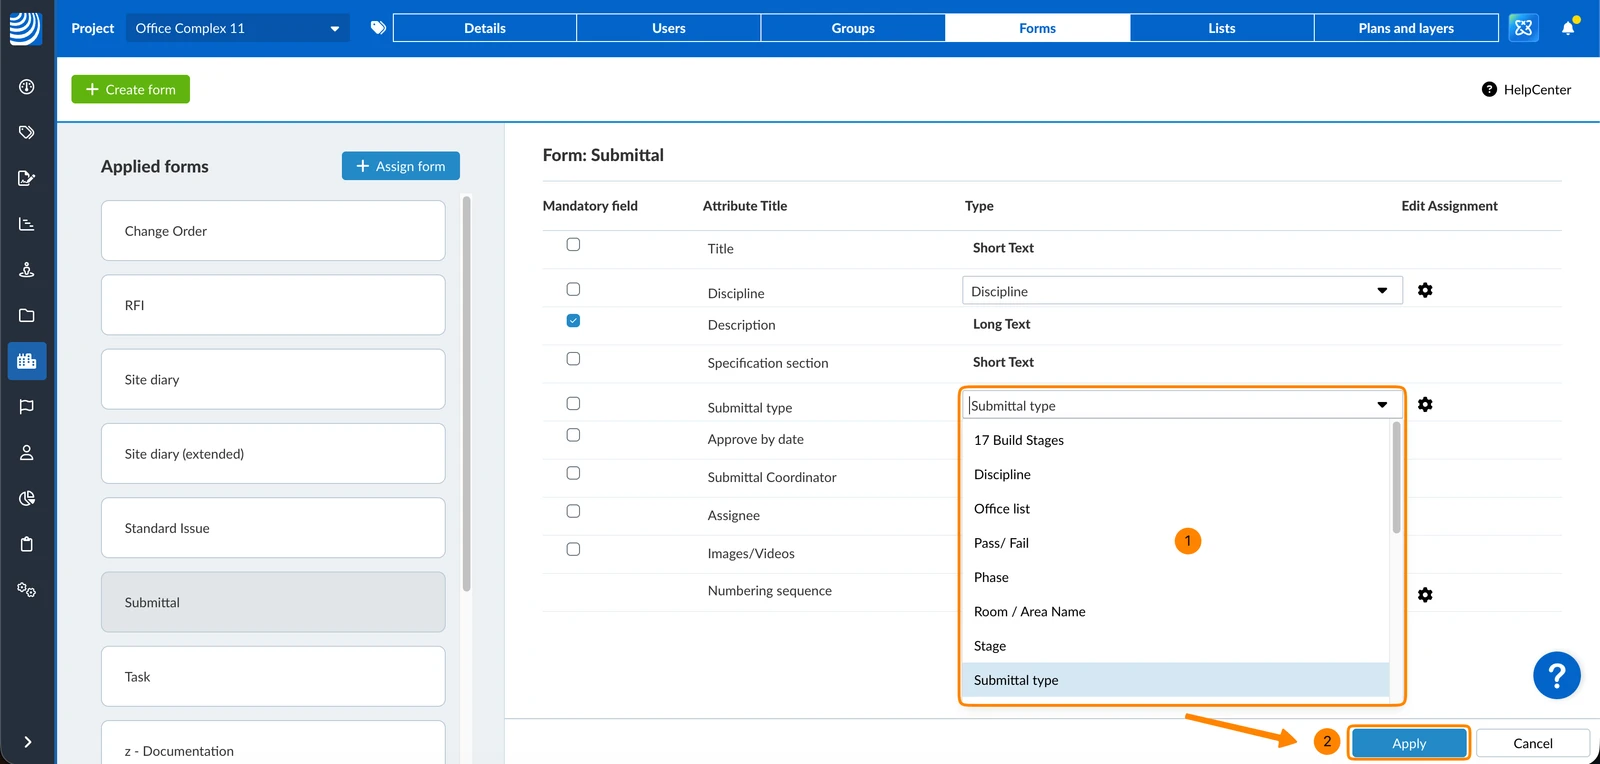
To assign a list to a list field:
- Select a list in the drop-down menu e.g. Submittal type
- Click Apply
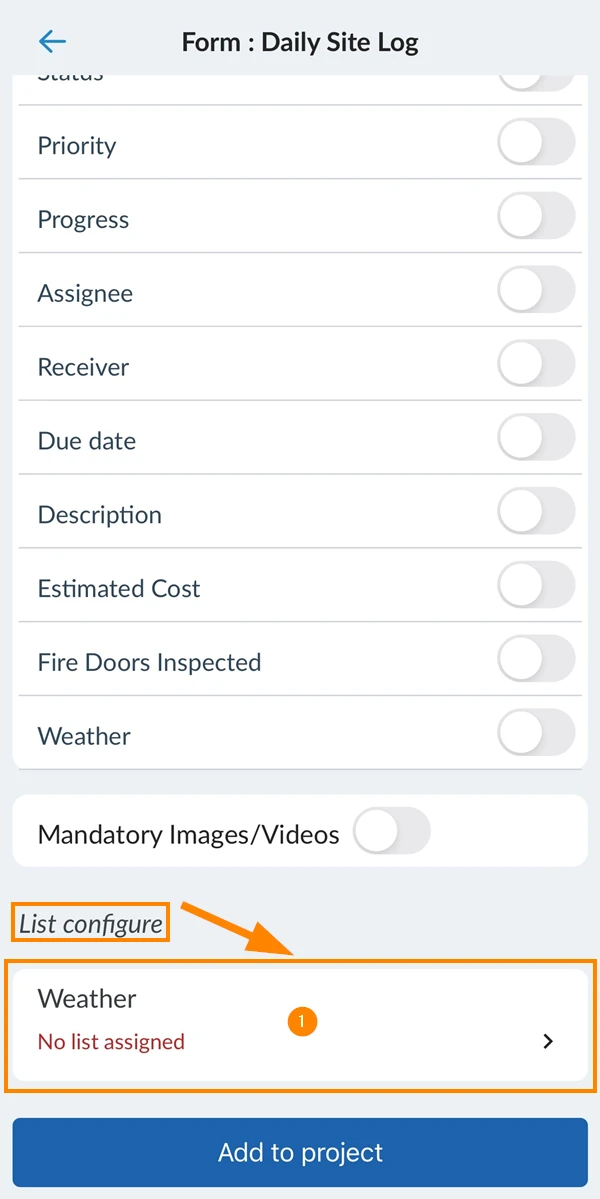
- Tap on the list field under list configure
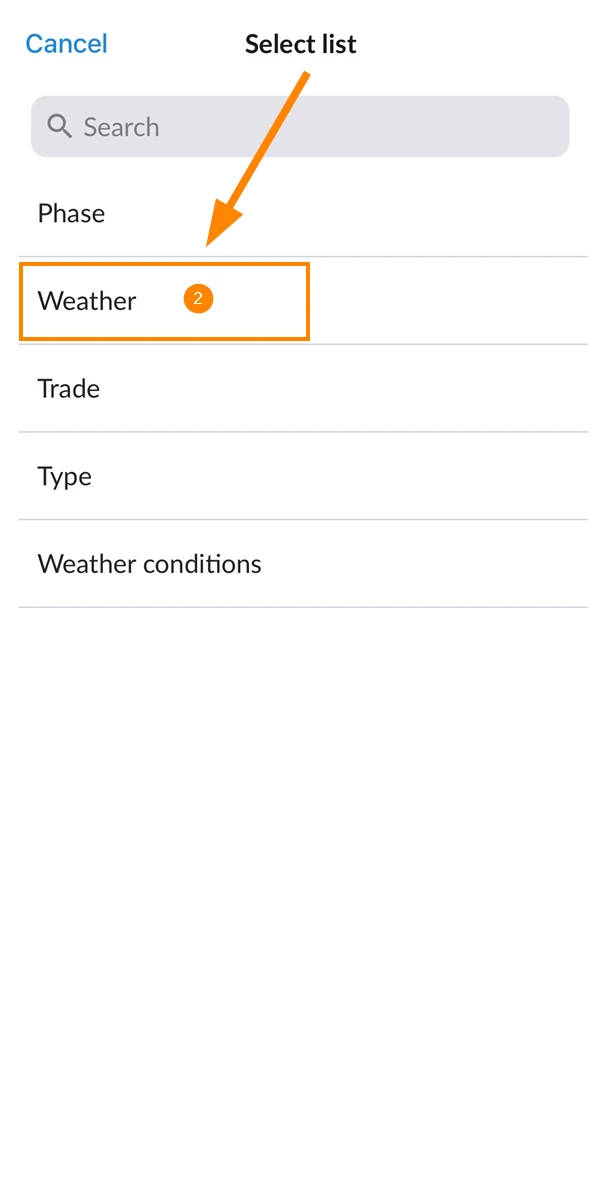
- Tap on the list you want to assign e.g. Weather
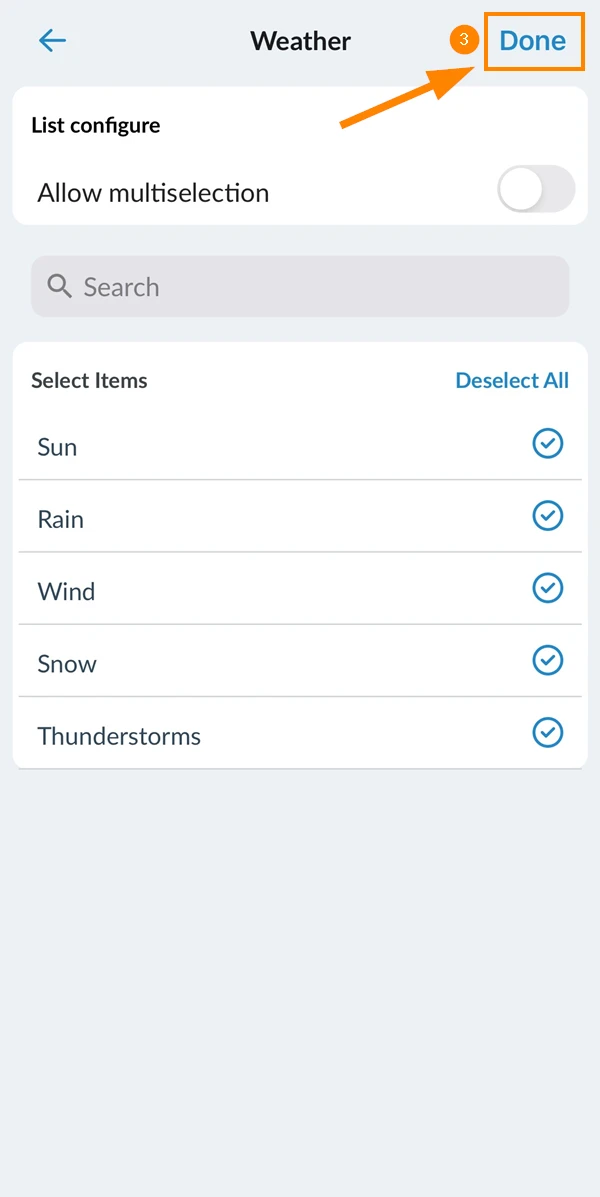
- Tap Done
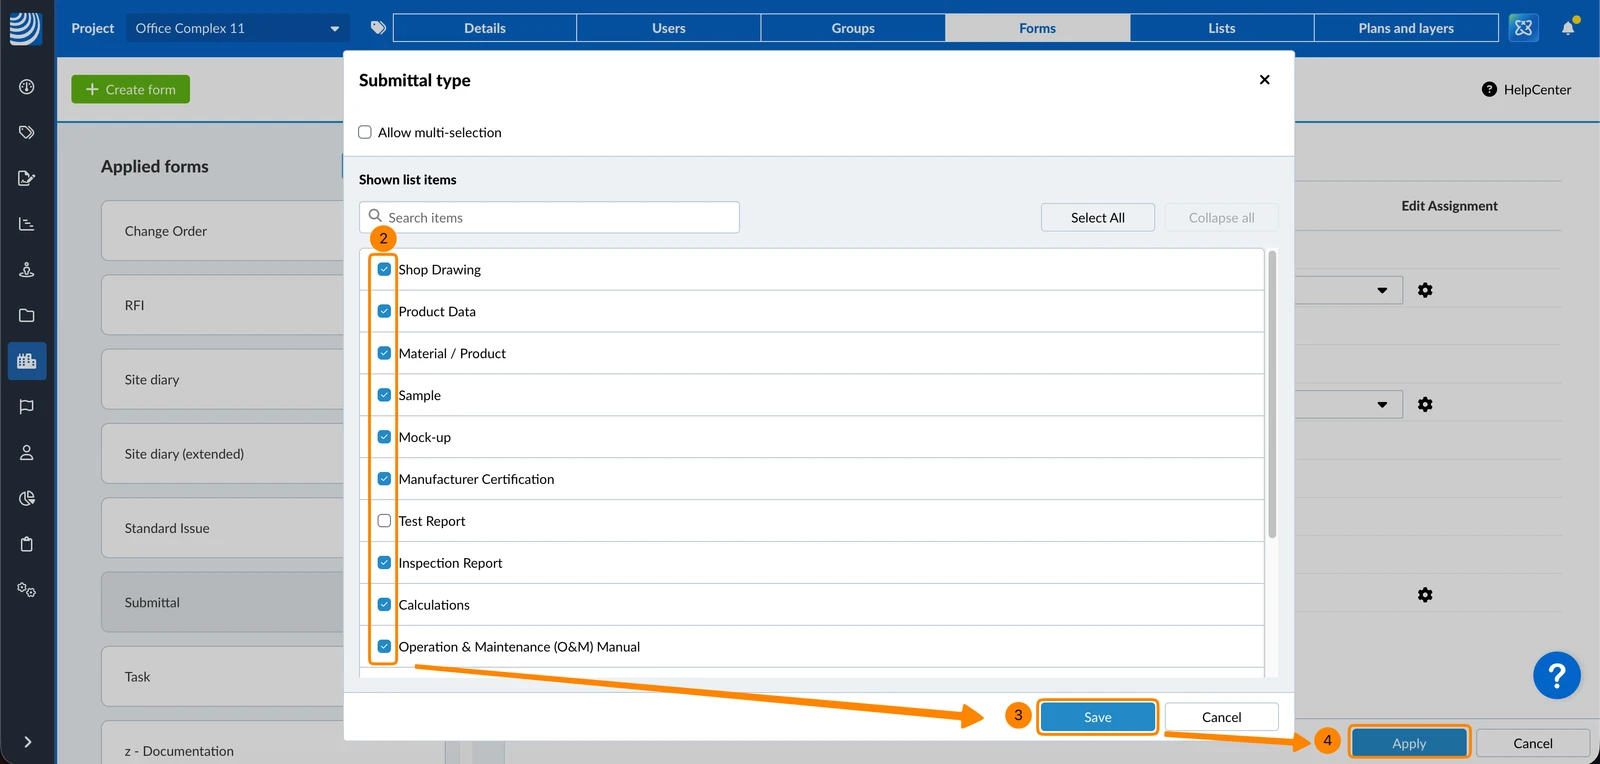
To disable values in the list:
- Click the settings icon
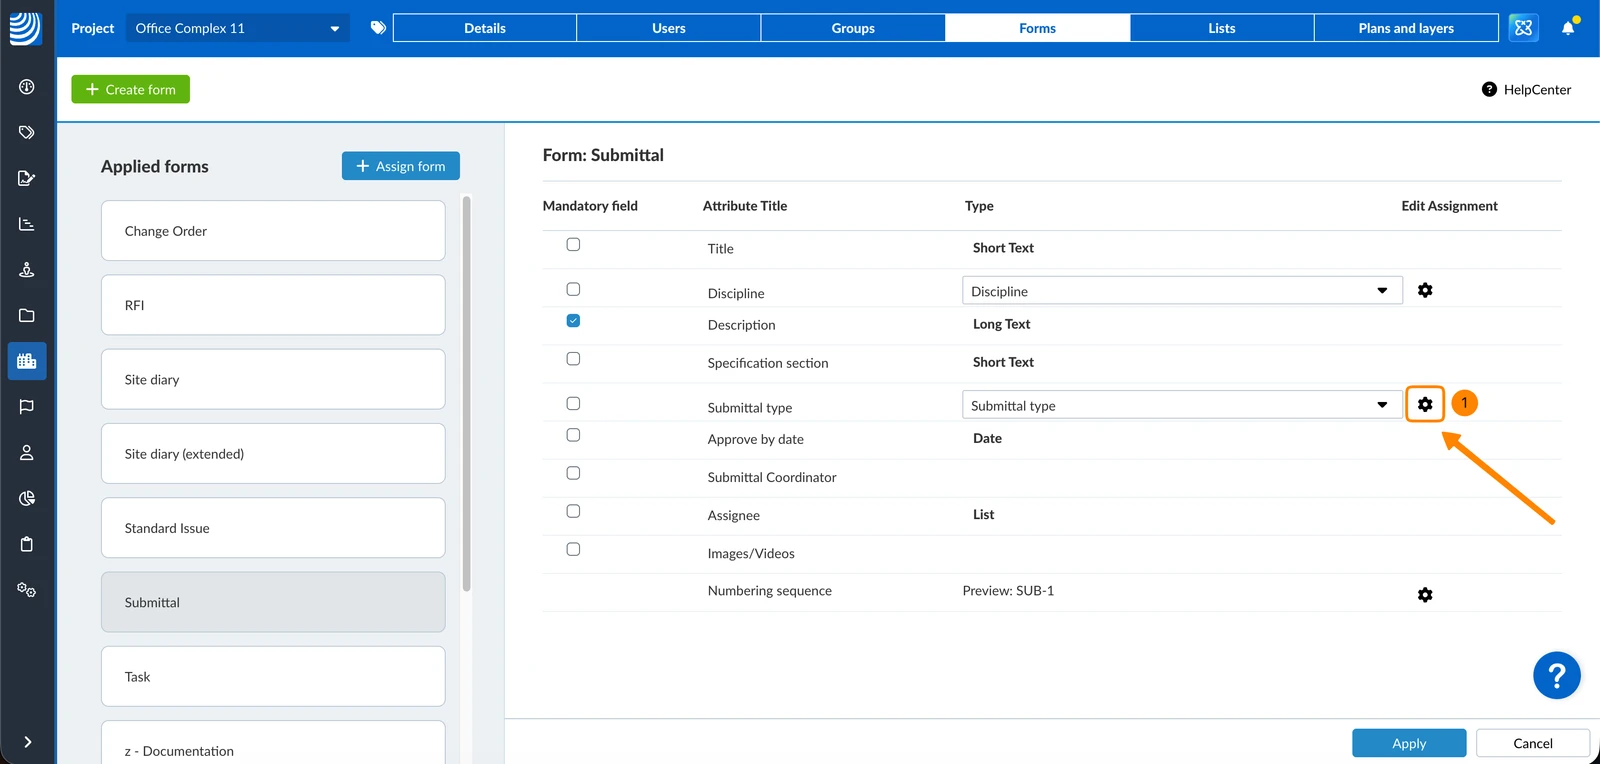
- Clear the checkbox(es) of the desired value(s)
- Click Save
- Click Apply
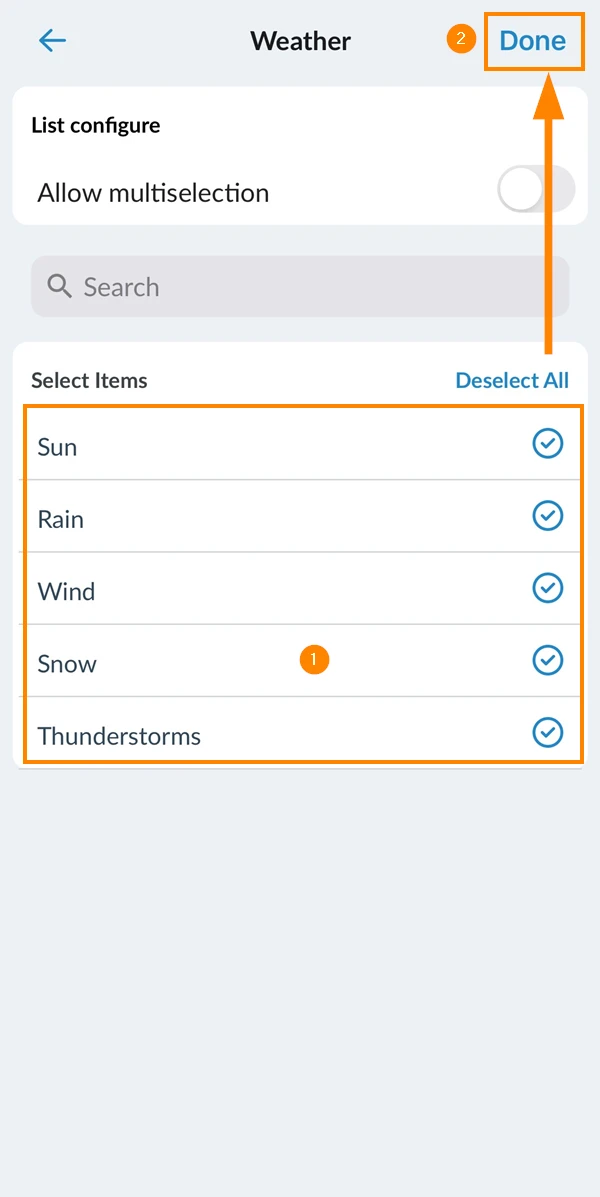
When you assign a list as described above in Assign List:
- Tap the list values that you want to disable e.g. Snow
- Tap Done
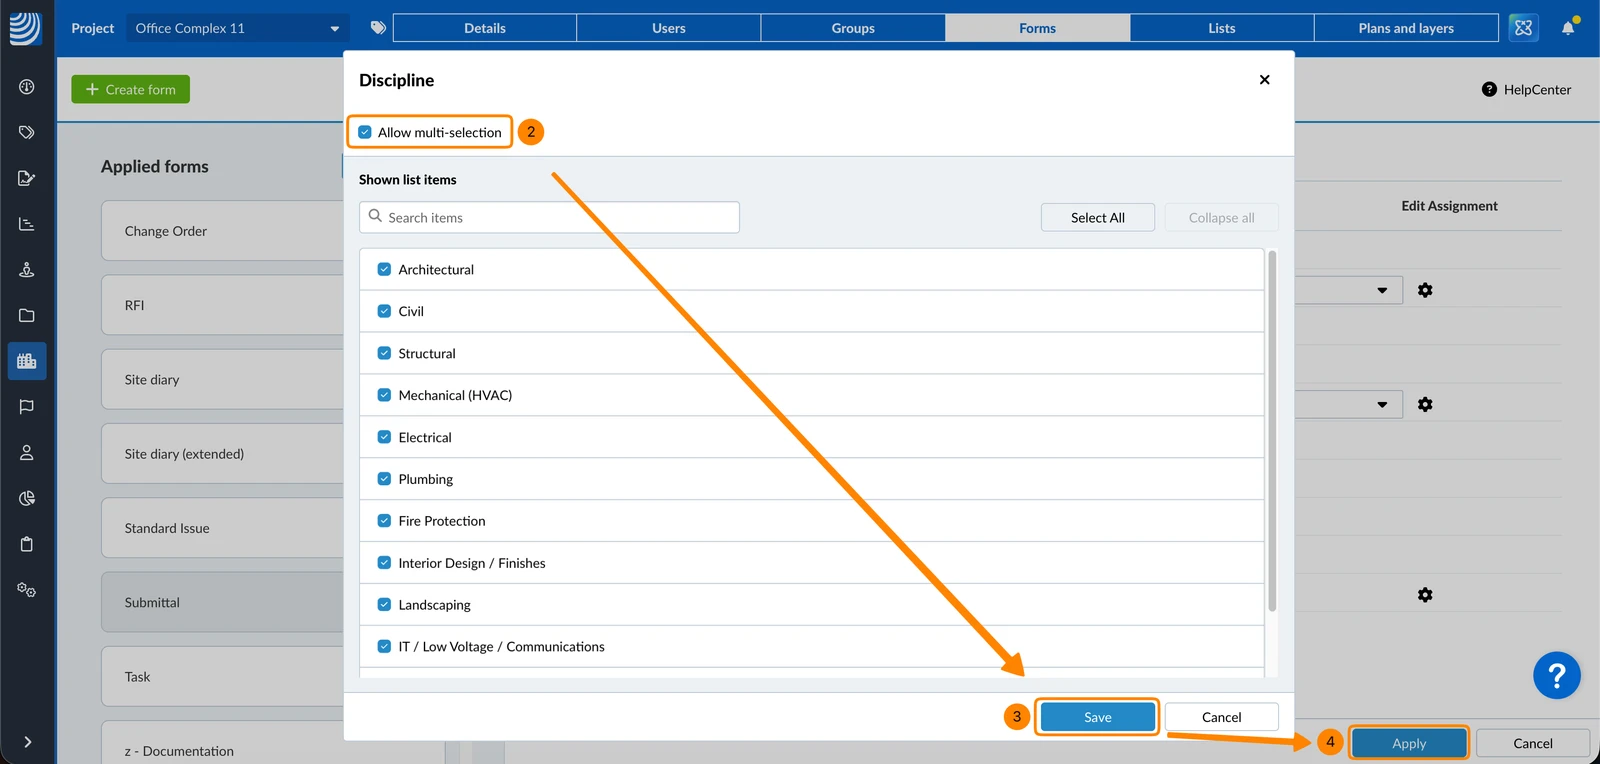
To allow the selection of multiple values for this list field in the ticket:
- Click the settings icon
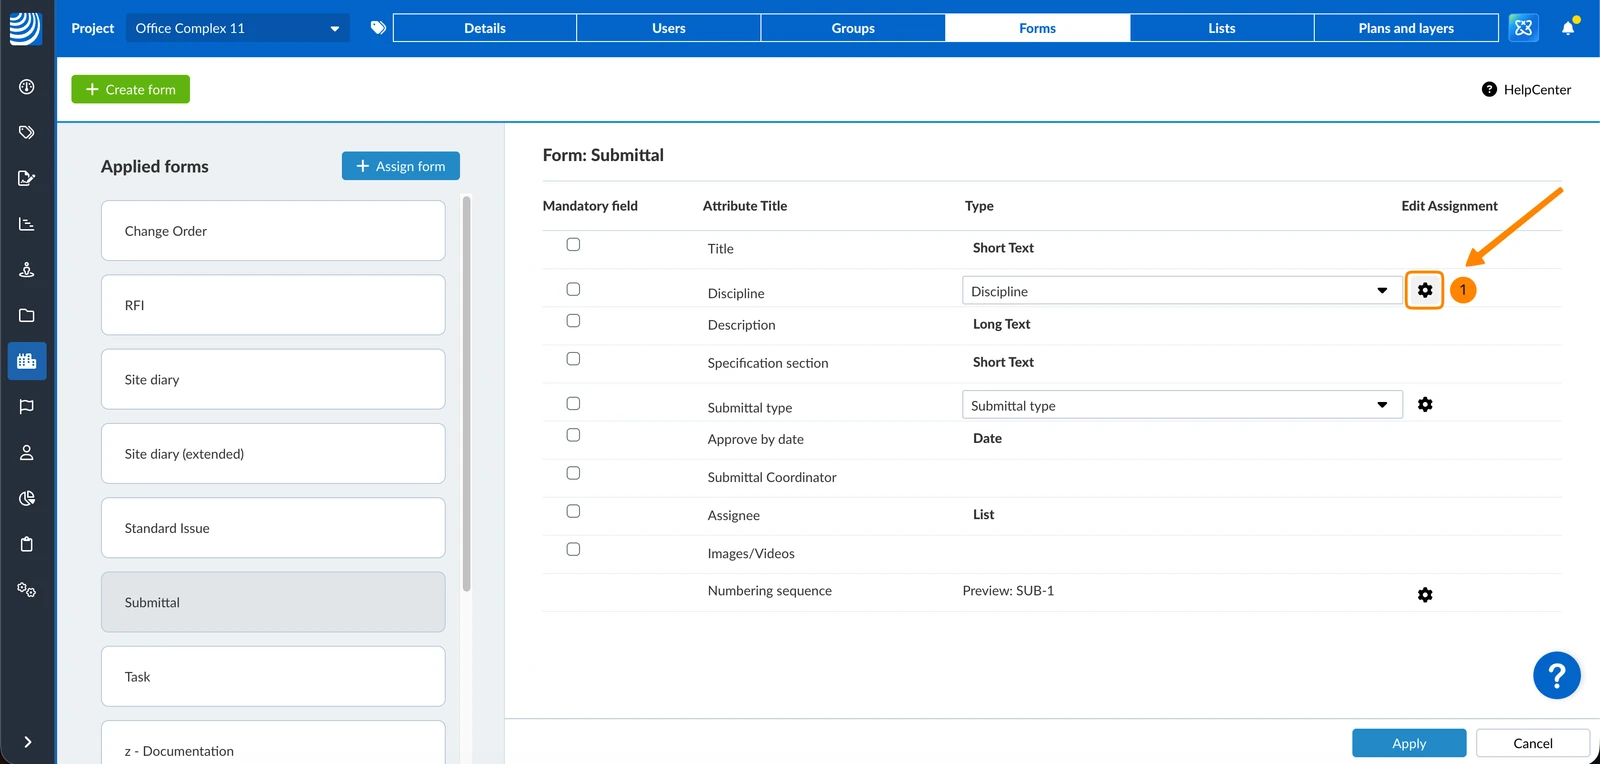
- Select the Allow multi-selection checkbox
- Click Save
- Click Apply
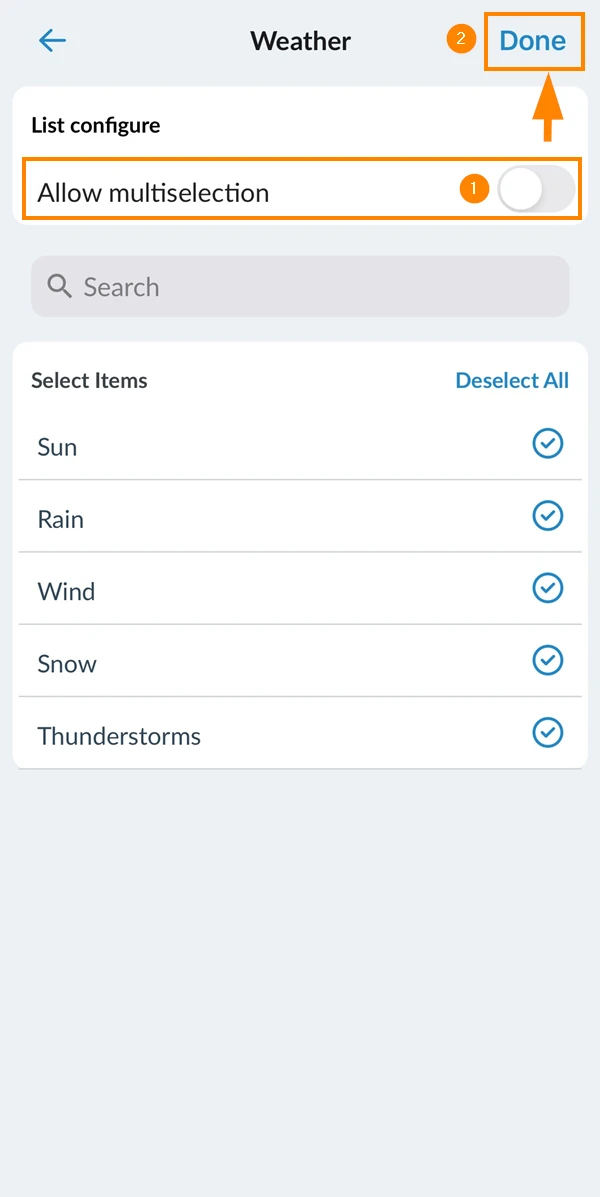
When you assign a list as described above in Assign List:
- Activate the Allow multiselection toggle
- Tap Done
Create a Form for the Current Project
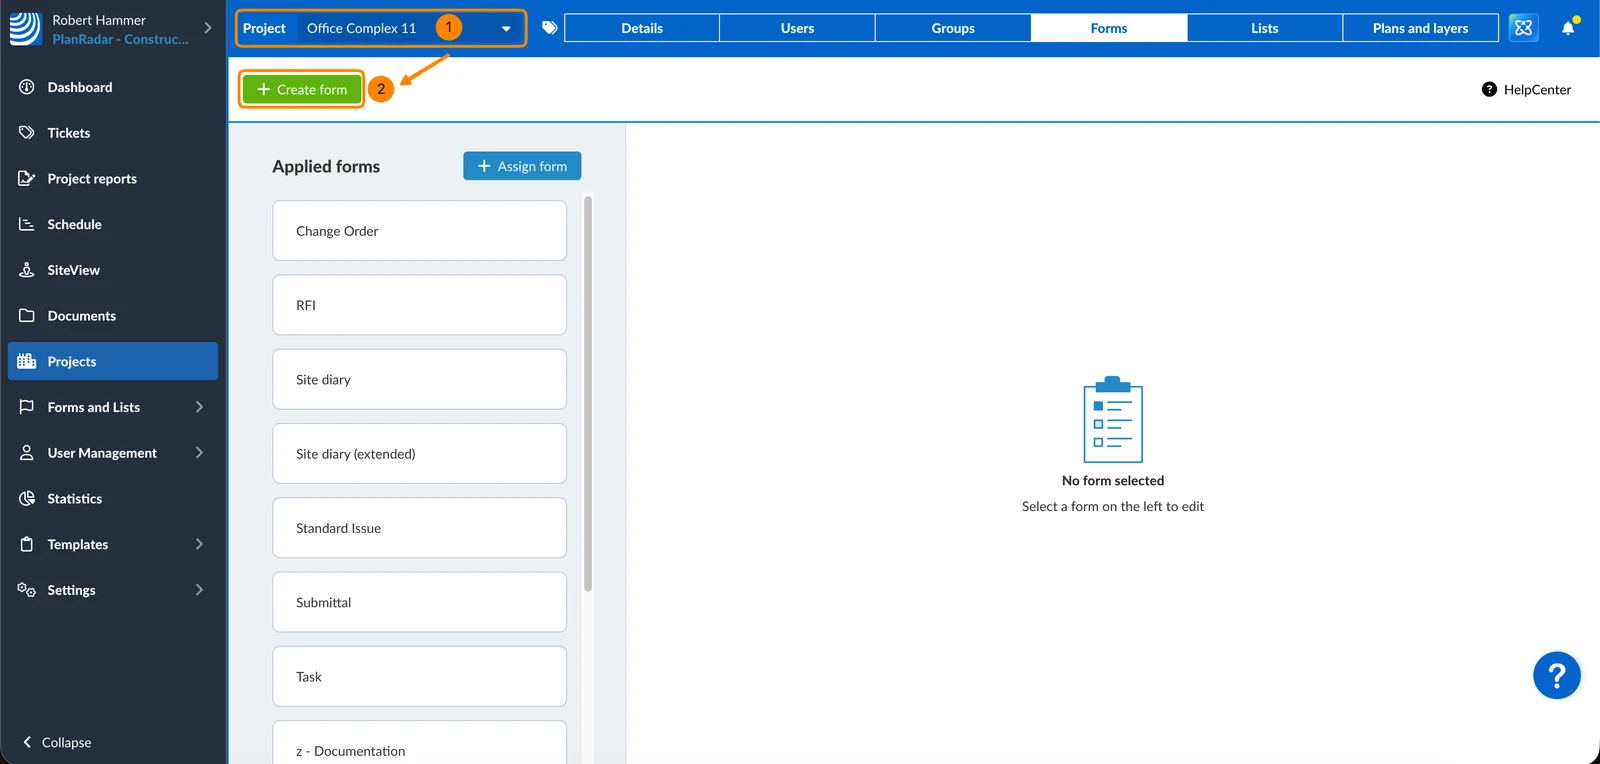
It is also possible to create a new from from within the forms of a project:
- Select a Project
- Click + Create form
Updated June 10, 2026