

 Deutsch
 Español
 Français
 Hrvatski
 Italiano
 Polski
 Português (BR)
Create and Edit Forms with AI
Overview
The AI Form Builder creates and configures forms from a natural language description or an uploaded document or image — whether you are starting a new form or editing an existing one.
The AI can configure the following:
| Fields | Name, description, type, ordering, mandatory, and default value. |
| Groups | Create groups and nest fields inside them. |
| List fields | Assign an existing list and enable multi-select. |
| User fields | Single or multi-user selection. |
| Attachment fields | Maximum number of attachments. |
| Checklist fields | Response labels and colours. Maximum number of attachments. |
| Form | Name, description, and settings: attachments, comments, plan position, geolocation, recurring activity, locking, numbering sequence, signatures, and approval workflows. |
Read more about forms in:
Not supported in the current version:
- Conditional visibility — set this manually after generation
- Field permissions — set these manually after generation
- Creating new lists — create the list first, then ask the AI to assign it to the field
Access & Permissions
How to Access the AI Form Builder
- Click Forms and Lists
- Click Forms
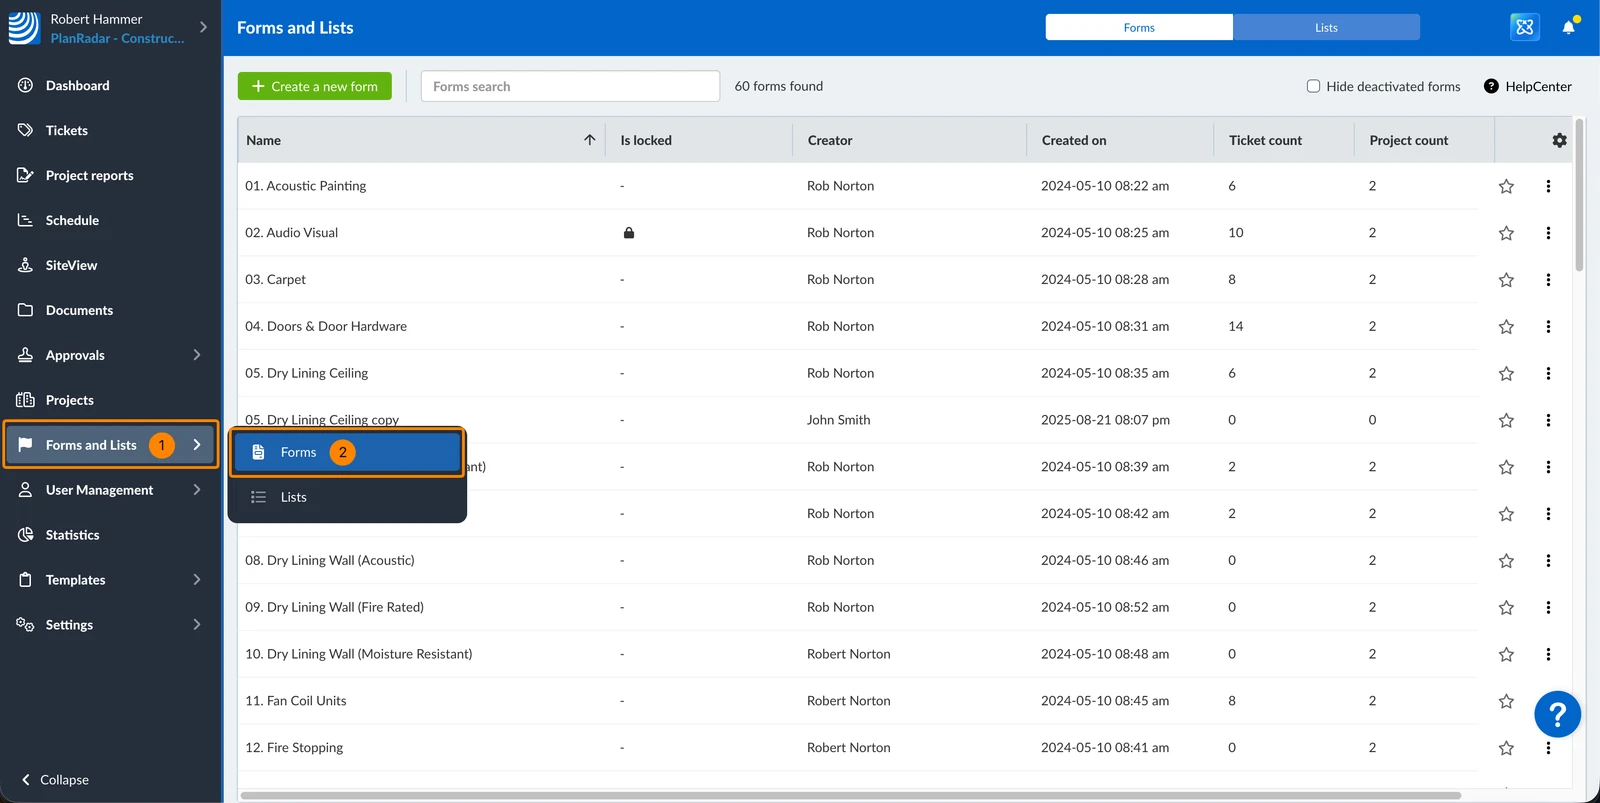
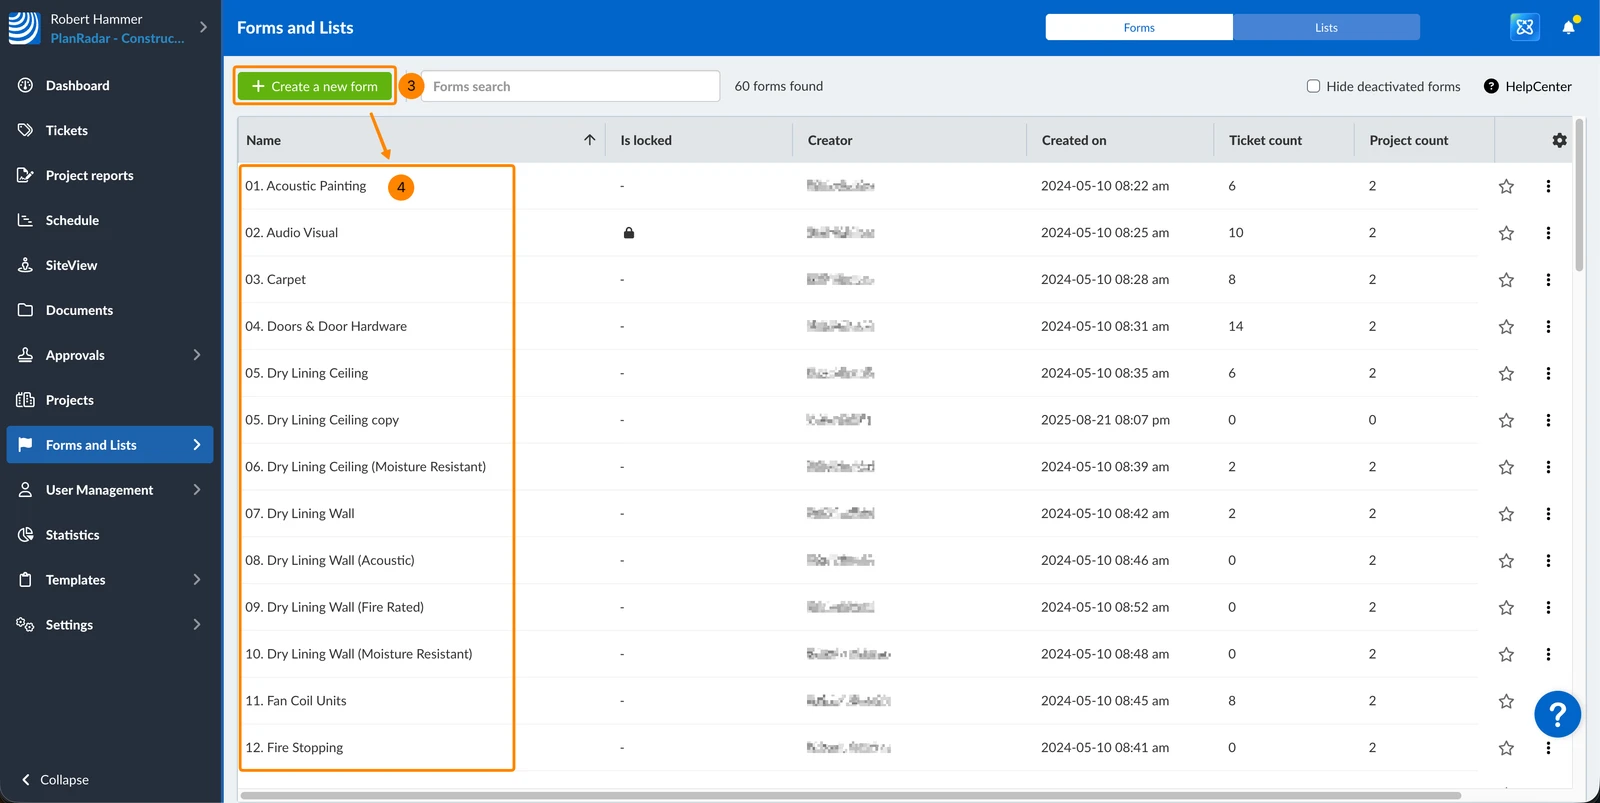
- Click + Create a new form
- OR click on an existing form to open it
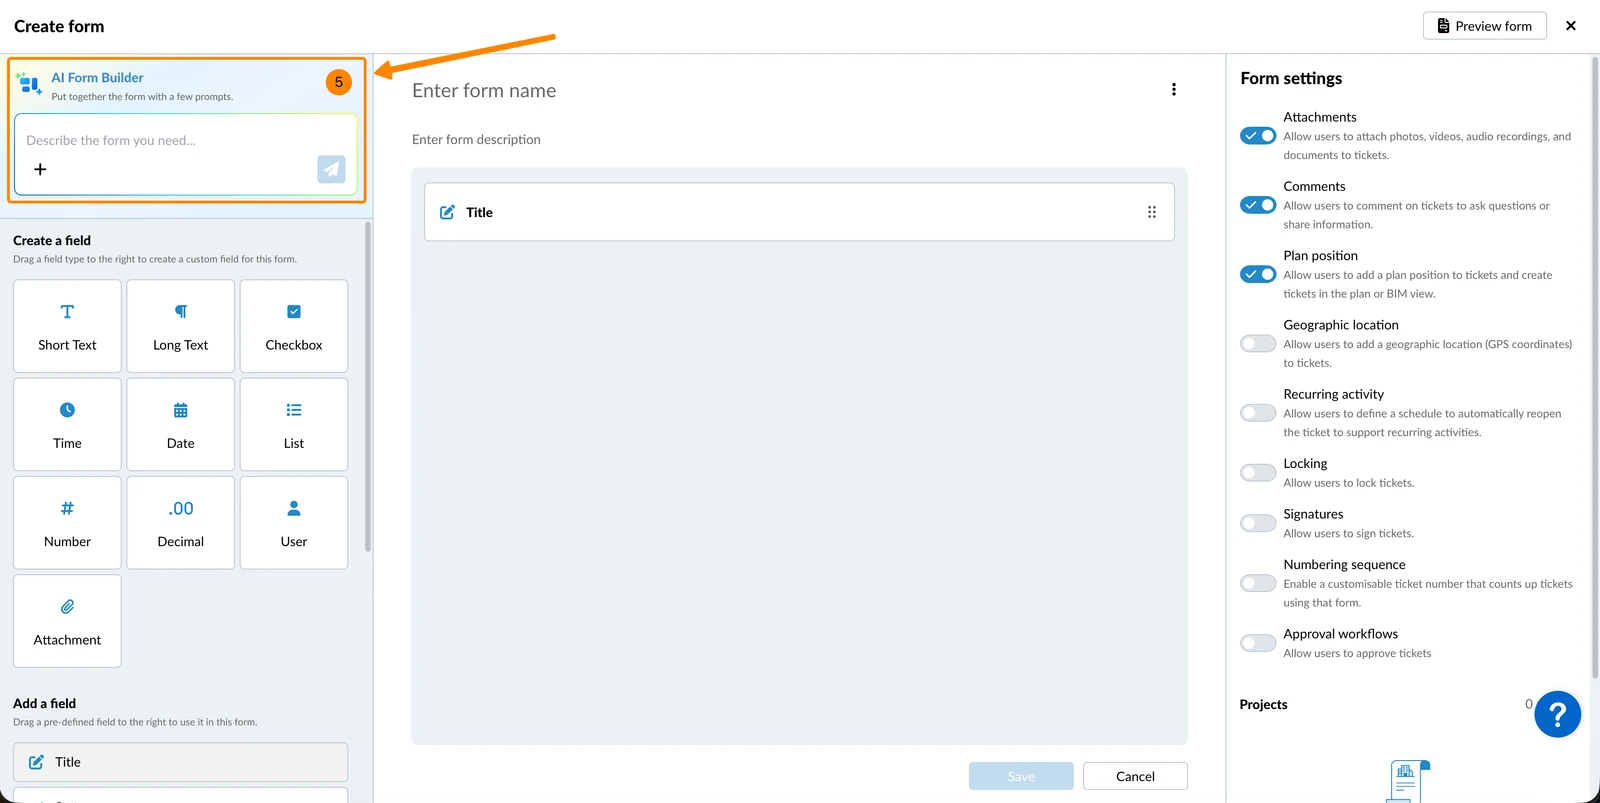
- The AI Form Builder input appears in the left panel
Build Your Form with AI
You can describe the form you need in text or upload an existing document — the AI will respond with a list of proposed changes based on your input.
- Enter a description in the input field
- OR click + to upload a document (or drag and drop the file from your computer to the chat)
- Click the Send icon
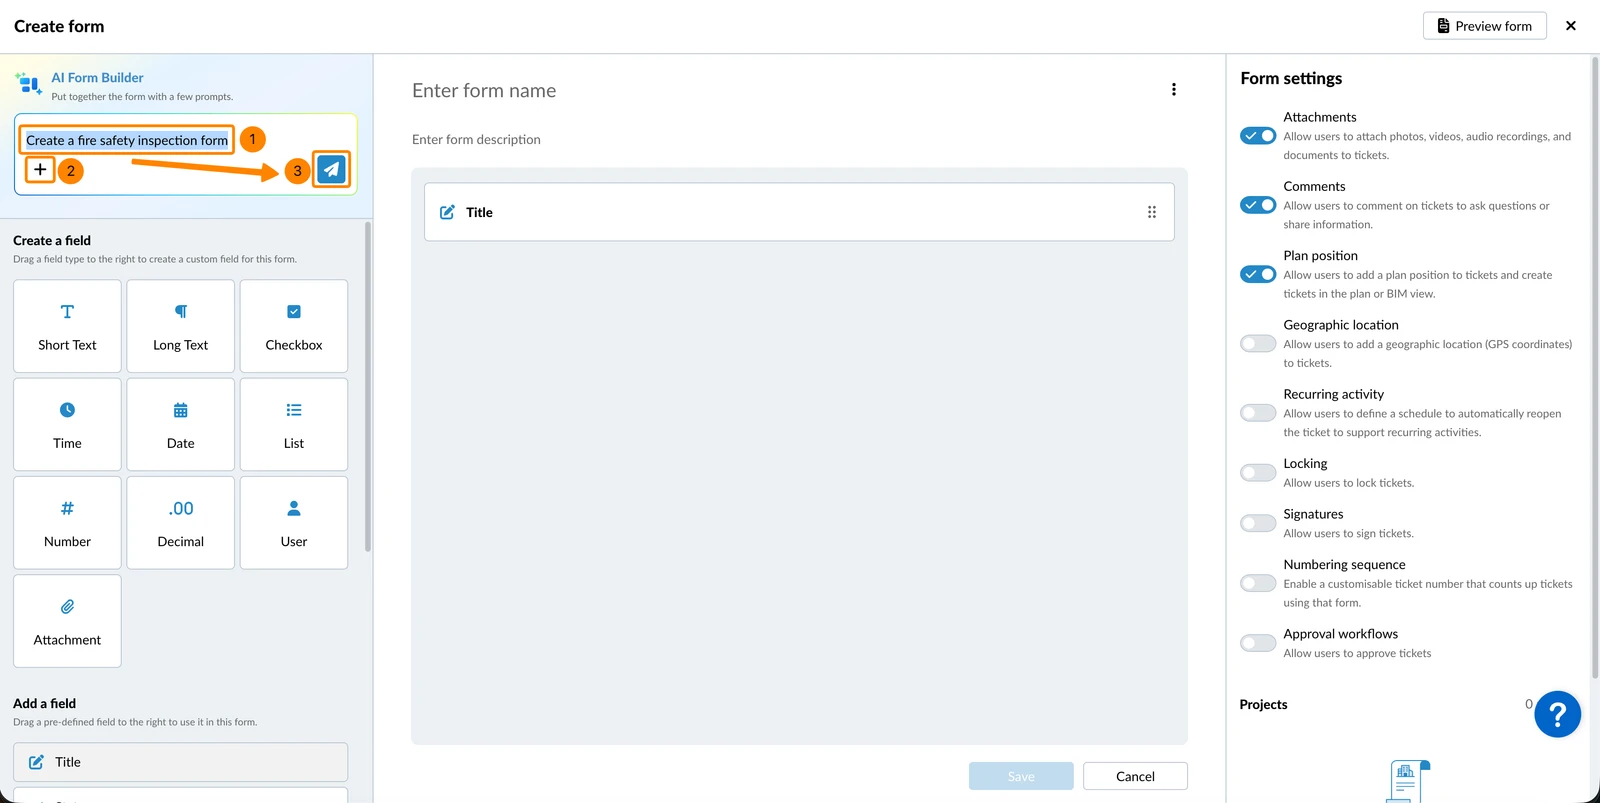
- After your first message, the left panel shows two tabs: AI Form Builder and Add fields. You can switch between them at any time to combine AI generation with manual editing.
- The AI responds with proposed changes — review and apply them as described in Review and Apply Suggestions below
- Click Apply to form to confirm
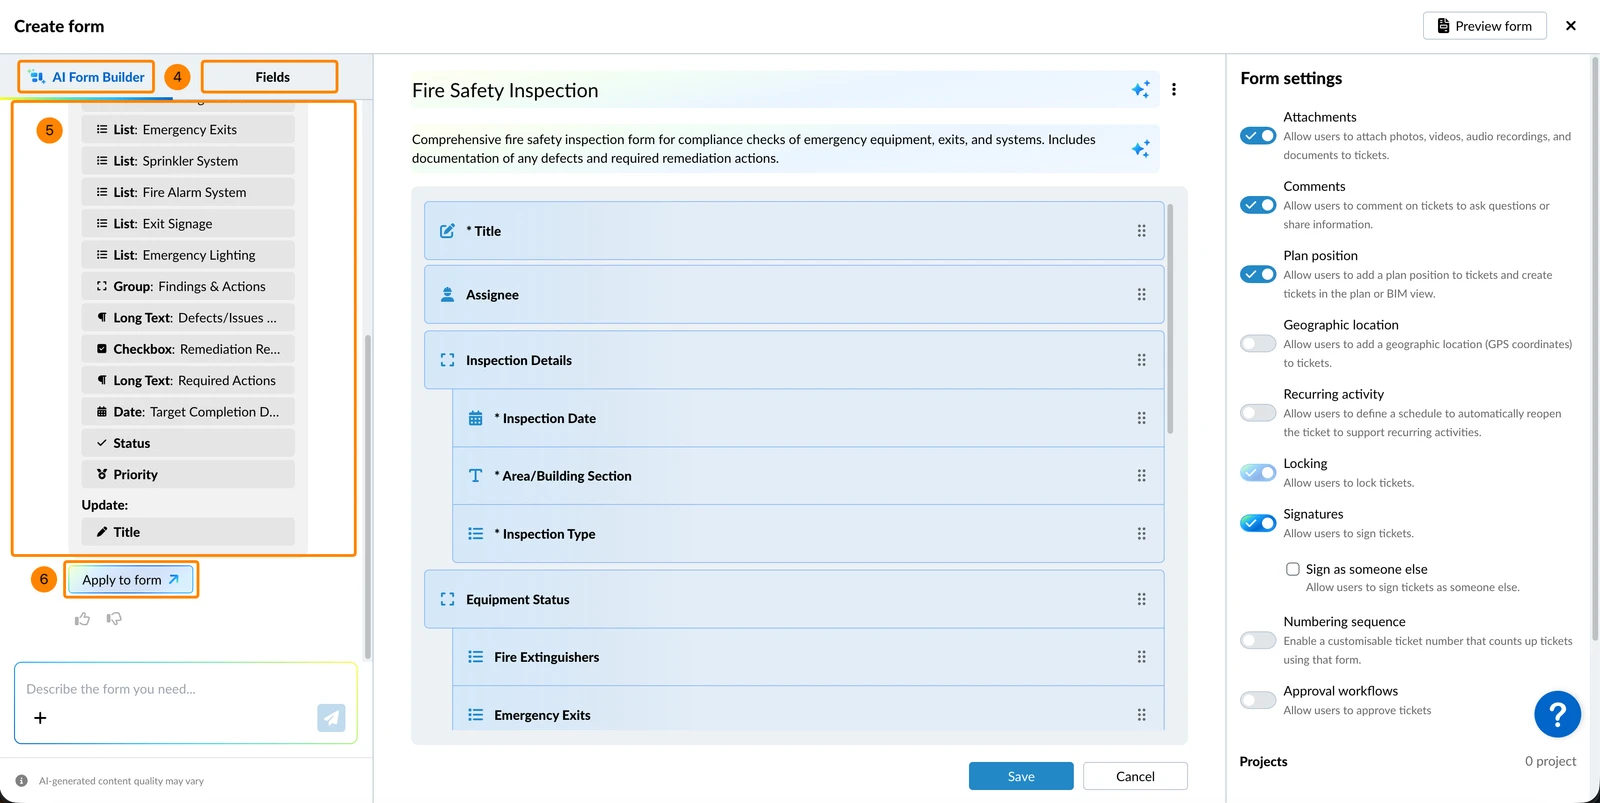
- Click Save when you are done with the form
Review and Apply Suggestions
Before applying, the AI groups the proposed field changes by type:
- Fields to be created
- Fields to be updated
- Fields to be deleted
To exclude a specific change before applying:
- Click the change to deselect it
- Click Apply to form
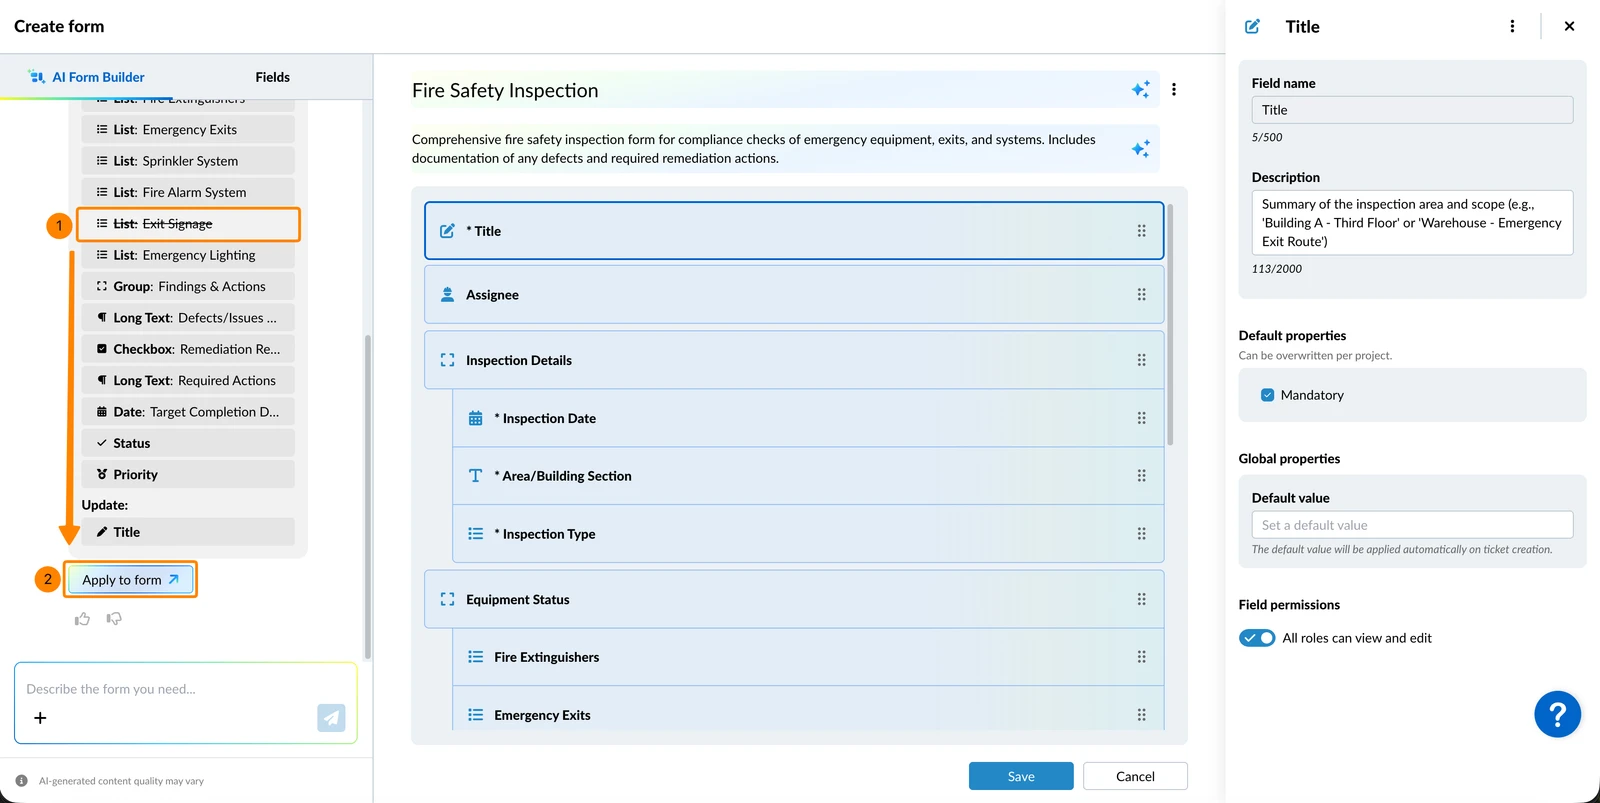
AI-highlighted fields
When the AI applies changes, created and edited fields are highlighted with a coloured border so you can identify and review AI-generated content. The highlight is removed when you edit the field manually or when you save the form.
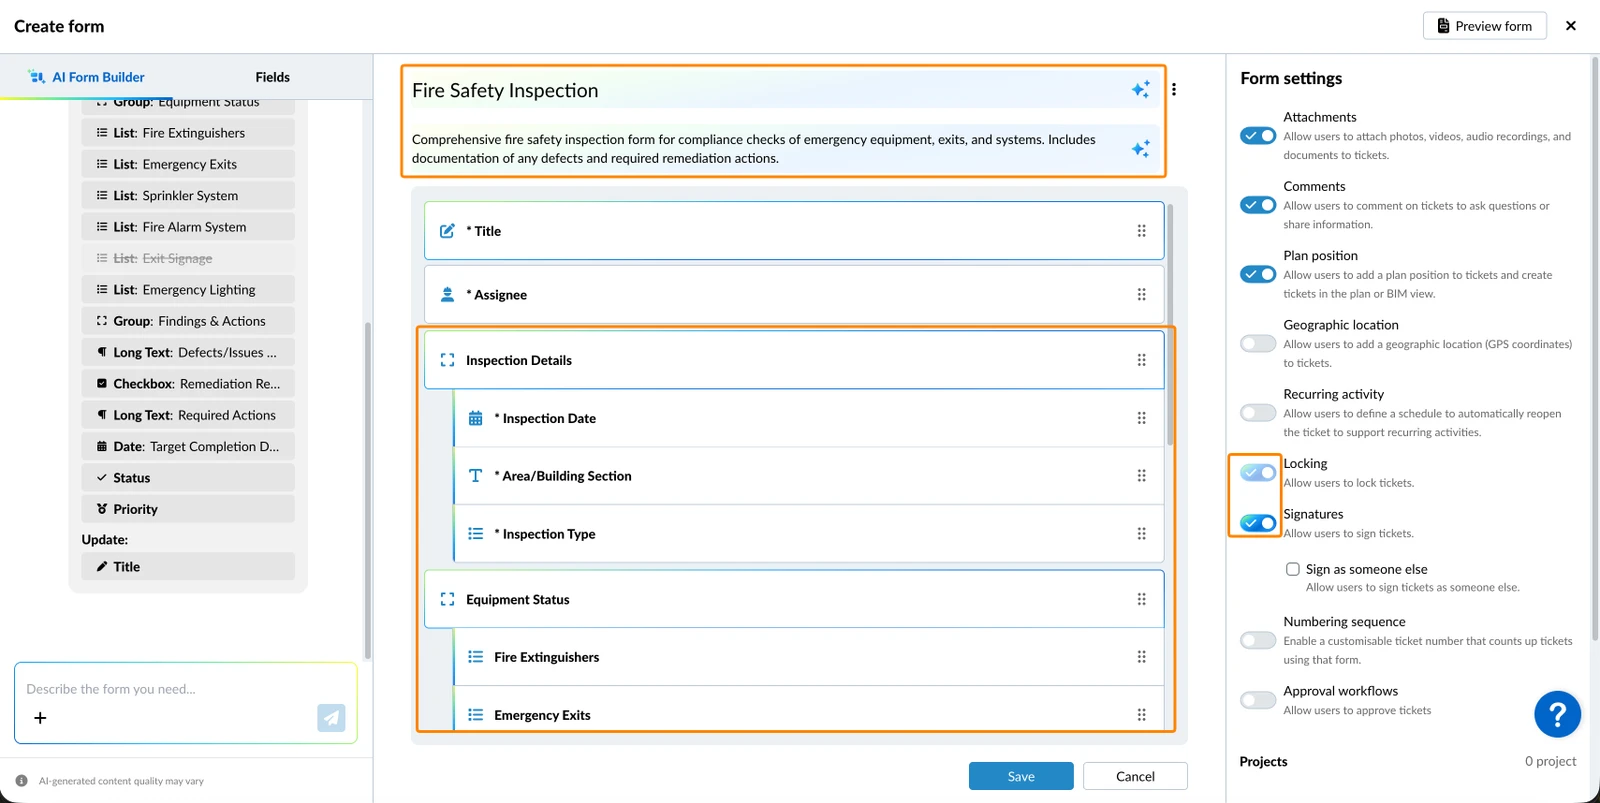
Refine Your Form
After applying, you can continue the conversation to adjust the form. Each follow-up uses the same confirm-then-apply flow.
Examples:
- "Enable signatures and add a numbering sequence starting at 10001"
- "Move all checklist fields into a group called 'Site Conditions'"
- "Translate all field names to German"
Undo Changes
To undo the last AI-applied changes, send a follow-up message such as:
- "Undo last changes"
- "Revert that"
You can also prevent unwanted changes before applying by clicking individual changes to deselect them.
Updated June 24, 2026