

 Deutsch
 Español
 Français
 Hrvatski
 Italiano
 Polski
 Português (BR)
Photo Editor
Overview
Edit photos when attaching them to your tickets to better highlight relevant issues.
Access & Permissions
Enable/Disable Photo Editor
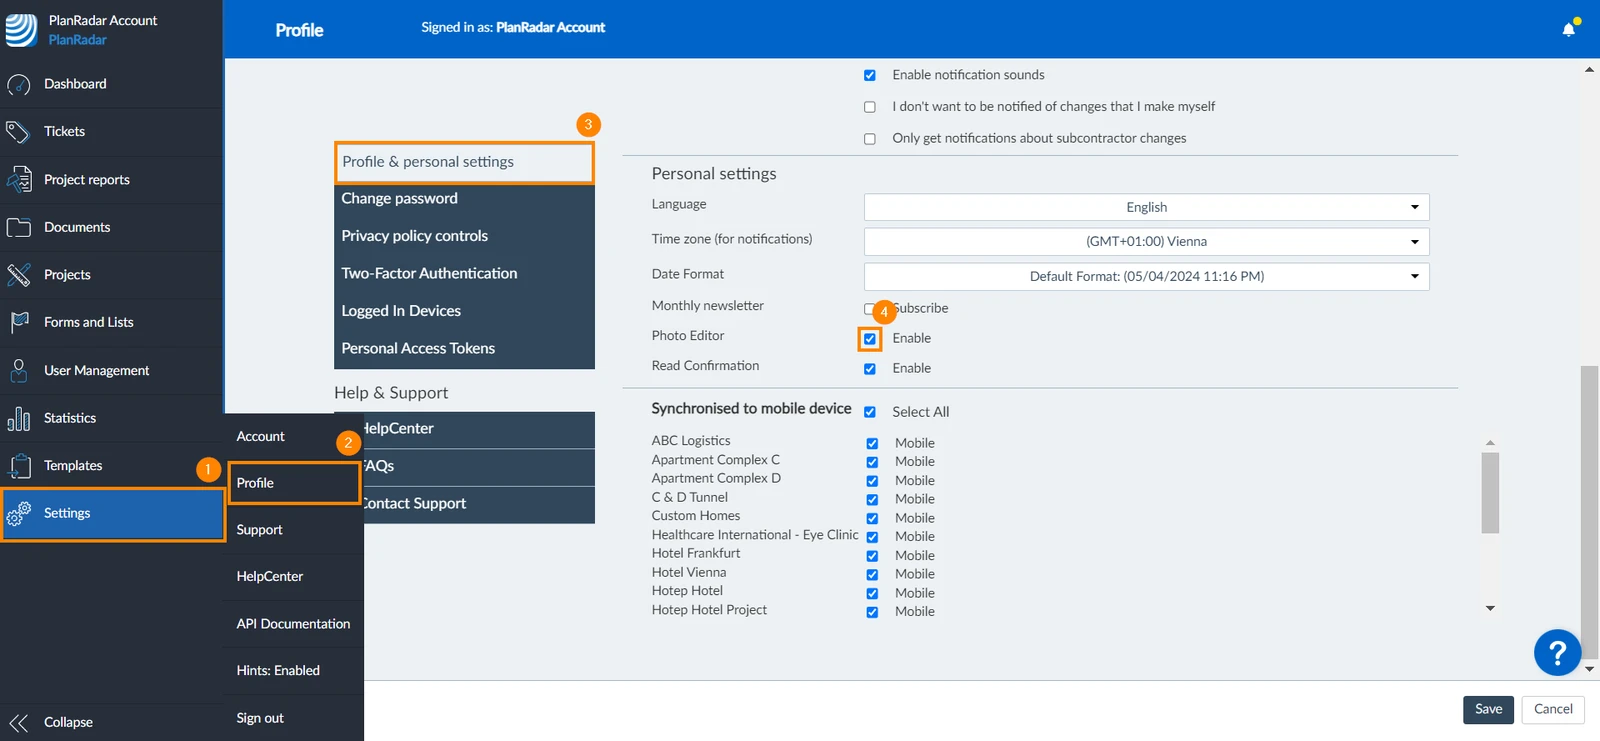
After taking or uploading a photo, the photo editor opens automatically. To prevent this, you can disable the photo editor in the Webapp or Android app.
To enable/disable the photo editor:
- Click Settings
- Click Profile
- Click Profile & personal settings
- Select/Clear the Photo Editor checkbox
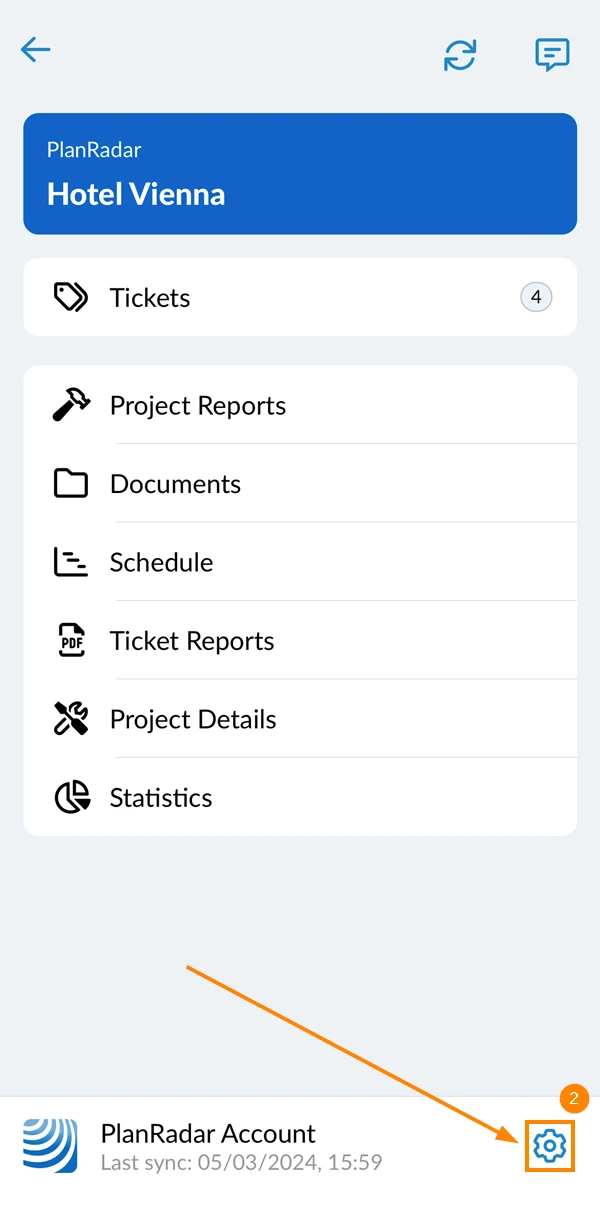
- Go to the main menu
- Tap Settings
- Activate/Deactivate the Disable photo editor toggle
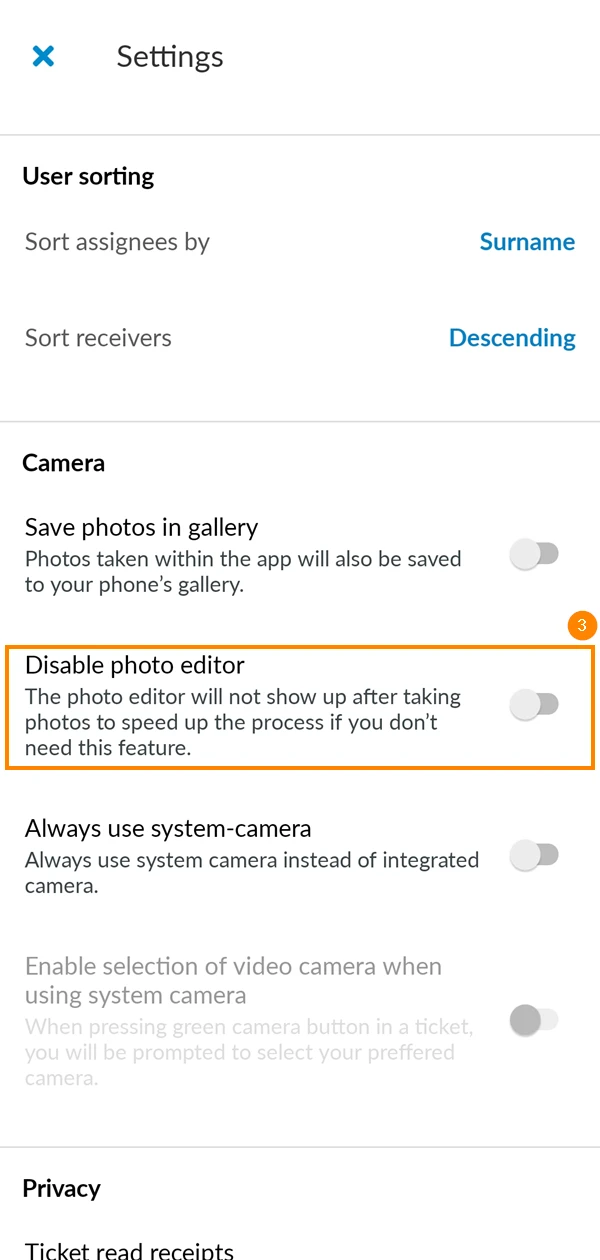
Photo Editor Tools
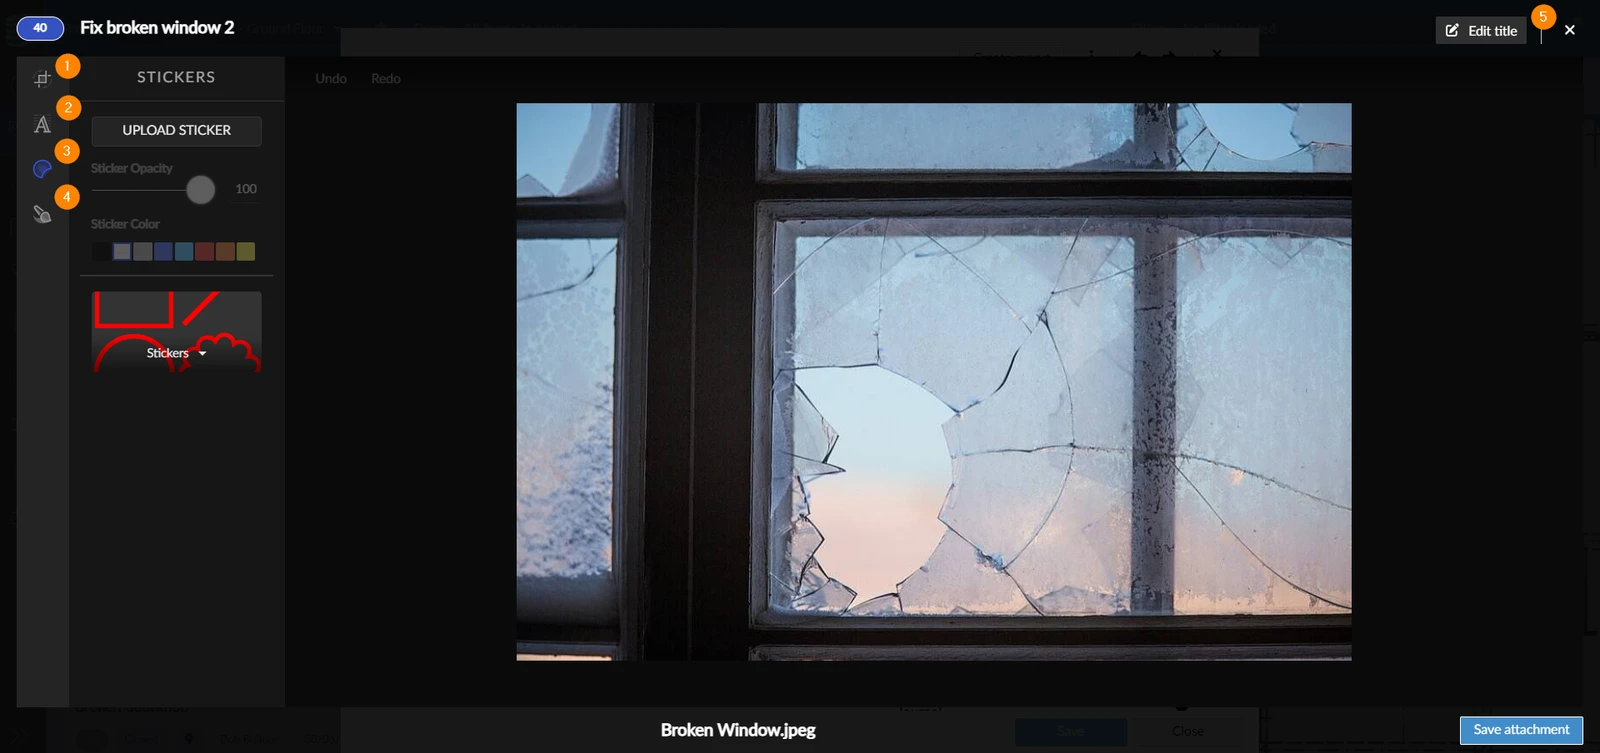
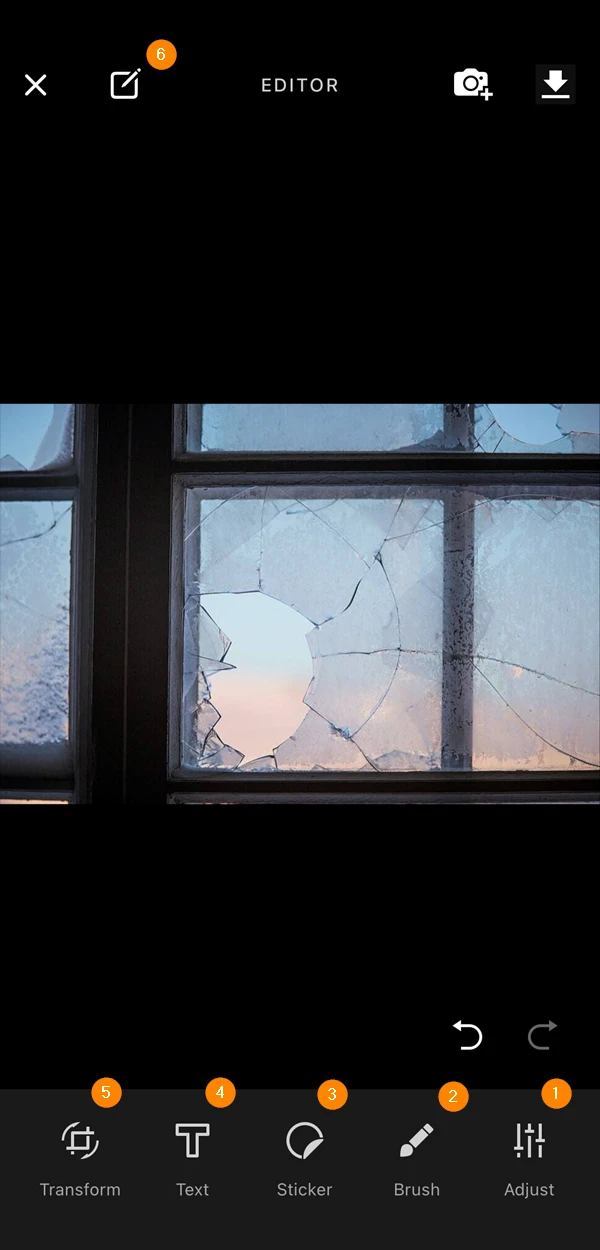
The photo editor offers the following tools:
- Transform
- Add text
- Add stickers
- Brush
- Edit photo title
- Adjust
- Brush
- Sticker
- Text
- Transform
- Edit title
- Brush
- Sticker
- Text
- Transform
- Edit title
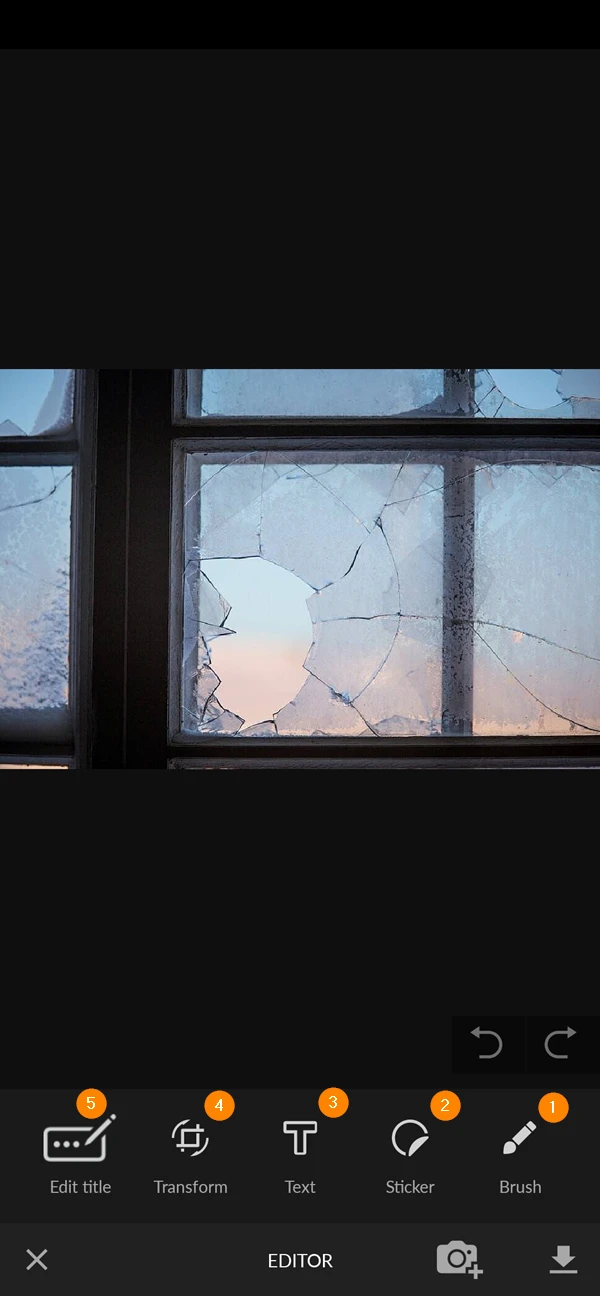
The Photo Editor offers the same possibilities in the web app and mobile apps. So, we will add examples from the web app only.
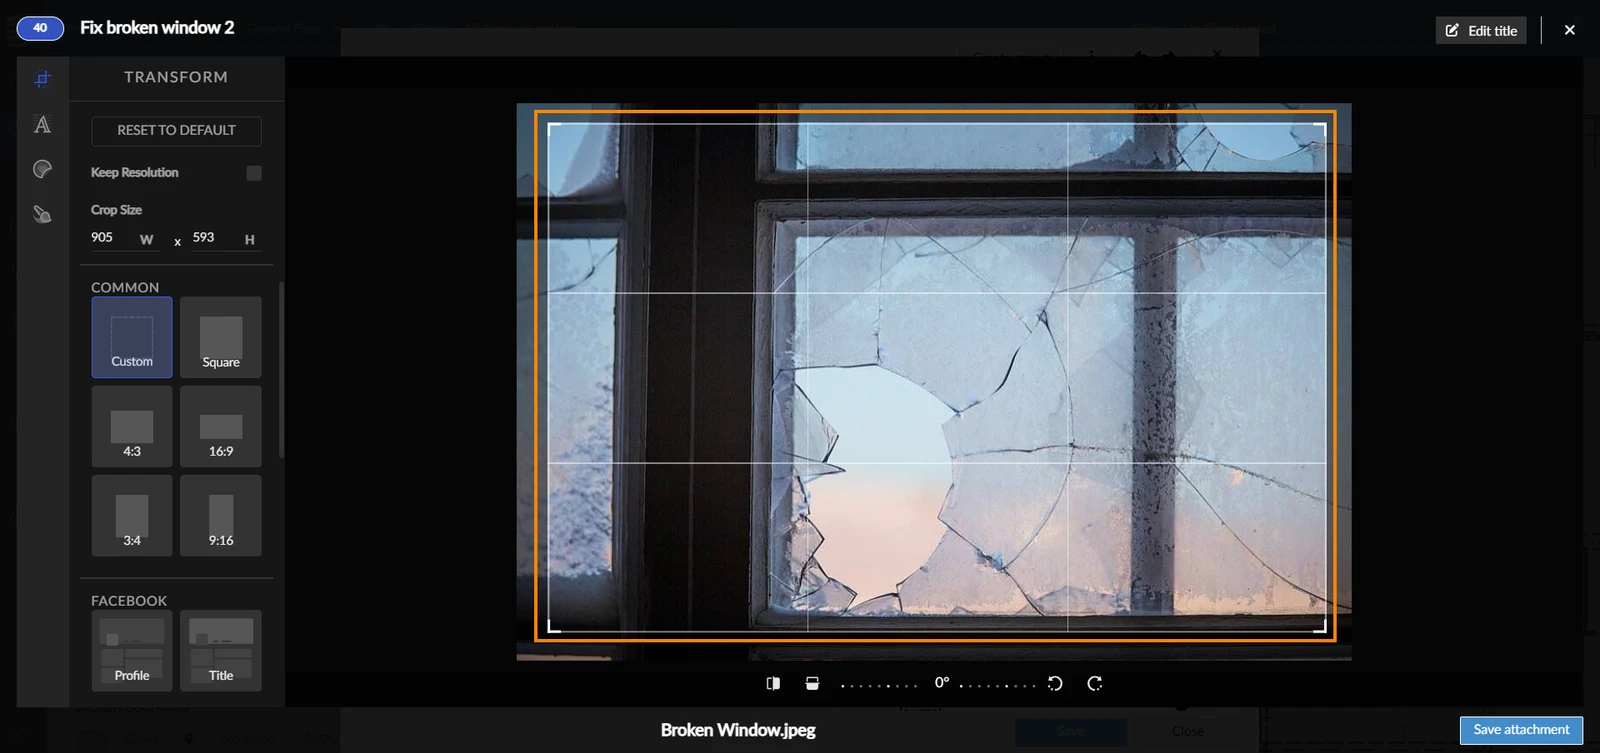
Transform
The transform edit enables you to crop photos. Simply, drag the corners of the cropping square to resize it:
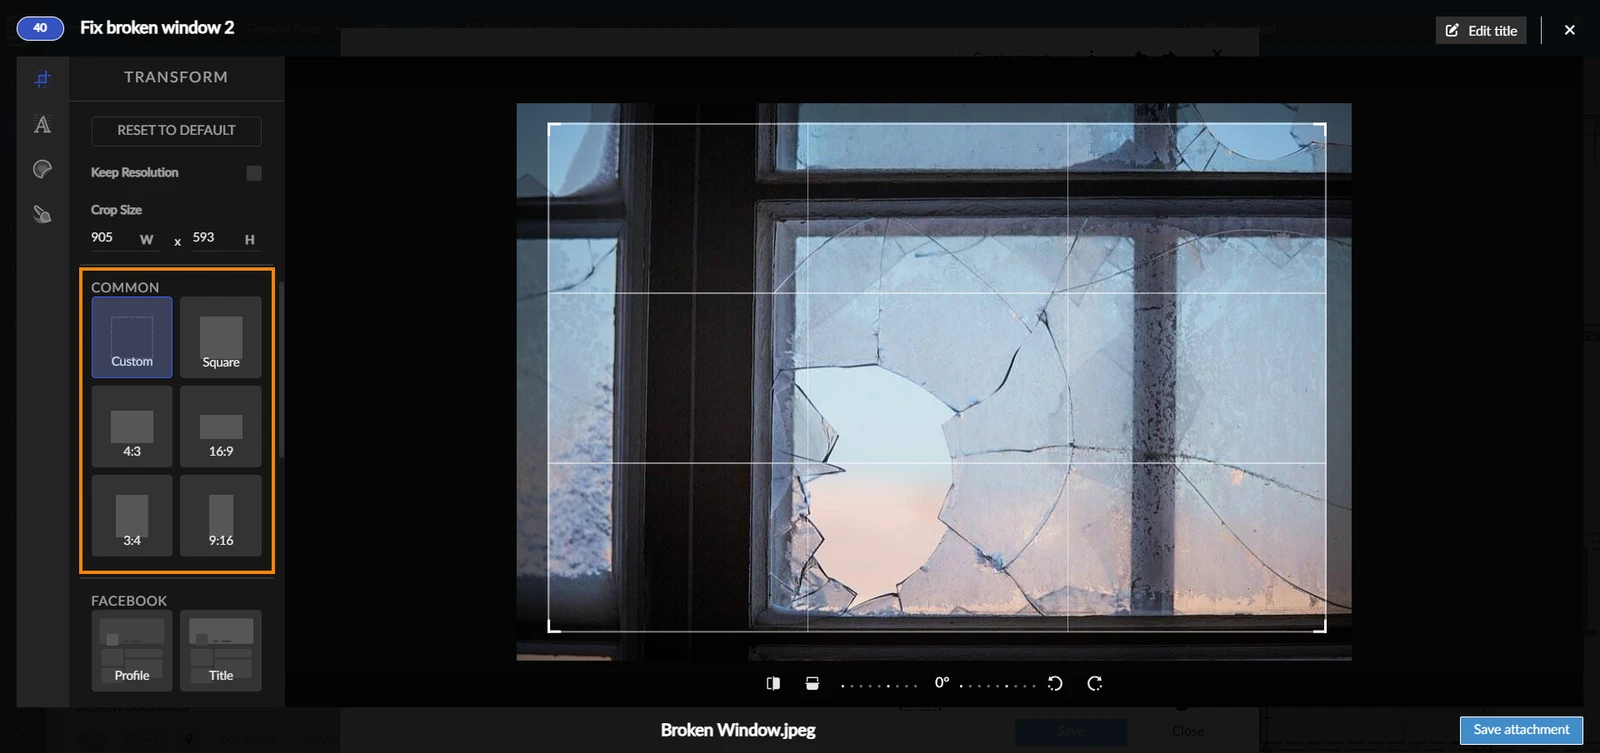
You can also select common aspect ratios:
Text
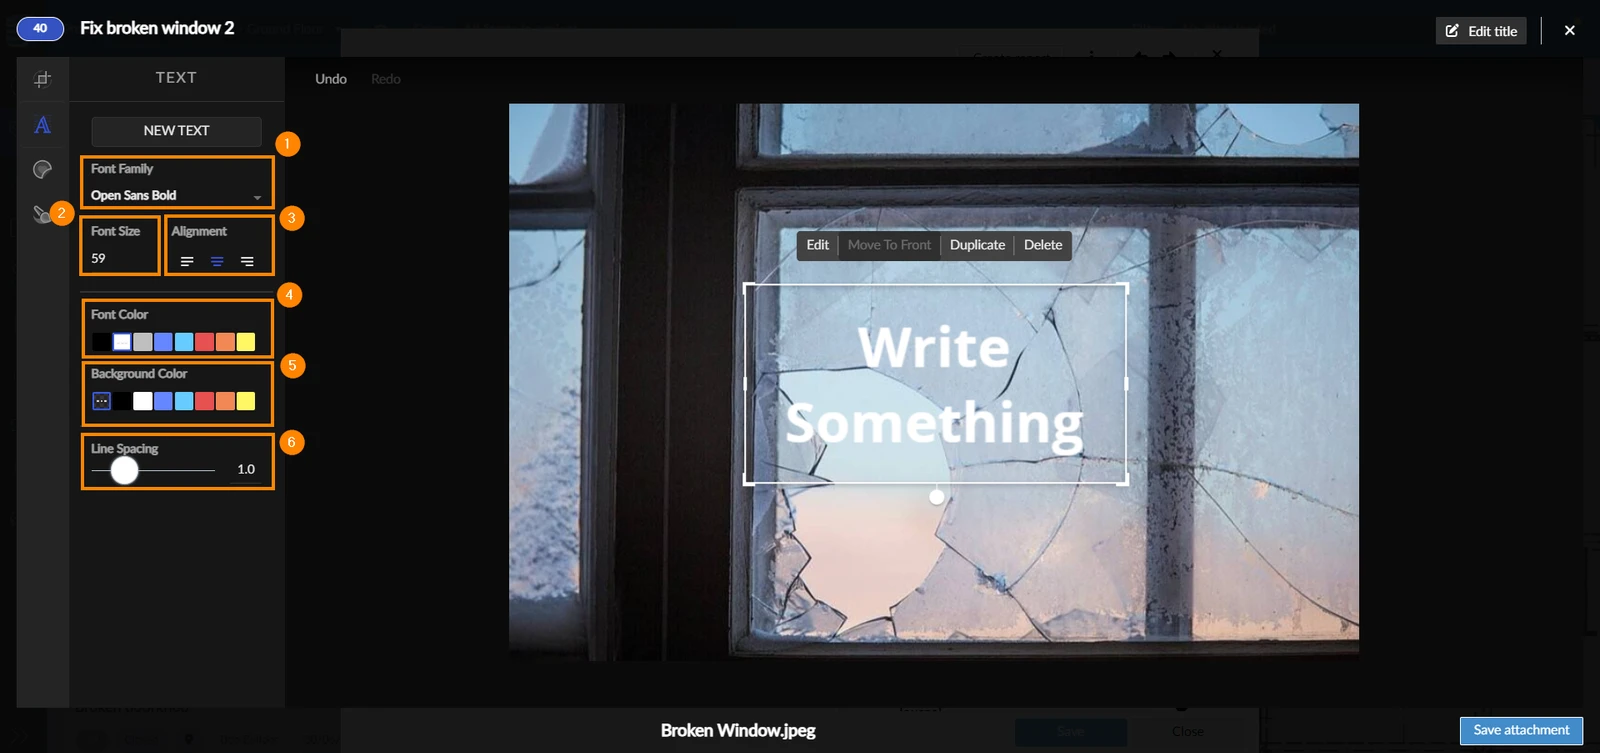
This enables you to add text on your photo. You can adjust the:
- Text font
- Font size
- Text alignment
- Font colour
- Text box background colour
- Line spacing
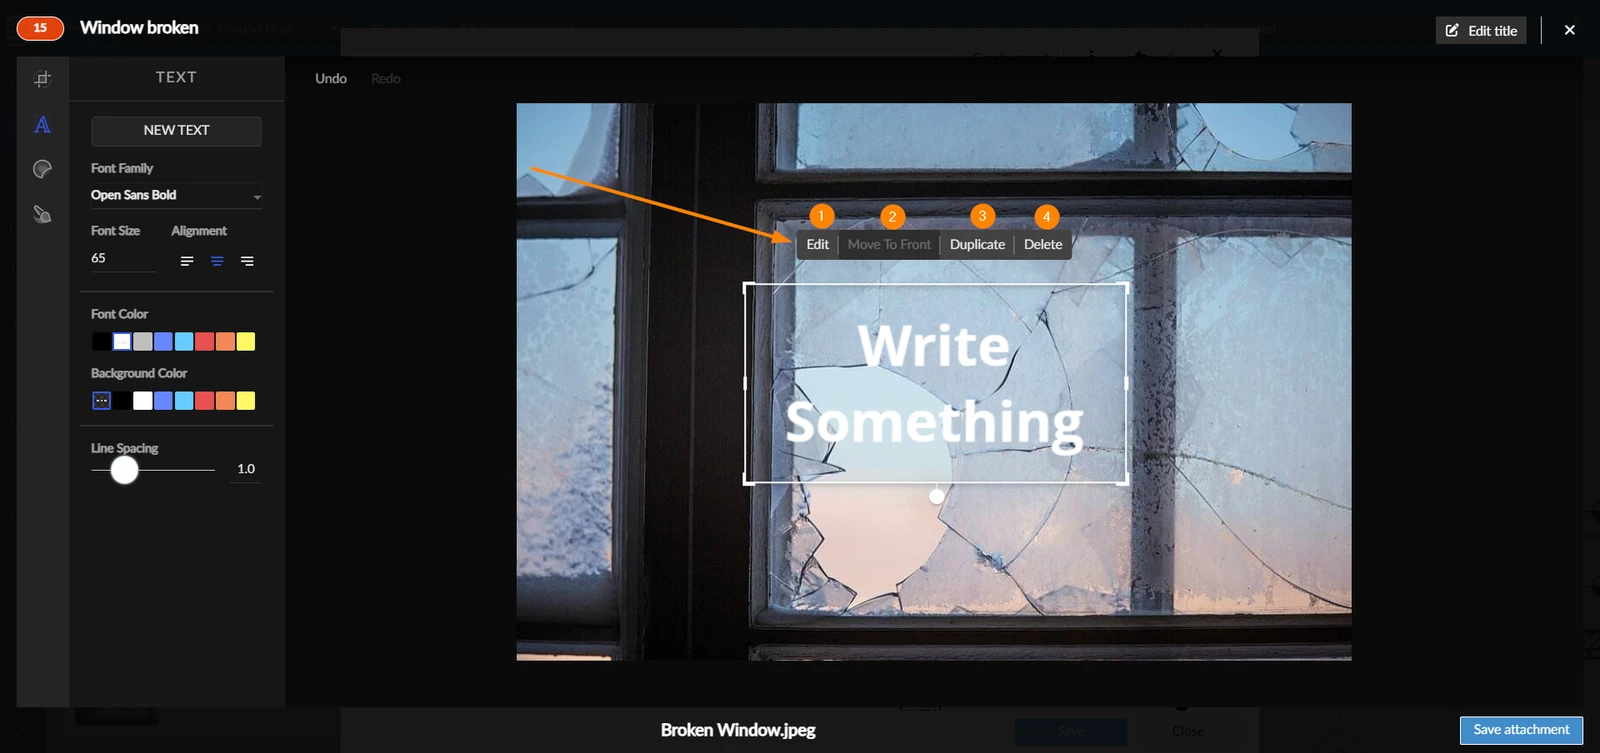
When writing your text, you have the options to:
- Edit the text
- Move it to the front of the image
- Duplicate it
- Delete it
Add Stickers
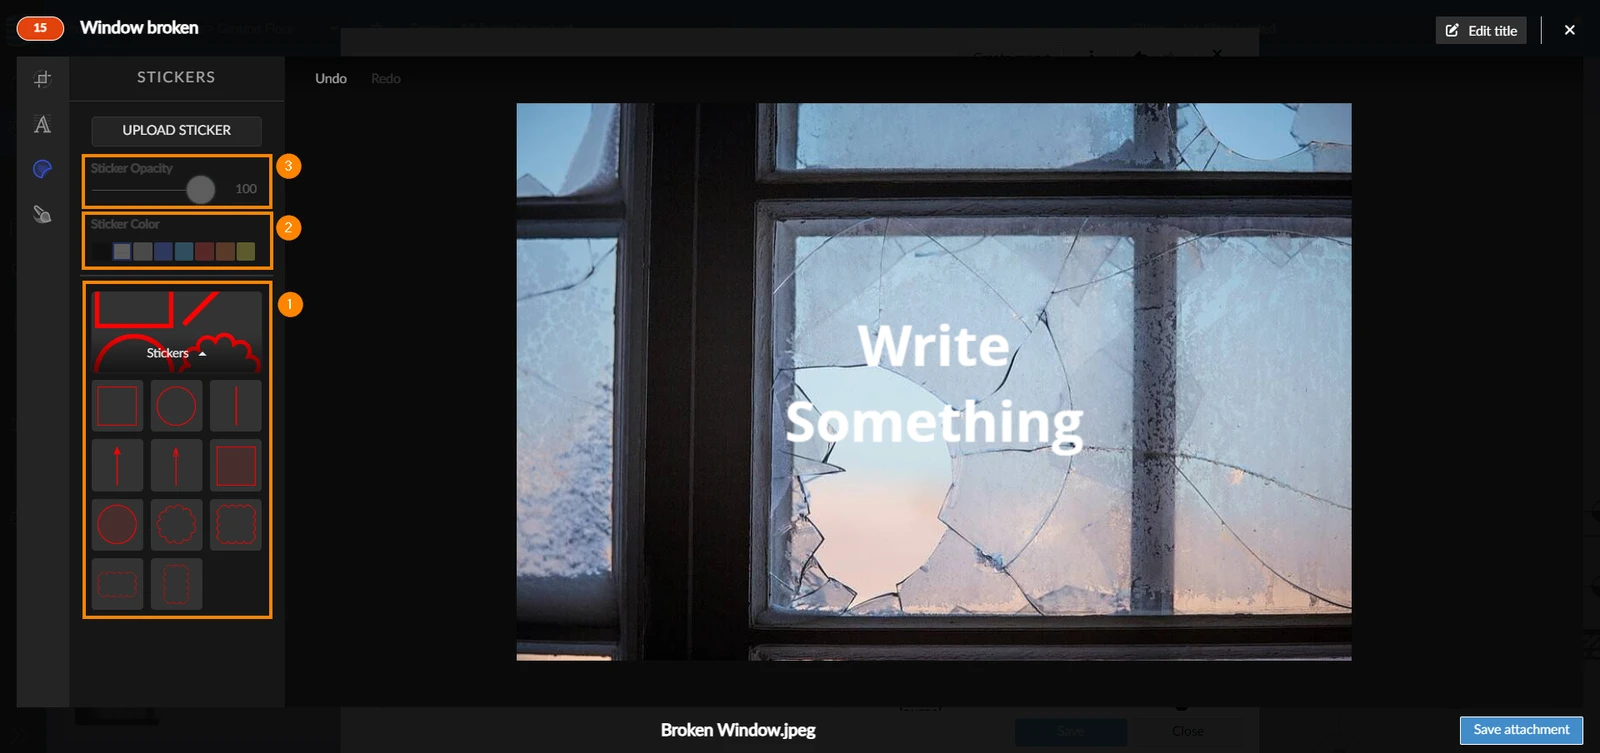
PlanRadar offers a number of stickers that can be used to highlight part/s of your uploaded photo. You can:
- Select the sticker to add
- Change sticker colour
- Choose sticker opacity
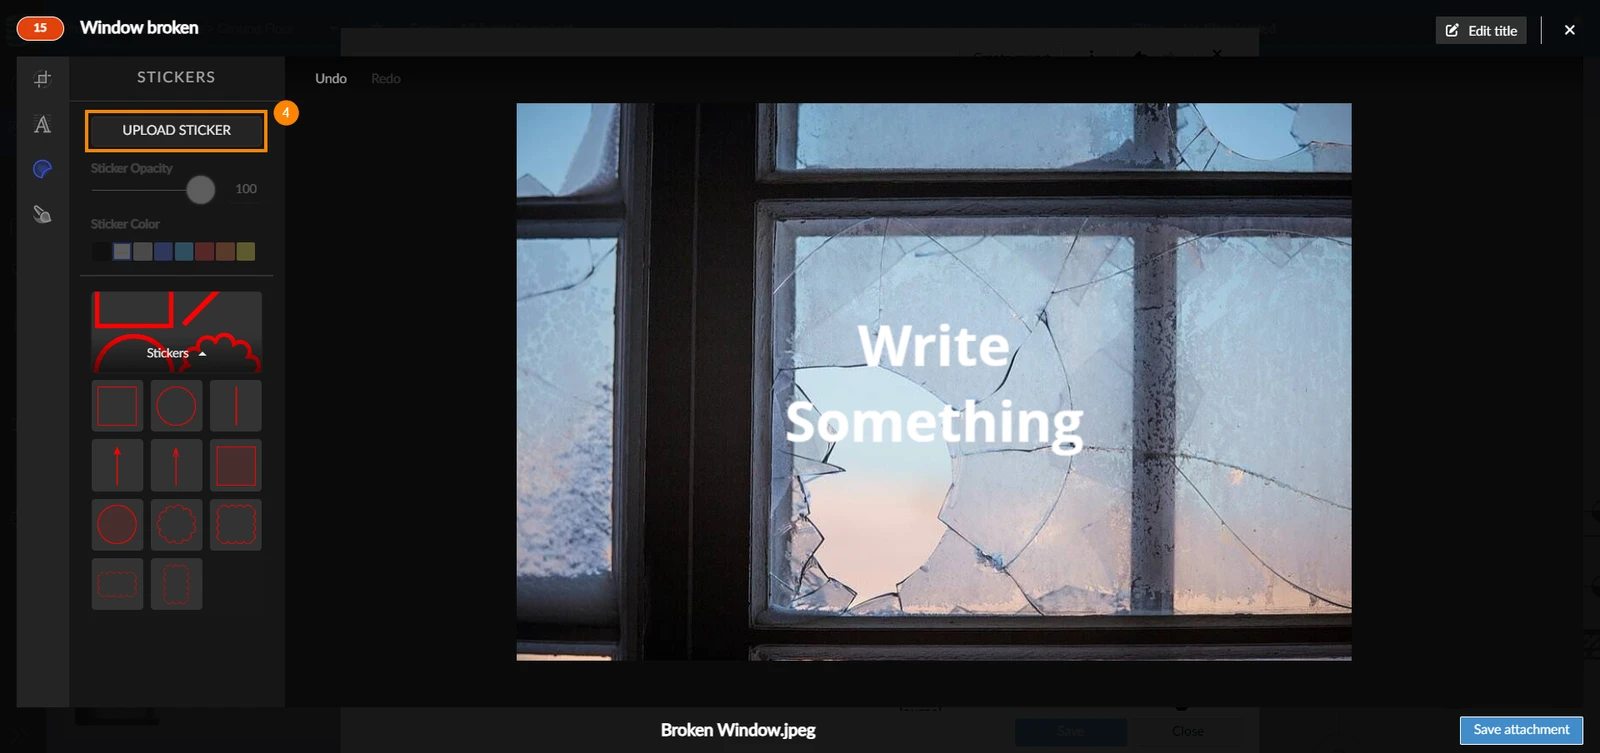
- Upload your own stickers as well by clicking Upload sticker
Brush
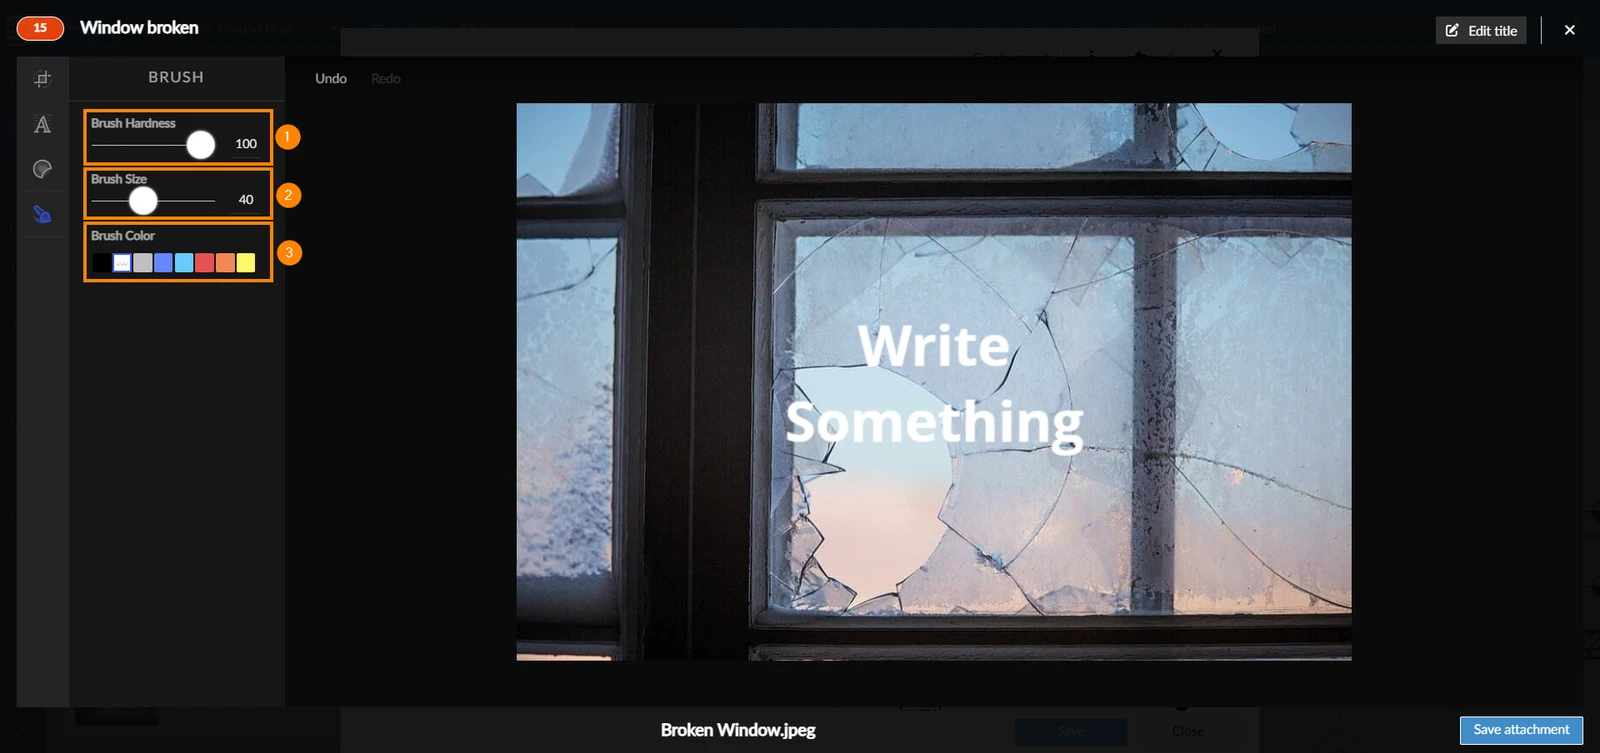
Another way to highlight parts of your photo is by using the Brush tool. It allows free-hand drawing. Using the brush, you can:
- Change brush hardness (opacity)
- Change brush size
- Select brush colour
Edit Photo Title
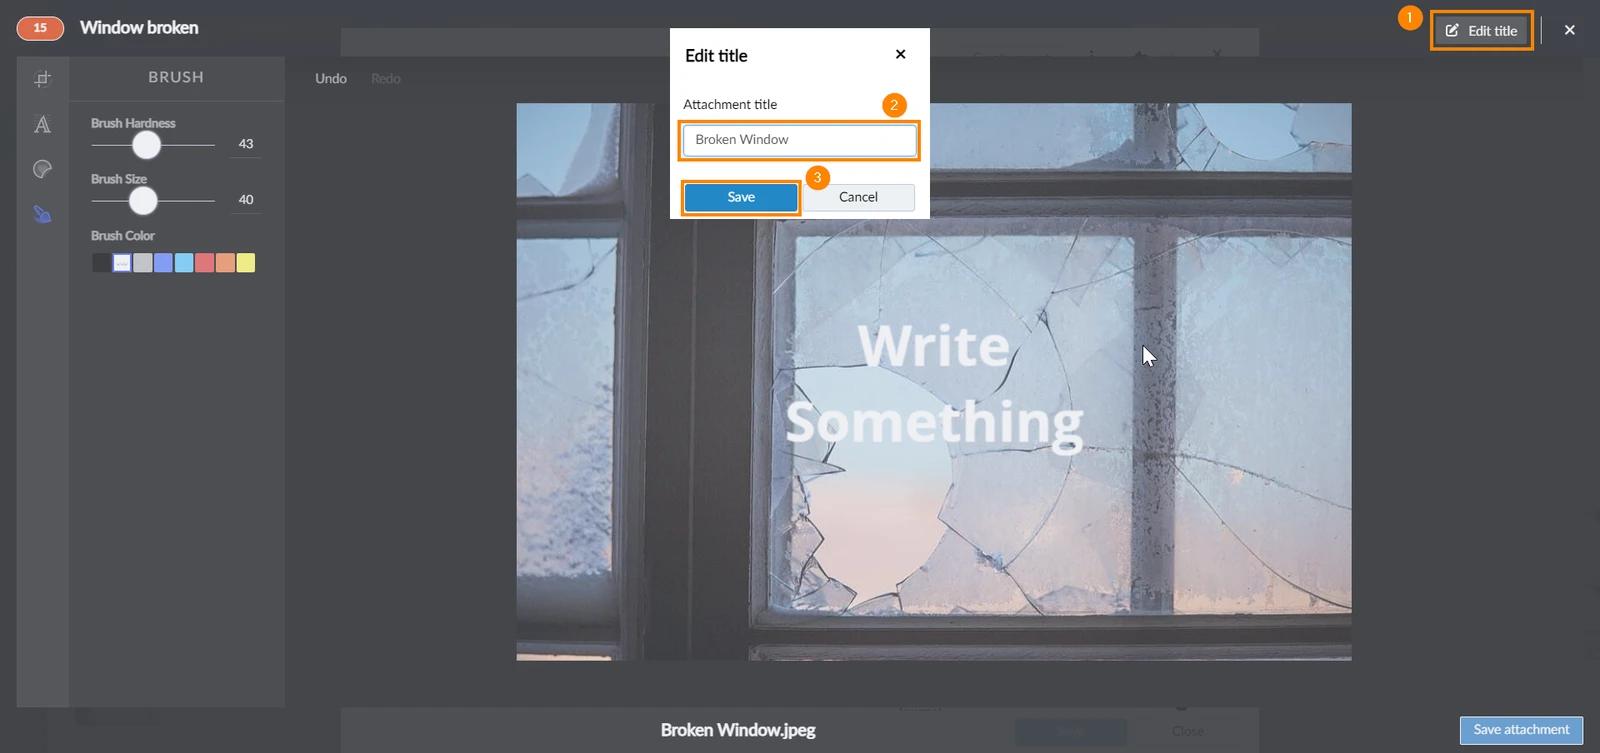
You can also edit the title of the photo after uploading it:
- Click Edit title
- Type the new title
- Click Save
Updated June 2, 2026