

 Deutsch
 Español
 Français
 Hrvatski
 Italiano
 Polski
 Português (BR)
Create & Manage Markups on PDFs in the Webapp
Overview
PDF markups allow you to add signatures, drawings, shapes, and comments directly to PDF files. On editable PDFs, you can also fill in form fields.
This improves review clarity, speeds up approvals, and supports real-time collaboration.
Read more in Review & Approve Documents and in Review & Approve a Ticket.
Currently, PDF markups are available for:
- PDFs saved in Documents > All files including File Approvals, Favorites, and Shared Items. Read more in View & Find Files/Folders.
- PDFs attached to tickets. Read more in View Ticket Attachments.
PDF markups are not yet available for Project reports. There you still cannot save markups directly. Read more in PDF Viewer > Sign Document / Add Annotations.
Access & Permissions
Collaboration and Visibility
-
Markups appear instantly for all users, enabling real-time collaboration.
-
Markups can be edited or deleted by any user with edit permissions, even if they were created by someone else.
-
For PDFs saved in Documents:
- Markups are saved automatically in the current version of the PDF.
- Markup changes are recorded in the file activity log.
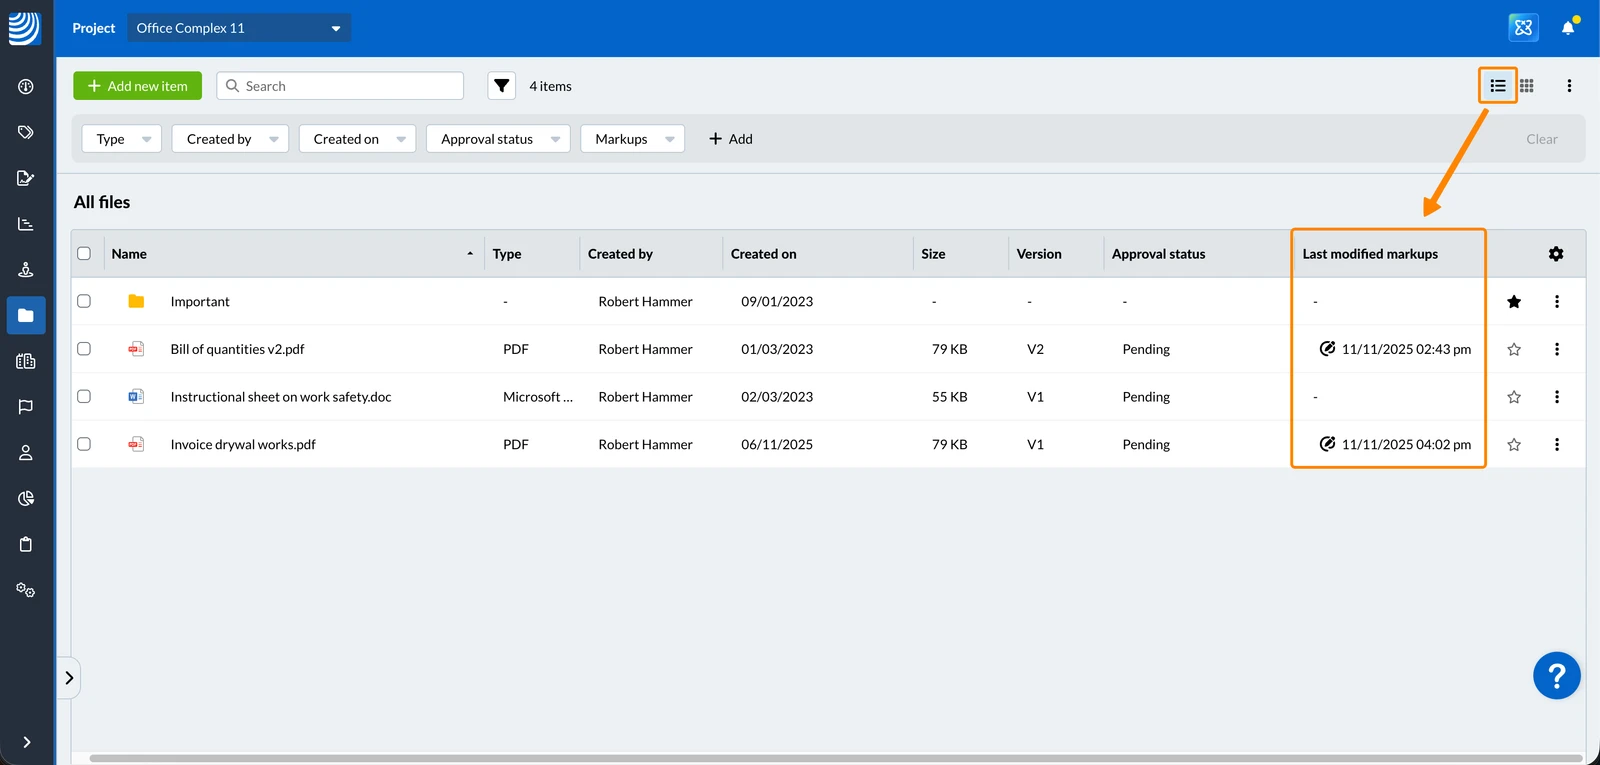
Read more in View Activity Log for Files & Folders in the Webapp. - In the file list, there is a column called Last modified markups and you can filter for files with markups.
Read more in View & Find Files/Folders > Filter. - During and after document approvals, markups can only be created and edited by the reviewers of the active approval step. Read more in Review & Approve Documents.
-
For PDFs attached to tickets:
-
Markup changes are recorded in the ticket journal.
Read more in Track Activity on a Ticket in the Journal. -
There is a column called Last modified markups in the:
- Ticket attachment gallery list view.
Read more in View Ticket Attachments > Attachment Galleries > View Options. - Ticket attachments list view in Documents and you can filter for tickets with markups.
Read more in View & Filter Attachments of All Tickets in the Webapp.
- Ticket attachment gallery list view.
-
During and after ticket approvals, markups can only be created and edited by the reviewers of the active approval step. Locked tickets prevent other users from creating or editing markups.
Read more in Review & Approve a Ticket and in Lock a Ticket.
-
How to access
To view a PDF in Documents:
- Click Documents
- Select a Project
- Click All files or Favorites or Shared Items
- Click the PDF
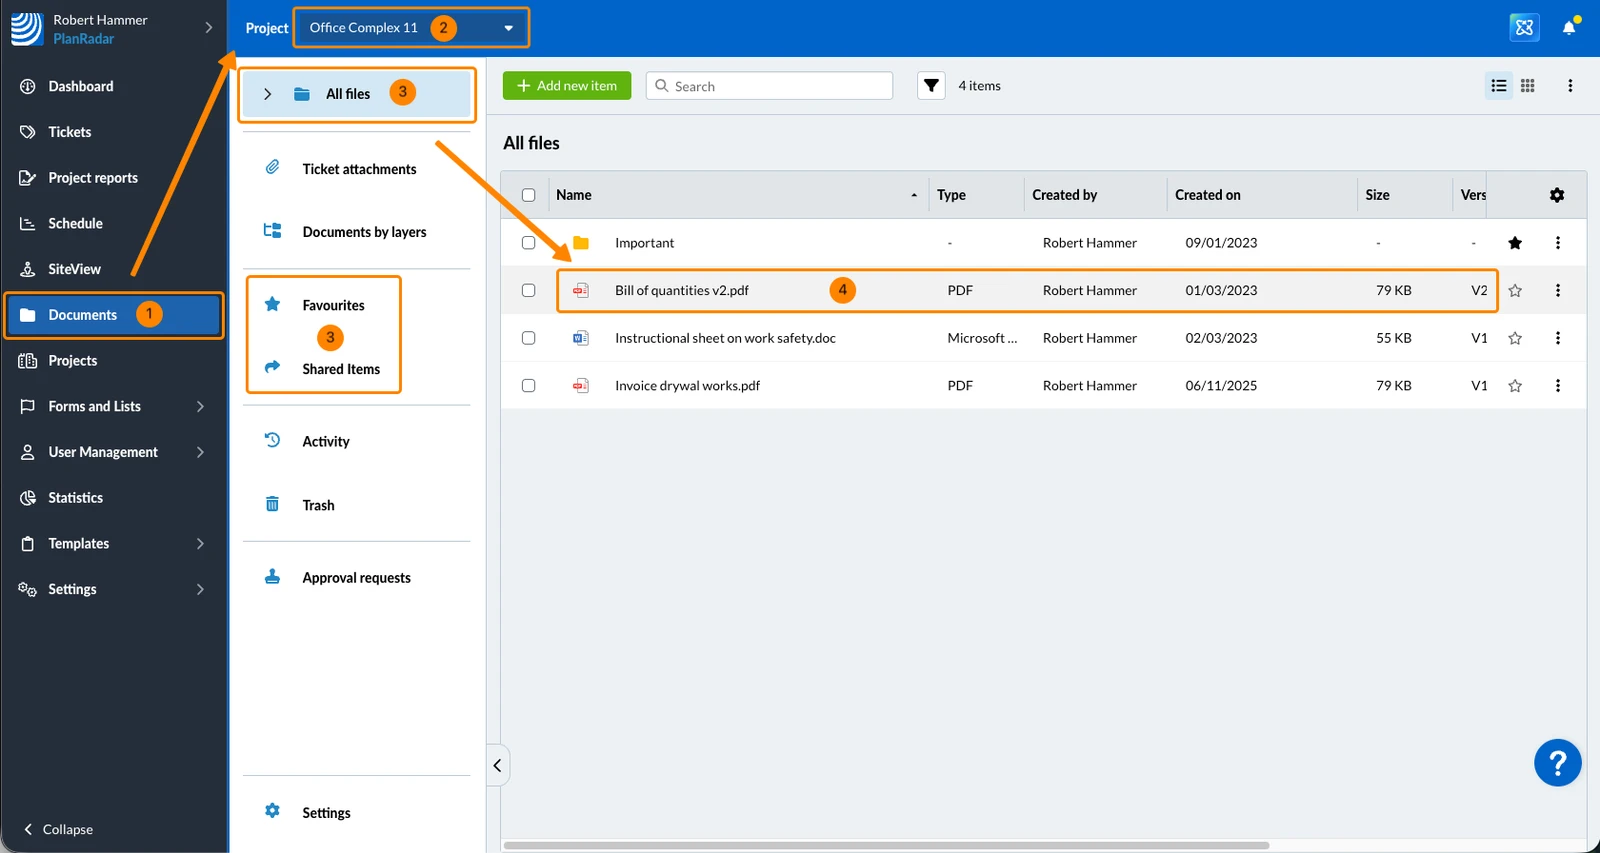
To view a PDF attached to a ticket:
- Click Tickets
- Click the ticket
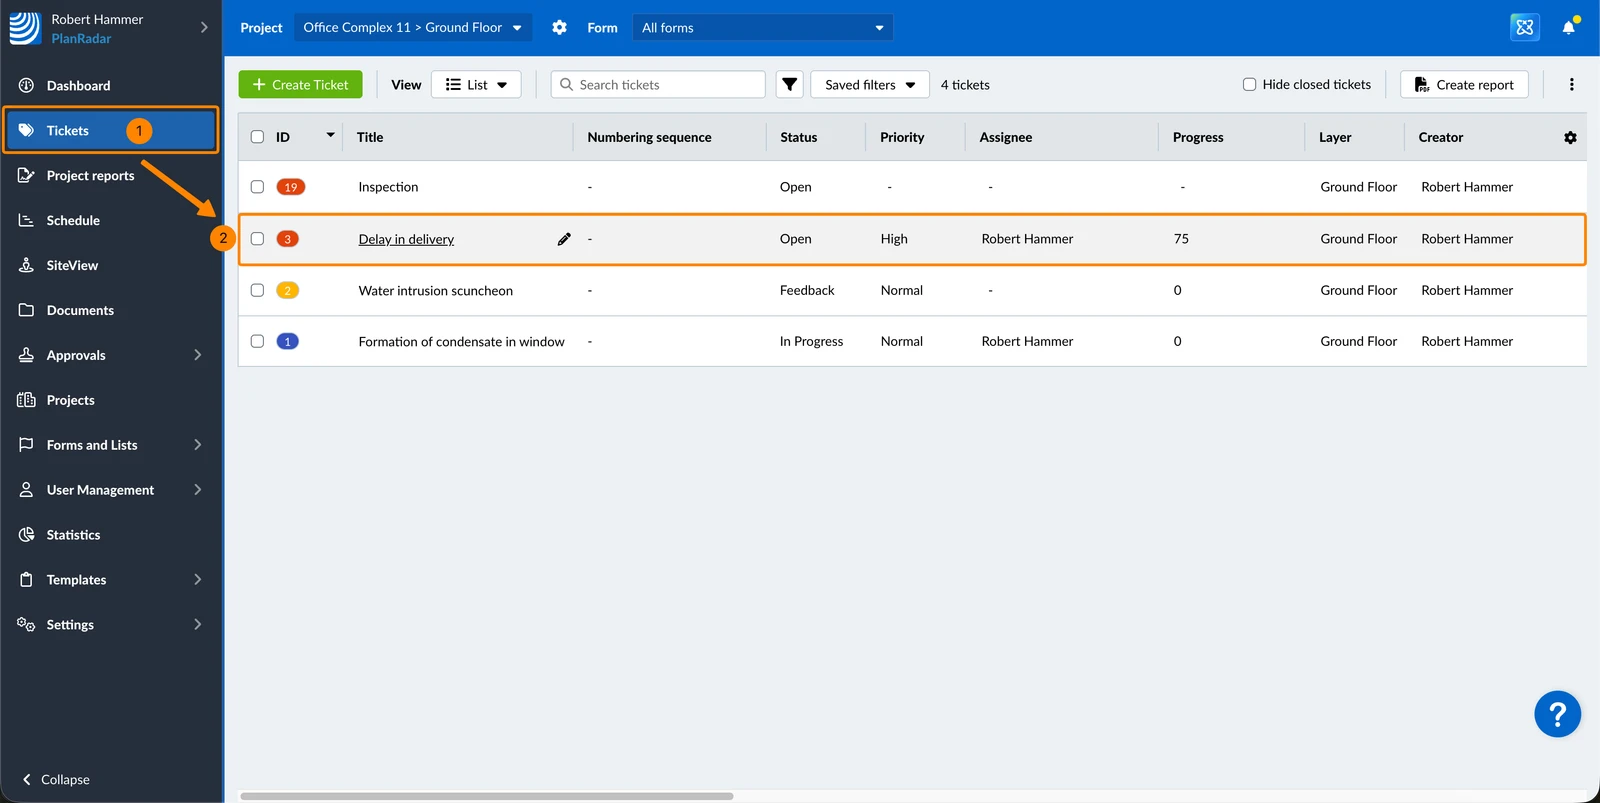
- Click the PDF
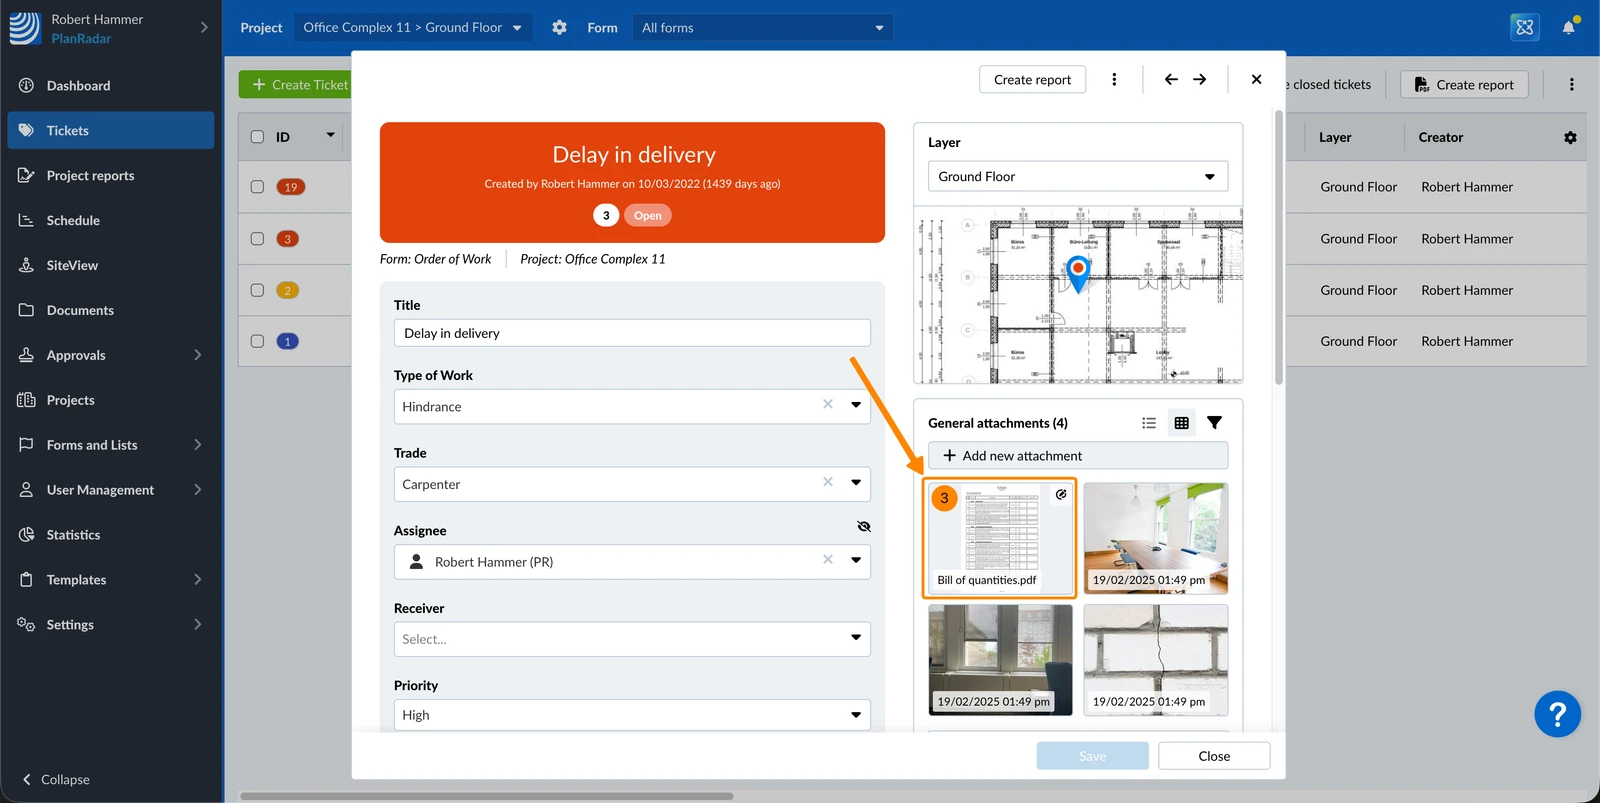
Create Markups
There is a limit of 500 markups per PDF.
To add markups in a PDF:
- Enable the Edit markups toggle
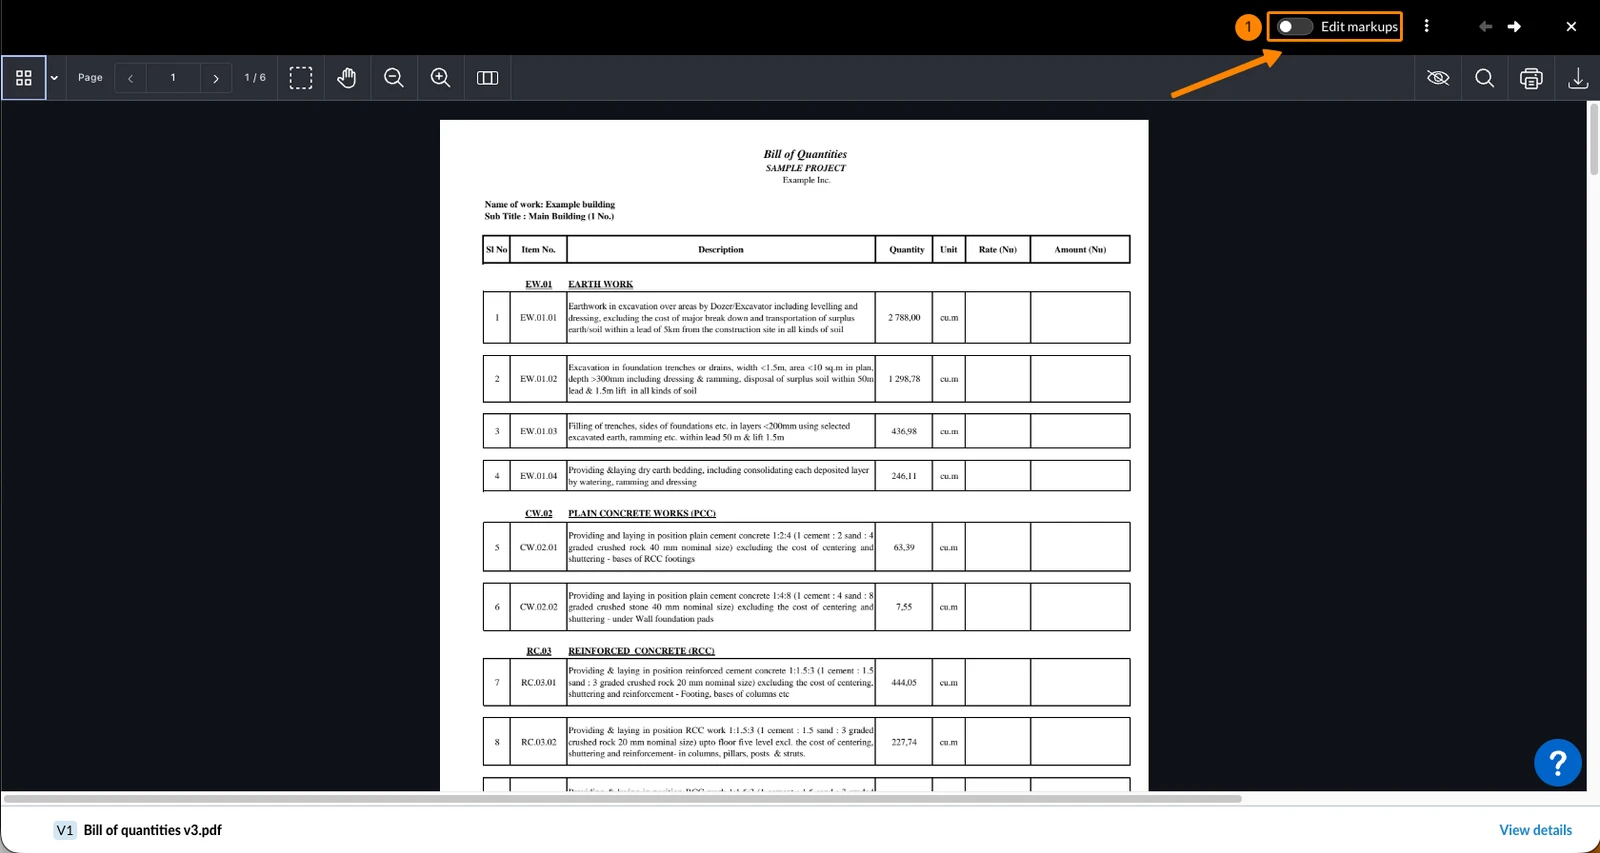
- Click on one of the markup tools. Read more below in Markup Tools & Options.
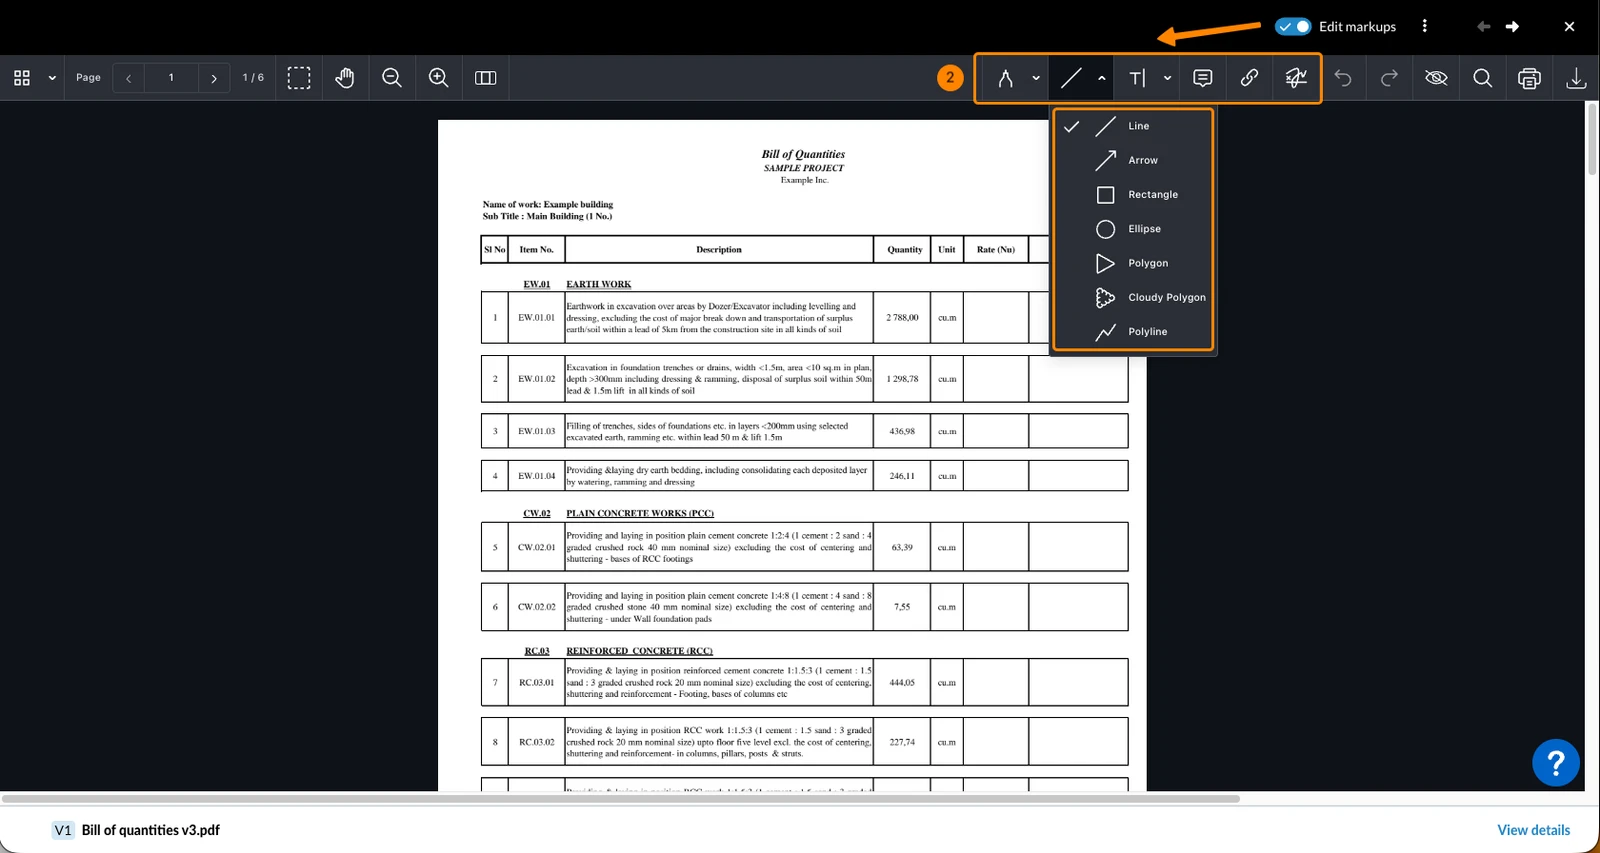
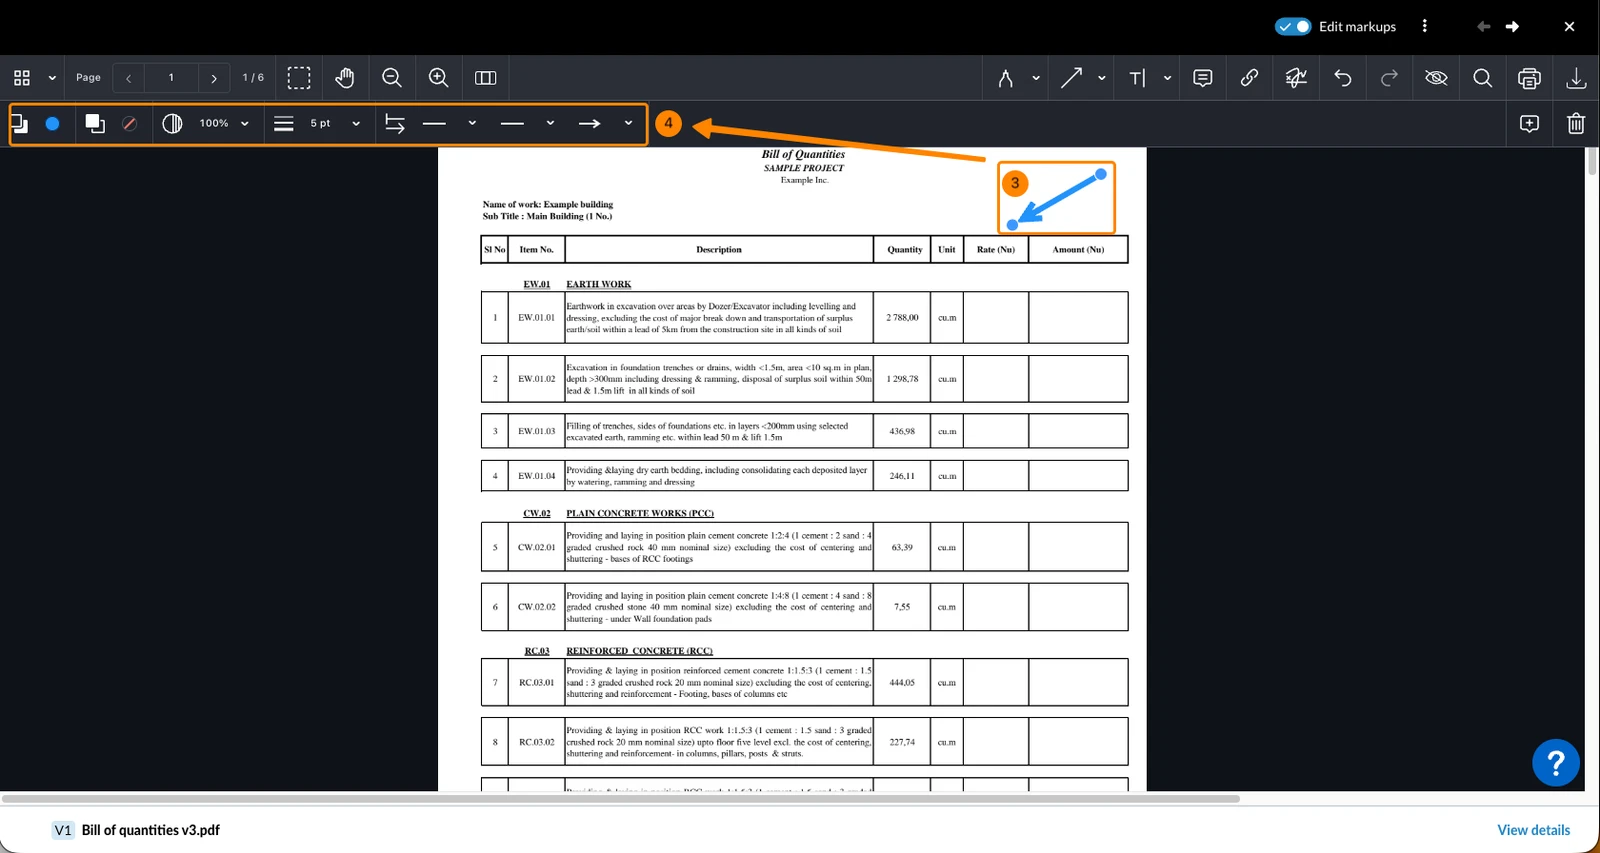
- Click or draw anywhere in the PDF to add the markup there
- Optional: Adjust the markup options
Markup Tools & Options
There are several markup tools that allow you to add and customize annotations.
Some of the markup tools offer additional tools in the drop-down menus. All tools offer formatting options depending on the selected tool, e.g. to change the line thickness or colour.
- Select the tool e.g. Drawing
- Select a tool from the drop-down e.g. Freeform Highlighter
- Adjust the formatting options in the left panel

The following markup tools are available:
Drawing
Draw a freeform line.

Freeform Highlighter
Draw a thick transparent line to highlight areas.

Eraser
The eraser removes parts of freehand drawings.

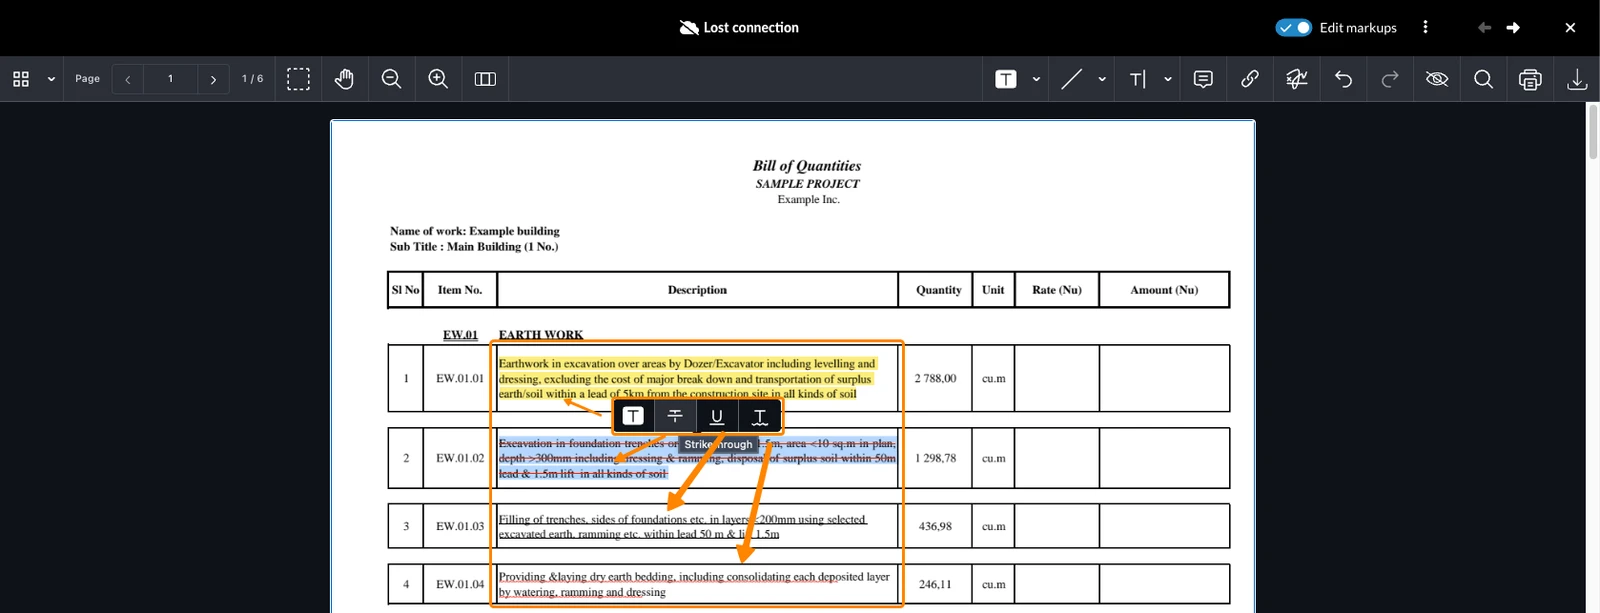
Text Highlighter
Select text and highlight it.

There are also inline formatting options when selecting a text for strikethrough, underline, and red wavy underline:
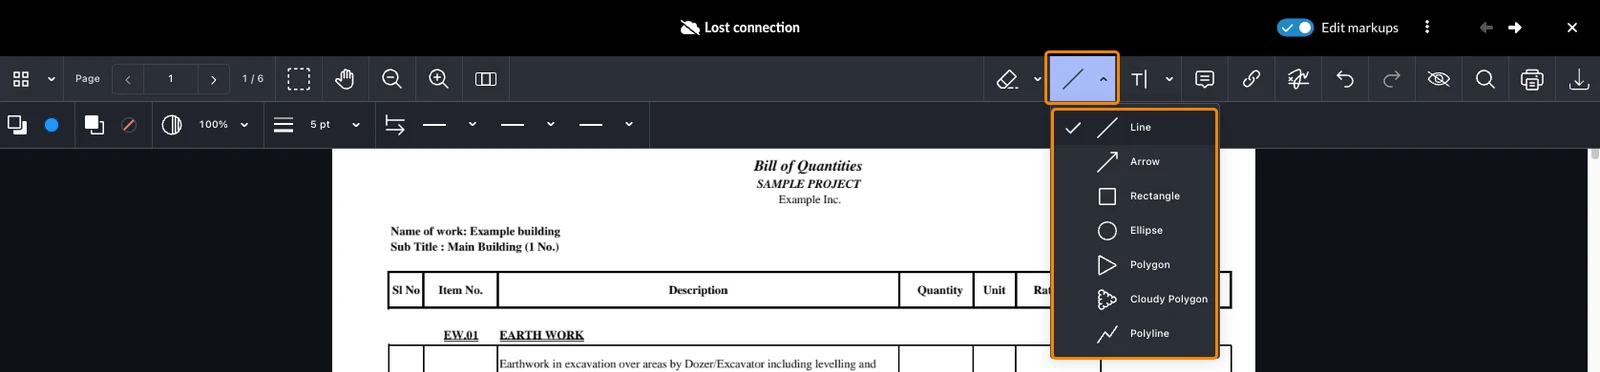
Lines & Shapes
Add a line or shape including:
- Line
- Arrow
- Rectangle
- Ellipse
- Polygon
- Cloudy Polygon
- Polyline
Text & Callout
Add text or a callout. A callout is a textbox with a flexible arrow.

Note
Add a note to place an icon that shows your text when clicked.

Link
Add a link to a page within the PDF or to an external website URL.
Links are transparent, so you can place them on top of other markups.
To select or edit a link, use the selection tool — see Select Markups below.
Links behave similarly to markups, but they are not classified as markups.

As a result, they are not included when indicating whether a PDF contains markups or when applying markup filters.

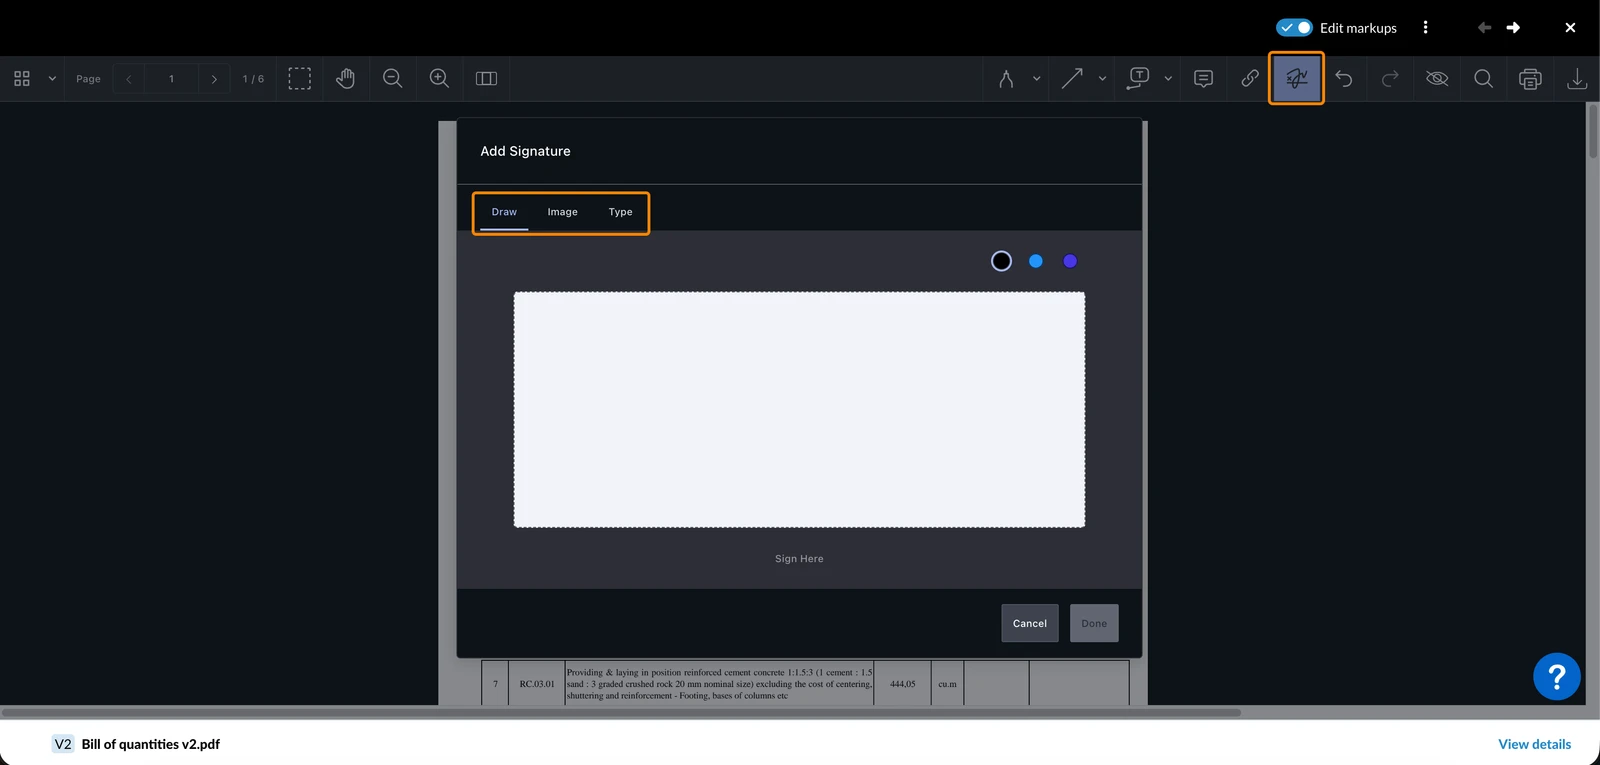
Signature
Add a signature by freehand drawing, uploading an image or typing your name.
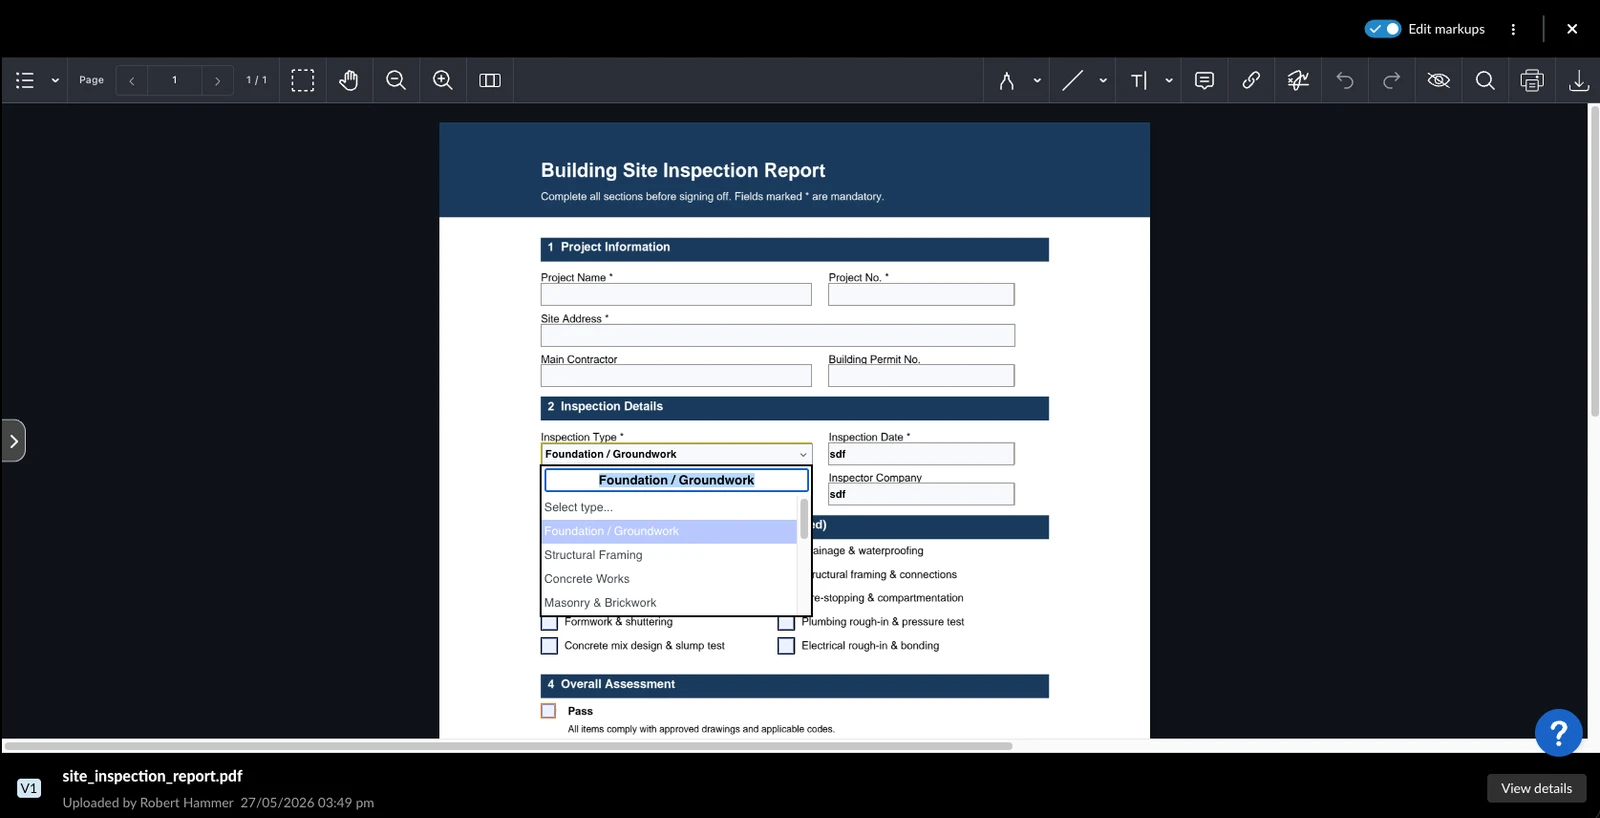
Form Fields
Fill in interactive form fields on editable PDFs. Supported field types include:
- Text field
- Checkbox
- Radio button
- Dropdown
When edit mode is active, click on a form field to interact with it — type text, check a box, select a radio button, or choose a value from a dropdown.
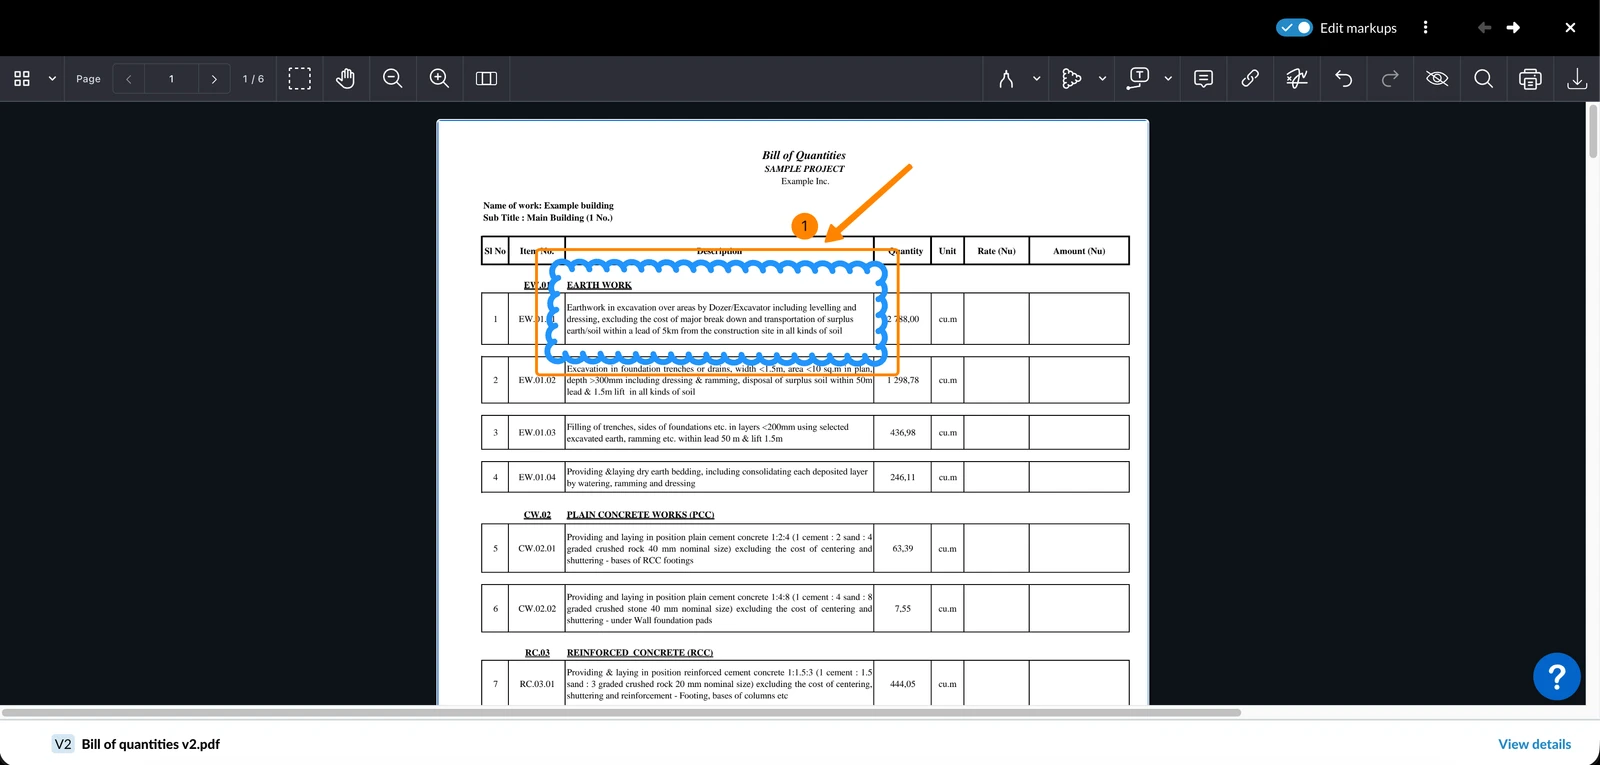
Edit Markups
To edit a markup:
- Click on the markup
- Apply your changes using the available formatting options as described above
- OR Move or Delete a markup as described below
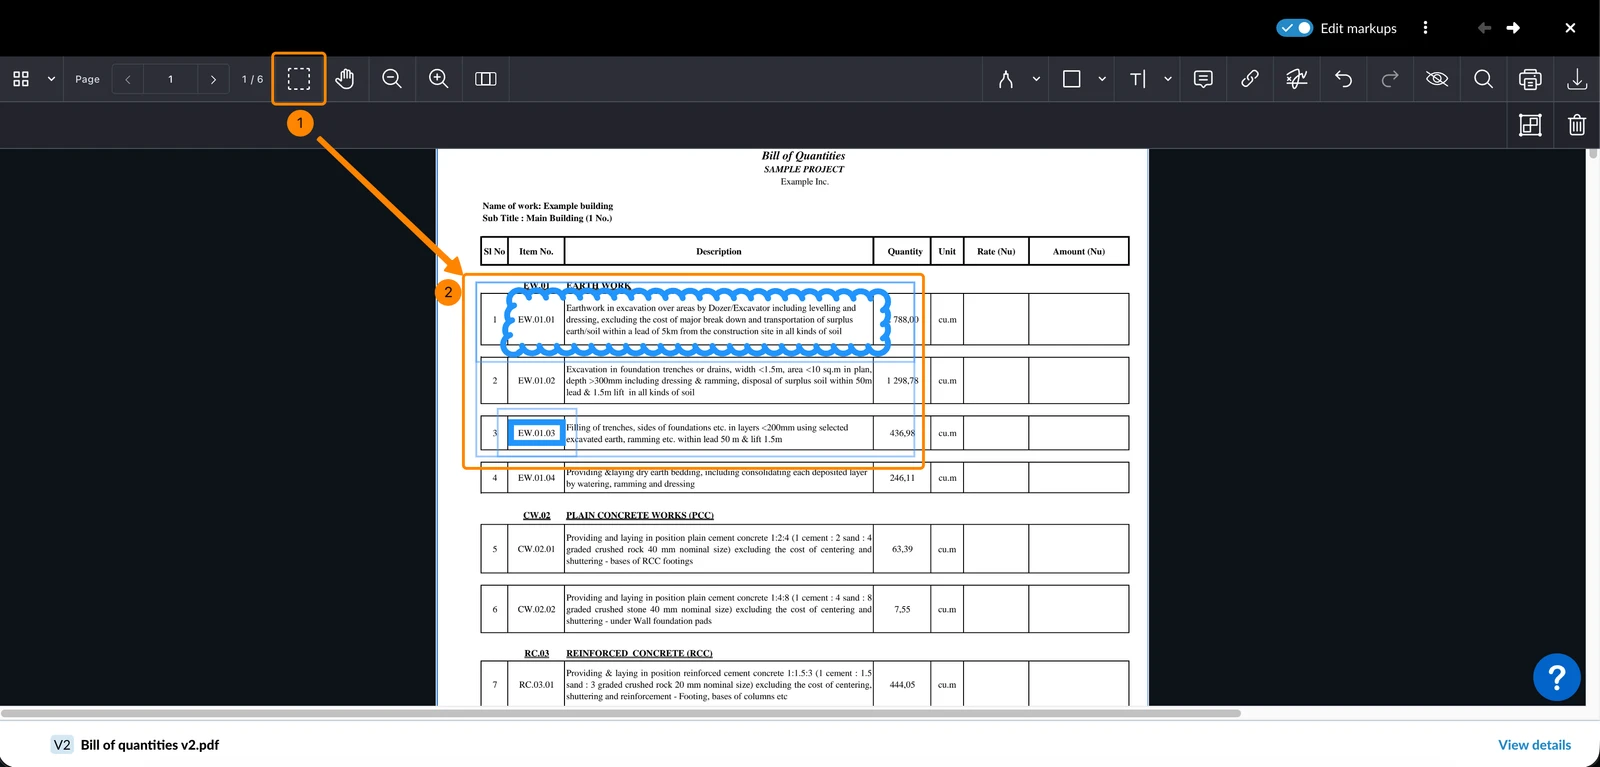
Select Markups
To select one or multiple markups:
- Click on the Select Multiple Annotations icon
- Select an area by holding the mouse button
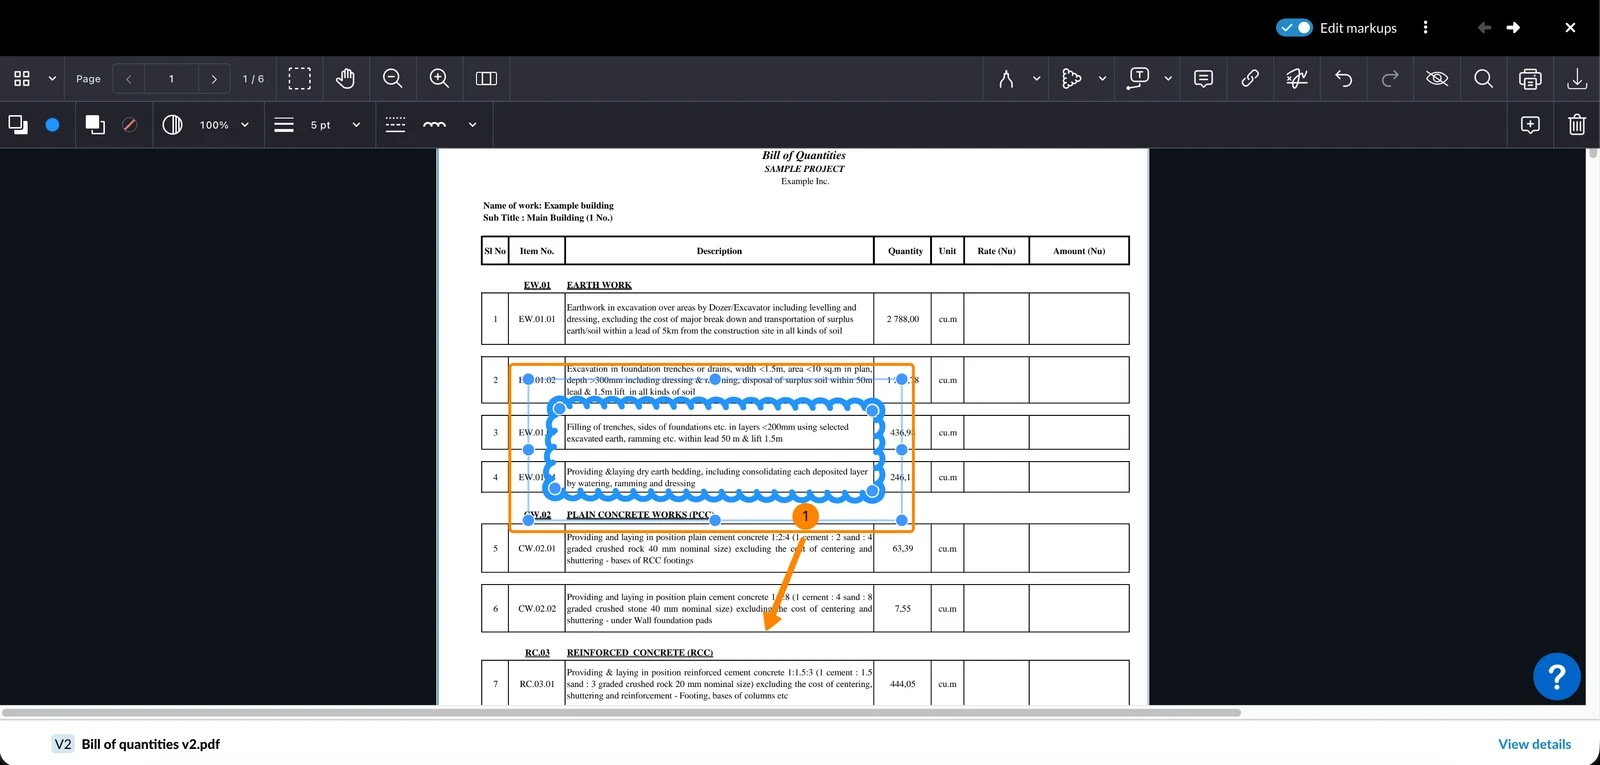
Move Markups
To move a markup:
- Drag the markup to the desired position
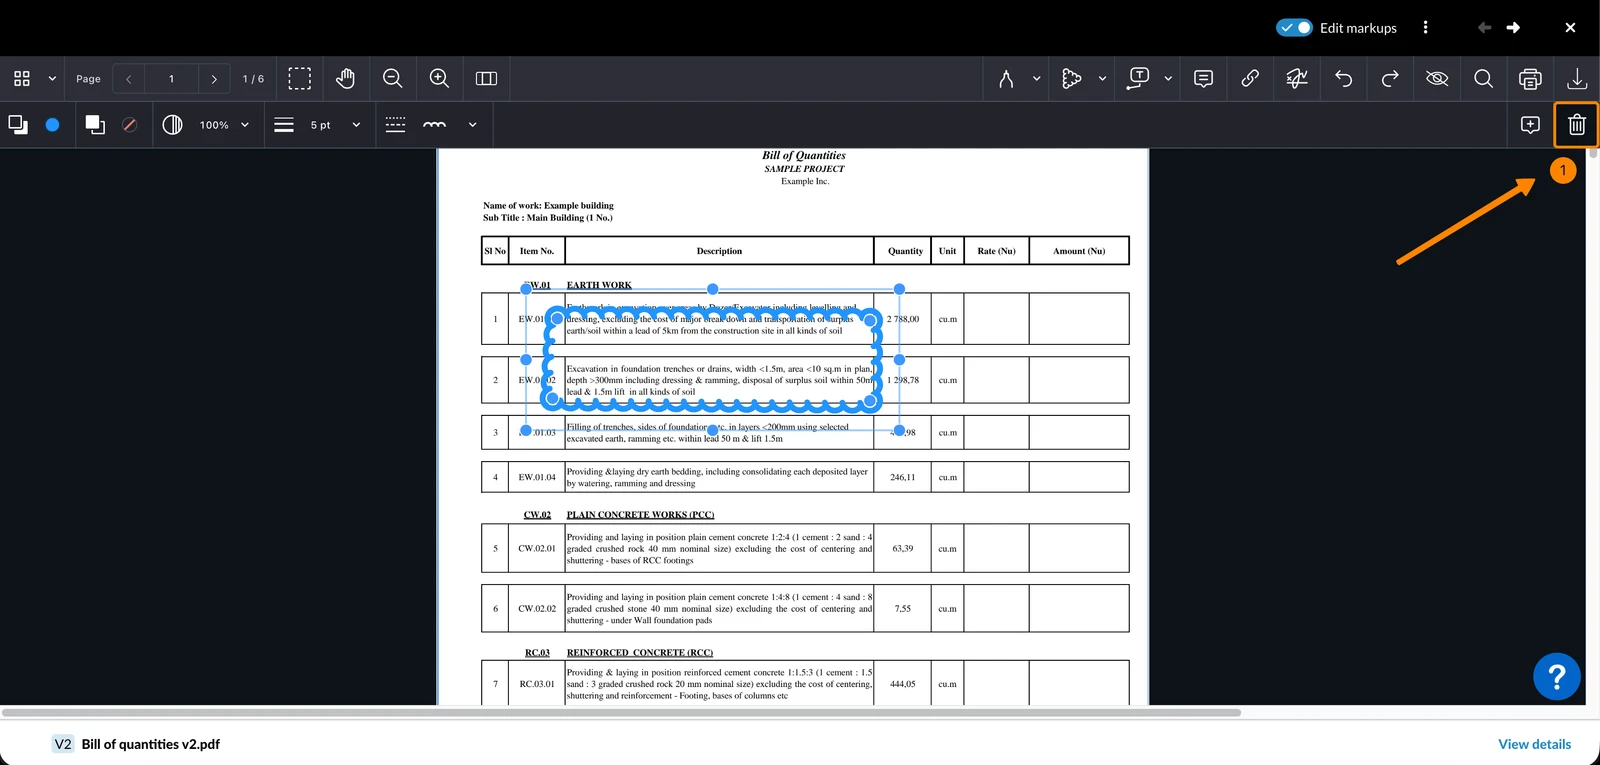
Delete Markups
To delete a markup:
- Click the Trash icon
- Or press Del or Backspace on your keyboard
Undo & Redo
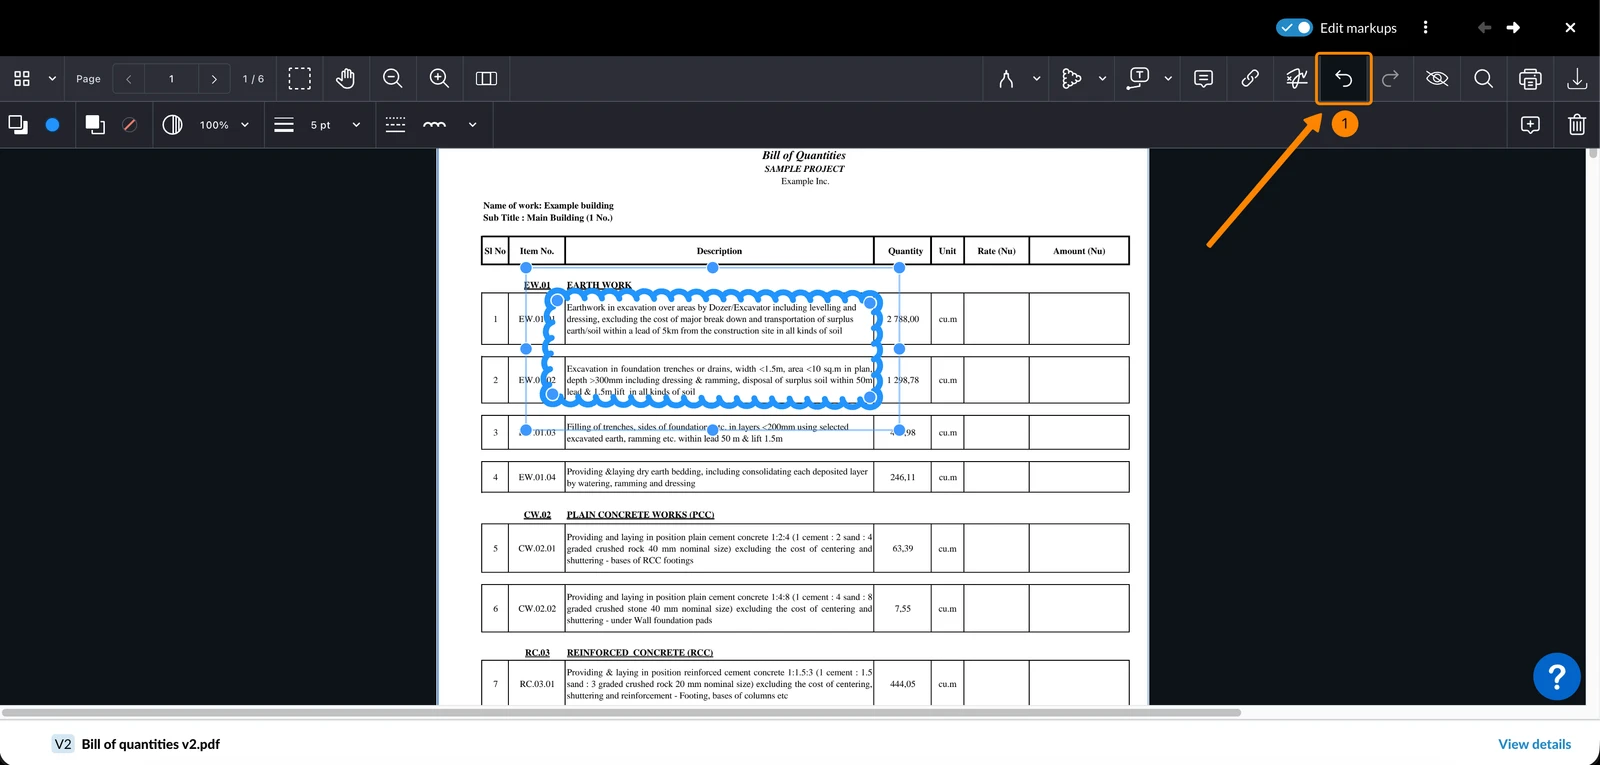
You can undo or redo changes while you are in a markup-editing session.
To undo an action:
- Click the Undo icon
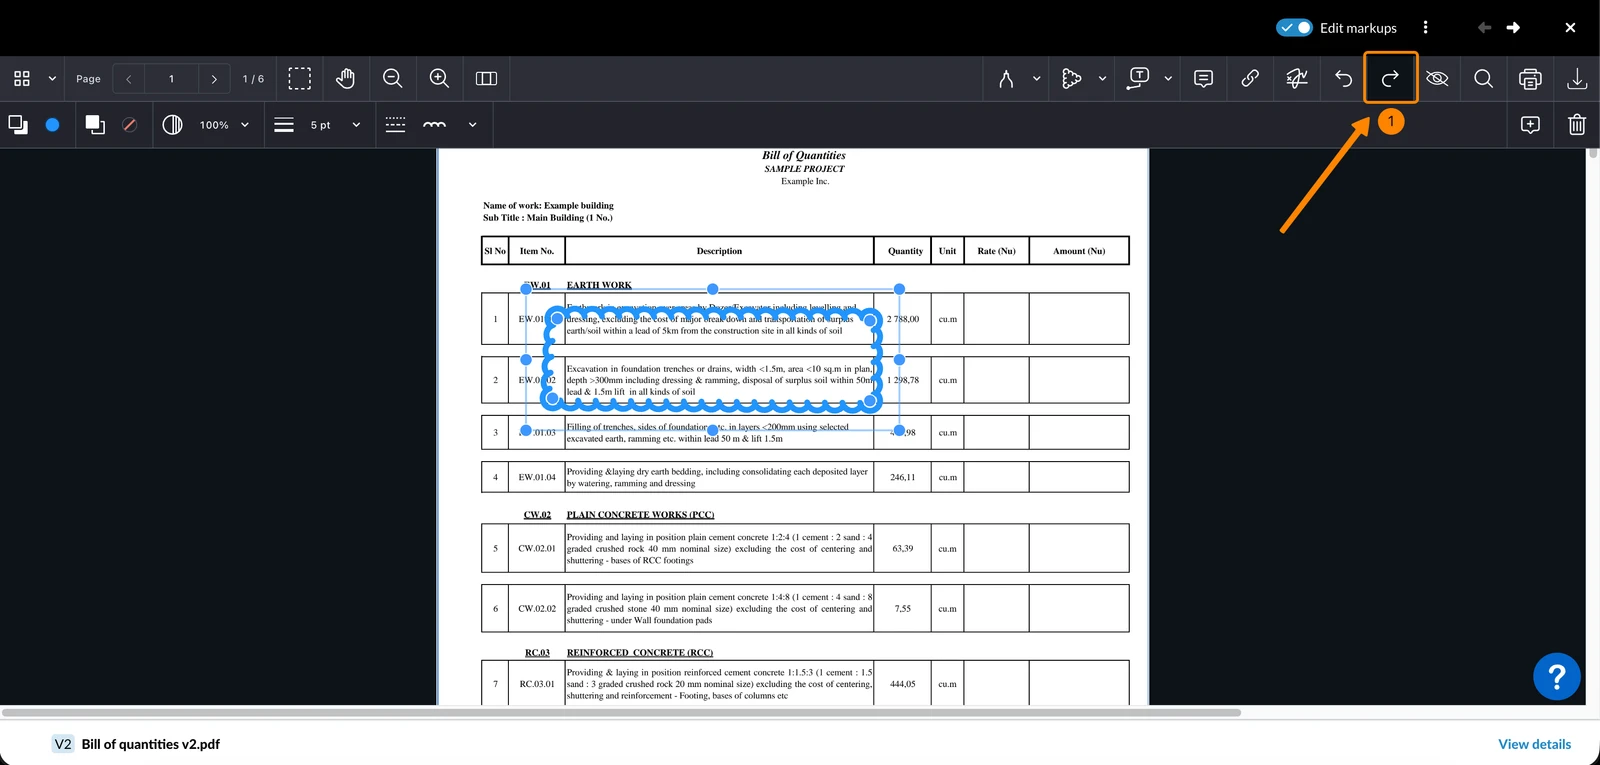
To redo an action (after undoing):
- Click the Redo icon
Show/Hide Markups
Showing or hiding markups only applies to your current viewer session. This setting is not saved and does not affect what other users see. When you open a PDF, markups are shown by default.
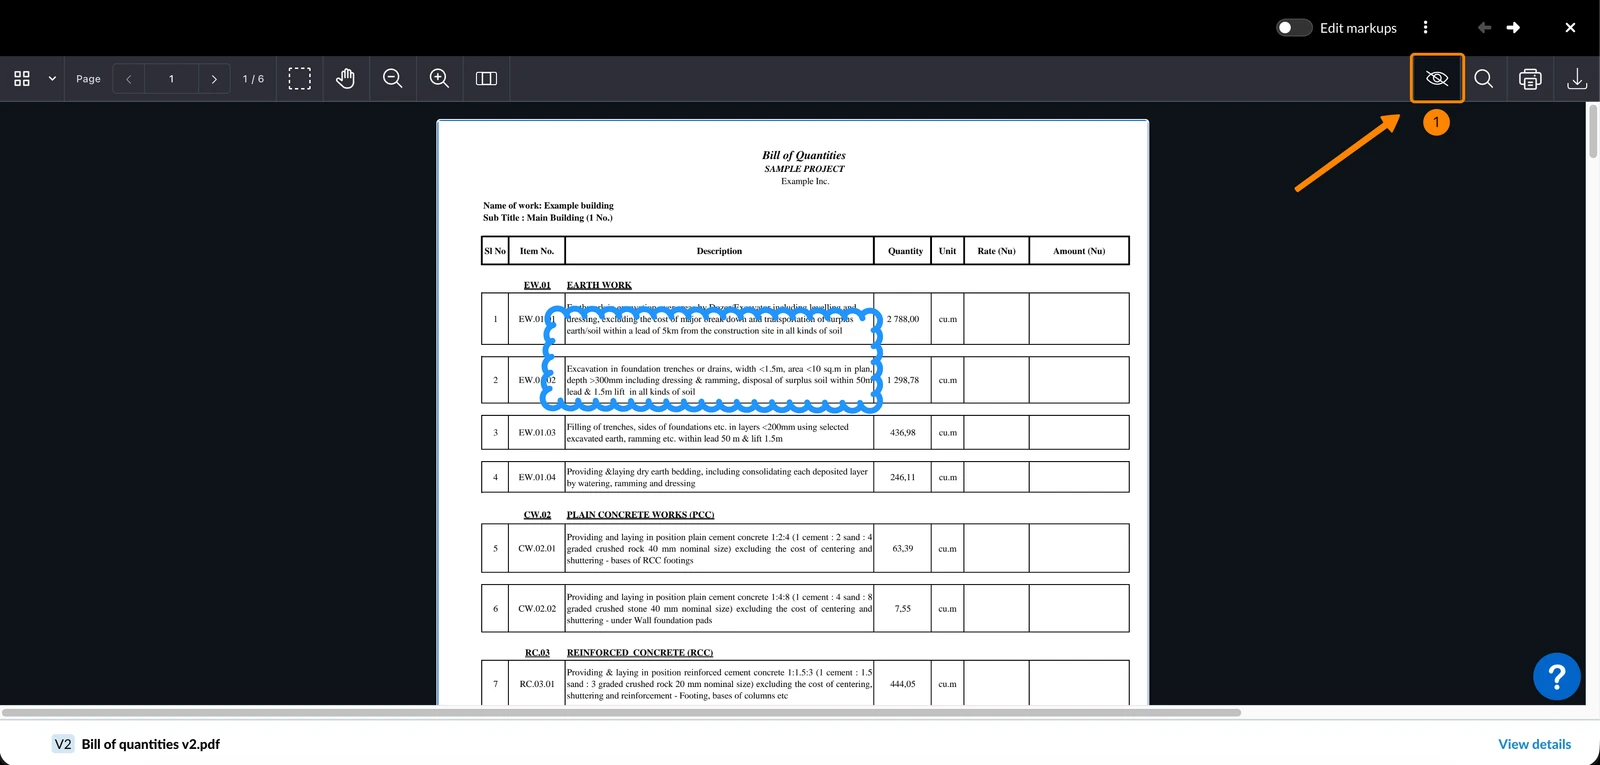
To hide all markups:
- Click the Hide markups icon
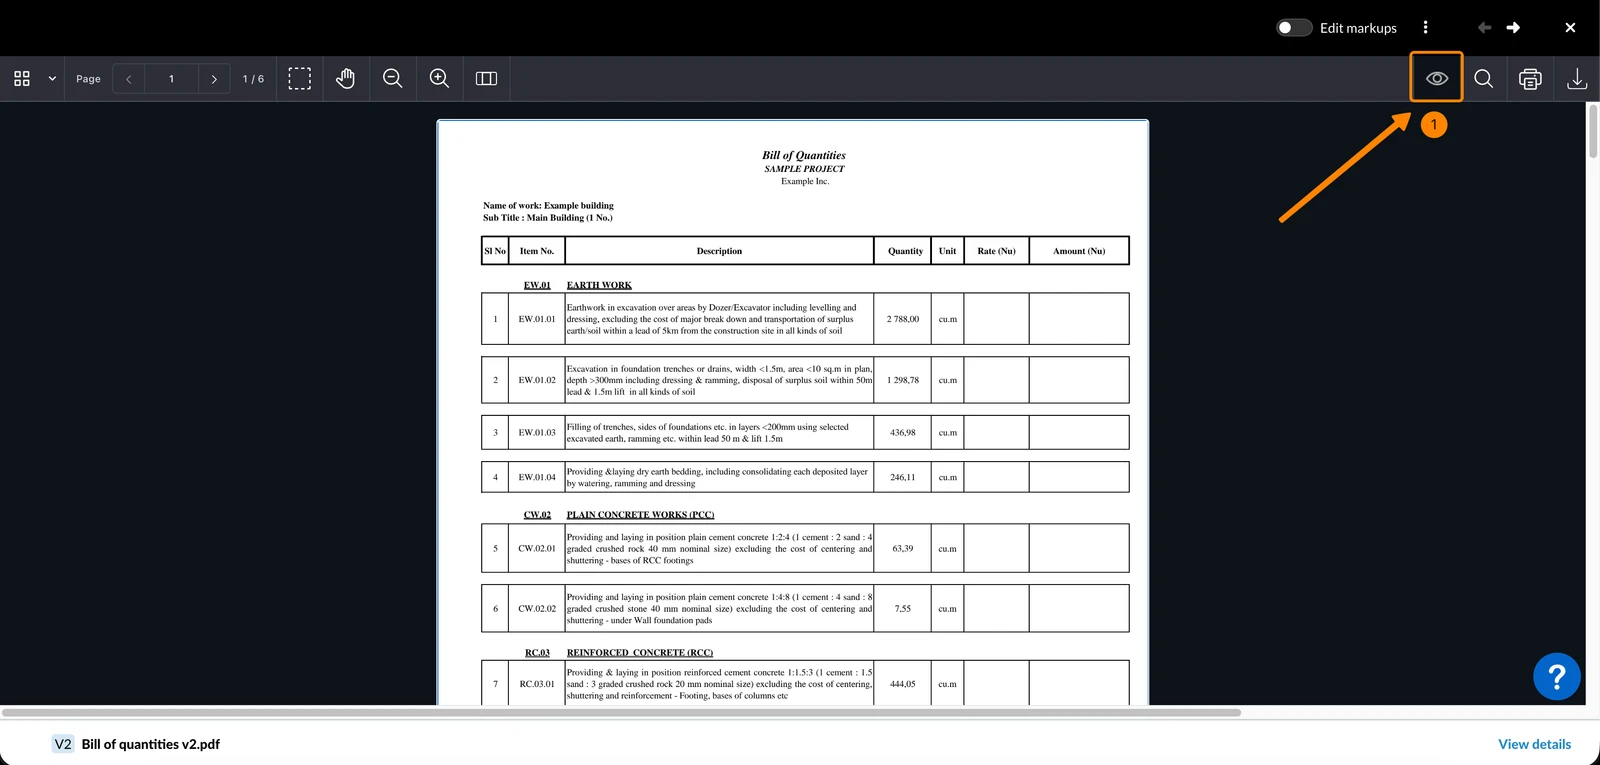
To show all hidden markups:
- Click the Show markups icon
Print & Download
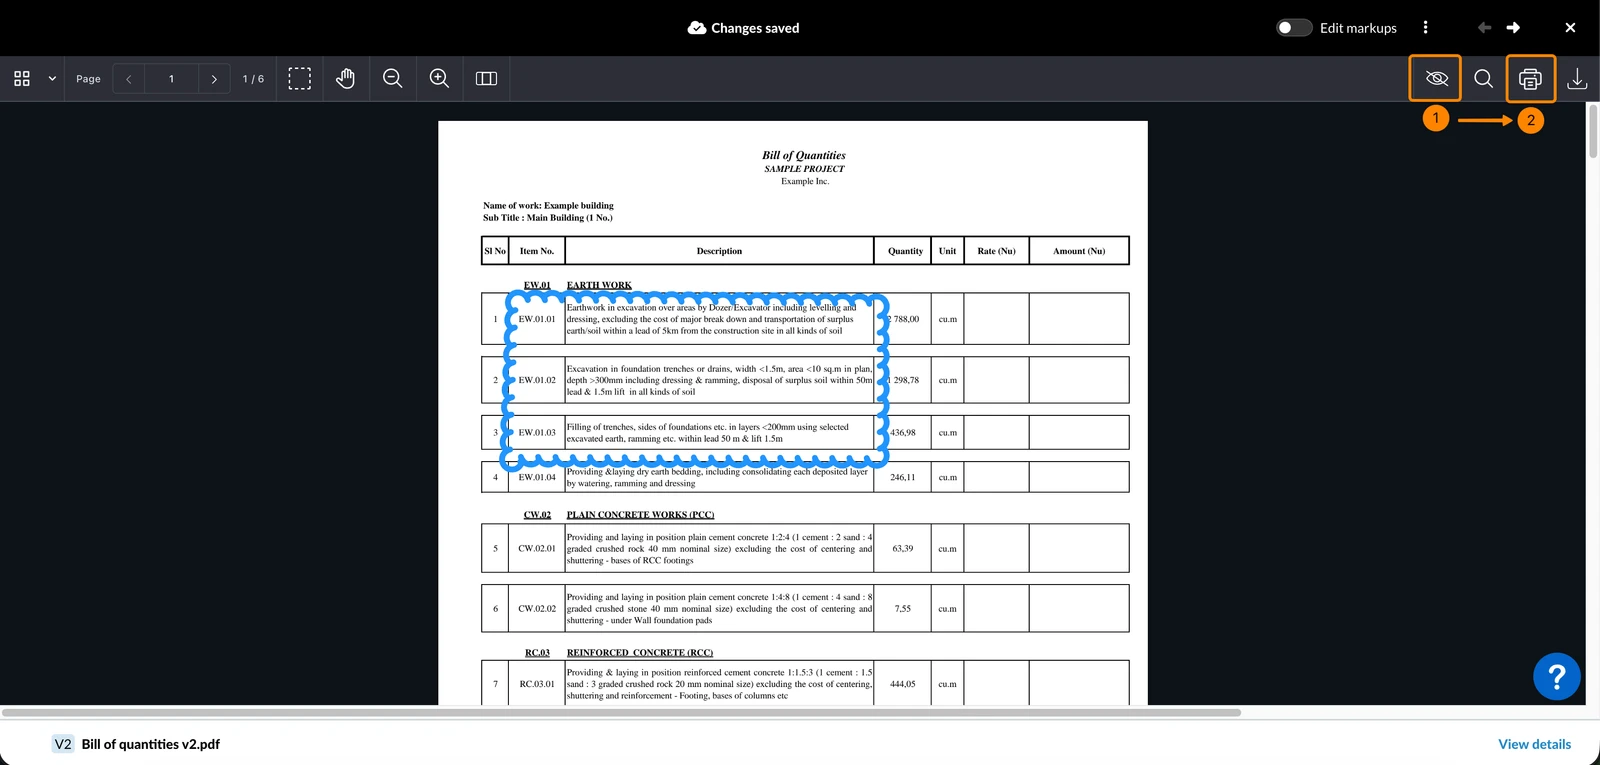
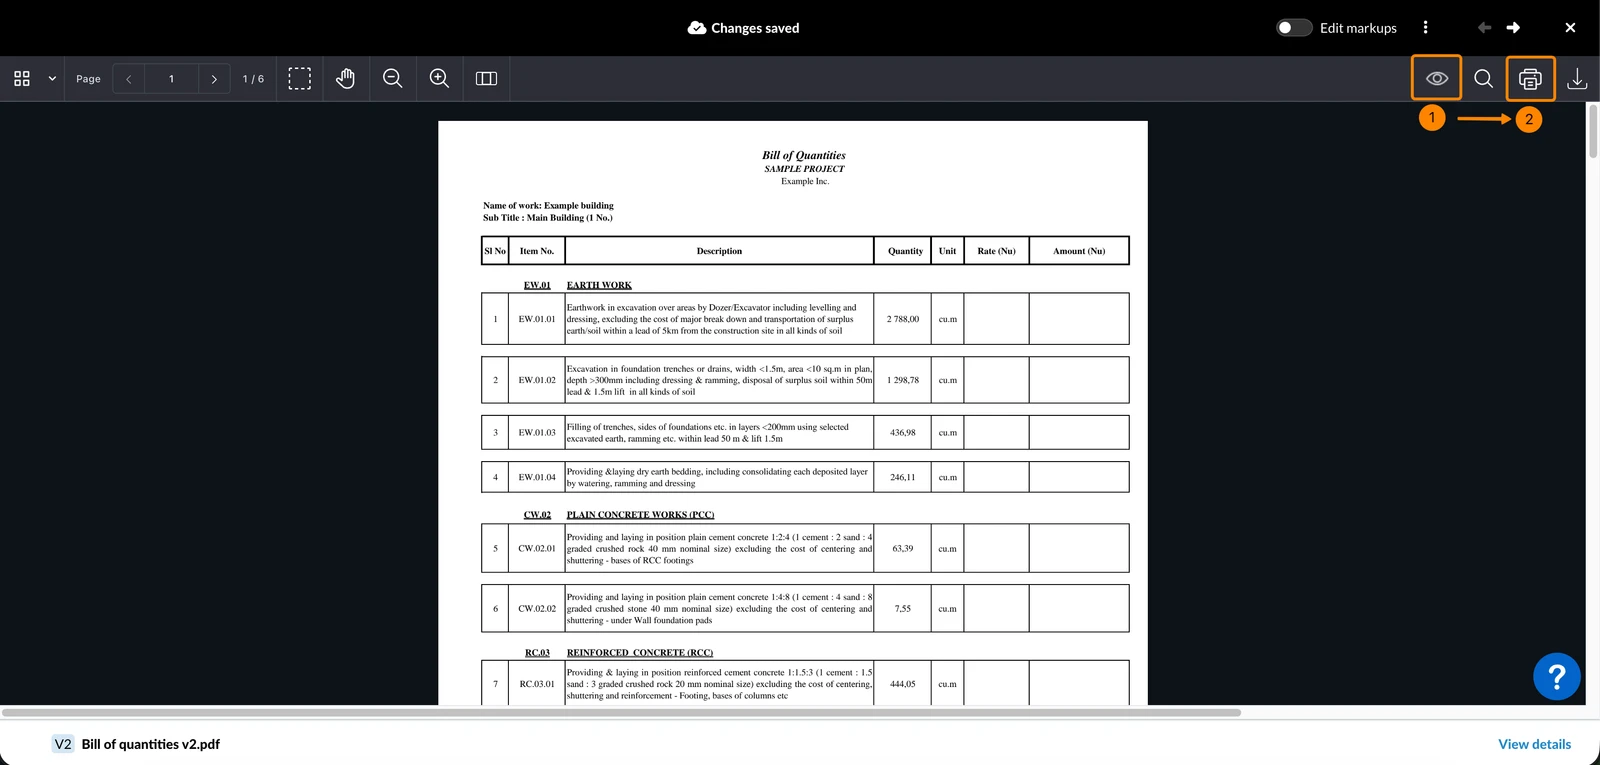
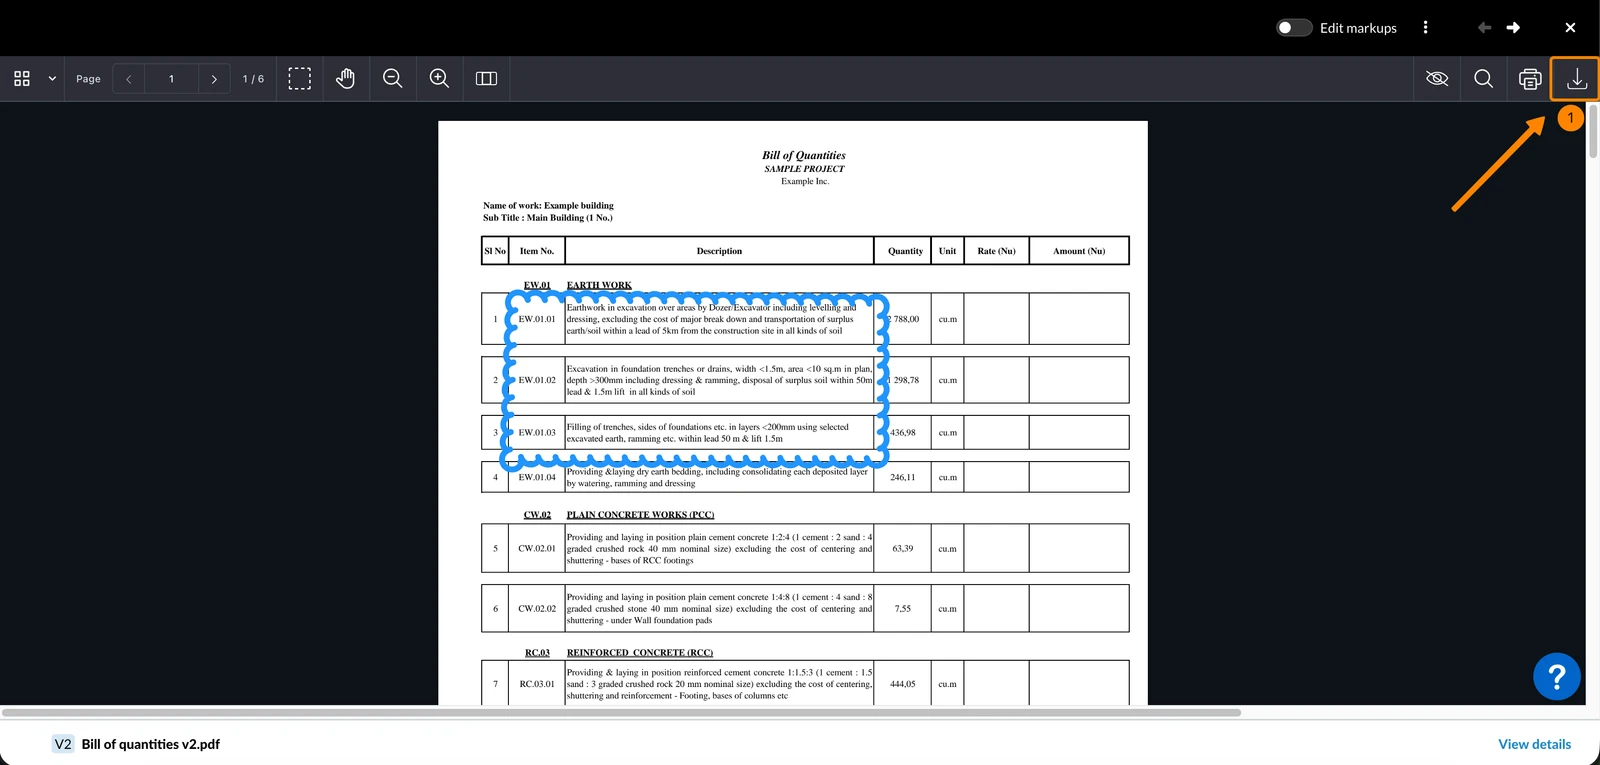
Markups are only included in the printed PDF if they are visible. When saving a PDF to your computer, export it to include markups or download it to exclude markups.
To print a PDF including markups:
- Click the Show markups icon
- Click the Print icon
To print a PDF excluding markups:
- Click the Hide markups icon
- Click the Print icon
To export a PDF including markups:
- Click the Export PDF icon
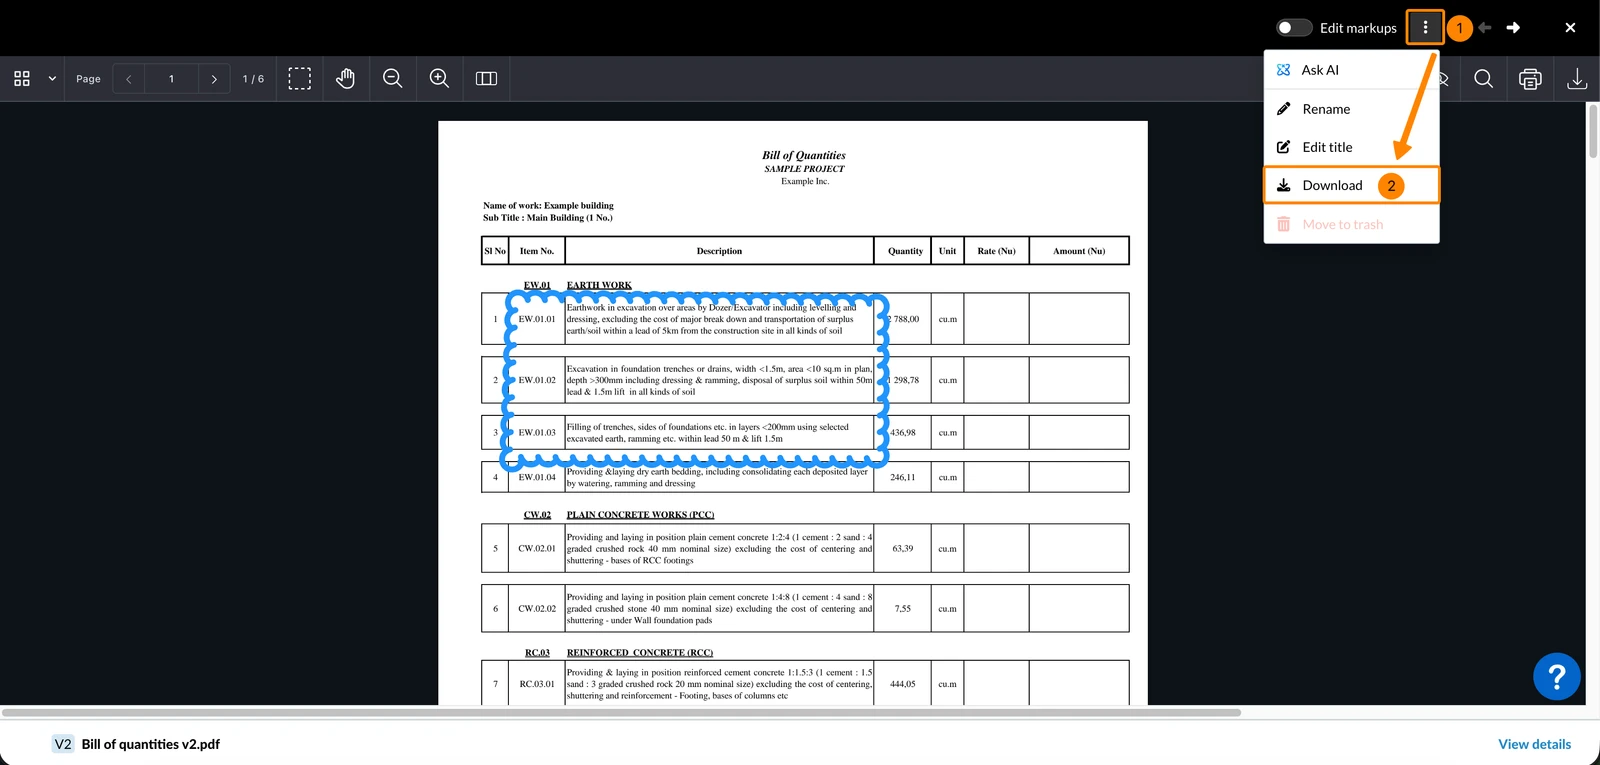
To download a PDF without markups:
- Open the More menu
- Click Download
Find PDFs with Markups
Find PDFs with markups by filtering. Read more in View & Find Files/Folders > Filter.
You can recognise whether a PDF contains markups without opening it:
- By the icon and time stamp in the Last modified markups column in the file's list view:
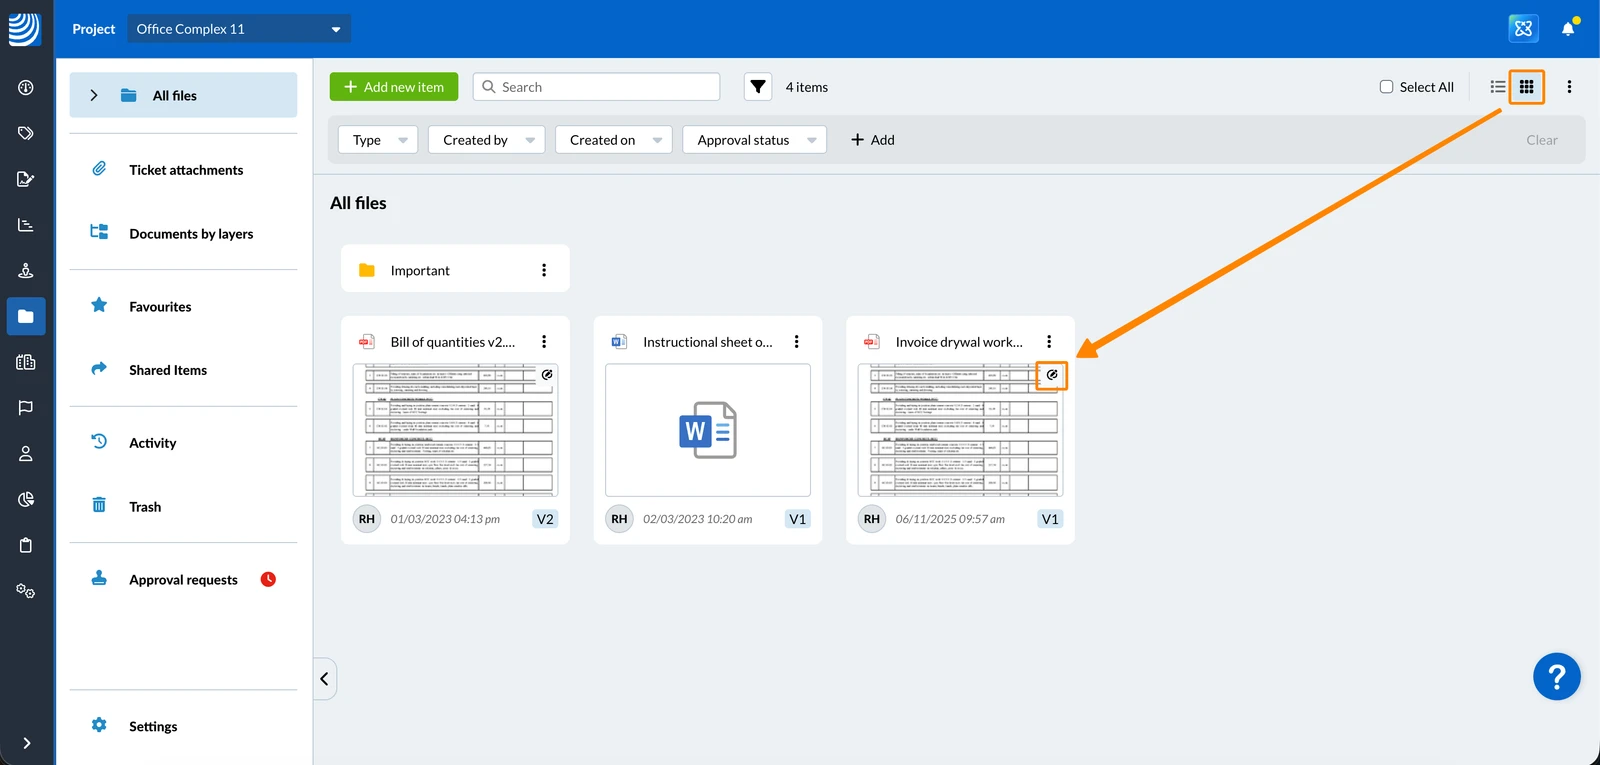
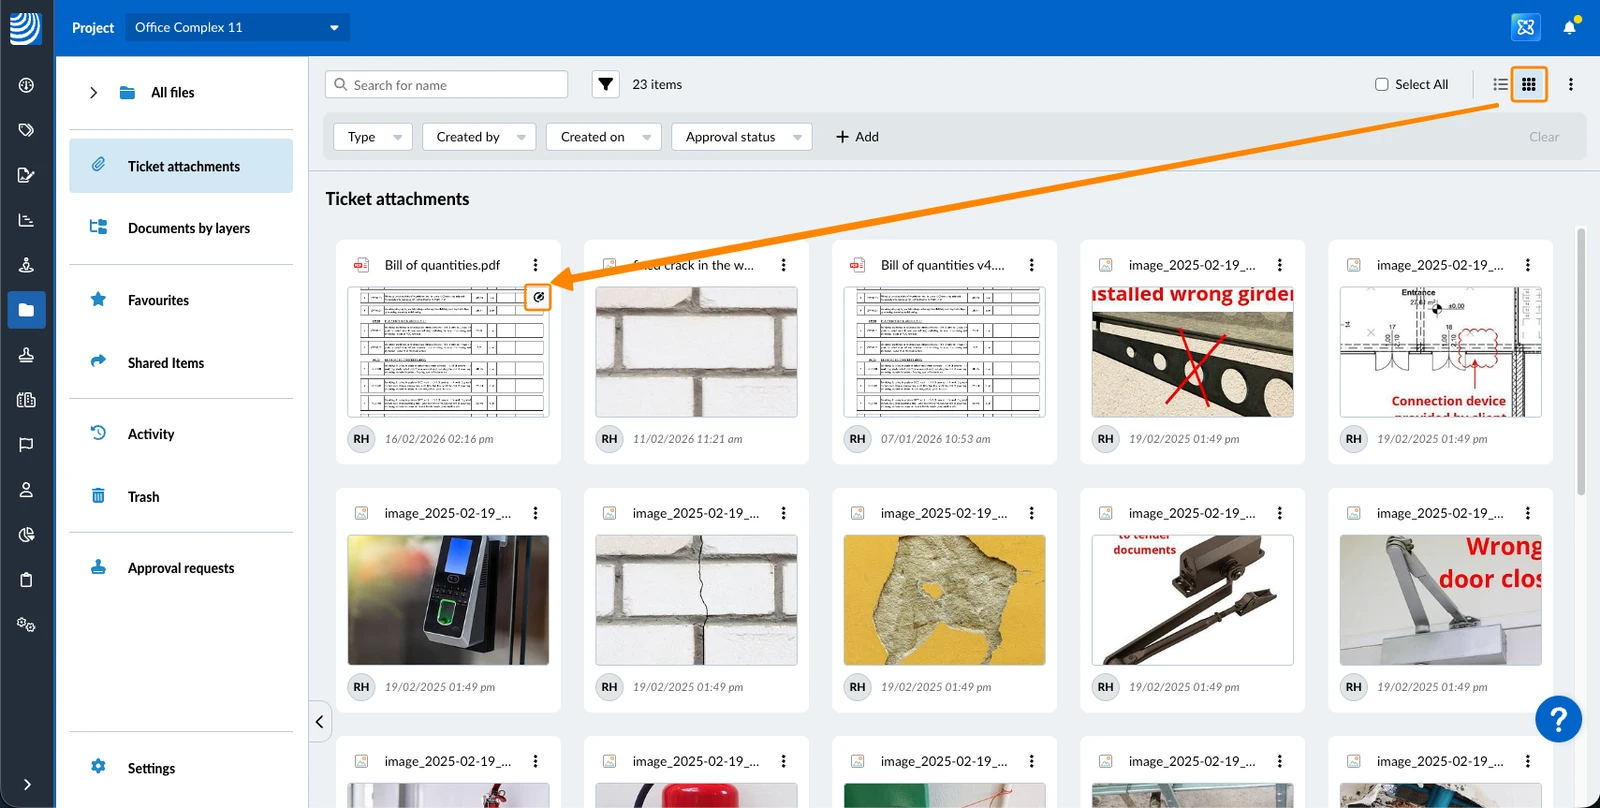
- By the icon on the thumbnail in the file's grid view:
- By the icon on the thumbnail in the ticket attachment grid view:
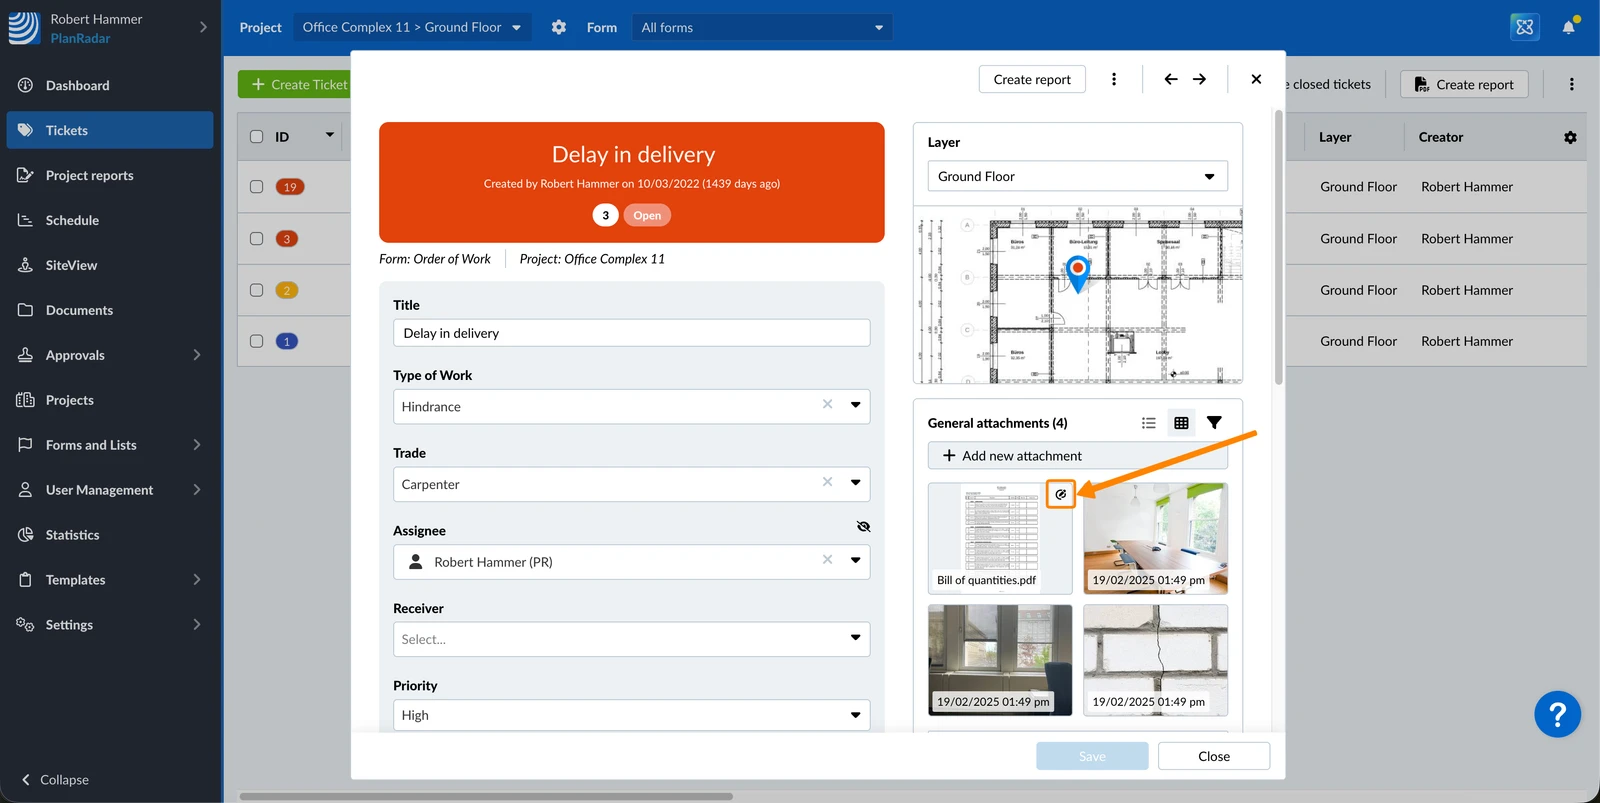
- By the icon on the thumbnail in any ticket attachment gallery:
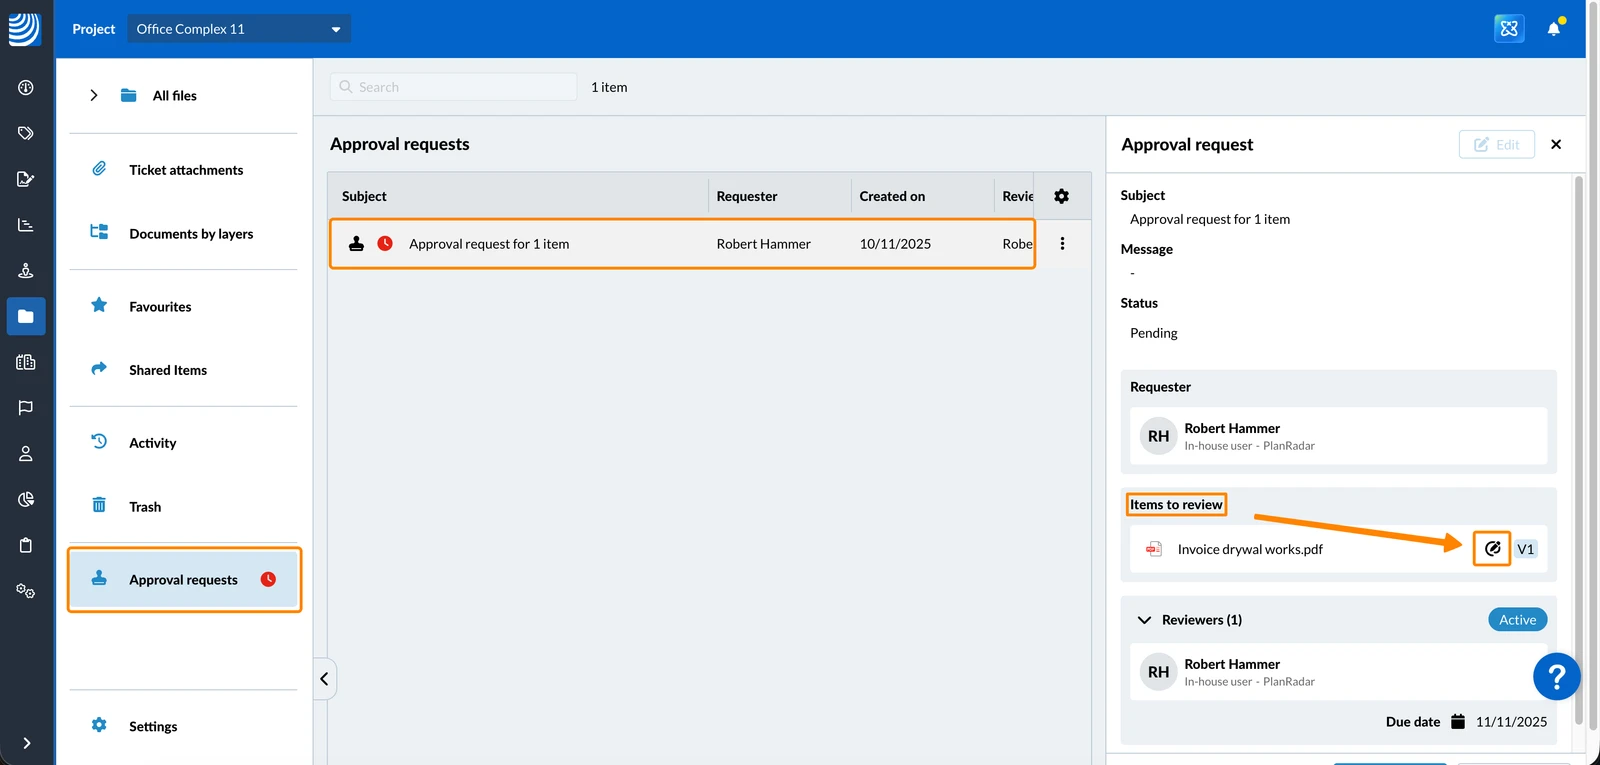
- By the icon in the file approval request details under Items to review:
Behaviour of markup modification info (Last modified markups timestamp, icon, filter, and activity log)
- The system intentionally waits up to a few minutes before updating the modification info to avoid unnecessary repeated updates when many markups are created in a short editing session. If the PDF viewer is closed using the close button, the update happens immediately. This behaviour does not affect the live collaboration experience when working on PDF markups.
- PDFs with markups that were uploaded before this feature's release in December 2025 will only be recognised as containing markups (e.g. in filters) after they have been opened at least once following the release.
Updated June 3, 2026