

 Deutsch
 Español
 Français
 Hrvatski
 Italiano
 Polski
 Português (BR)
Update Plans
Overview
Upload a new version of a plan to a layer that already contains a plan. Also see Upload Plans to Layers.
The latest version of the plan automatically becomes the current version and is displayed whenever the layer is selected. Old plan versions can still be viewed as described in View & Compare Plan Versions in the Webapp.
Access & Permissions
How to access
To manage the layers of a project:
- Click Projects
- Click on the project to open it
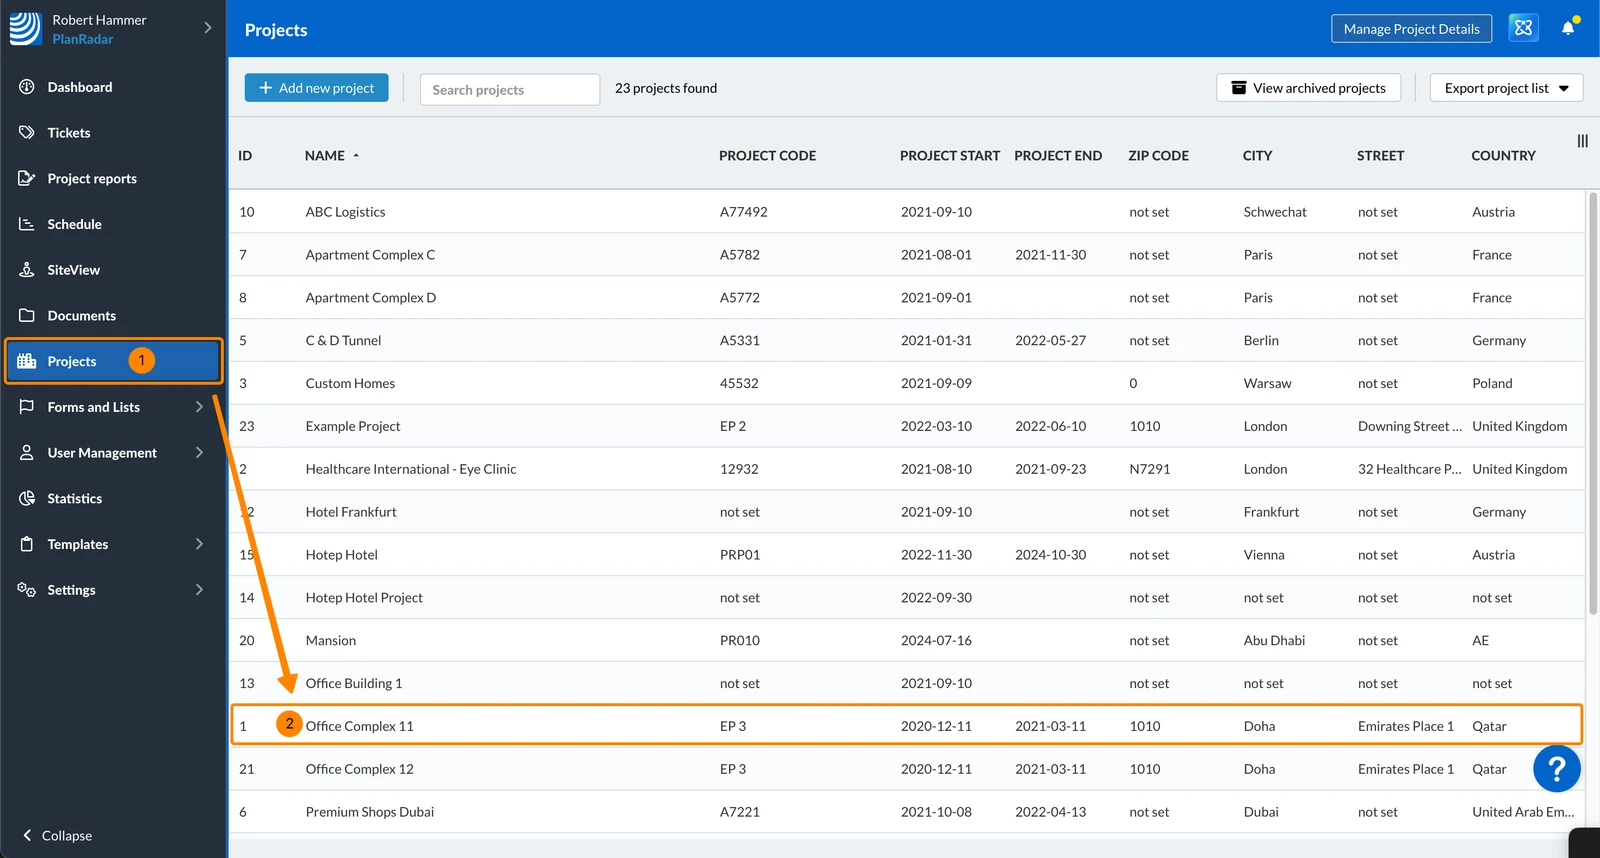
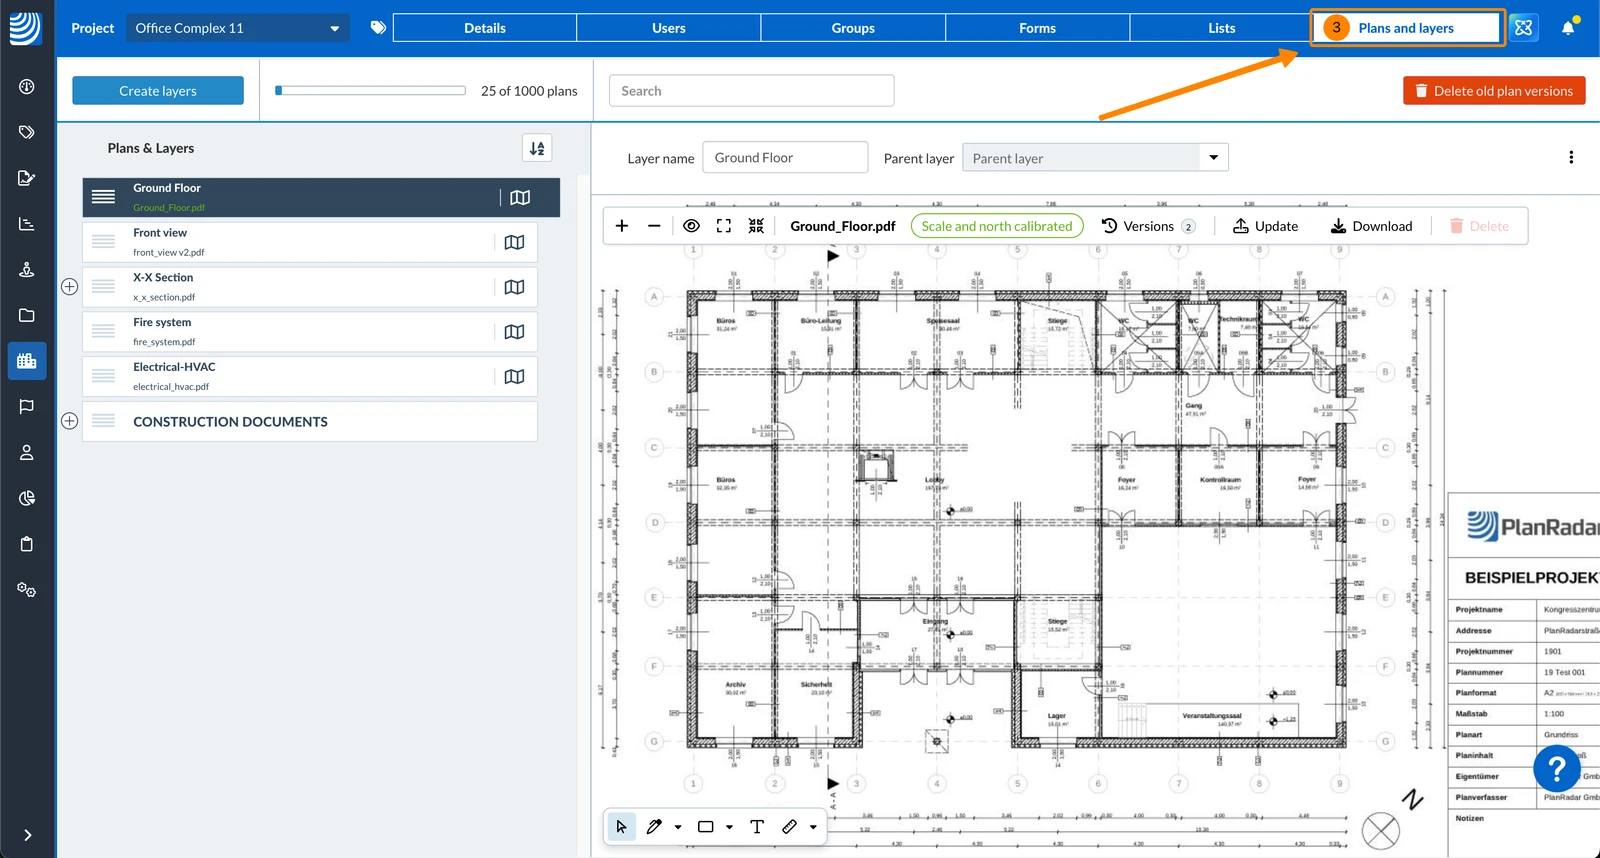
- Click Plans and layers
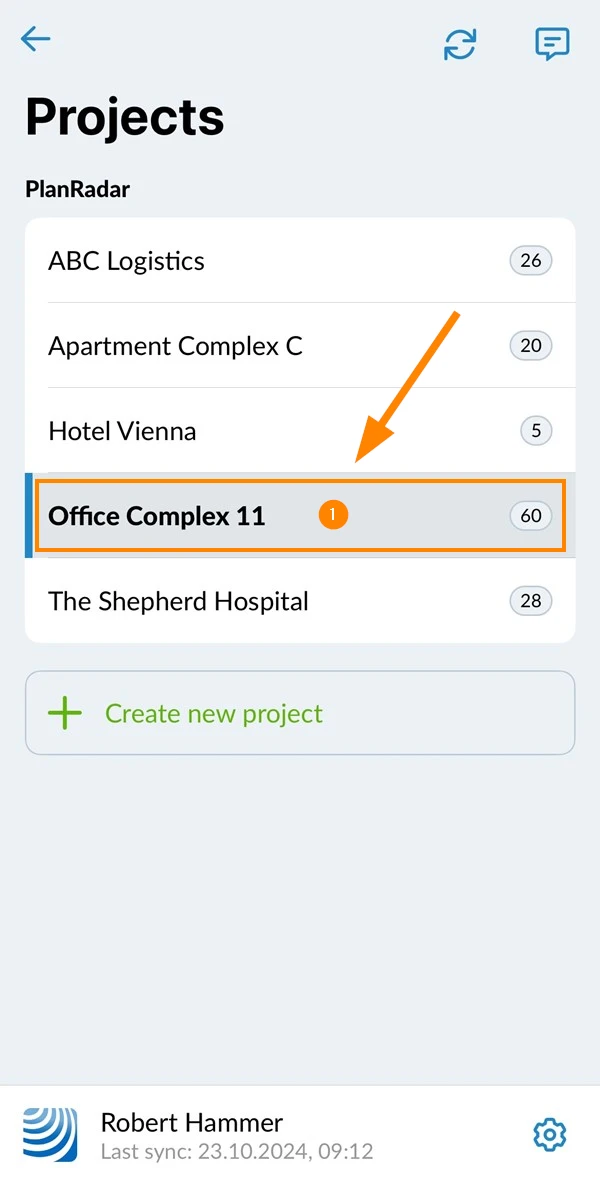
- Select the project e.g. Office Complex 11
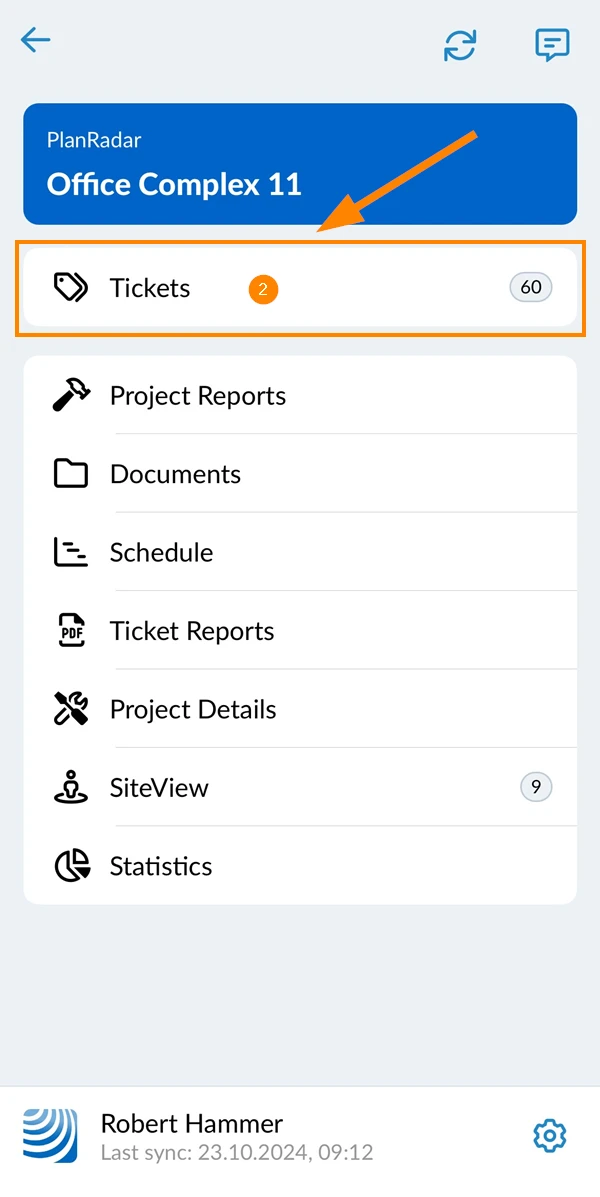
- Tap Tickets
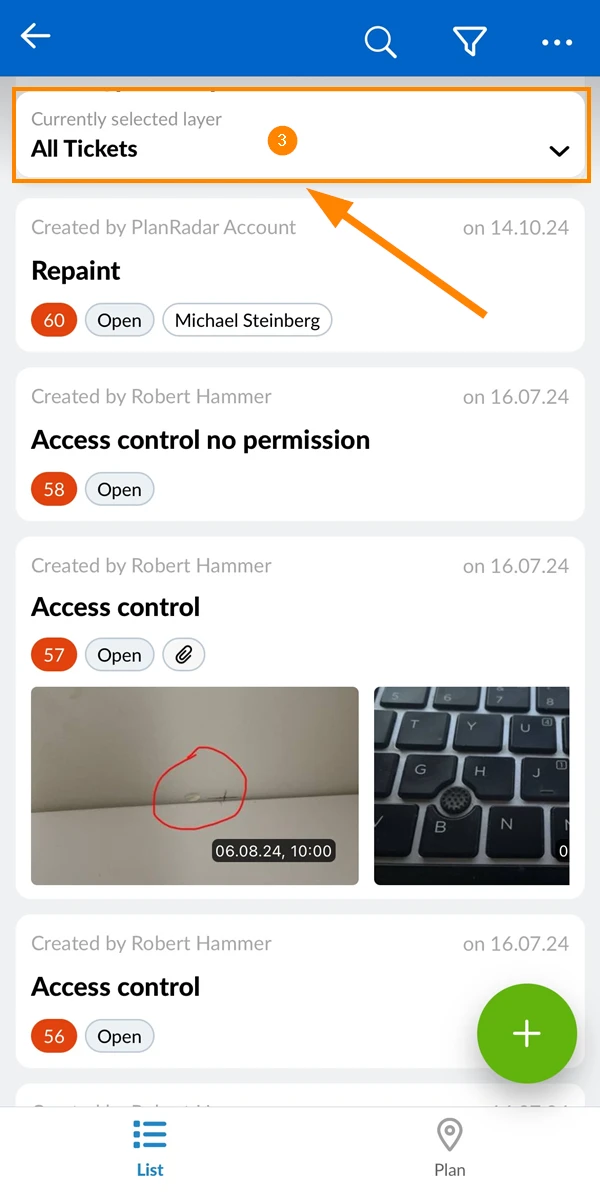
- Open the layer selector
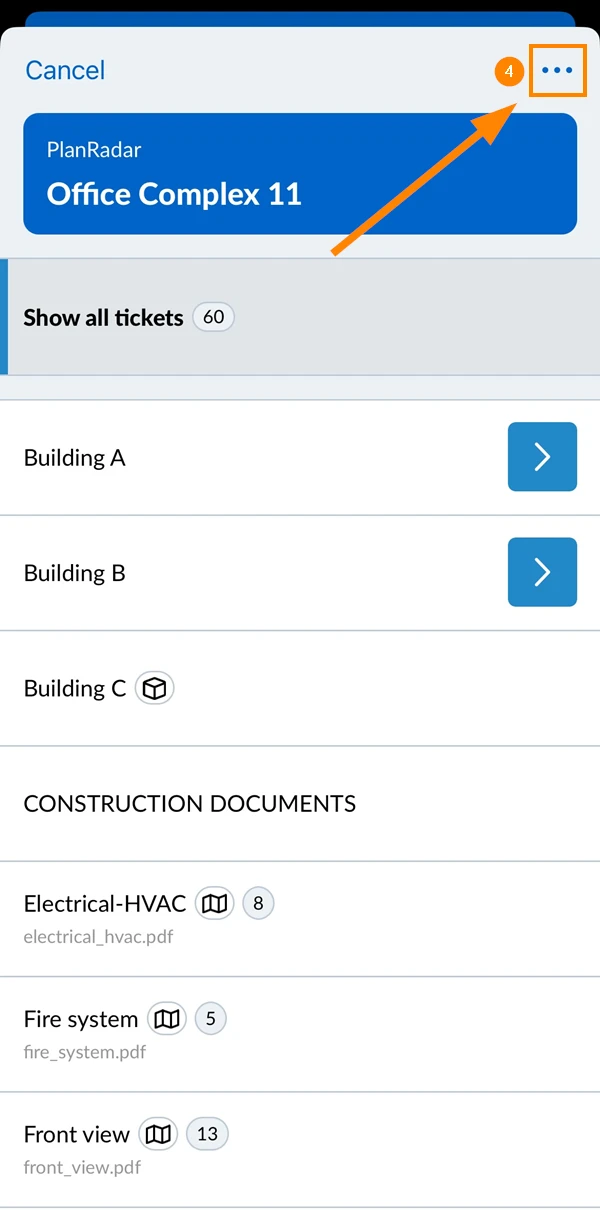
- Open the More menu
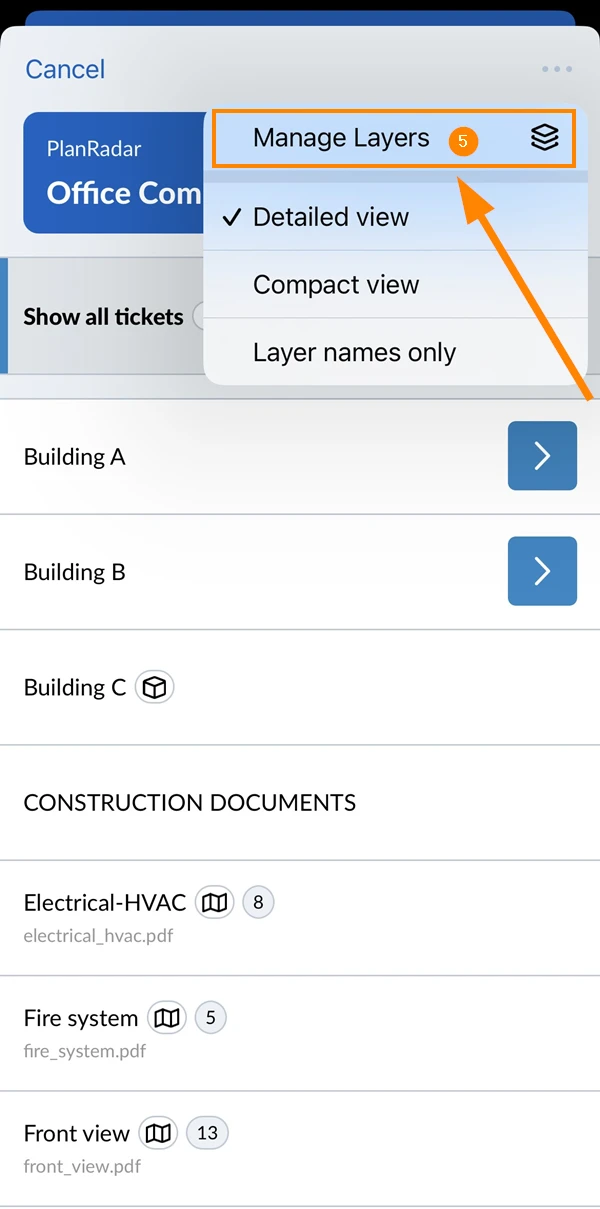
- Tap Manage Layers
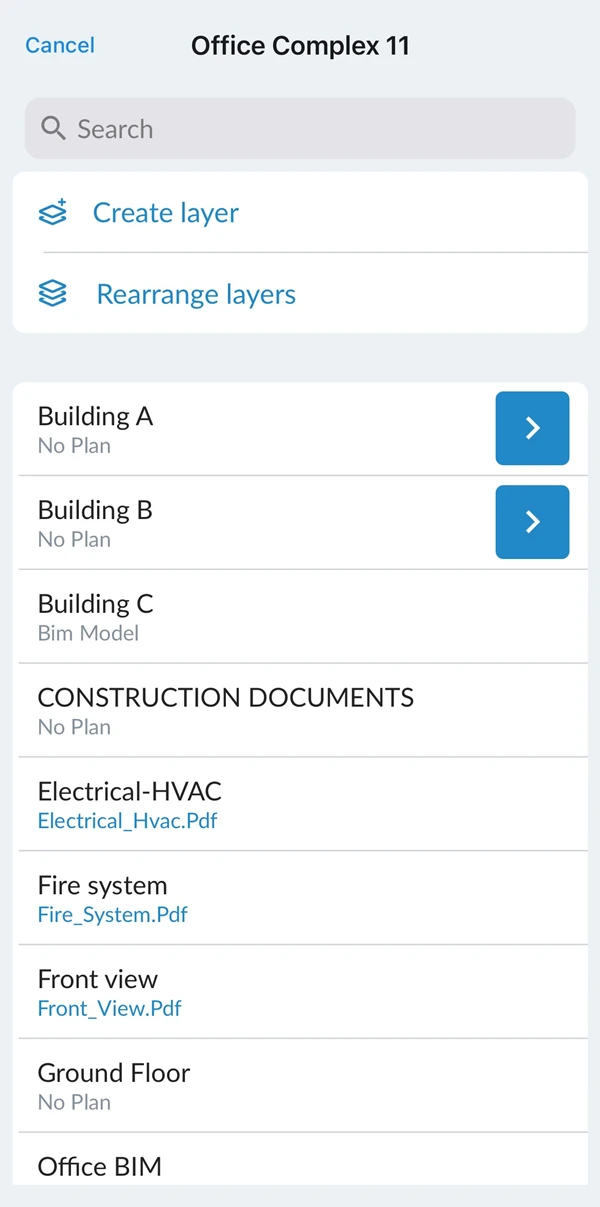
- See the manage layers screen
Upload a New Plan Version
If a layer already contains a plan, you can update it with a newer version.
To upload a new plan version:
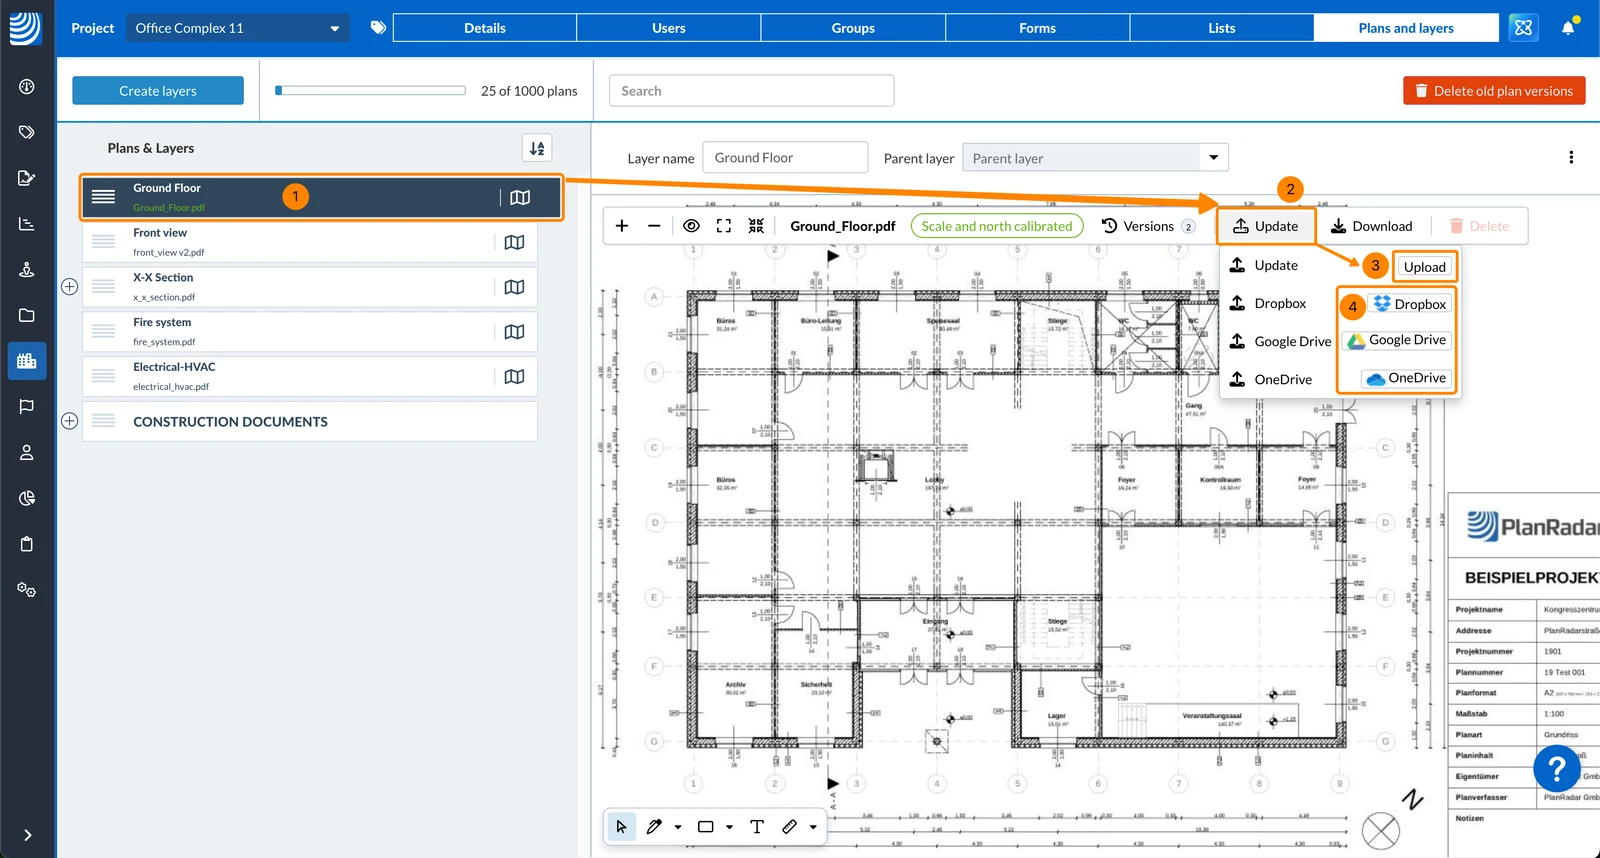
- Click on the layer/plan e.g. Ground Floor
- Click Update
- Click Upload and select the plan file from your computer.
- OR upload the plan file from a cloud storage service.
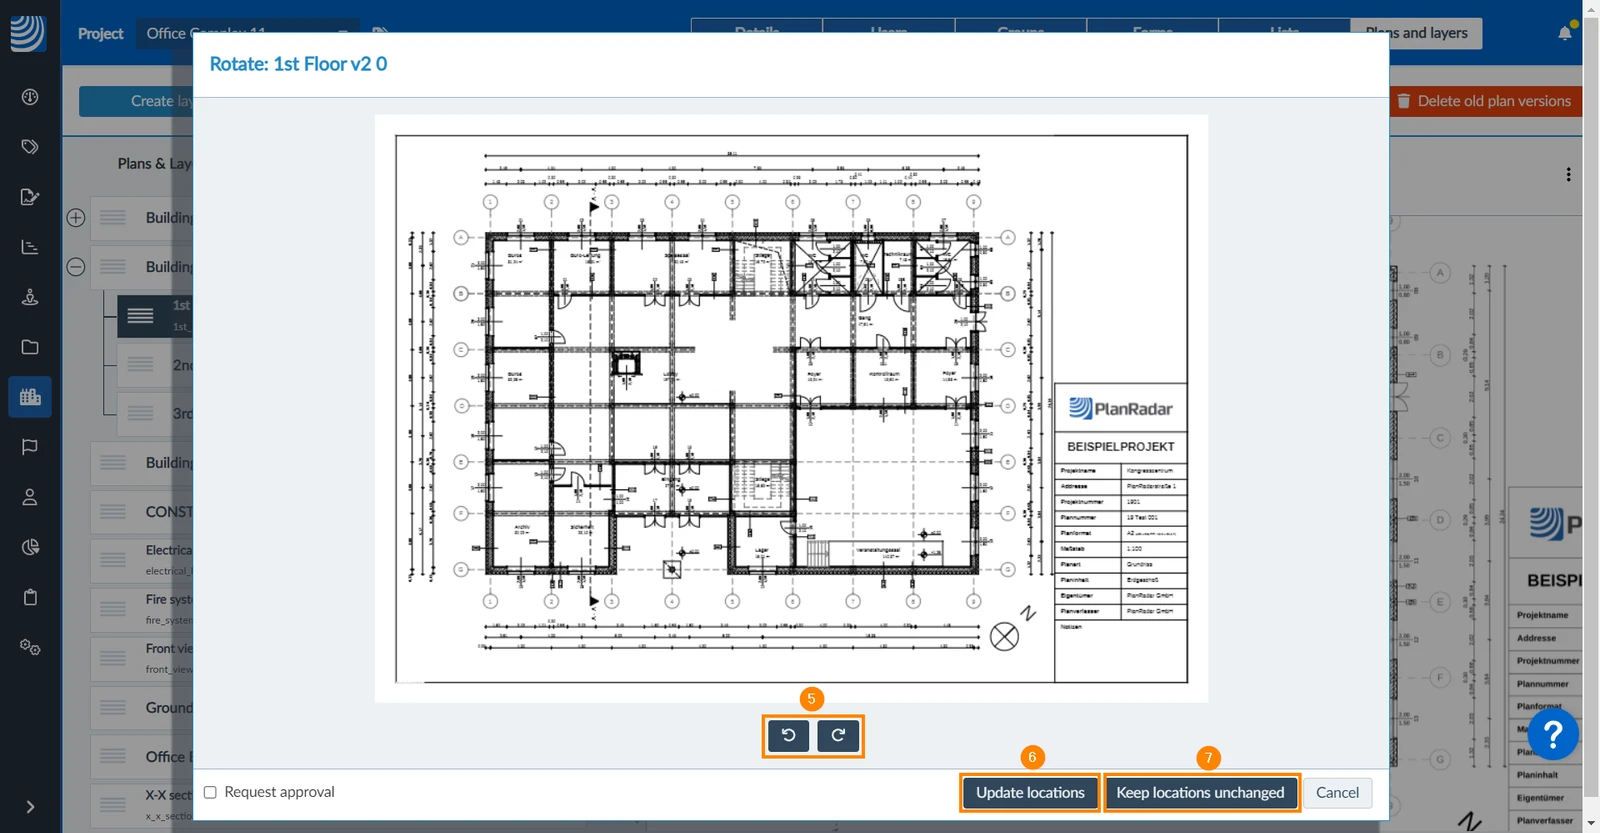
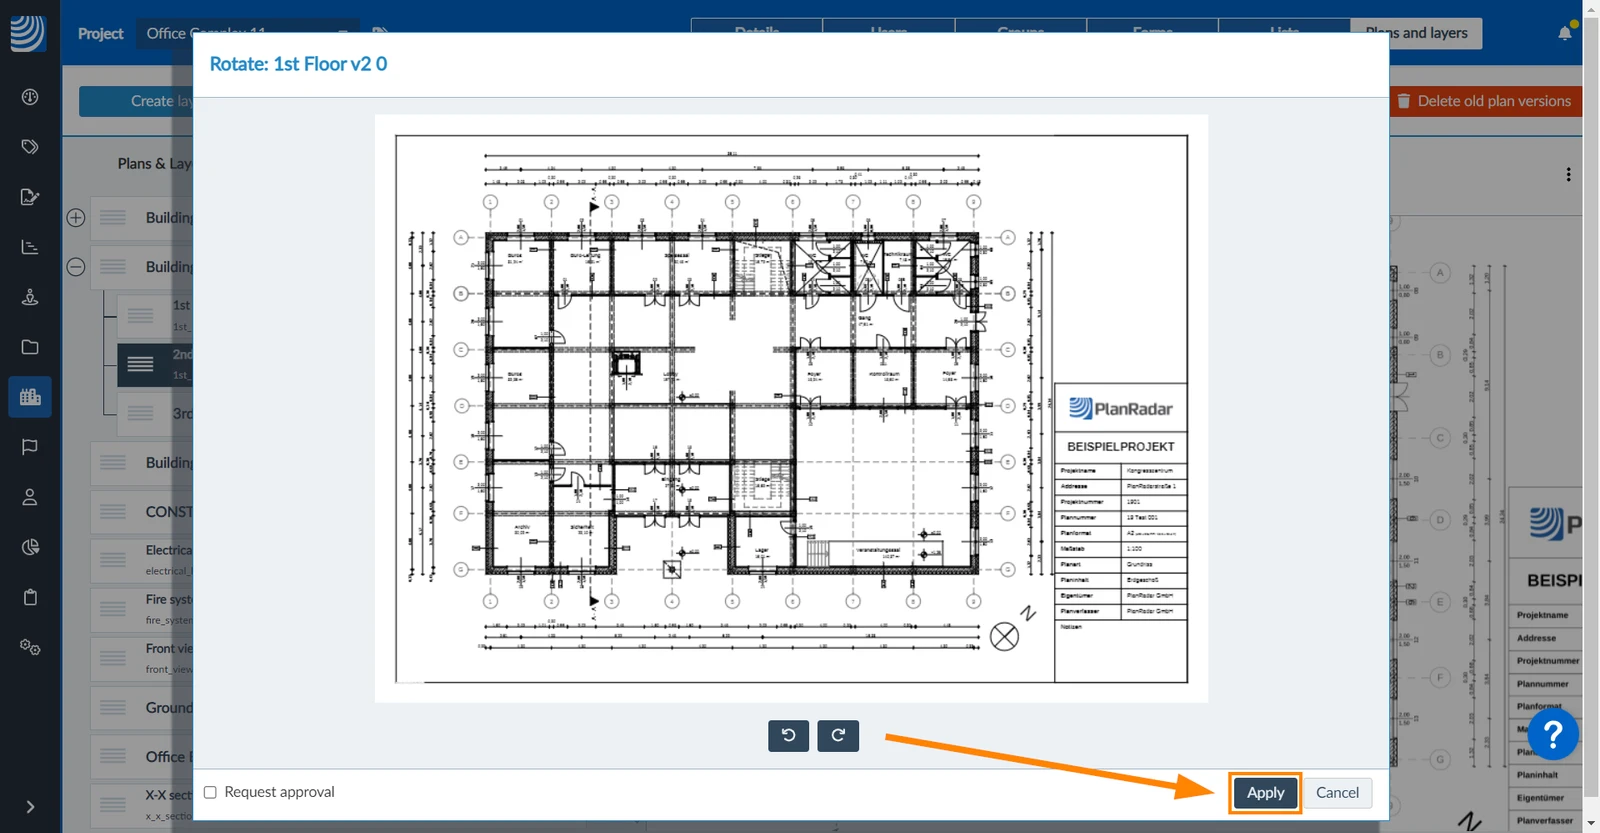
- Optional: Click the rotation buttons to rotate 90° clockwise or counter-clockwise.
- Recommended: Click Update locations.
- OR (not recommended): Click Keep locations unchanged to skip the following steps (only if you are absolutely sure that the plan has not changed in position or scale and tickets or SiteView runs won't be affected).
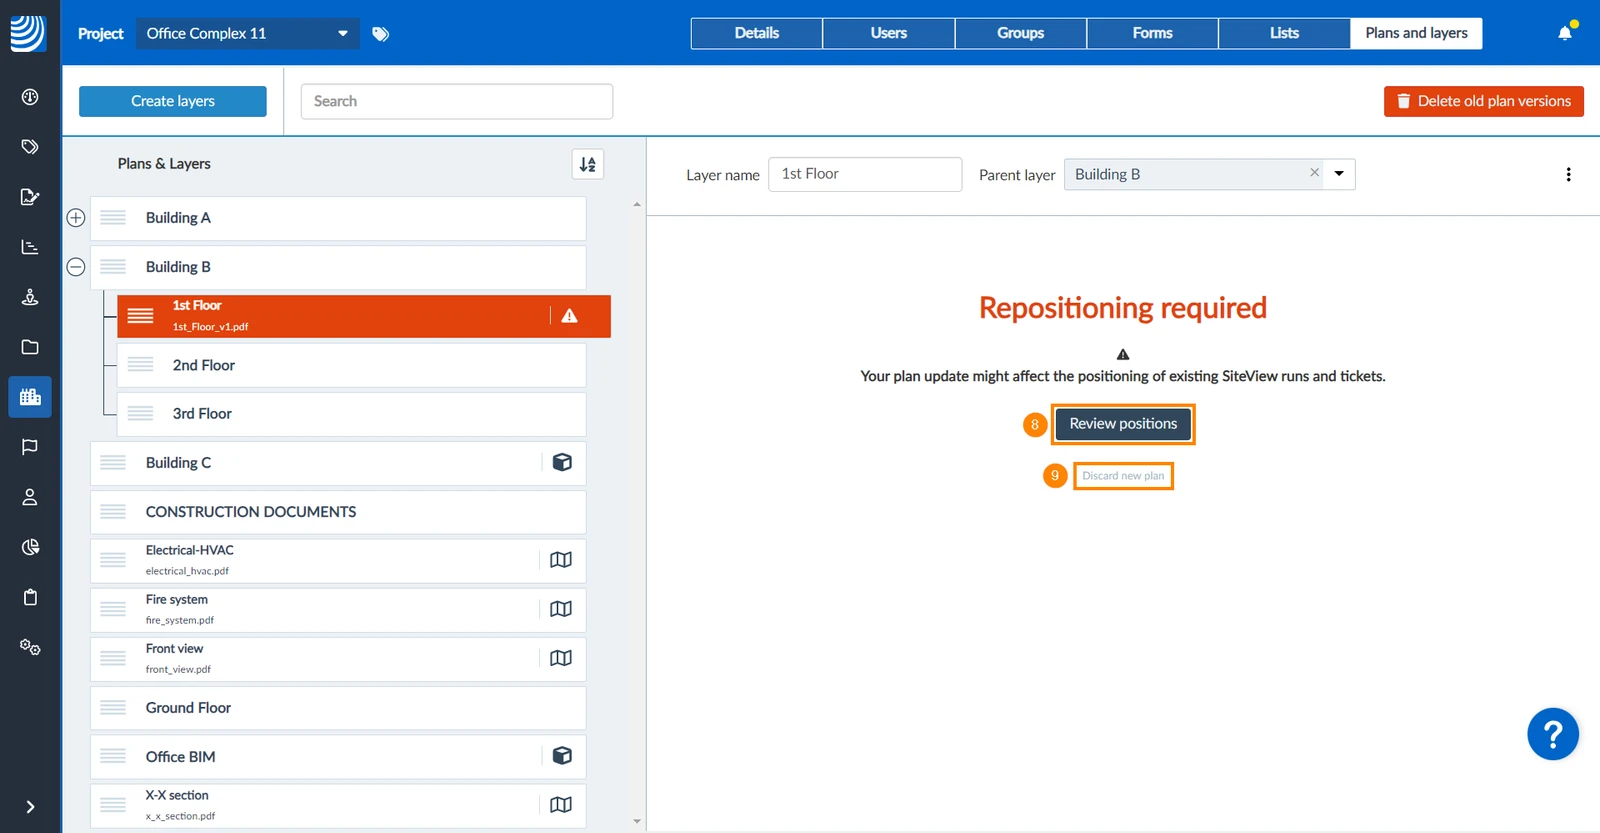
- Click Review positions
- OR Click Discard new plan
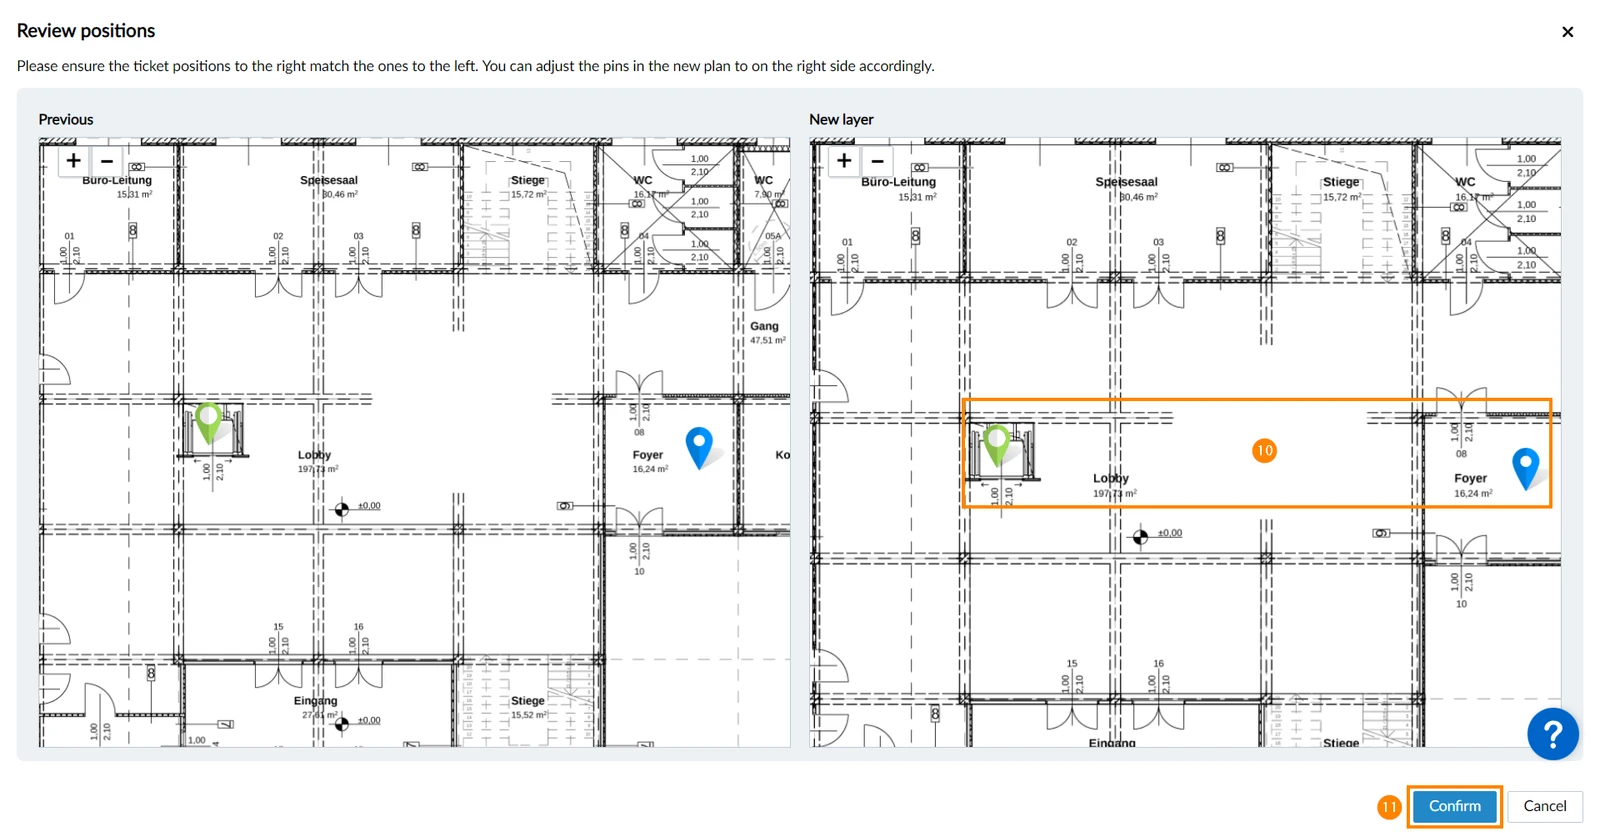
- If needed, move the pins on the right hand side to match the position on the left hand side.
- Click Confirm
If the layer doesn't contain any tickets with a plan position or SiteView runs, there is only the Apply button instead of the Update/Keep locations buttons:
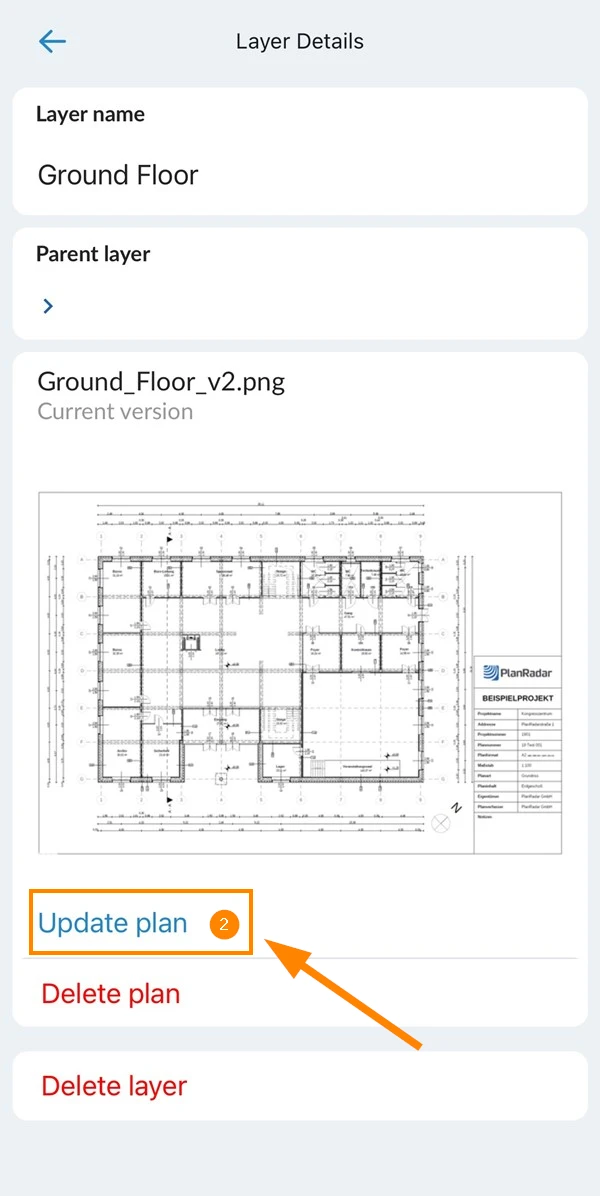
- Navigate to the layer and view the layer details as described in Manage Layers of a Project > Navigate the Layer Hierarchy.
- Tap Update plan
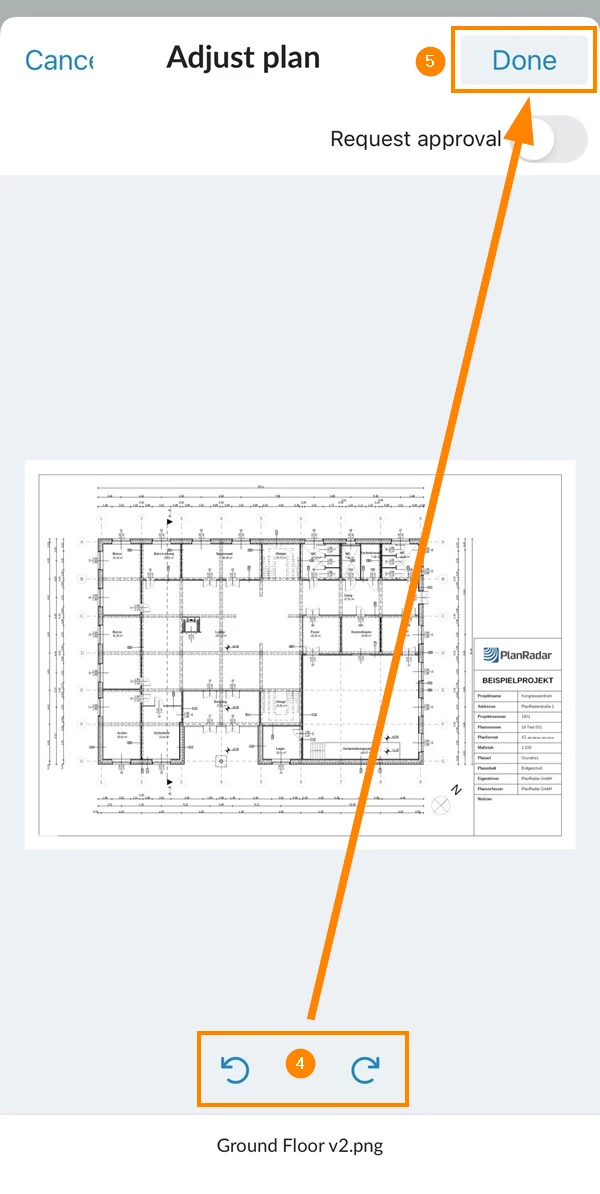
- Select the plan file
- Optional: Tap the rotation buttons to rotate 90° clockwise or counter-clockwise.
- Tap Done
Updated June 19, 2026