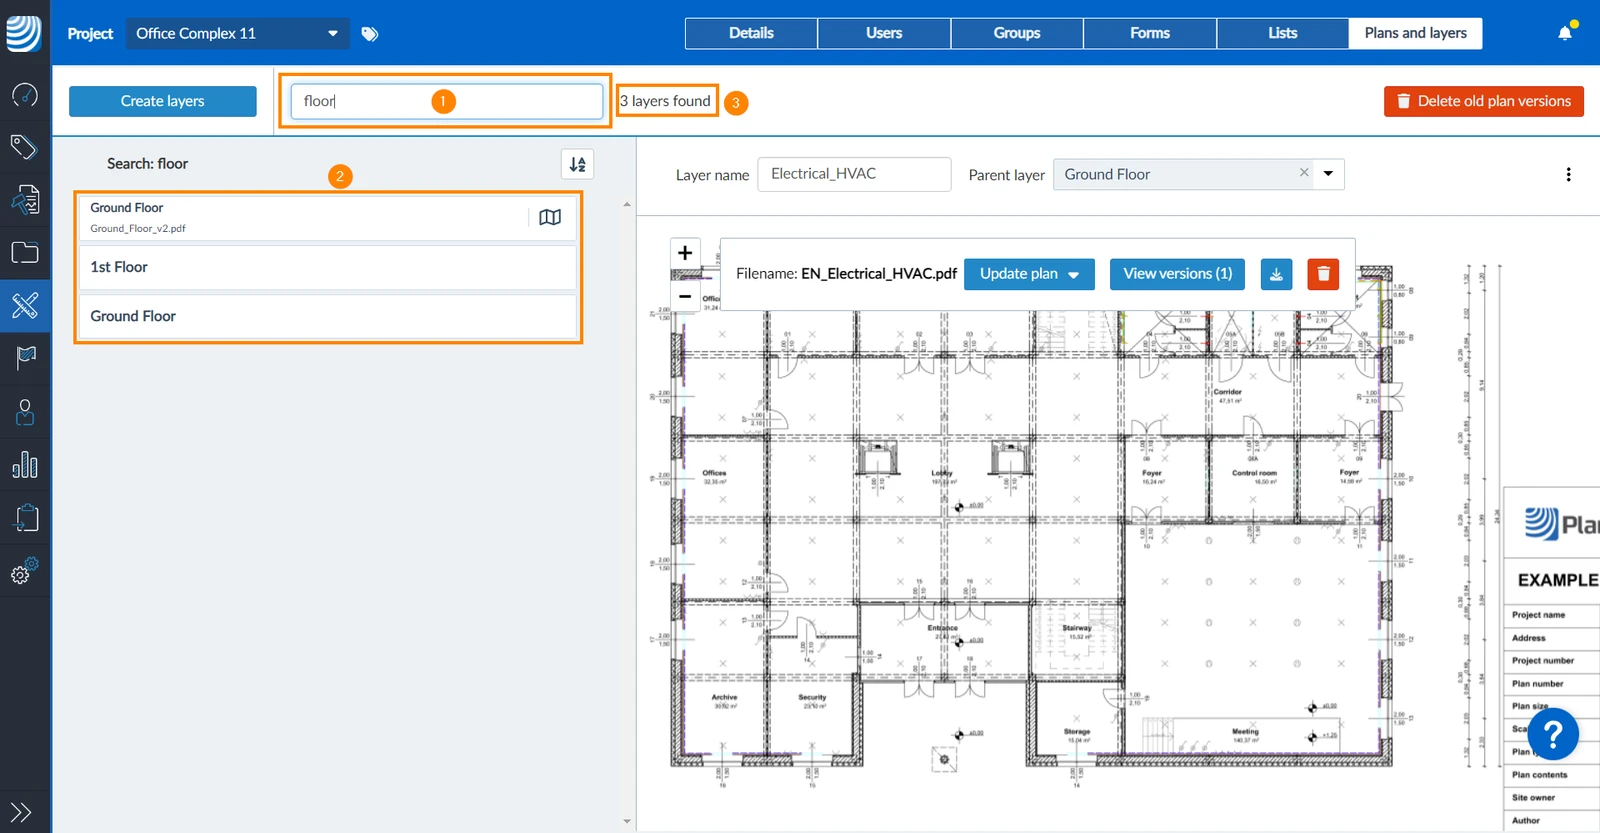
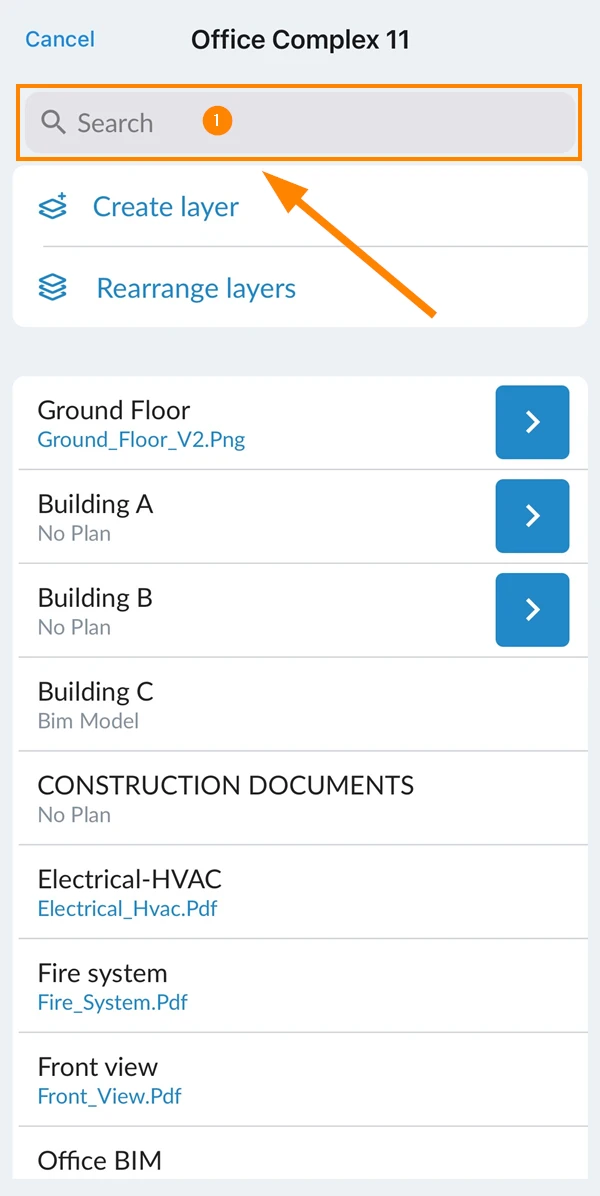
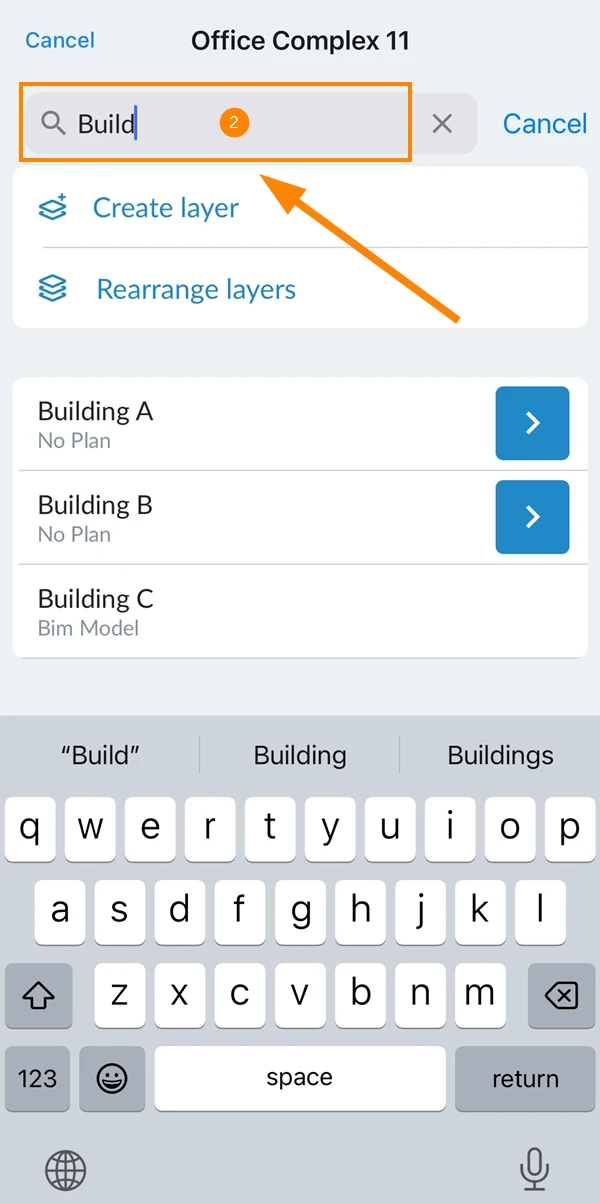
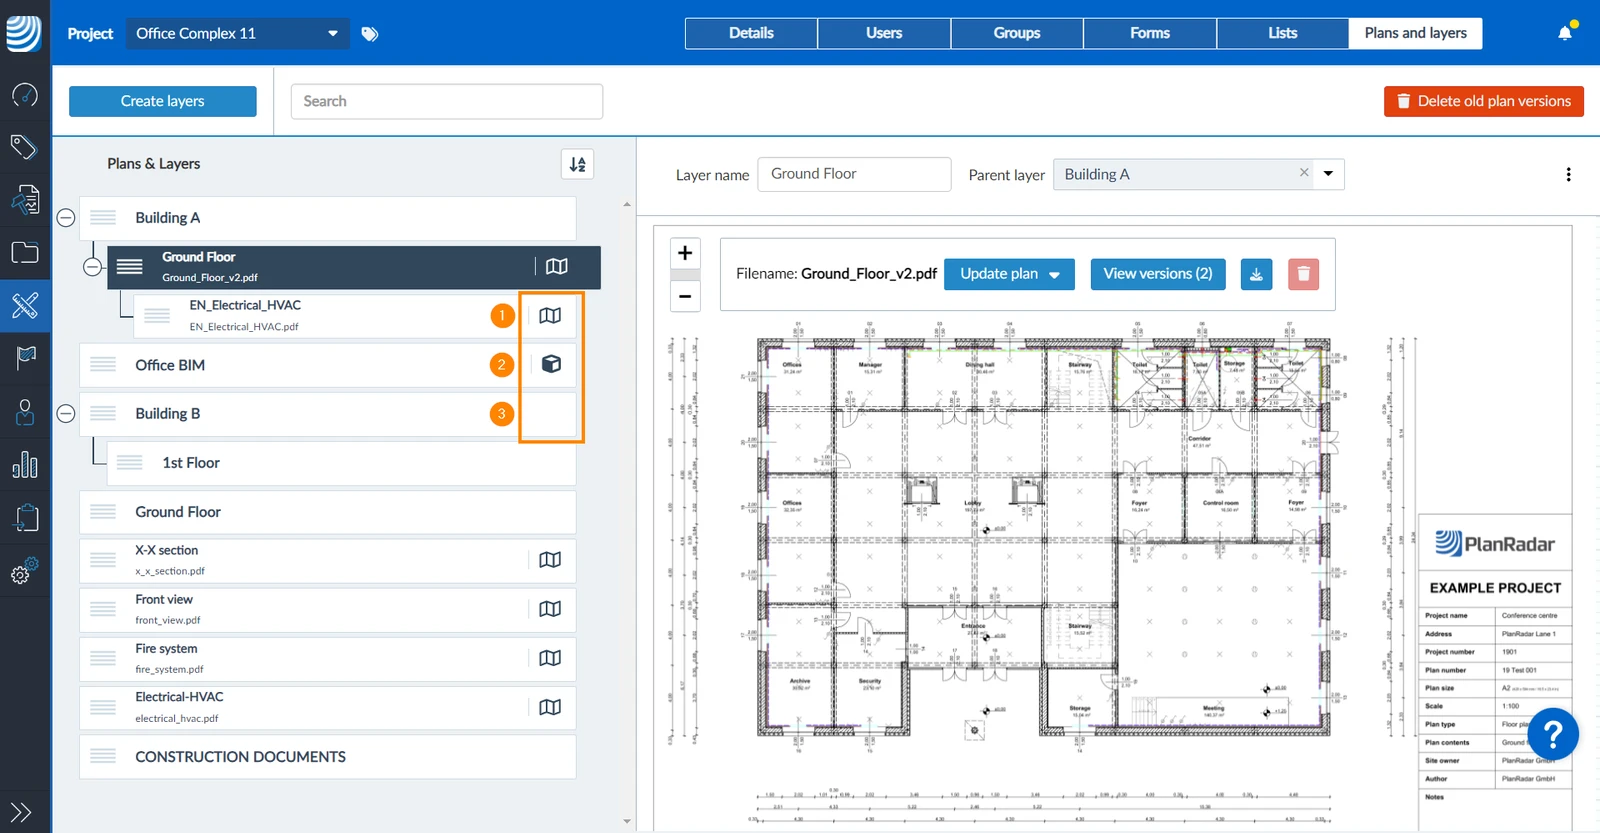
Each project requires at least one layer to organise all your tickets in PlanRadar. You can create a hierarchy of layers to organise your project into buildings, floors, type of work, and other aspects.
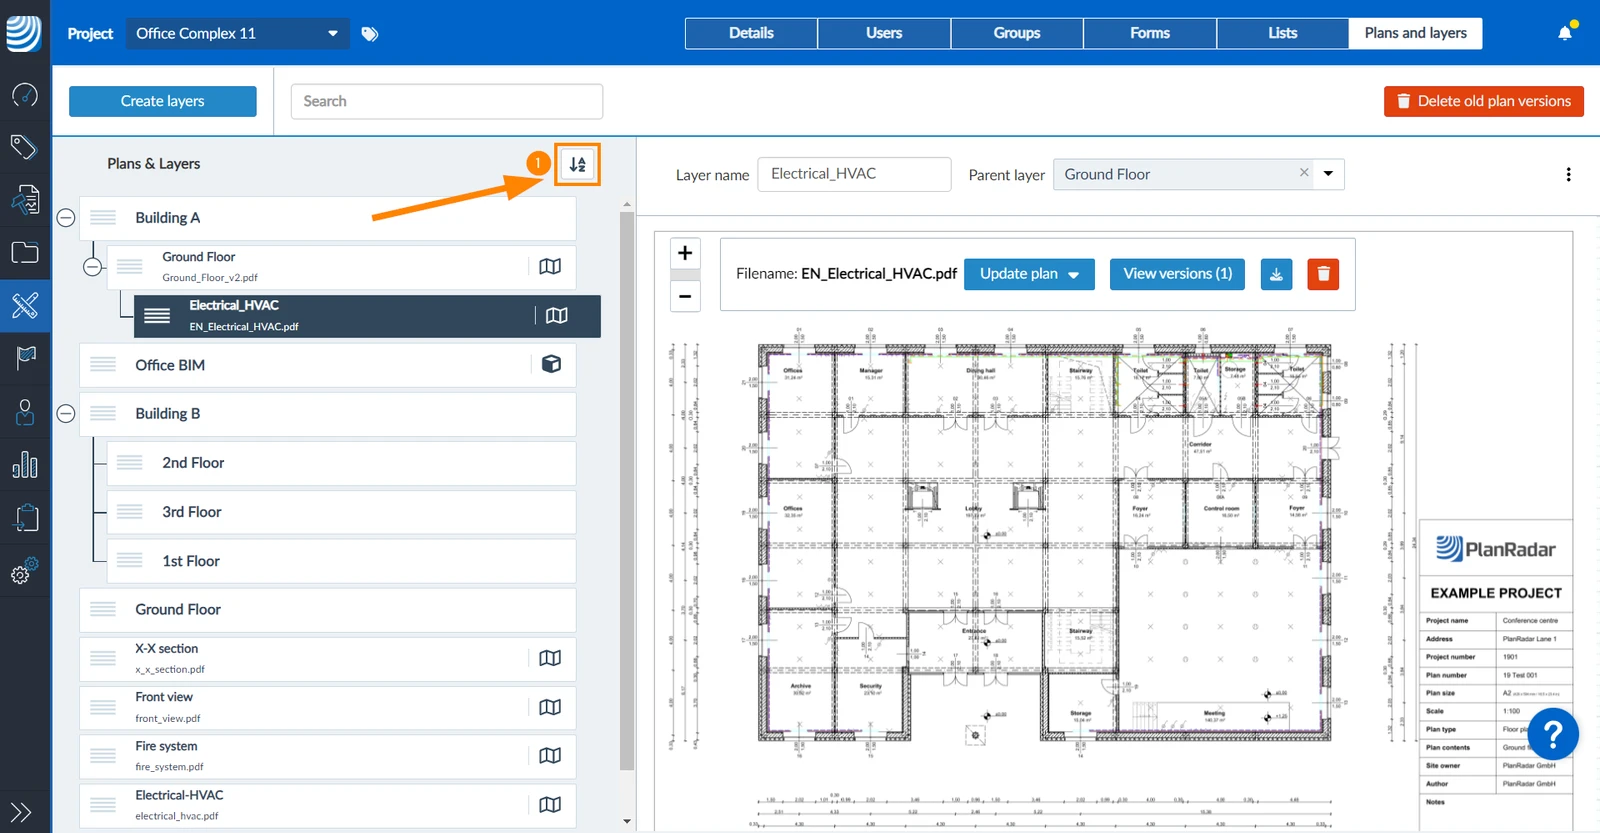
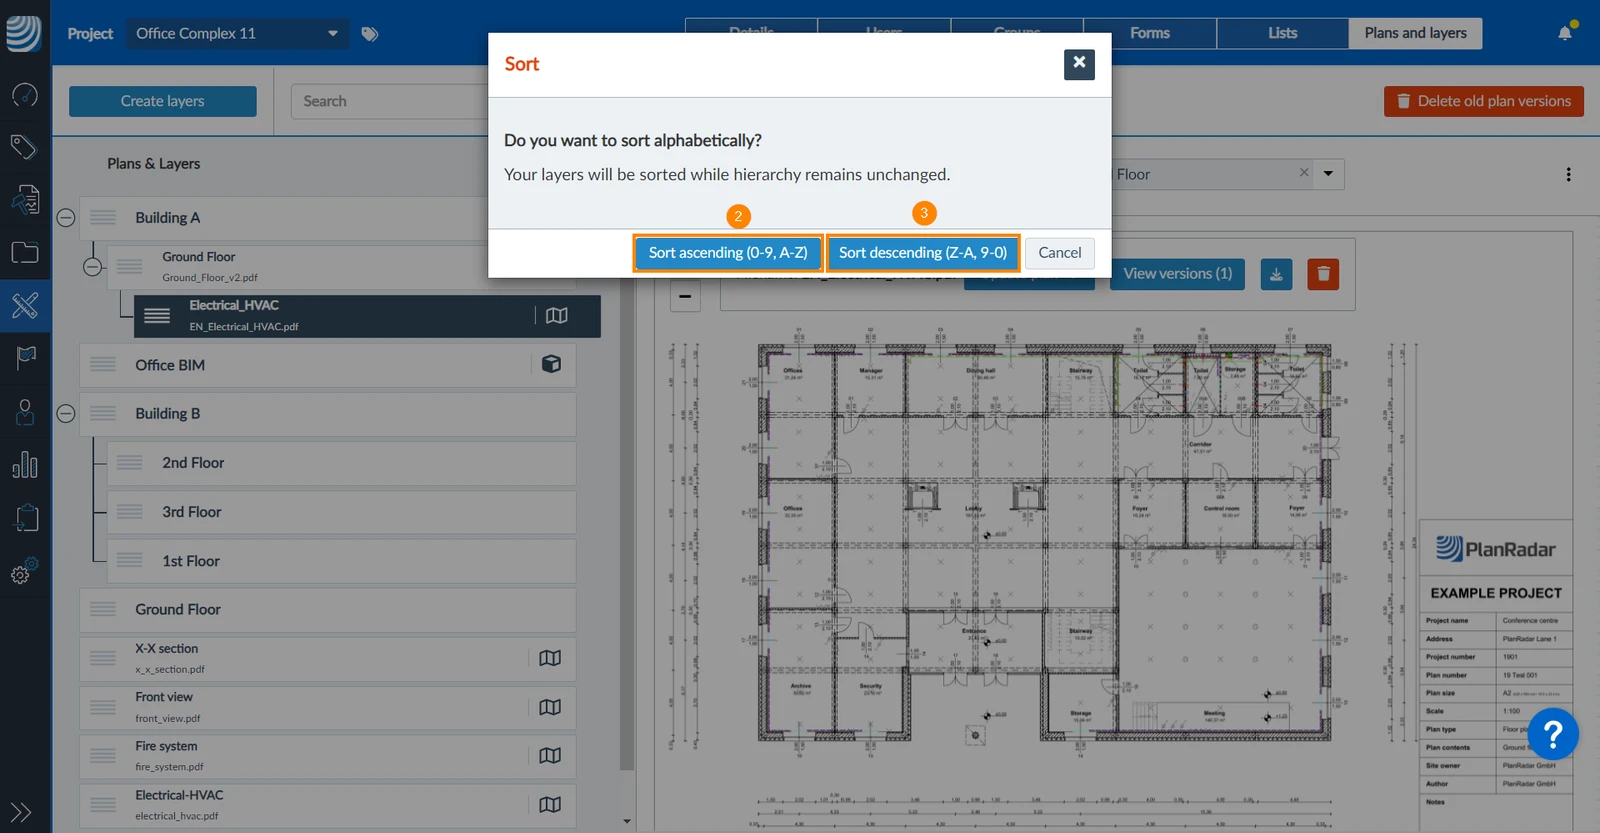
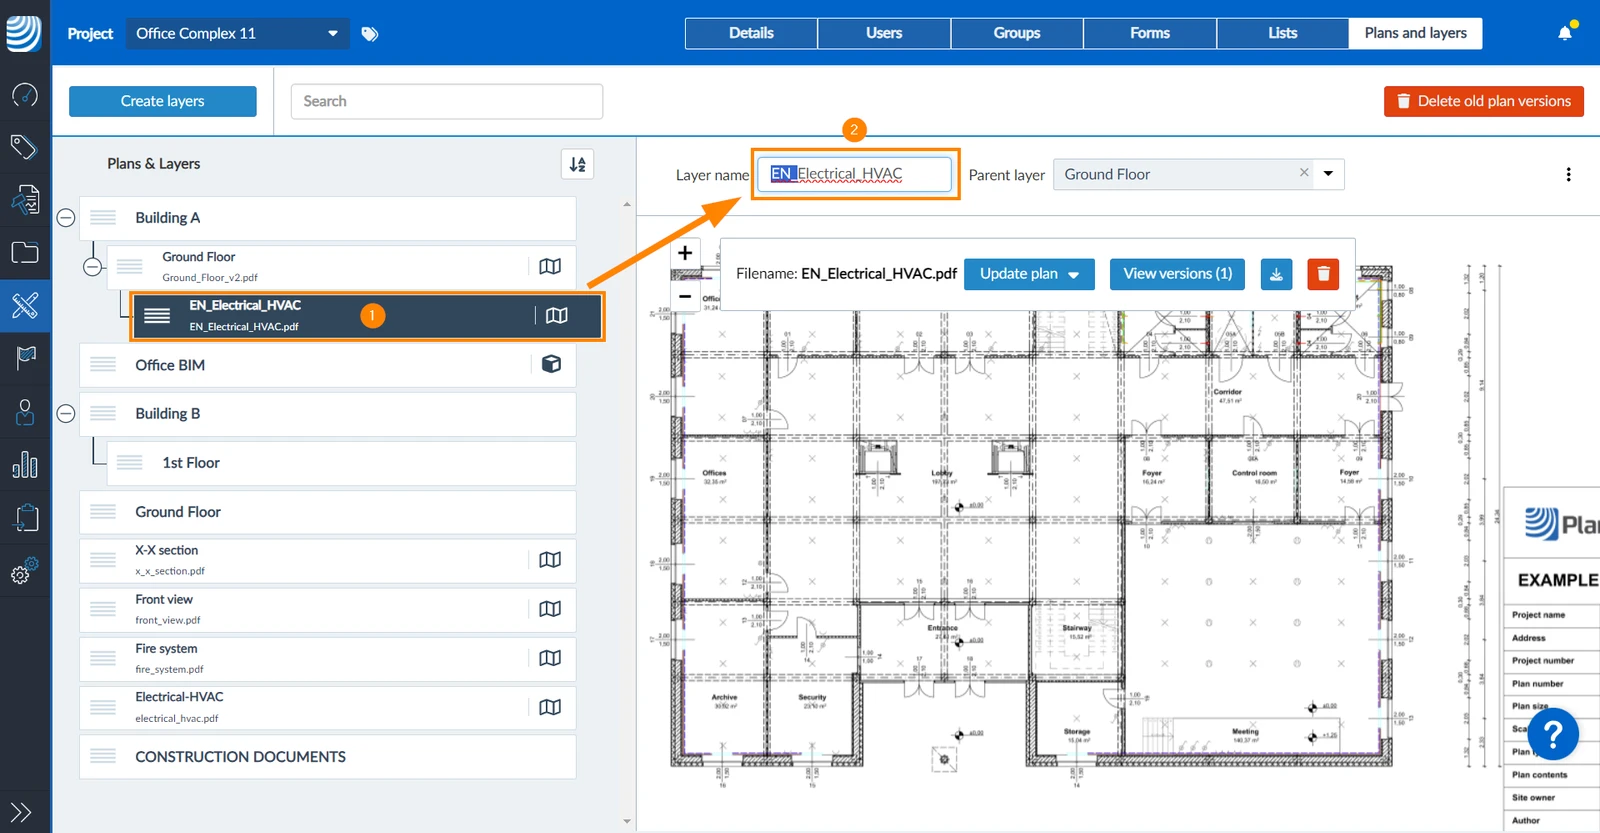
You can create, delete, rename and rearrange layers in both, webapp and mobile apps. In the webapp you can also sort them alphabetically as a one-time operation.
Access & Permissions
How to access
To manage the layers of a project:
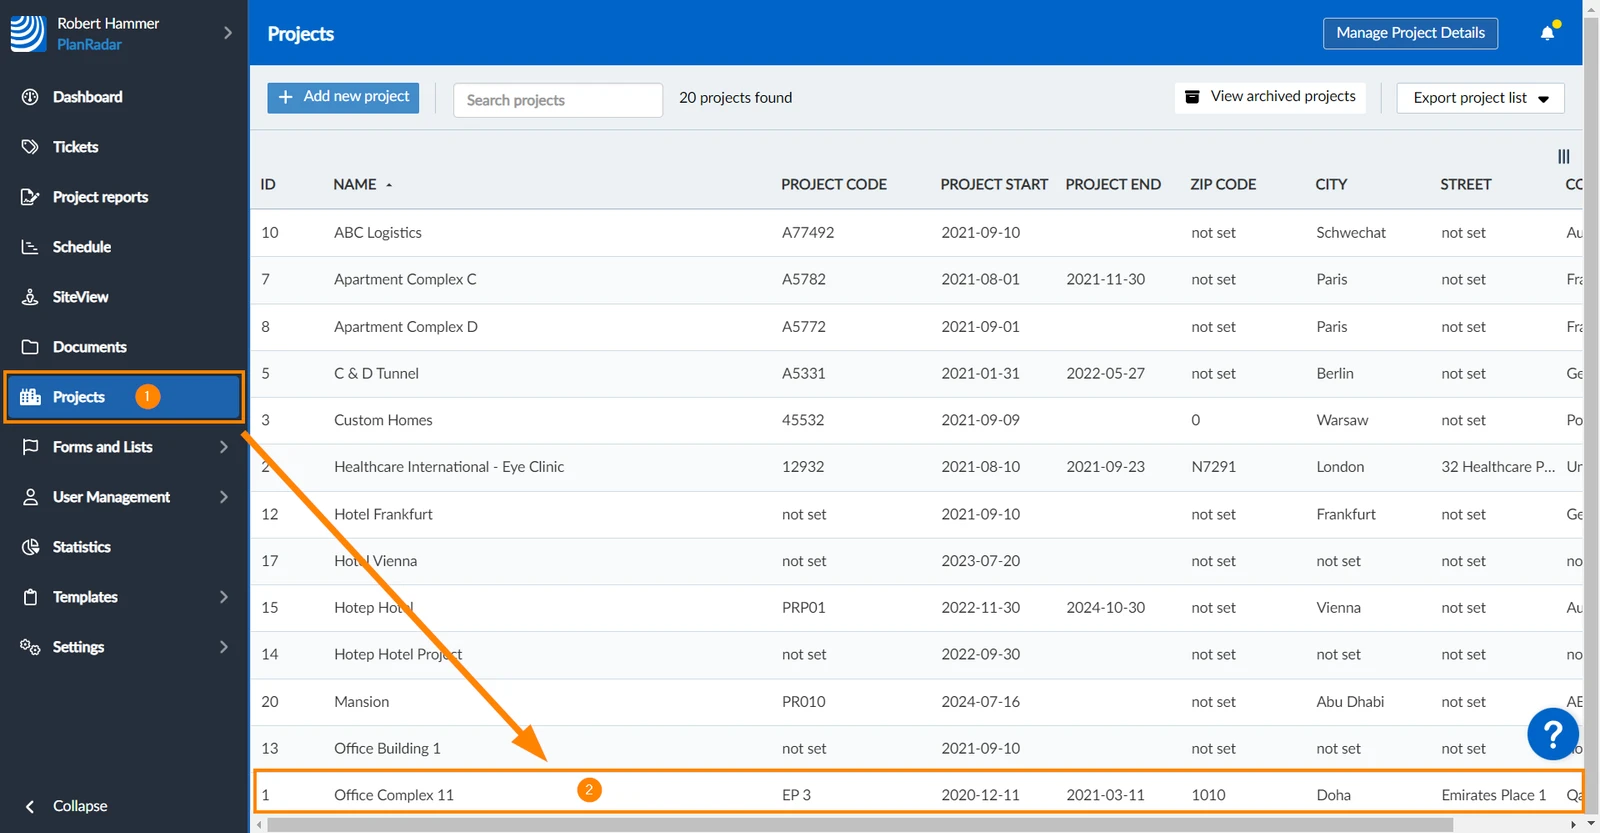
Click Projects
Click on the project to open it
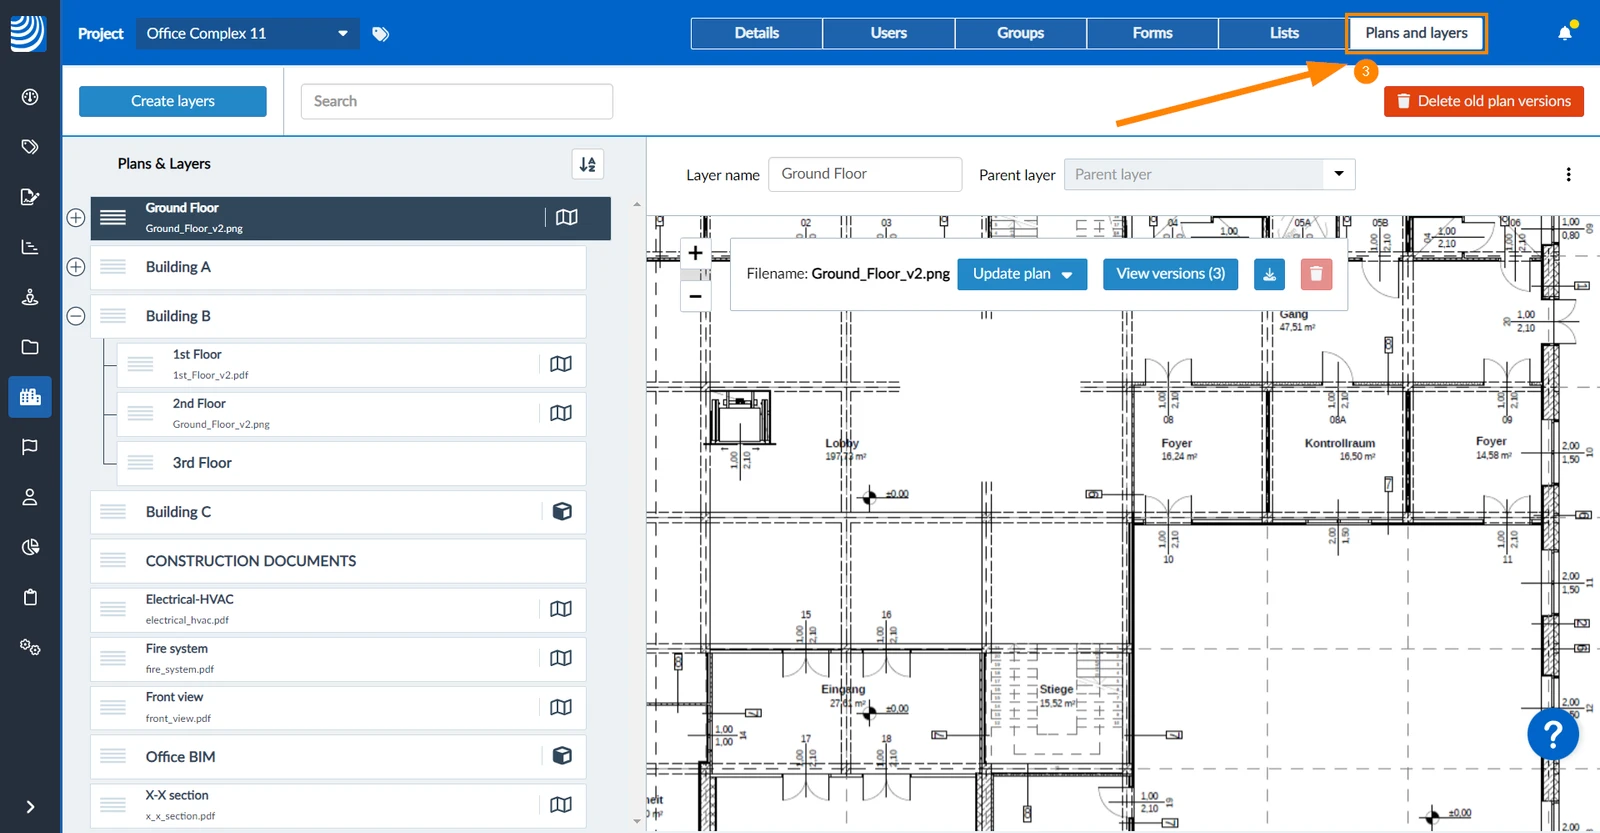
Click Plans and layers
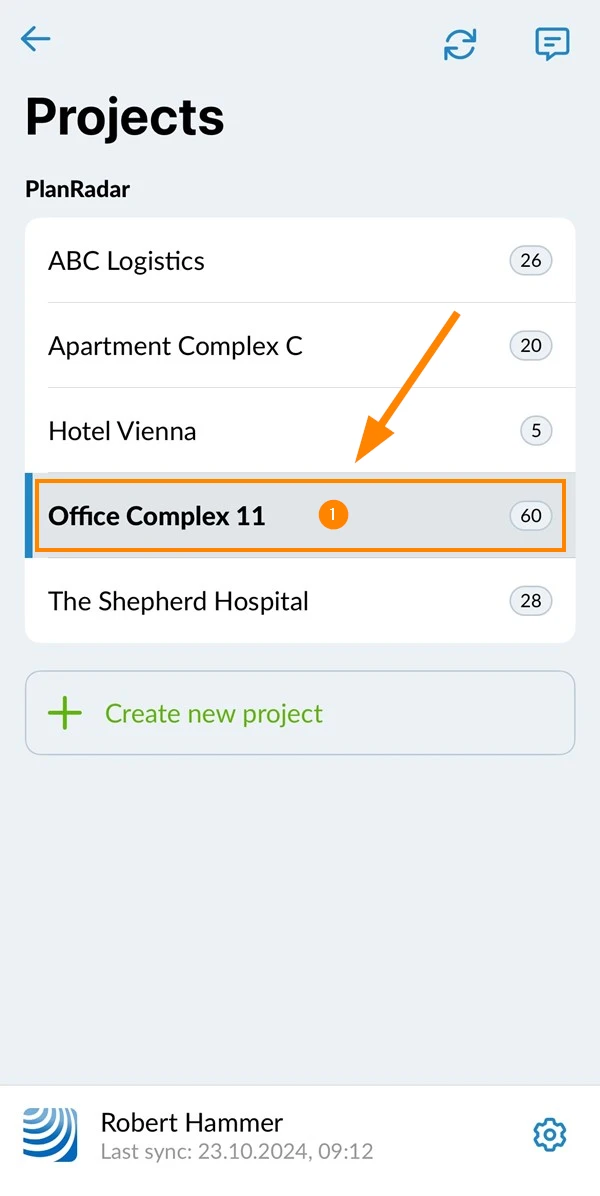
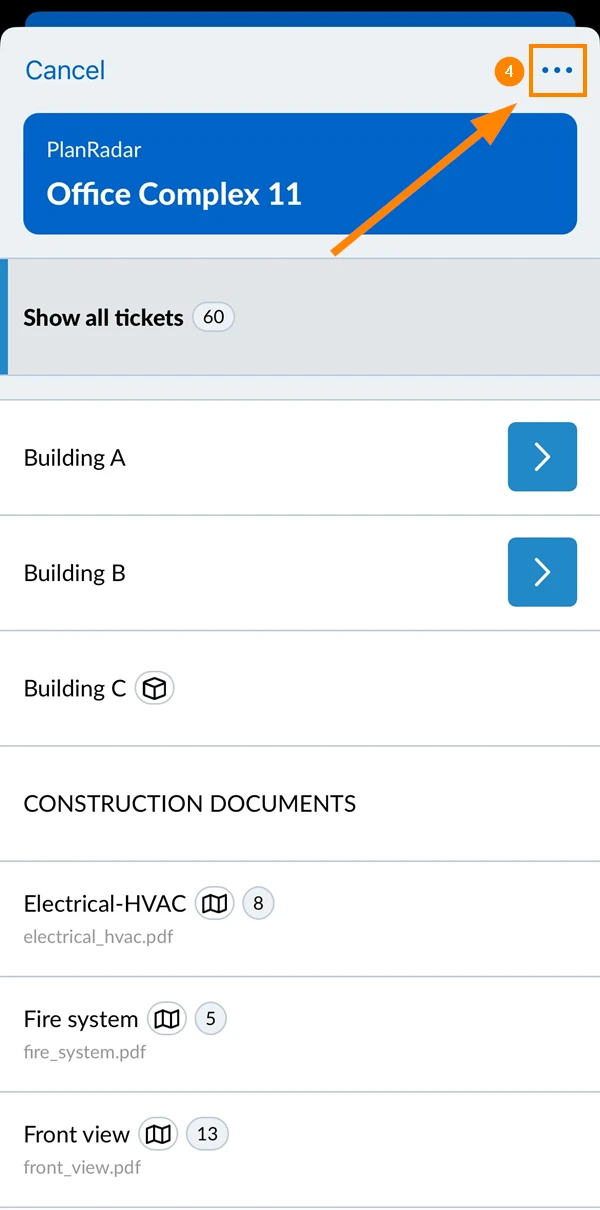
Select the project e.g. Office Complex 11
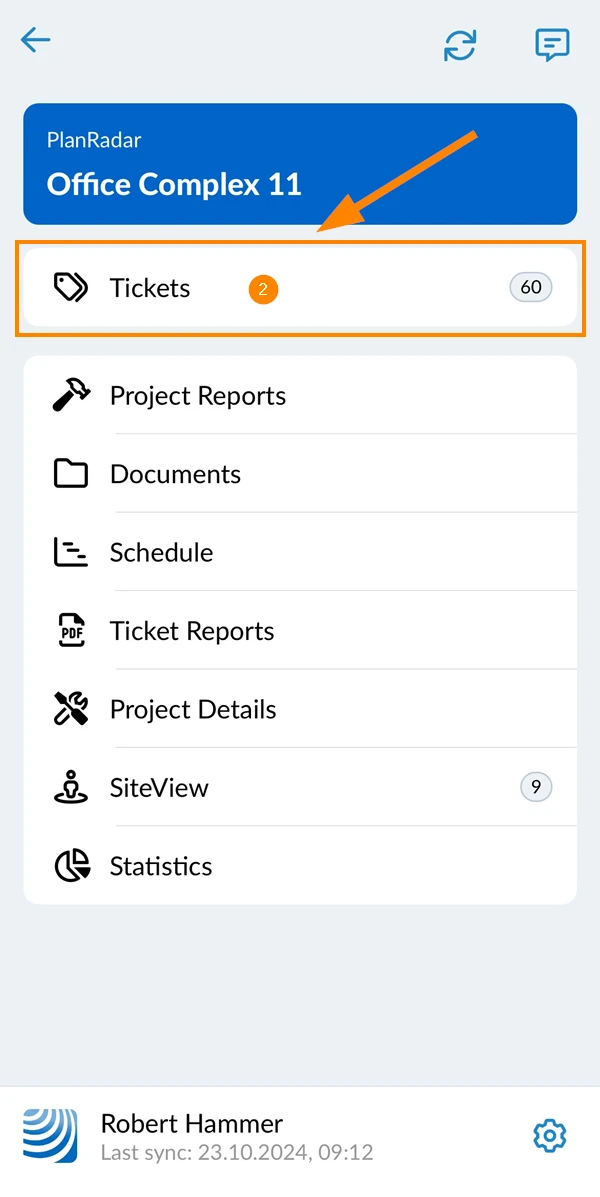
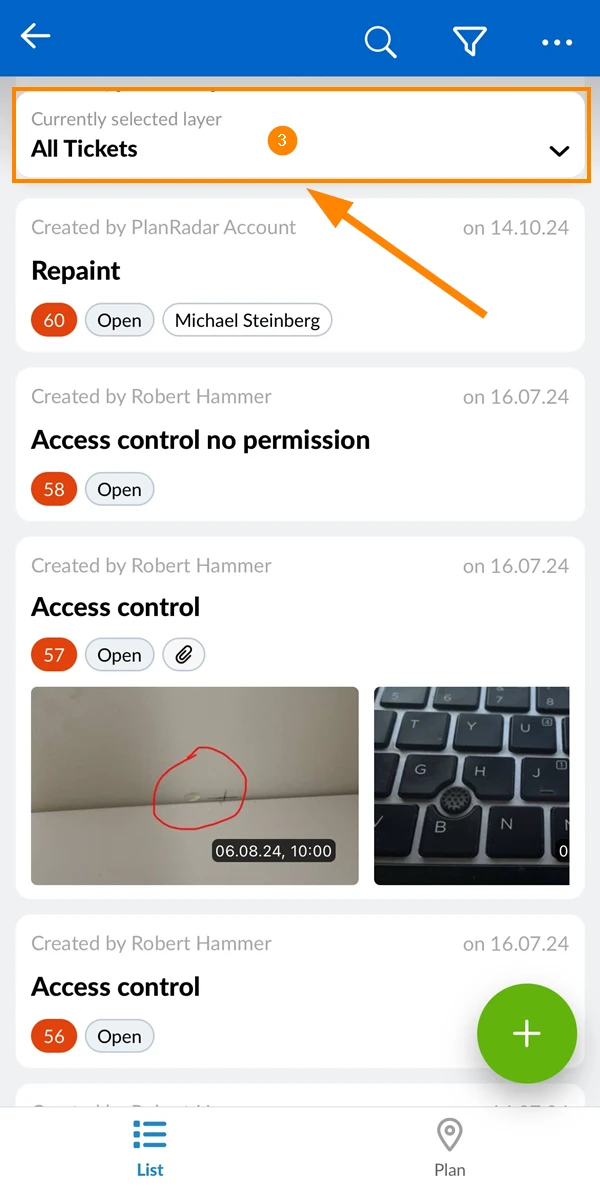
Tap Tickets
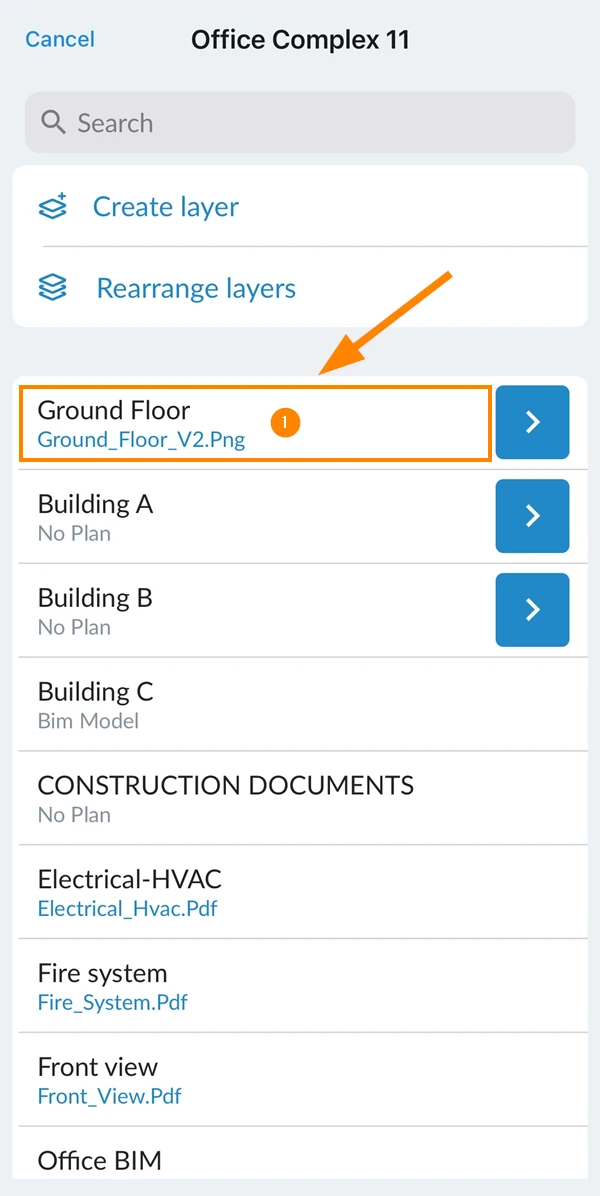
Open the layer selector
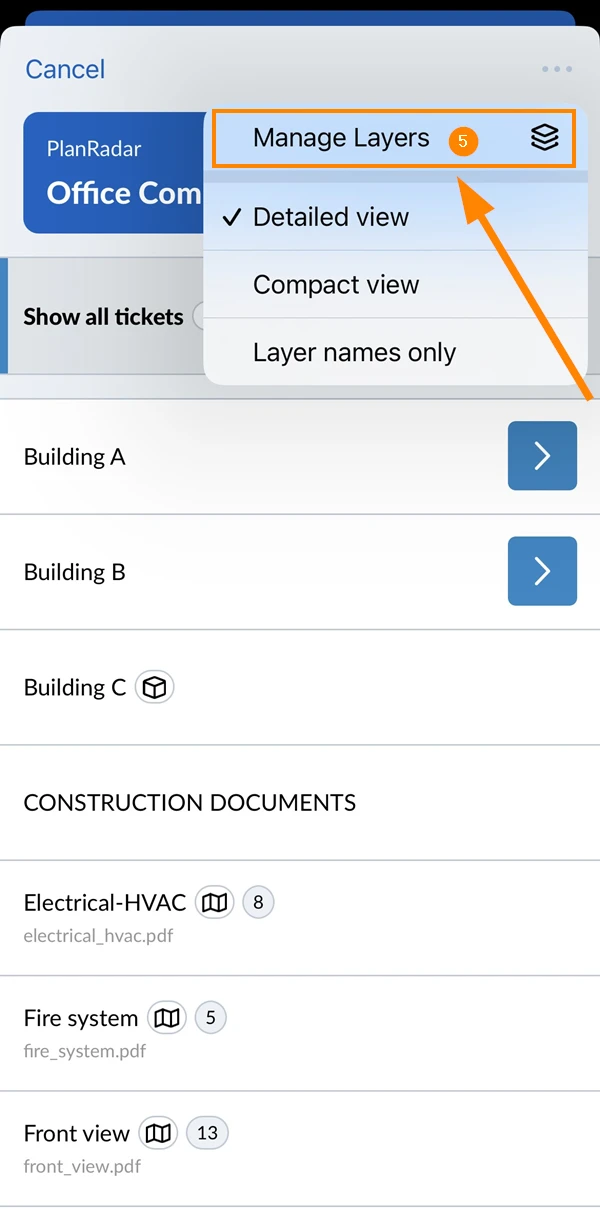
Open the More menu
Tap Manage Layers
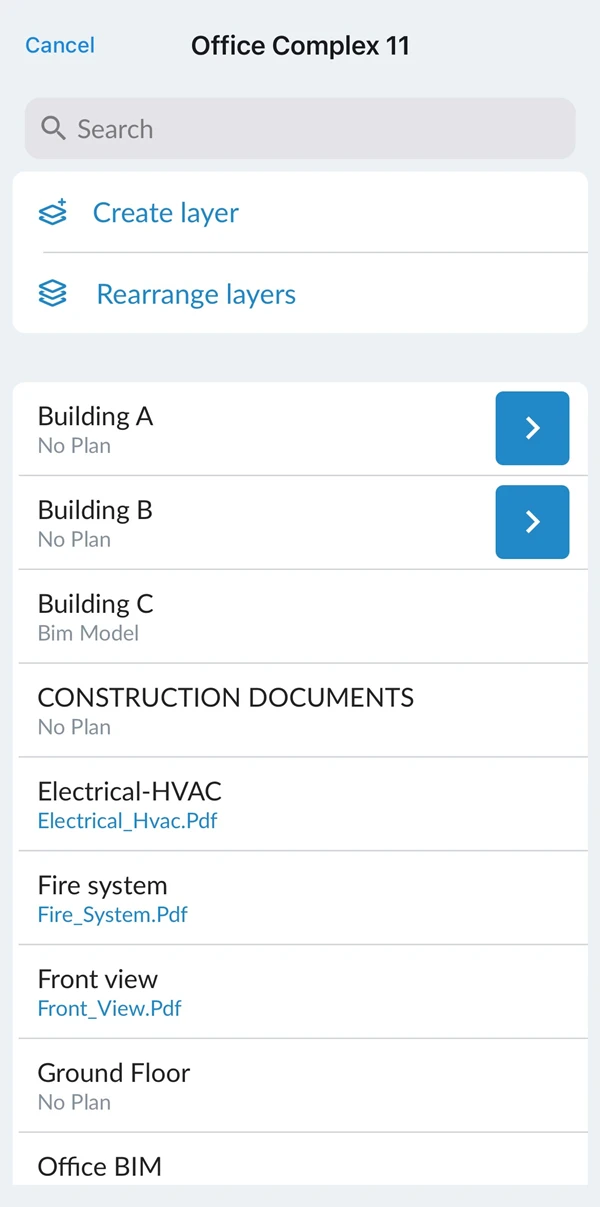
See the manage layers screen
Create a Layer
You can structure your layers in a hierarchy of layers and sub-layers.
To create a layer on the first level of your structure:
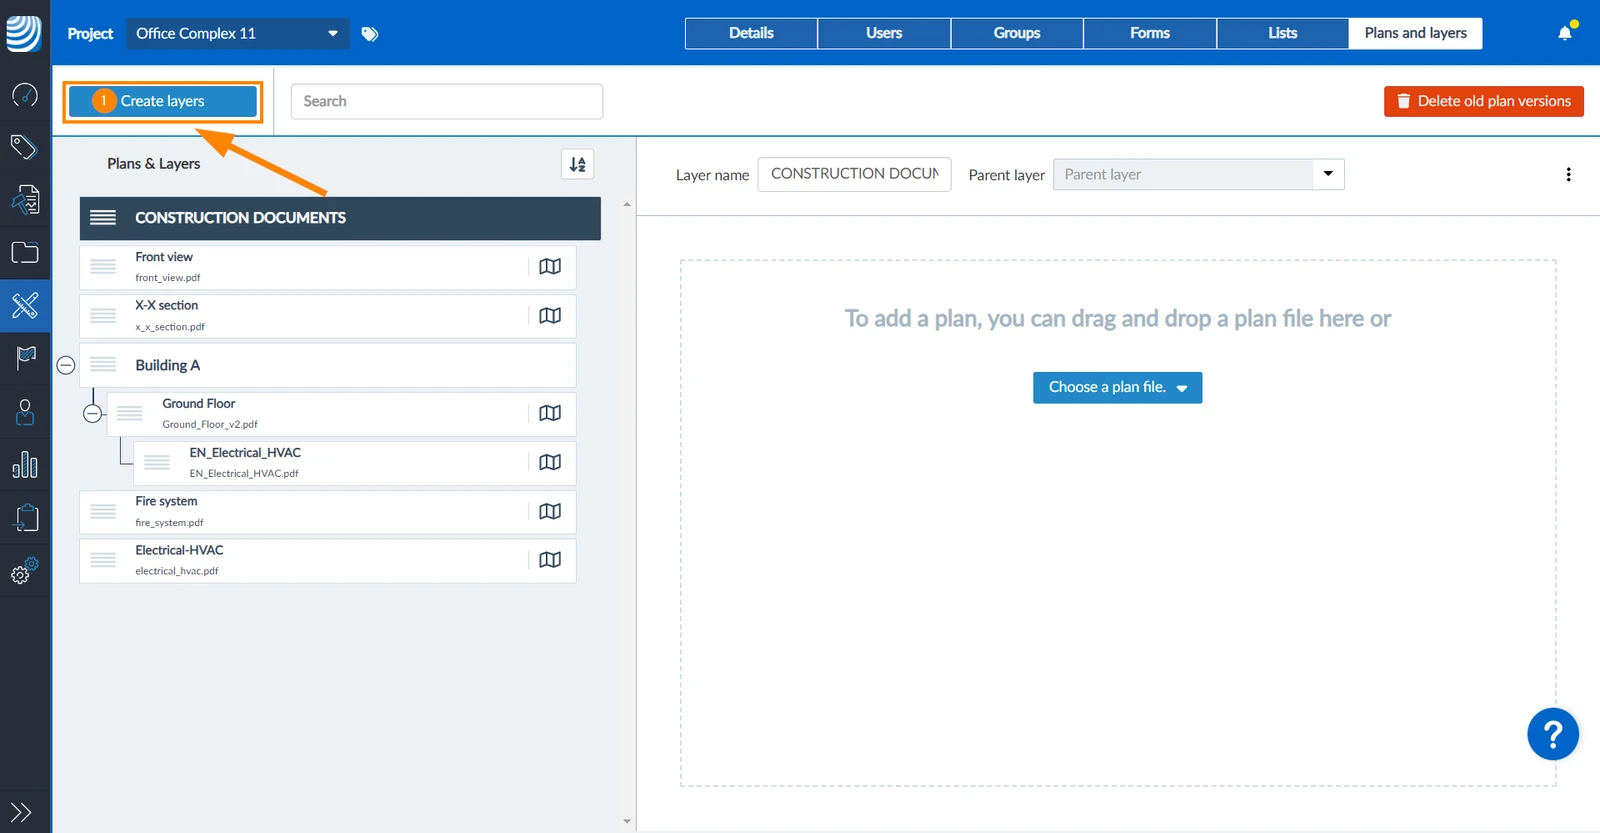
Click Create layer
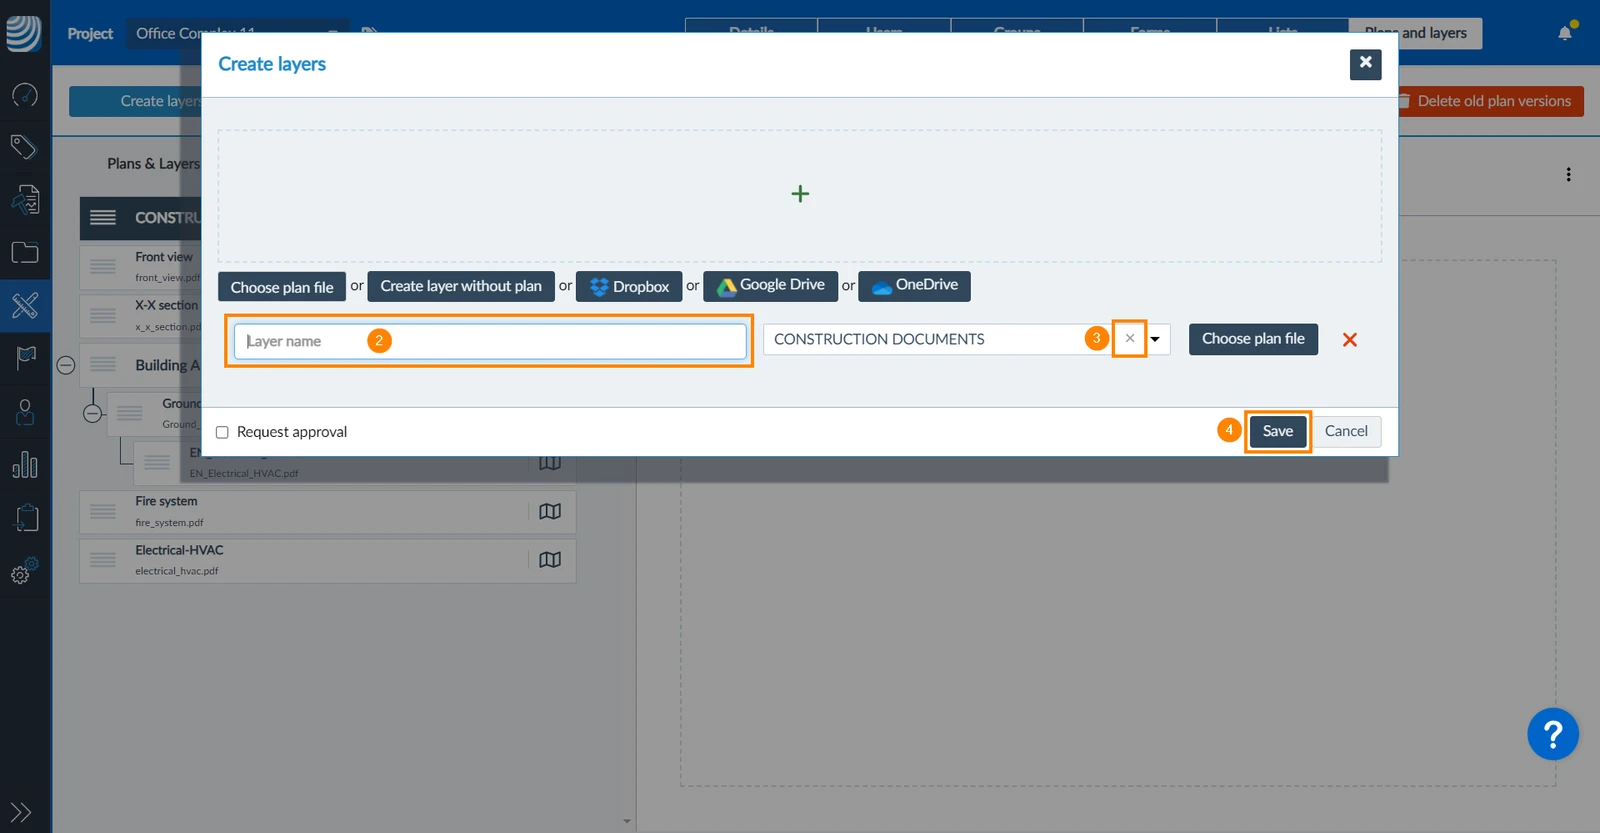
Enter the Layer name
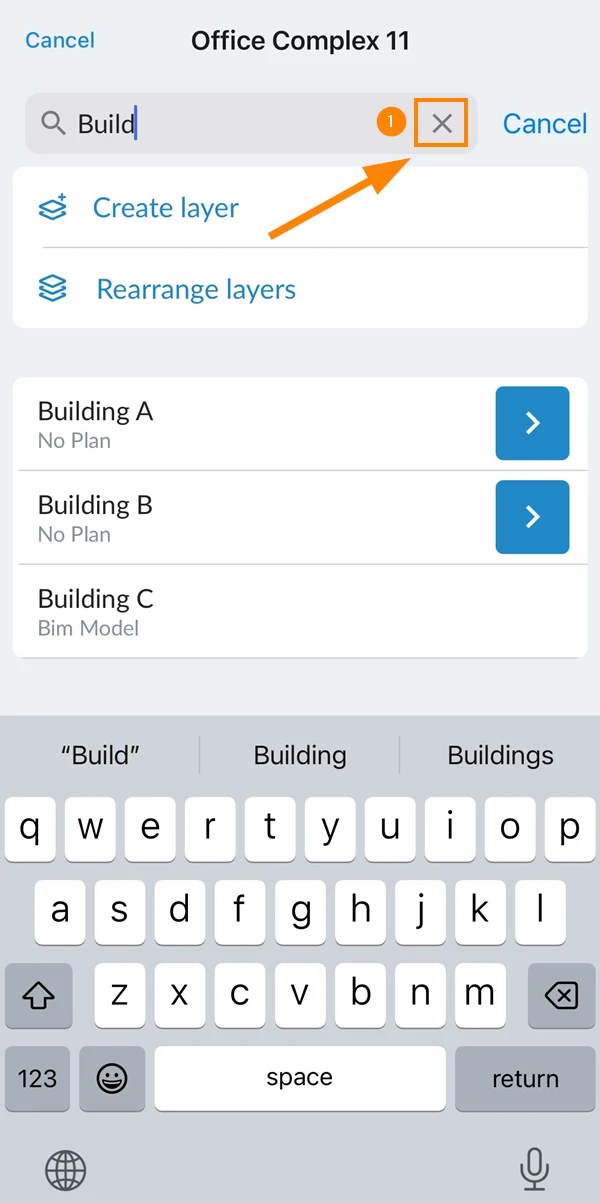
Click X to remove the parent layer (only required if a layer is currently selected in the tree)
Click Save
To create a sub-layer:
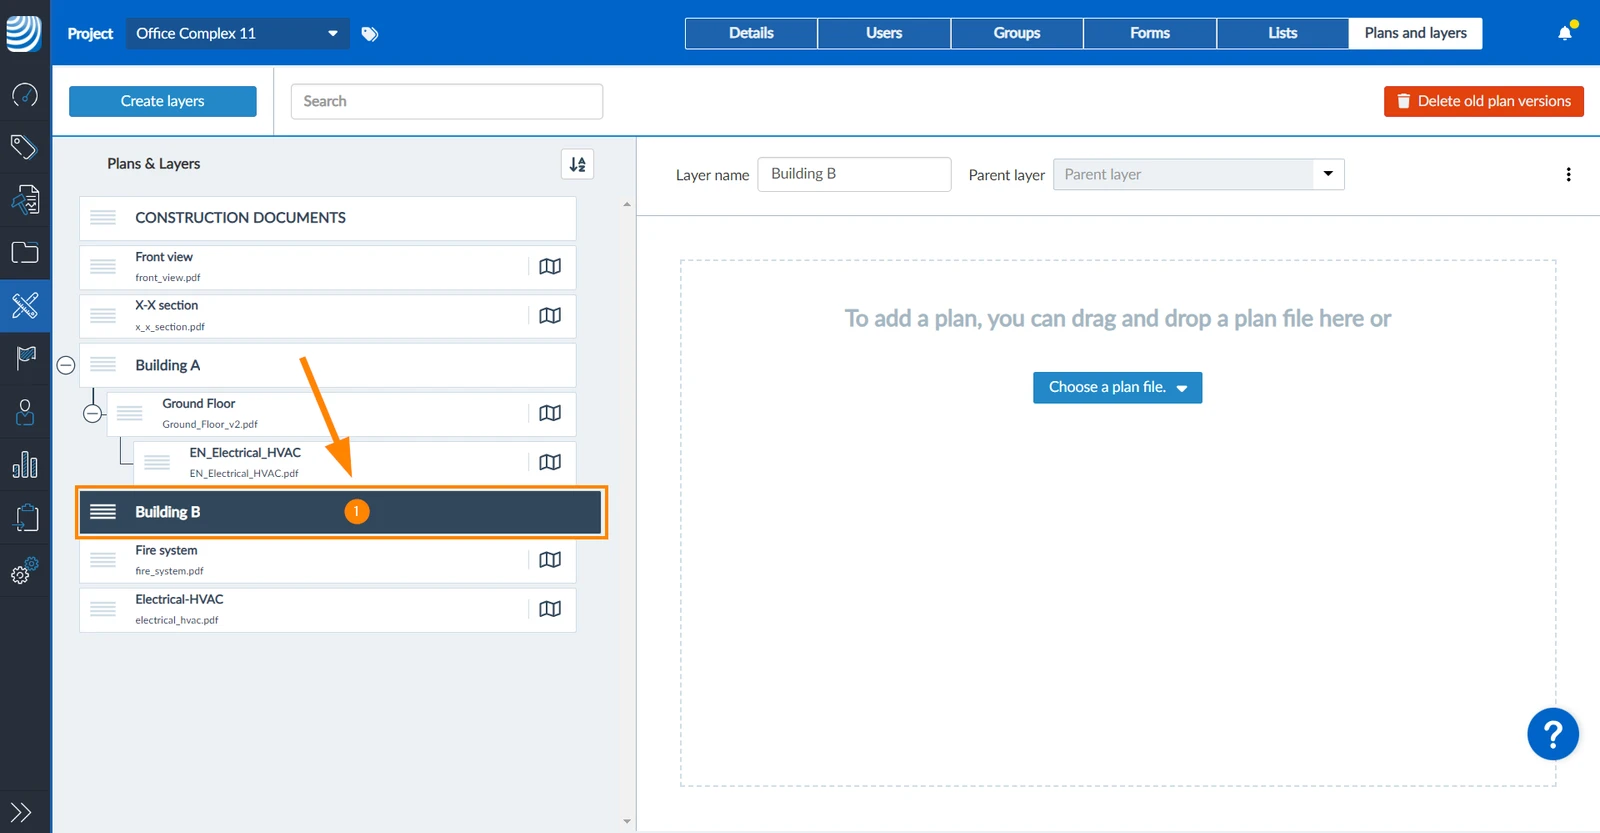
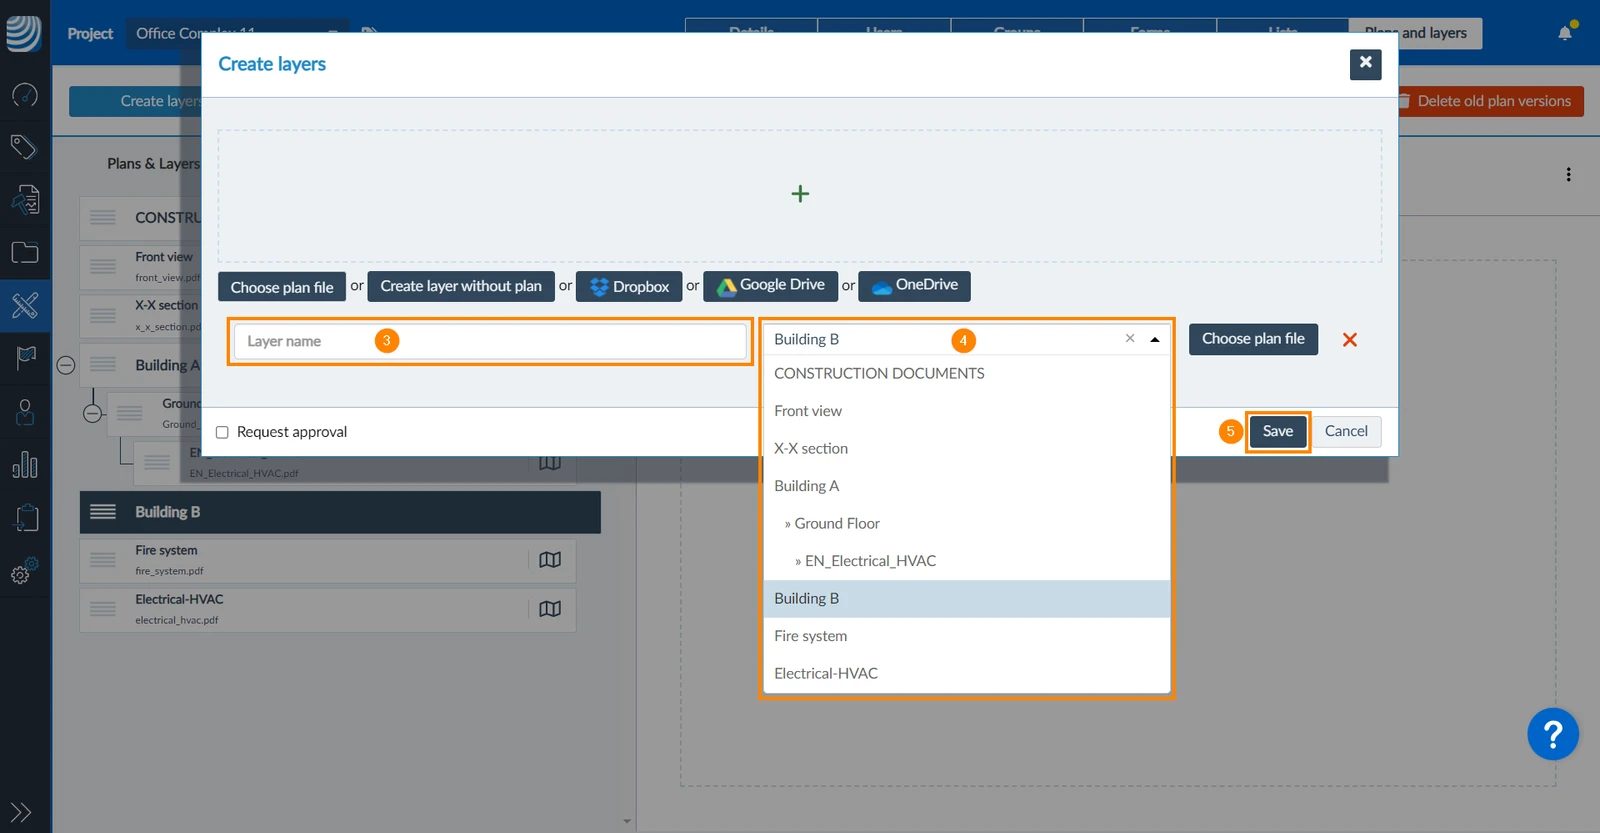
Optional: Select a parent-layer under which you want to create a sub-layer e.g. Building B
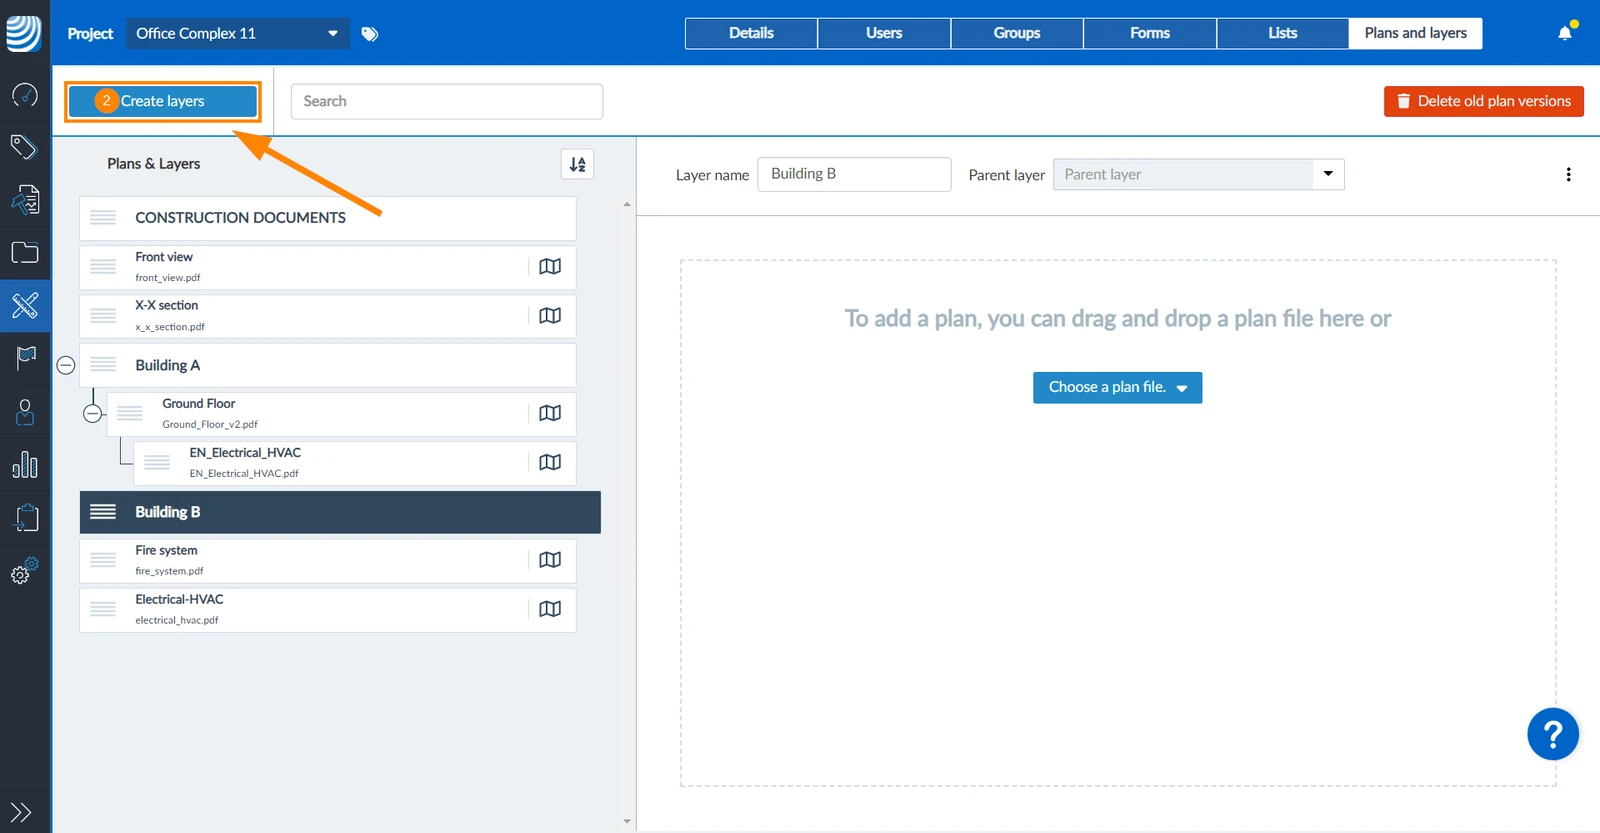
Click Create layer 

Enter the Layer name
Optional: Select a different parent-layer in the drop-down
Click Save
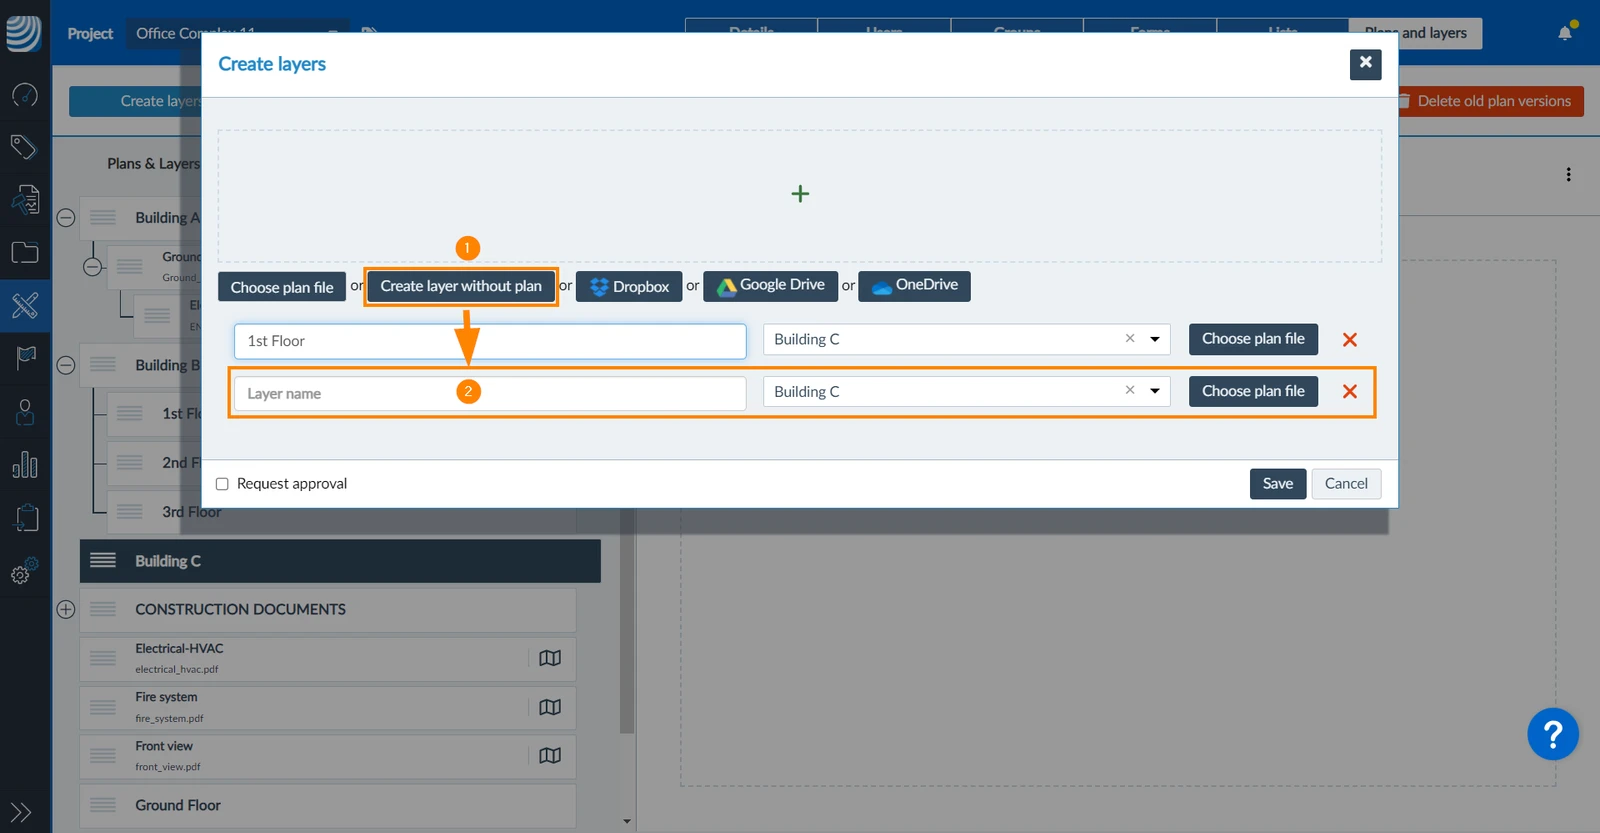
To create additional layers without a plan:
Click Create layer without plan
An additional line is added each time where you can enter a layer name and change the parent-layer as described above.
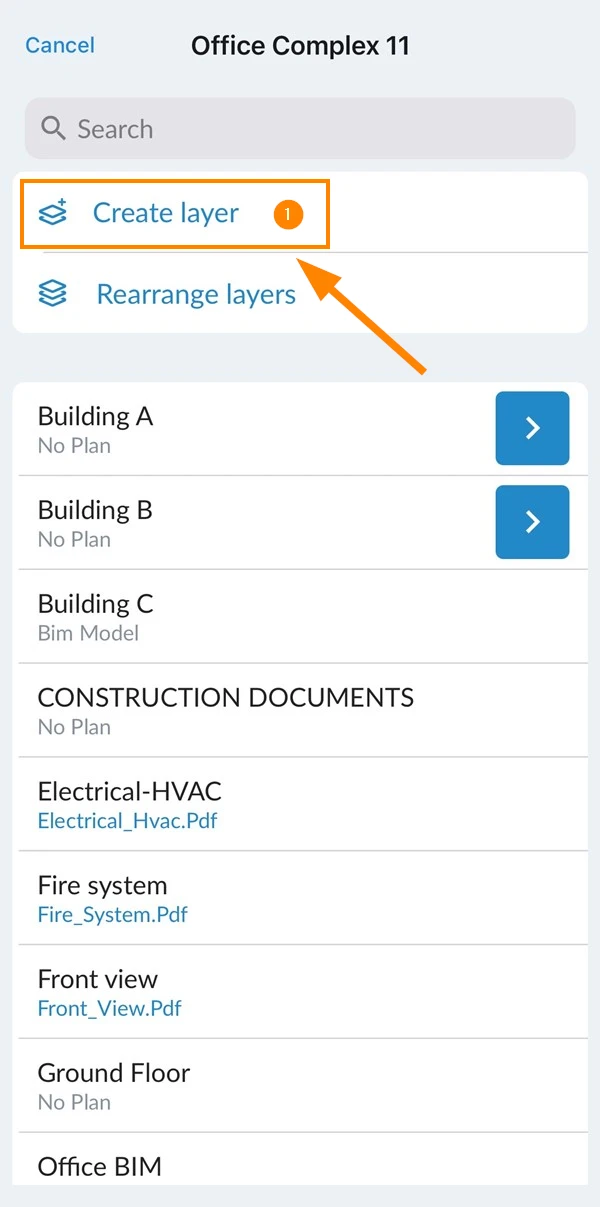
To create a layer or sub-layer without a plan:
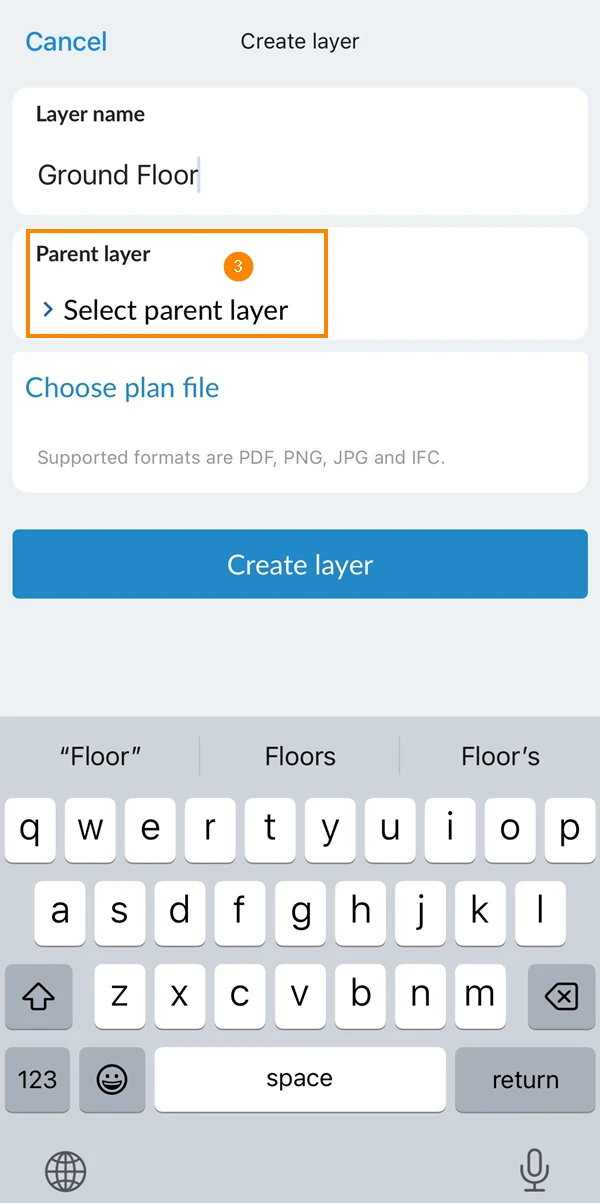
Tap Create layer
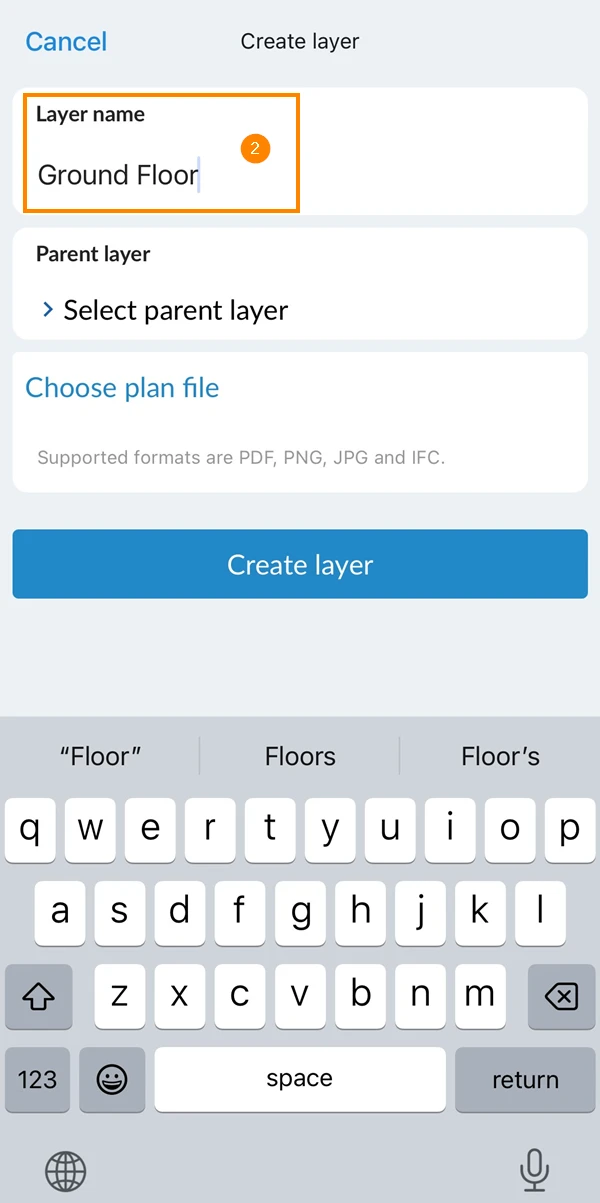
Enter a Layer name e.g Ground Floor
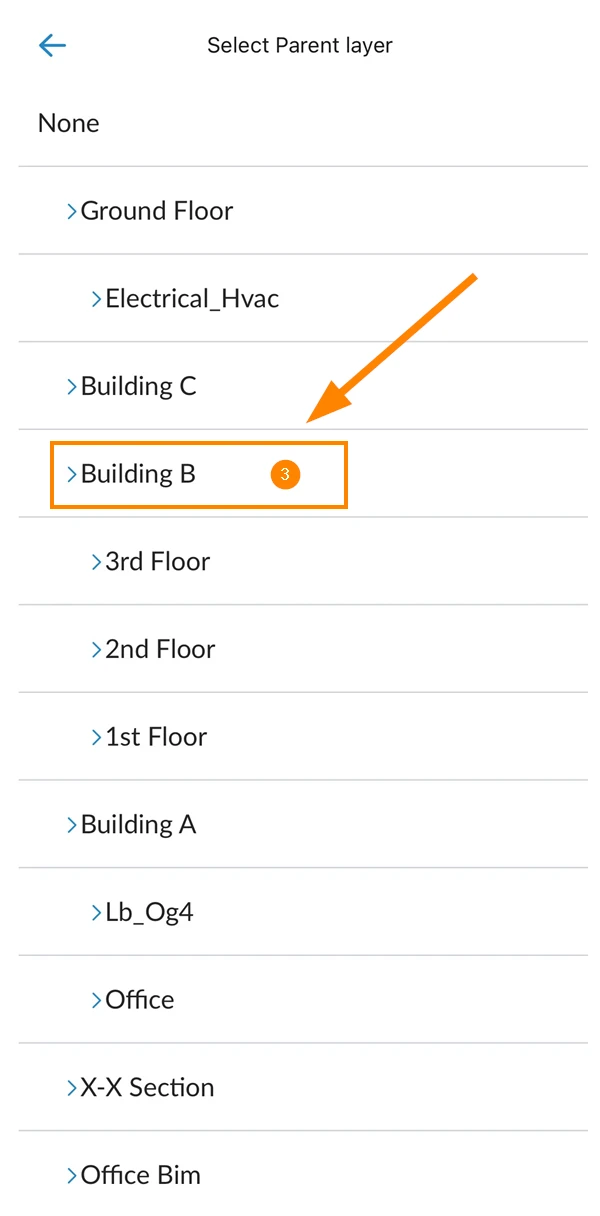
Optional: Tap Select parent layer
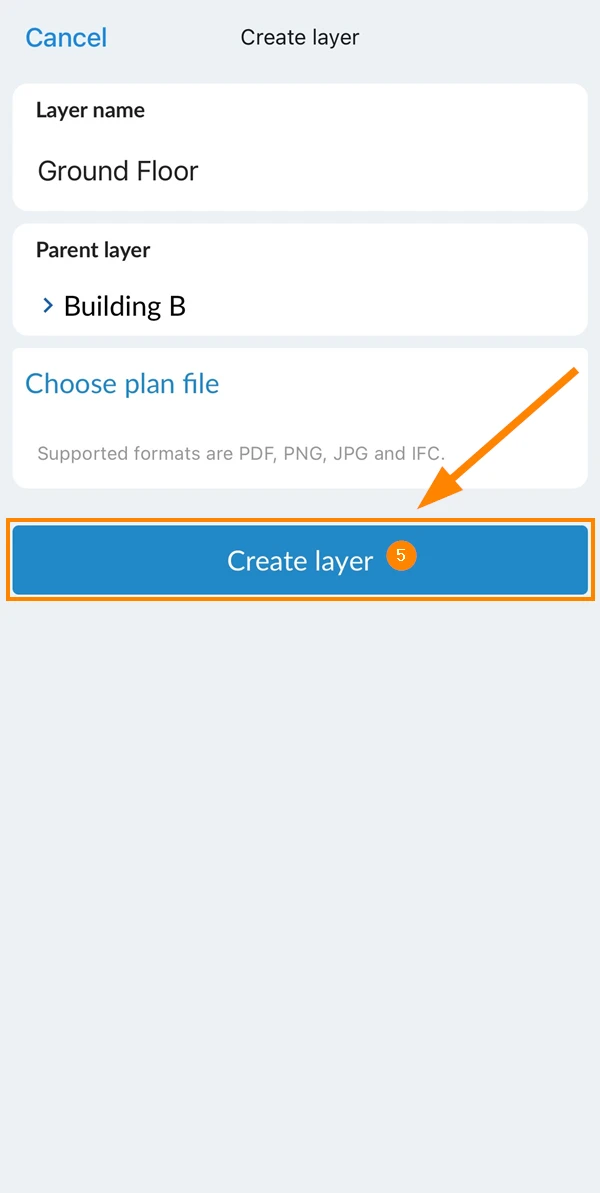
Optional: Select a parent layer e.g. Building B
Tap Create layer
Navigate the Layer Hierarchy
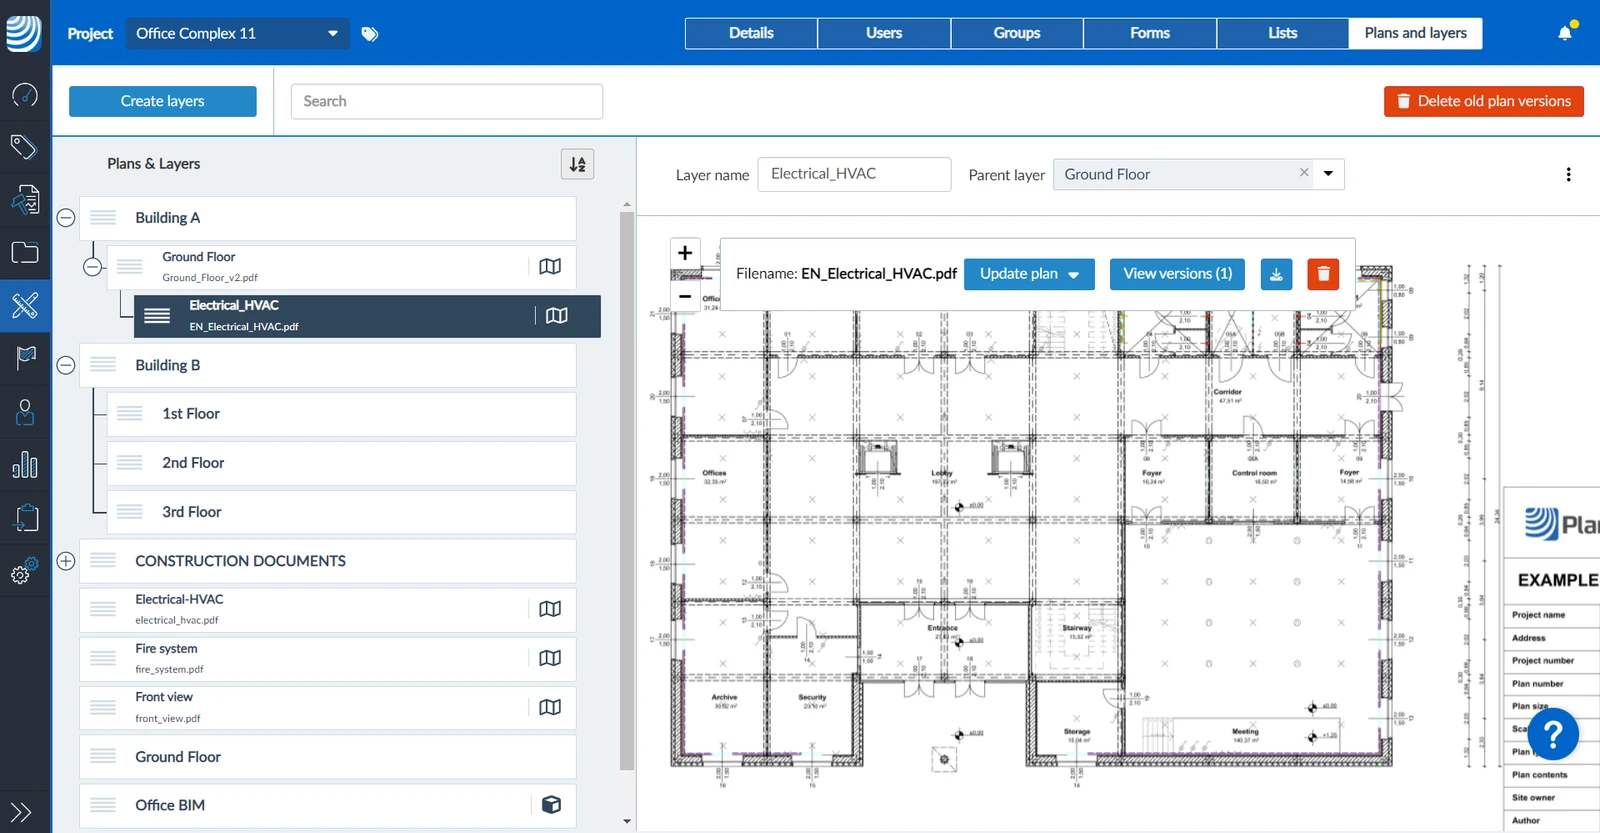
Collapse/Expand Sub-Layers
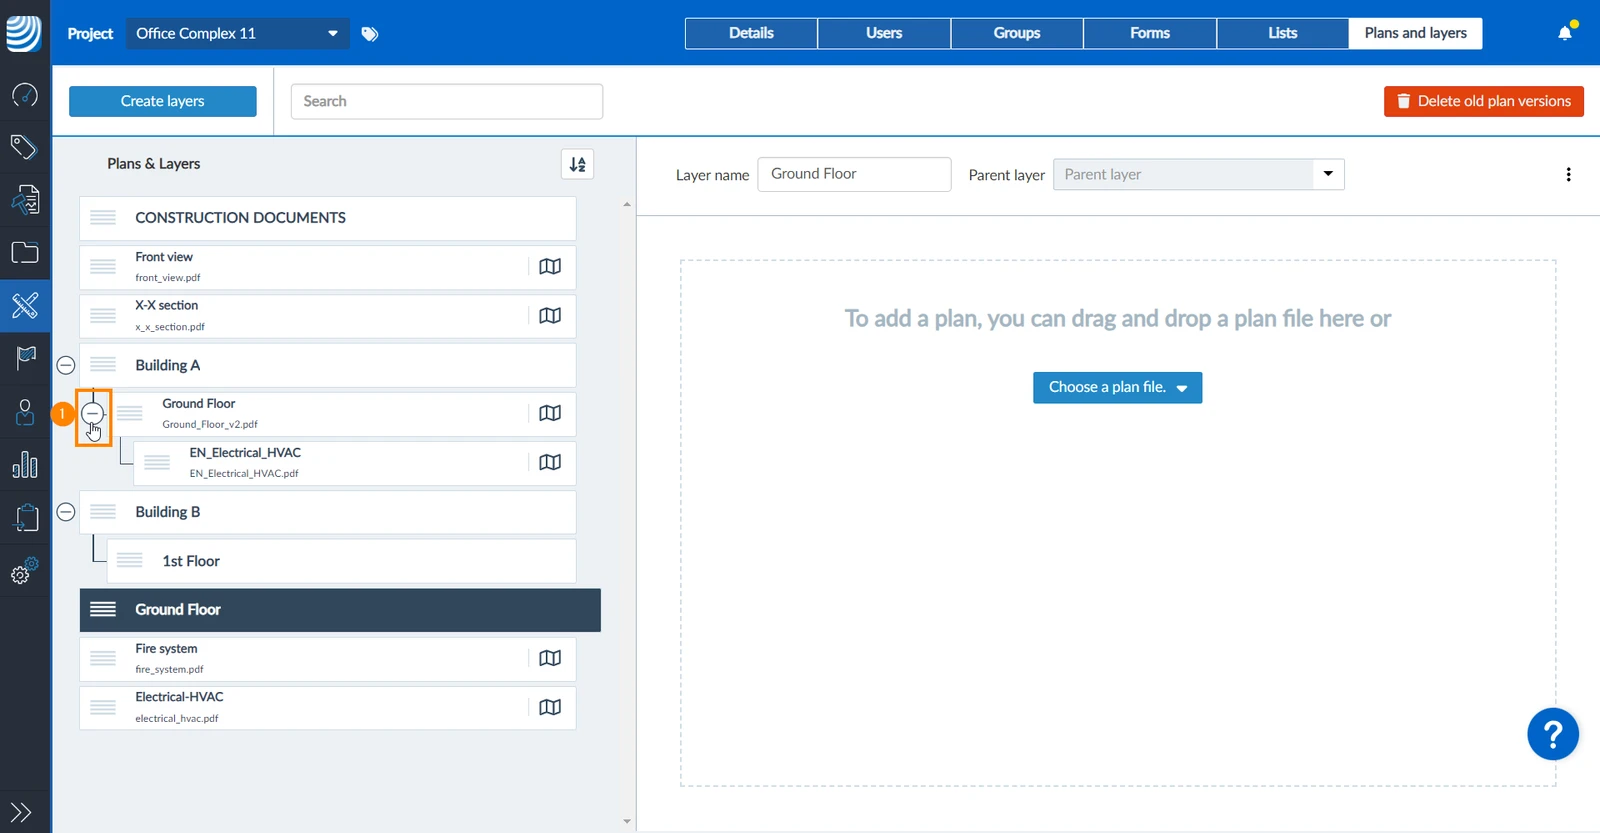
To collapse and hide the sub-layers of a parent-layer:
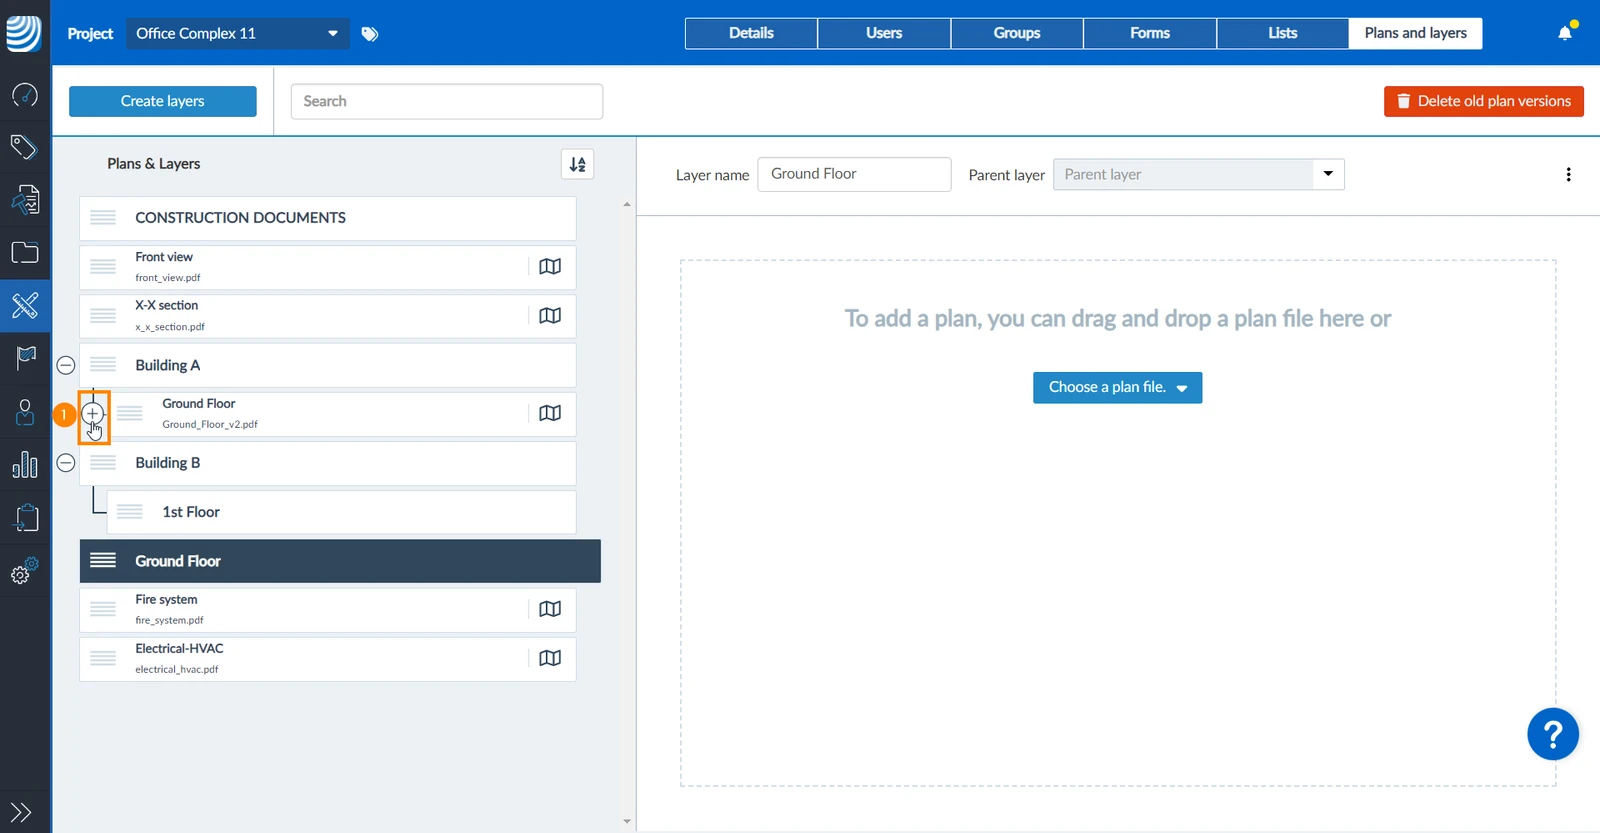
Click the - icon
To expand and show the sub-layers of a parent-layer:
Click the + icon
Navigate to Sub-Layers and Back
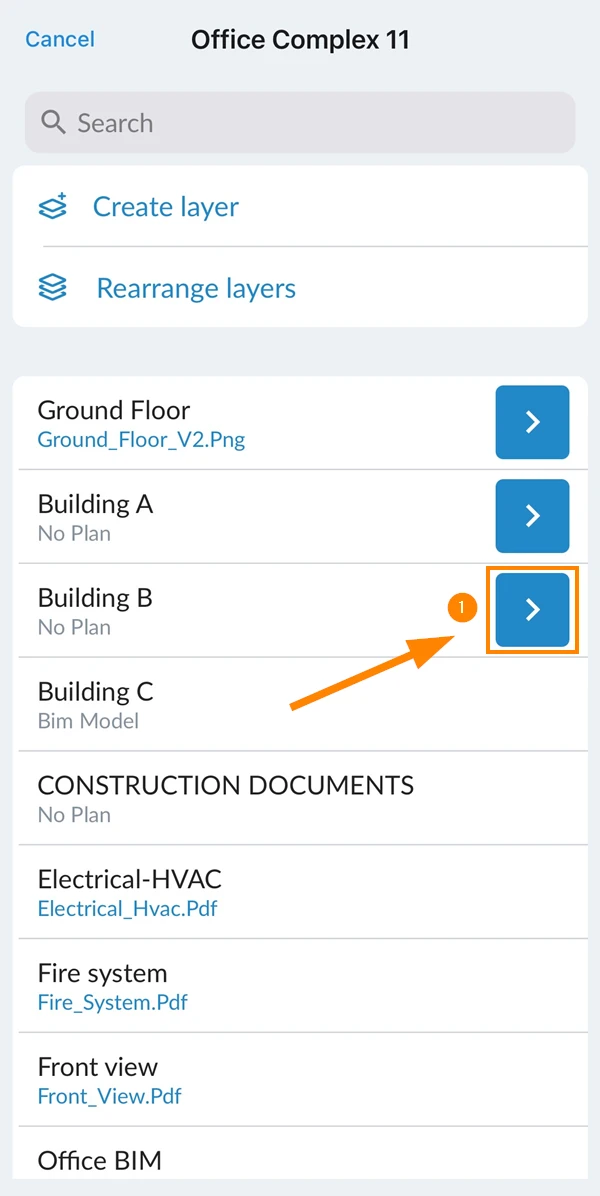
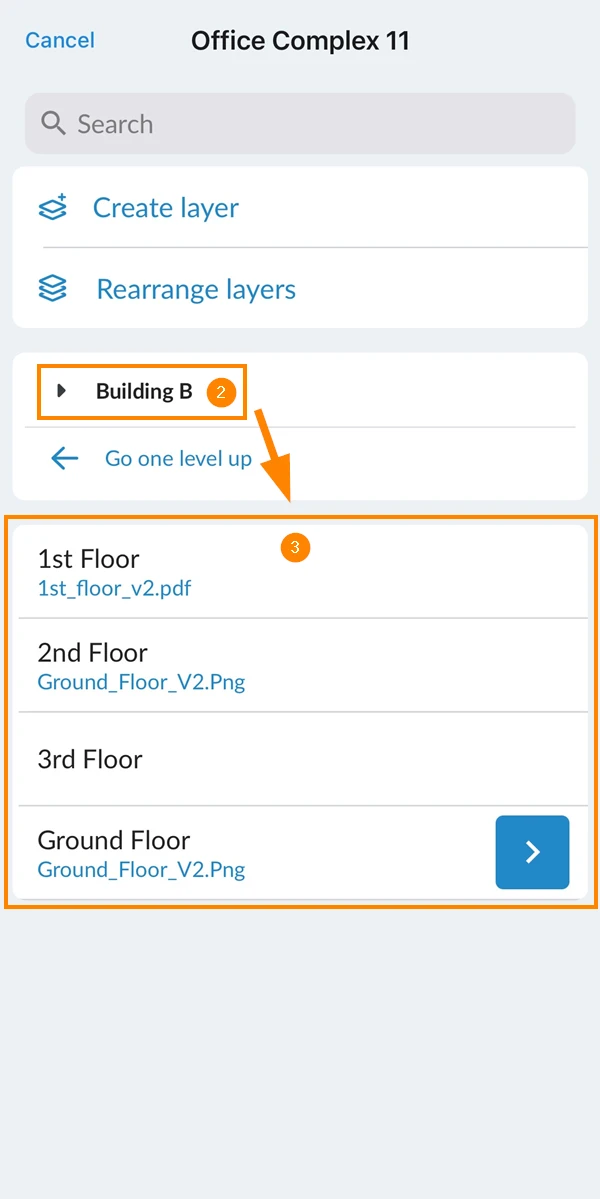
To view the sub-layers of a parent-layer:
Tap the arrow button next to the parent-layer
See the name of the current layer
See the list of sub-layers
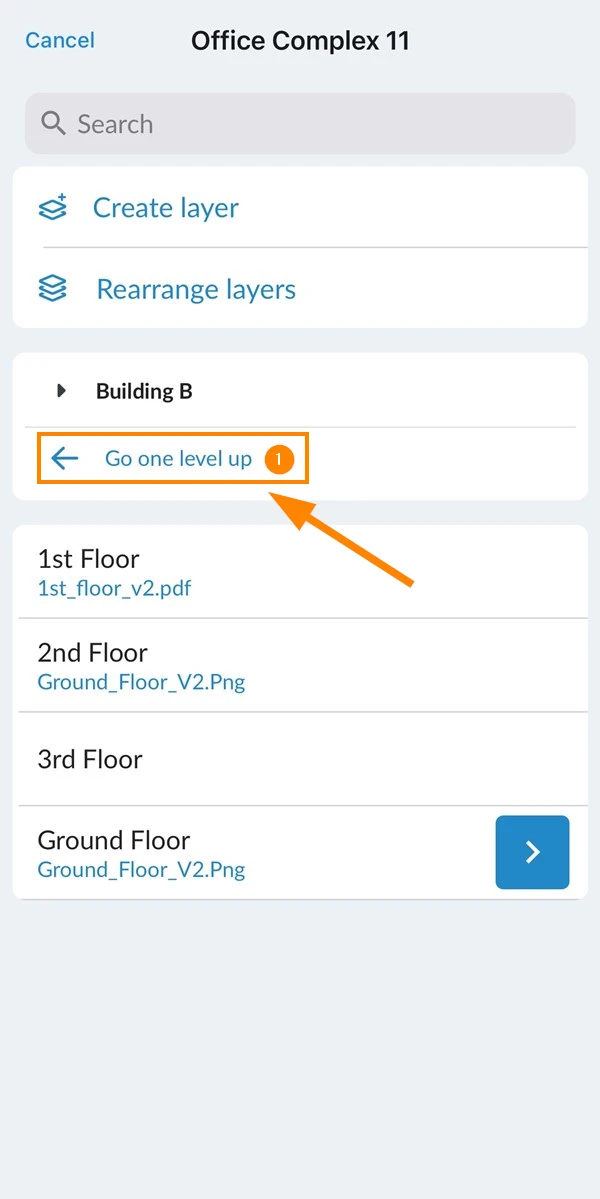
To go one level up in the hierarchy:
Tap Go one level up
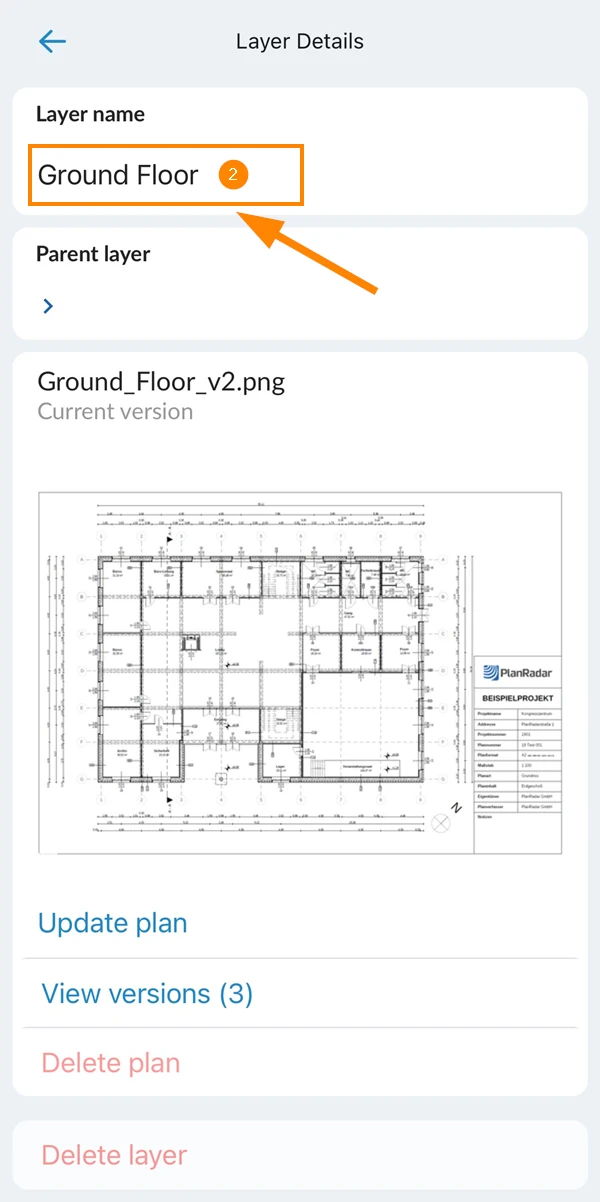
View Layer Details
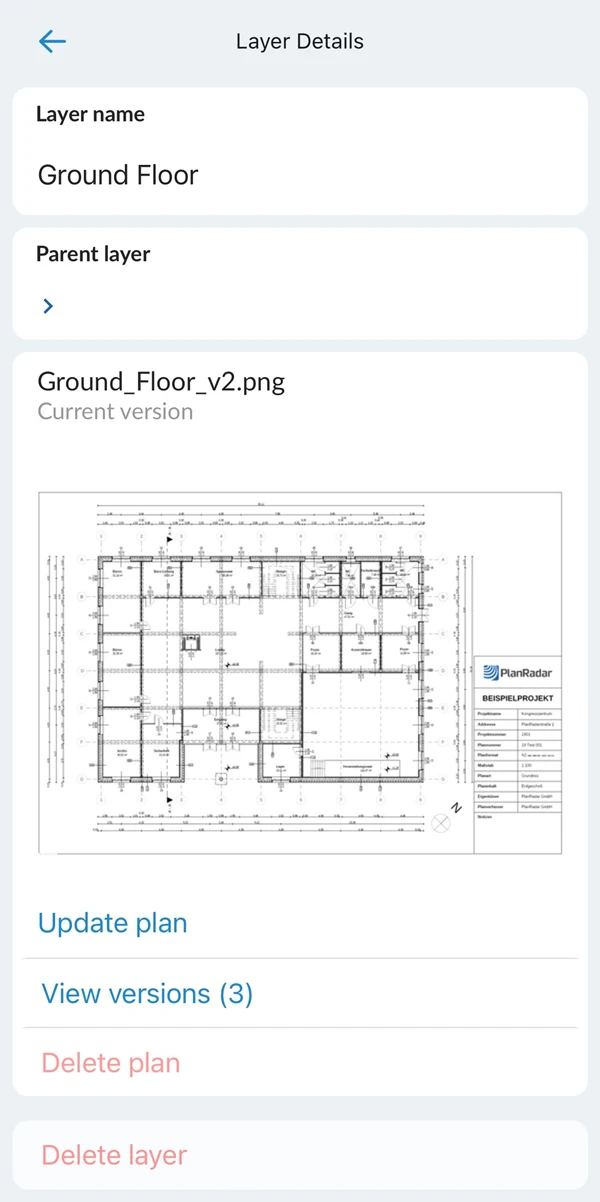
To view the details of a layer:
Tap on the layer
See the Layer details
Rearrange Layers
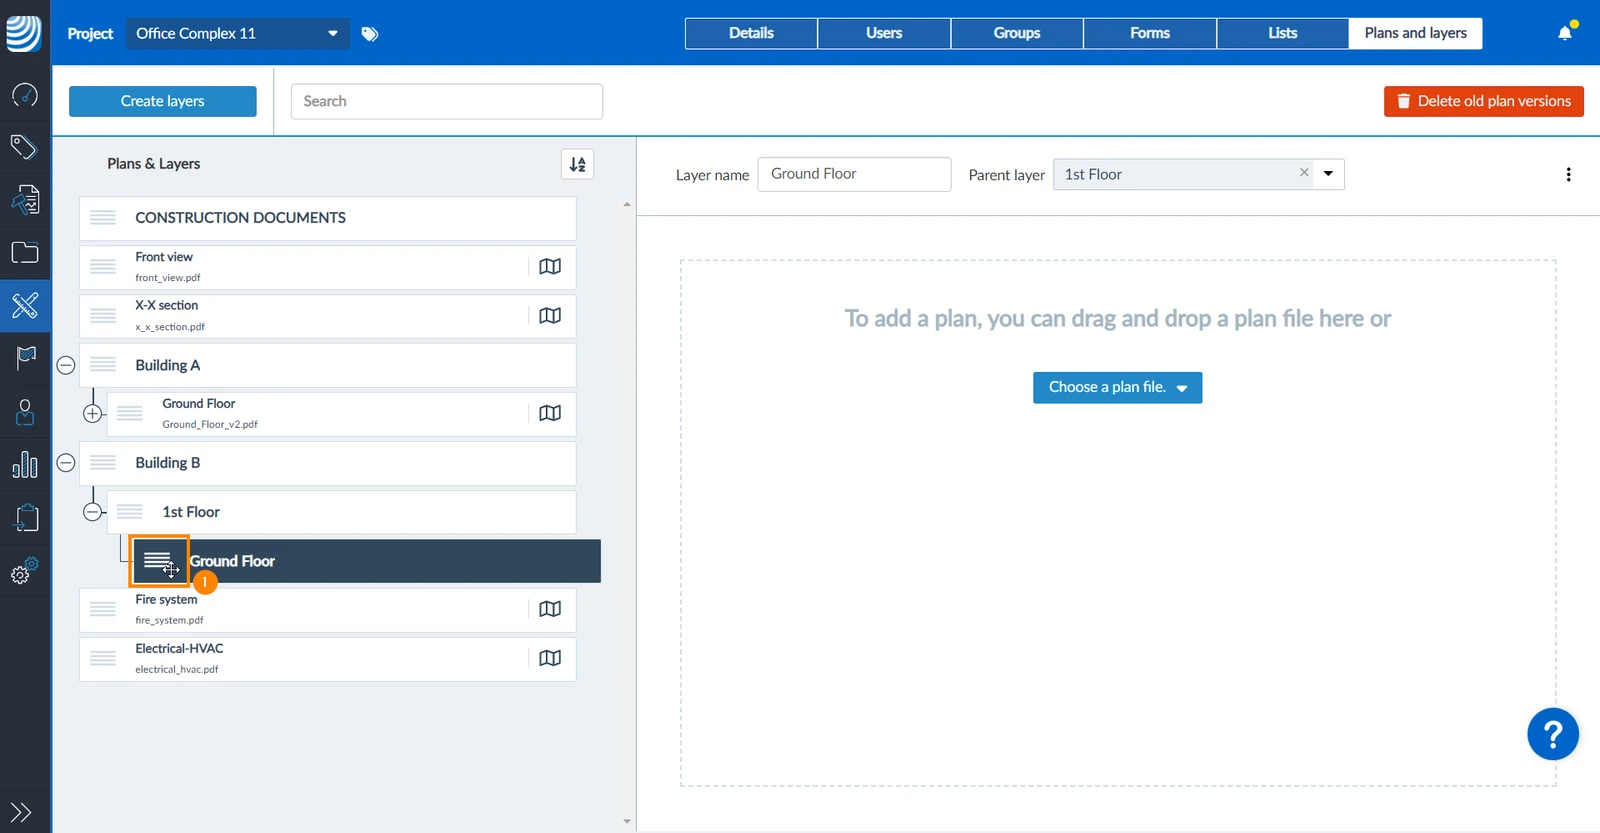
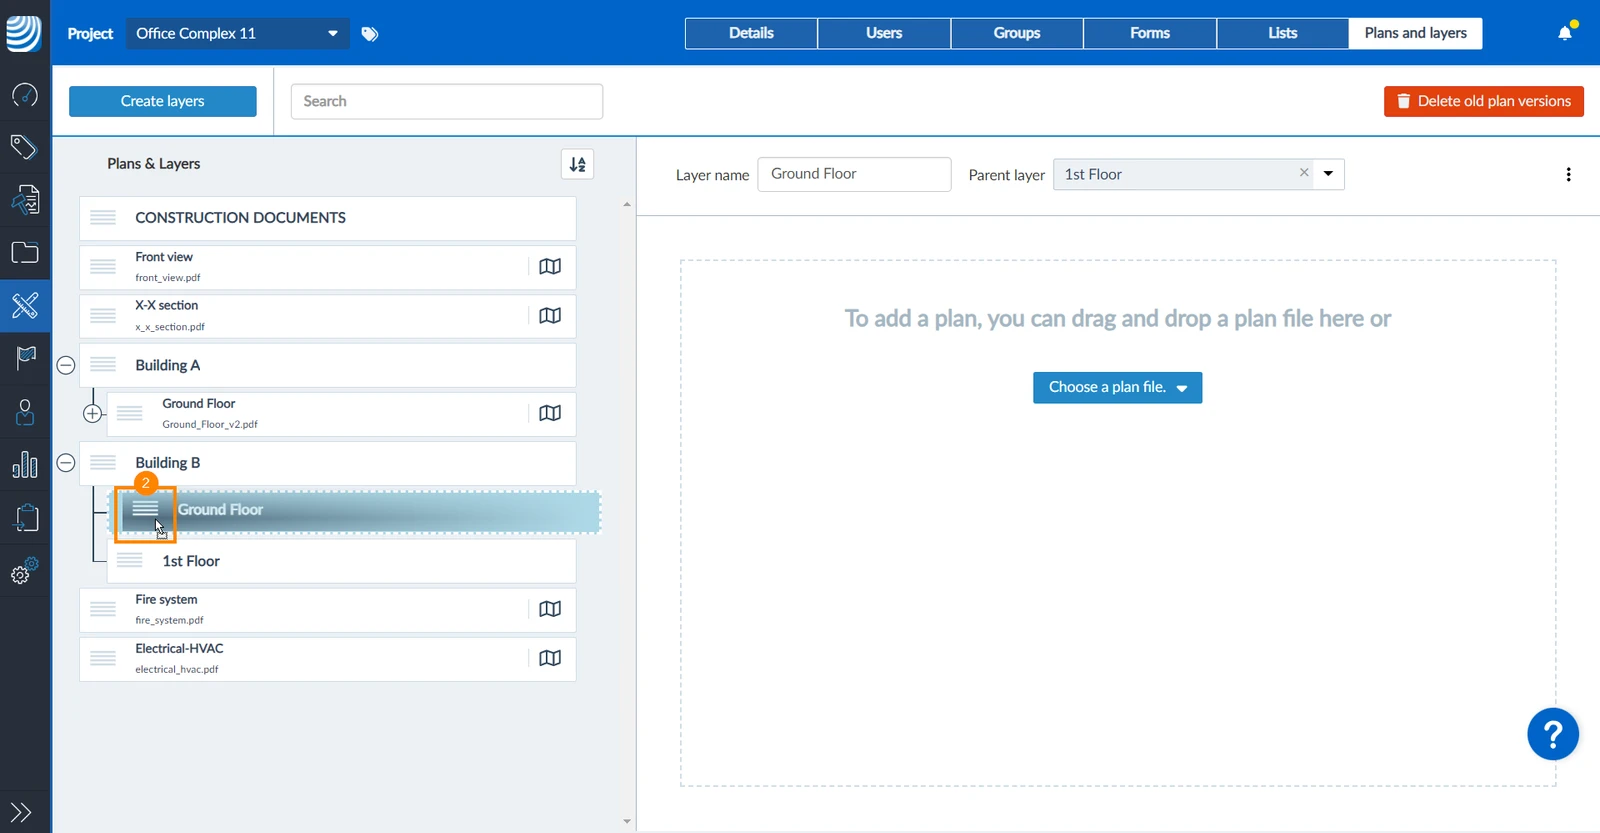
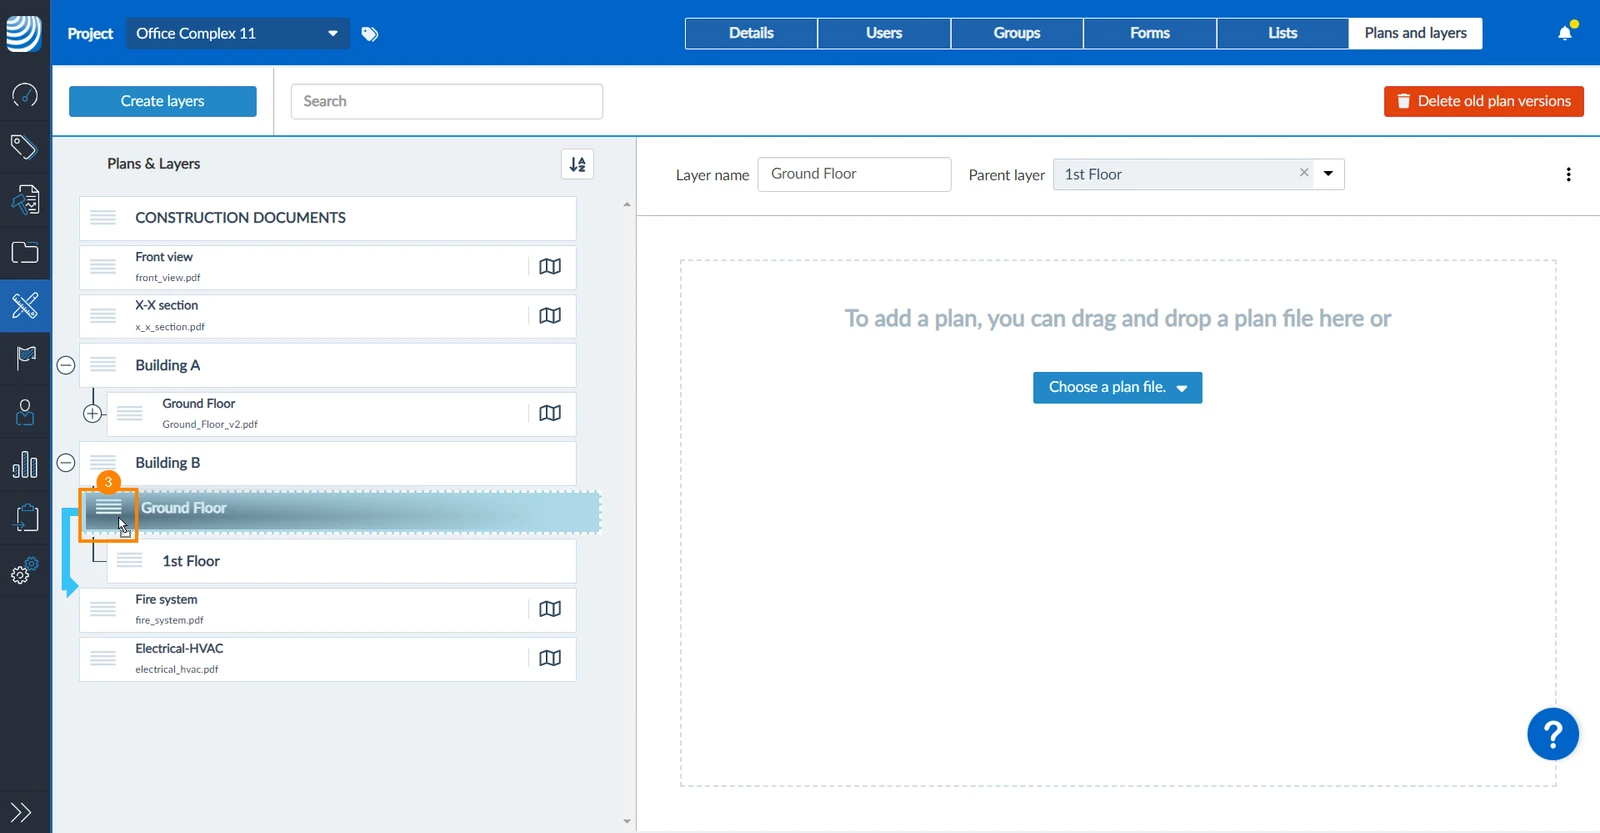
To change the hierarchy or order of a layer with drag and drop:
Drag the order icon of the layer you want to move.
Drag it up or down to change the order.
Drag it left or right to change the hierarchy level.
If you move it further to the left, you see the blue arrow indicating it will be placed on the same level as the layer above it, instead of as a sub-layer as in step two.
Drop it on the desired position by releasing the mouse button.
Change or Remove the Parent Layer
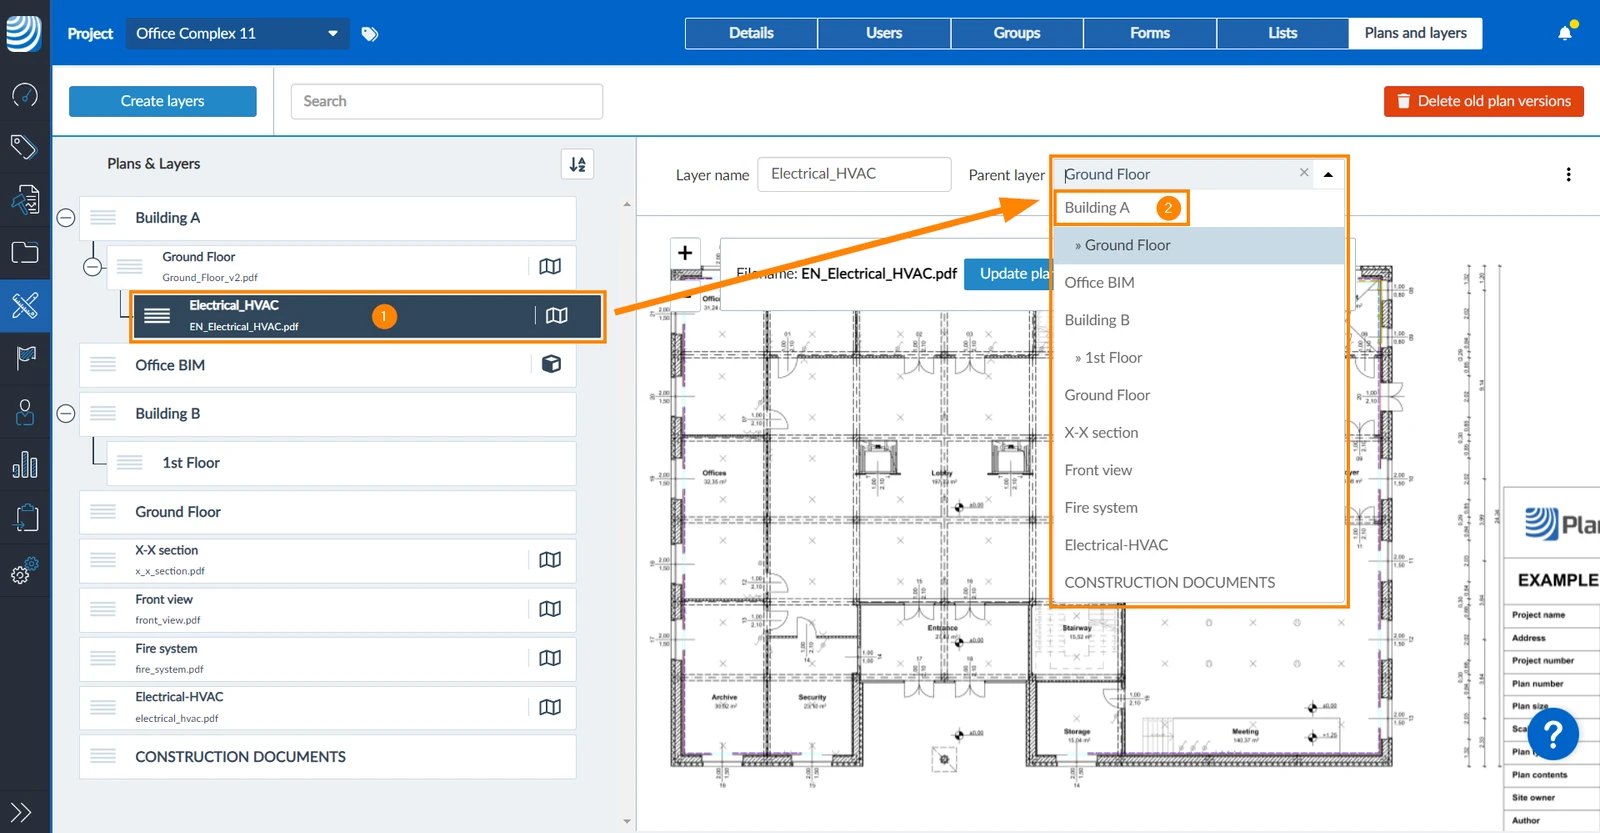
Besides using drag & drop, you can set the parent layer via the parent layer dropdown:
Select the layer
Select a new Parent layer in the drop-down
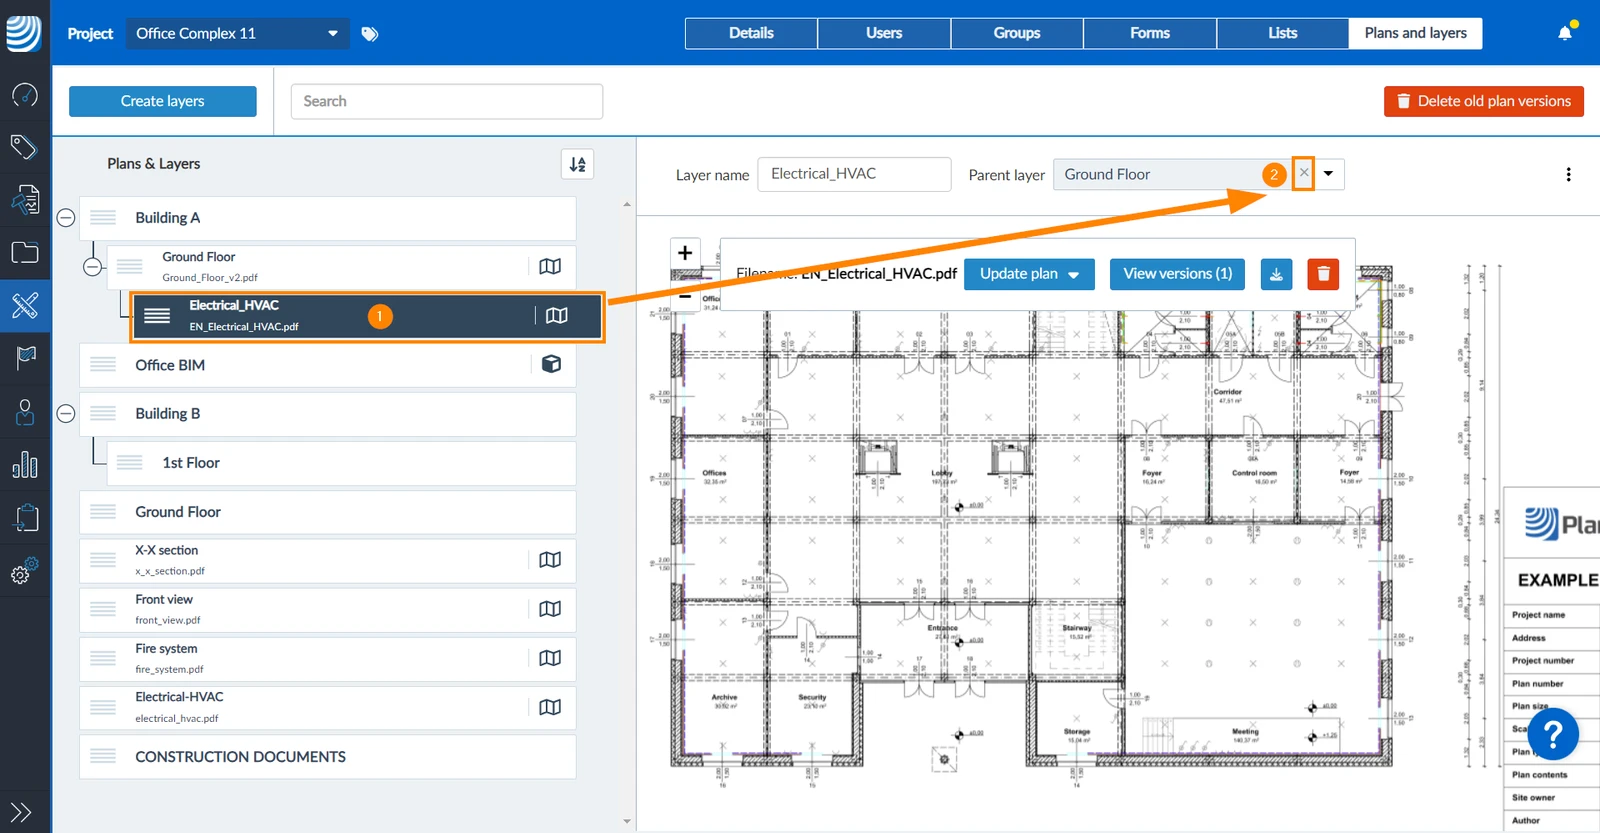
To remove the parent layer and move the layer to the first level of the hierarchy:
Select the layer
Click X in the Parent layer drop-down
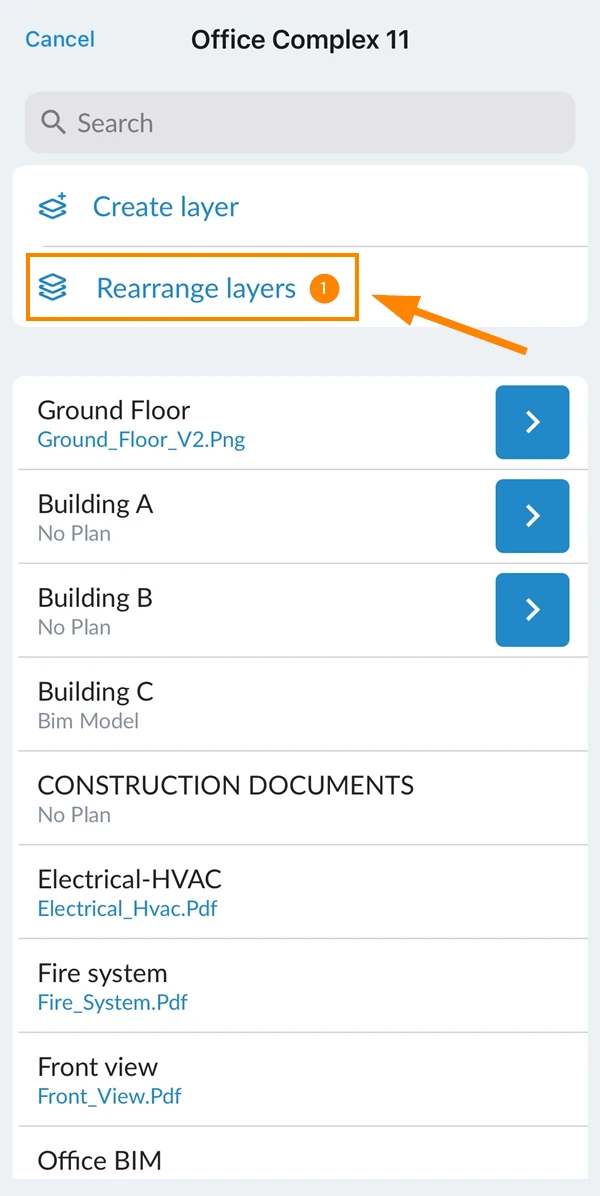
To change to order of layers on the first level of the hierarchy:
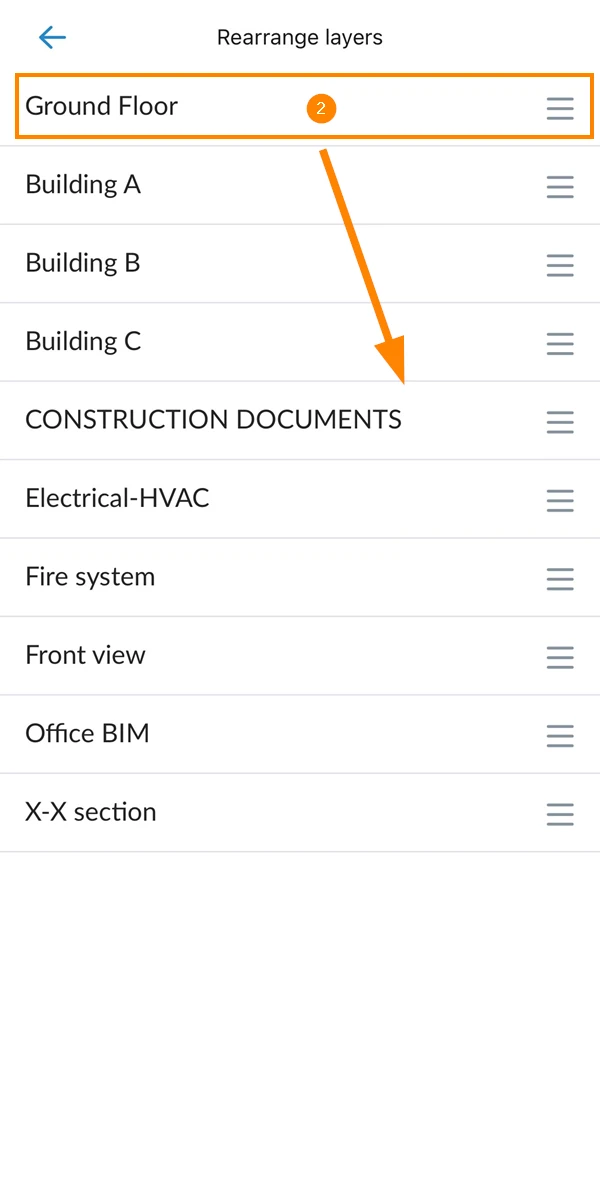
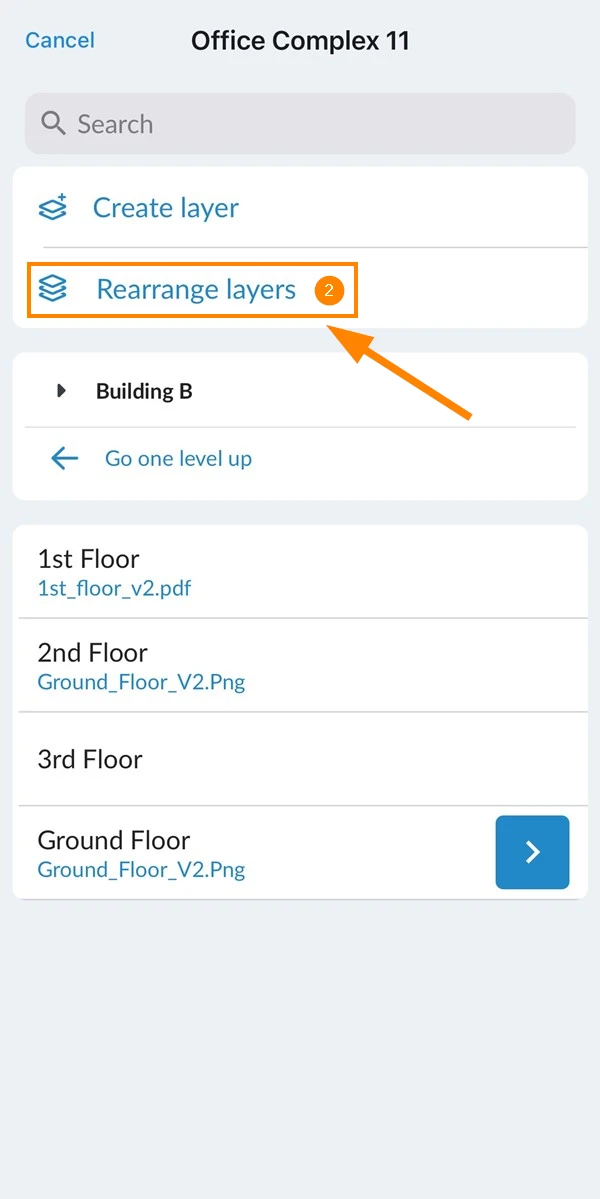
Tap Rearrange layers
Drag and drop the layers to the desired position
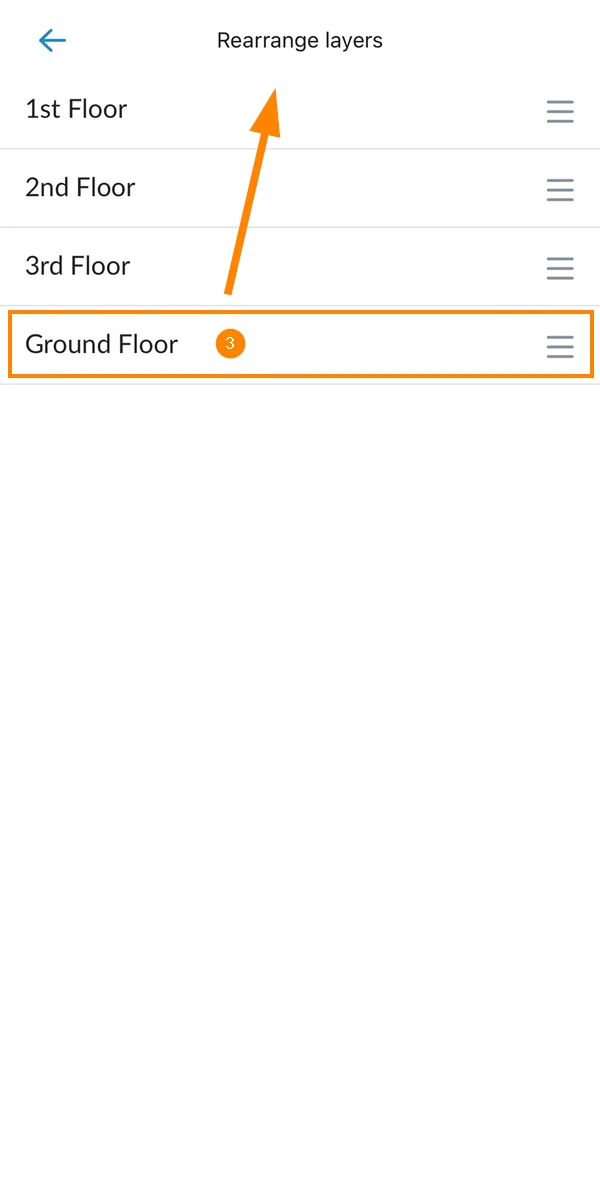
To change to order of sub-layers of a specific parent-layer:
It is not possible to delete a layer that contains tickets. If you are using Documents by Layers it is also not possible to delete a layer that contains documents.
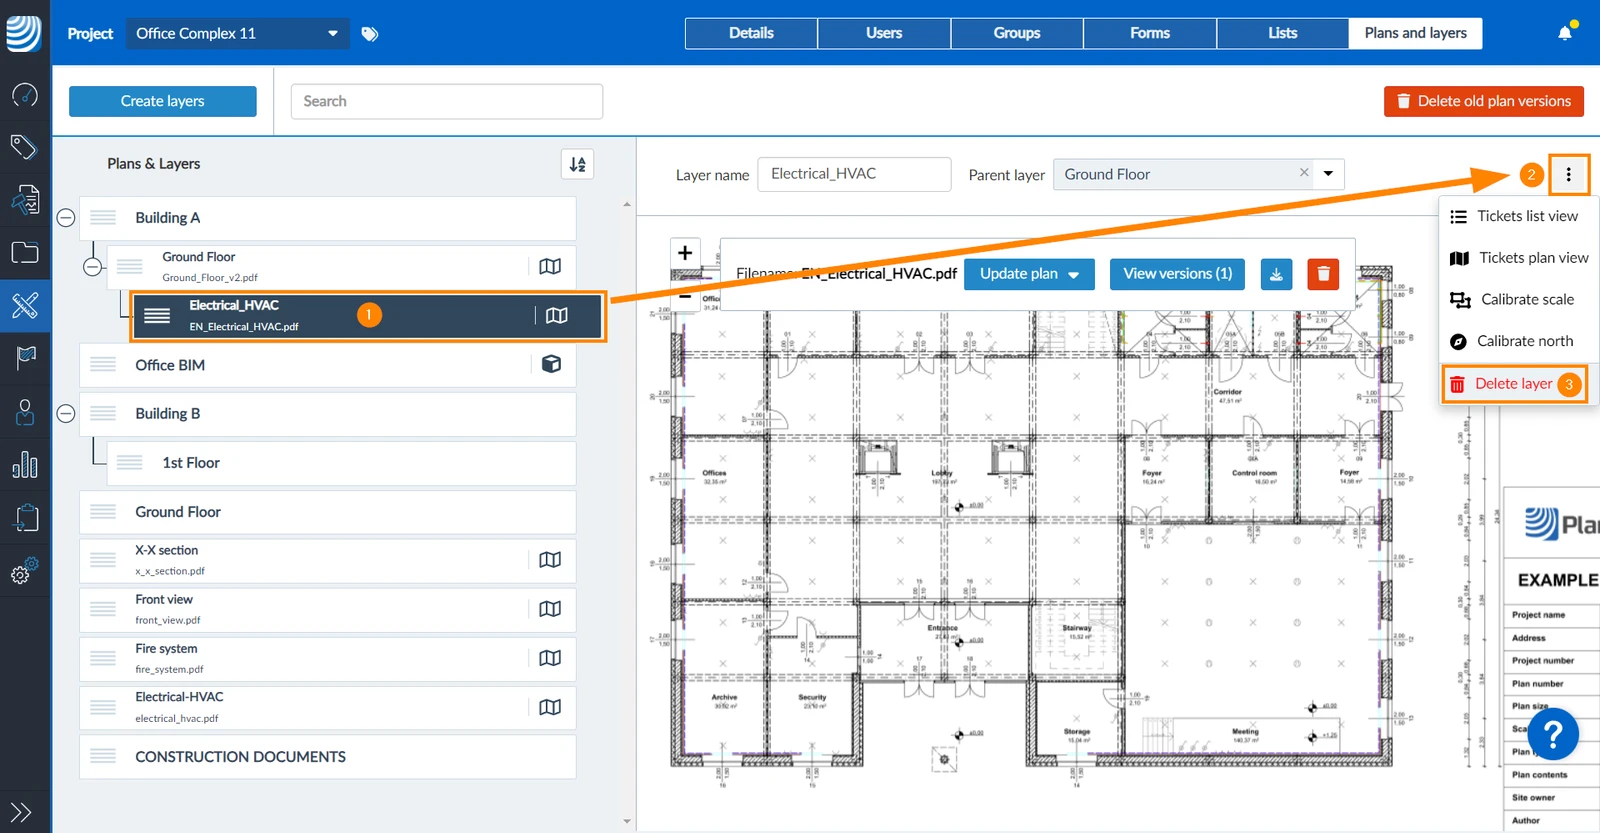
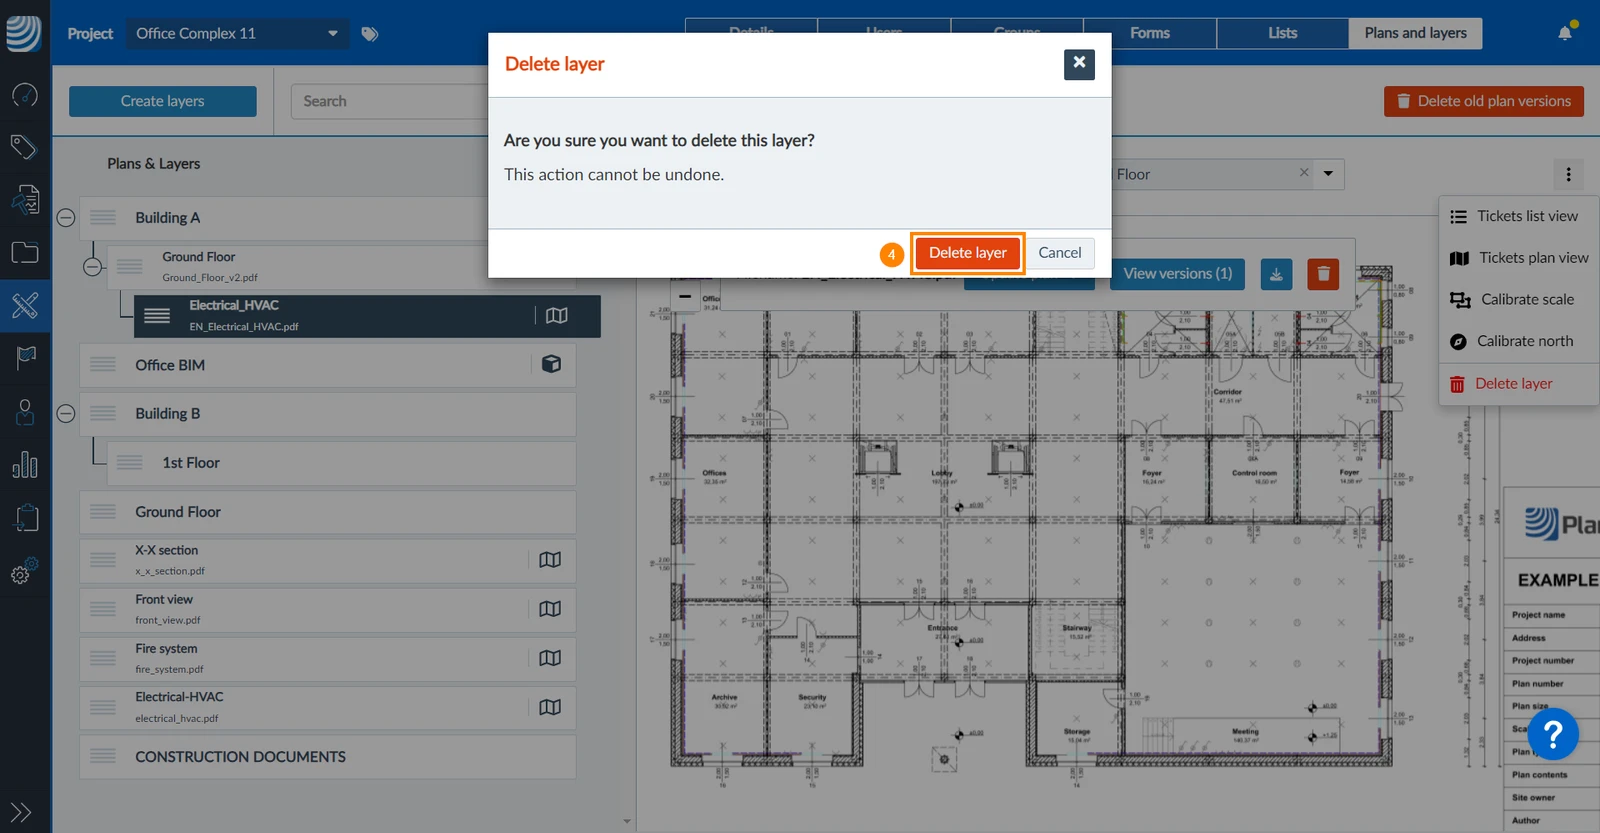
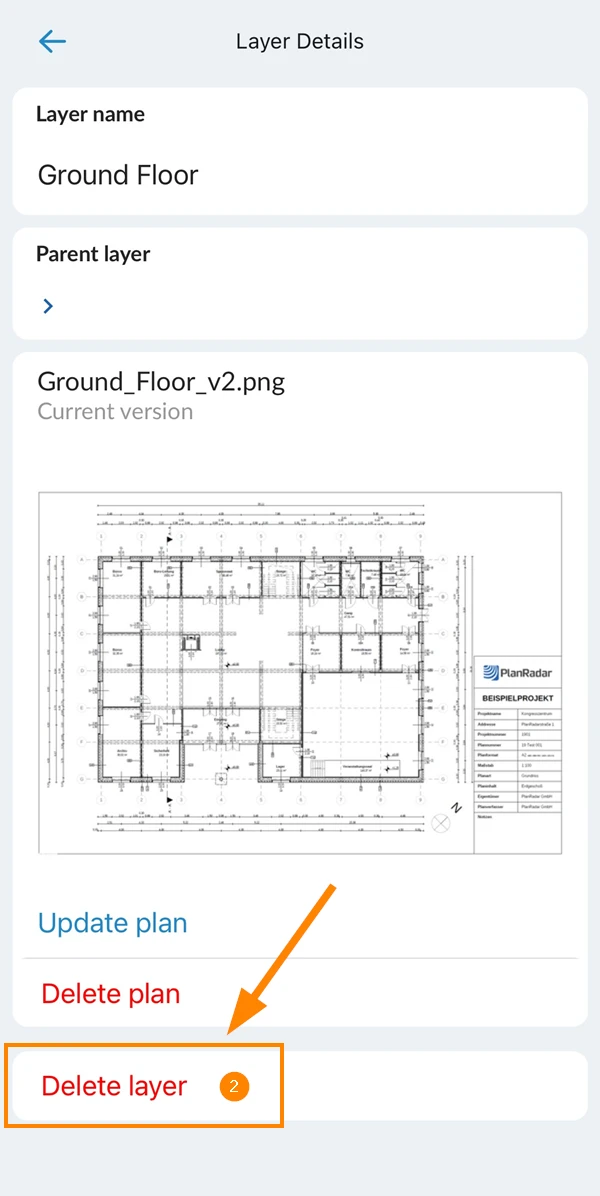
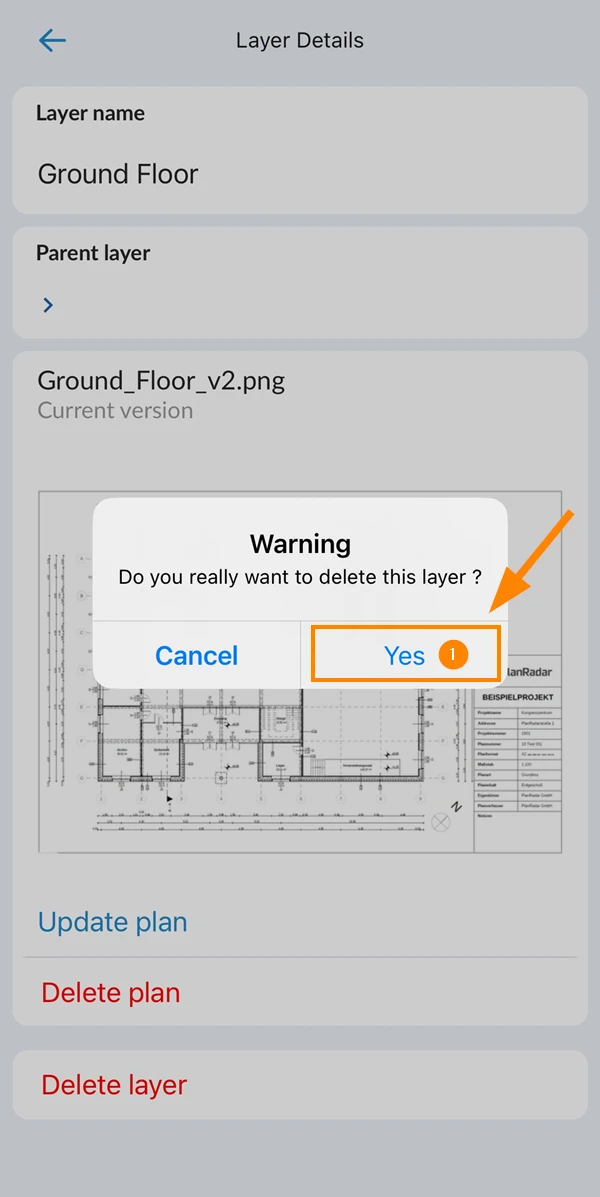
To delete a layer including all its plan versions:


 Deutsch
 Español
 Français
 Hrvatski
 Italiano
 Polski
 Português (BR)