

 Deutsch
 Español
 Français
 Hrvatski
 Italiano
 Polski
 Português (BR)
Upload Plans to Layers
Overview
Plans are managed in layers. Layers are similar to folders to help you organise your plans and tickets.
Each plan must be assigned to a layer. Each layer cannot have more than one plan though plan versions are supported.
Access & Permissions
How to access Plans and Layers
To manage the layers of a project:
- Click Projects
- Click on the project to open it
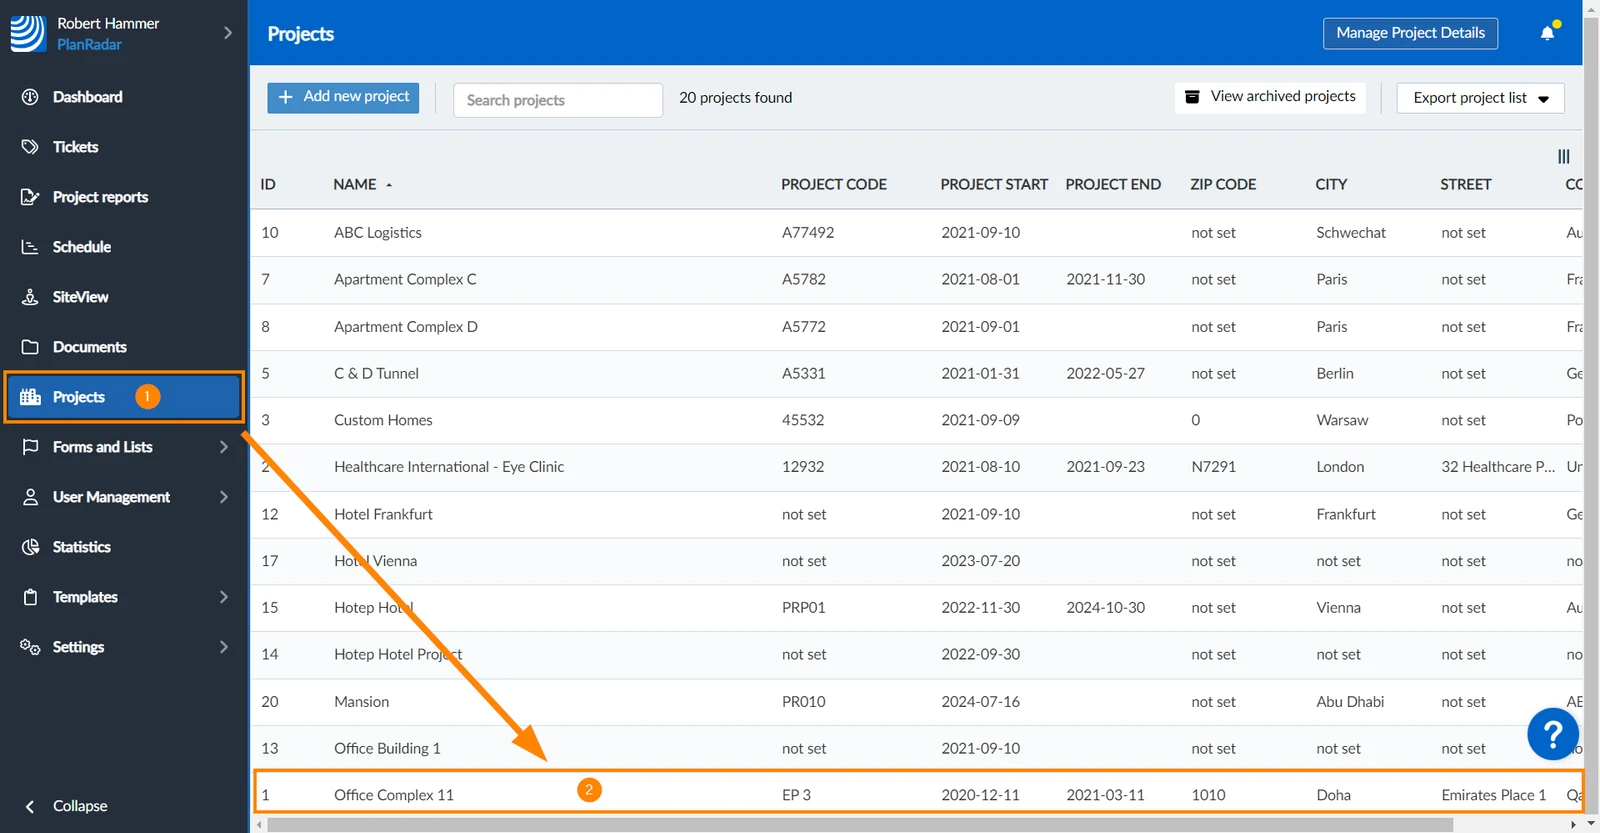
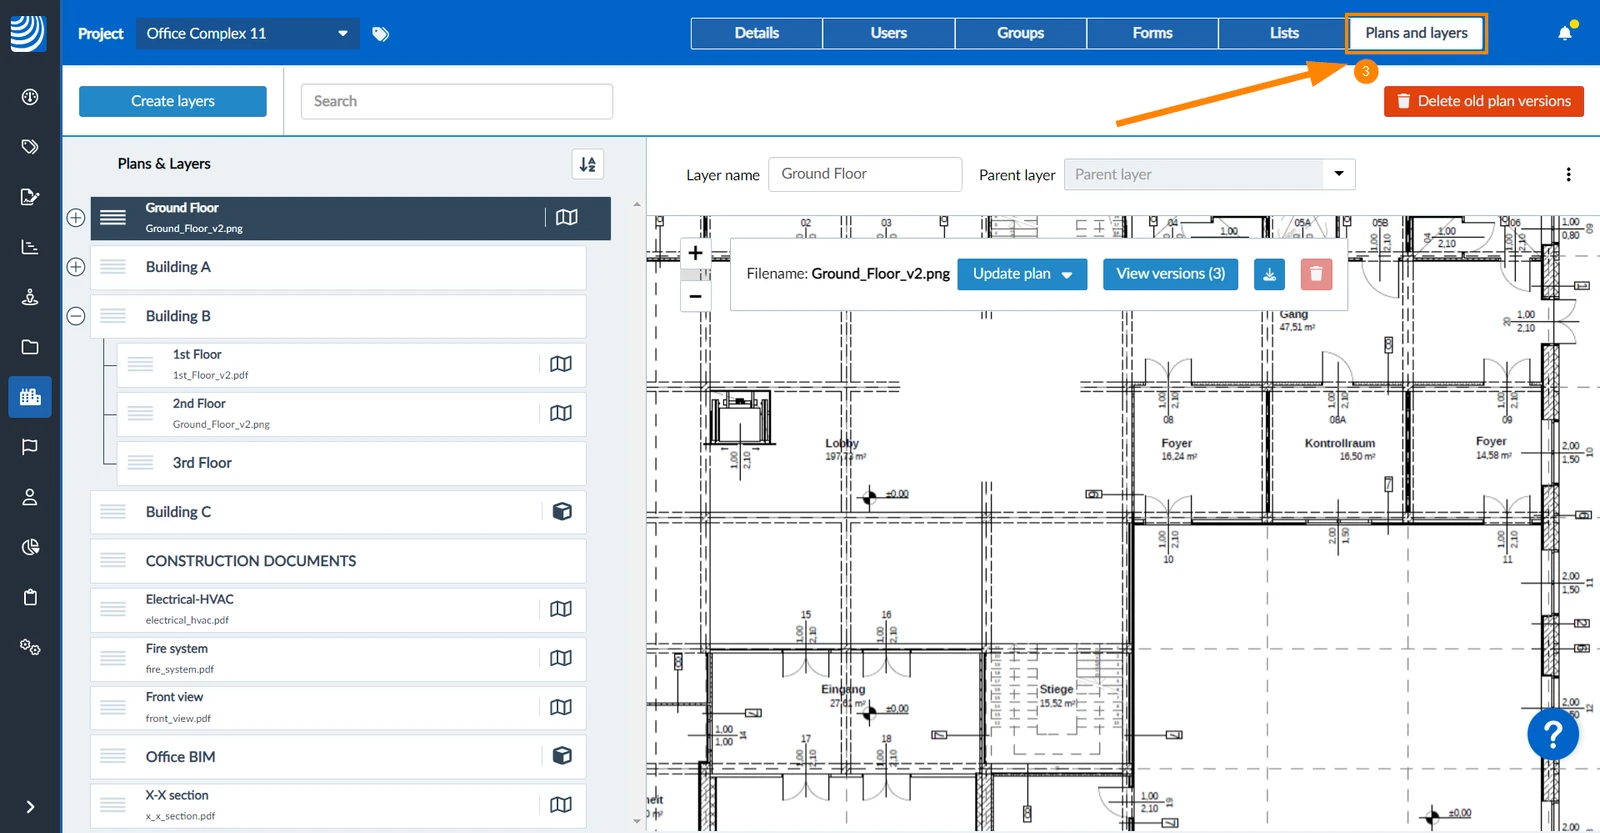
- Click Plans and layers
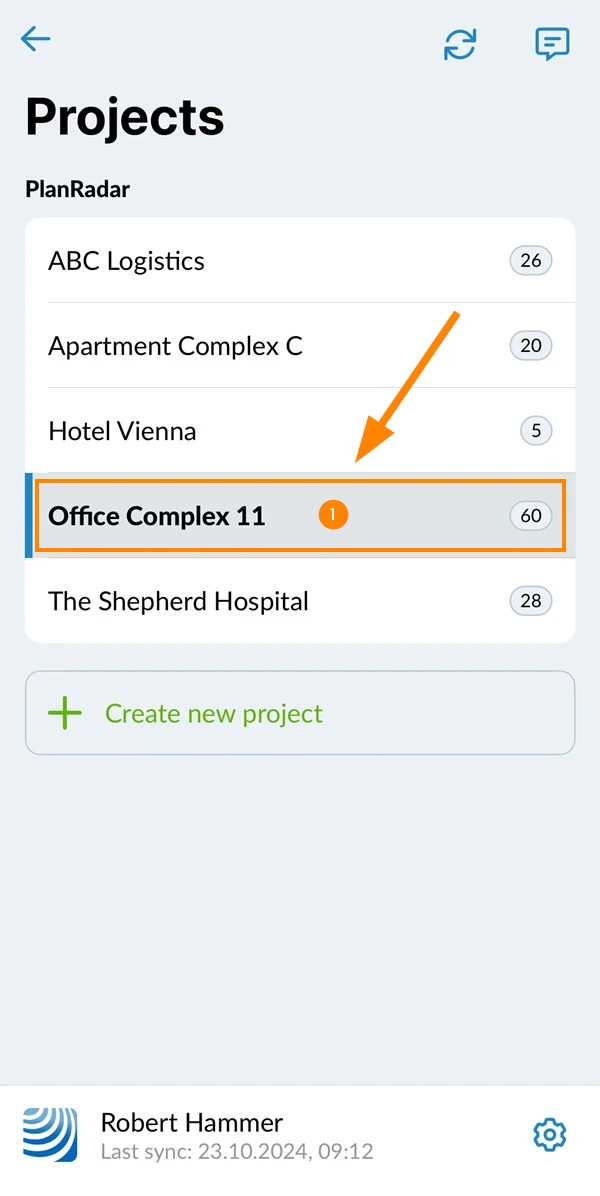
- Select the project e.g. Office Complex 11
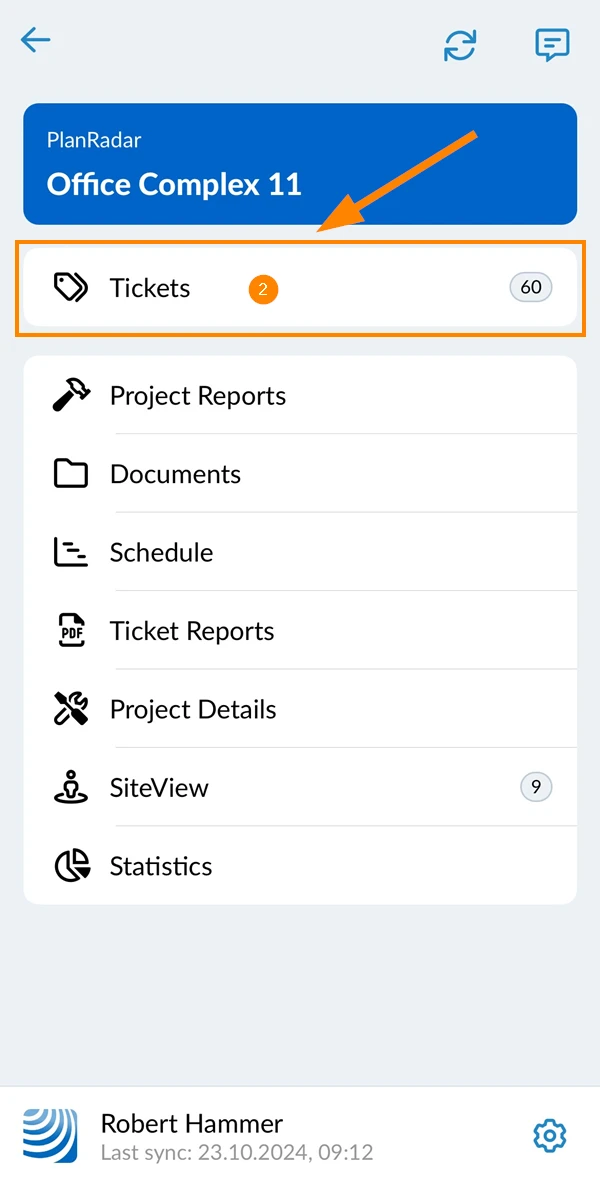
- Tap Tickets
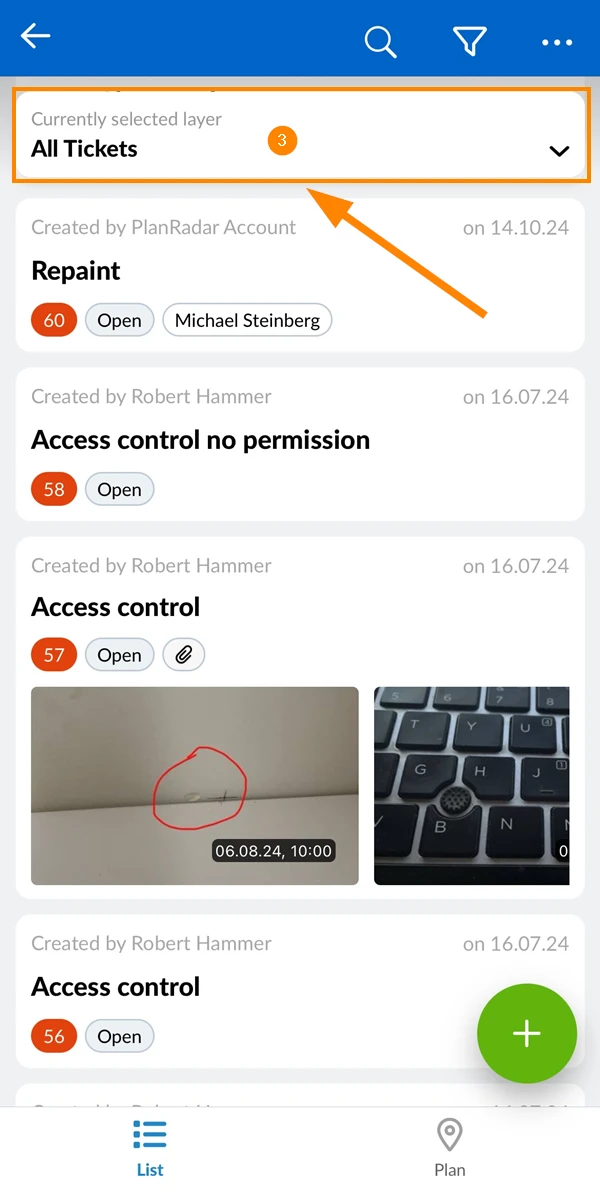
- Open the layer selector
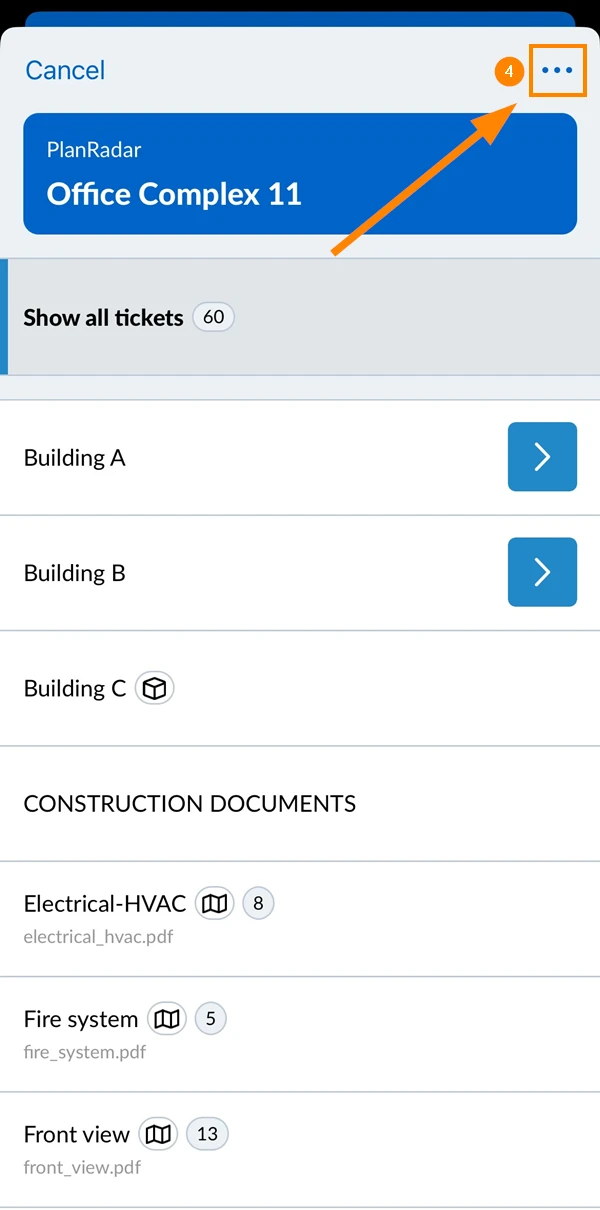
- Open the More menu
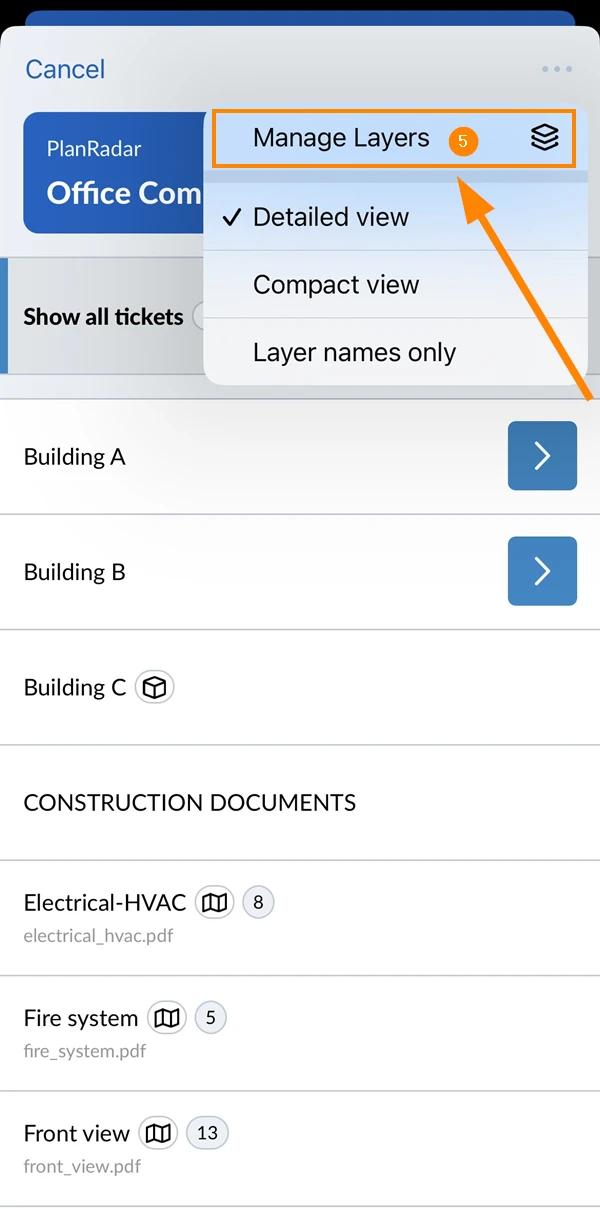
- Tap Manage Layers
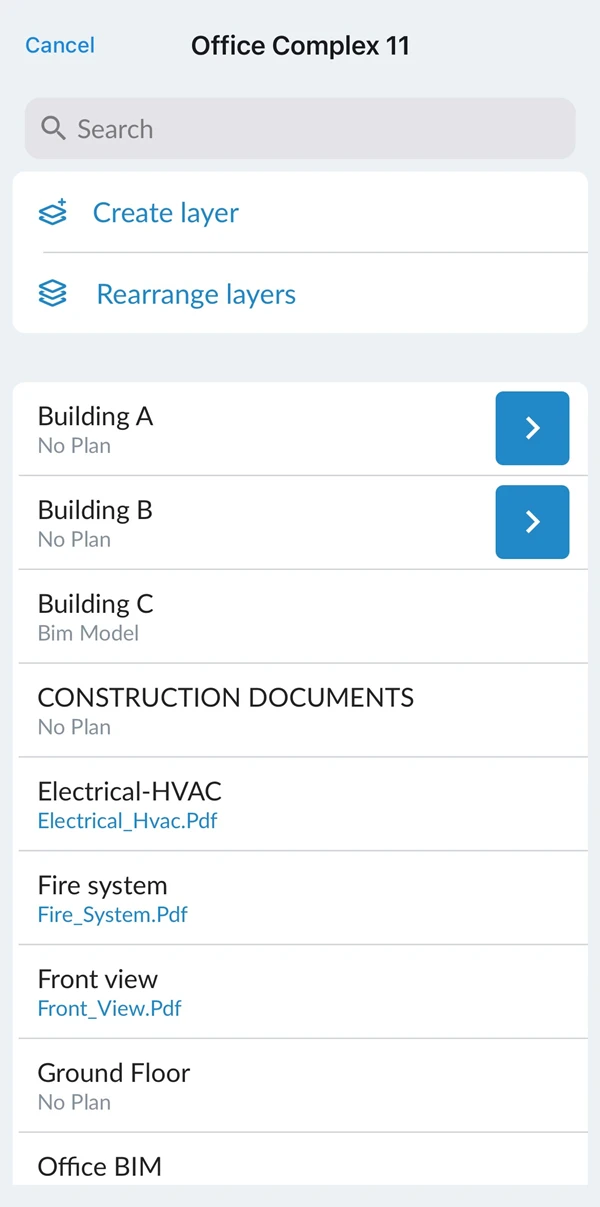
- See the manage layers screen
Upload a Plan to an Existing Layer
Layers can be created and used without plans as described in Manage Layers of a Project > Create a Layer.
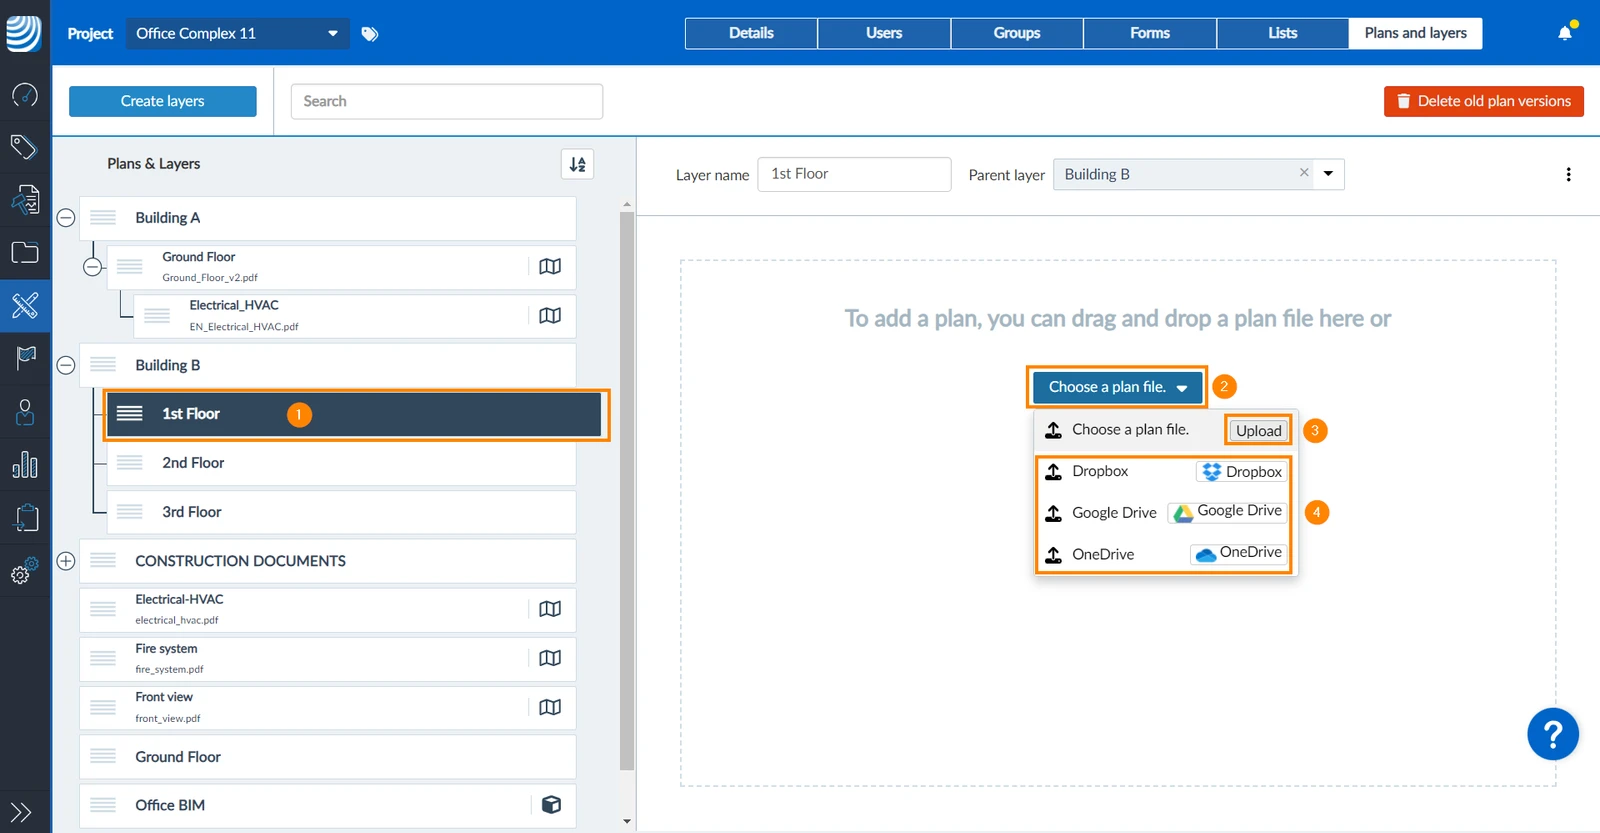
If the target layer for your plan already exists and does not yet contain a plan or BIM model, you can upload a plan like this:
- Select the target layer
- Click Choose a plan file
- Click Upload and select the plan file from your computer.
- OR upload the plan file from a cloud storage service.
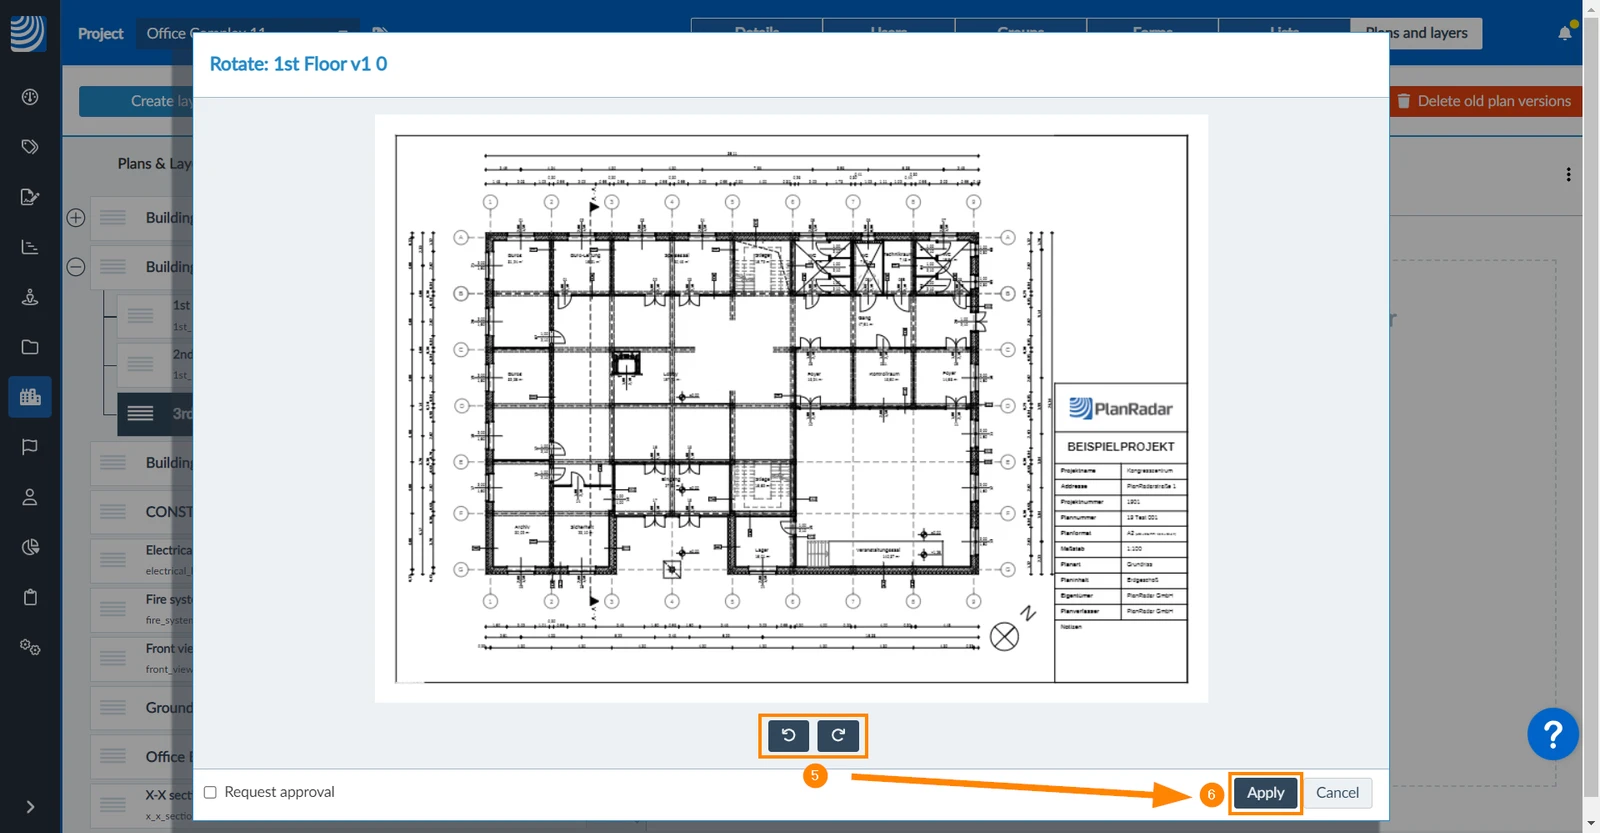
- Optional: Click the rotation buttons to rotate 90° clockwise or counter-clockwise.
- Click Apply
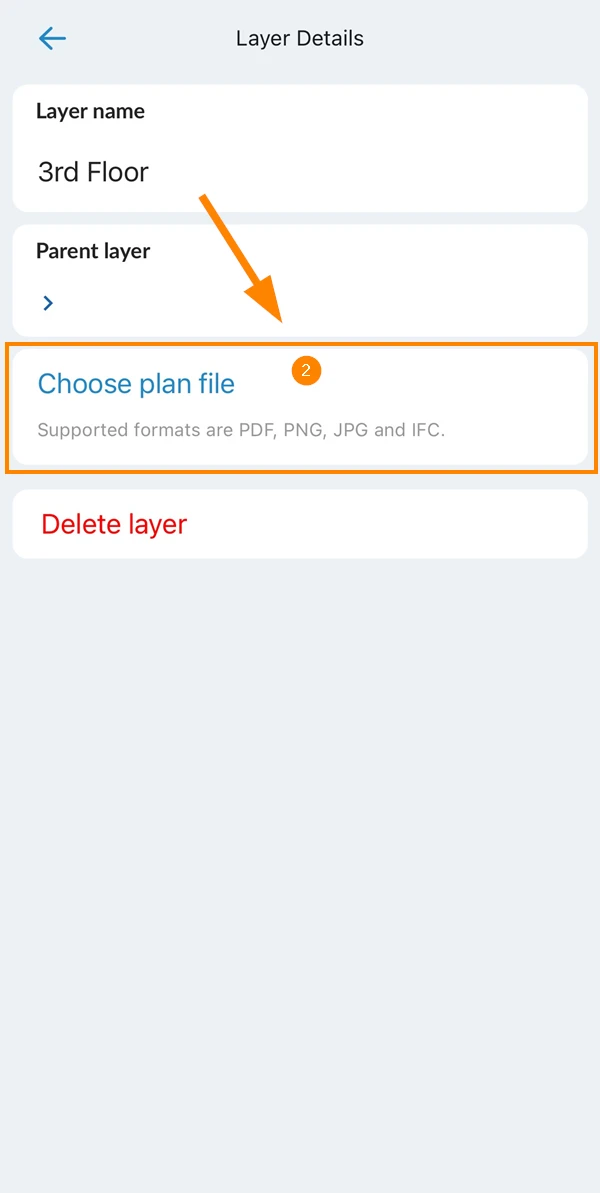
- Navigate to the layer and view the layer details as described in Manage Layers of a Project > Navigate the Layer Hierarchy.
- Tap Choose plan file
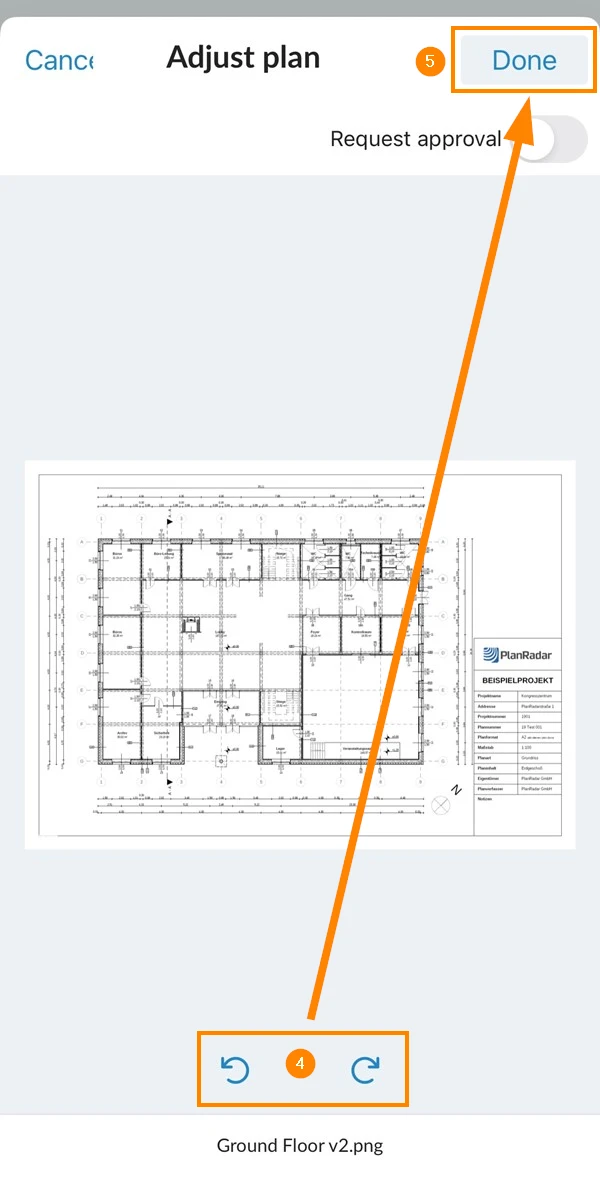
- Select the plan file
- Optional: Tap the rotation buttons to rotate 90° clockwise or counter-clockwise.
- Tap Done
Create Layers & Upload Plans
You can create multiple layers and upload their plans efficiently in one step. It is even possible to upload PDF files with multiple pages and split it into multiple automatically created layers.
To create layers and upload plans:
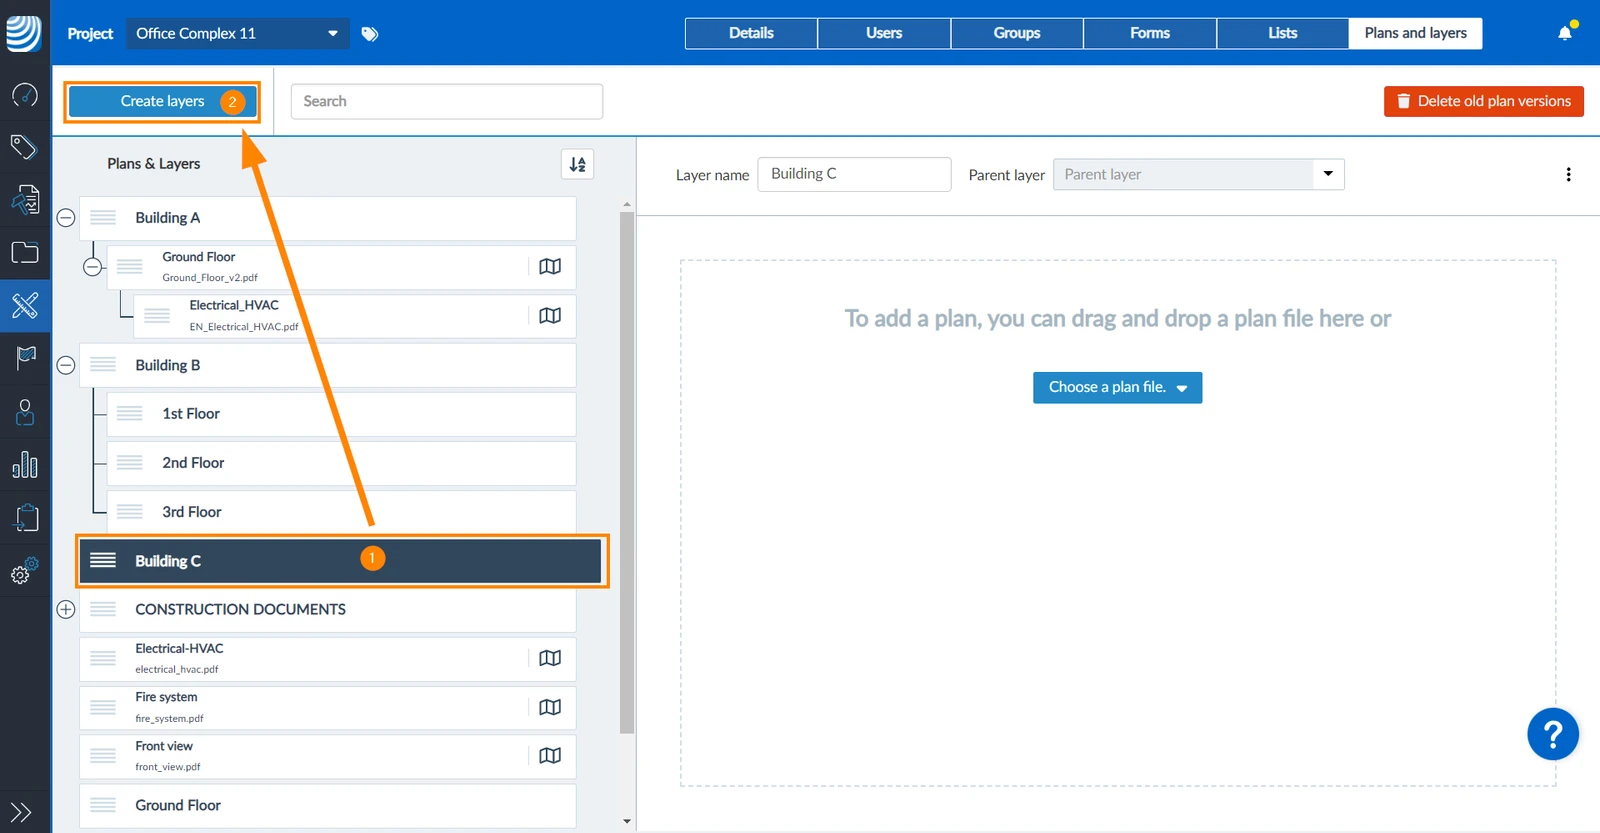
- Select the target parent-layer
- Click Create layers
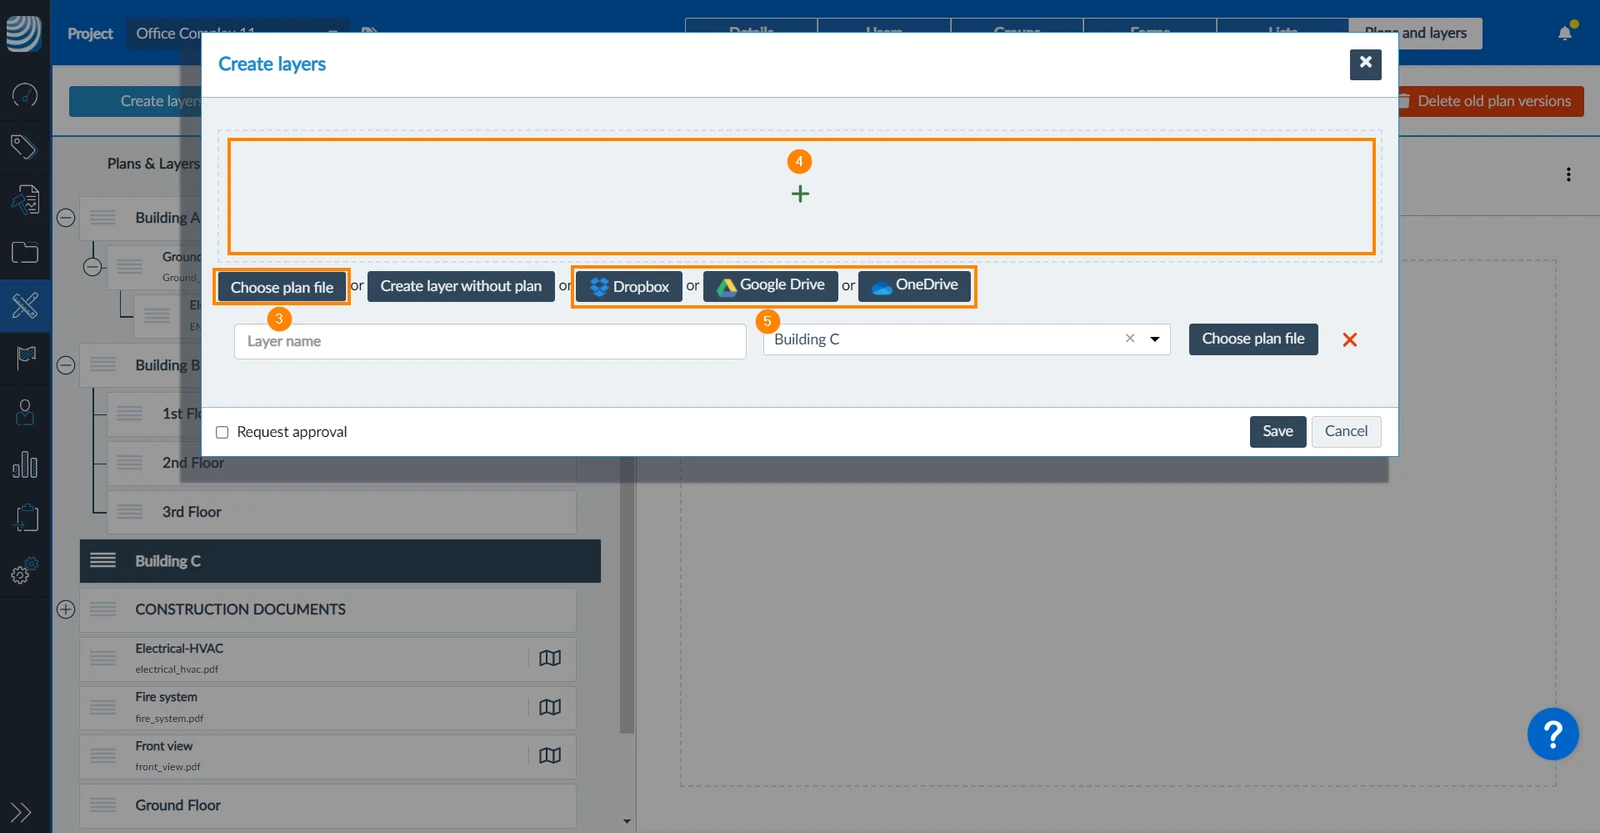
- Click Choose plan file and select the file in the file browser dialogue.
- OR use drag and drop to upload the file from an open file browser on your computer.
- OR upload the file from a cloud storage service.
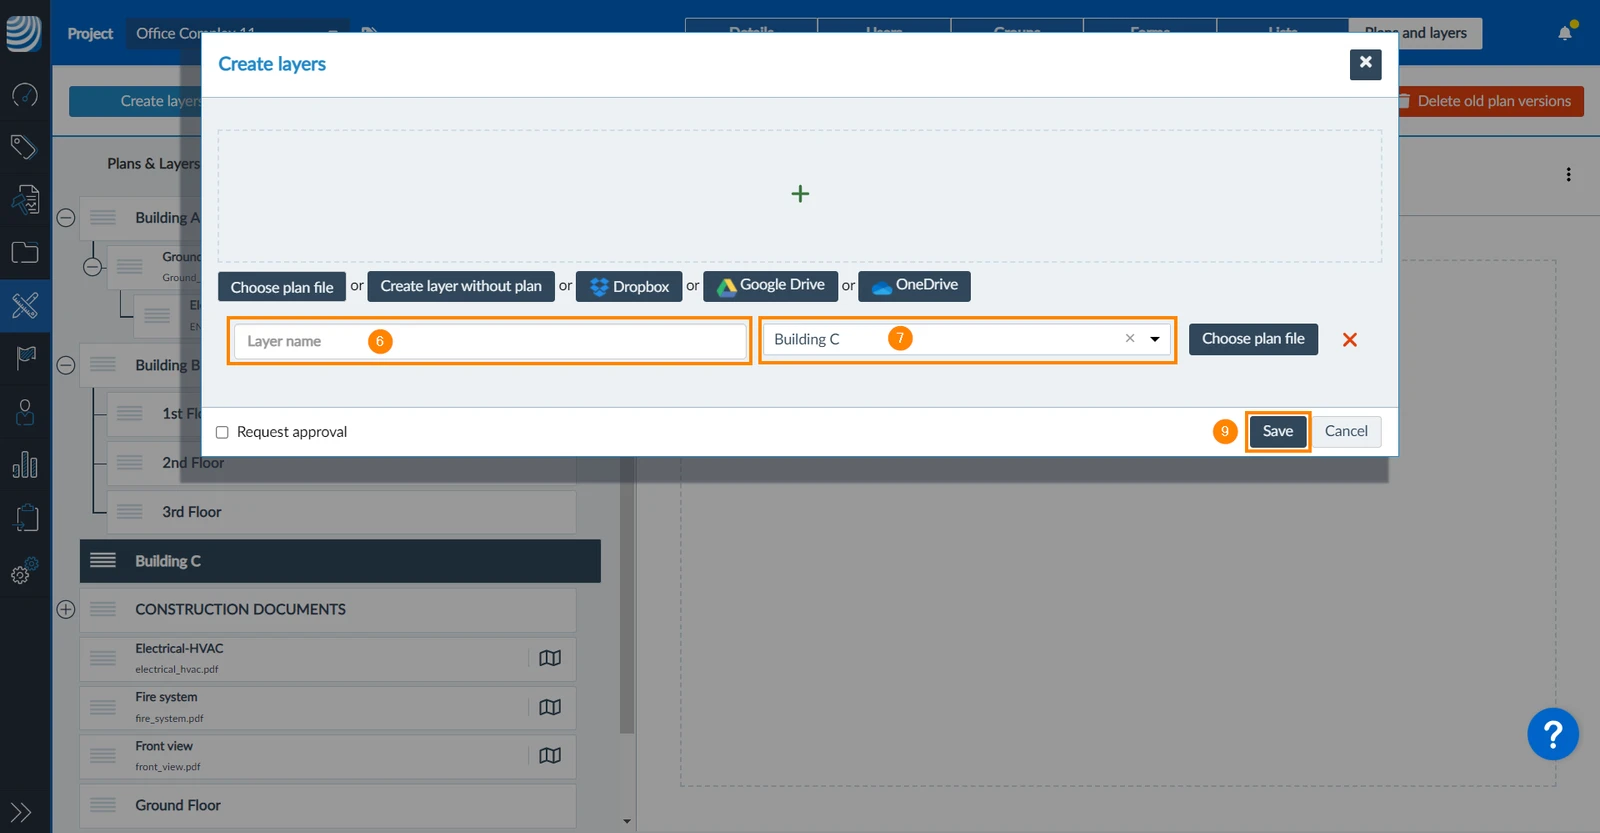
- Enter the Layer name
- Optional: Change or remove the parent-layer
- Repeat steps 3-7 to create additional layers and select plan files.
- Click Save to confirm the creation of the new layers and plans.
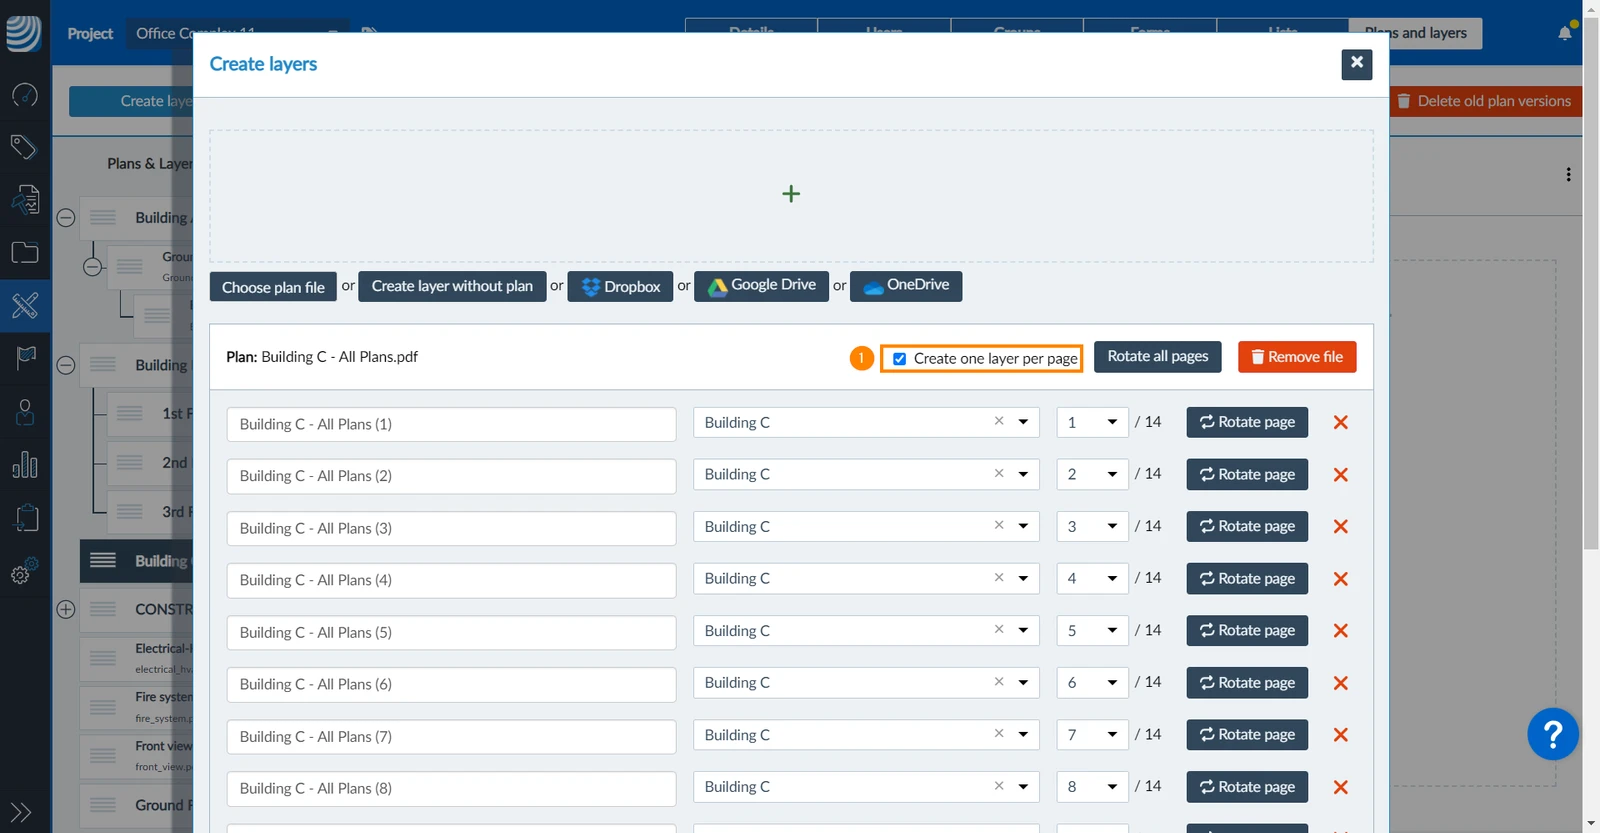
To create layers and plans for every page of a PDF file, select a multi-page PDF file:
- Select the Create one layer per page checkbox
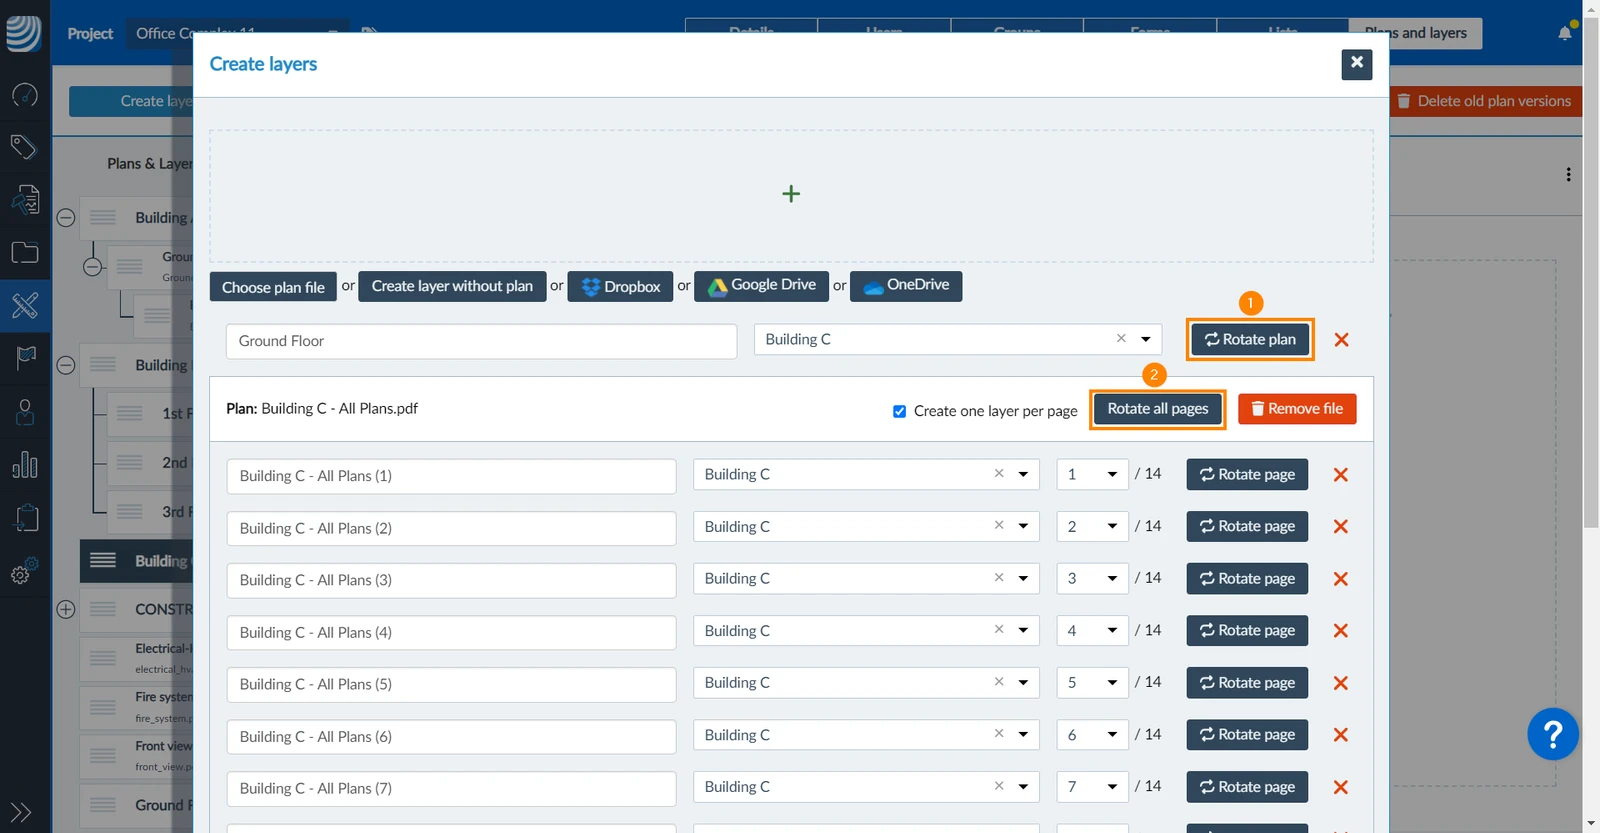
To rotate a plan (or all pages in case of a multiple page PDF):
- Click Rotate plan
- OR click Rotate all pages
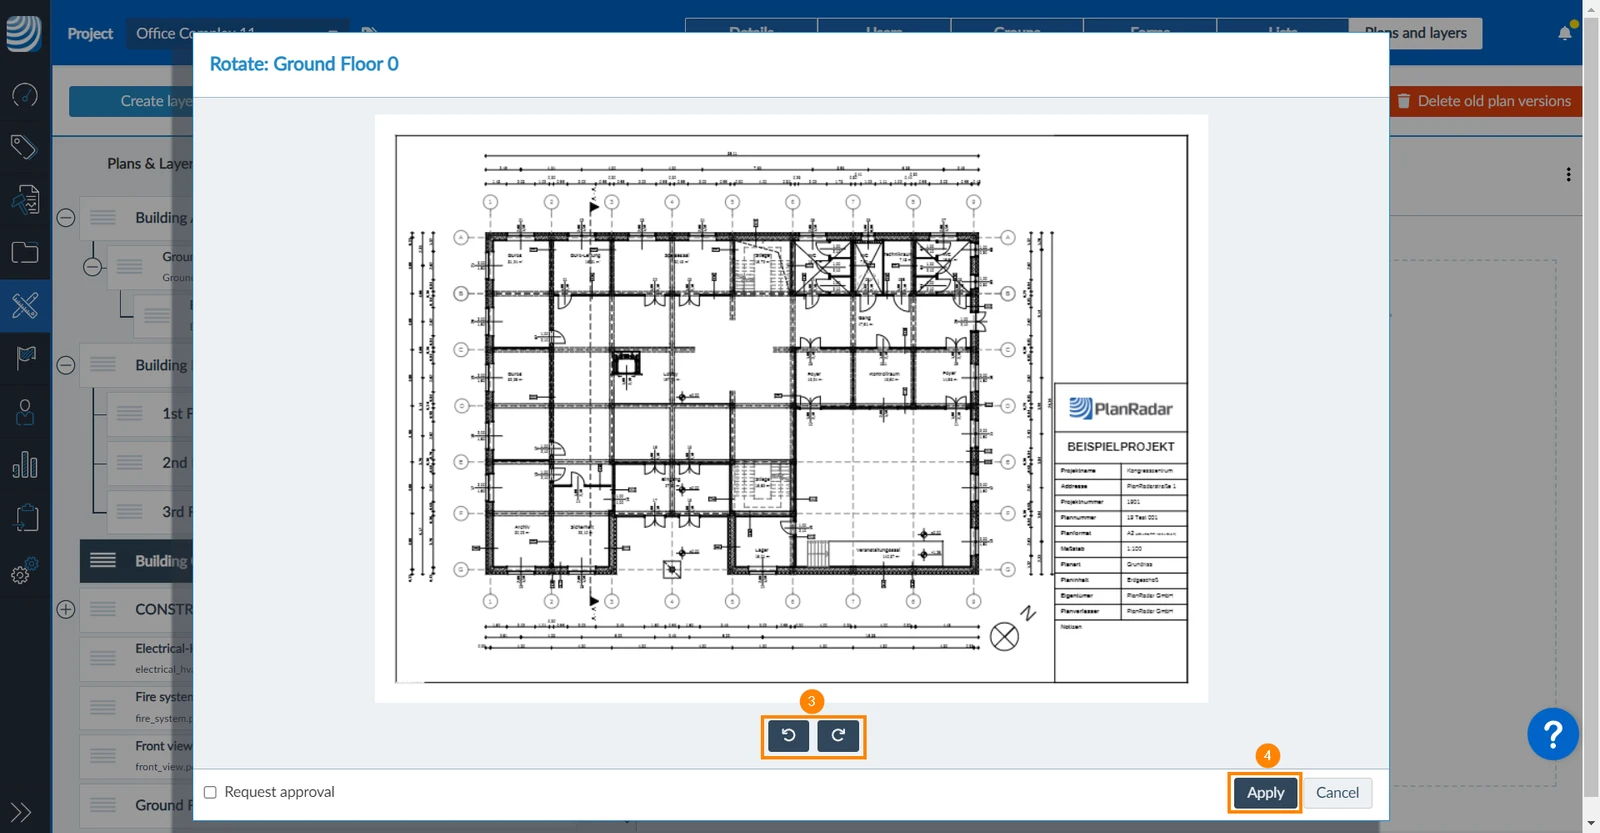
- Click the rotation buttons to rotate 90° clockwise or counter-clockwise
- Click Apply
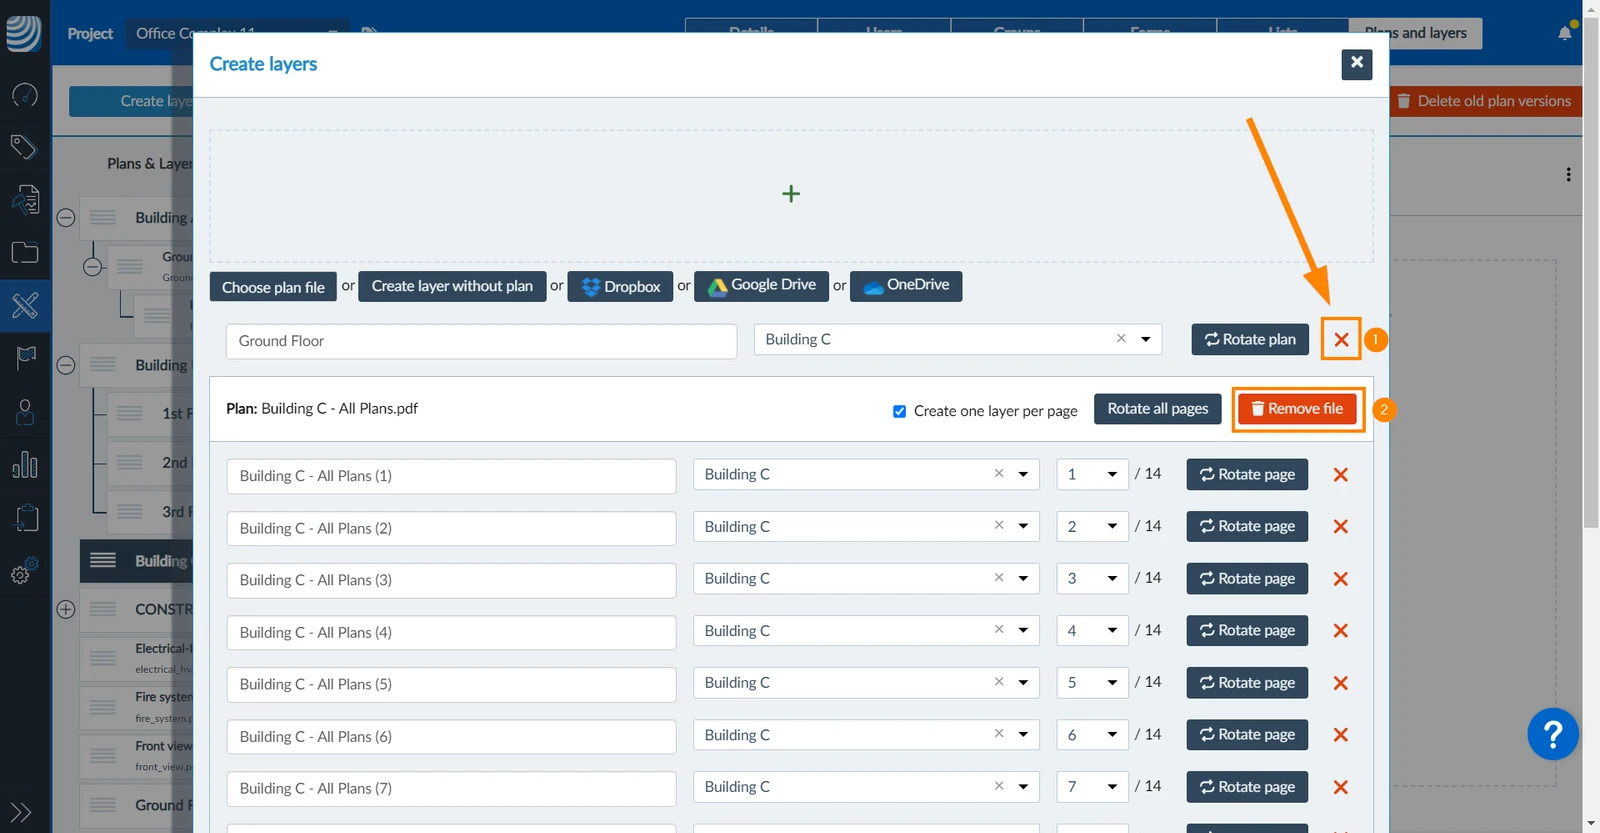
To remove a layer and plan from the list of plans to be added and saved:
- Click X
- OR click Remove file (in case of multiple page PDFs)
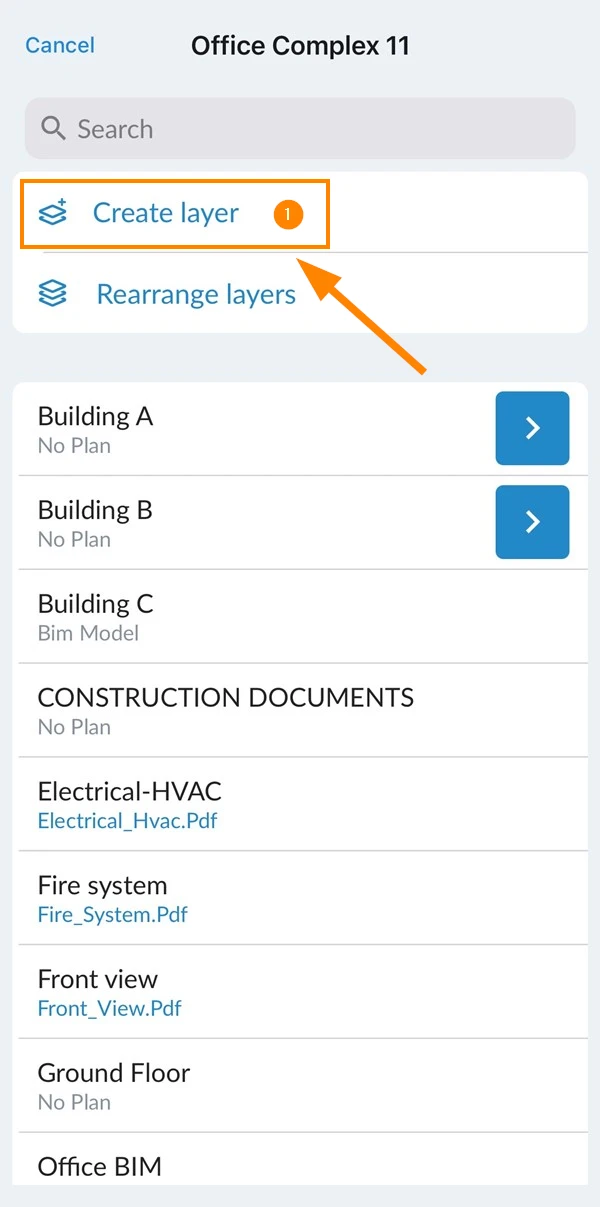
To create a layer or sub-layer with a plan:
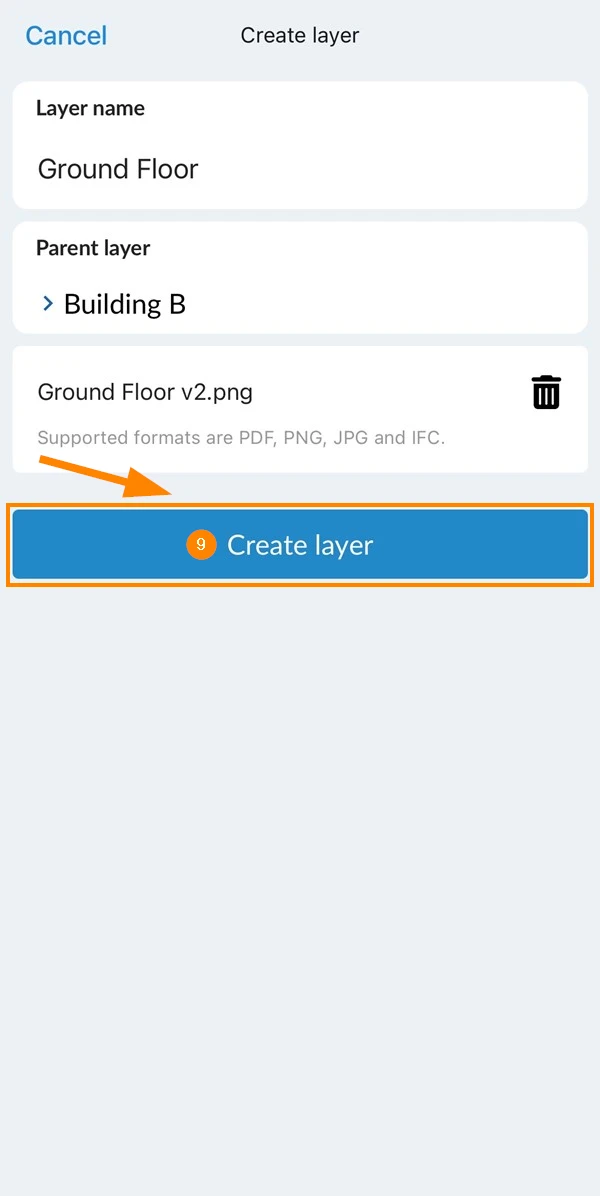
- Tap Create layer
- Enter a Layer name e.g Ground Floor
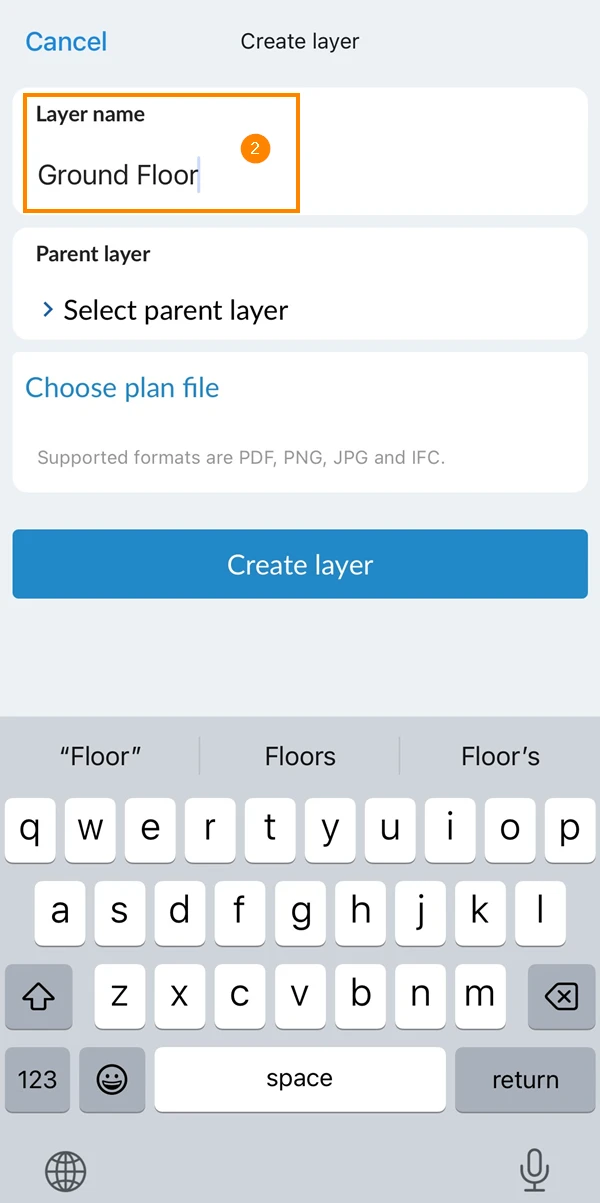
- Optional: Tap Select parent layer
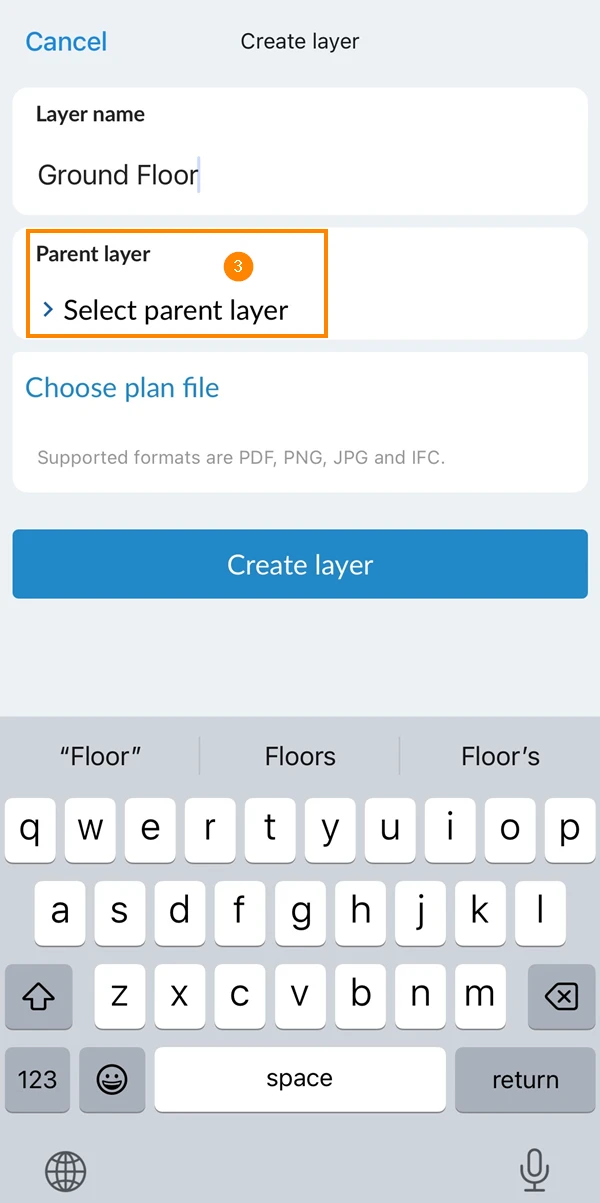
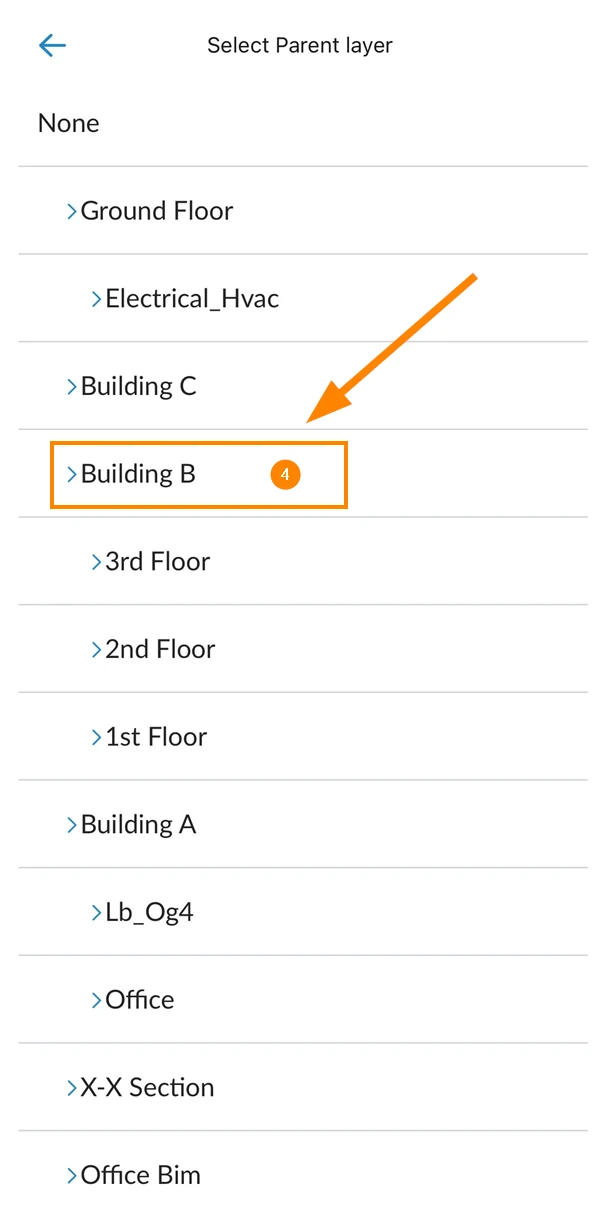
- Optional: Select a parent layer e.g. Building B
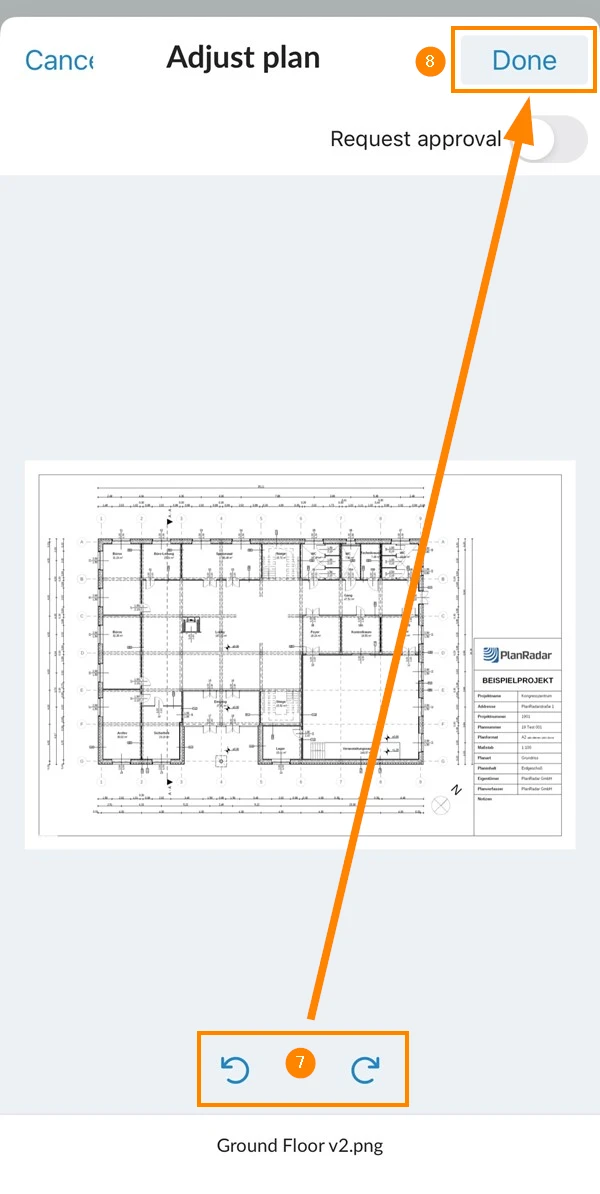
- Tap Choose plan file
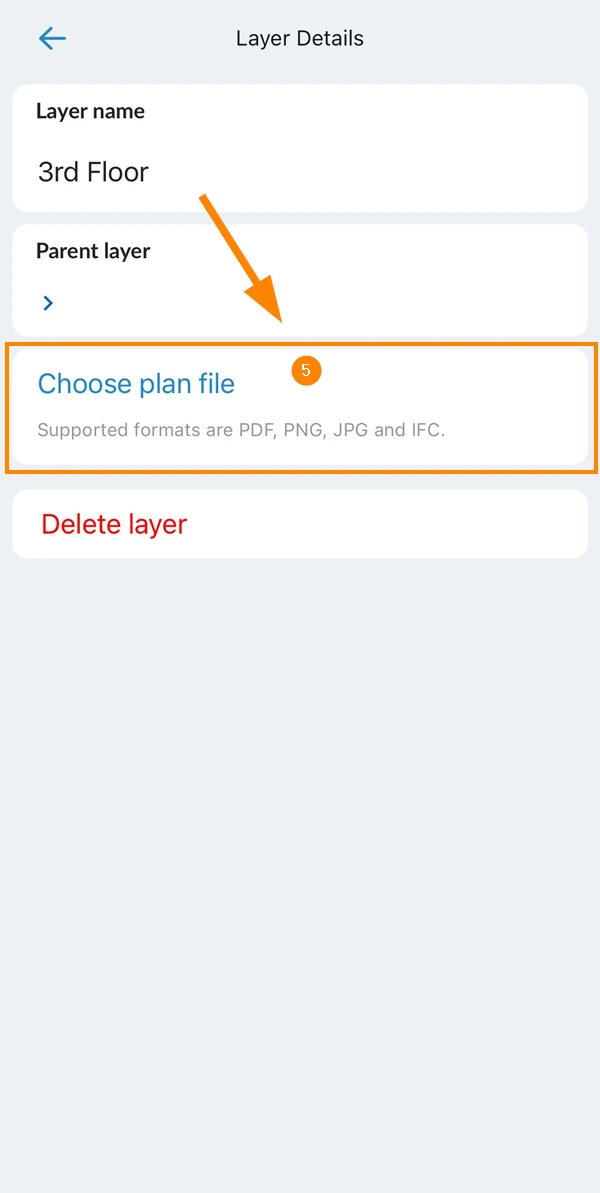
- Select the plan file
- Optional: Tap the rotation buttons to rotate 90° clockwise or counter-clockwise.
- Tap Done
- Tap Create layer
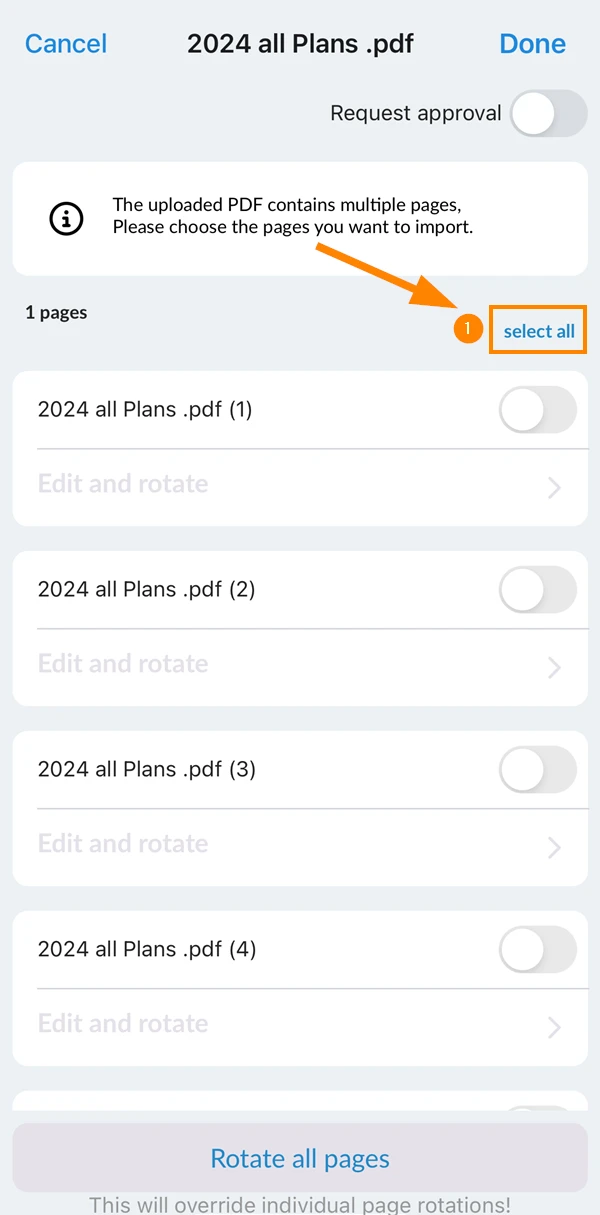
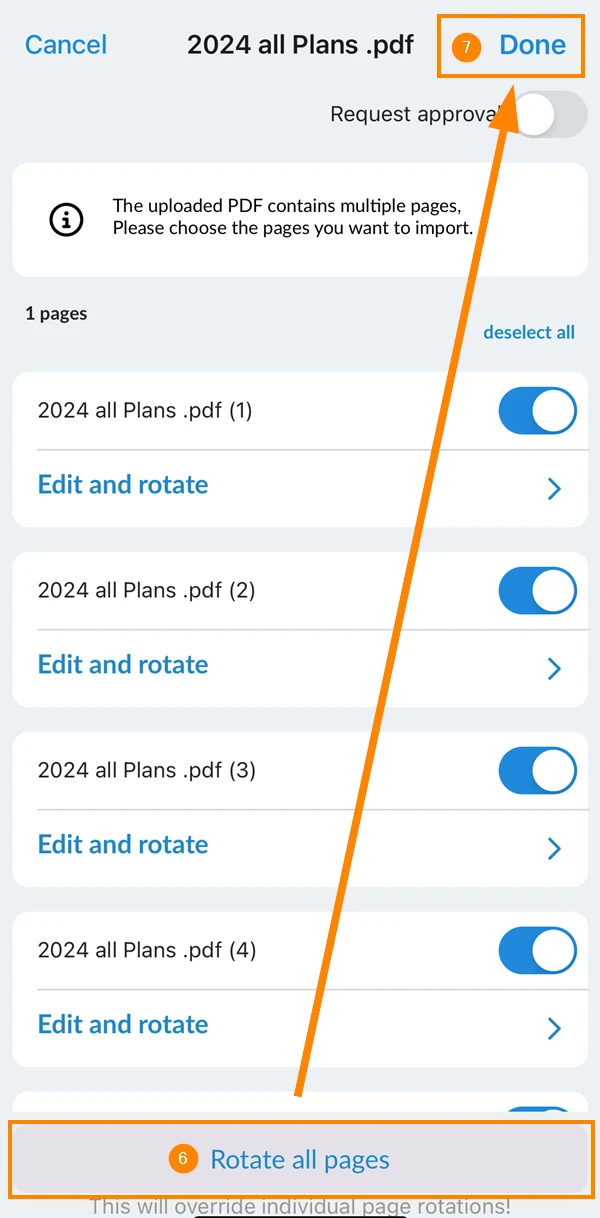
To create layers and plans for multiple pages of a PDF file, start as described above, select a multi-page PDF file and continue as follows:
- Tap select all if you want to upload every page
- Optional: Activate/deactivate the toggles next to each page to include or exclude them
- Optional: Tap Edit and rotate to rename or rotate single pages
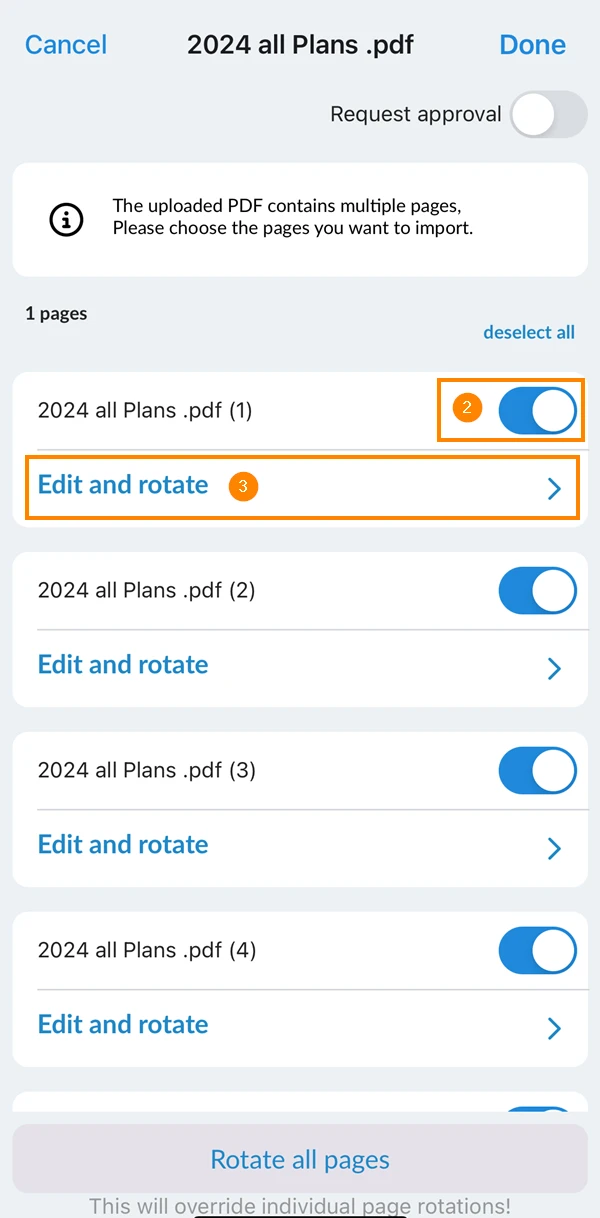
- Optional: Tap on the name to rename the layer
- Optional: Tap the rotation buttons to rotate the page
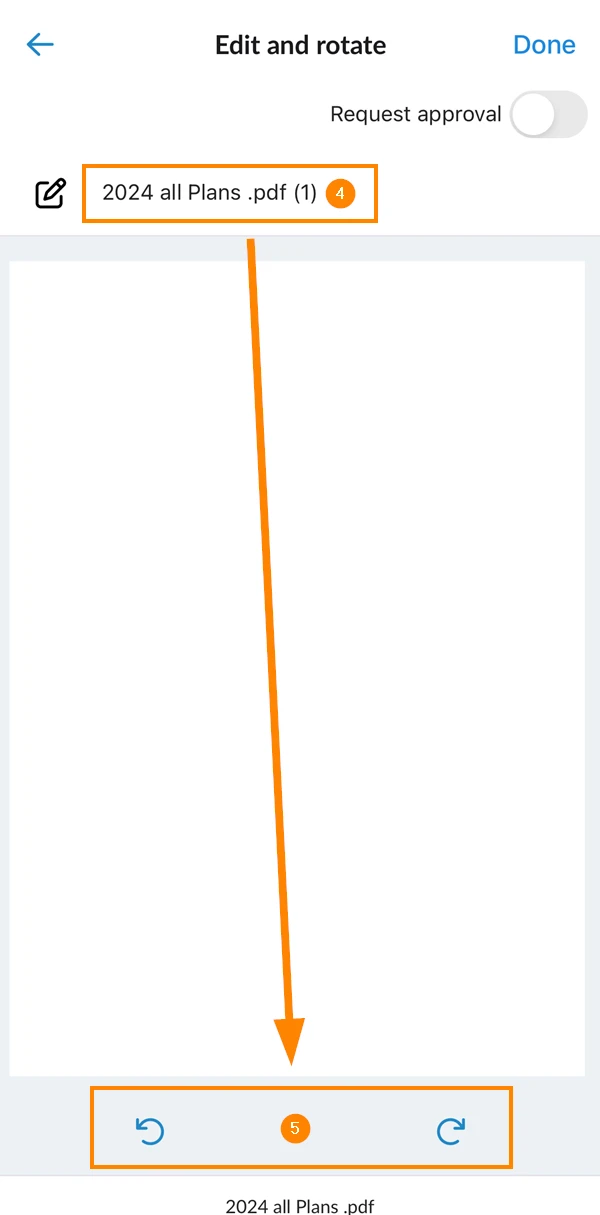
- Optional: Tap Rotate all pages (This will override individual page rotations!)
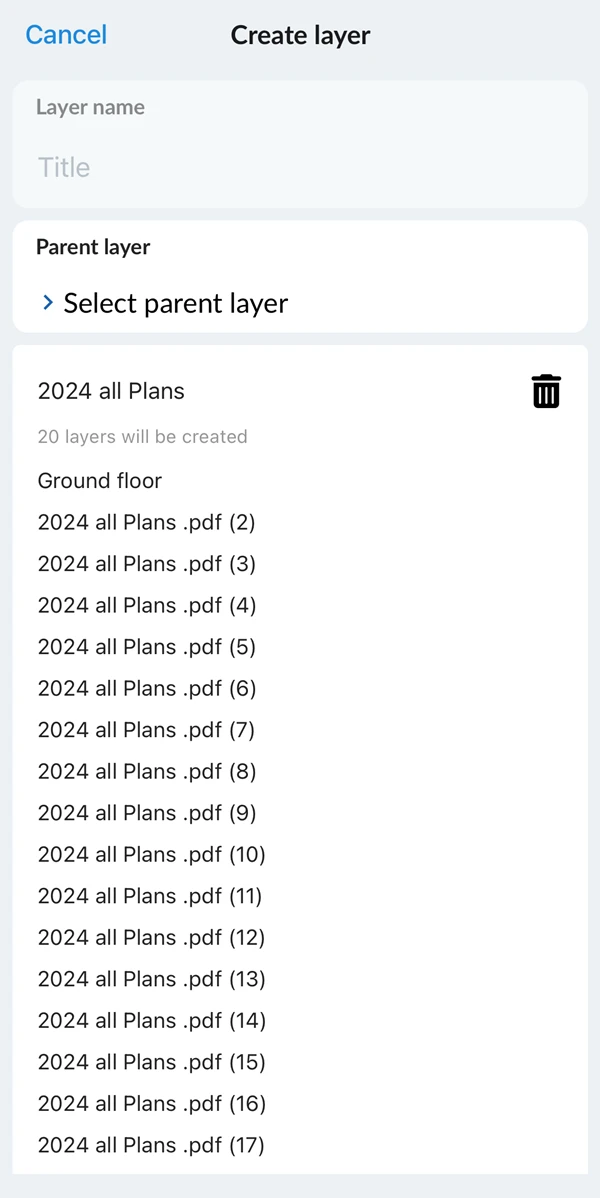
- Tap Done when all layer names and rotations are final
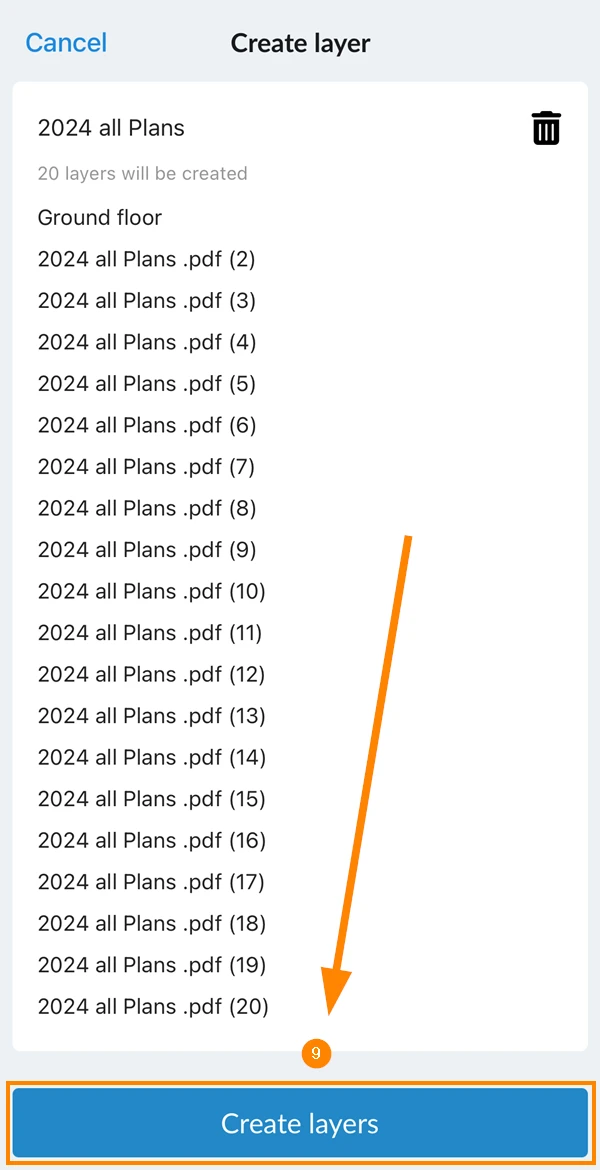
- Check the summary of all layers that will be created
- Scroll down and tap Create layers
Once uploading and processing is complete, all layers and plans will be accessible.
Updated June 16, 2026