

 Deutsch
 Español
 Français
 Hrvatski
 Italiano
 Polski
 Português (BR)
Request Approval for Documents
Overview
Request approval for any files saved in Document Management > All files.
You can request approval for a single file or for multiple files in the same request.
Access & Permissions
How to access Document Management
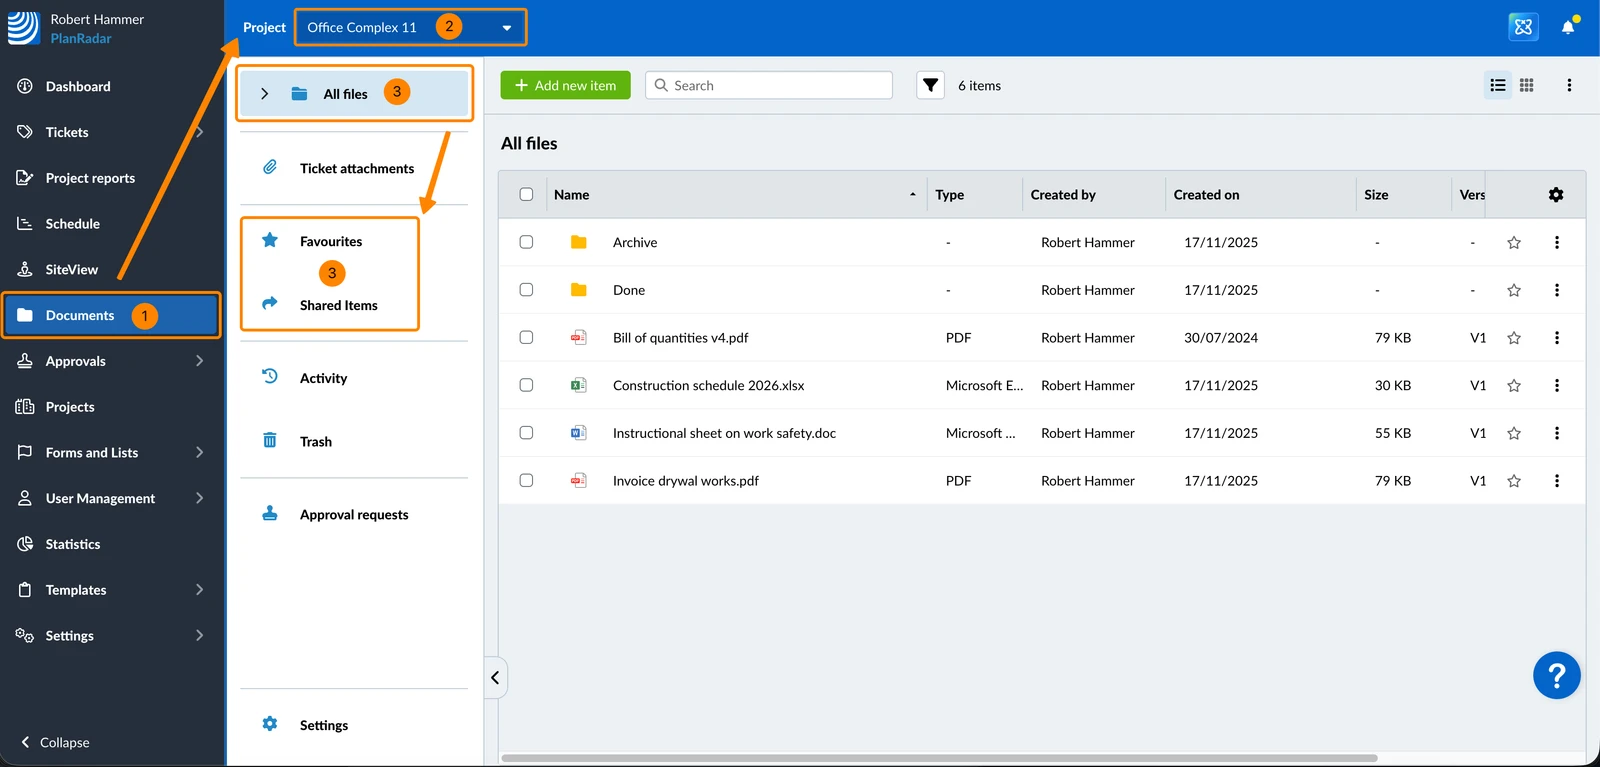
To browse for a file for which you can request approval:
- Click Documents
- Select a Project
- Click All files or Favorites or Shared Items
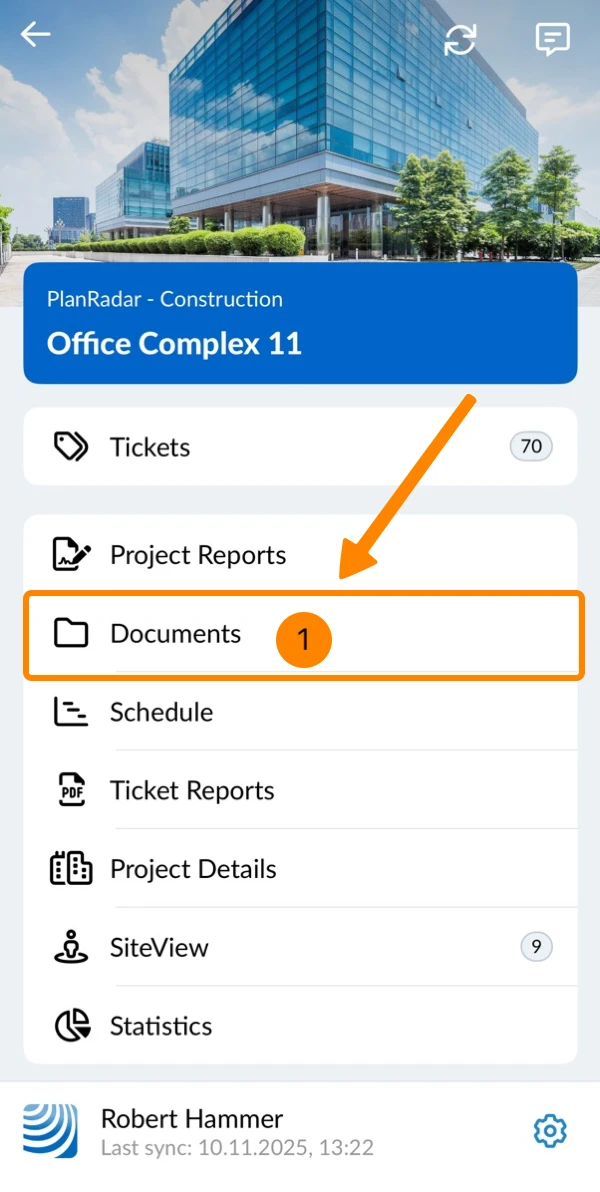
- Tap Documents in the main menu
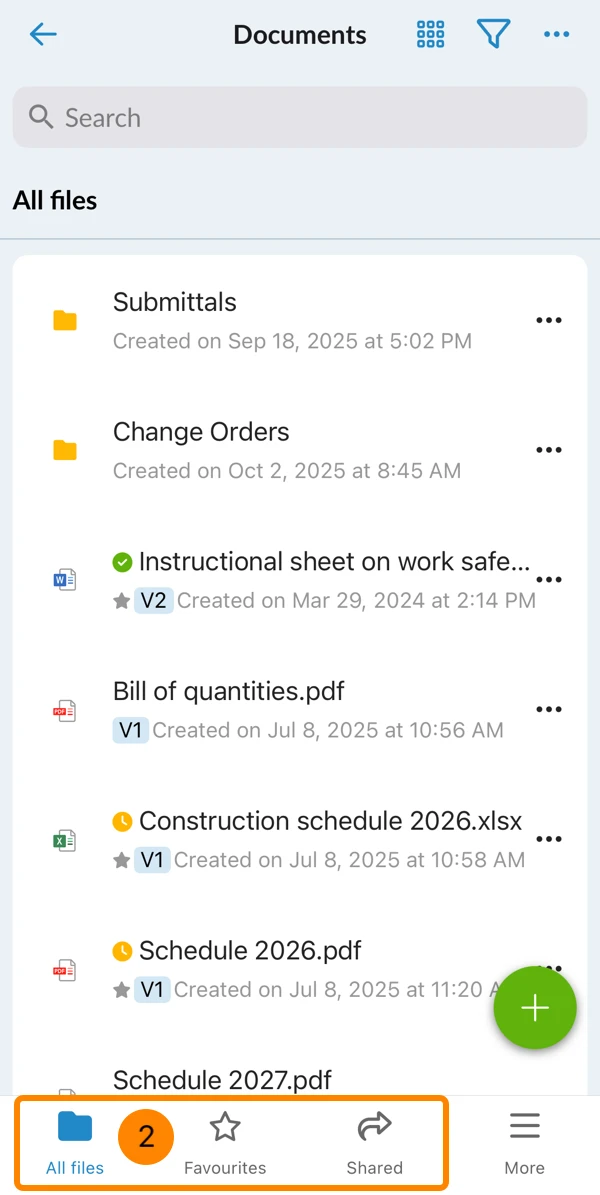
- Tap All files or Favorites or Shared
Request Approval for a Single File
There are three ways to request approval for a single file.
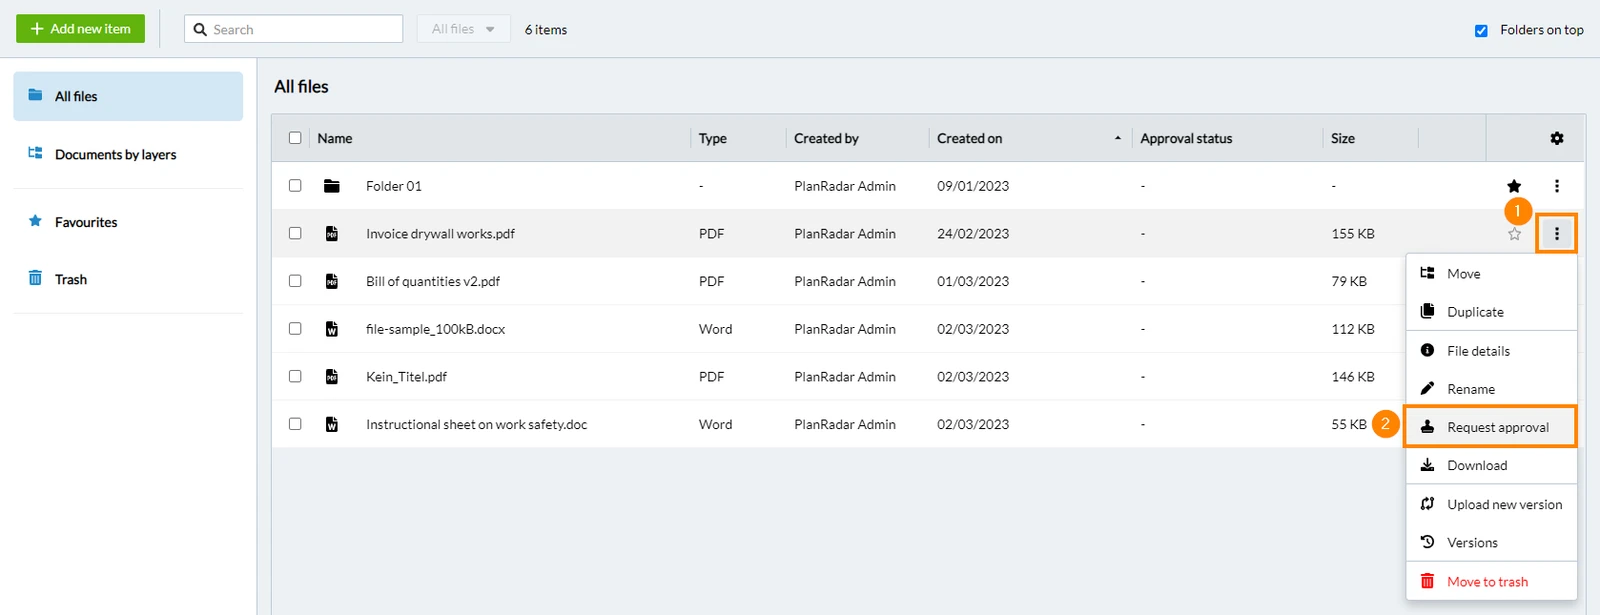
For the Current Version in the File List
- Click More
- Click Request approval
- Open the More menu
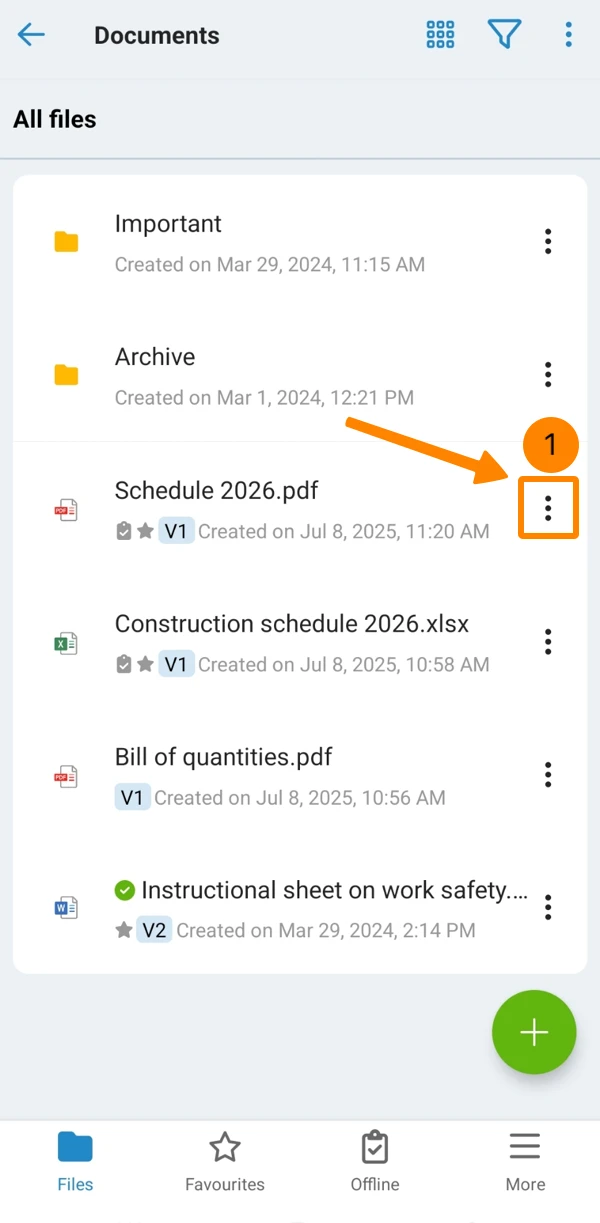
- Tap Request Approval
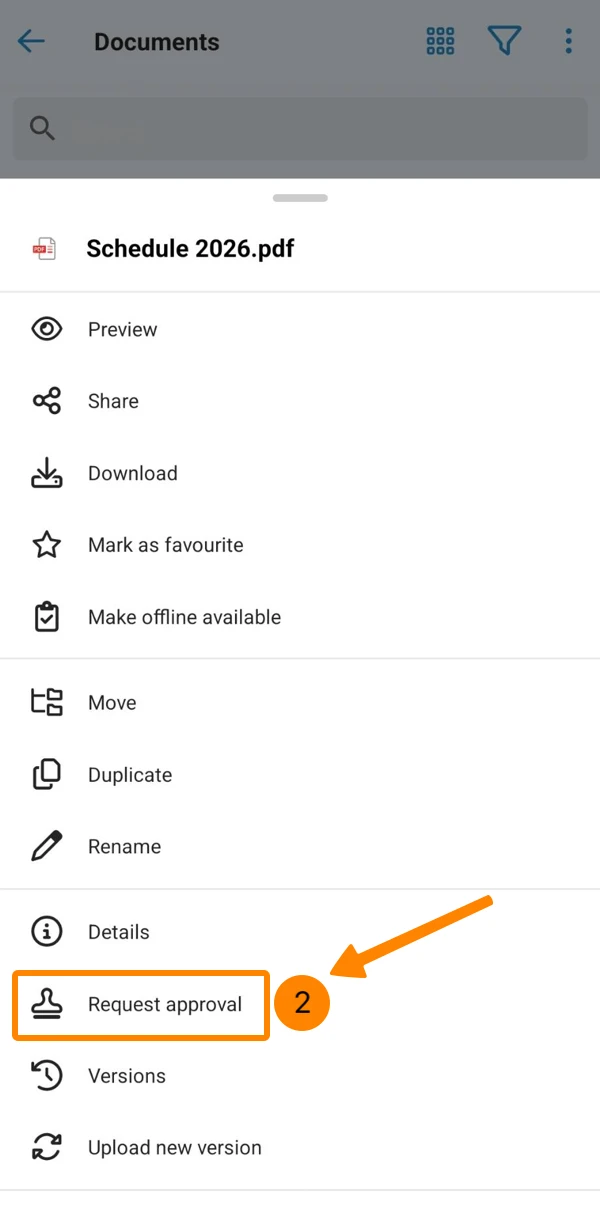
Continue below on how to fill and send the approval request.
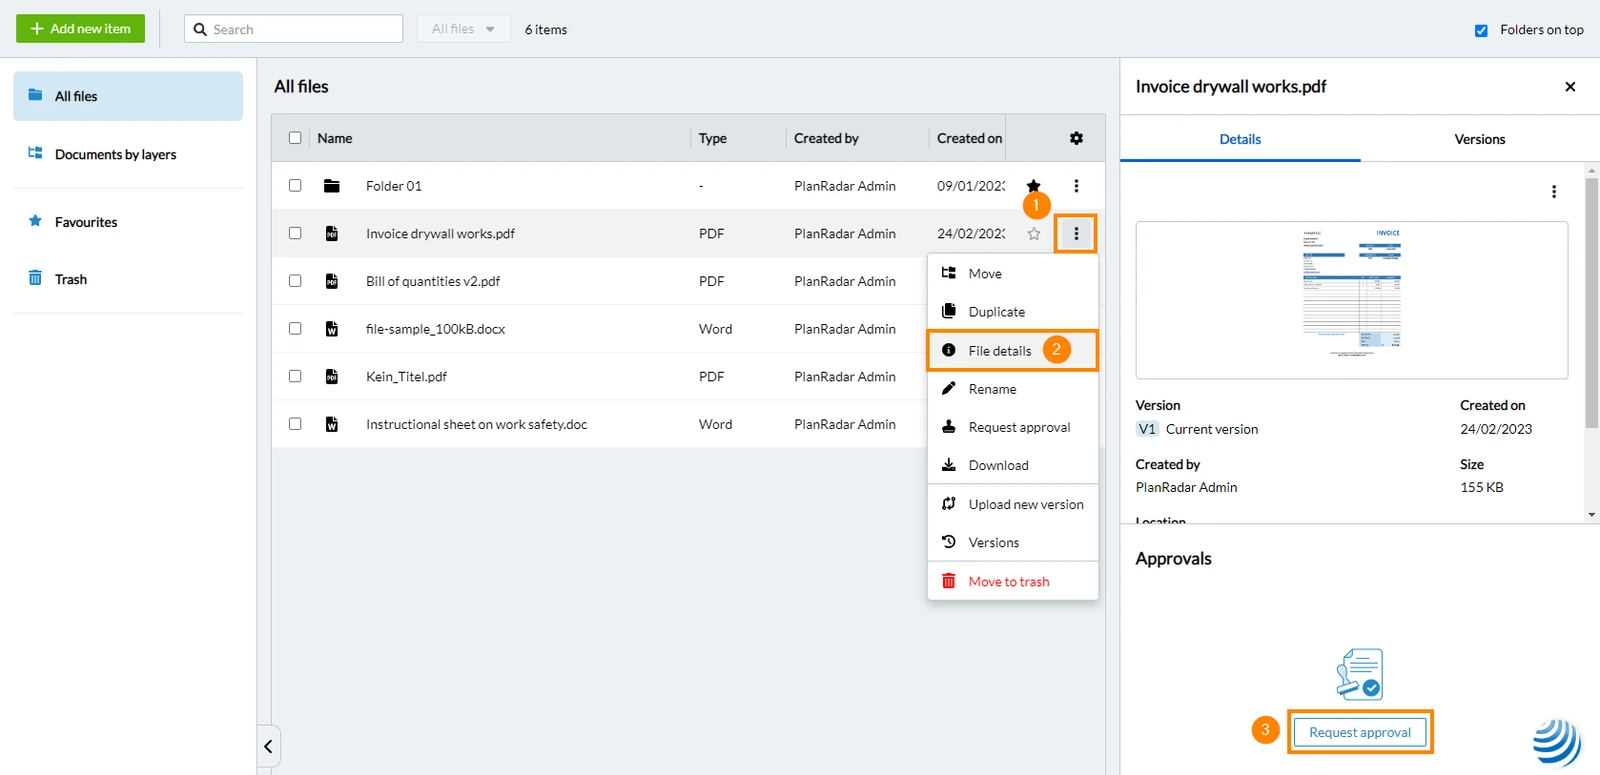
For the Current Version in File Details
- Click More
- Click File details
- Click Request approval
-
- Open the More menu
- Tap Details
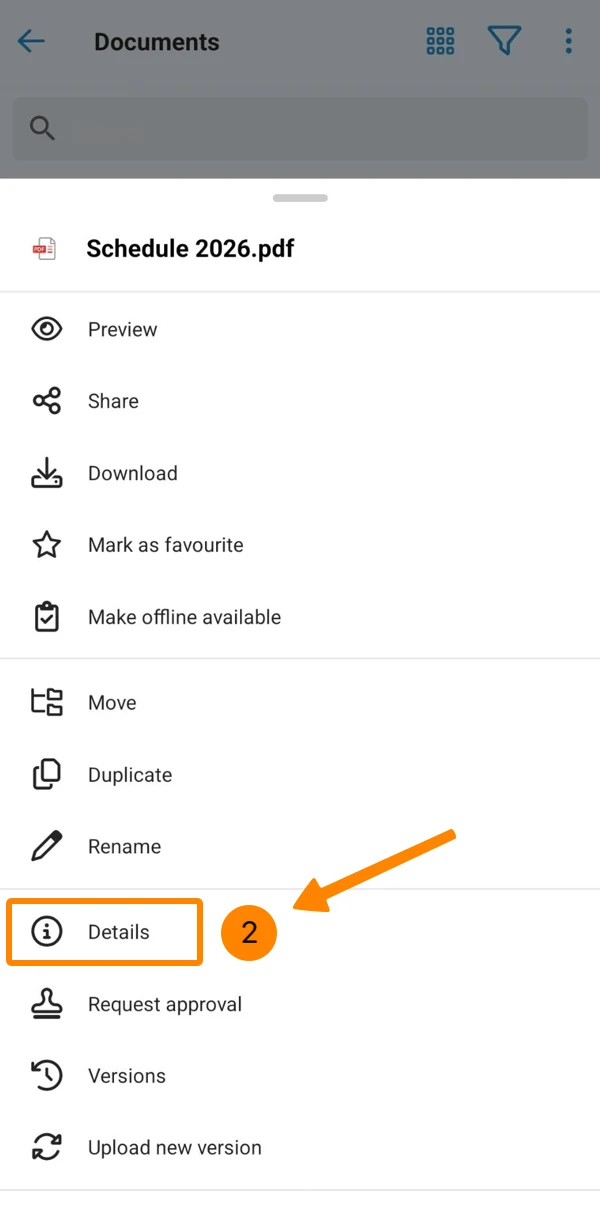
- Scroll down and tap Request approval
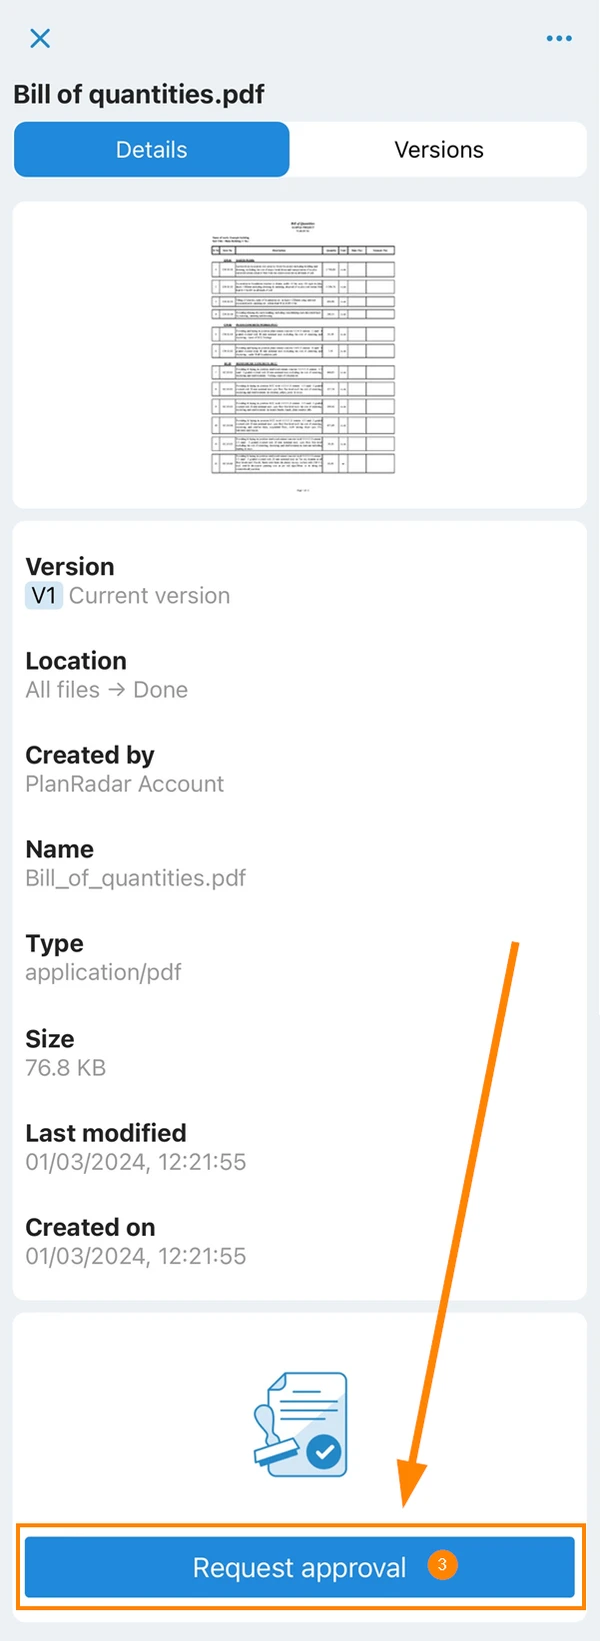
- Open the More menu
Continue below on how to fill and send the approval request.
For a Previous Version
- Click More
- Click File details
- Click Versions
- Click More for a specific version
- Click Request approval
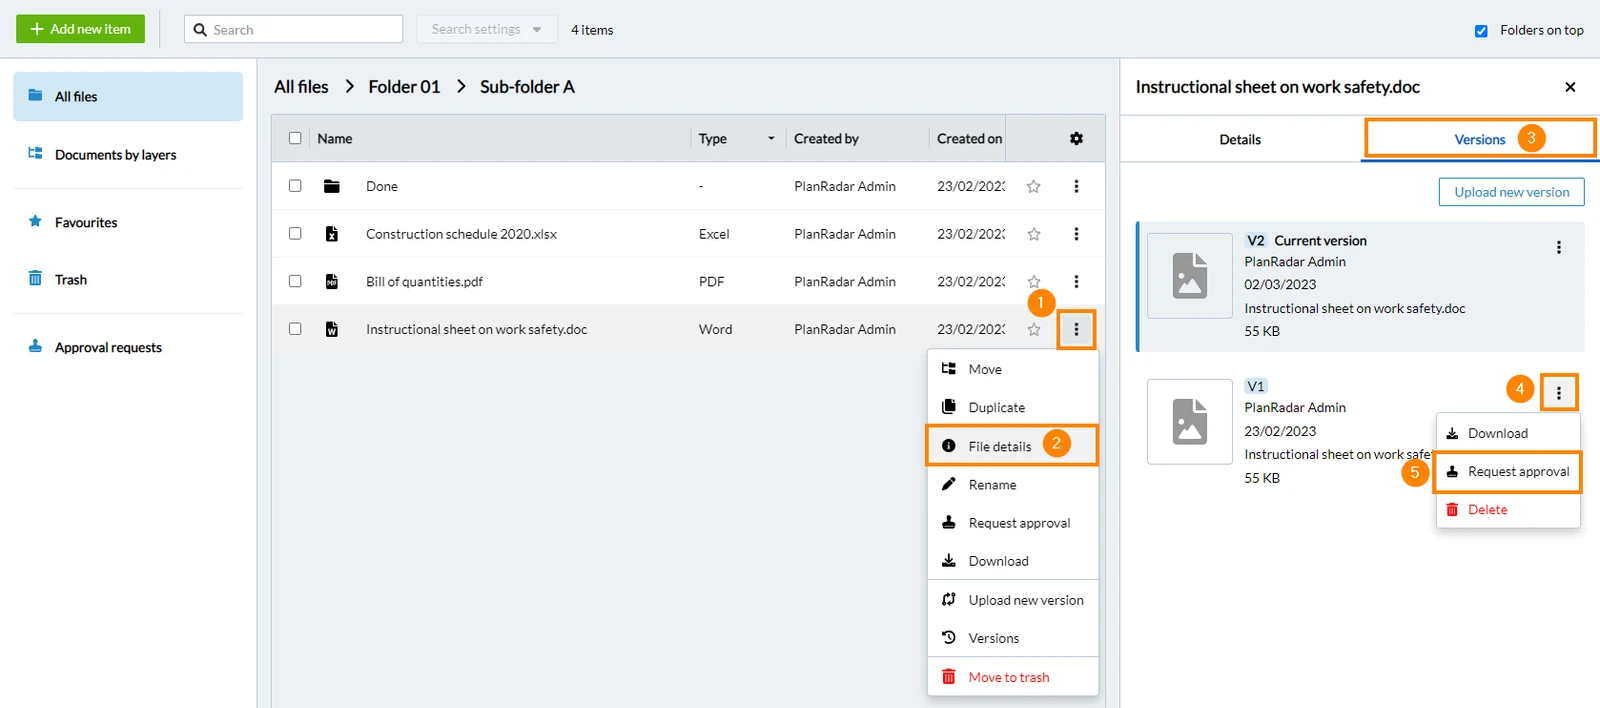
- Open the More menu of the file
- Tap Details
- Tap Versions
- Tap More
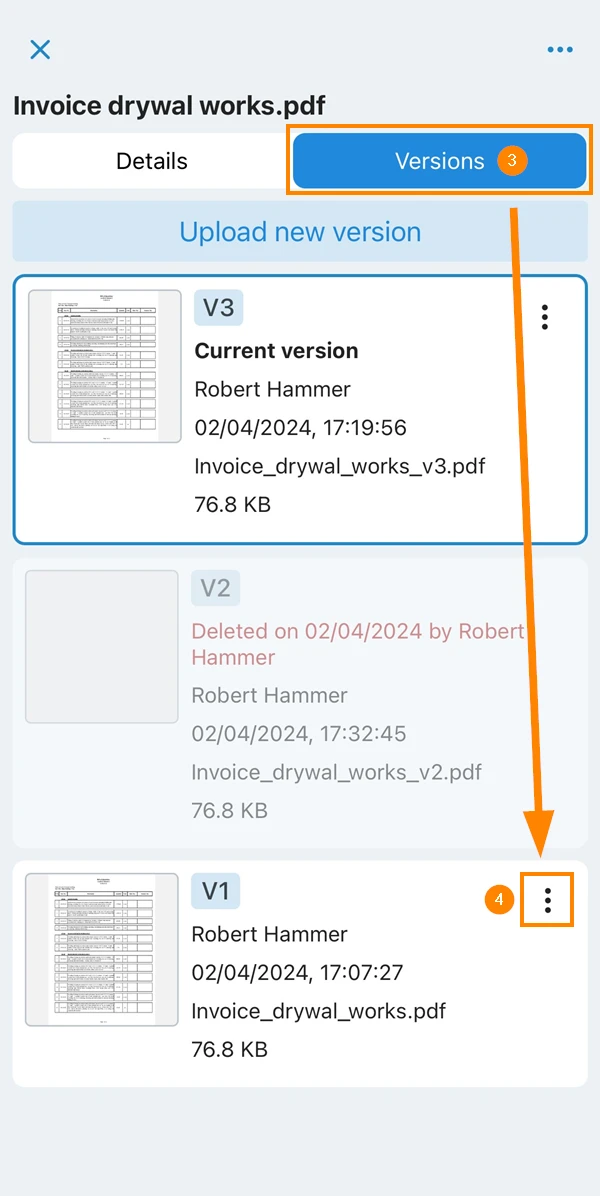
- Tap Request Approval
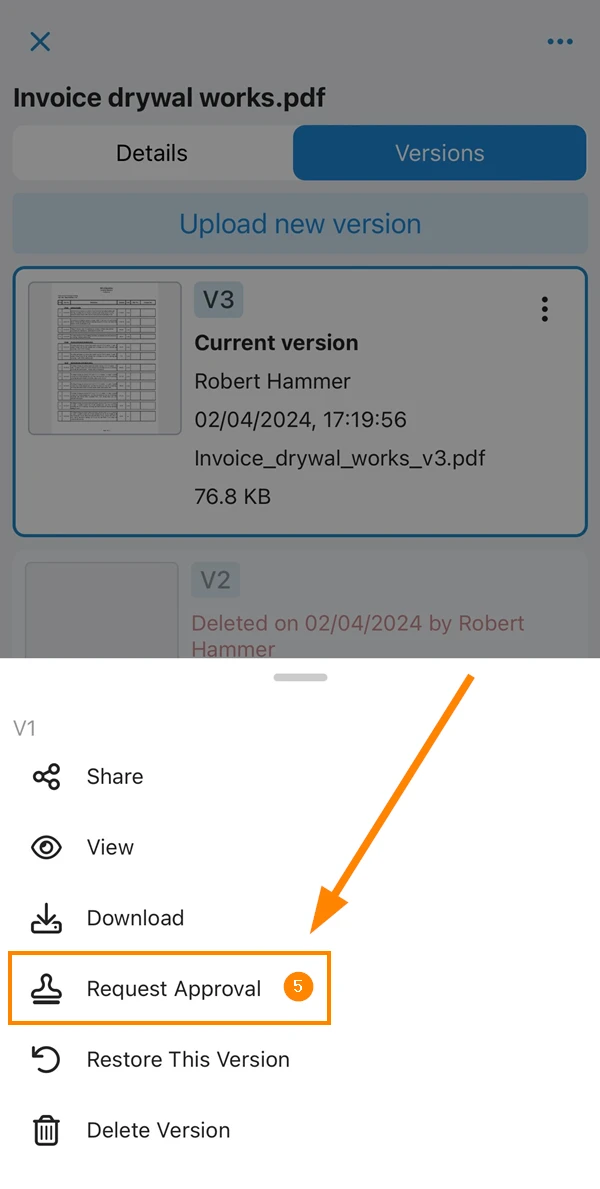
Continue below on how to fill and send the approval request.
Request Approval for Multiple Files
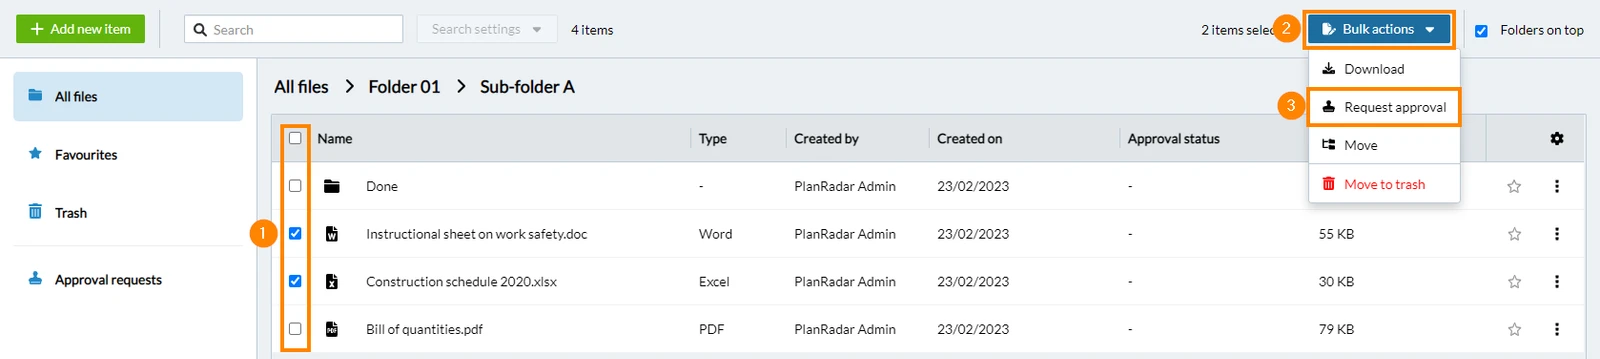
- Select the checkboxes for each file
- Click Bulk actions
- Click Request approval
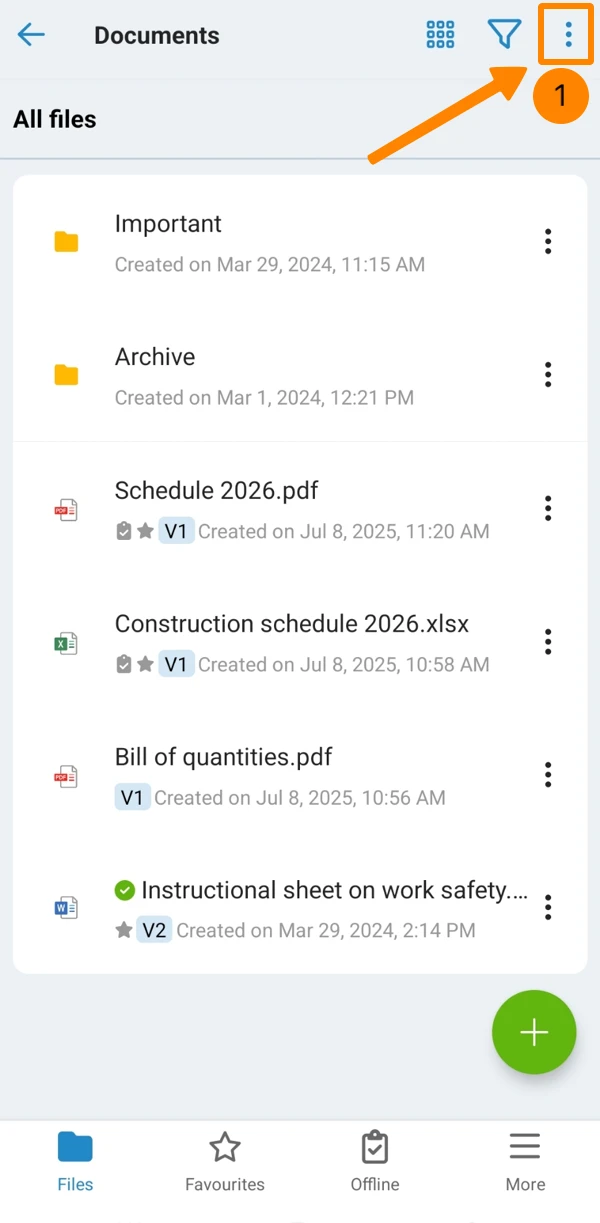
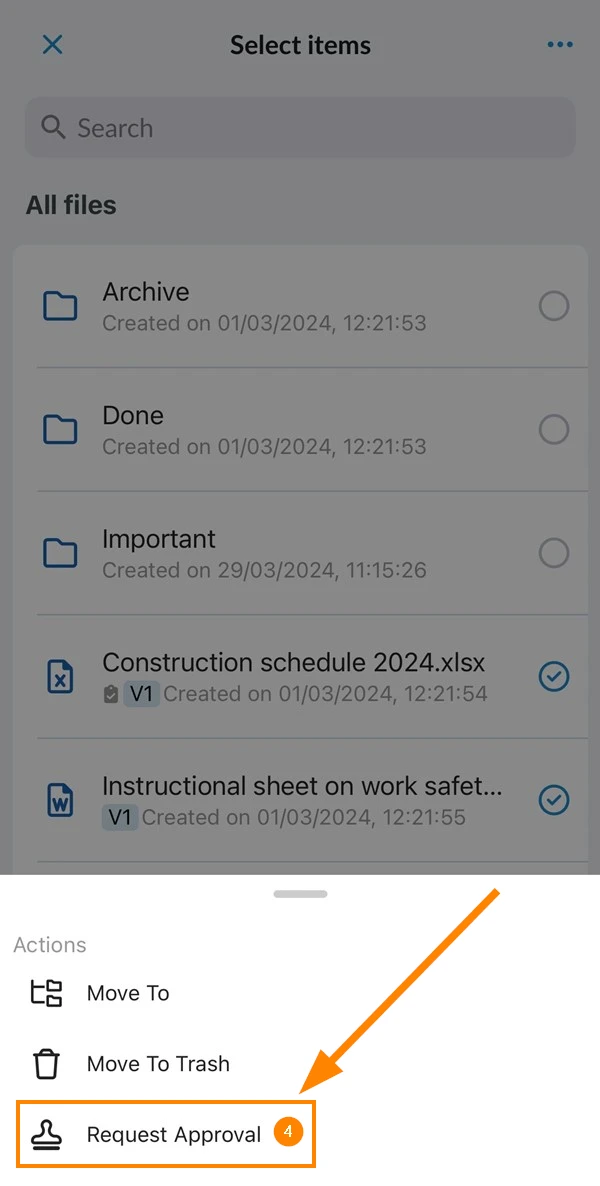
- Open the More menu
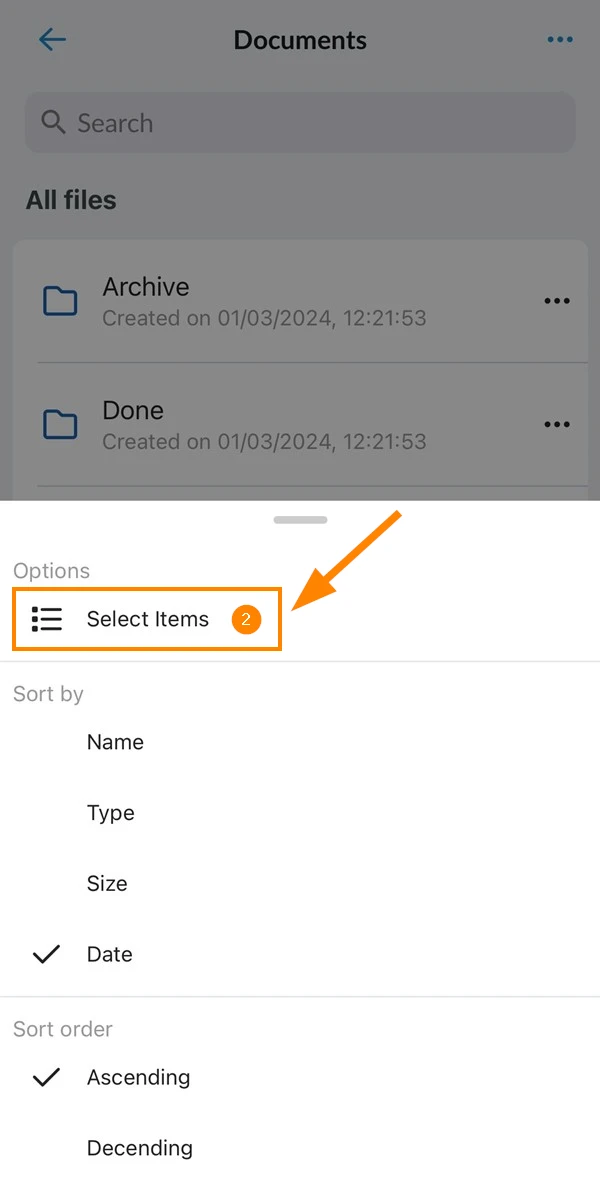
- Tap Select Items
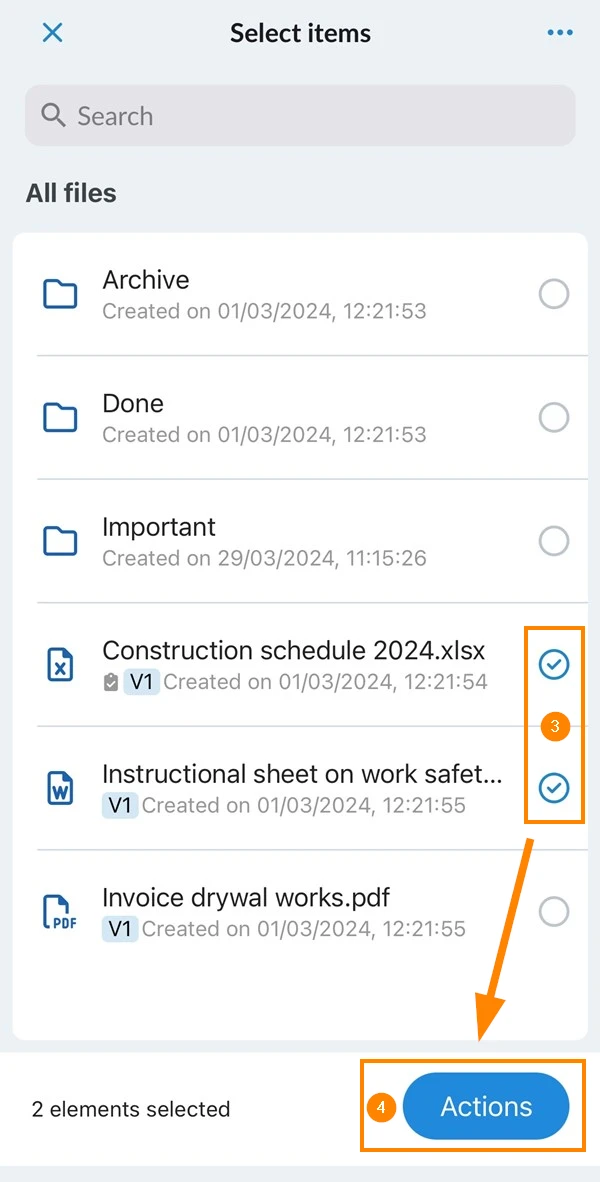
- Select the files
- Tap Actions
- Tap Request Approval
Fill and Send an Approval Request
After selecting one or more files to request an approval, you need to fill some mandatory fields:
- At least one reviewer
- Subject
- Duration / Due date
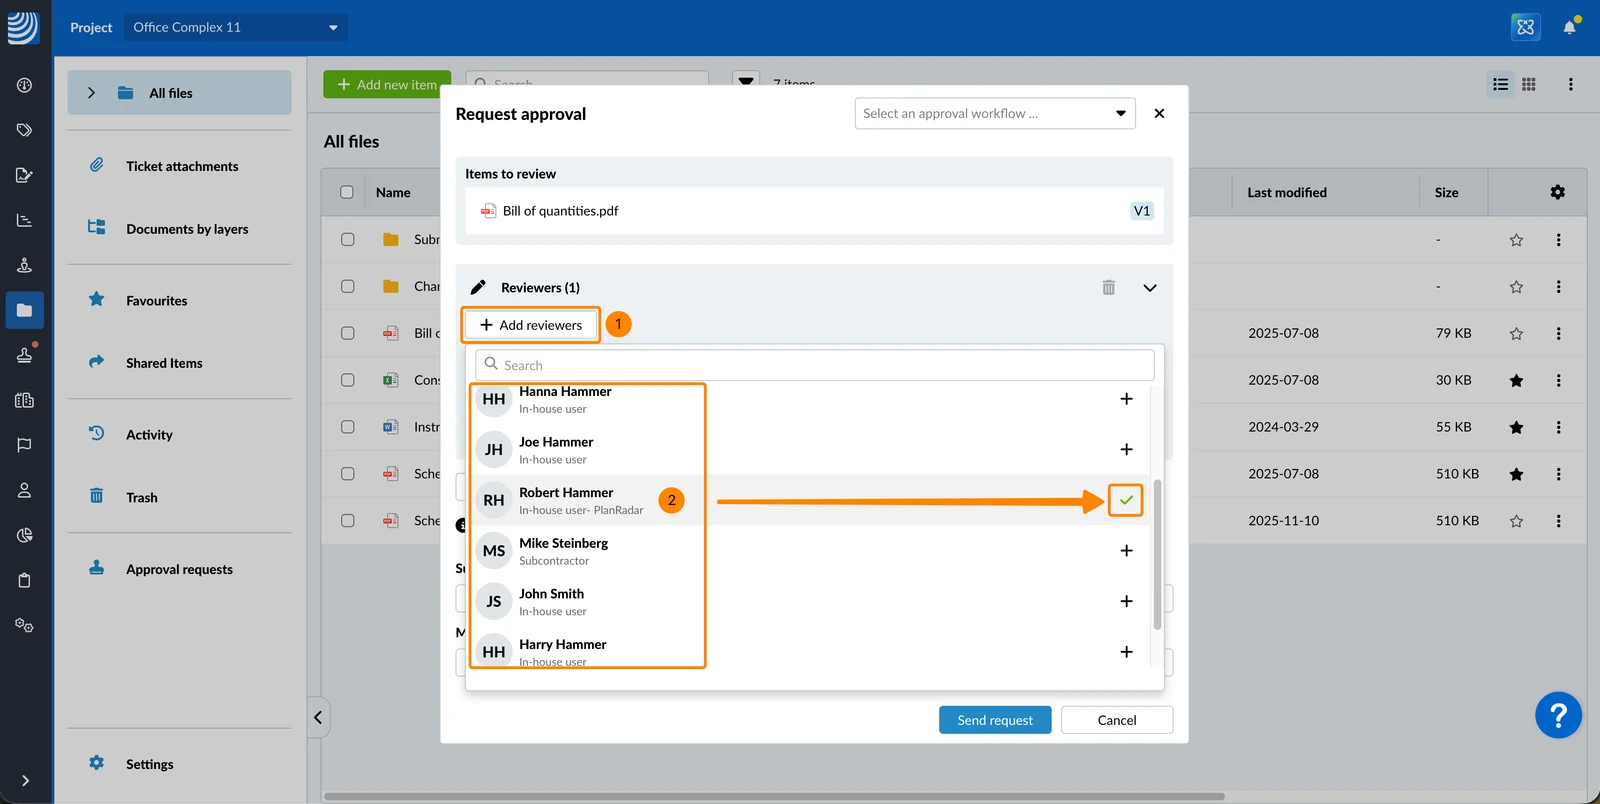
- Click Add reviewers
- Click on the user(s) to add them as a reviewer.
Once added, a ✔ is display. Click again to remove them.
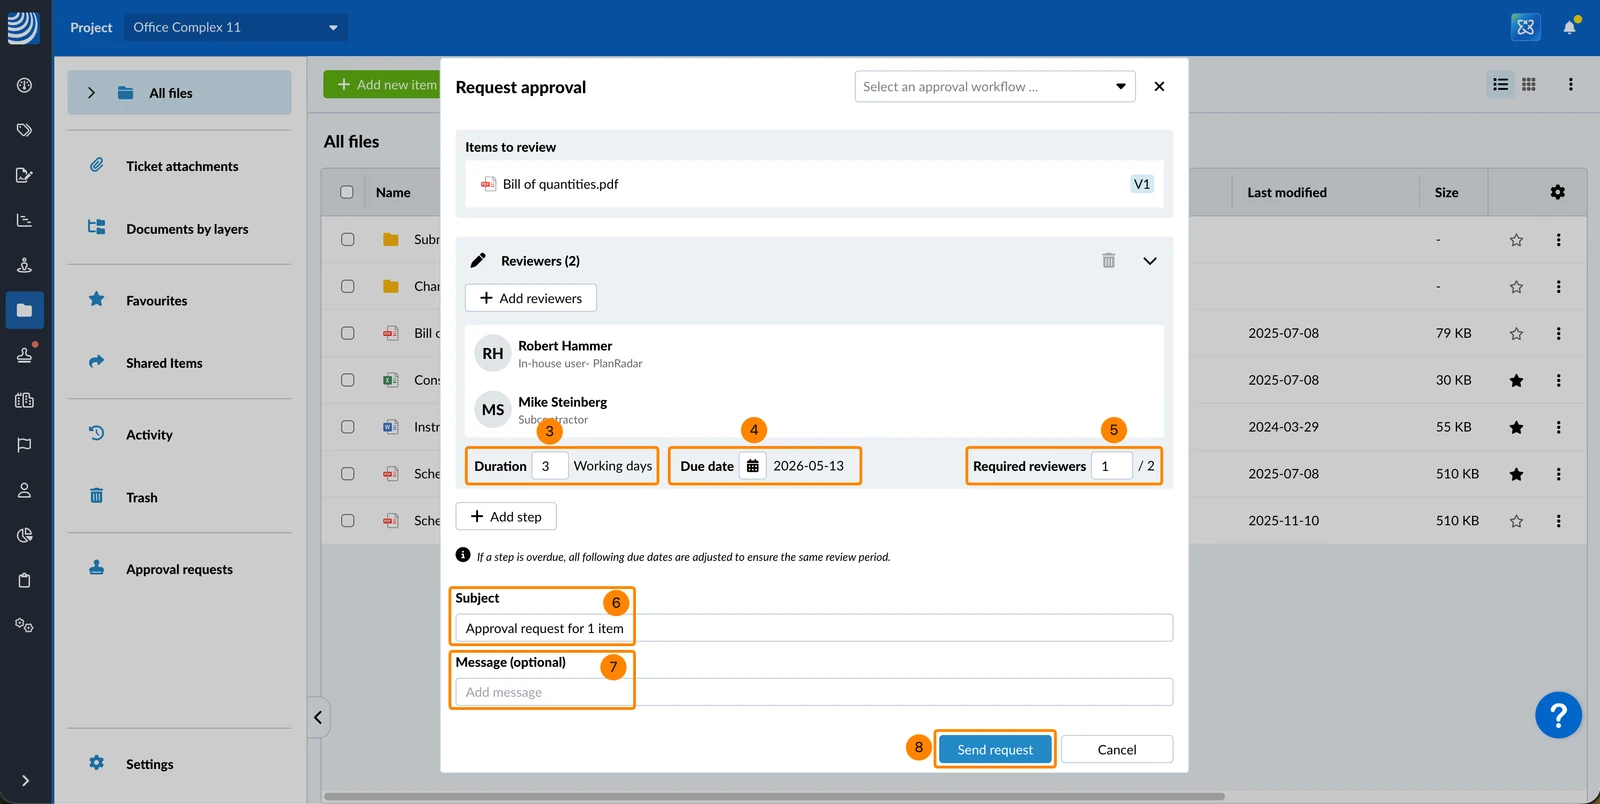
- Enter the Duration in working days. The due date will be updated automatically.
- Alternatively: Set a Due date. The duration in working days will be updated automatically.
Also see Configure Working Days (in project details). - Optional: Enter the number of Required reviewers if not all reviewers need to approve to complete the step — for example, 1 out of 2.
- Optional: Edit the Subject
- Optional: Enter a Message
- Click Send request
- Tap Add reviewers
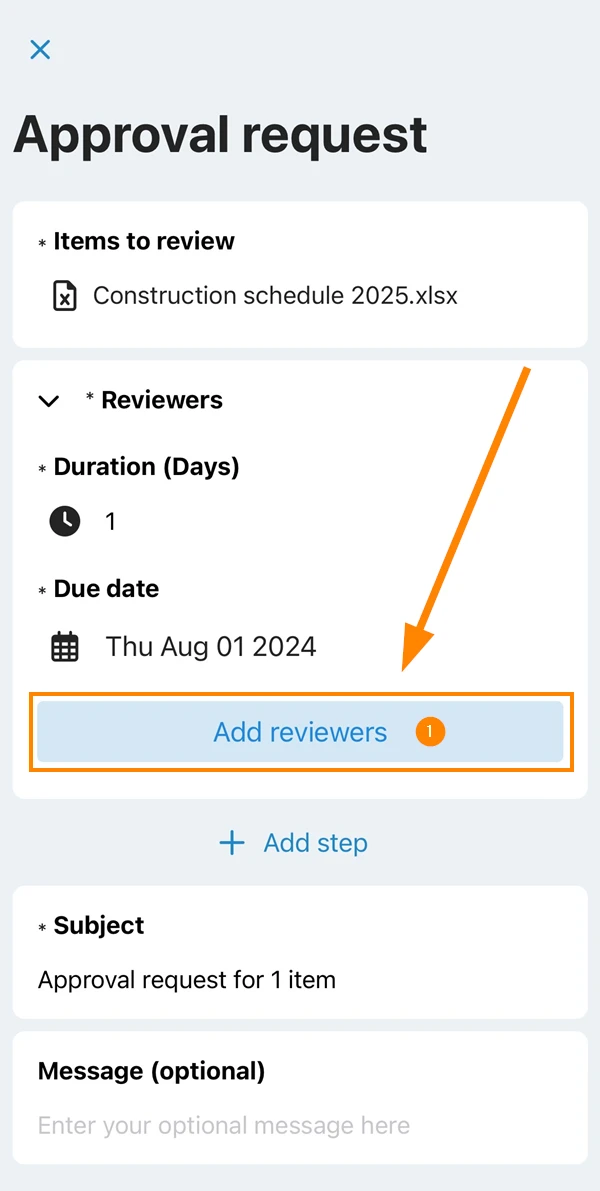
- Select one or multiple reviewers and confirm with Done
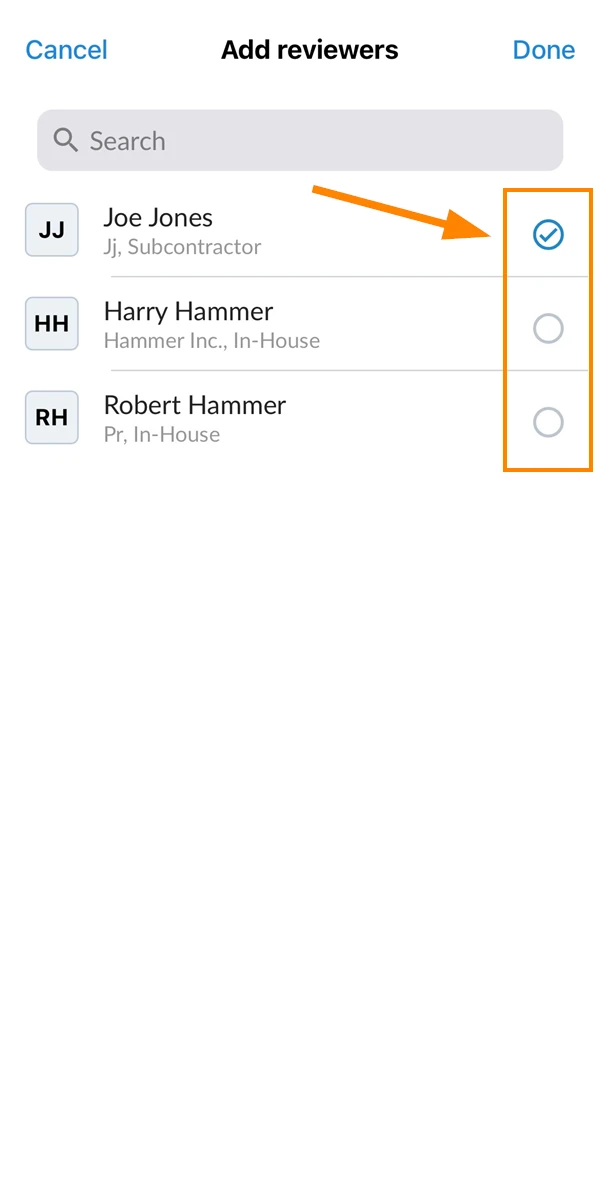
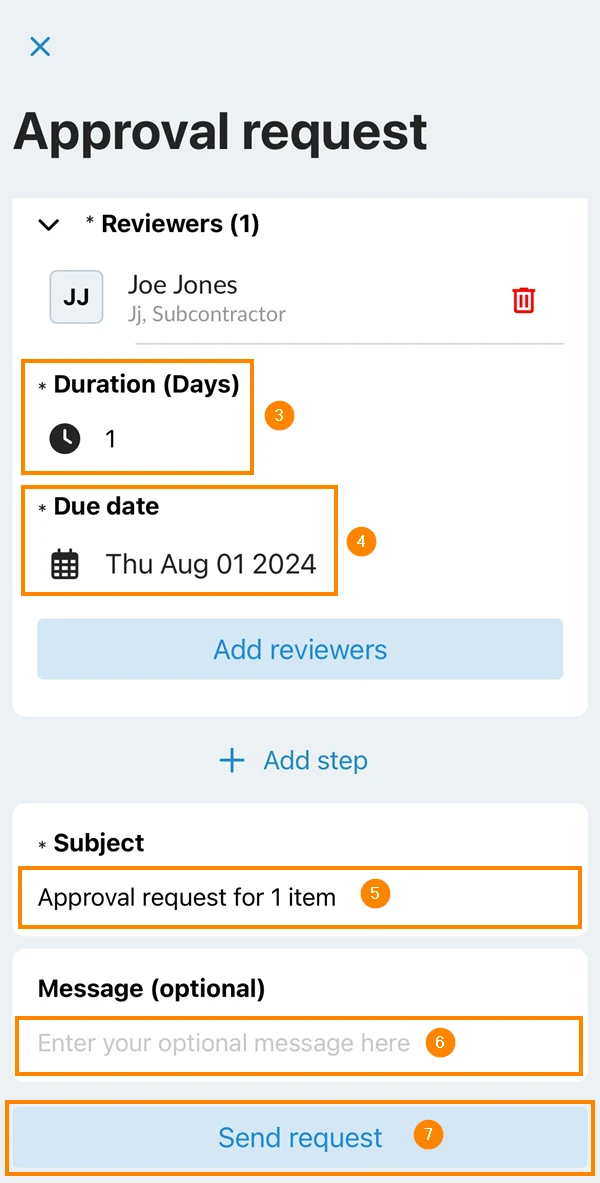
- Enter the Duration in working days. The due date will be updated automatically.
- Alternatively: Set a Due date. The duration in working days will be updated automatically.
Also see Configure Working Days (in project details). - Optional: Edit the Subject
- Optional: Enter a Message
- Tap Send request
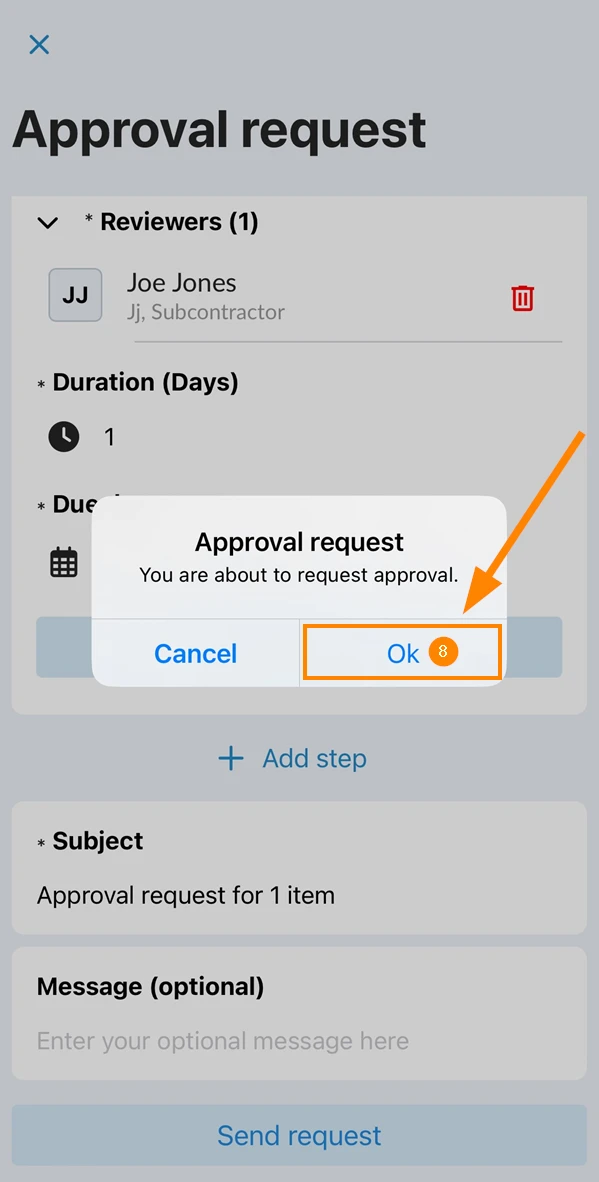
- Tap Ok
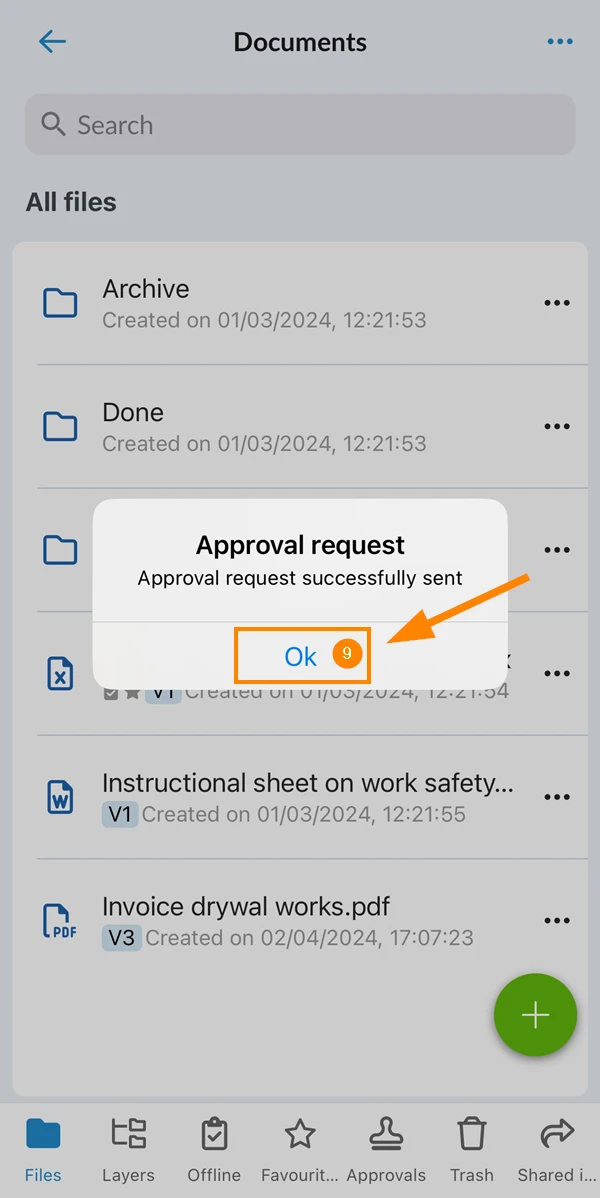
- Tap Ok
Add Steps to an Approval Request
It is possible to add multiple steps for approval requests. Read more in Approvals > Multi-Step Approvals.
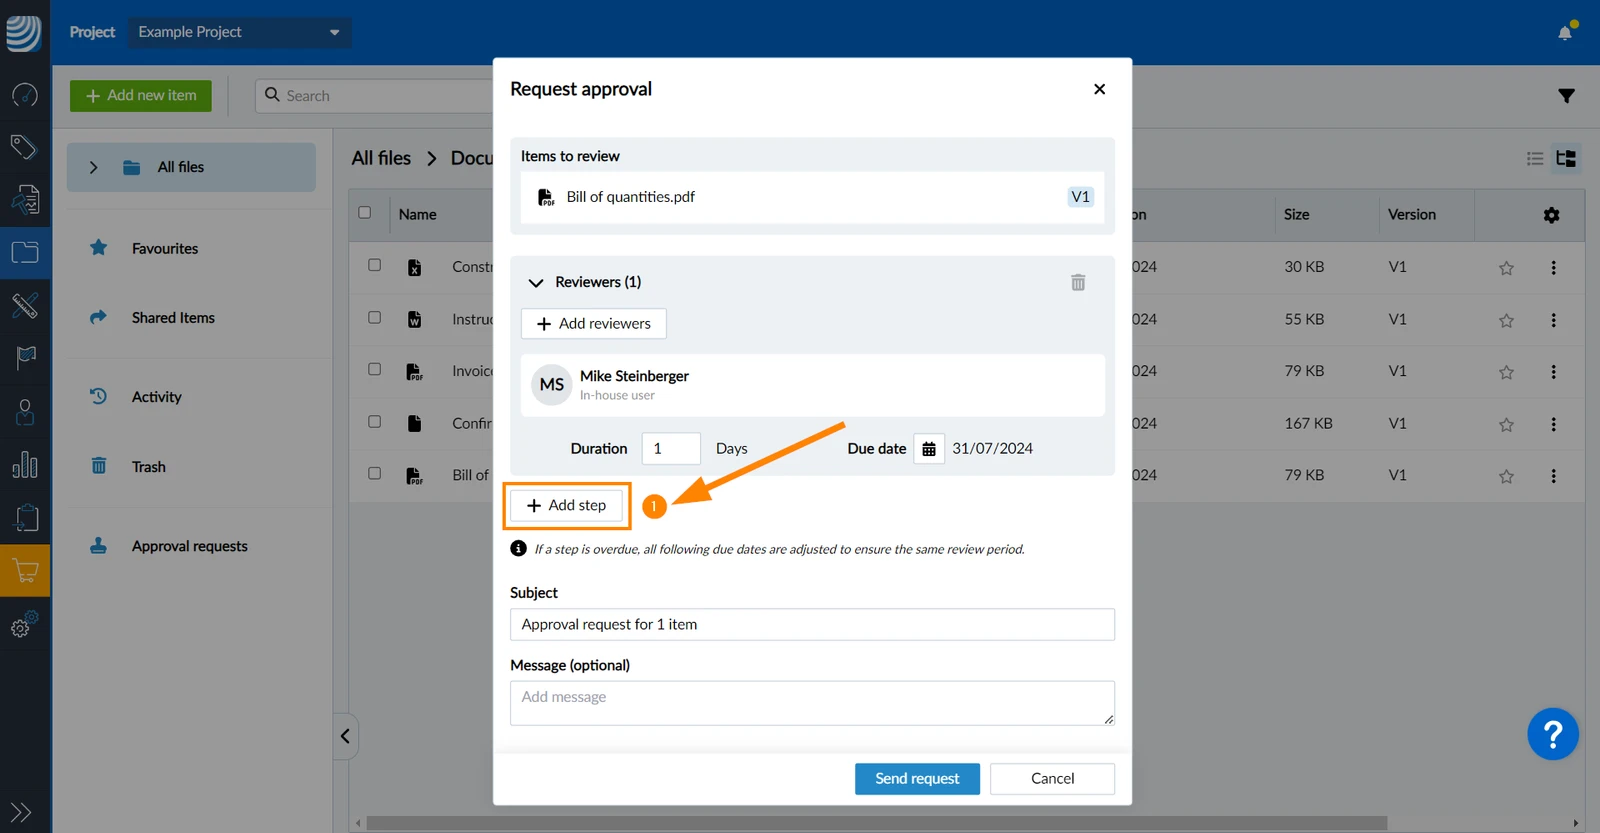
When you Fill and Send an Approval Request you can add more steps.
Adding a step is only possible if the previous step has at least one reviewer.
To add steps:
- Click Add step
- Tap Add step
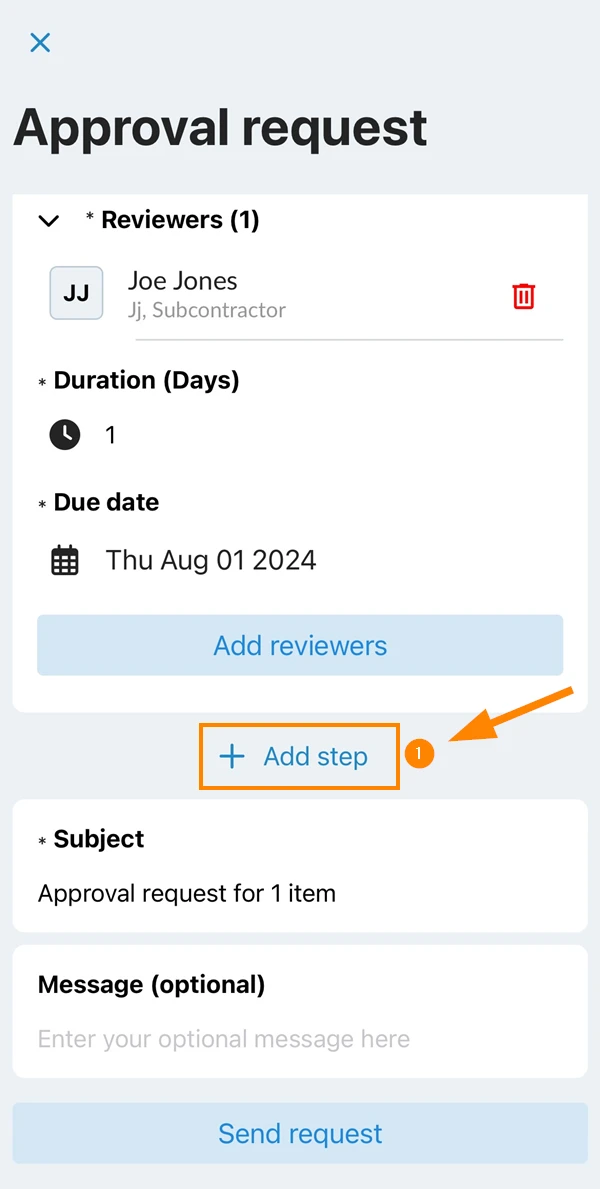
Add one or more reviewers to each step and set the duration or due date for each step, as described above in Fill and Send an Approval Request and repeat to add more steps.
Delete Steps
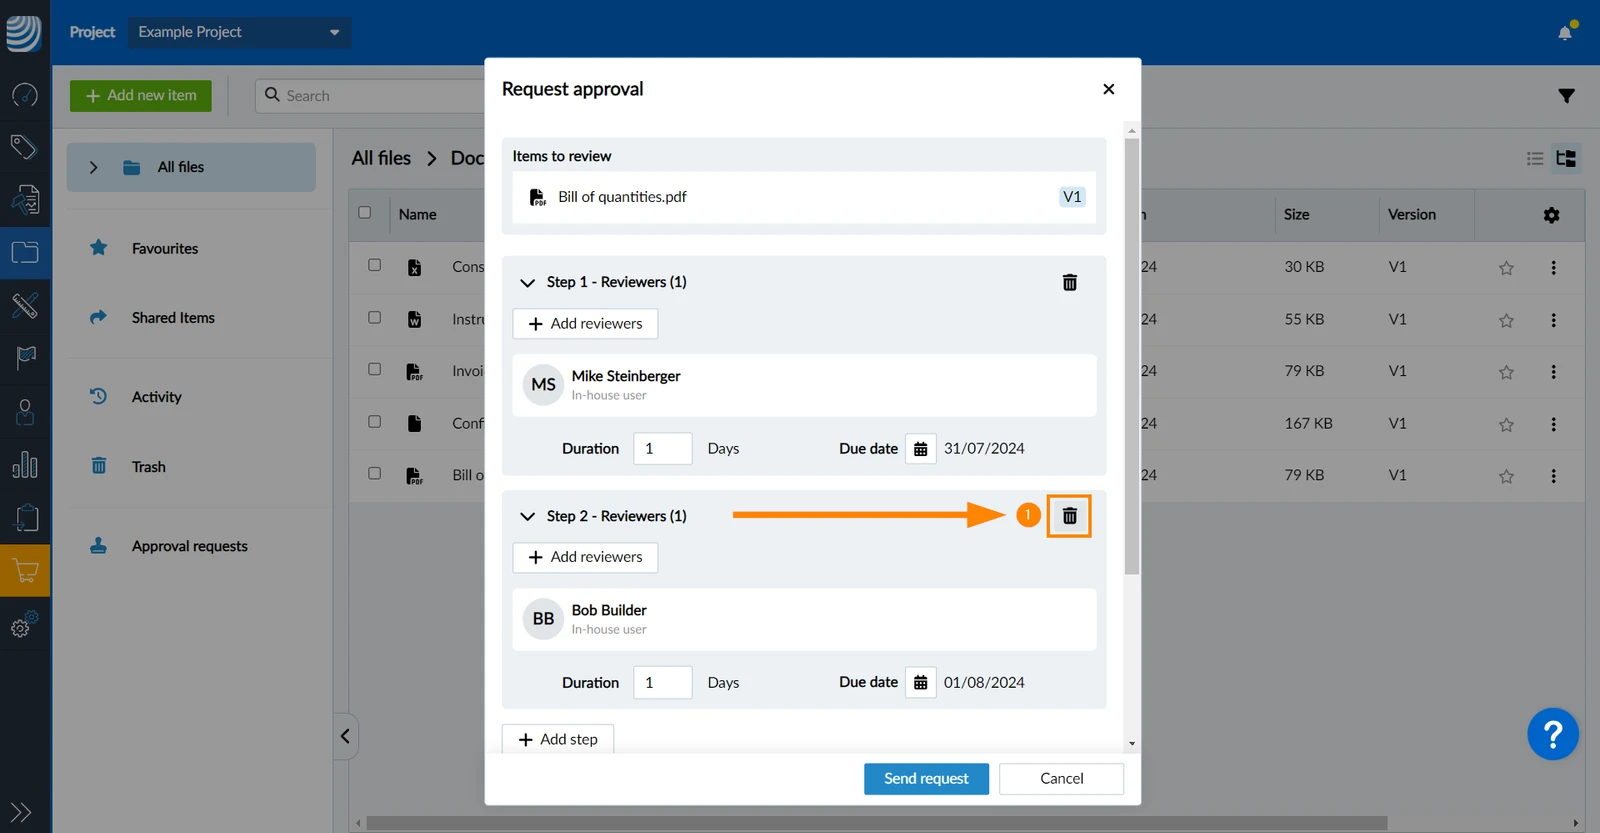
To delete steps:
- Click the delete icon
- Click Delete to confirm
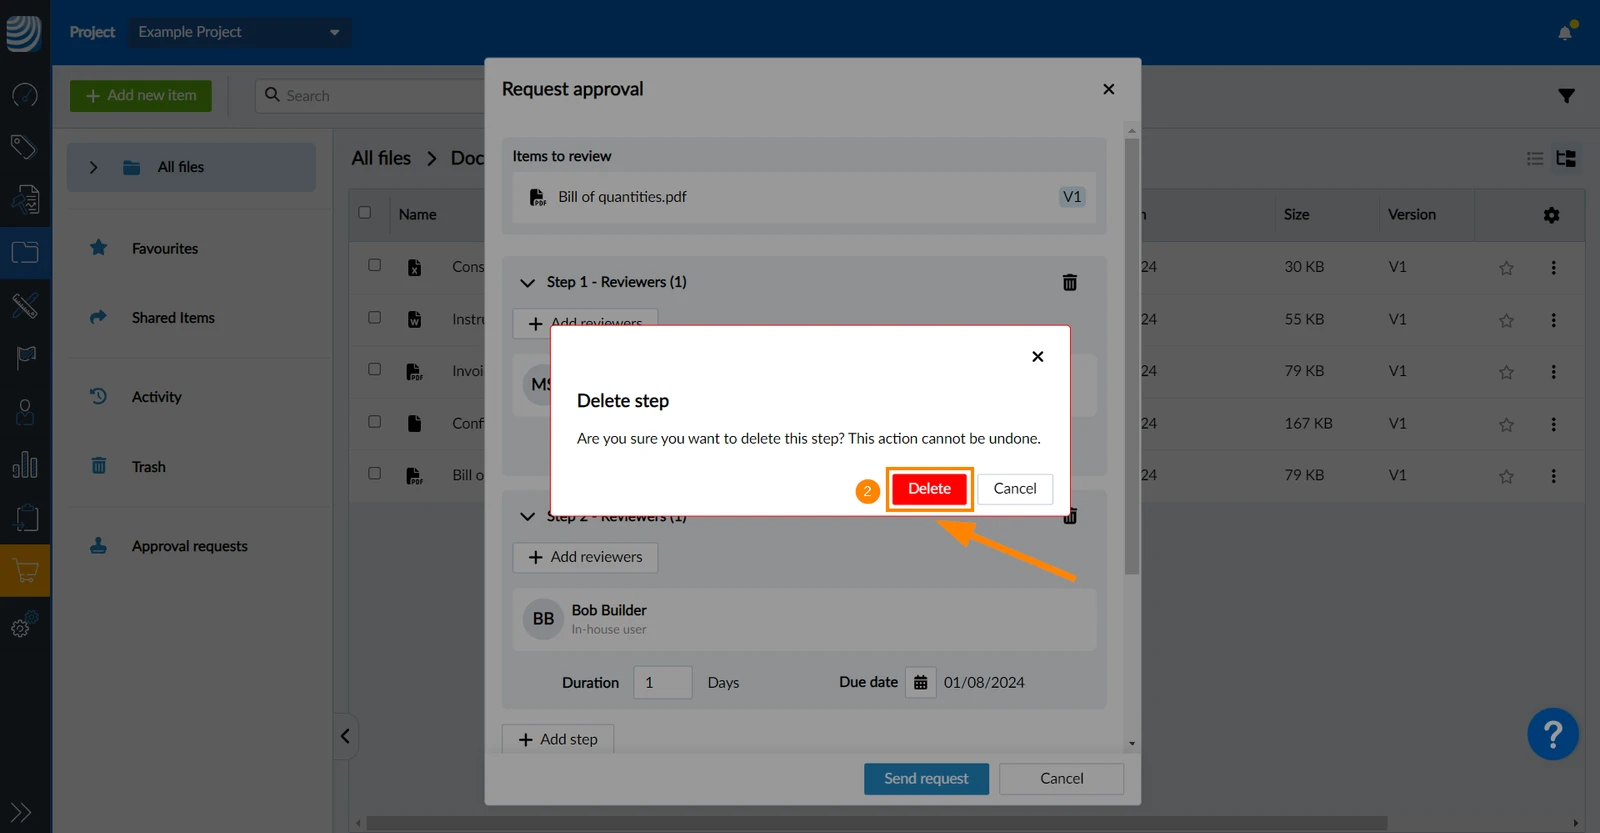
- Tap the delete icon
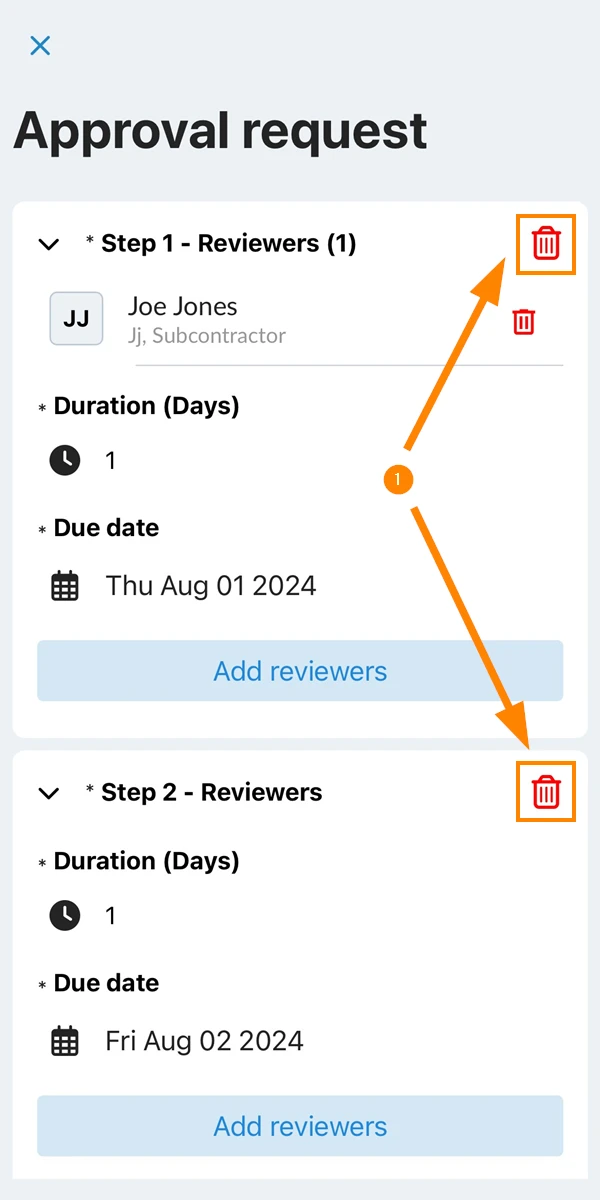
- Tap Delete to confirm
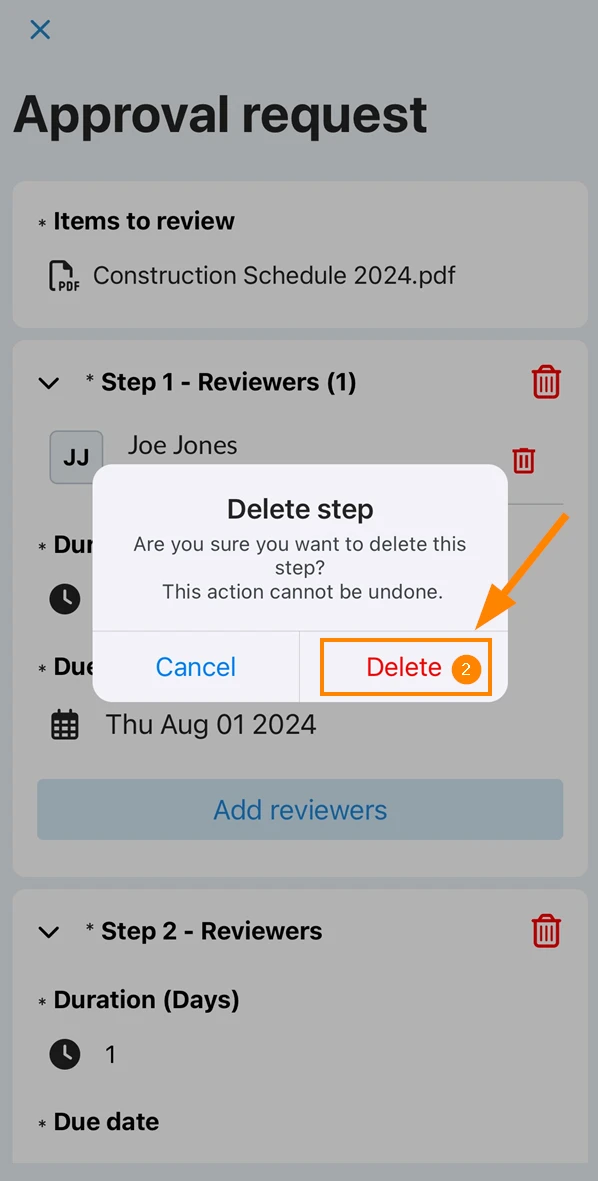
The last remaining step cannot be deleted.
Add Steps to a Completed Approval
-
You can add additional steps and reviewers after a document approval request got completed.
- You cannot delete previous steps or reviewers.
-
If a step is added after an approval request has been completed:
- Approved files will remain approved.
- Rejected files will need to be reviewed again.
- Affected users will be notified.
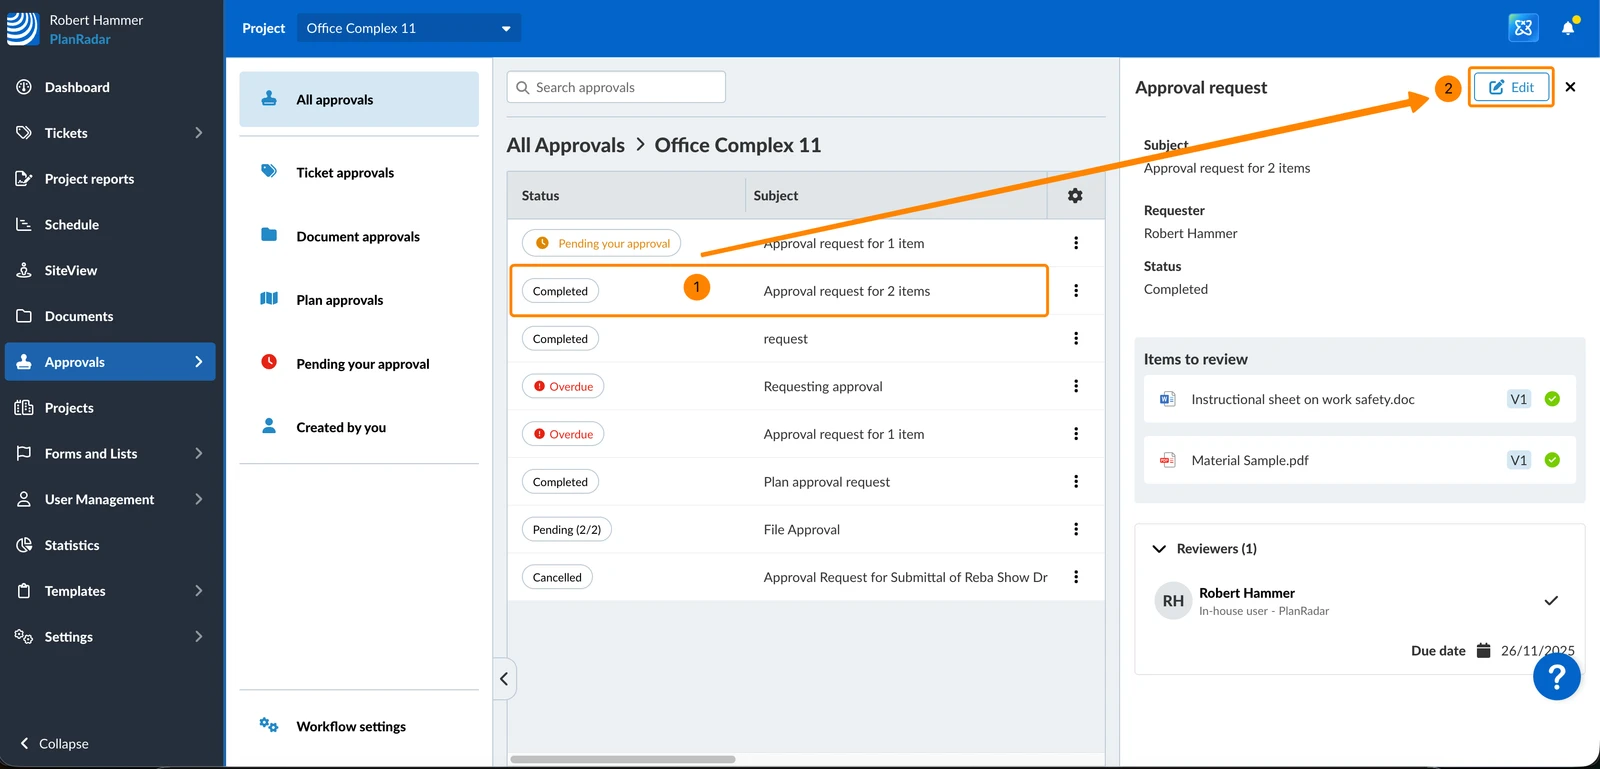
To add steps to a completed approval request:
- Click on the completed approval request
- Click Edit
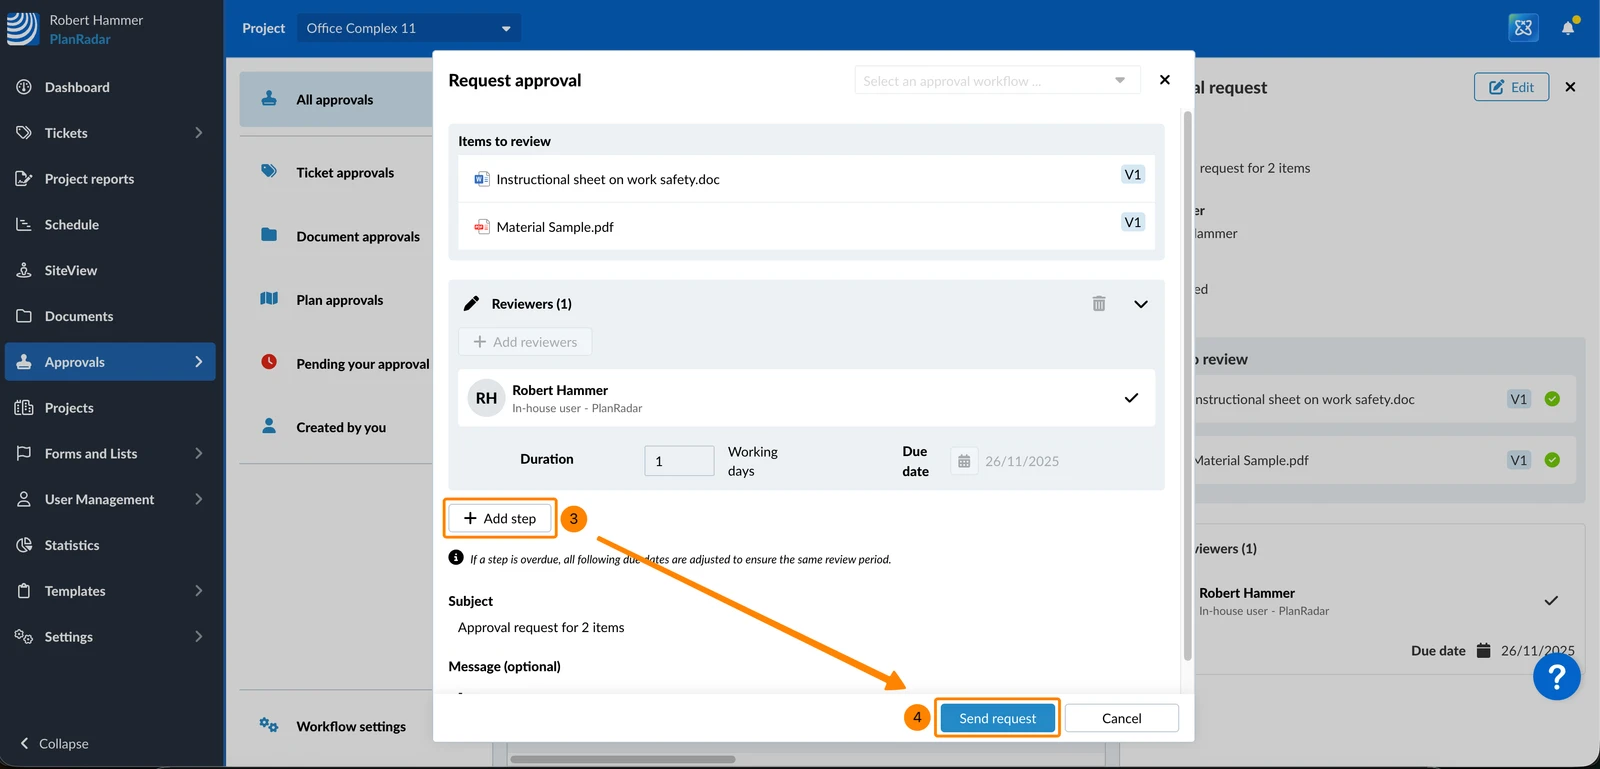
- Click + Add step
Also see Request Approval for Documents > Fill and Send an Approval Request. - Click Send request
- Tap Approvals
- Tap Completed
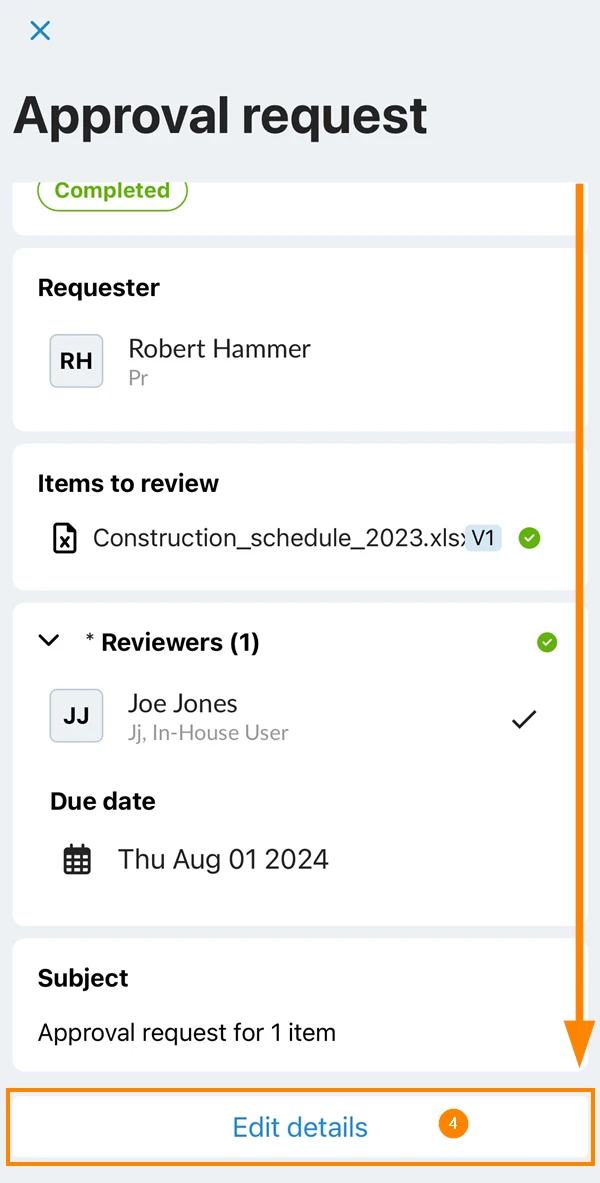
- Tap on the approval request
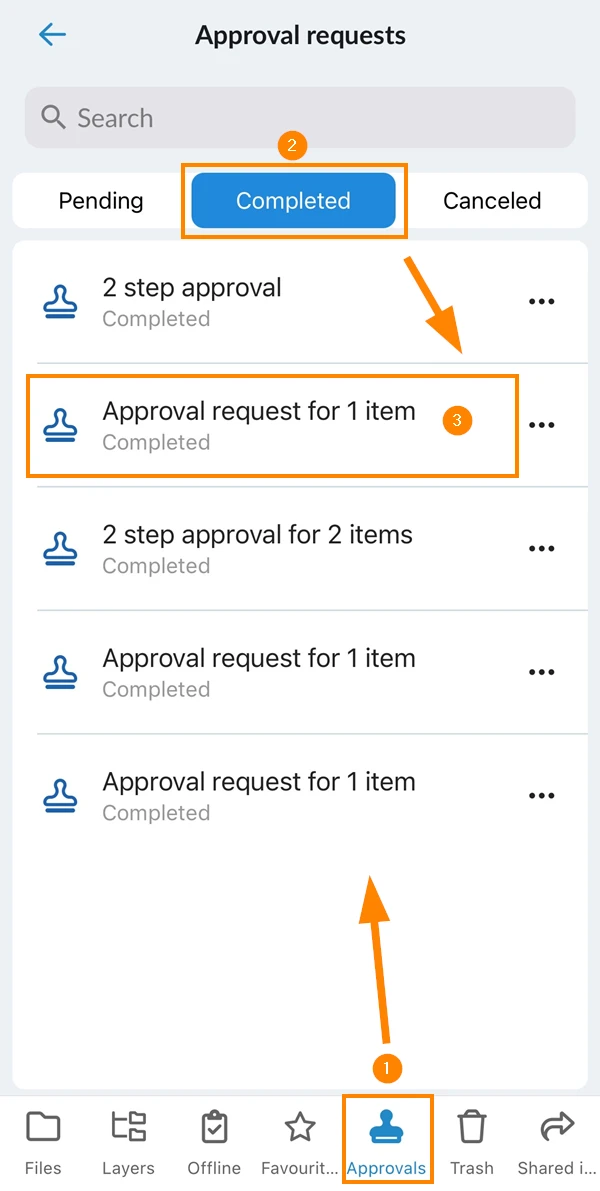
- Scroll down and tap Edit details
Approval Workflows
Approval workflows allow you to quickly create new approval requests with a predefined set of reviewers and steps. Create them in the Webapp and apply them on all platforms.
Apply an Approval Workflow
When you Request Approval for a Single File (or for multiple files - as described above) you don't need to repeatedly fill in the same reviewers and steps as described above in Fill and Send an Approval Request.
Instead you can apply an approval workflow:
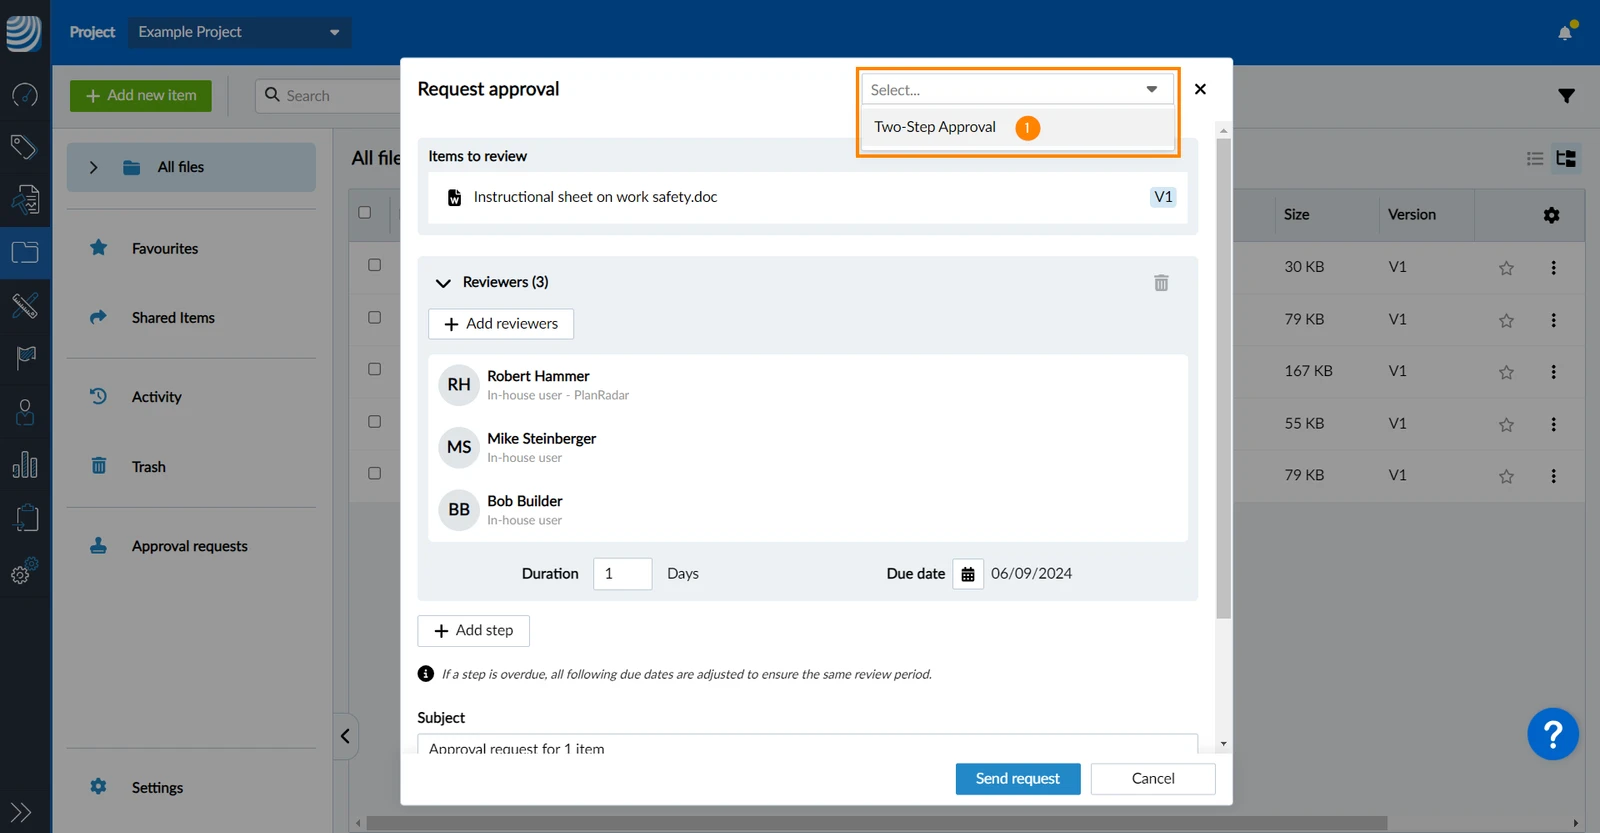
- Select an approval workflow in the drop-down
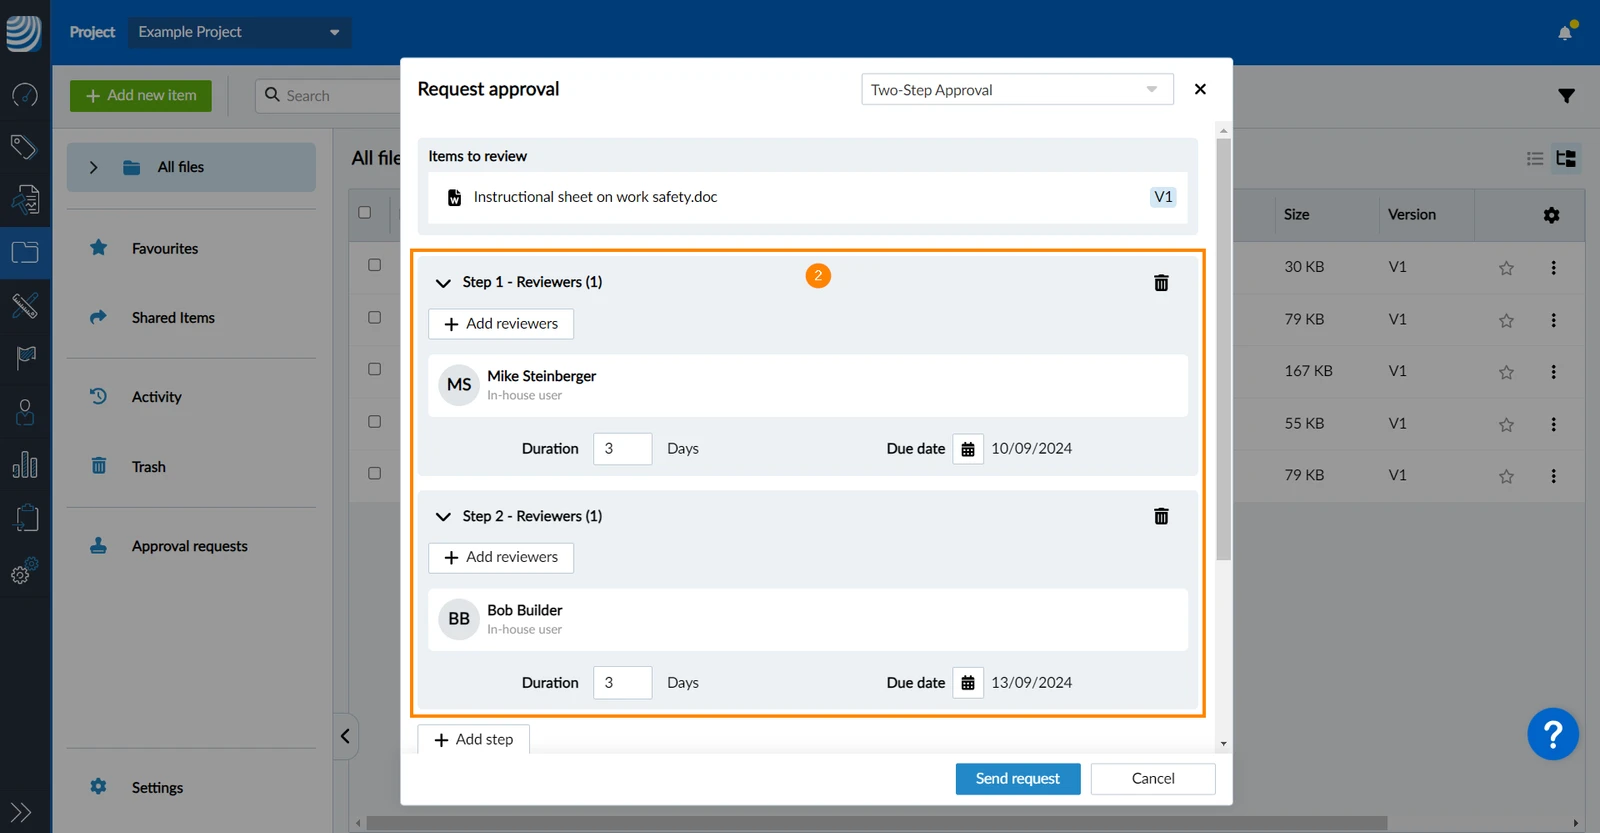
- The reviewers, steps, and durations are filled in as defined in the selected approval workflow:
- The subject and message are also filled in if defined in the approval workflow:
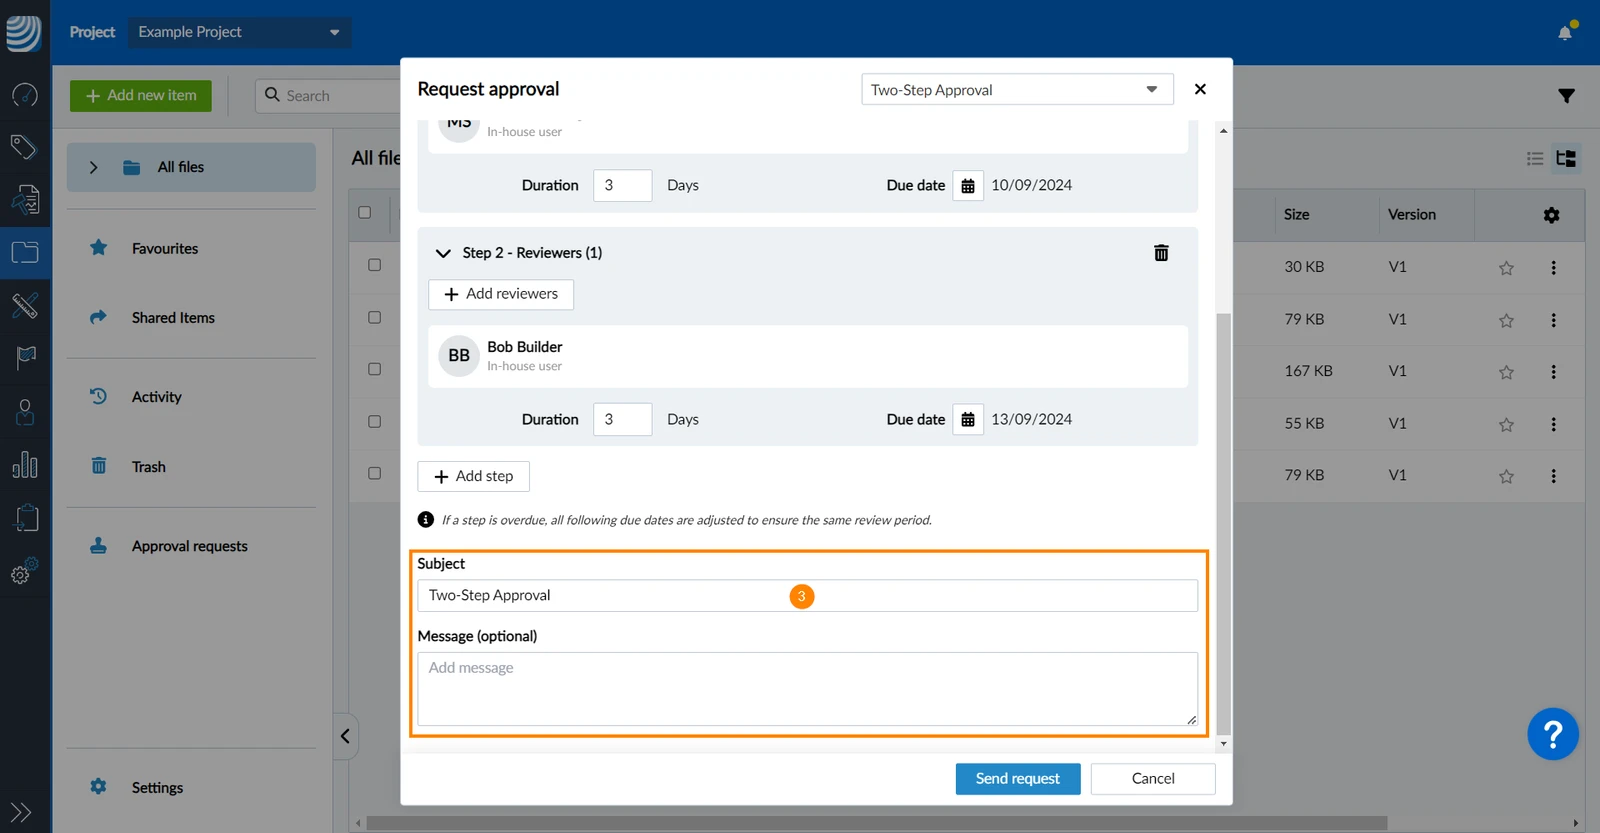
- You can only change the steps, reviewers, and durations of this approval request if the person who created the workflow has allowed you to do so. The subject and message can always be edited.
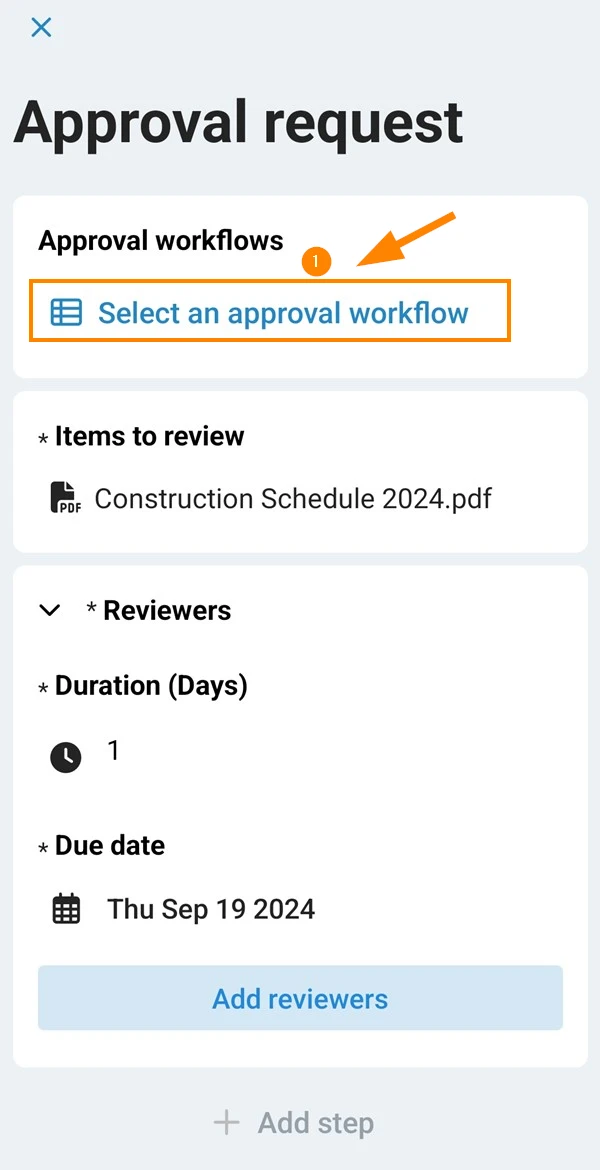
- Tap Select an approval workflow
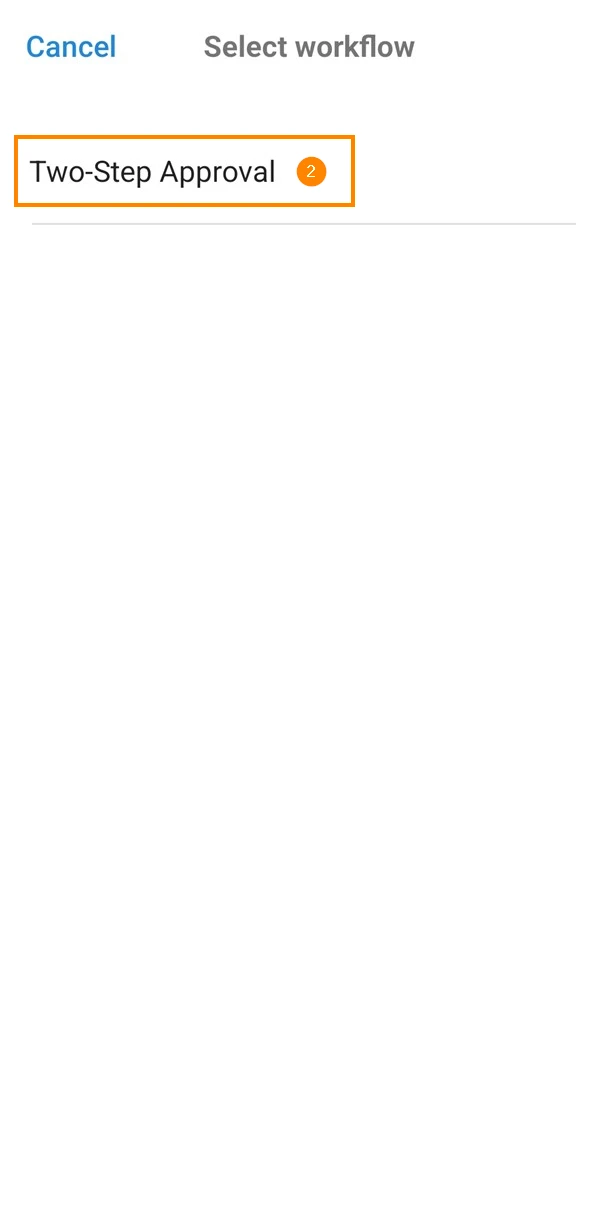
- Select a workflow e.g. Two-Step Approval
- The reviewers, steps and durations are filled in as defined in the selected approval workflow:
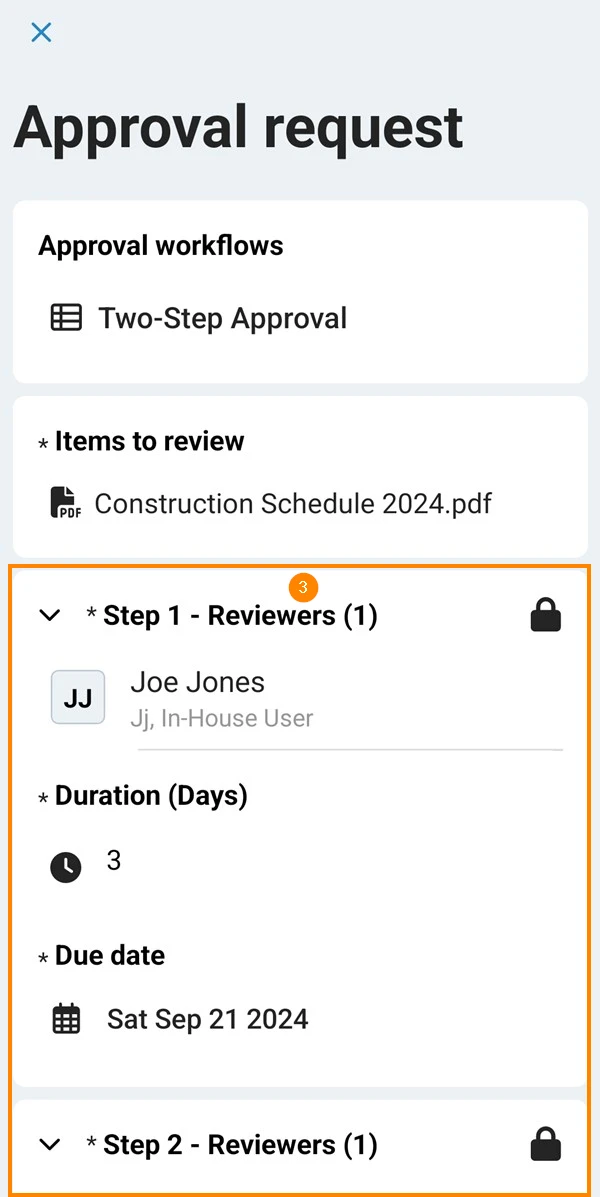
- The subject and Message are also filled in if defined in the approval workflow:
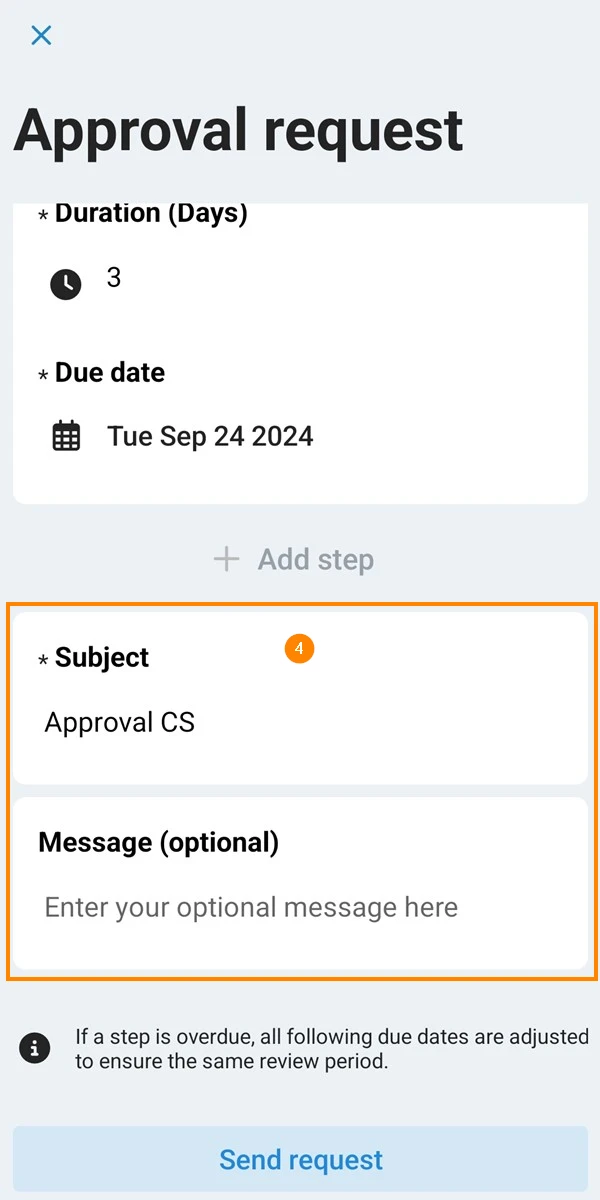
- You can only change the steps, reviewers and durations of this approval request if the person who created the workflow has allowed you to do so. The subject and message can always be edited.
Updated May 8, 2026