

 Deutsch
 Español
 Français
 Hrvatski
 Italiano
 Polski
 Português (BR)
Custom User Details
Overview
Customise user details by adding, editing, or removing custom details to tailor user profiles to your specific needs.
Access & Permissions
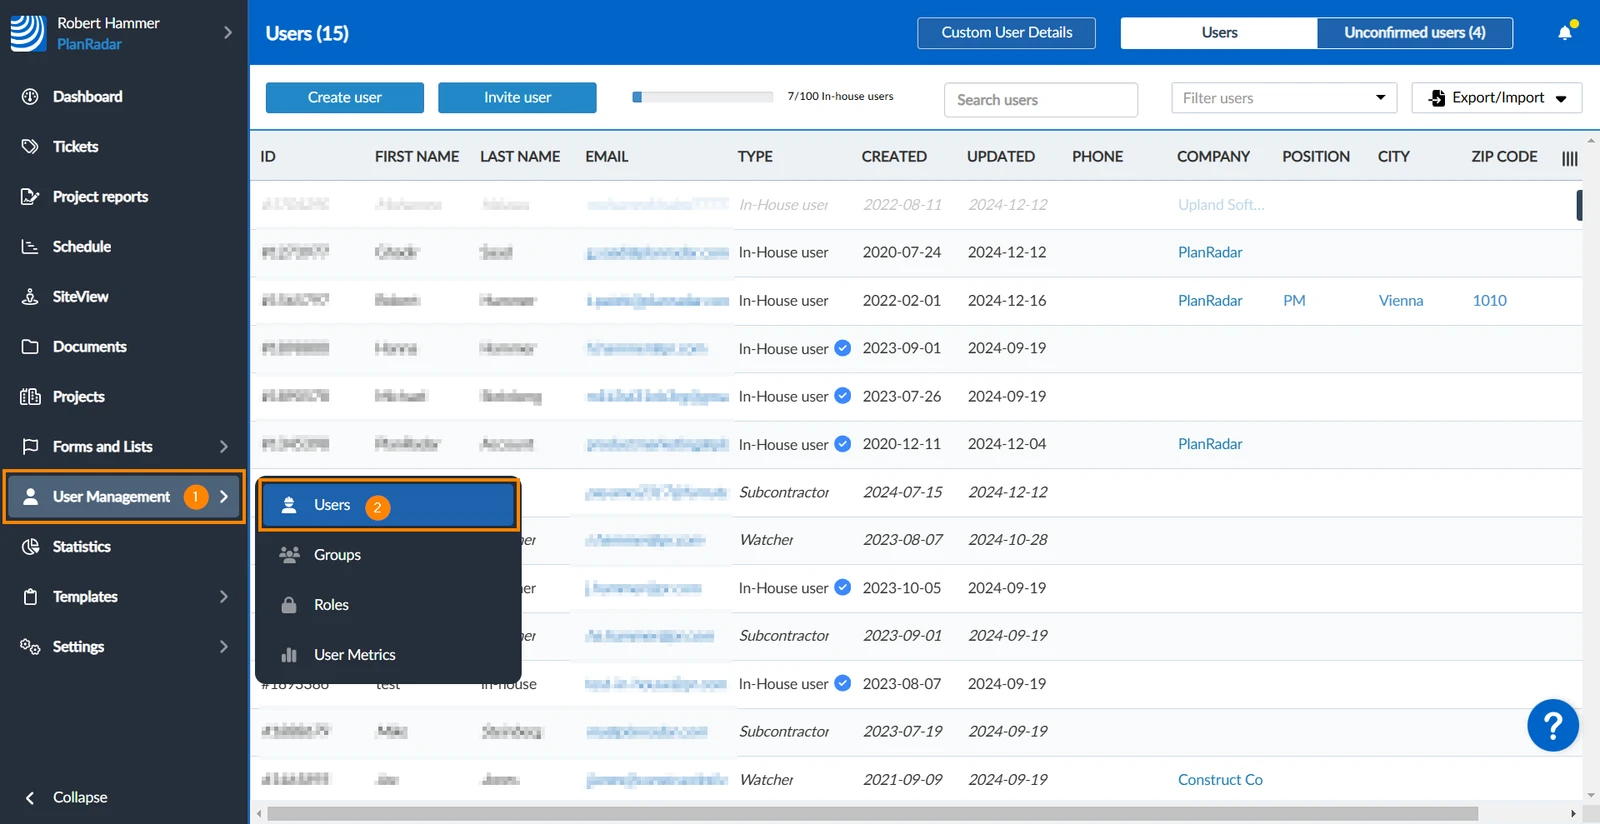
How to access Users
- Hover over User Management
- Click Users
Add Custom User Details
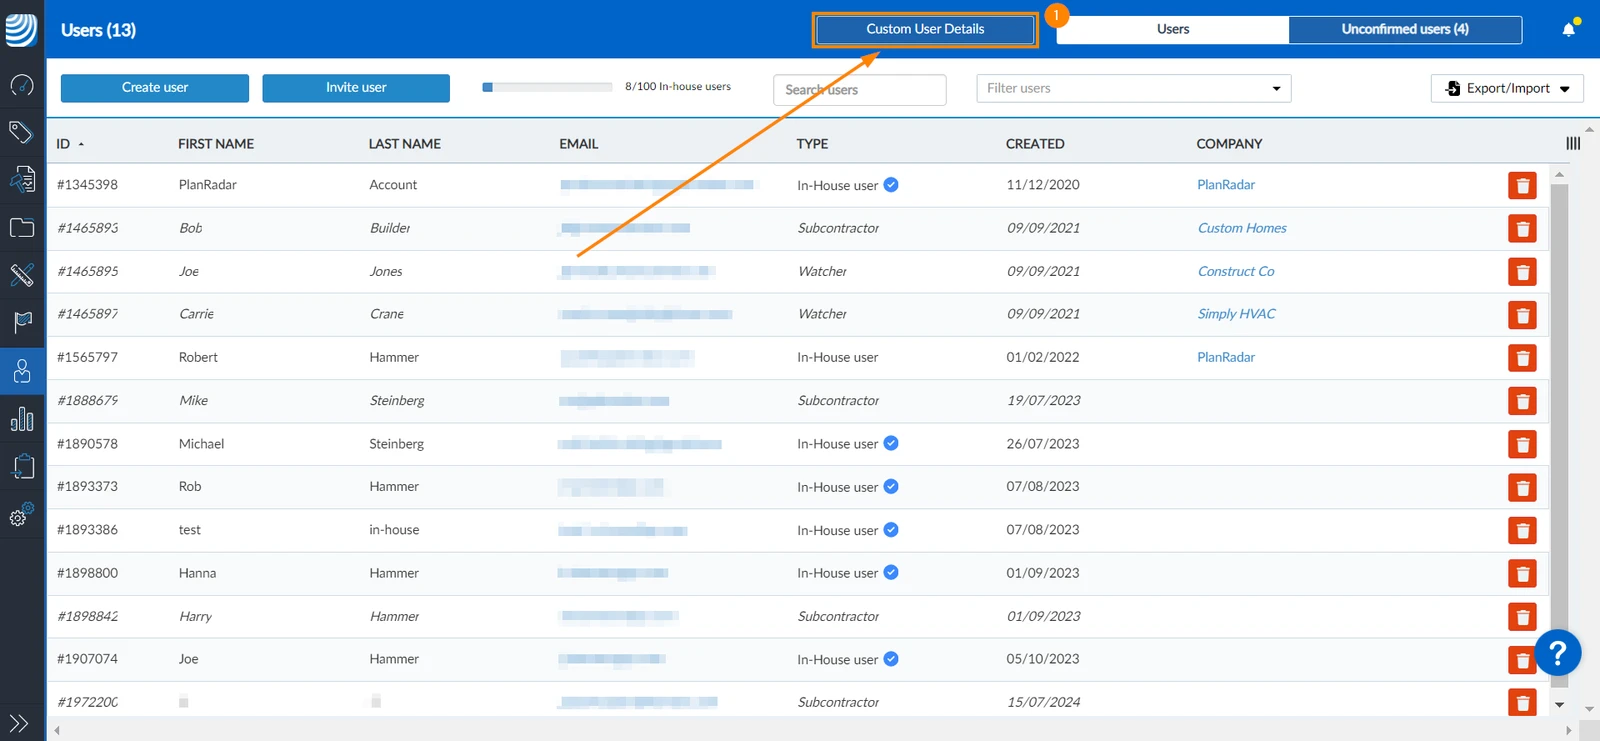
Add an additional user detail:
- Click Custom User Details
- Enter the field name
- Choose the field type (checkbox, date, decimal, list, long text, short text, number, or time)
- Optional: Select the Required checkbox to make the field mandatory when adding a new user
- Click +Add Field
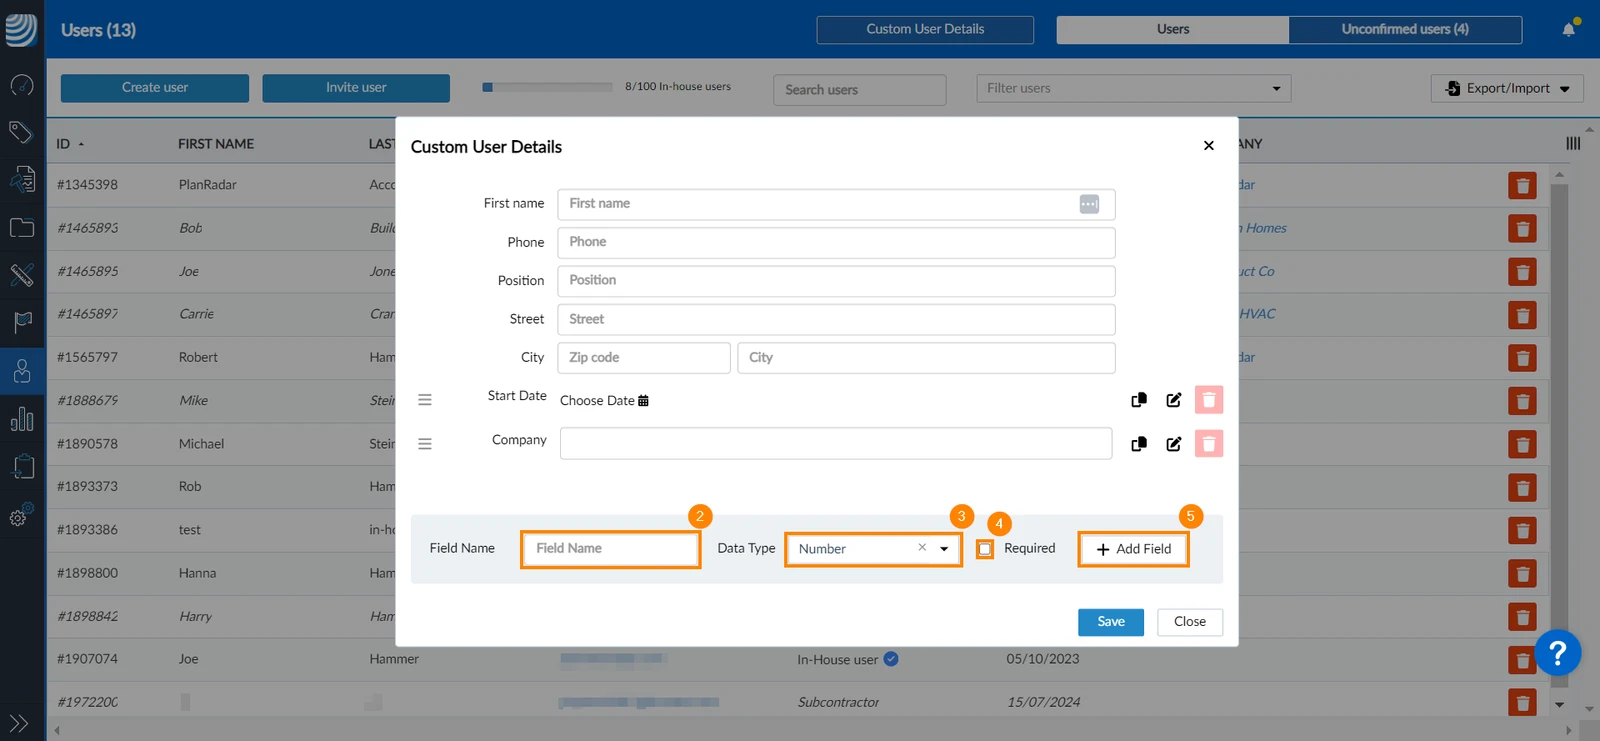
- Repeat steps 2 to 5 to add more fields
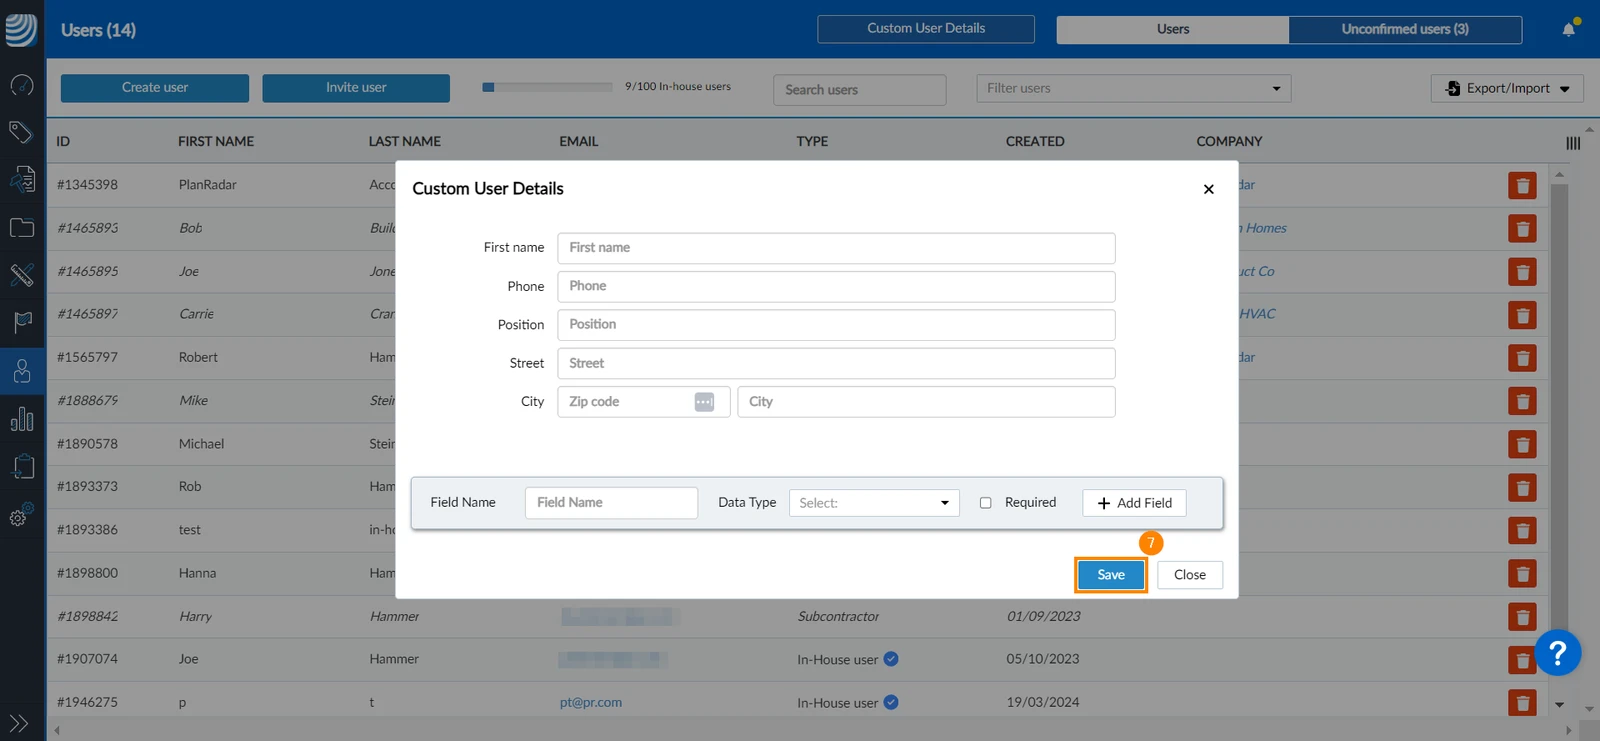
- Click Save
Edit Custom User Details
To edit custom user details:
- Click Custom User Details
- Click the edit icon next to the custom detail you want to edit.
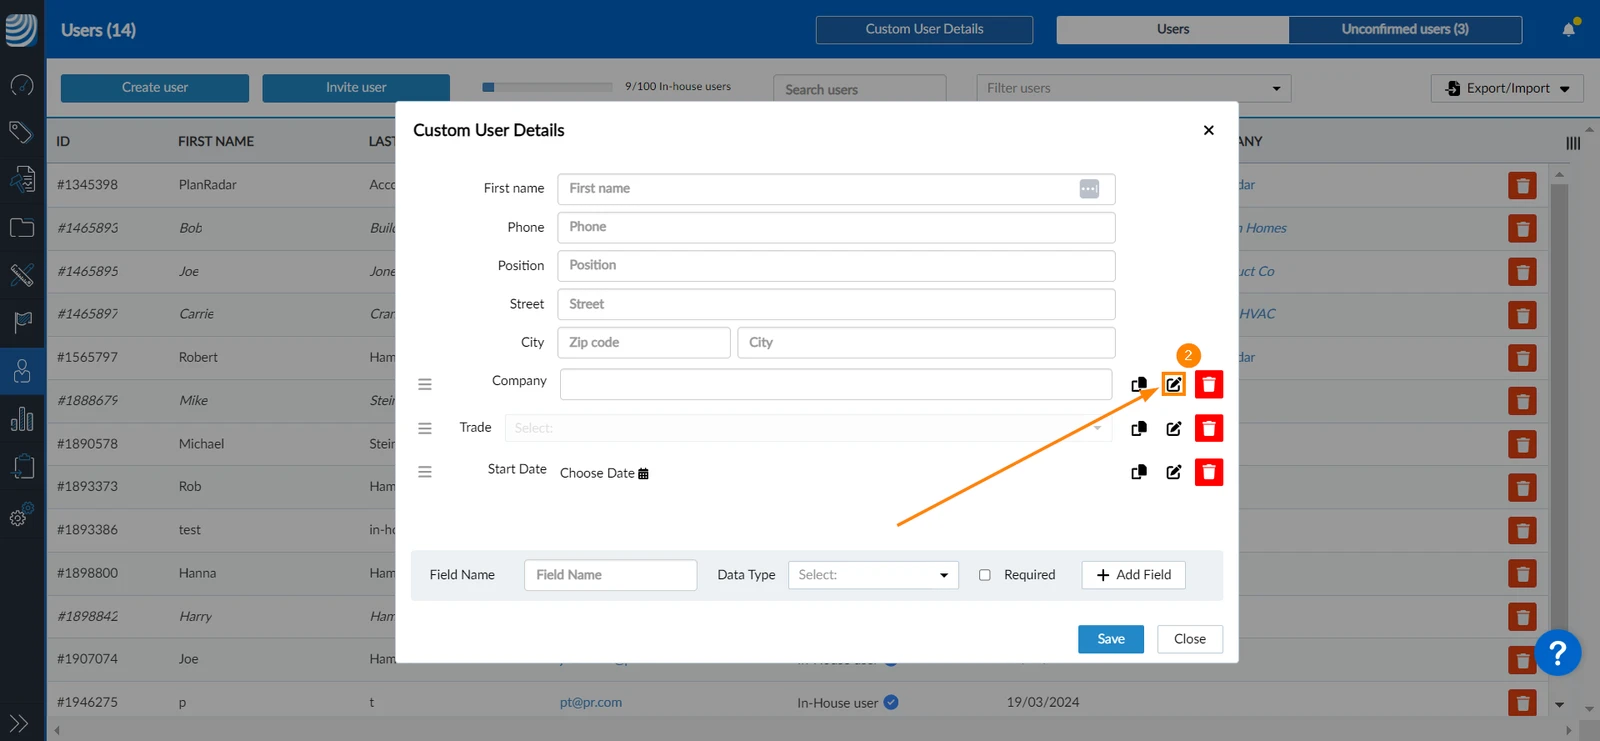
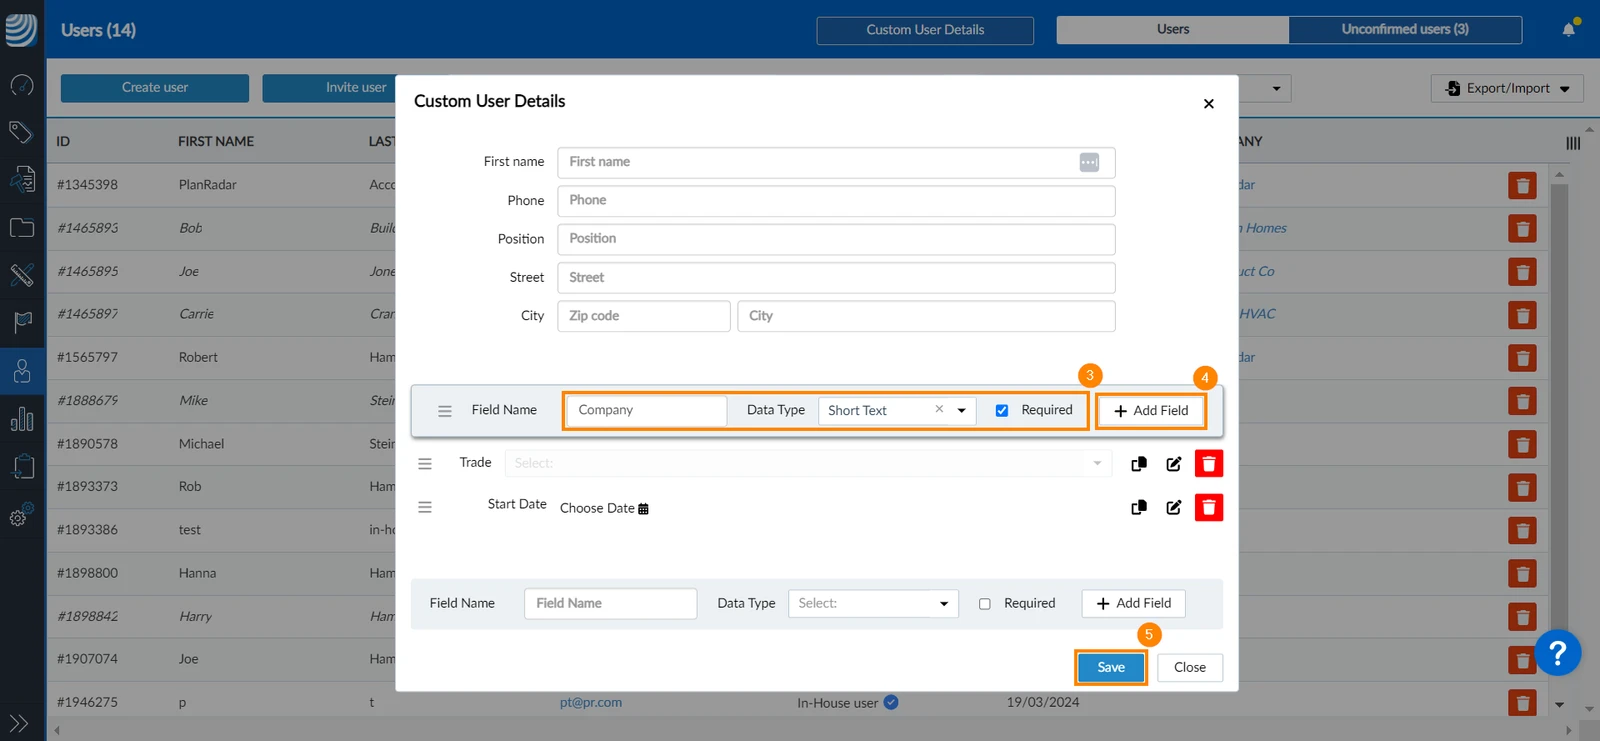
- Apply your changes
- Click Add Field to confirm your changes.
- Click Save
Rearrange Custom User Details
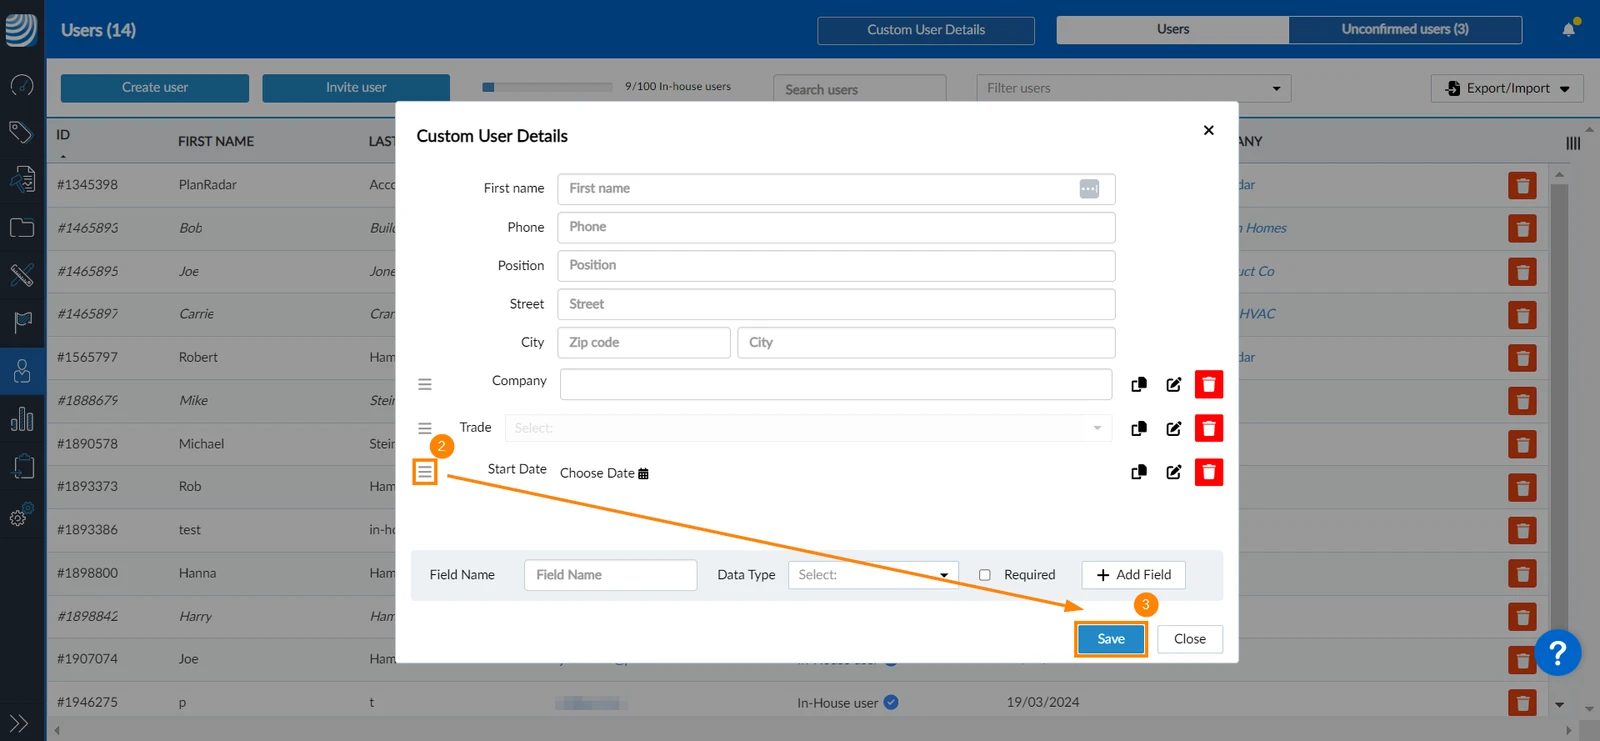
You can define the order in which the user details appear when creating or editing a user. To do so:
- Click Custom User Details
- Click and hold the order icon next to the field you want to rearrange, drag and drop it to the desired position.
- Click Save
Delete Custom User Details
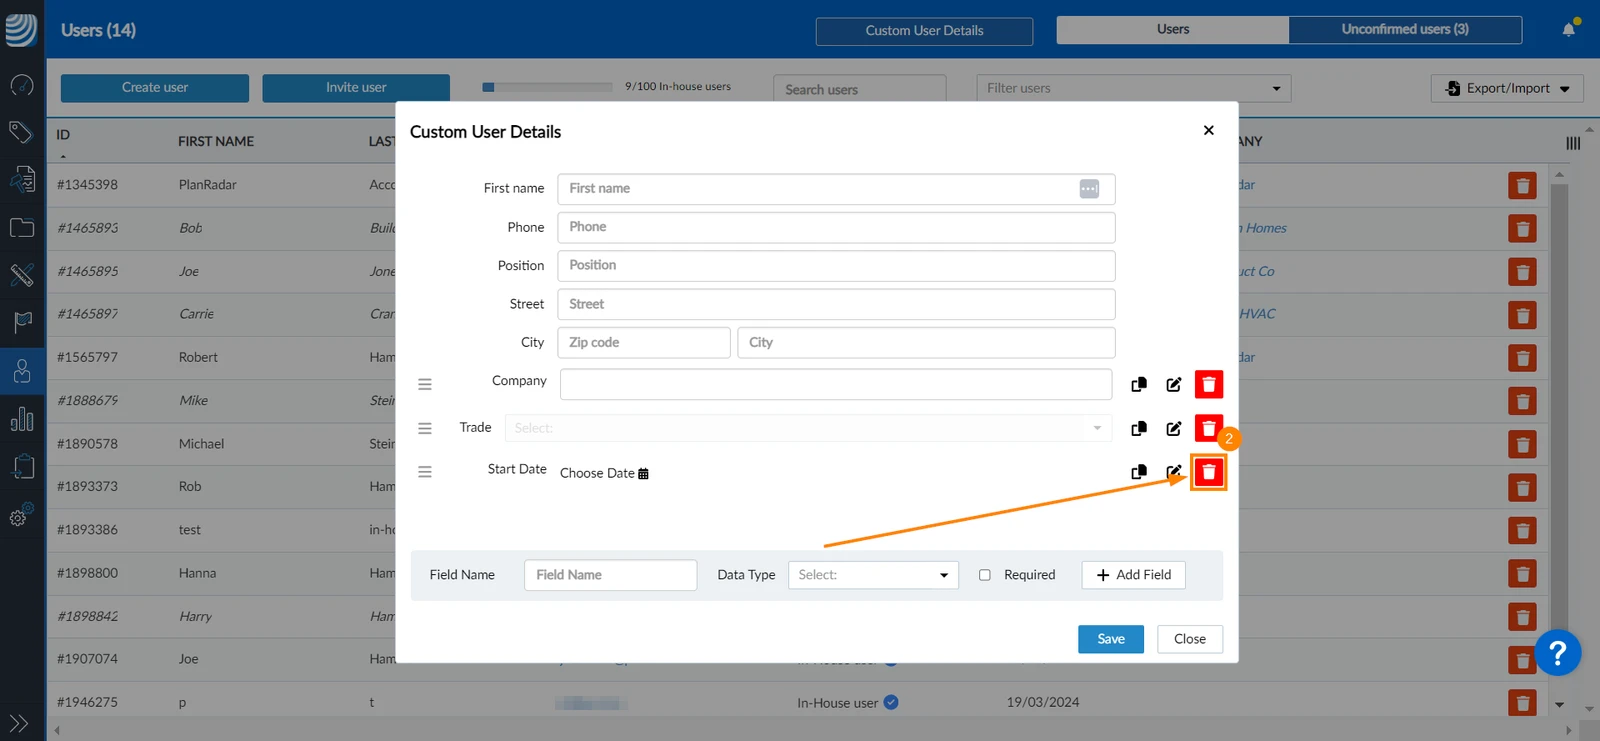
You can delete custom details only if they haven't been used. To delete a custom user detail:
- Click Custom User Details
- Click the Delete icon
Updated December 19, 2024