

 Deutsch
 Español
 Français
 Hrvatski
 Italiano
 Polski
 Português (BR)
Import Users
Overview
PlanRadar can save you a lot of time by importing users from an Excel or CSV file. This can be useful if you are setting up PlanRadar for your company for the first time, or if you have a new project that requires a lot of new users.
Access & Permissions
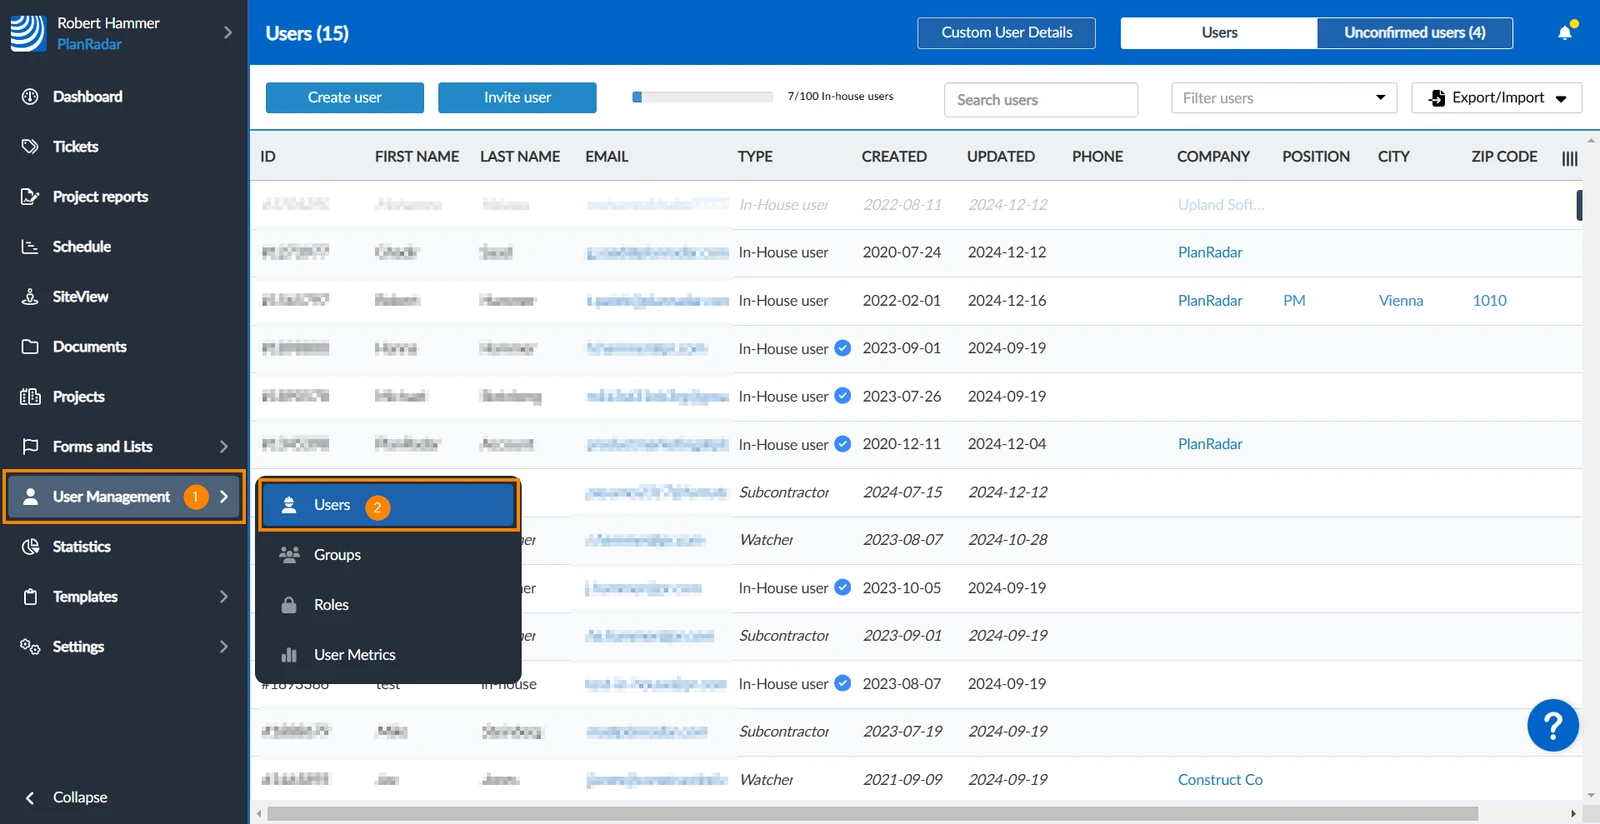
How to access Users
- Hover over User Management
- Click Users
Prepare Import File
Before the actual import you need to prepare a file which contains user data. You can either upload your own Excel or CSV file or download an Excel template and populate it with user data which is strongly recommended.
Use Excel Template File
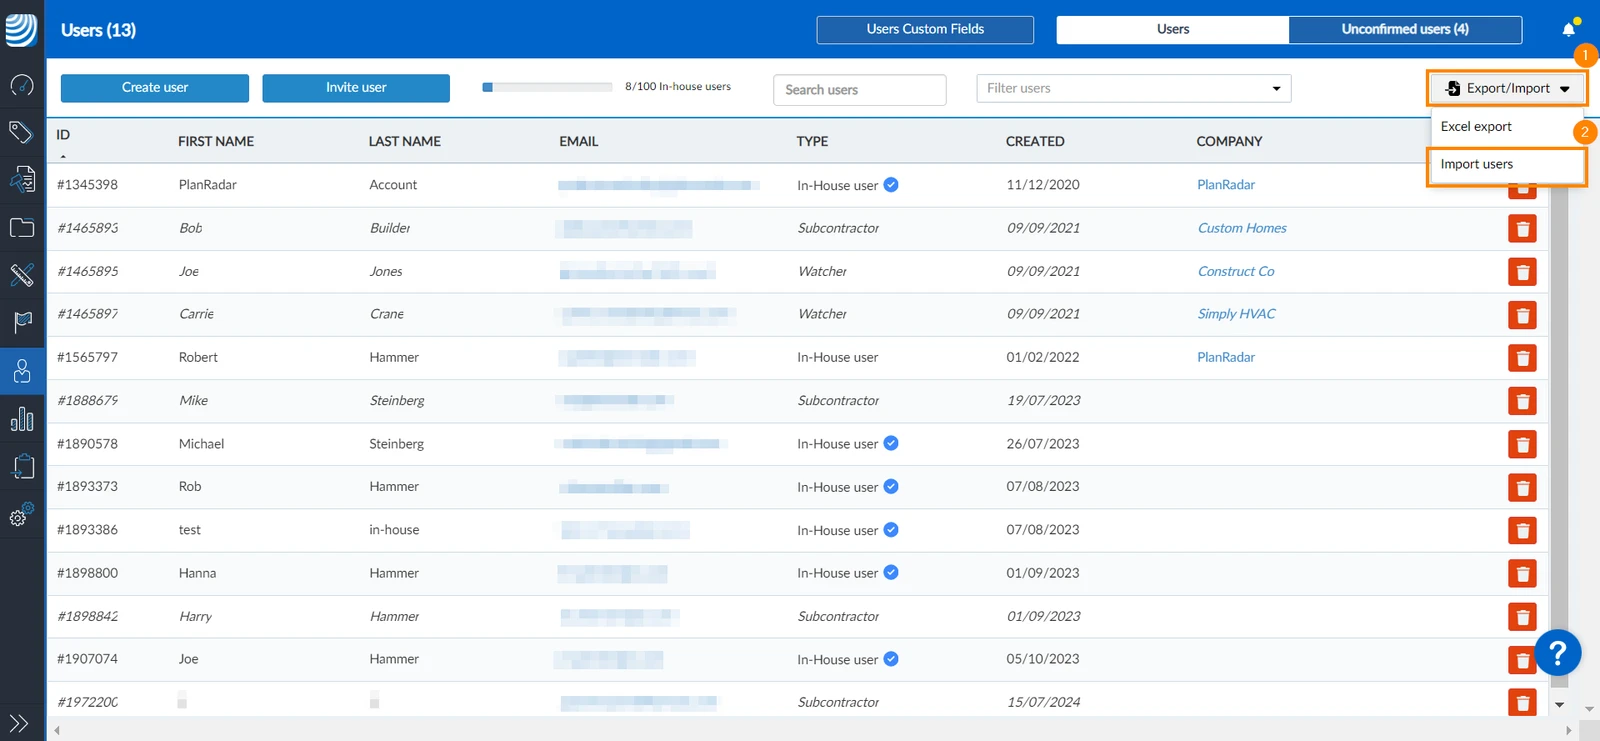
To get the Excel template file:
-
Open the Export/Import drop-down
-
Click Import Users
-
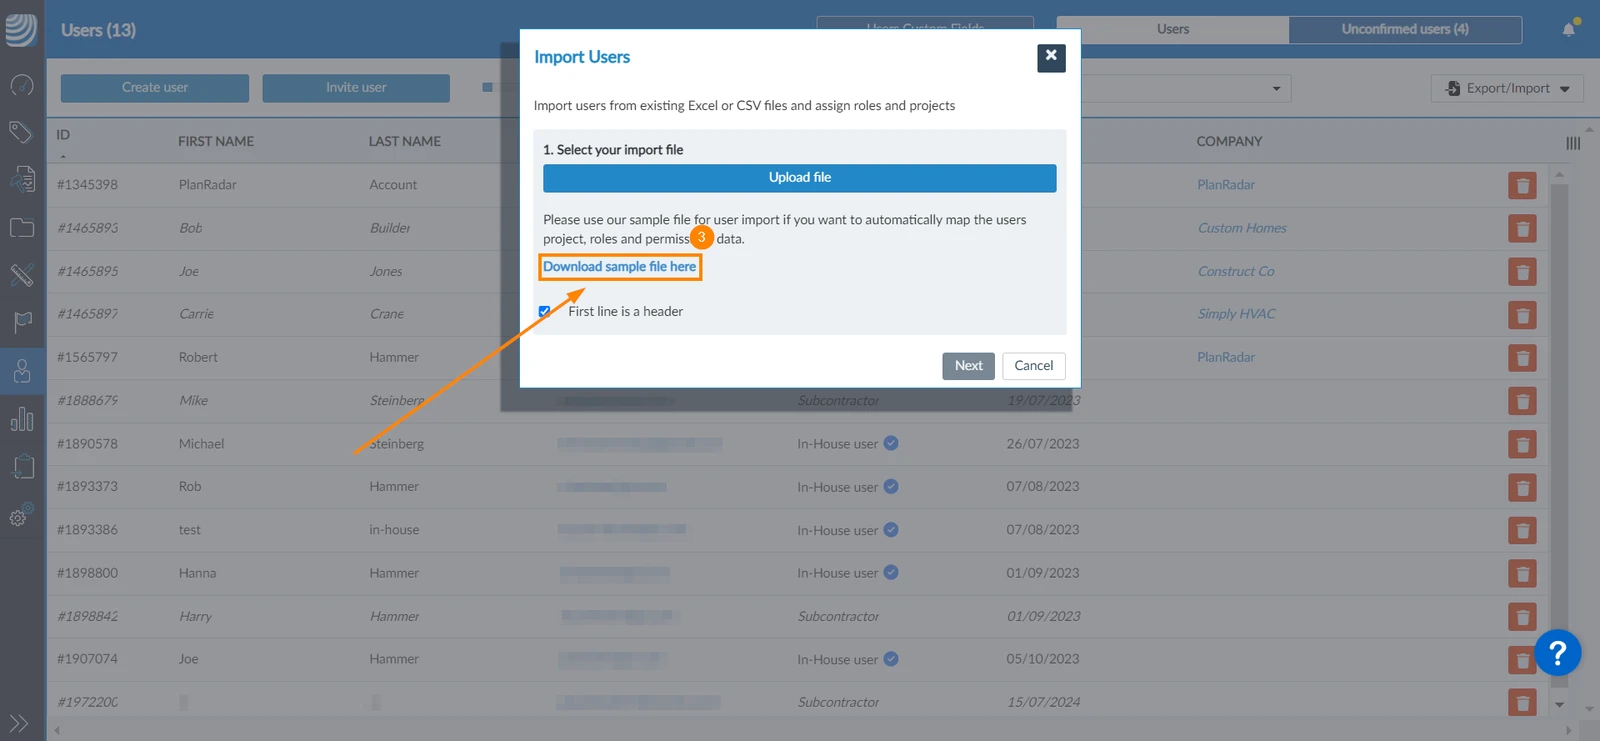
Click Download sample file here
-
An Excel file will be downloaded to your device with columns for first name, last name, email address, position, phone number, address, company, user type, projects and roles, permissions, and custom user details.
-
Once you have filled the Excel template file continue as explained below in Import Users.
Use your own File
Using your own file can be useful if you have exported the user data from another software. The file needs to have the following criteria:
- Only XLSX and CSV files are supported.
- Each row in the file represents a user and each column represents a user field.
- First name, last name, email address, and user type are required. All other user details are optional and can be filled out manually later in PlanRadar. Columns can be interactively mapped during import, i.e. a column header is optional and column names can be arbitrary.
- If there are mandatory user custom fields in your account, they have to be defined in the file.
Import Users
Ensure you have prepared the import file correctly as described above.
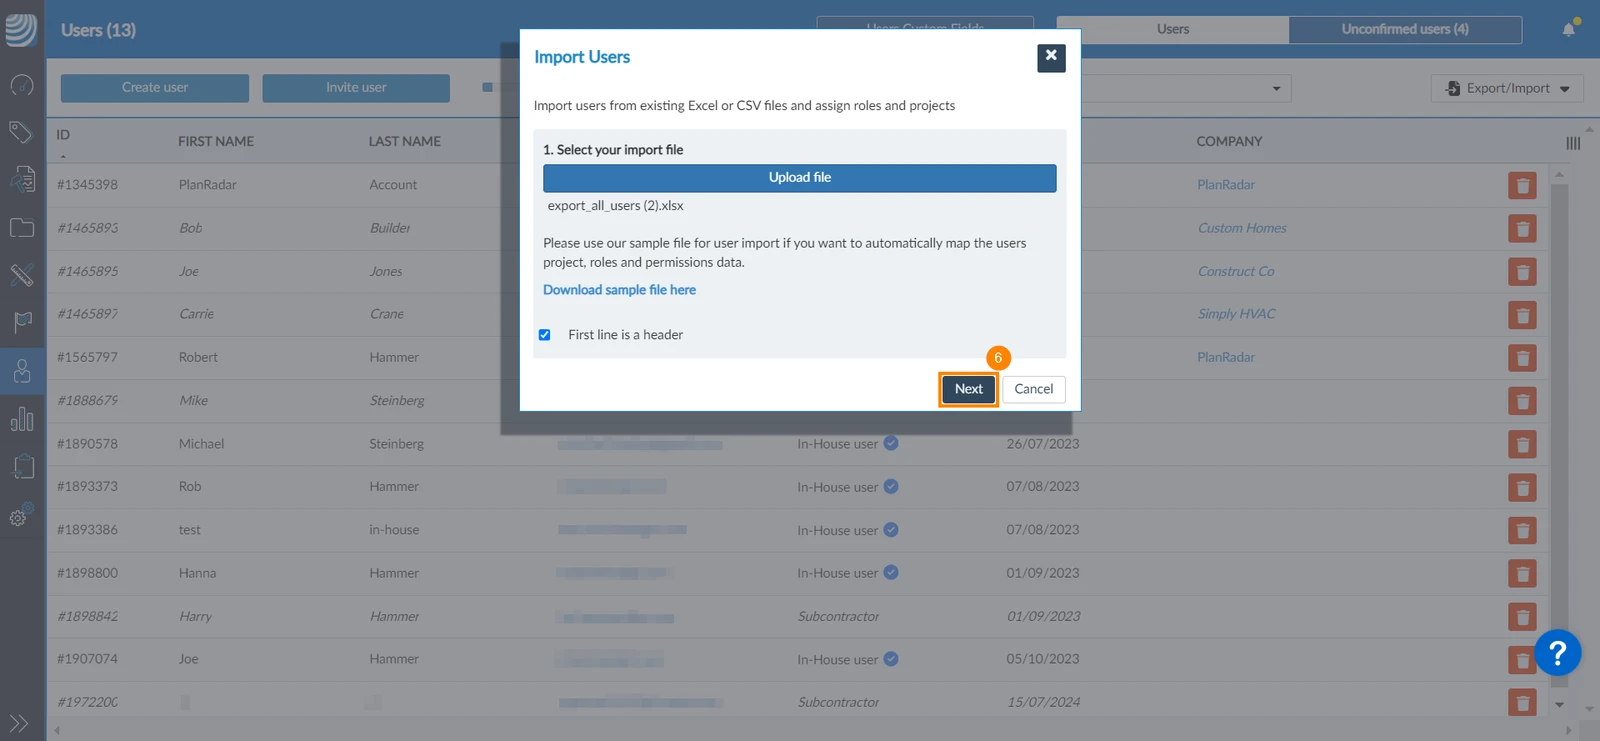
- Open the Export/Import drop-down
- Click Import Users
- Select the First line is a header checkbox if the first horizontal line in your file includes titles. Keep it checked if you are using the provided Excel template file. If the import file does not have a column header, uncheck it (in this case you will have to map data by column numbers later).
- Click Upload file
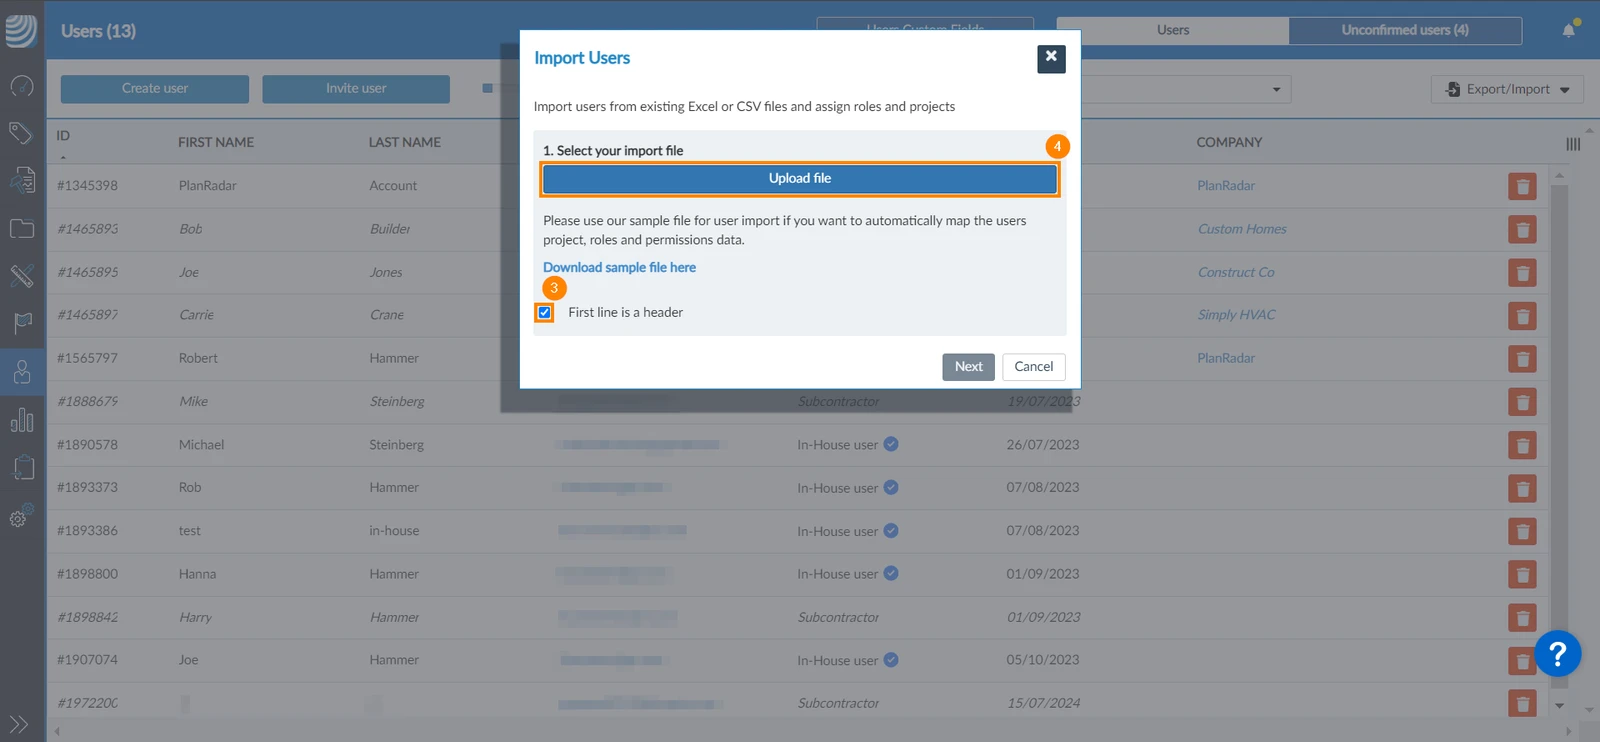
- Select the file from your device
- Click Next
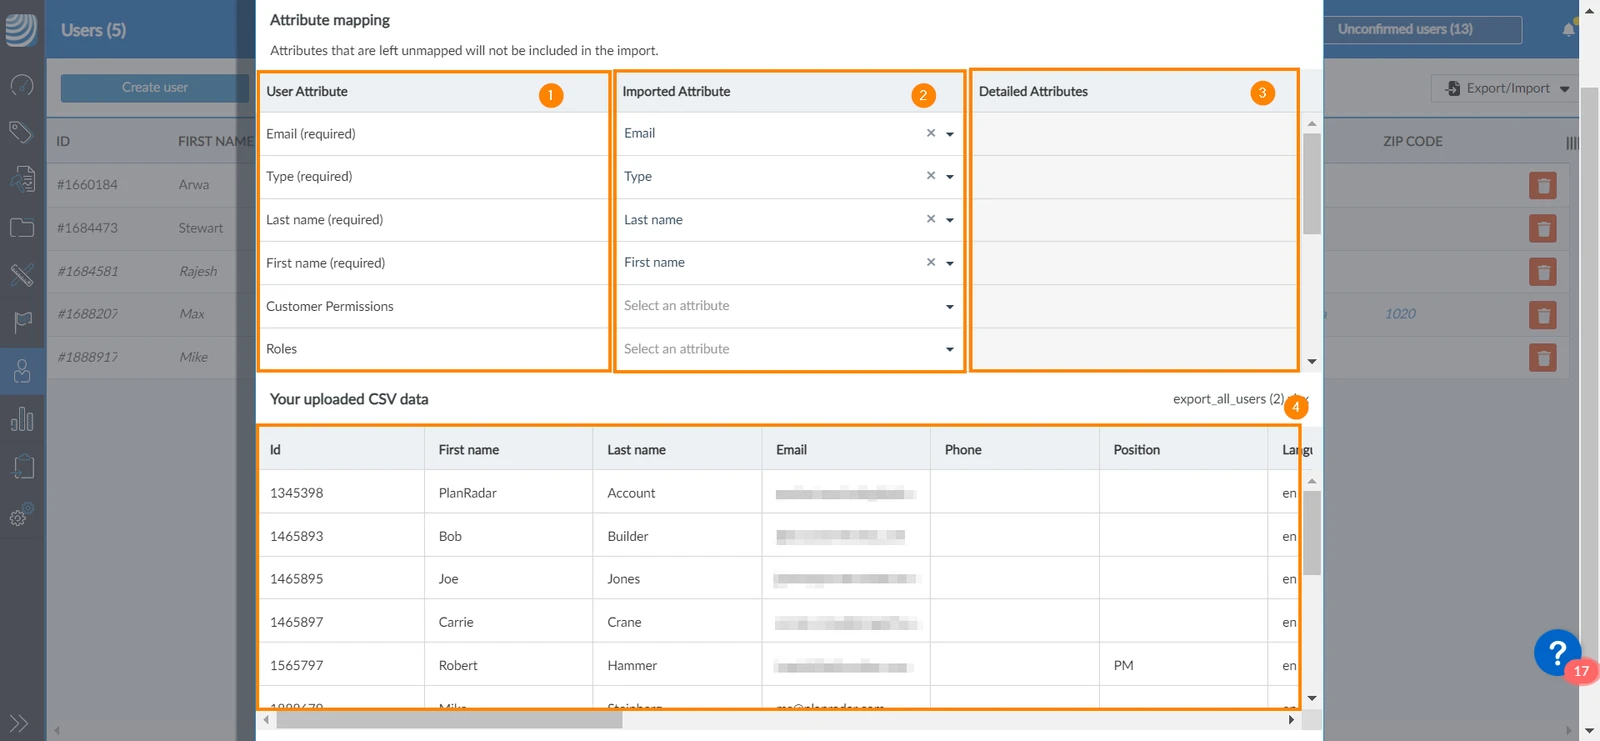
Now you need to define a mapping to ensure that the data for each column in your file is correctly imported into the corresponding user field in PlanRadar.
The mapping dialogue box displays a mapping table at the top and a preview of your file at the bottom.
-
The User Attribute column lists all the user fields in your account.
-
The Imported Attribute column allows you to select the columns from your import file and map them to the corresponding user attributes.
-
The Detailed Attributes are only required if the user field type is 'List'.
-
The preview helps to understand the data and pick the right columns, especially if there is no header column and you only see column numbers.
-
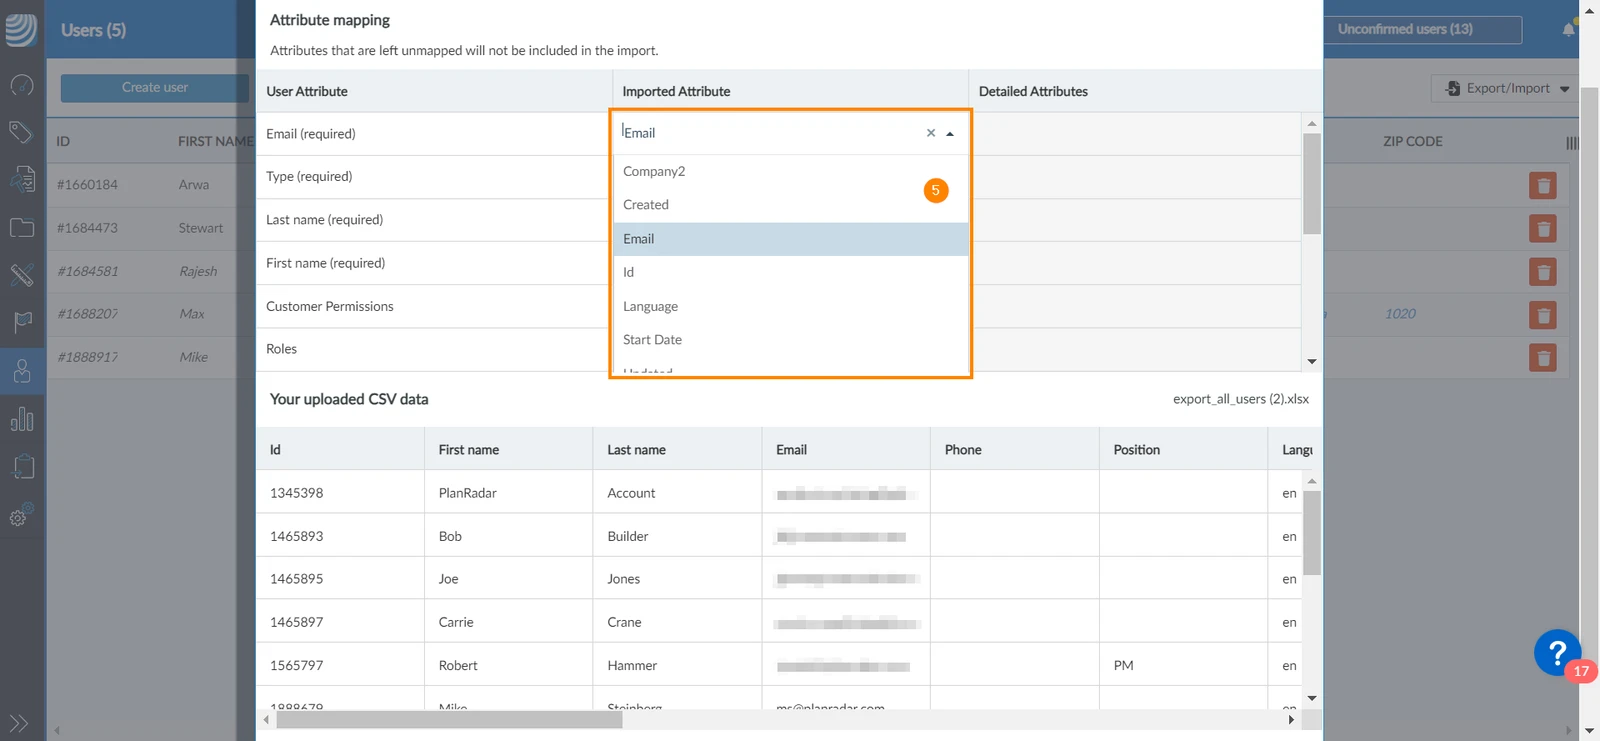
Select the column header (or number) from your imported file in the drop-down to map it to the corresponding user attribute in PlanRadar
-
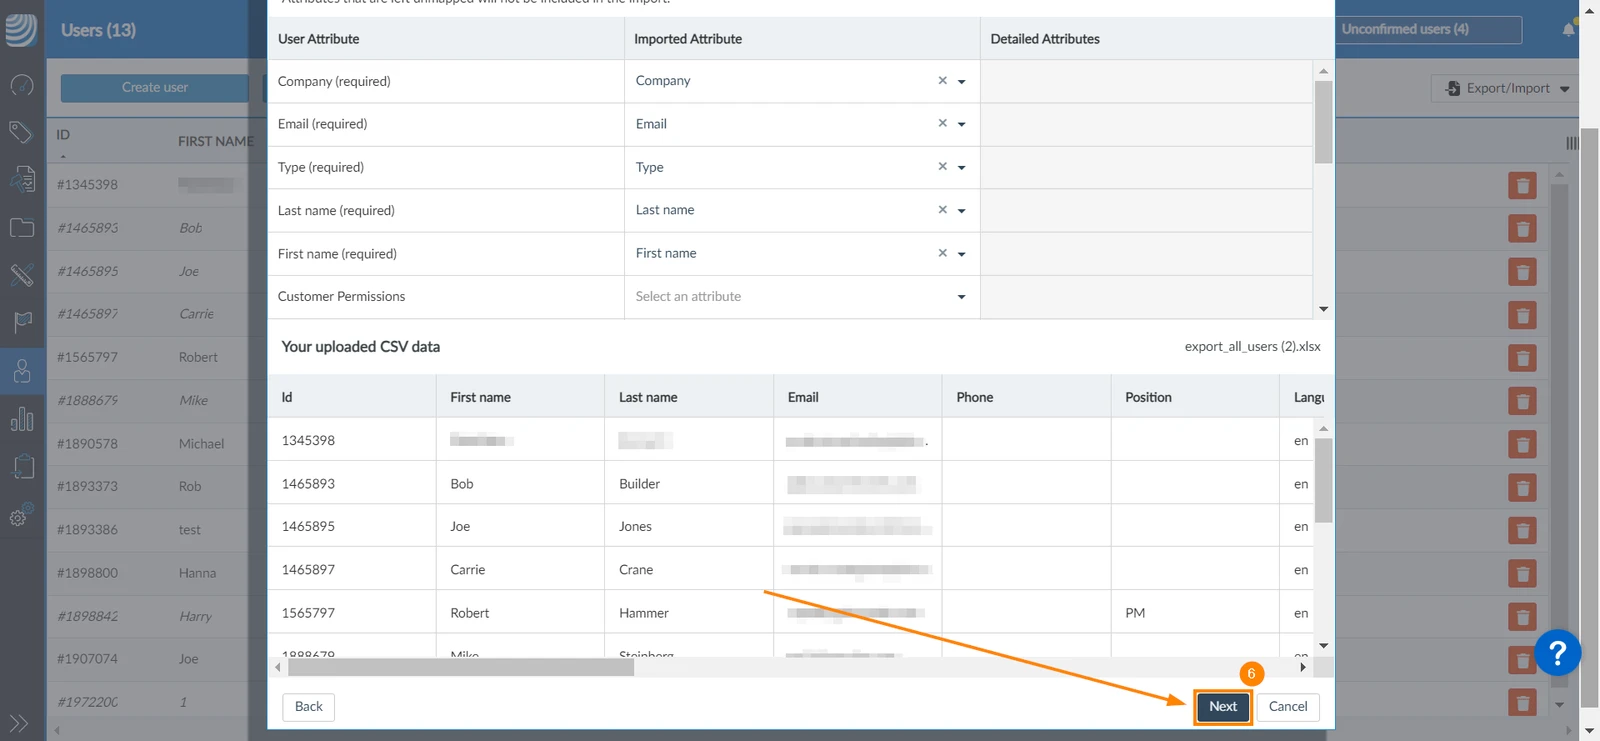
Click Next
-
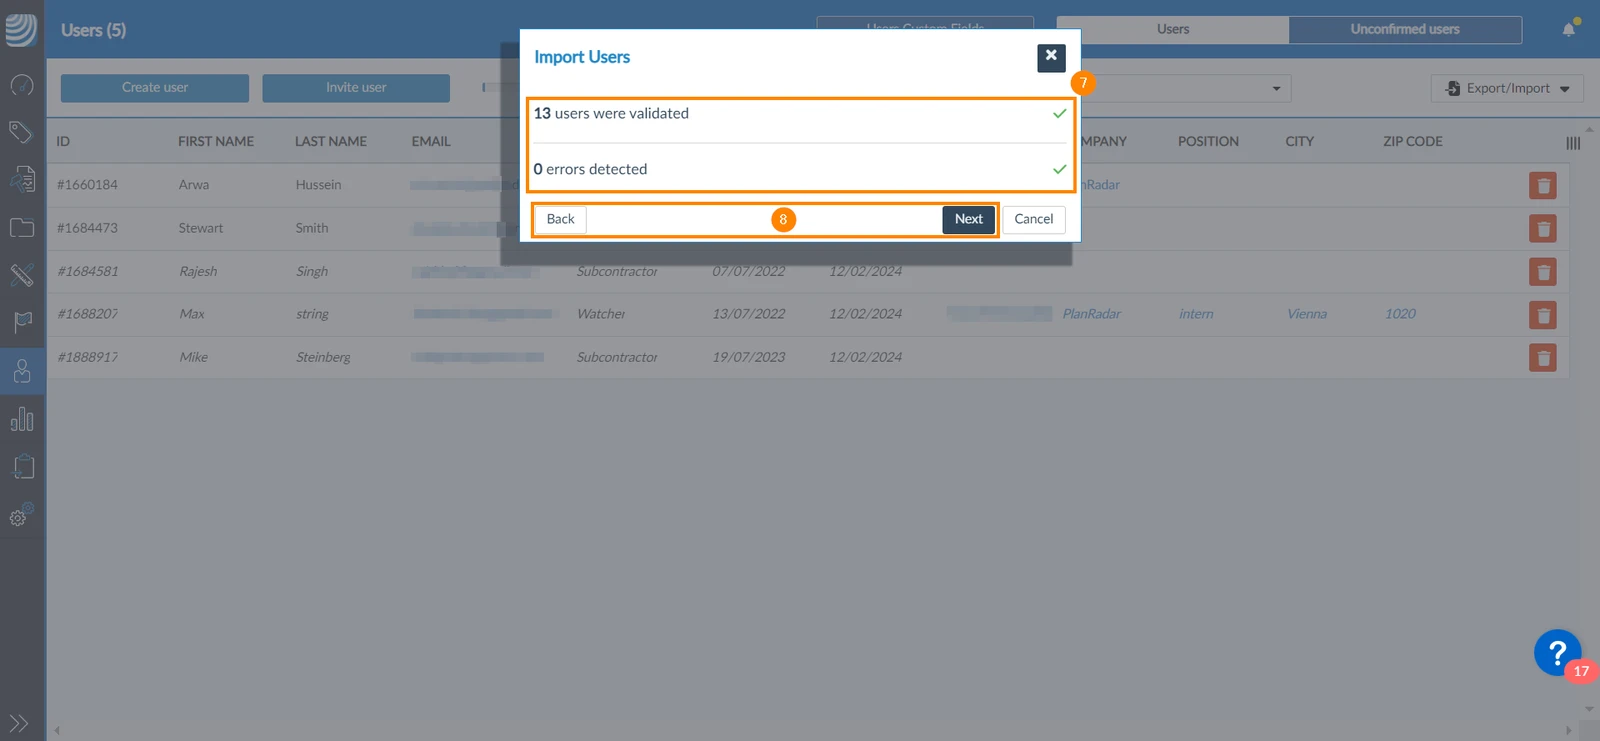
A pop-up window will appear on the screen to show the number of successfully imported users and the number of mapping errors
-
Click Back to correct any mapping errors as explained below or click Next to continue
-
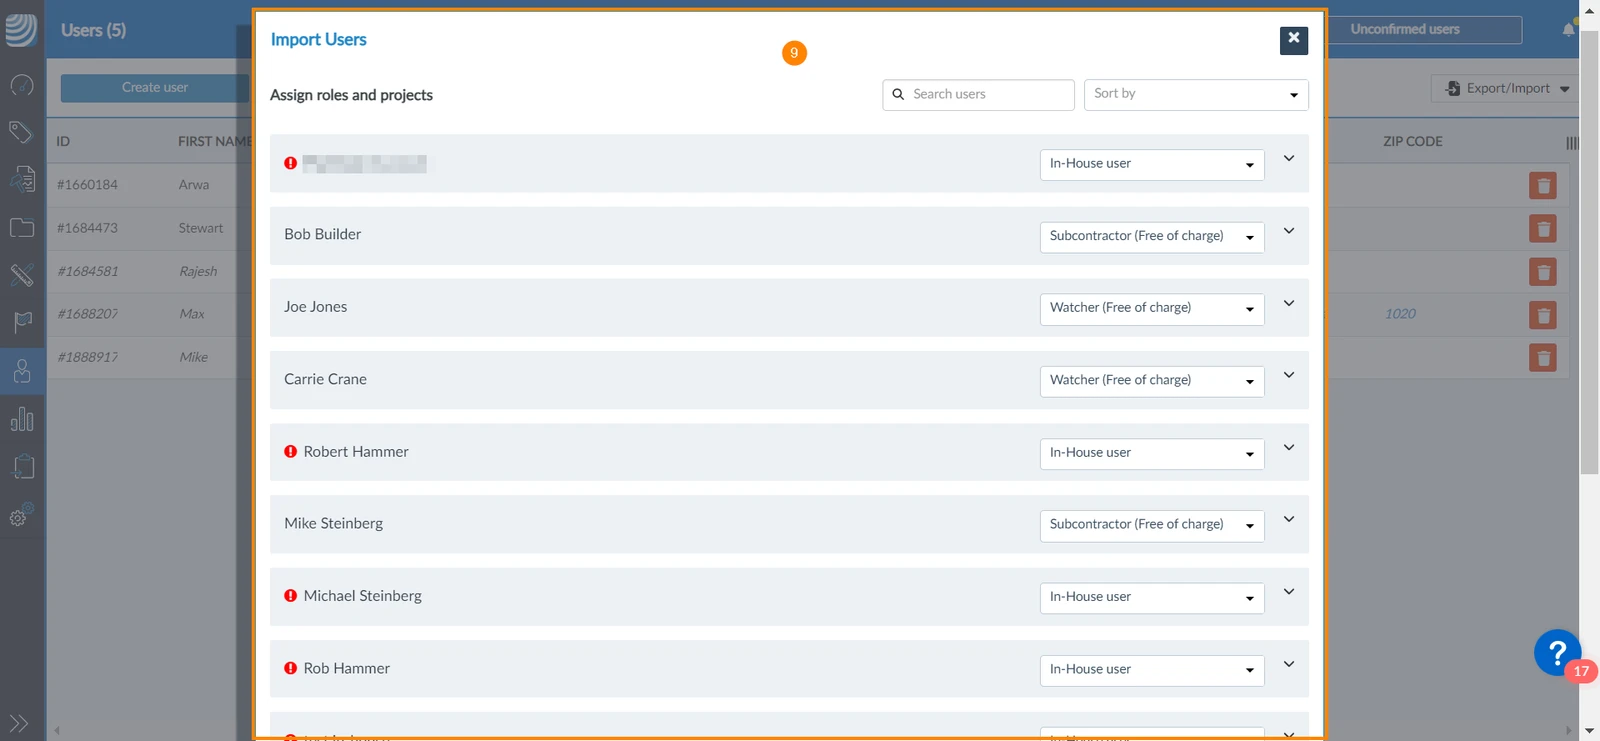
A new window will open with all the imported users.
-
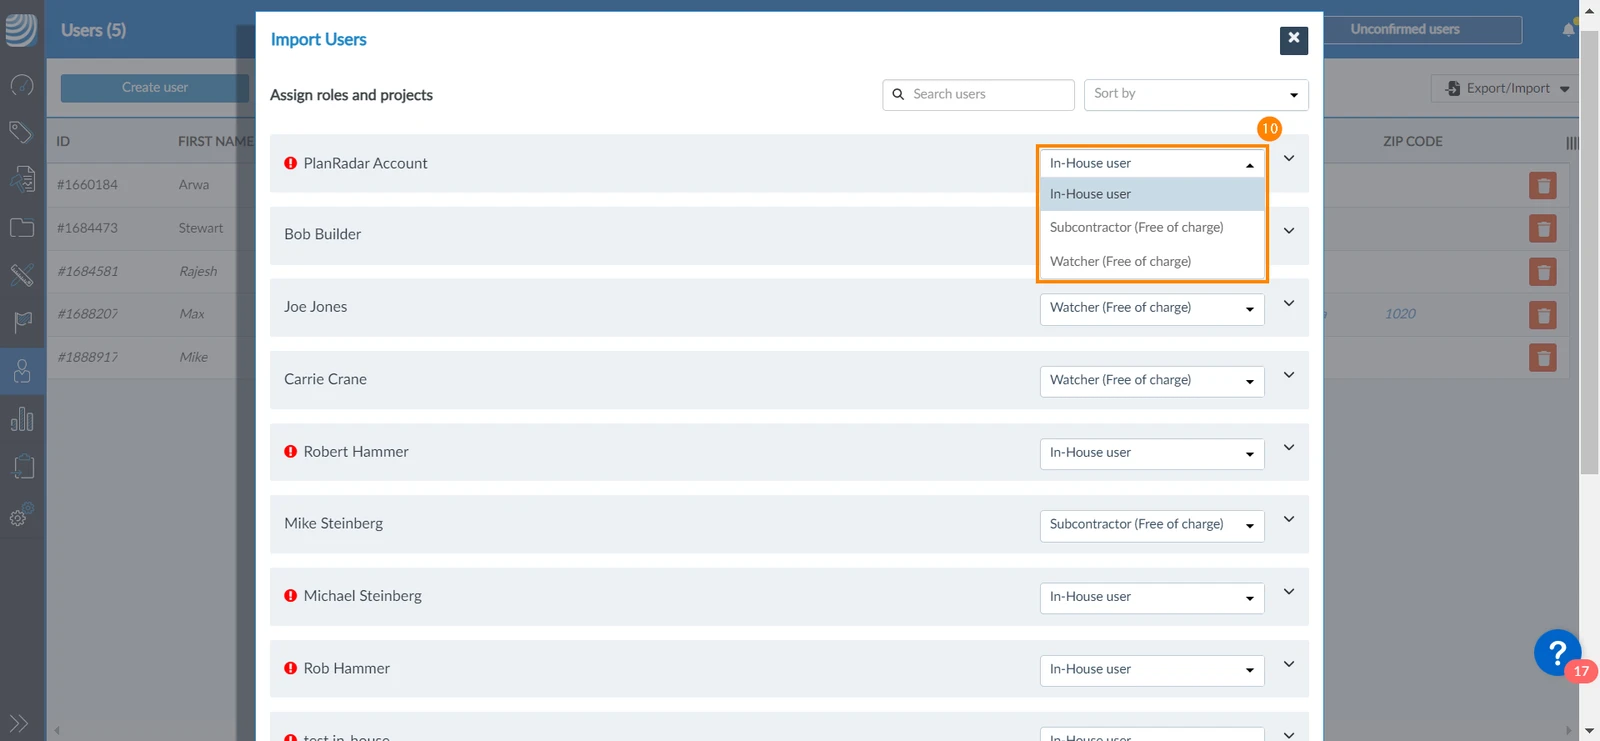
You can use the drop-down next to the user, to change the user type
-
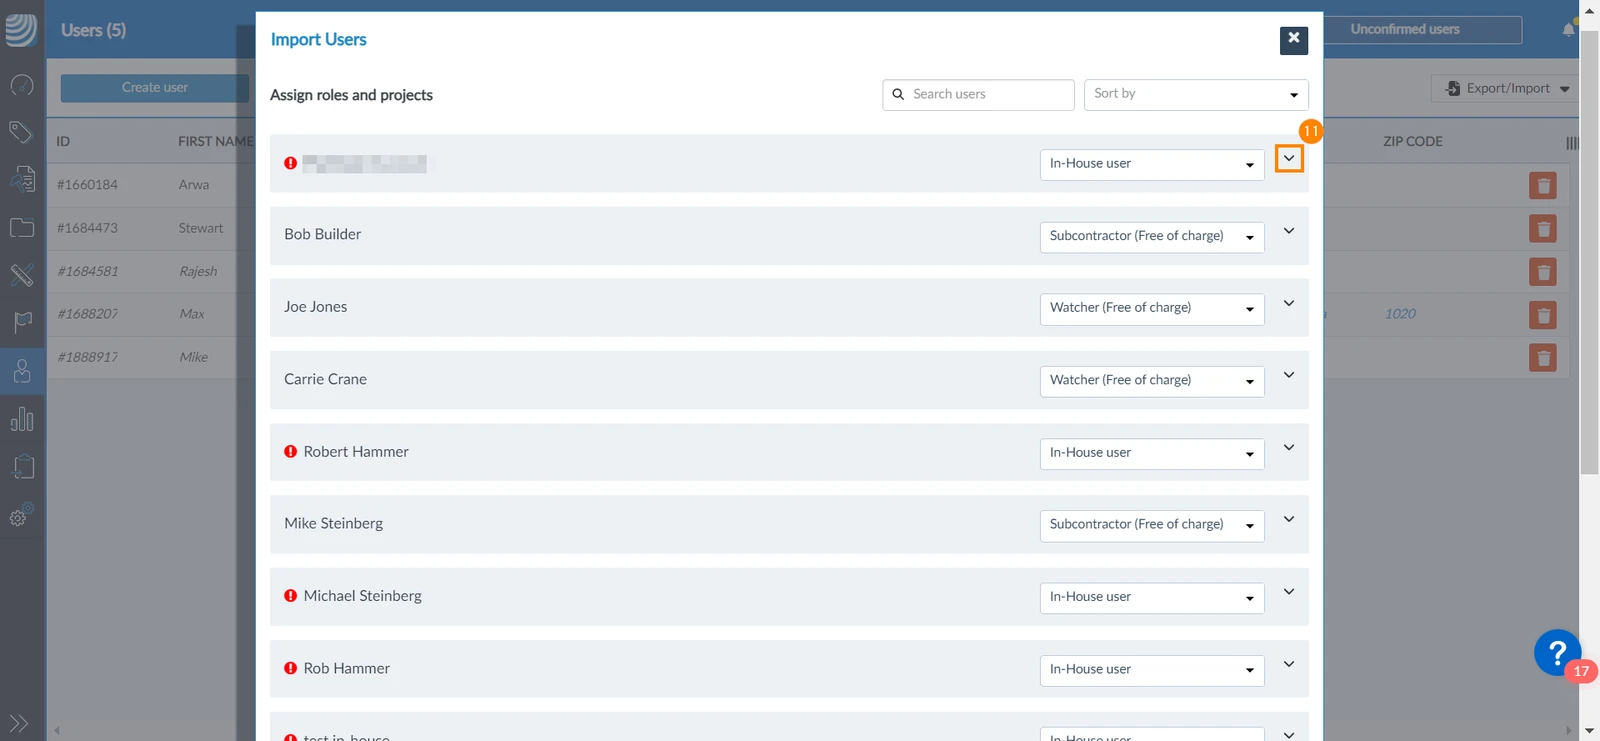
Click the expand arrow next to the user
-
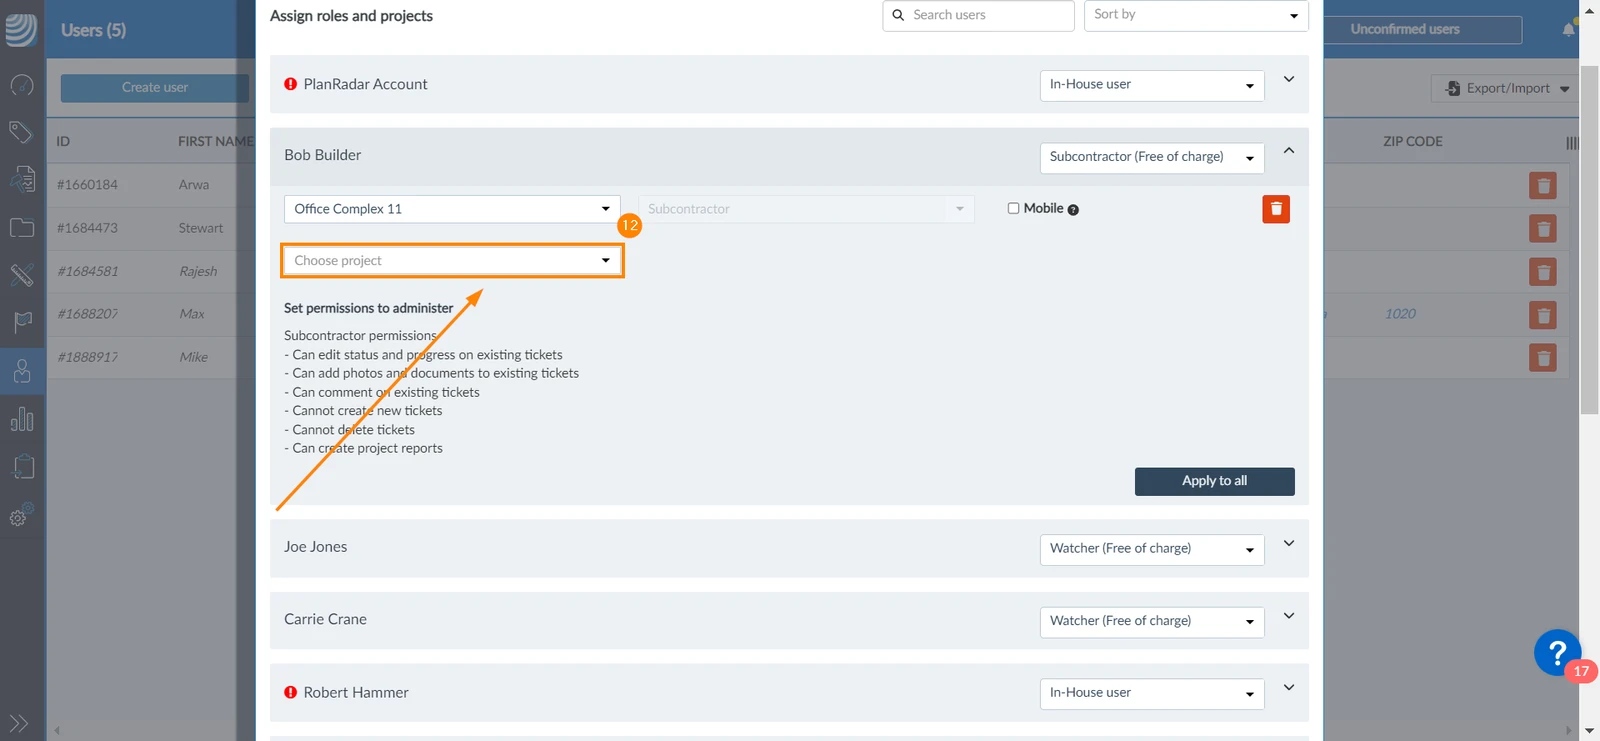
You can assign users more projects
-
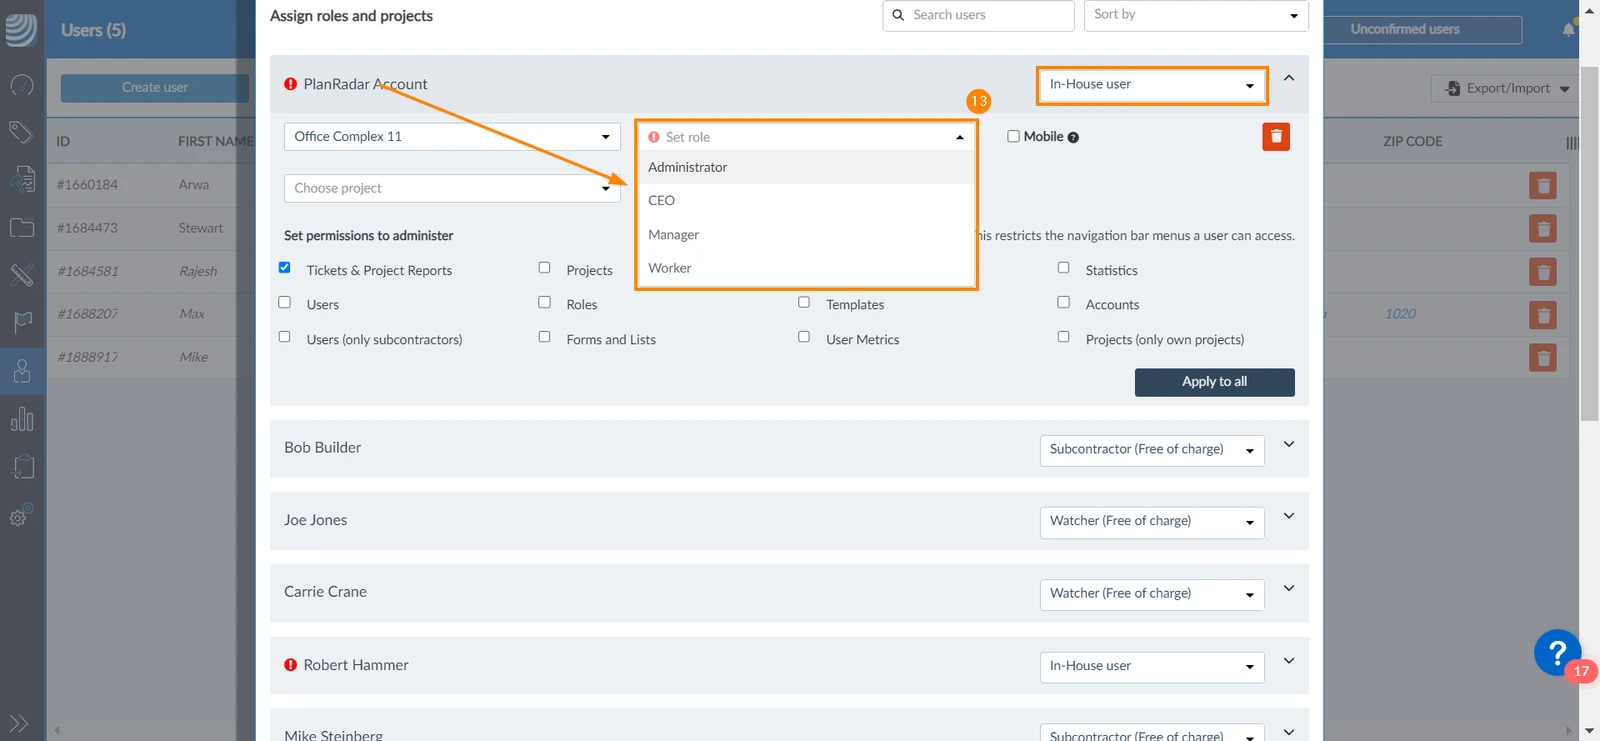
For in-house users, you can assign them roles
-
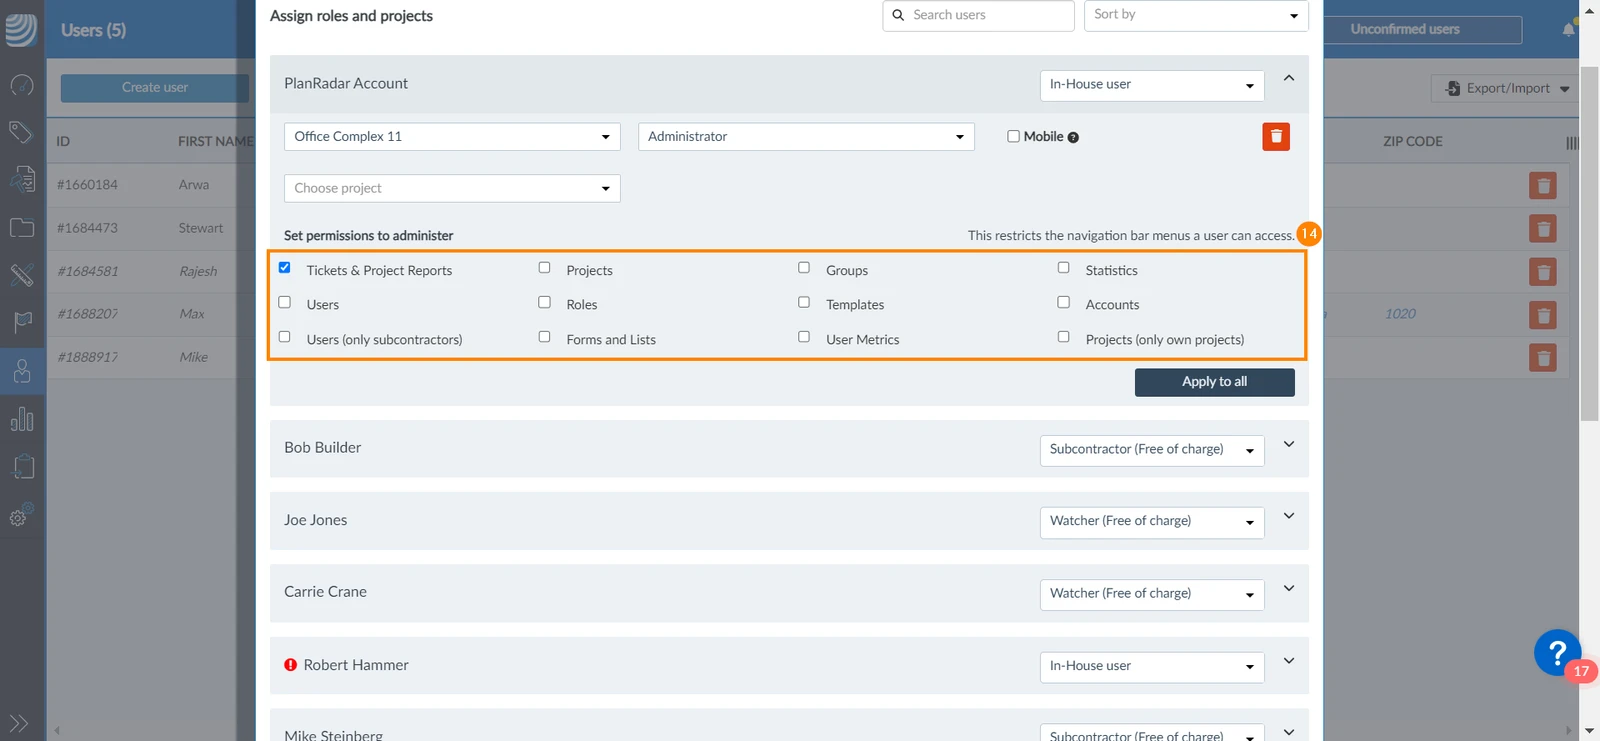
You can also set the in-house users' user permissions
-
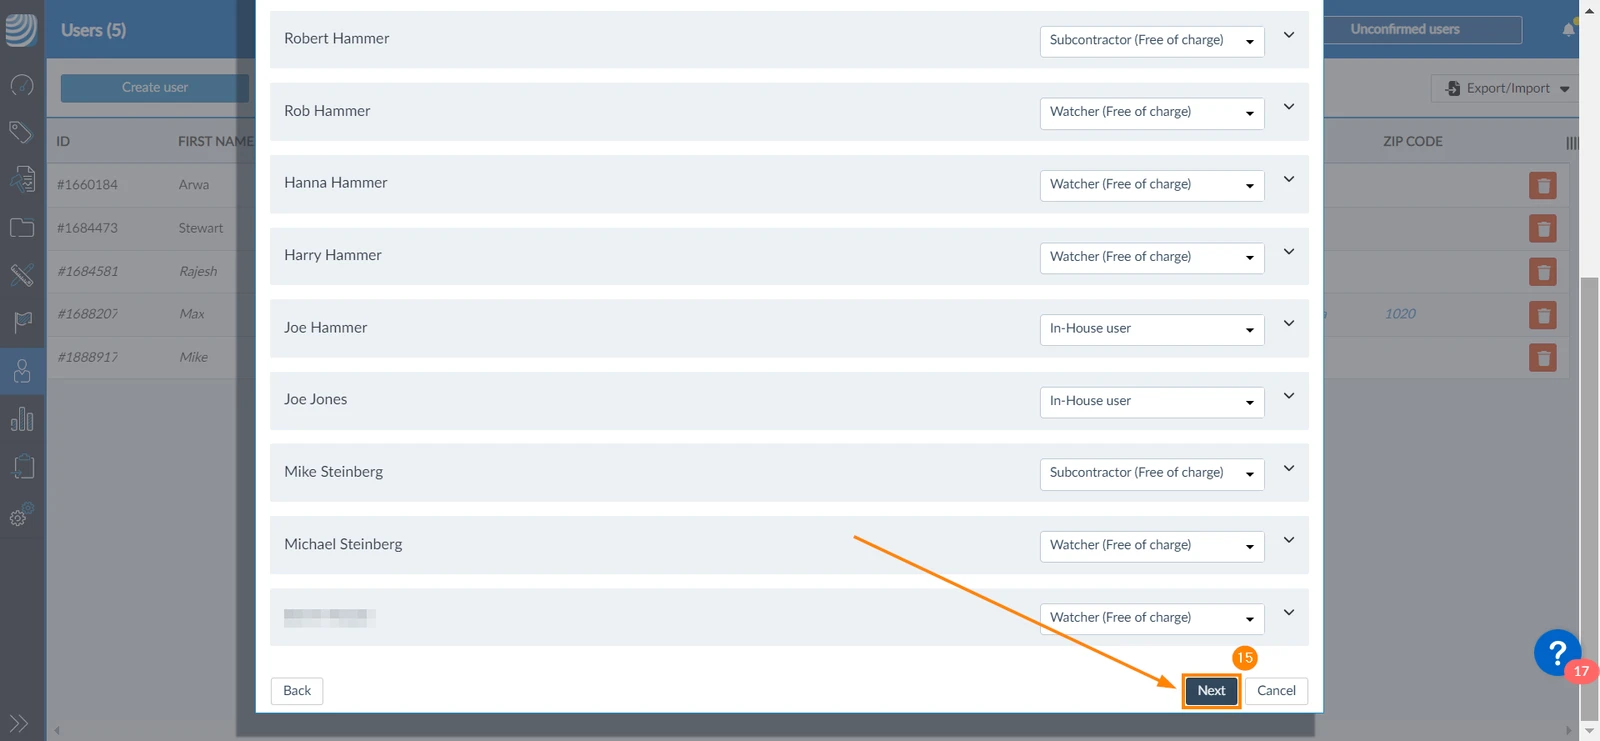
Click Next
-
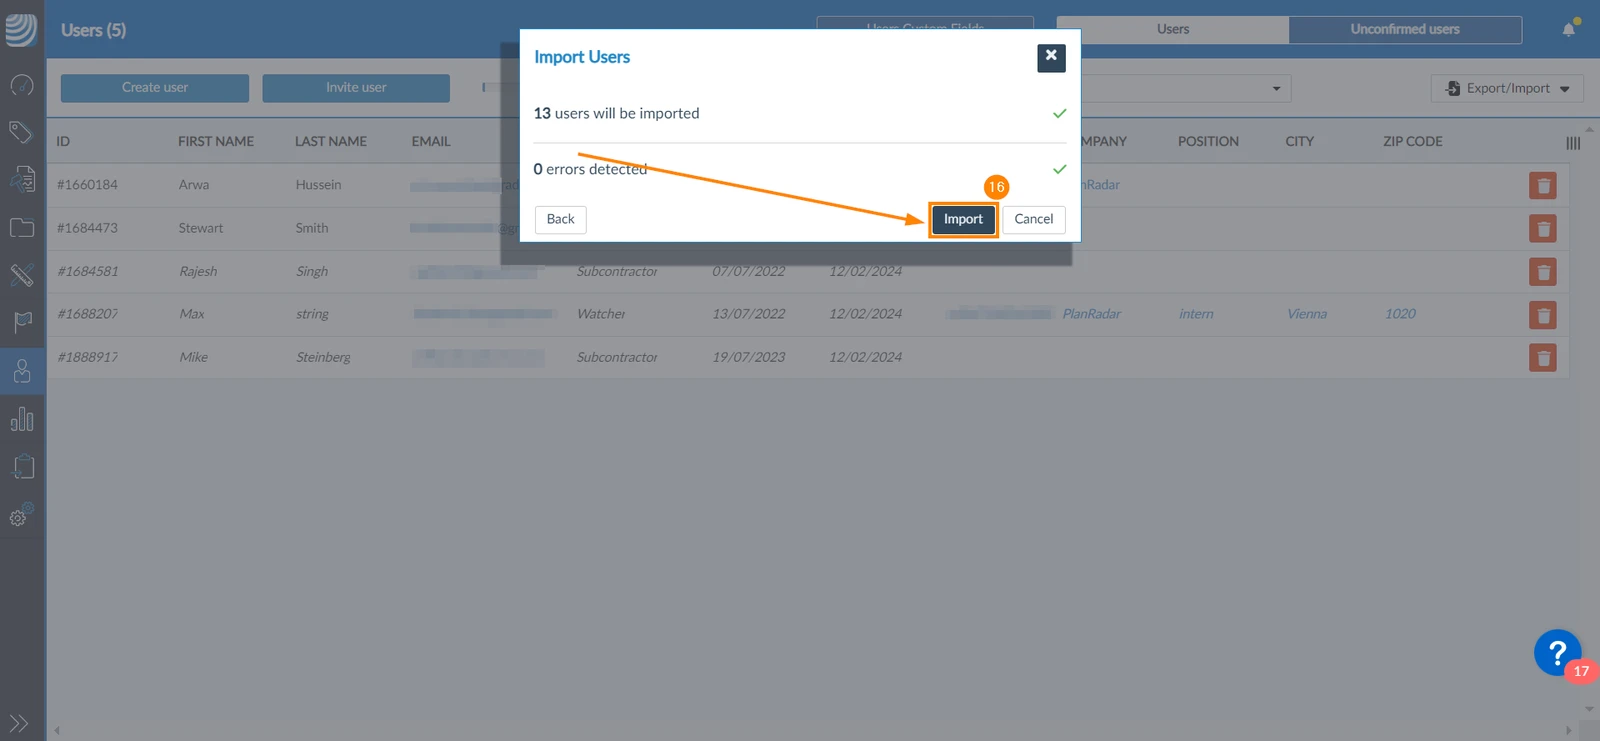
Click Import
-
All users will be sent invitation emails
-
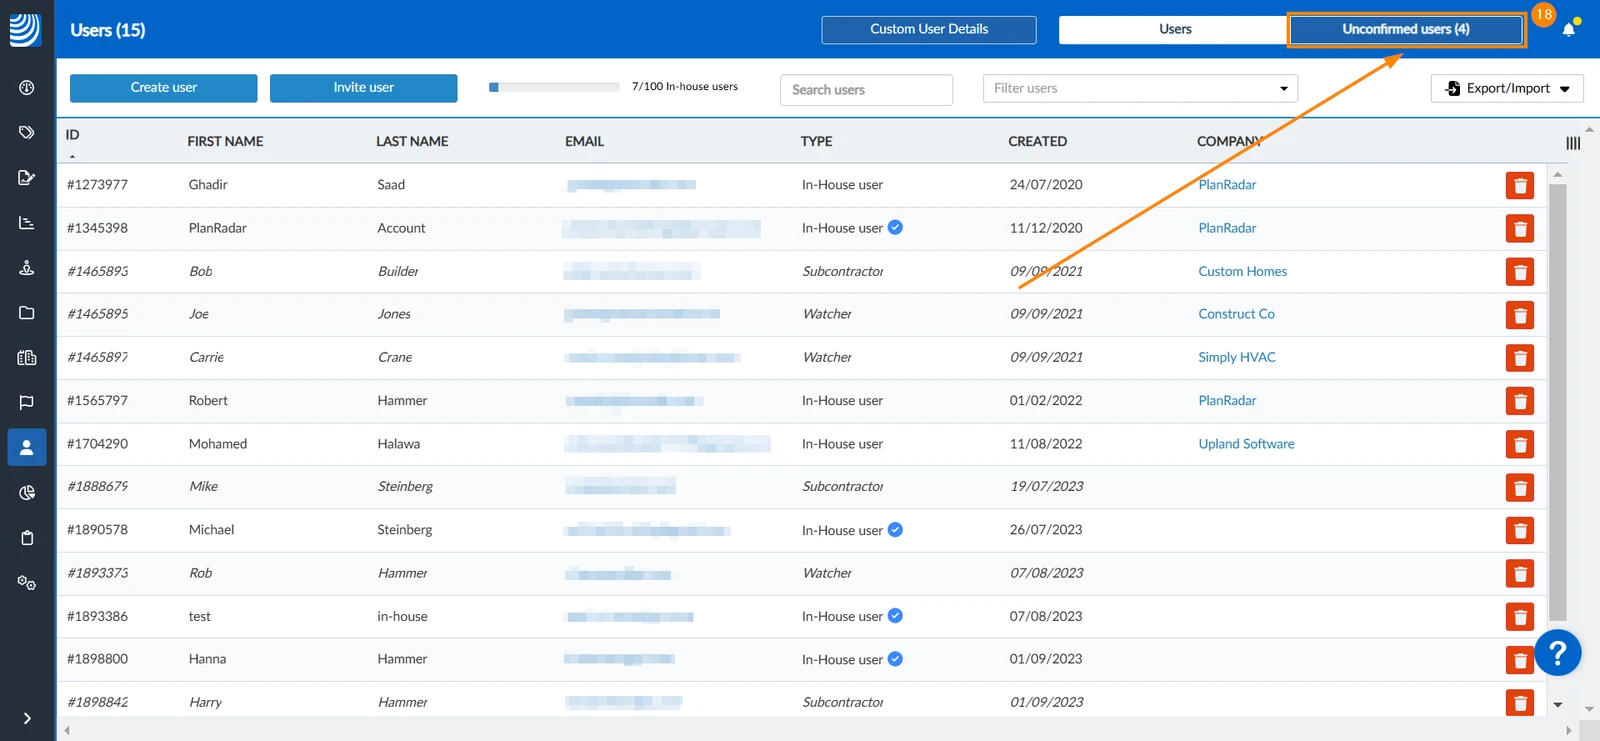
You can find the imported users in the Unconfirmed users section
Updated December 19, 2024