

 Deutsch
 Español
 Français
 Hrvatski
 Italiano
 Polski
 Português (BR)
Create & Manage Groups
Overview
Create, edit and manage groups of users. Groups are created at the account level and can then be assigned to specific projects as needed. Once a group is assigned to a project, all its members are automatically added to that project.
Access & Permissions
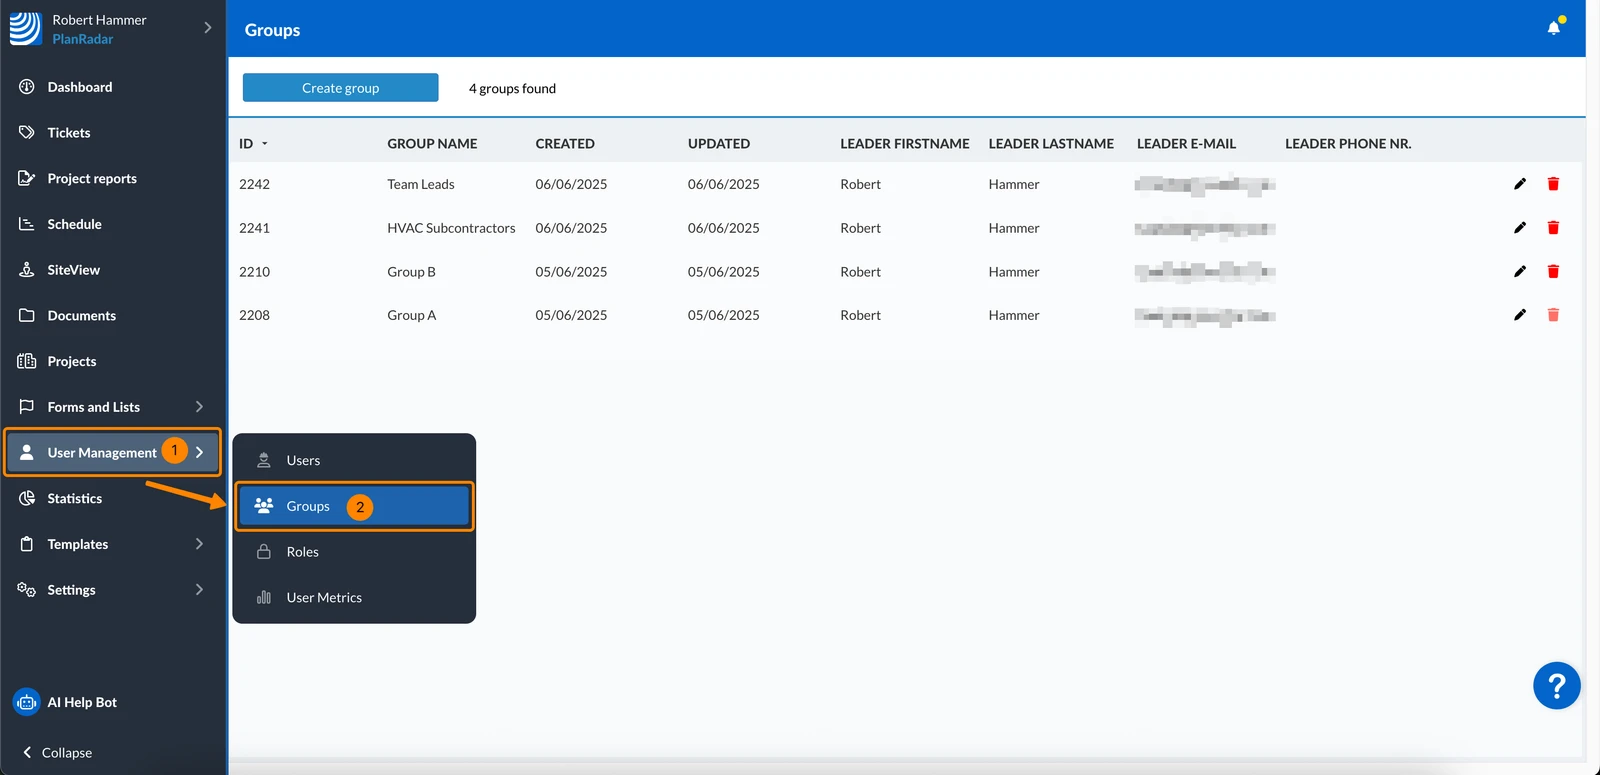
How to access Groups
- Hover over User Management
- Click Groups
Create a Group
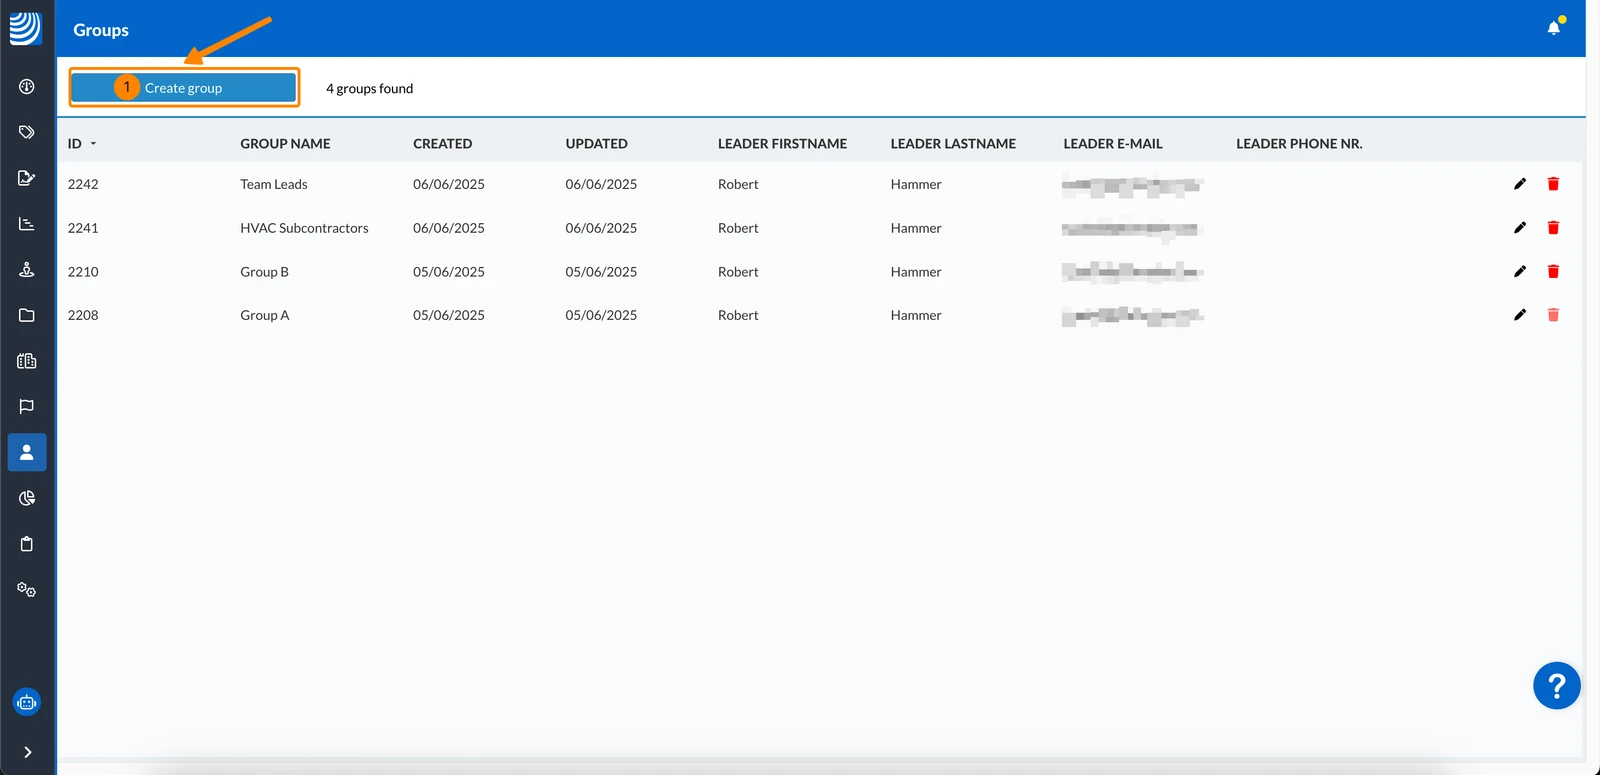
To create a group:
- Click Create group
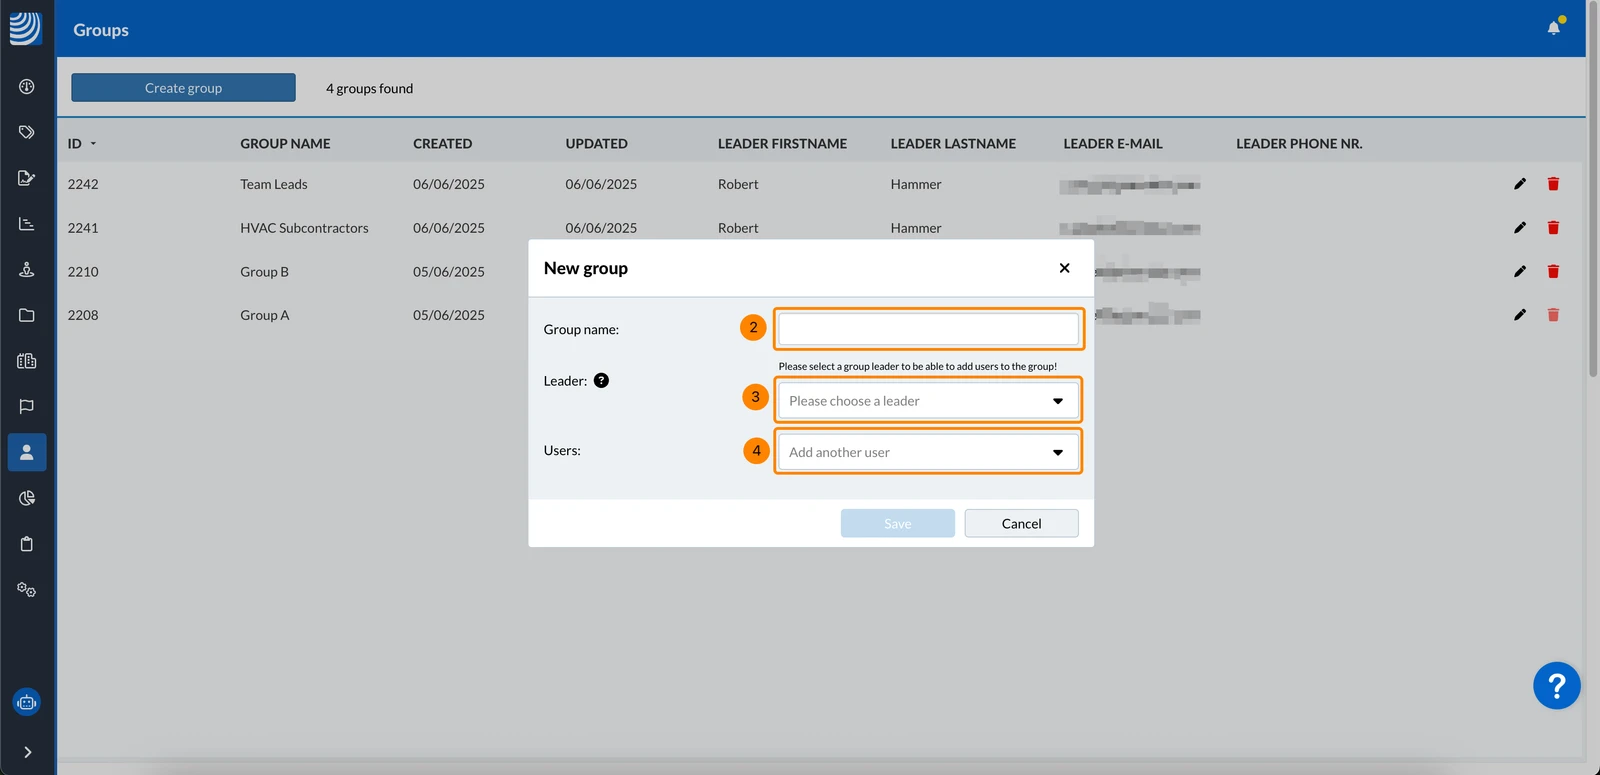
- Type the group name
- Select the group leader from the drop-down menu
- Select the first user in the group
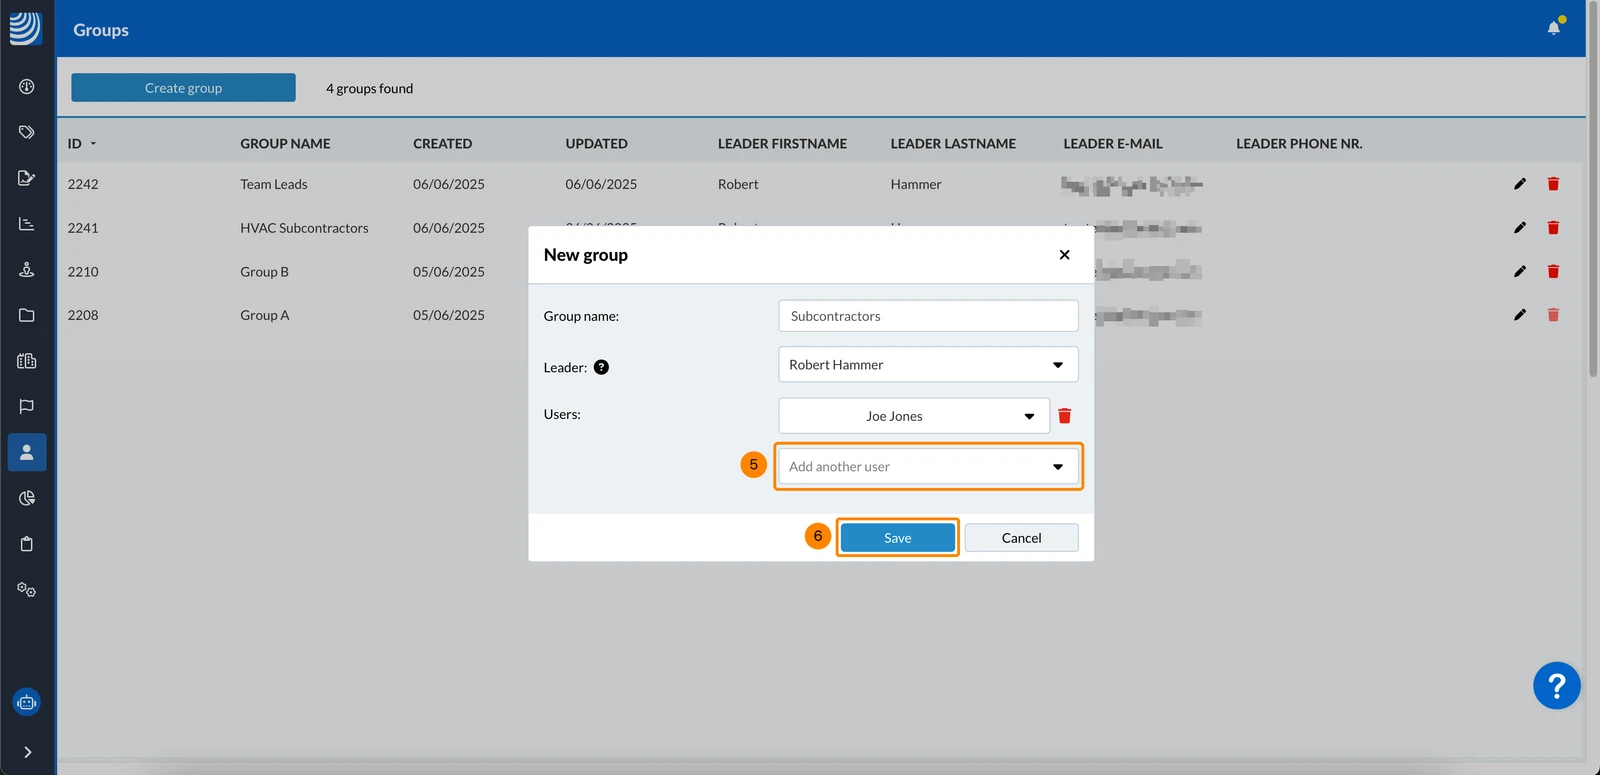
- Each time you add a user, a new drop-down will appear allow adding more users, so you can add as many users as you want
- Click Save
Edit and Filter Groups
When adding members to a group, these users will automatically be added to all projects the group is a member of.
When removing members of a group, you can choose to remove them from affected projects if they are managed by that group or you can choose to just remove them from the group while keeping them as individual project members.
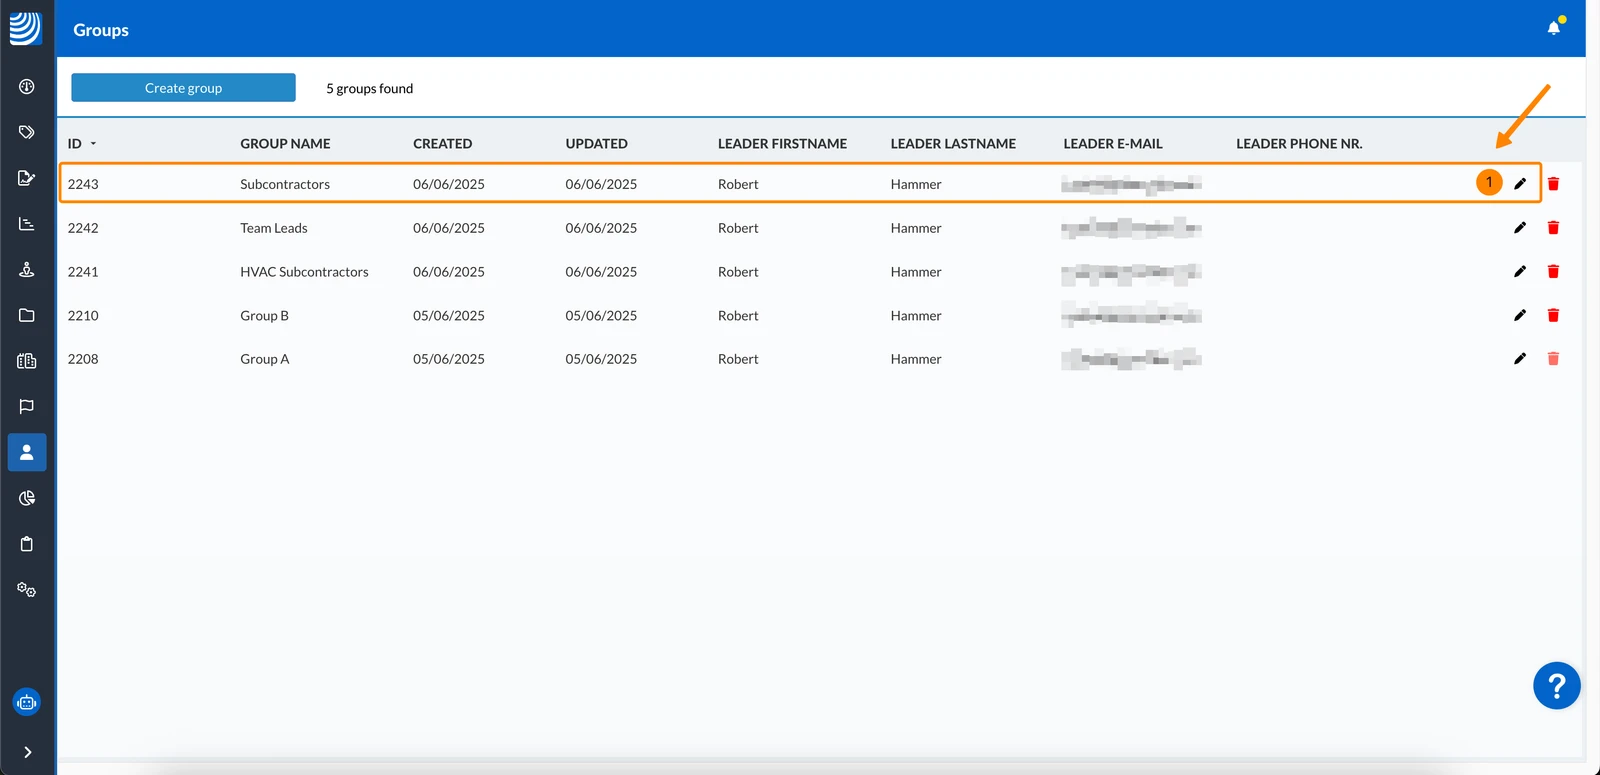
To edit a group:
- Click the group or its Edit icon
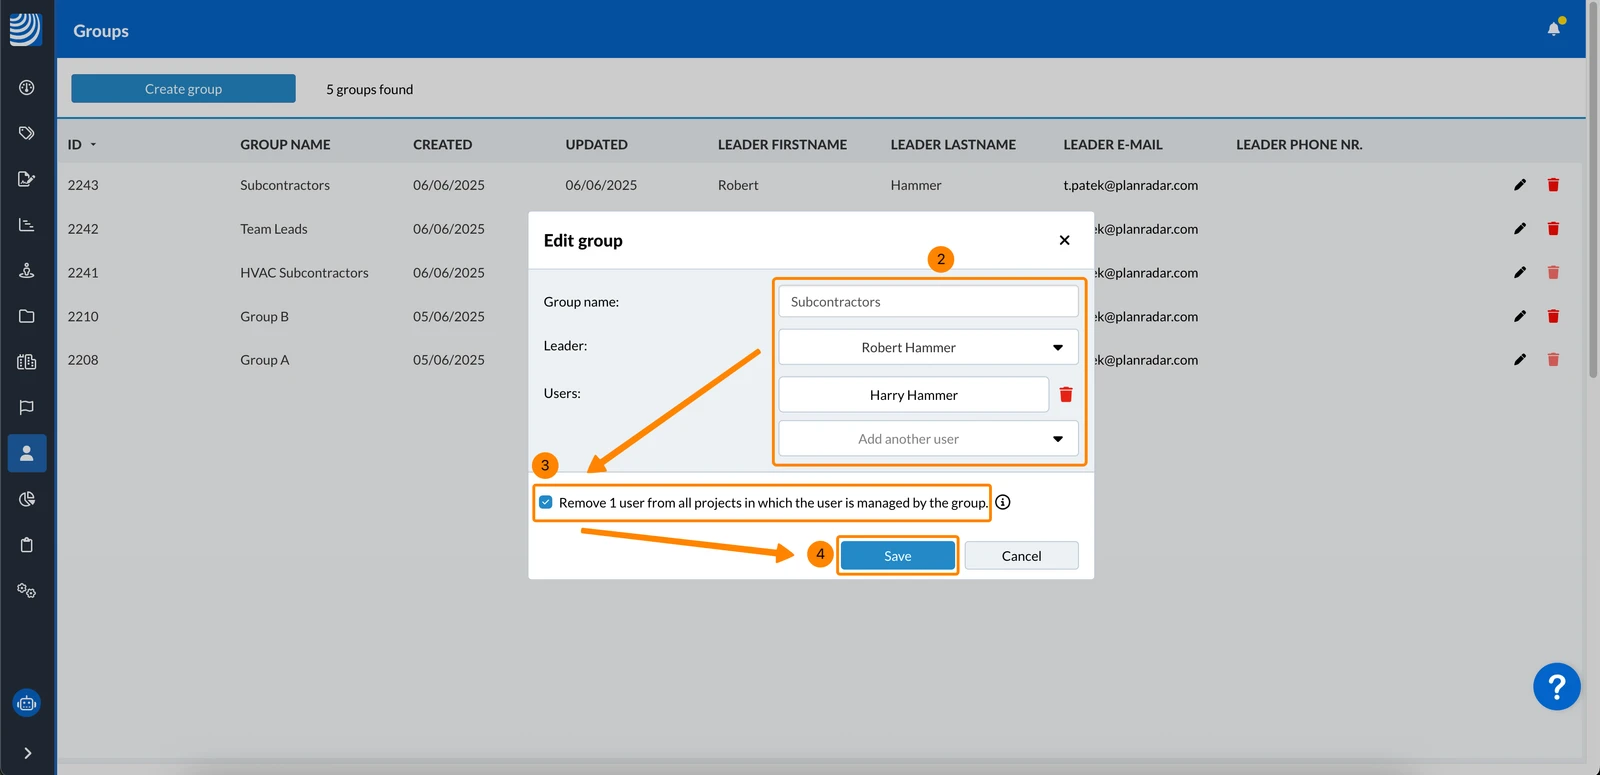
- Make your changes
- Optional: Keep/clear the Remove X users from all projects in which the user is managed by the group checkbox.
- Click Save
Filters work in the same way as described in Filter Tickets.
The following filter criteria are available for the groups table:
-
Added by default:
- Leader
- Members
-
Not added by default:
- ID
- Group name
- Created on
- Updated at
- Leader e-mail
- Leader phone number
- Projects
- Projects count
Delete Group
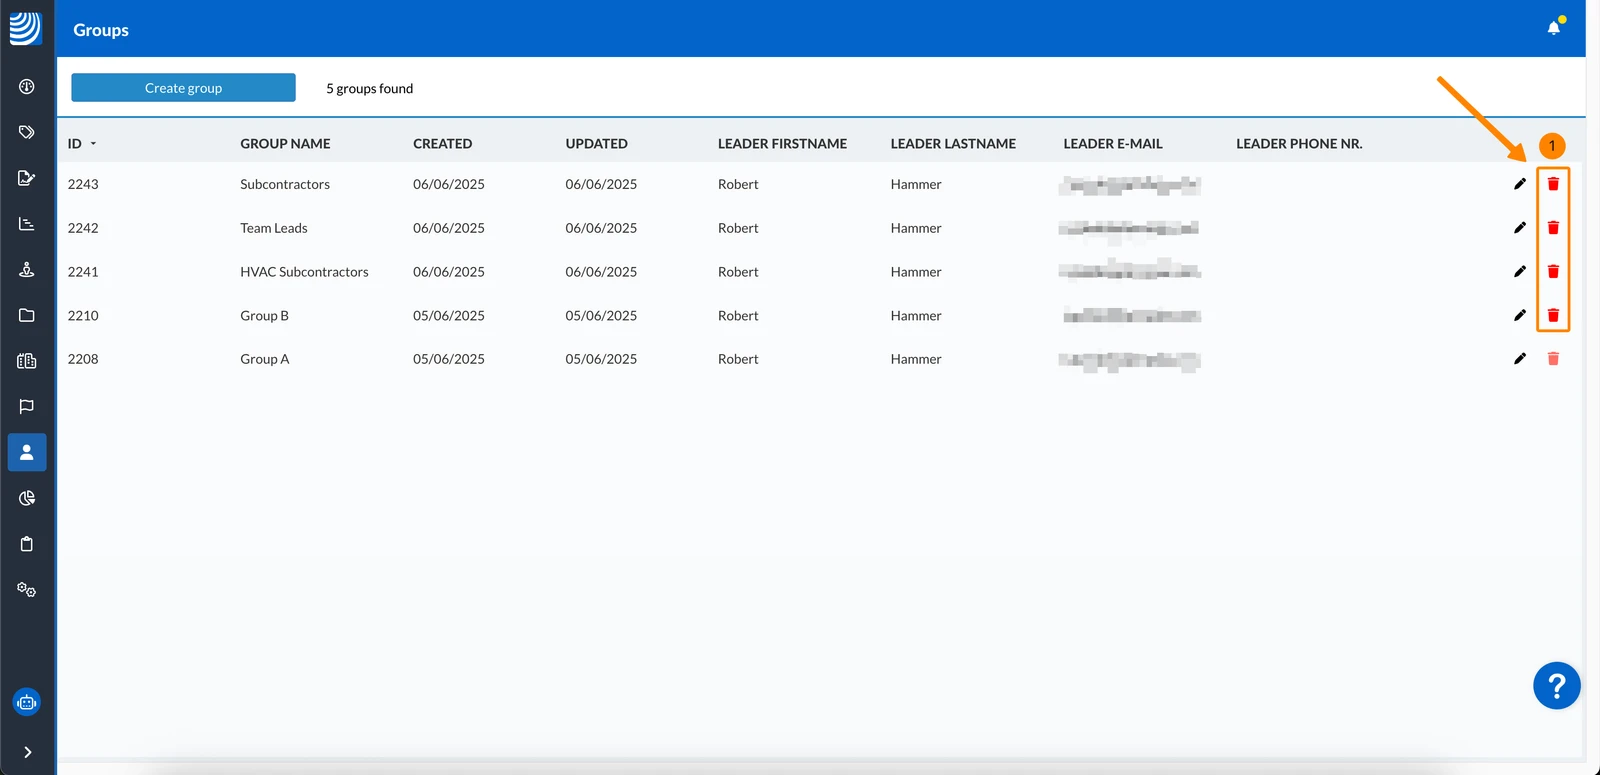
To delete a group that is not assigned to a project:
- Click the Delete icon
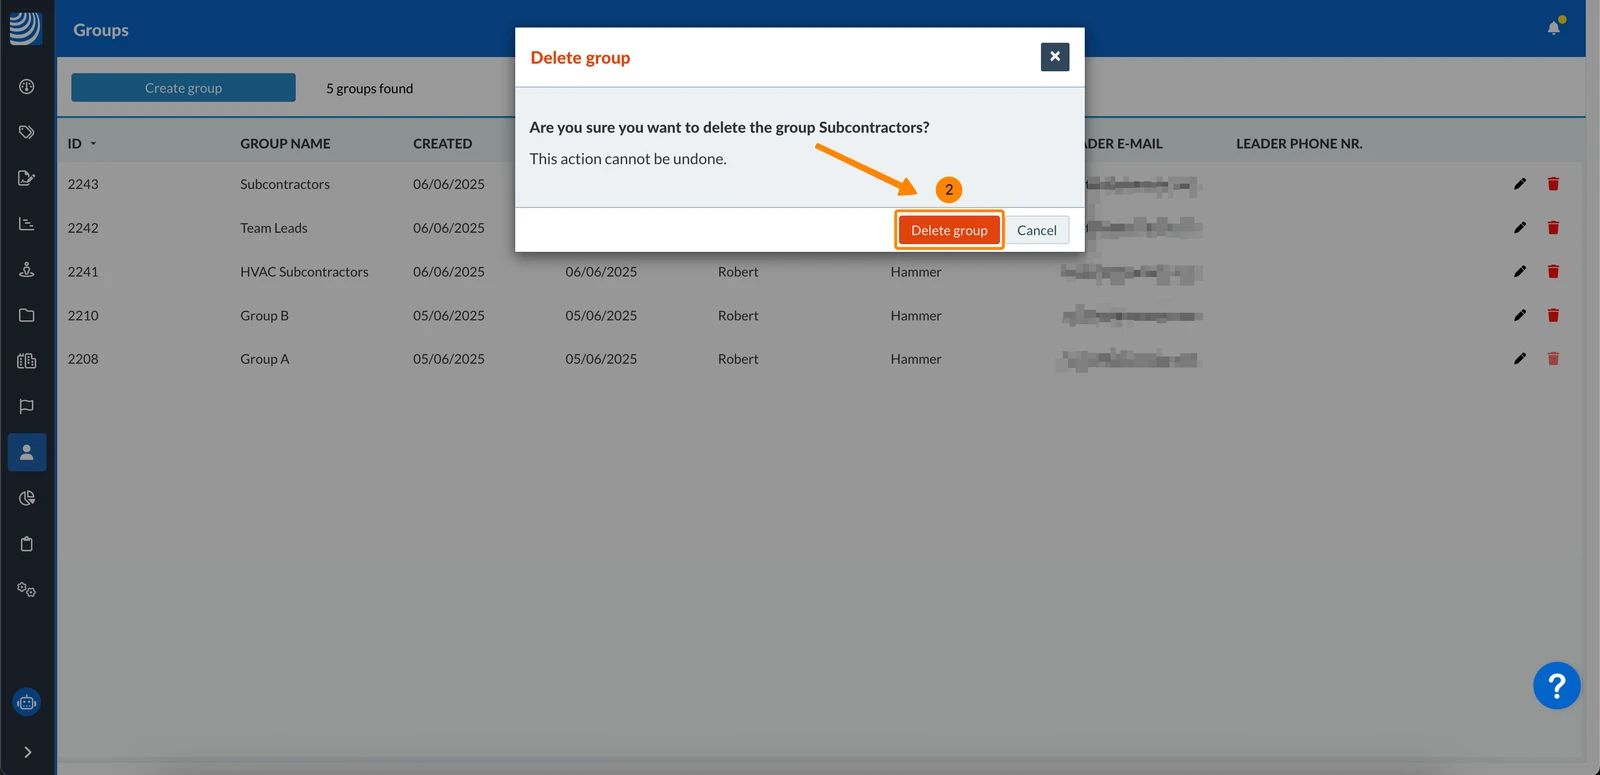
- Click Delete group to confirm
Updated June 22, 2026