

 Deutsch
 Español
 Français
 Hrvatski
 Italiano
 Polski
 Português (BR)
Create & Invite Users
Overview
You can create new users or invite users that already exist in another PlanRadar account into your account.
Access & Permissions
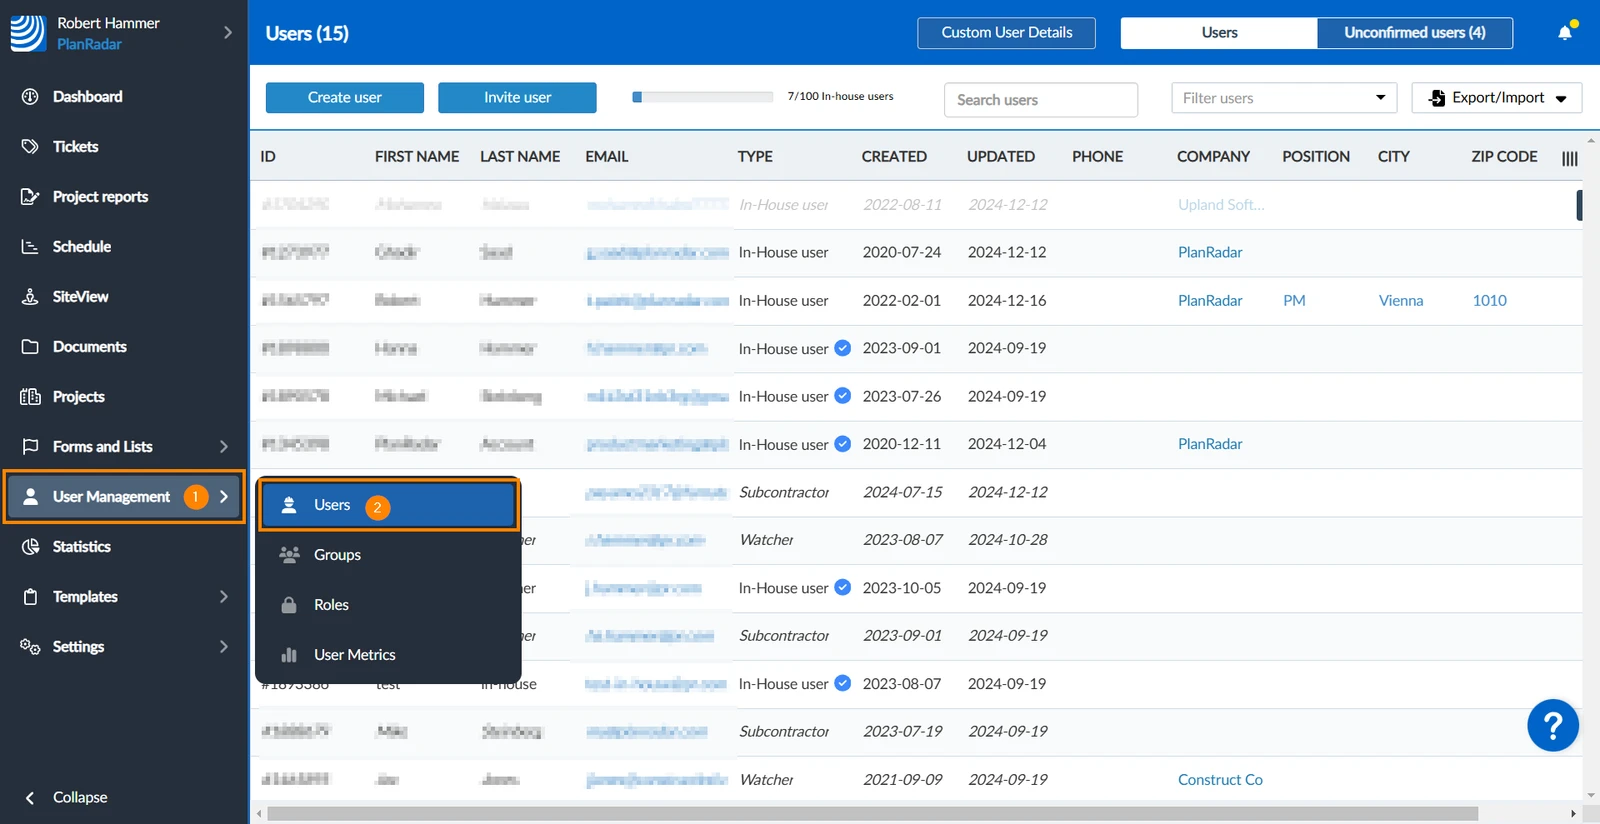
How to access Users
- Hover over User Management
- Click Users
Create a User
You can create a new user if their email address is not yet used in another PlanRadar account.
After "creating" users you can immediately assign tickets to them as there is no invitation they would have to accept first.
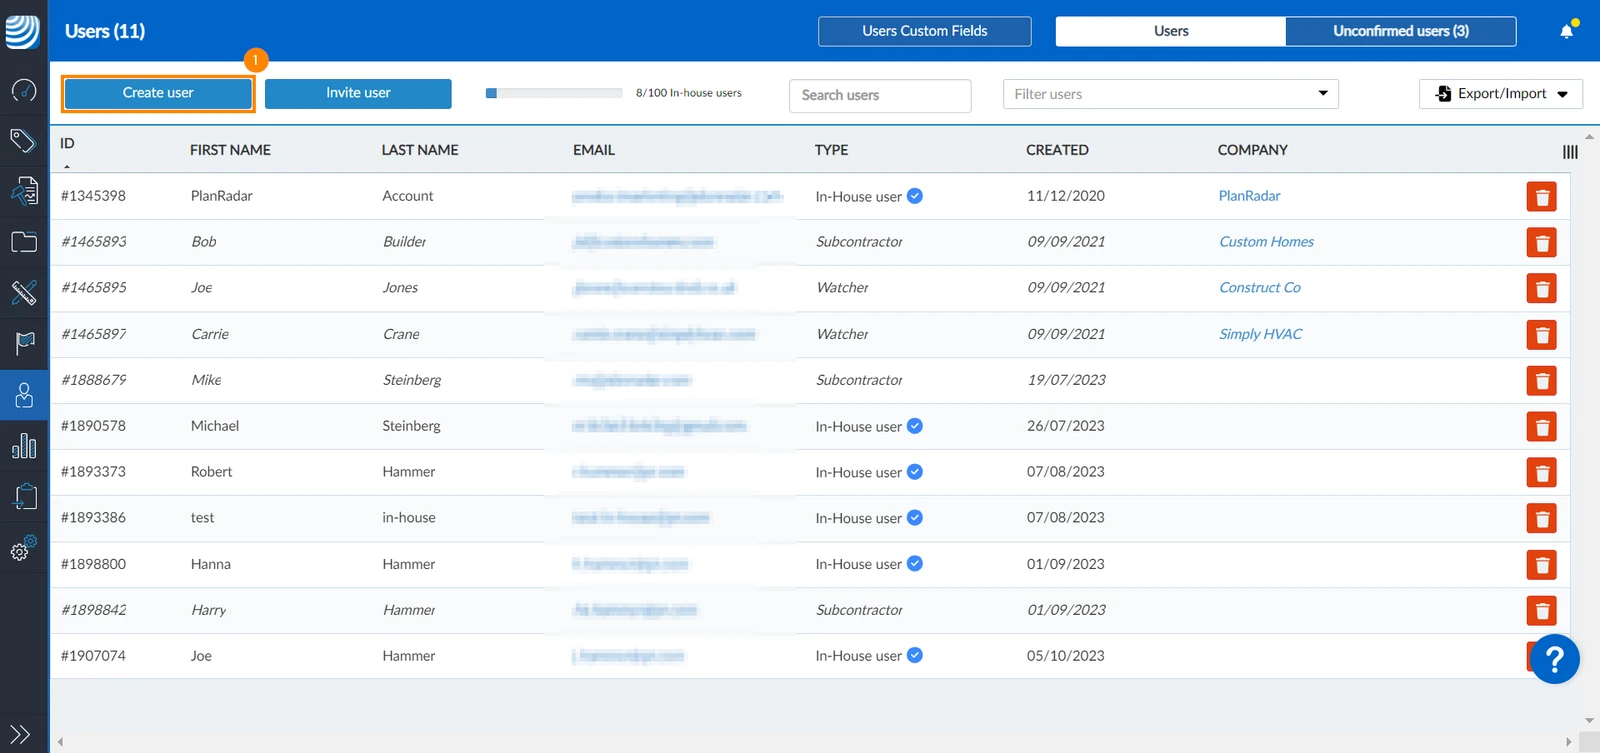
To create a new user:
- Click Create user
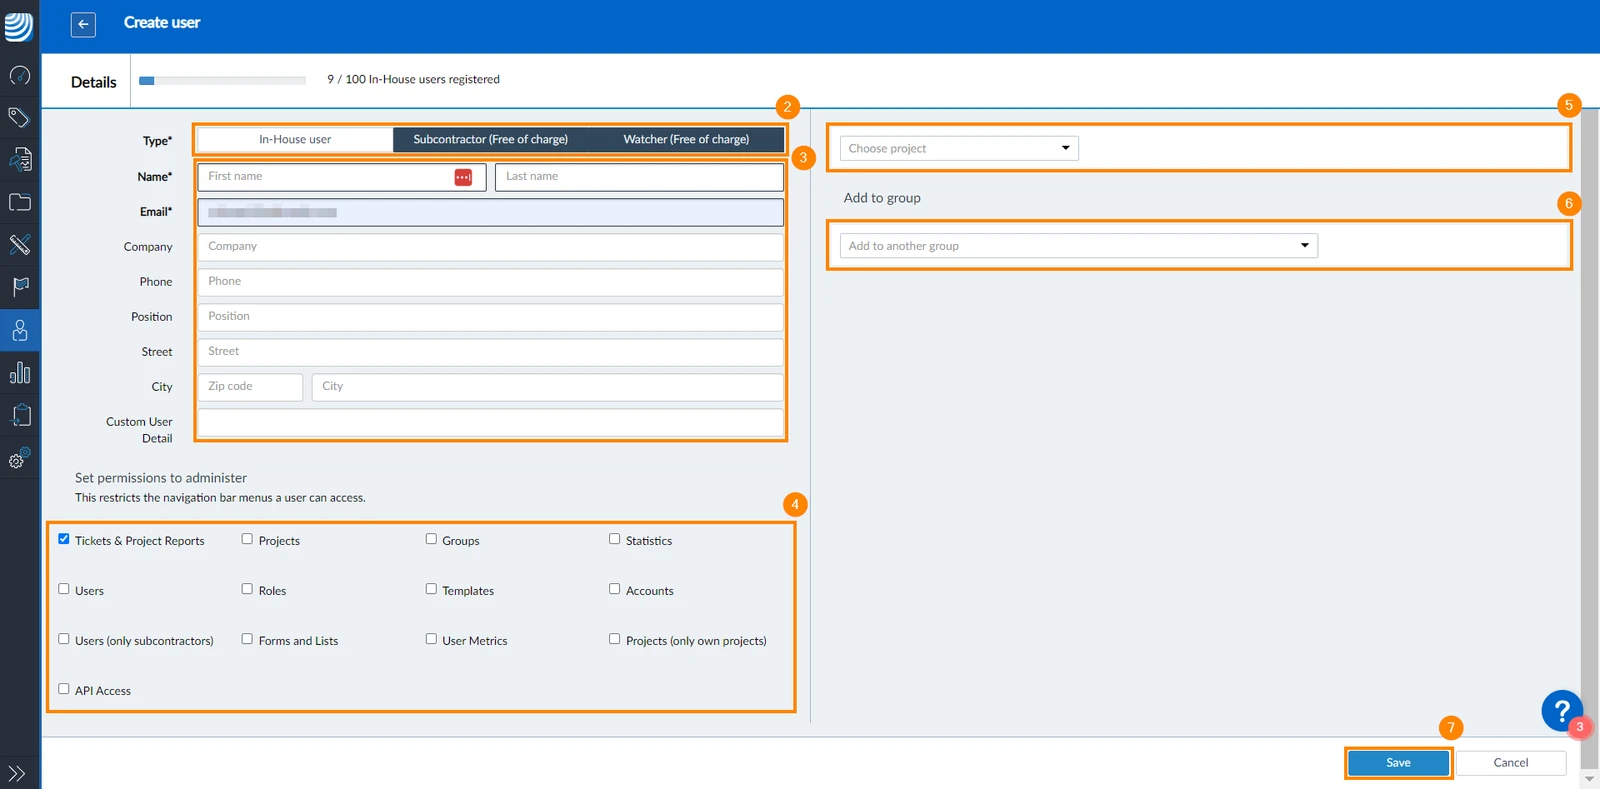
- Select the User Type
- Fill in the user information (first name, last name, email address, and password are mandatory)
- Select the user permissions under Set permissions to administer - this section is only available if you selected the In-house user type, as explained in Configure User Permissions.
- Select the projects to which you want to add the user, as explained in Assign Users to Projects.
- You can also add the user to a group, as explained in Create & Manage Groups.
- Click Save
Invite a User
Invite users if their email address is already used in another PlanRadar account.
To invite a user to your PlanRadar account:
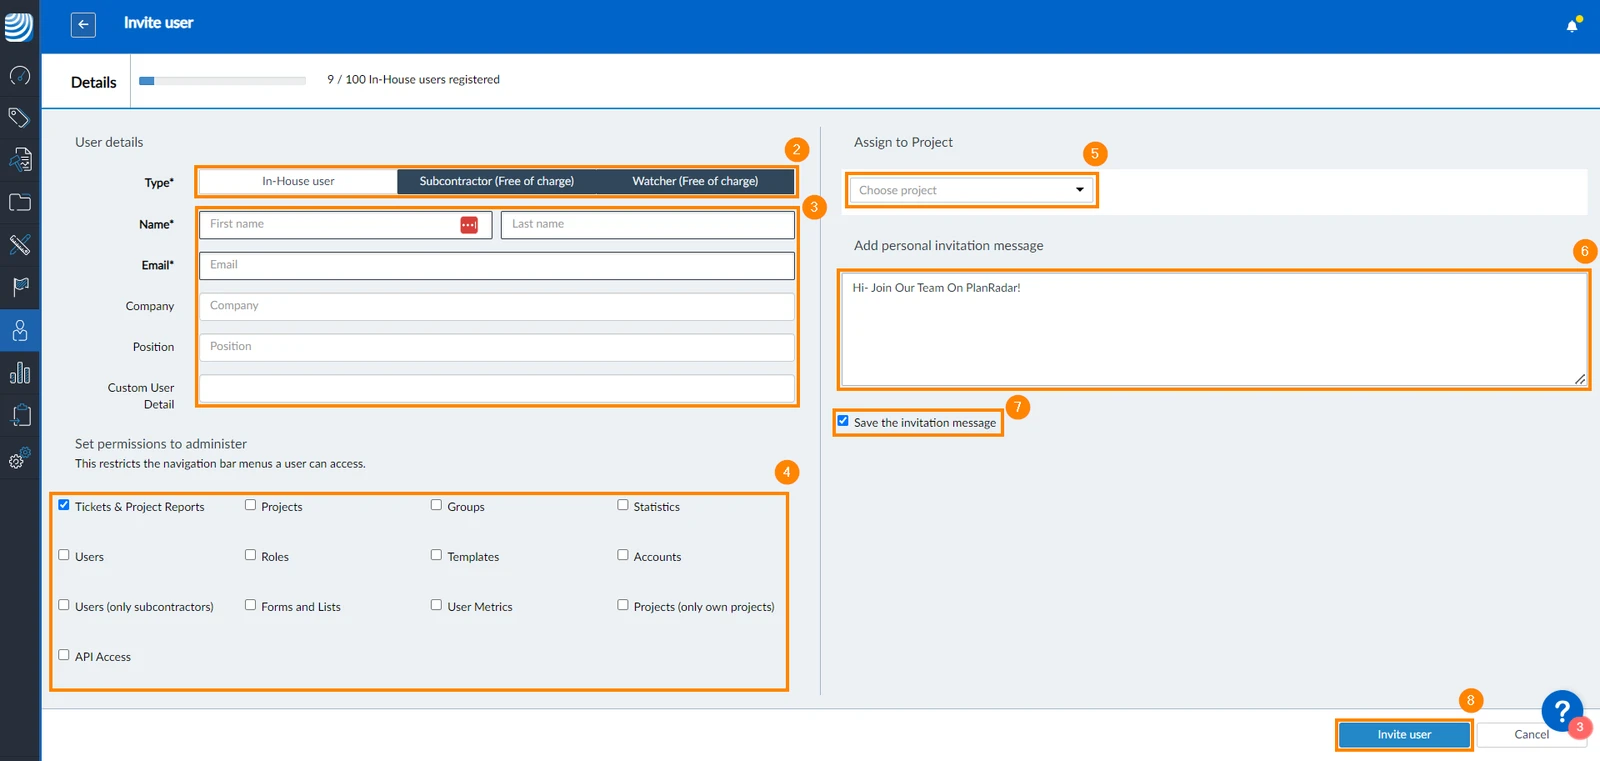
- Click Invite User
- Select the User Type
- Fill in the user details (first name, last name, email address, and password are mandatory)
- Select the user permissions under Set permissions to administer - this section is only available if you selected the In-house user type, as explained in Configure User Permissions.
- Select the projects to which you want to add the user, as explained in Assign Users to Projects.
- Optional: Add a personal message to be added to the invitation email
- Optional: Select the Save the invitation message checkbox if you want to reuse the message for the next invitation.
- Click Invite user
Unconfirmed Invitations
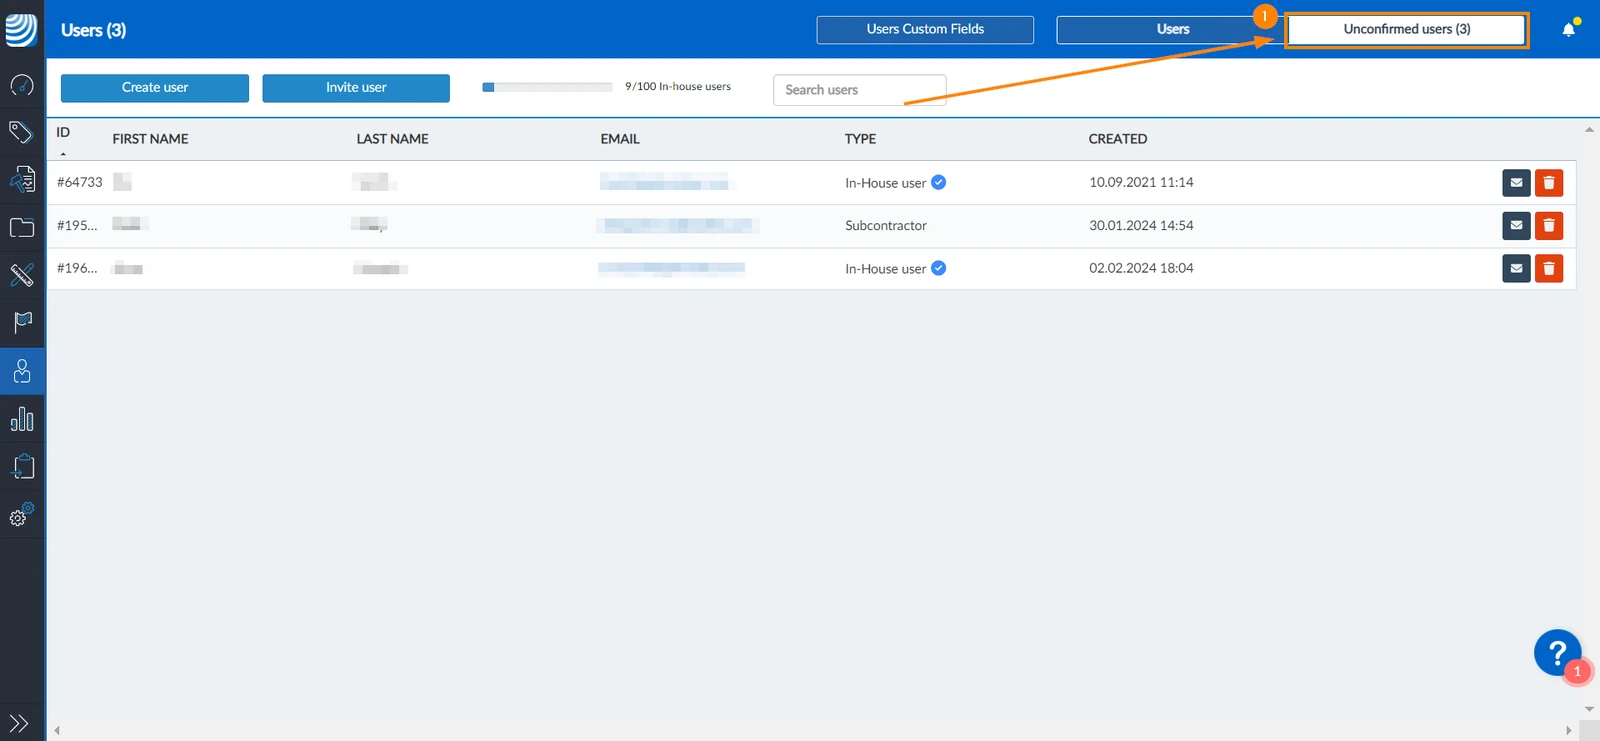
For users who haven't accepted their invitations, they will be listed under Unconfirmed users.
To check unconfirmed invitations:
- Click Unconfirmed users
Resend Invitation
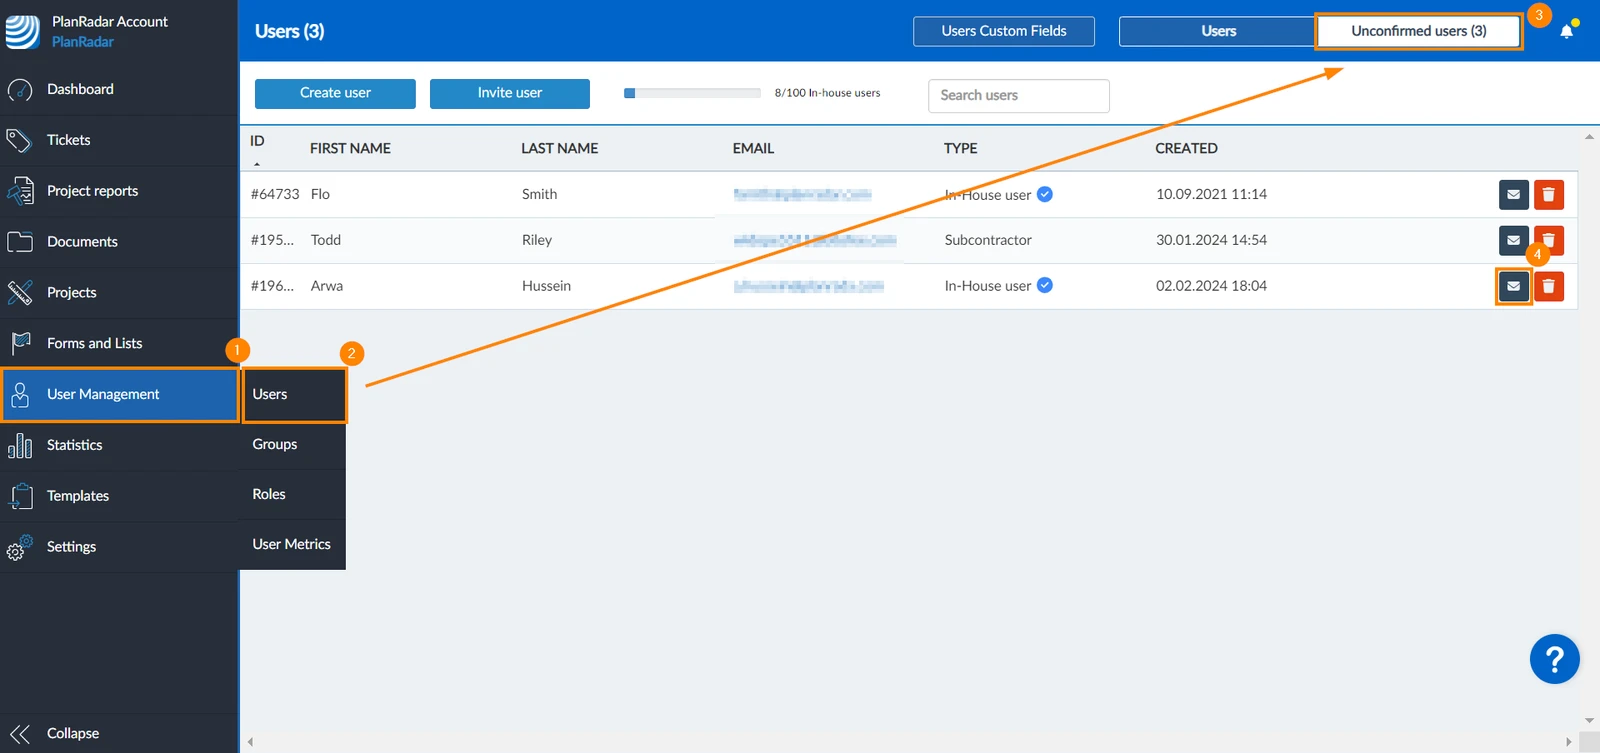
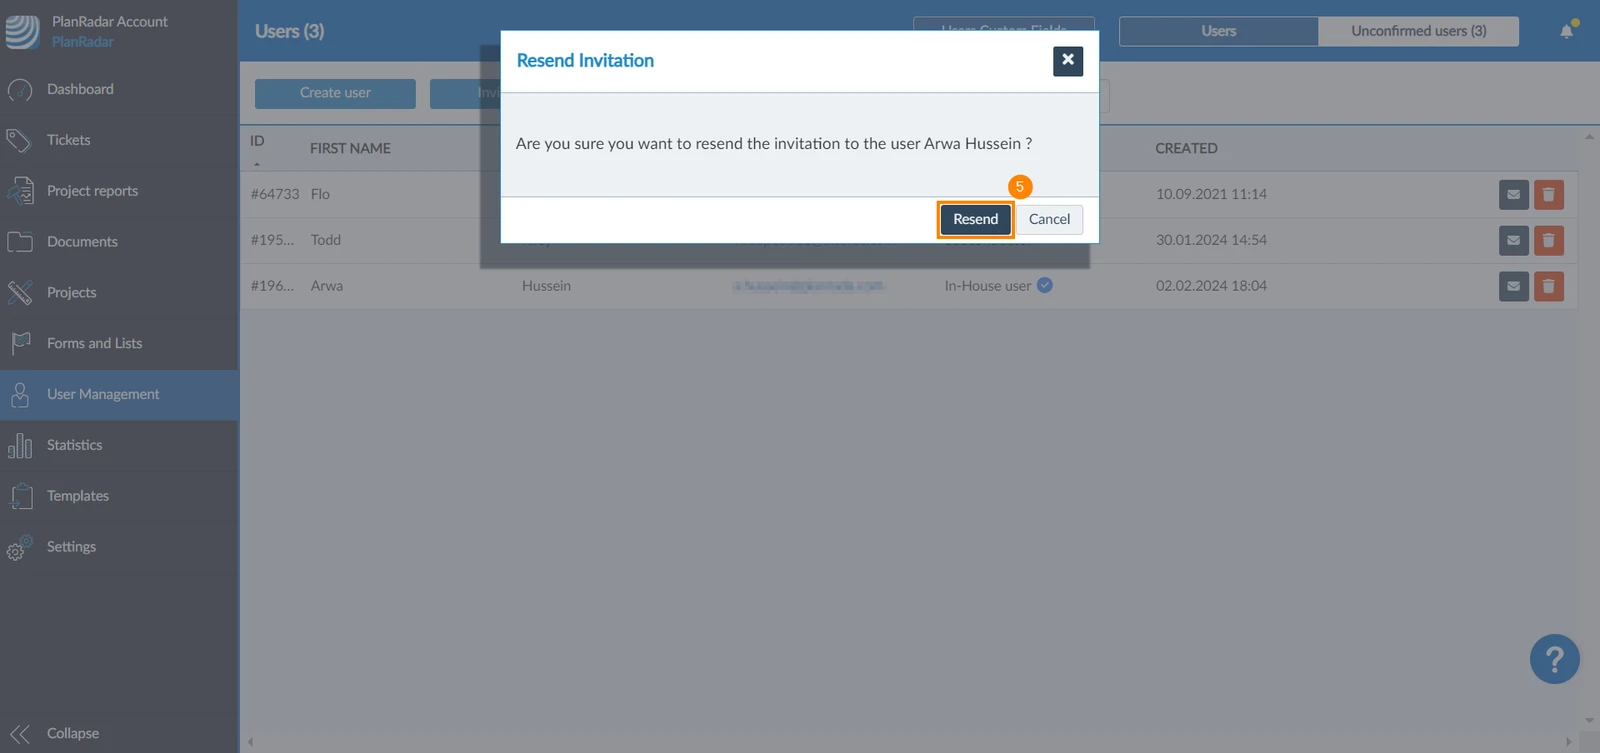
To resend the invitation to a user:
- Click User Management
- Click Users
- Click Unconfirmed users
- Click the message icon
- Click Resend to confirm
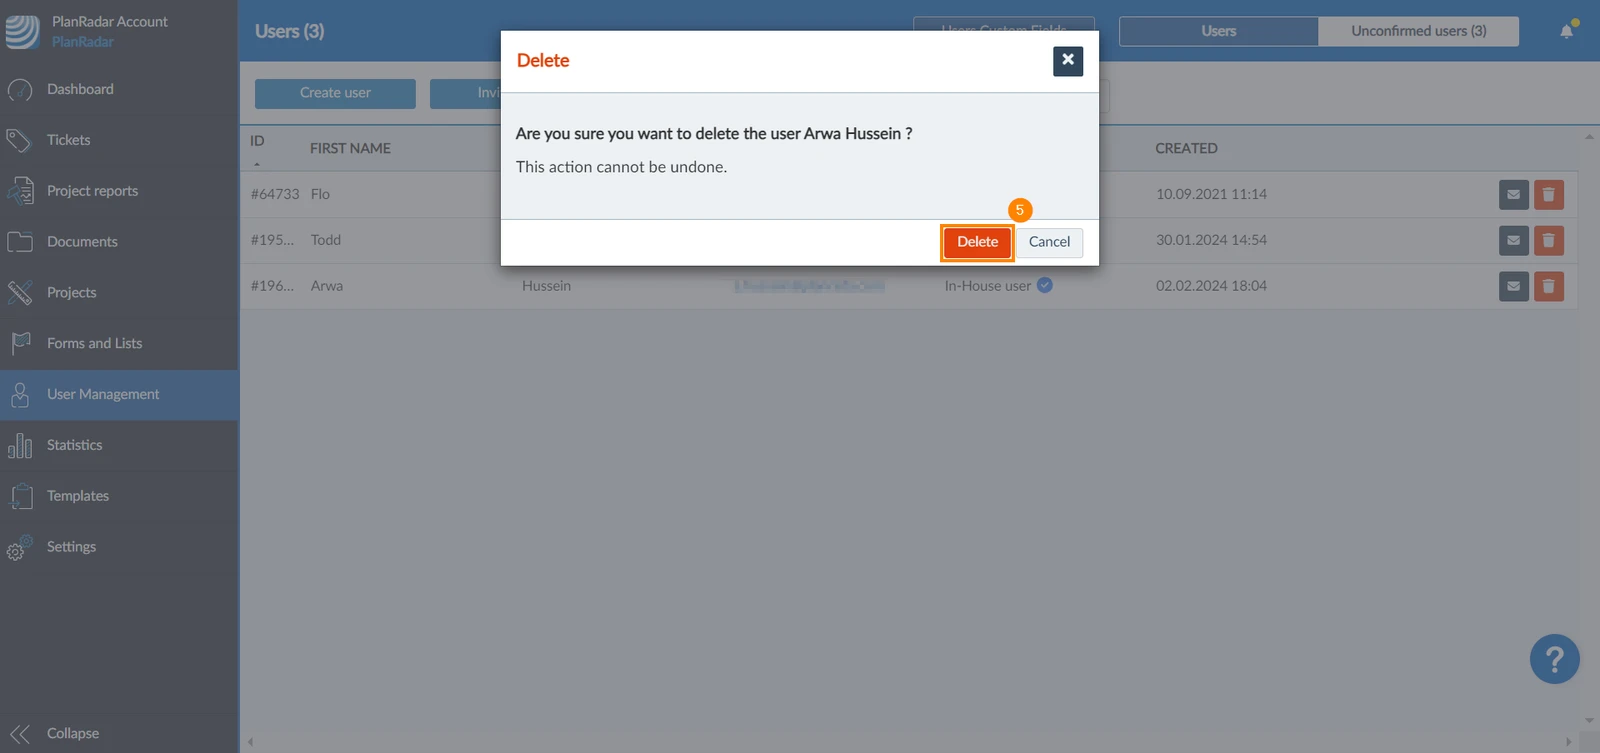
Delete an Invitation
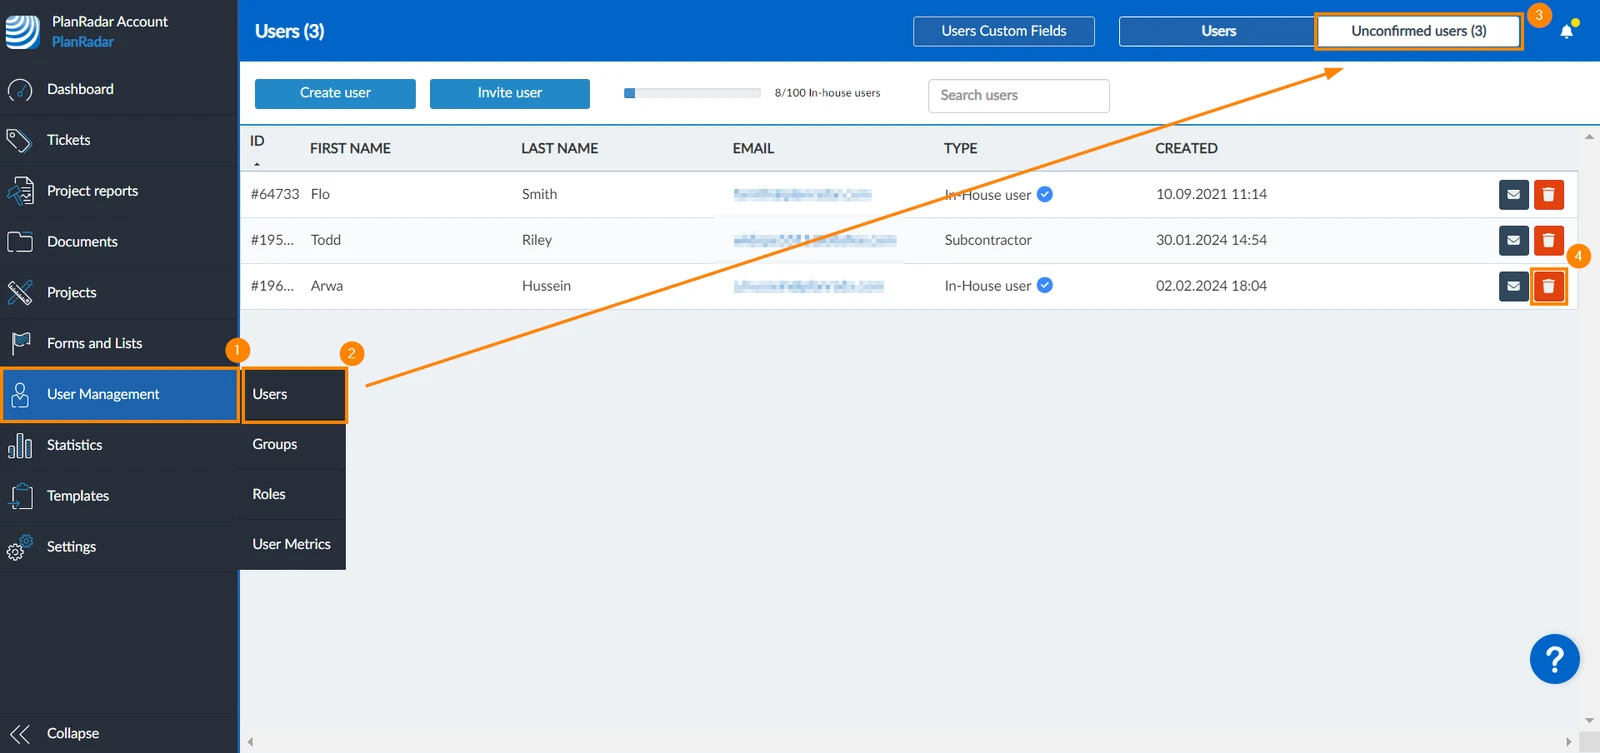
You can delete invitations before they are accepted by users. To do so:
- Click User Management
- Click Users
- Click Unconfirmed users
- Click the Delete icon
- Click Delete to confirm
Updated June 18, 2026