

 Deutsch
 Español
 Français
 Hrvatski
 Italiano
 Polski
 Português (BR)
Filter Tickets
Overview
With the powerful ticket filters, you can:
-
Filter tickets by one or multiple criteria.
-
Save and reuse filters across the Webapp and mobile apps.
-
Load shared filters and share your own filters with other users.
-
Use filters to Create Ticket Reports and to Export Tickets to Excel in the Webapp.
-
Use filters to Edit Multiple Tickets at once in the Webapp.
-
Apply saved filters to charts and boards in Statistics.
Access & Permissions
How to access Ticket Filters
- Click Tickets
- In the View drop-down select Plan, List or Calendar
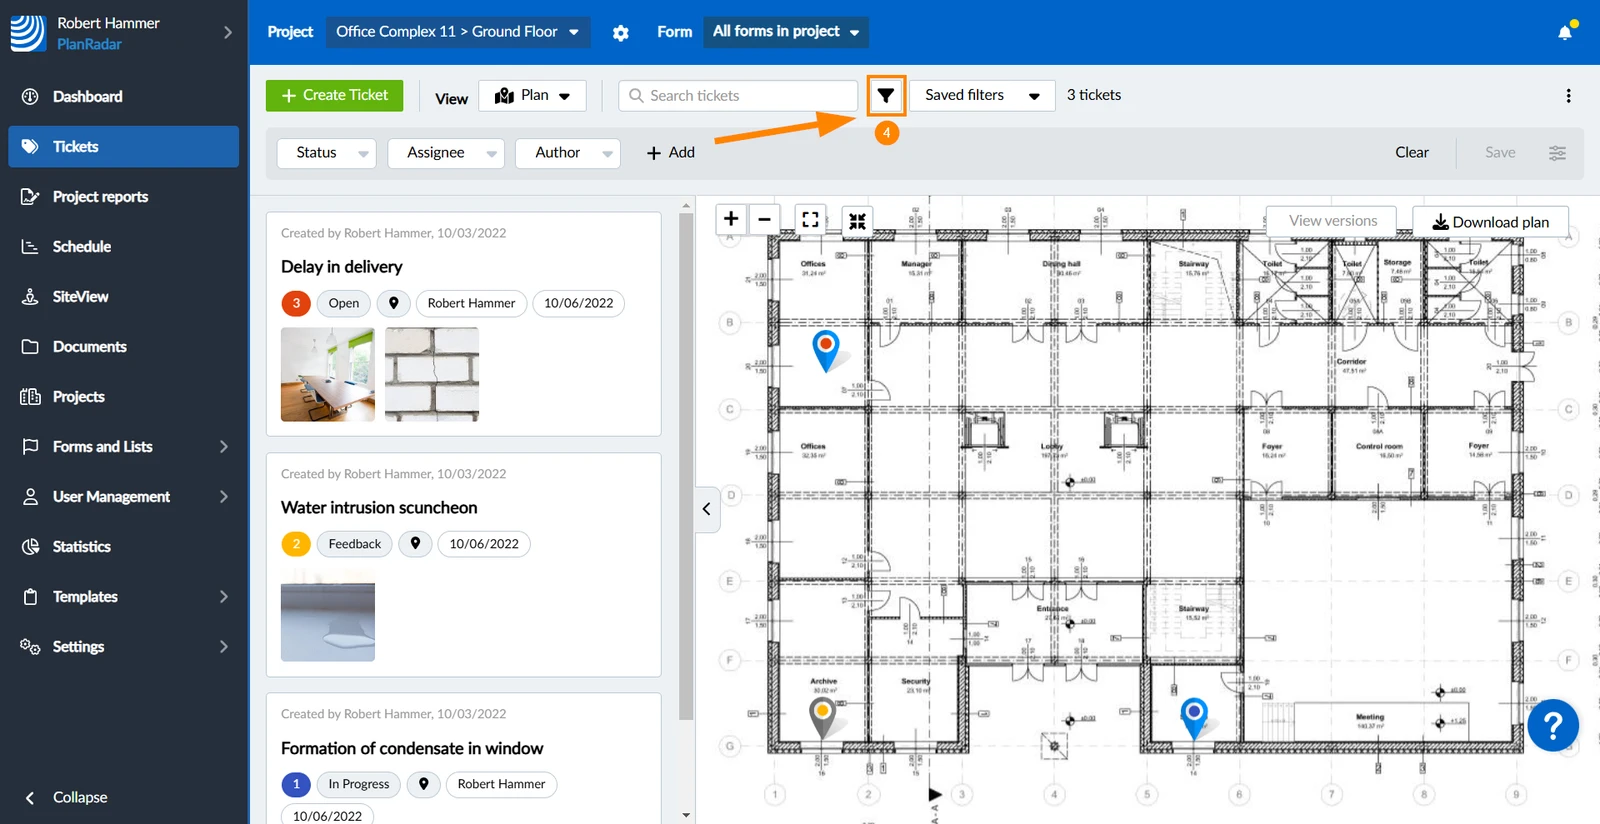
- Click the Filter icon to view the filter panel
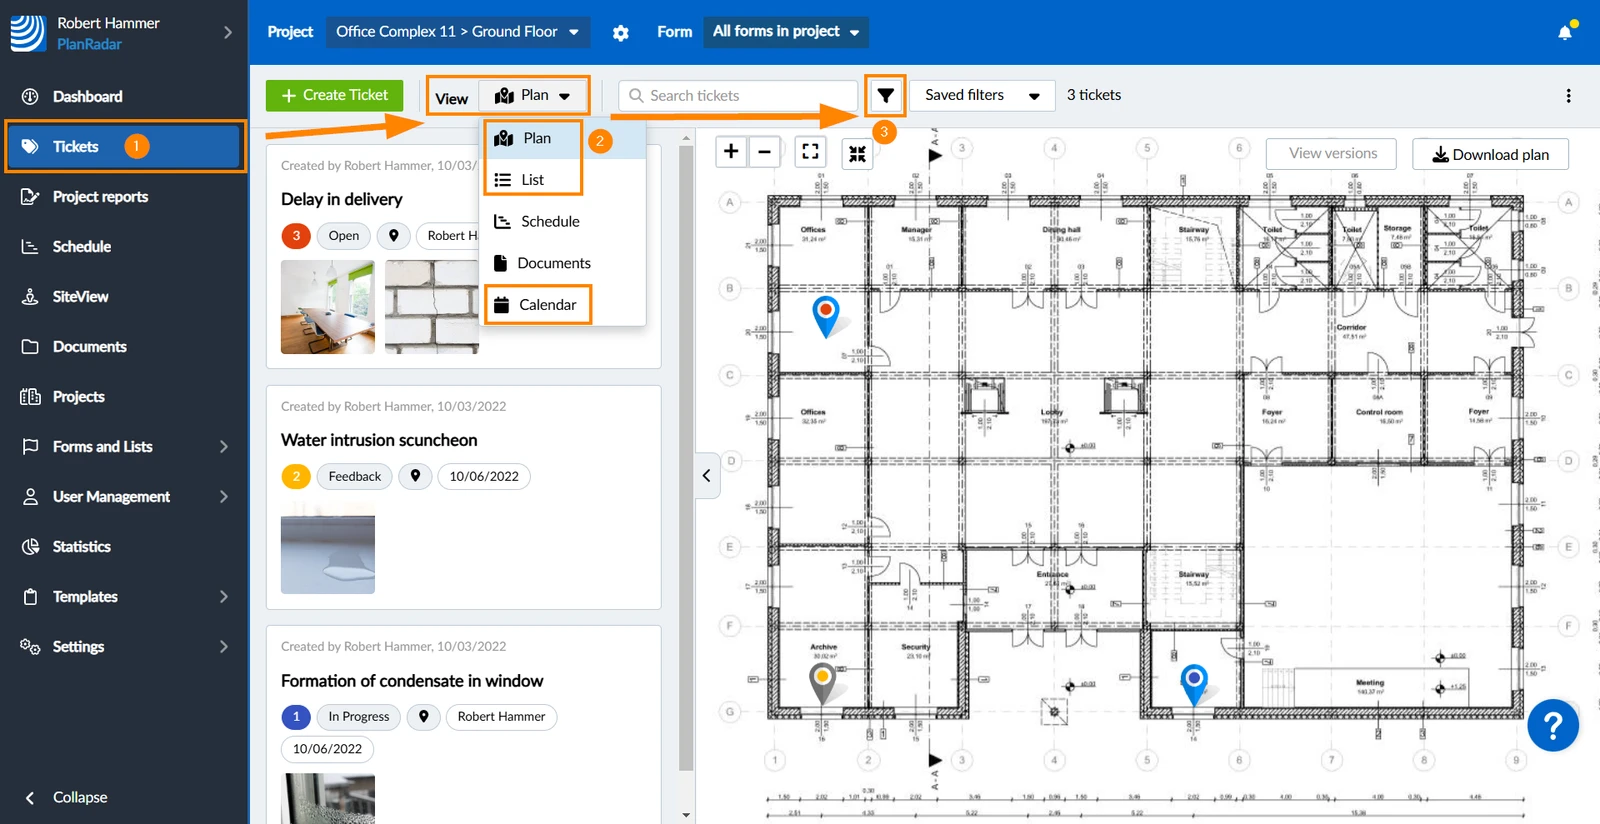
- Optional: Click the Filter icon again to hide the filter panel
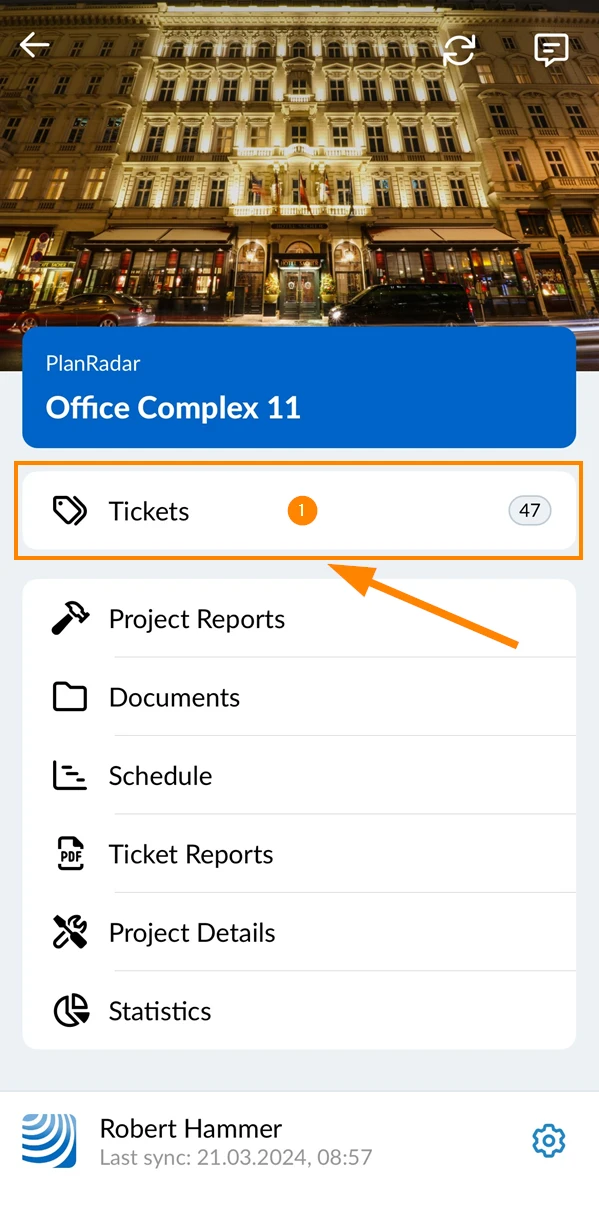
- Tap Tickets in the main menu
- Switch between Plan and List view
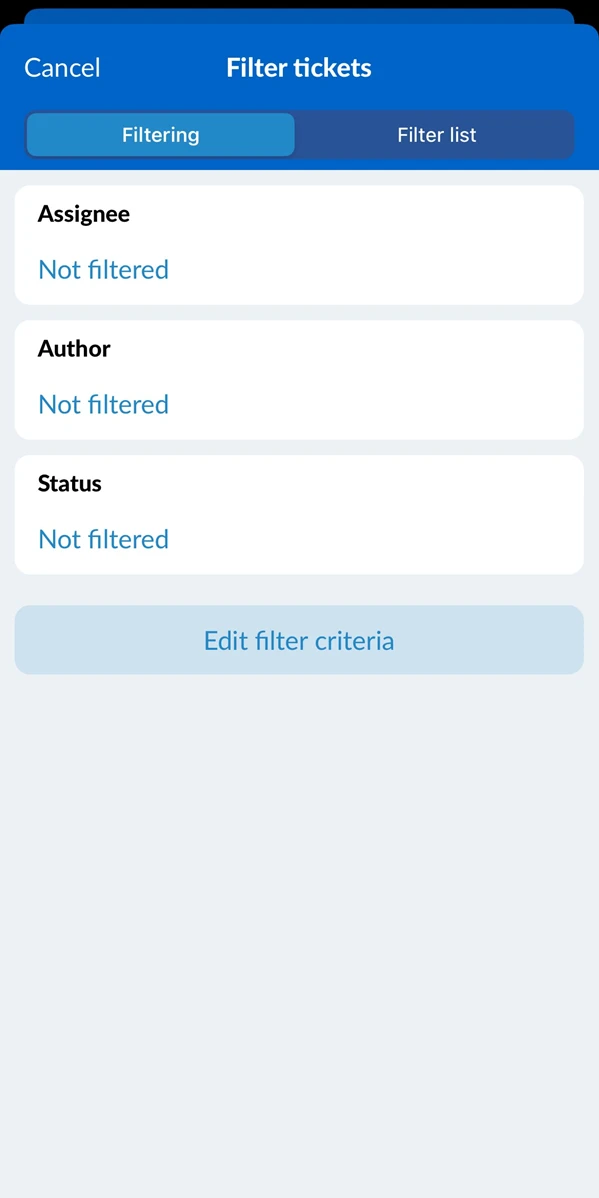
- Tap the filter icon
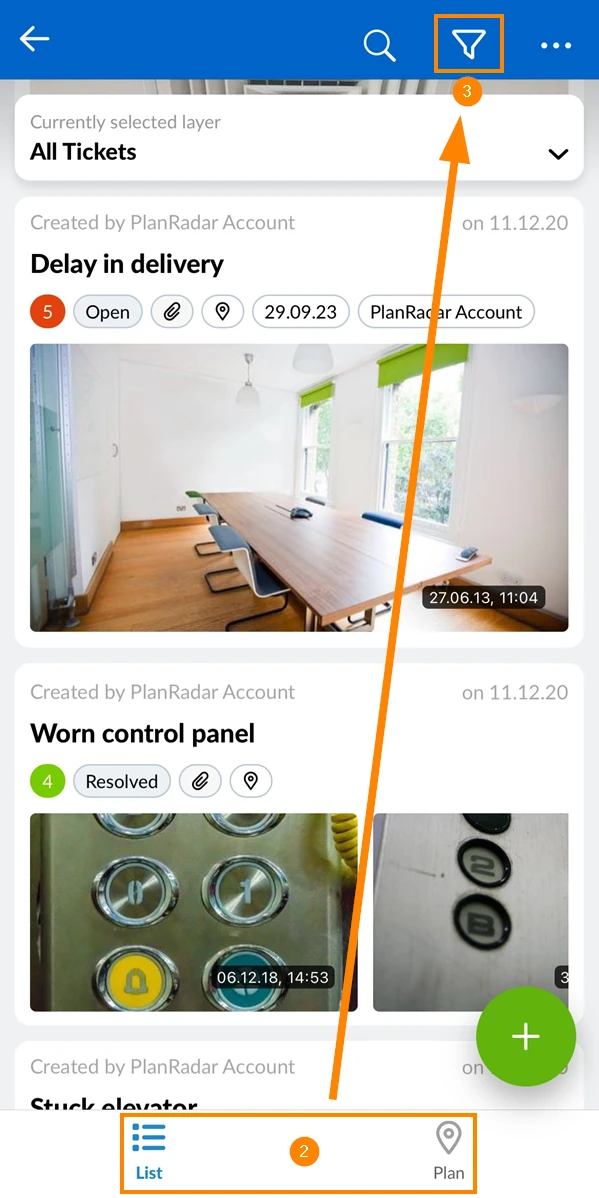
- See the Filter tickets screen, which is your starting point for everything described below.
Use a Saved or Shared Filter
To apply a filter that someone shared with you or that you saved for yourself:
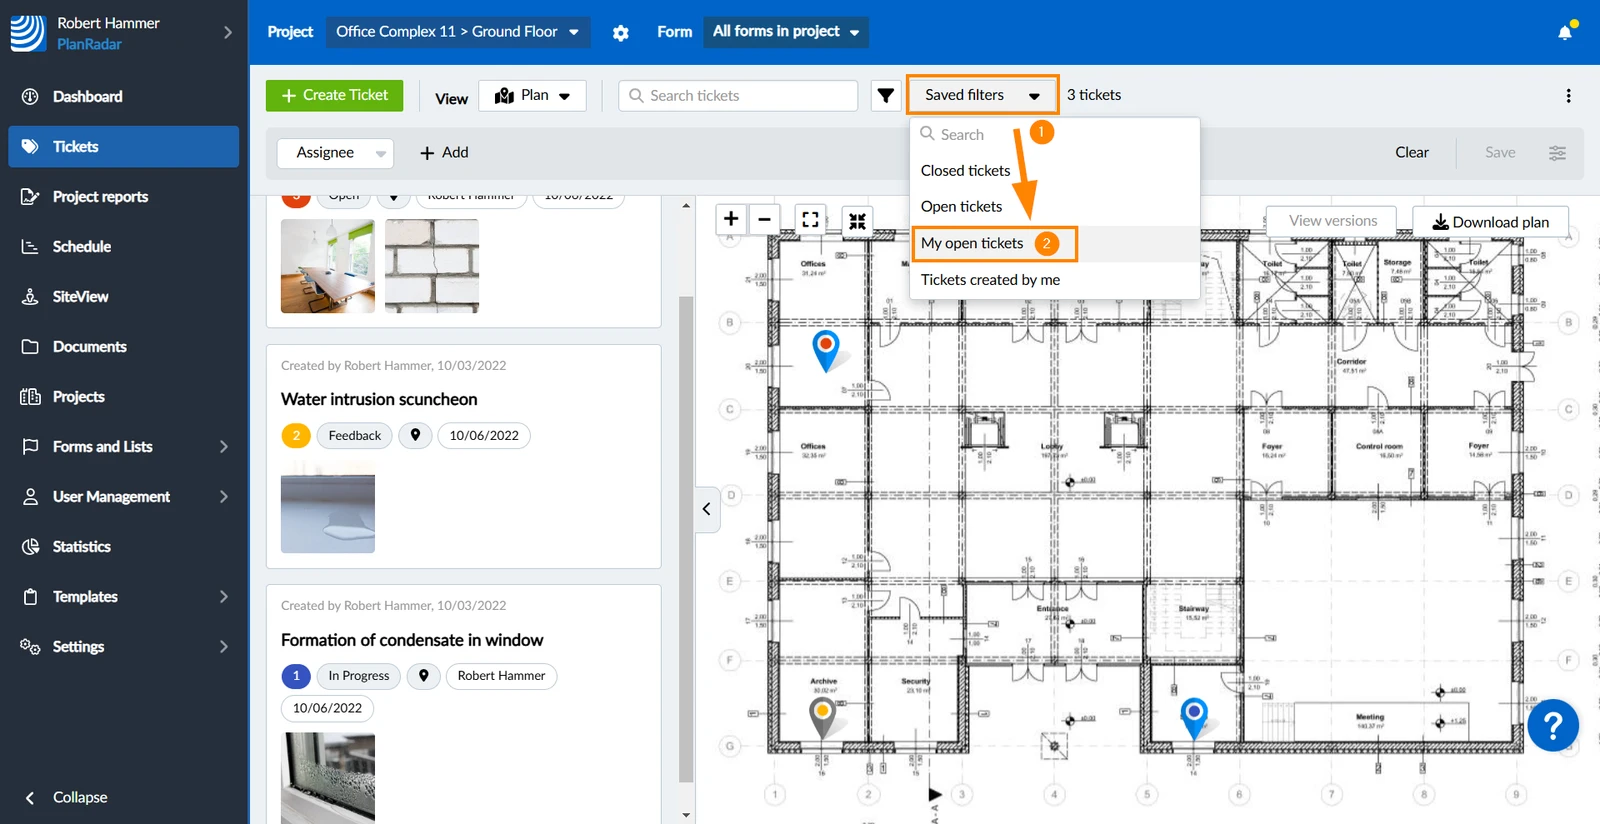
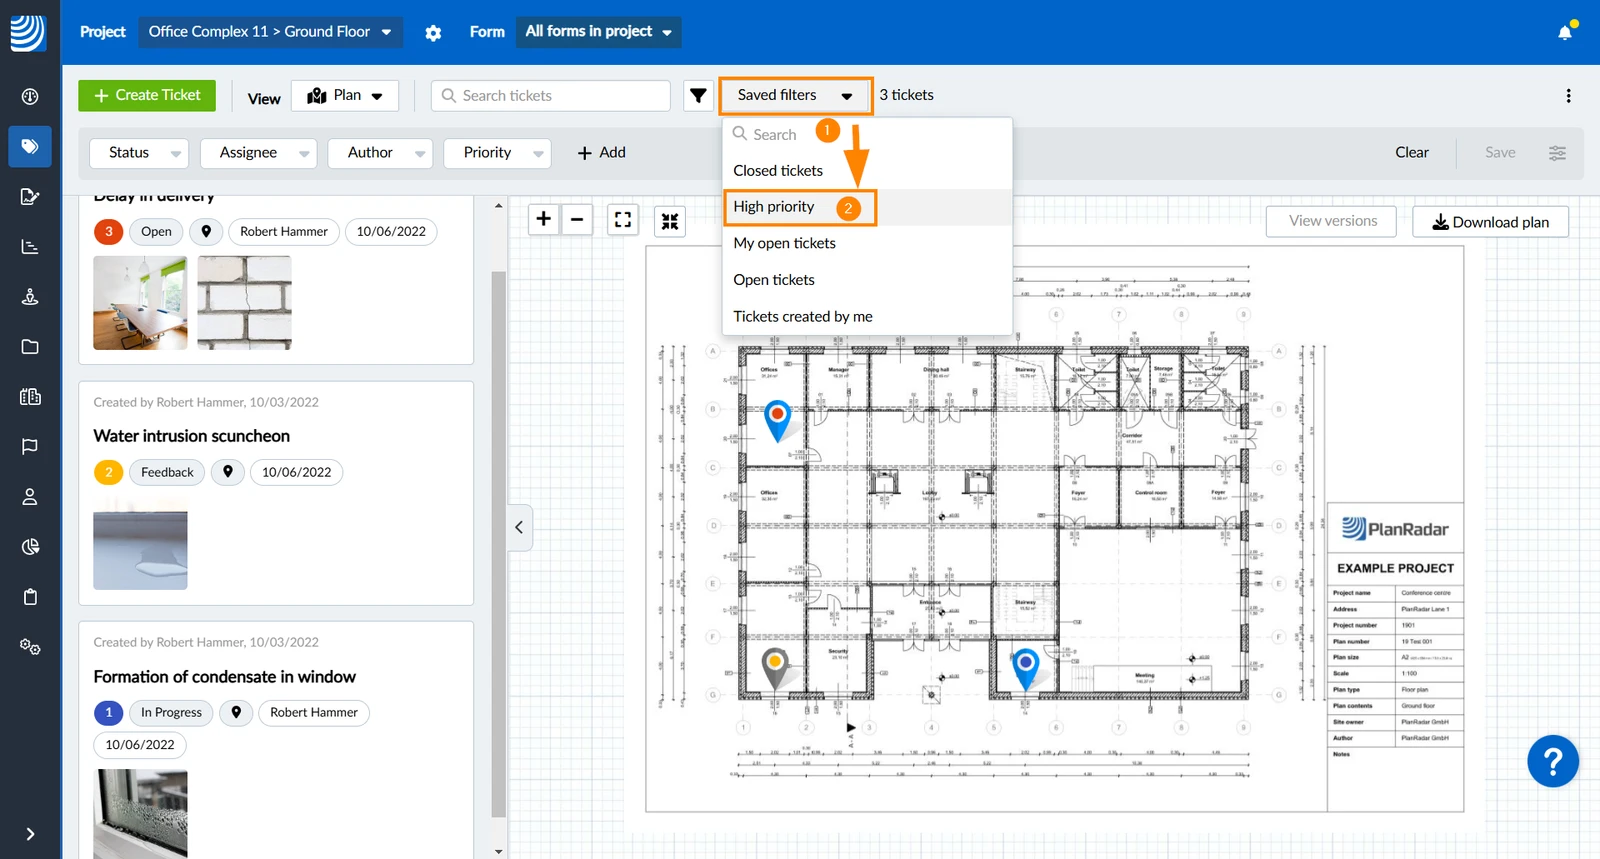
- Open the Saved filters drop-down (to see a list of all filters you saved or someone shared with you)
- Select a filter e.g. My open tickets
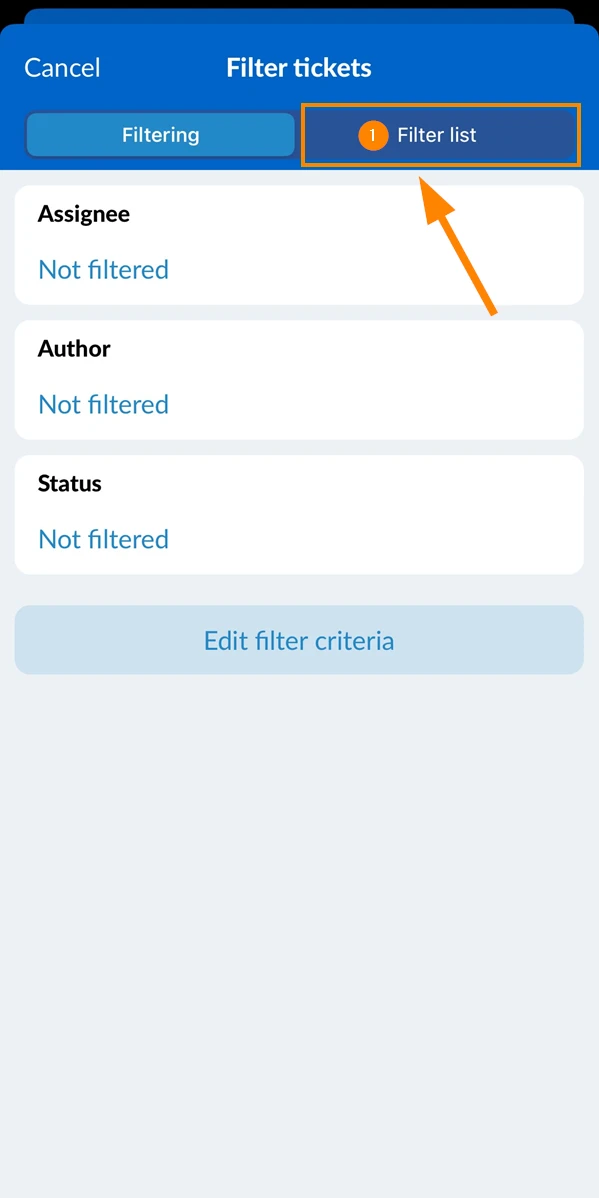
- Tap Filter list
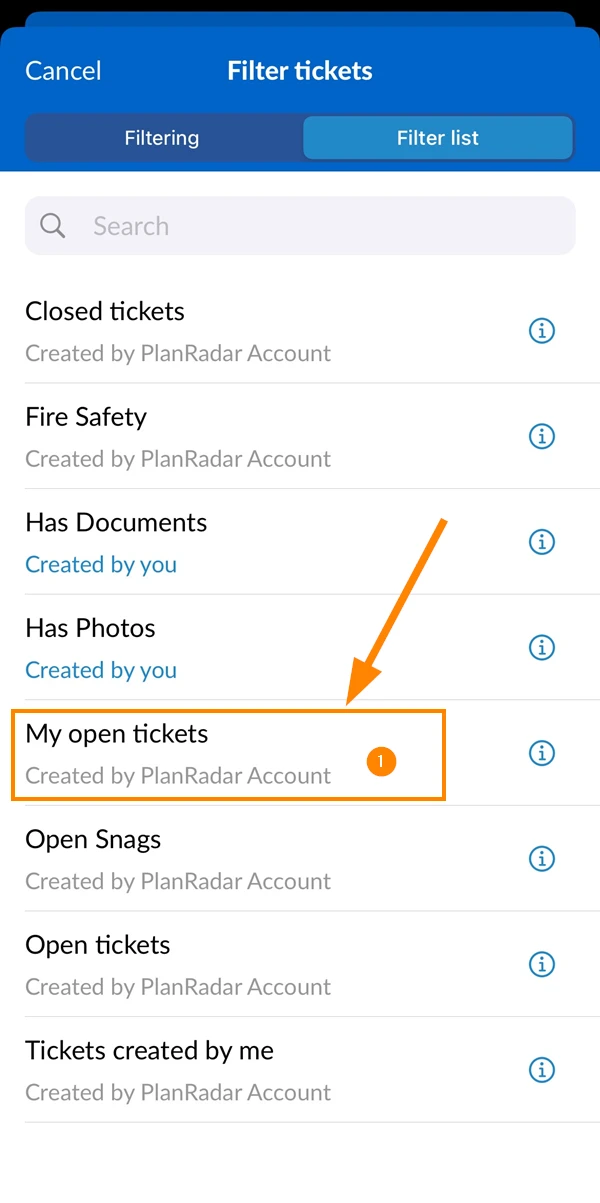
- Tap on the filter e.g. My open tickets
Deactivate Filter
To deactivate filters:
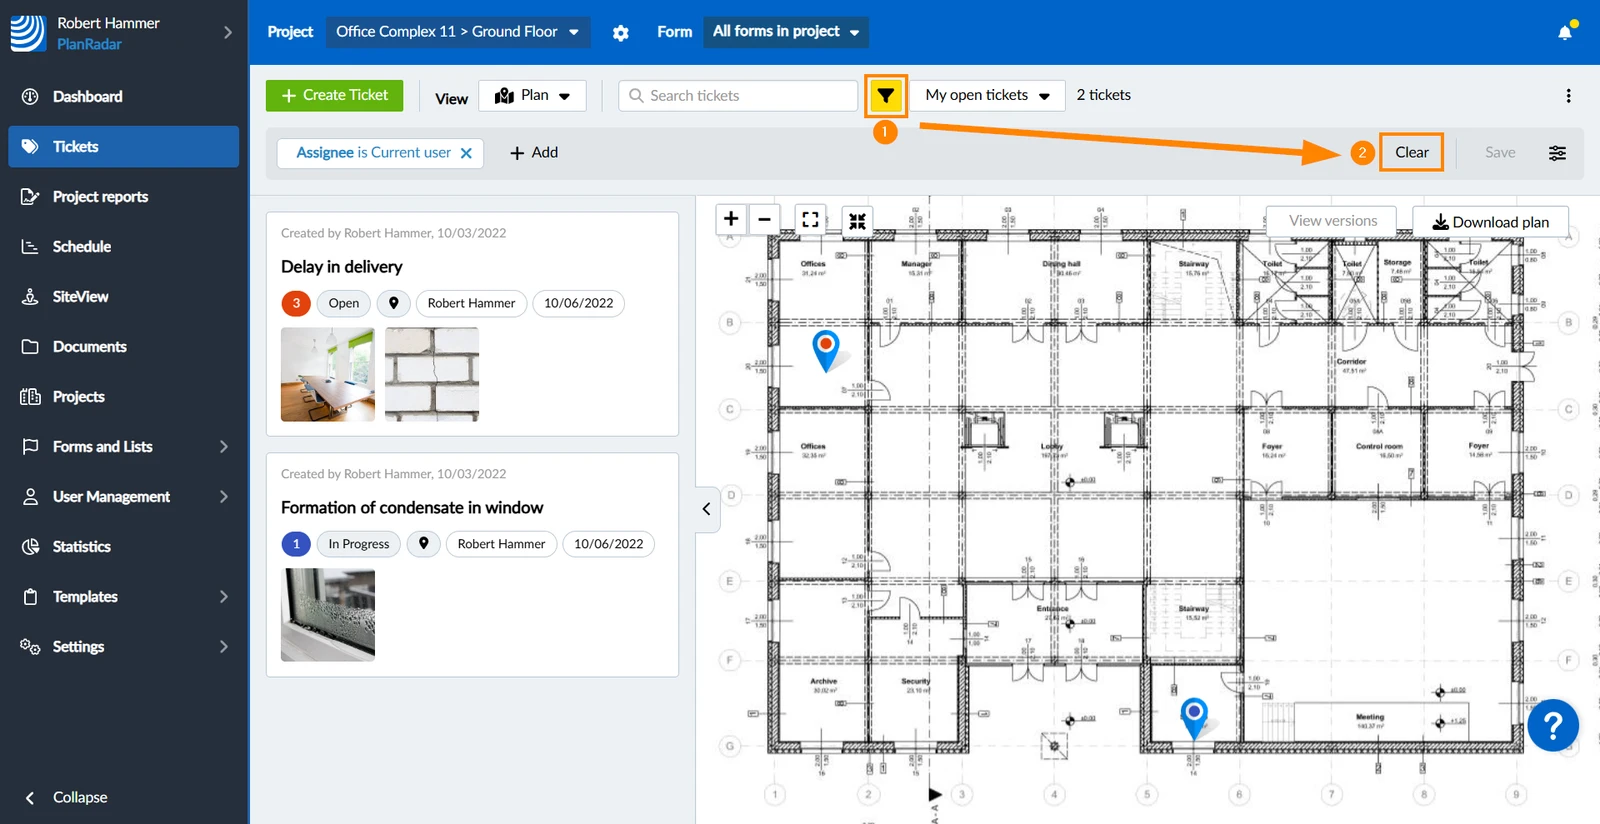
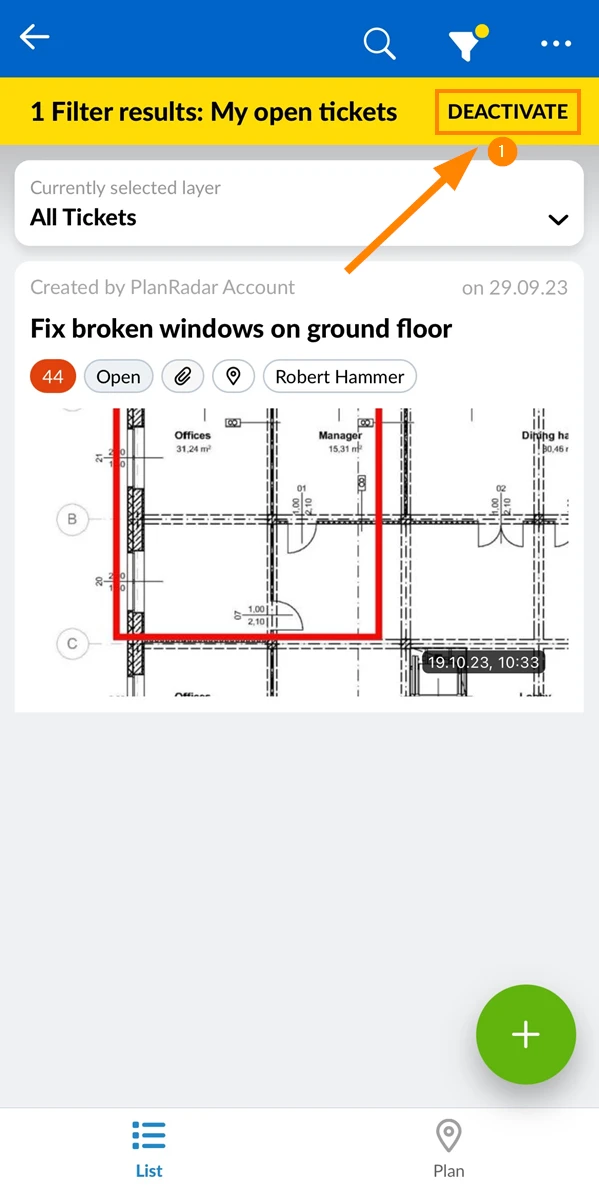
- The yellow filter icon indicates that a filter is active.
- Click Clear to show all the tickets of your project, layer, and form again.
- Tap Deactivate to show all the tickets of your project and layer again.
Create a Filter
You can create a filter for one time use, save it for yourself or even share it with other users.
Add Filter Criteria
To add a filter criteria:
- Click + Add
- Click on a filter criteria e.g. Priority to add it to your current filter.
Added criteria are greyed out.
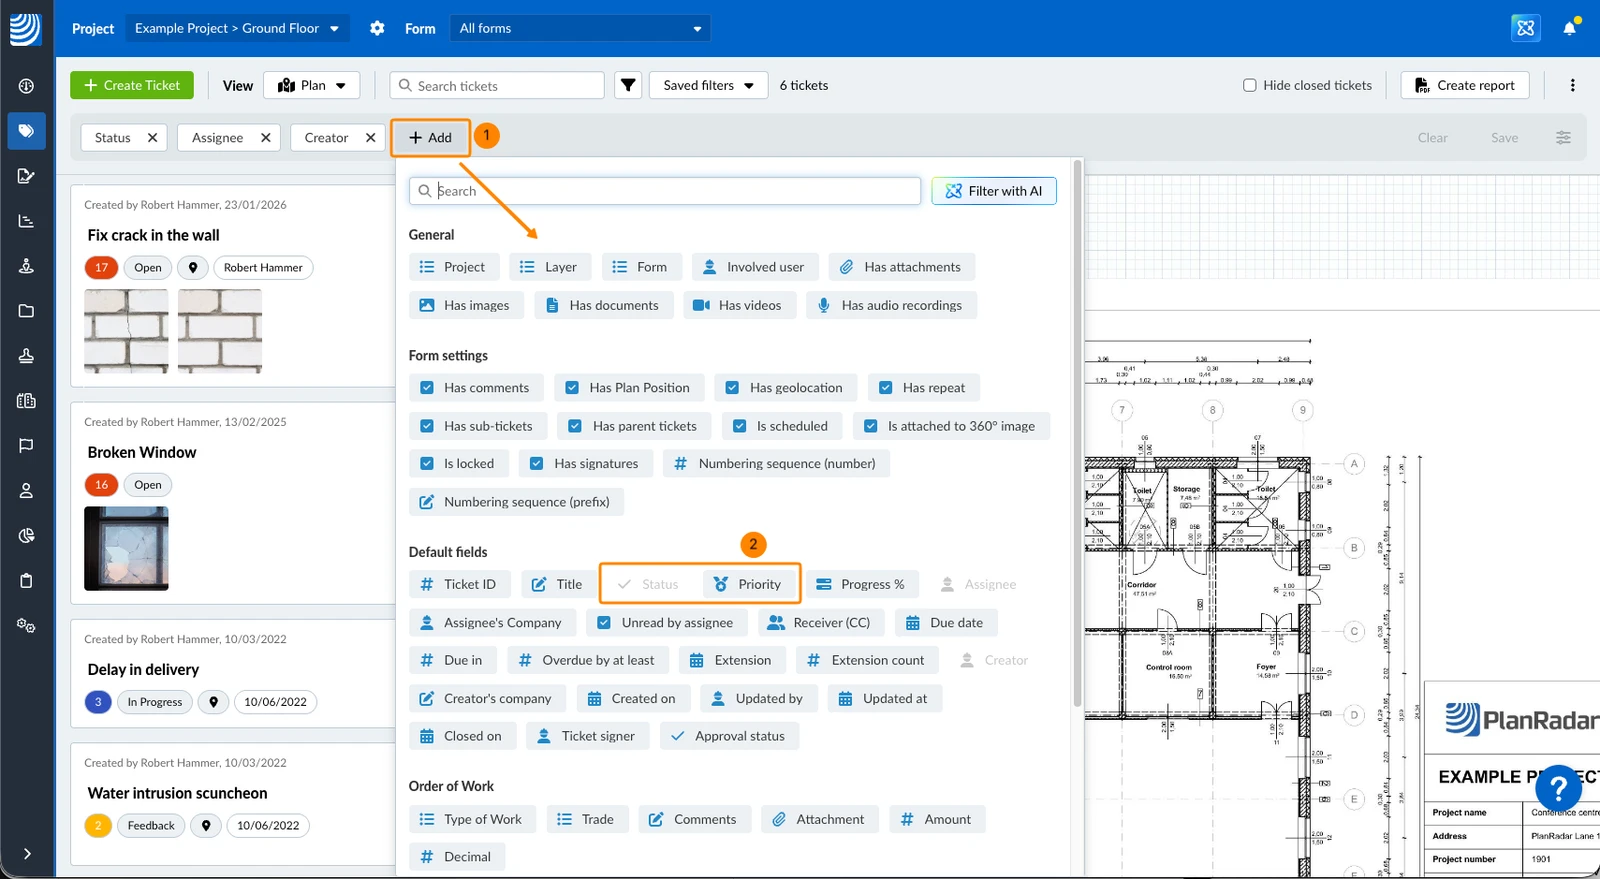
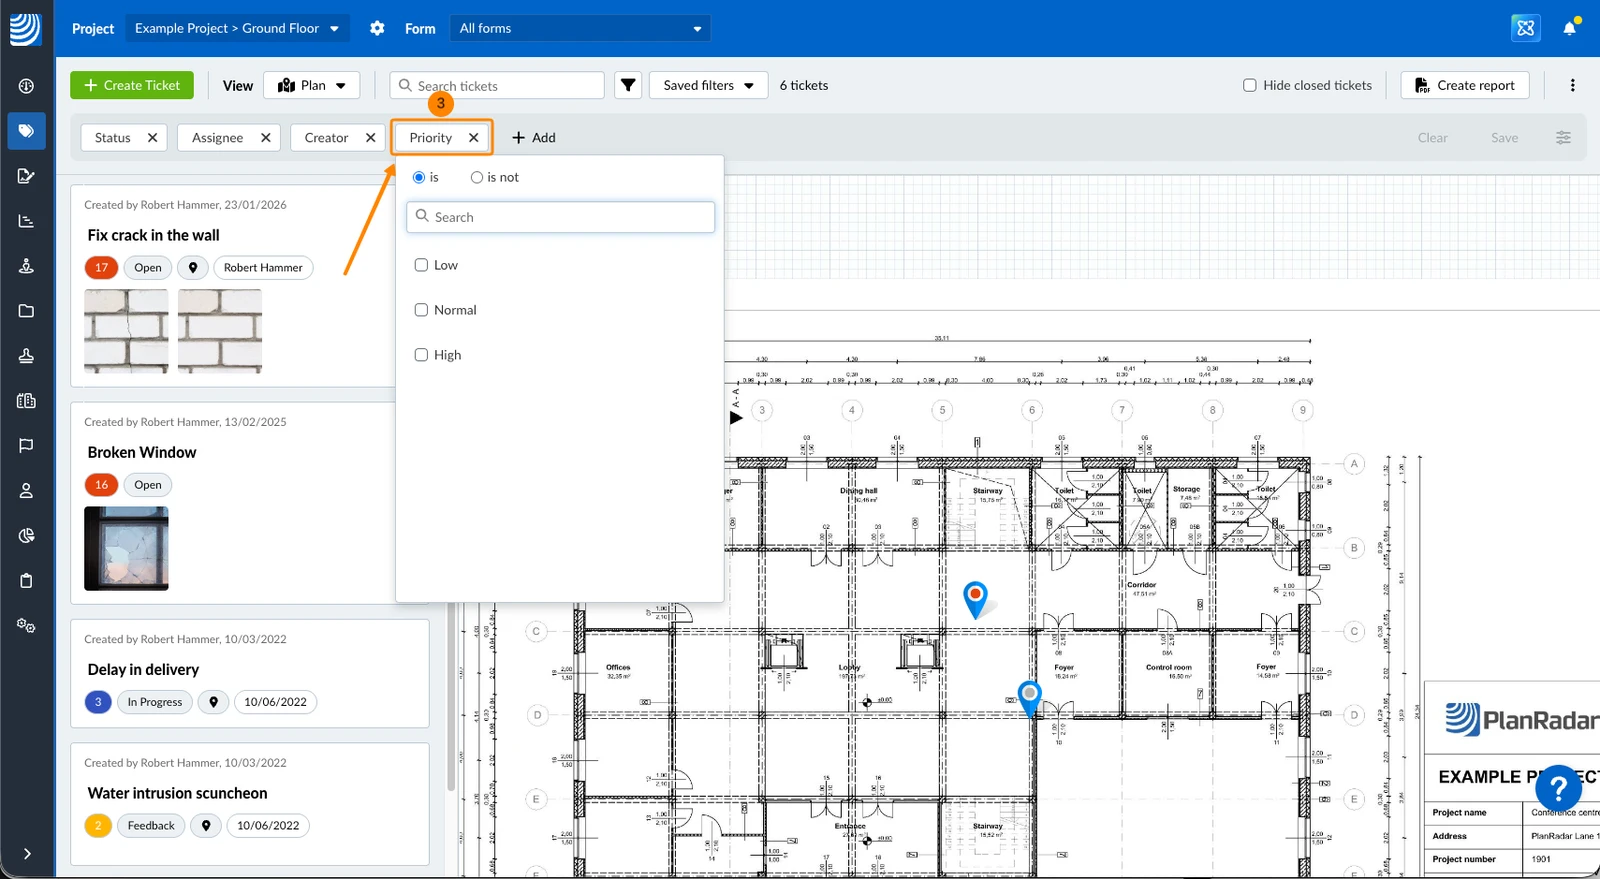
- The criteria 'Priority' gets added and you can continue below in Change Values of Filter Criteria.
- Tap Edit filter criteria
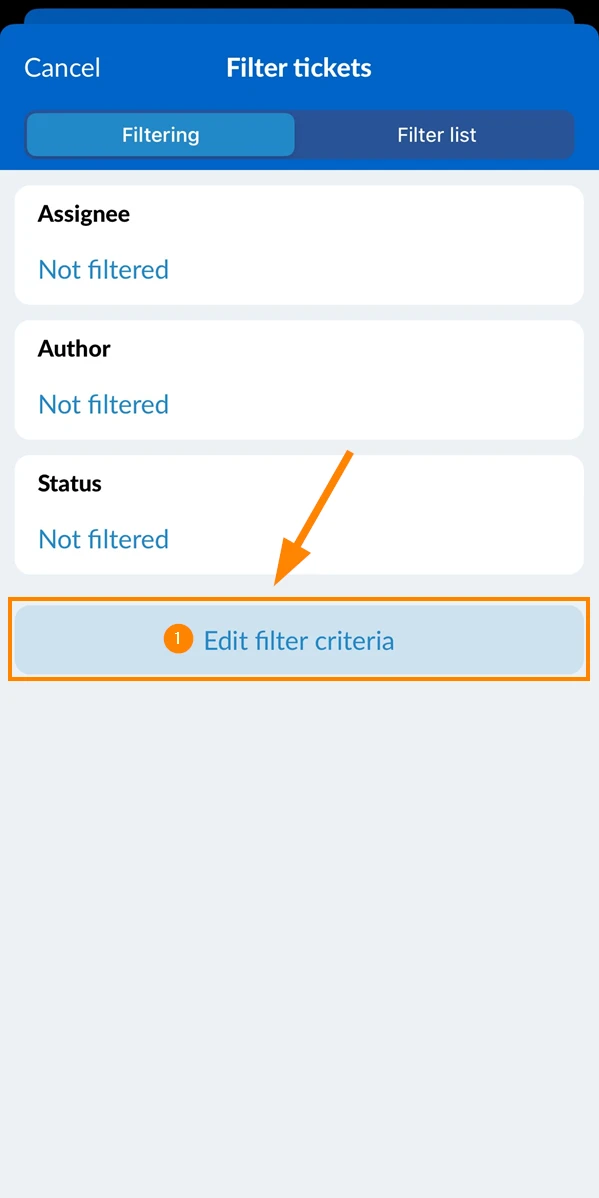
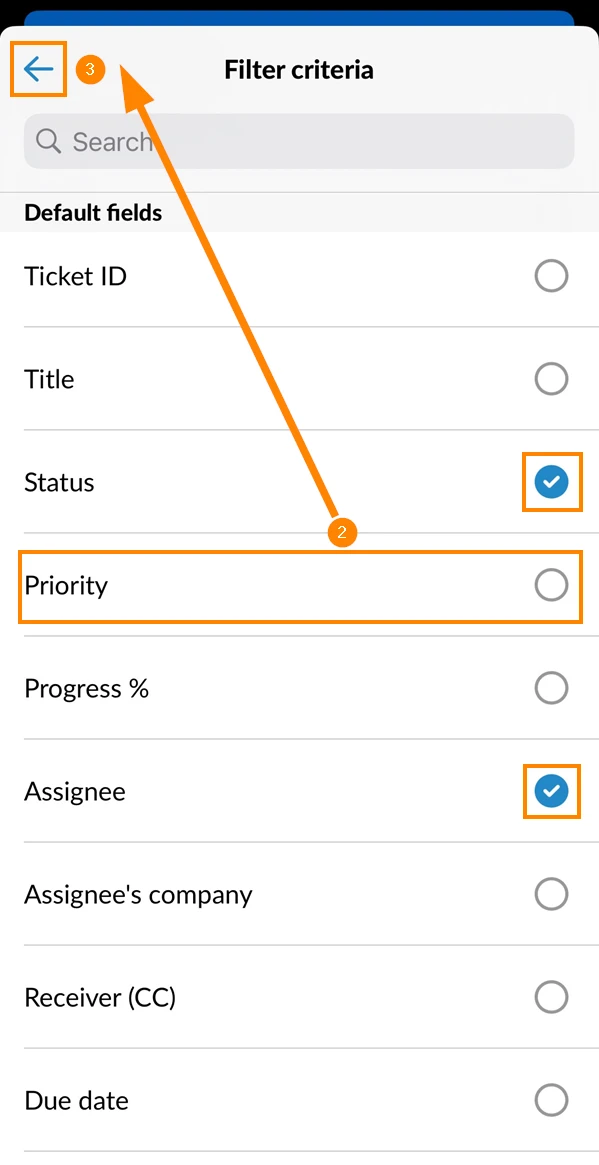
- Tap the criteria that you want to add e.g. Priority.
Selected criteria show a blue check mark. - Tap back to confirm your selection and add the criteria to your current filter.
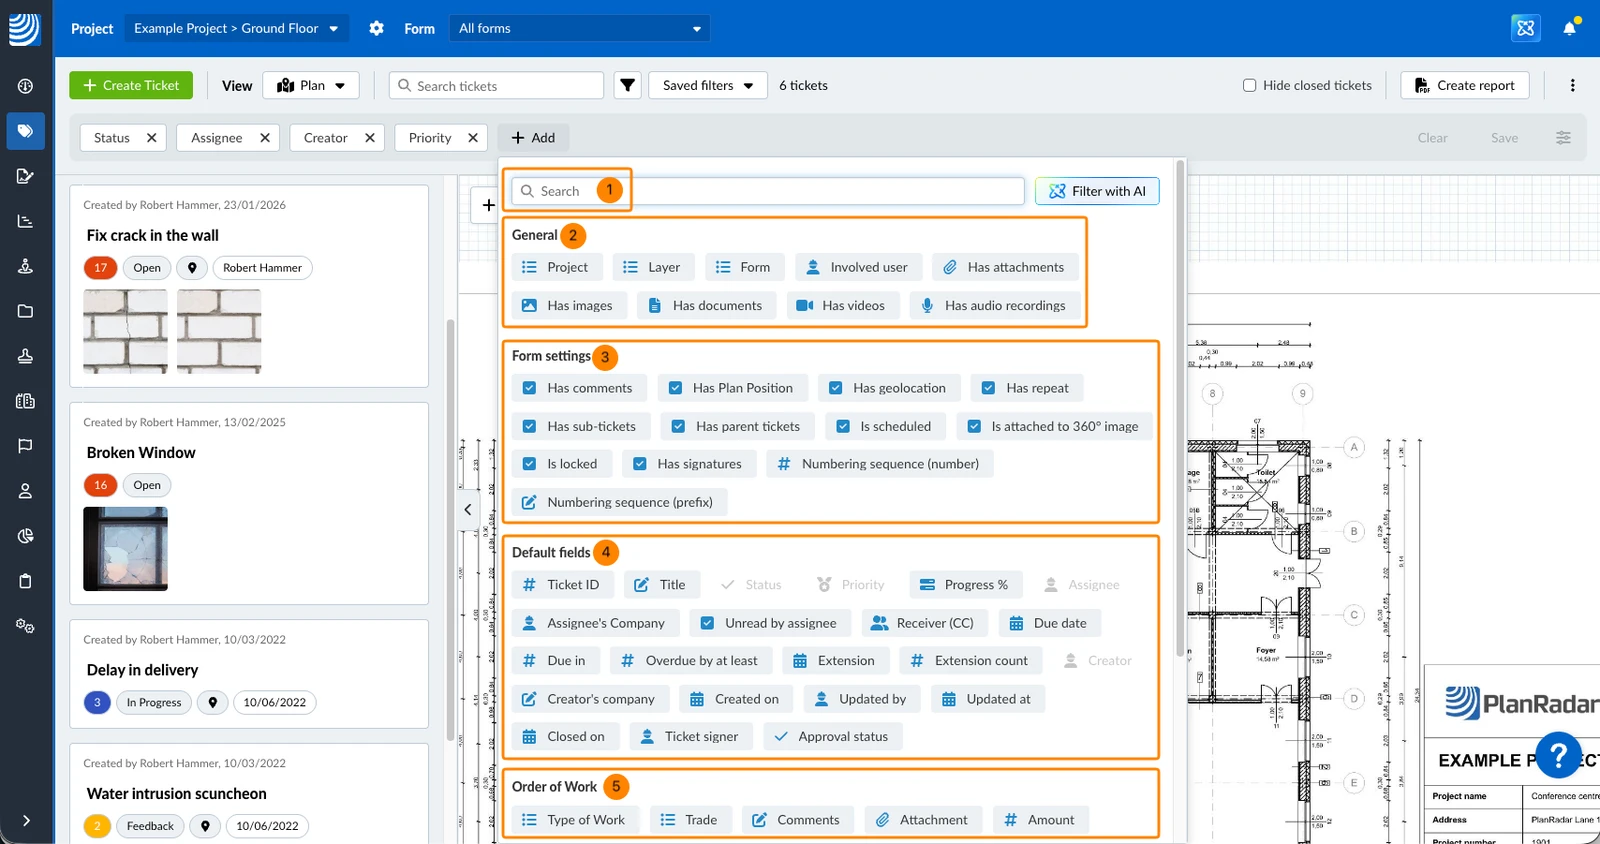
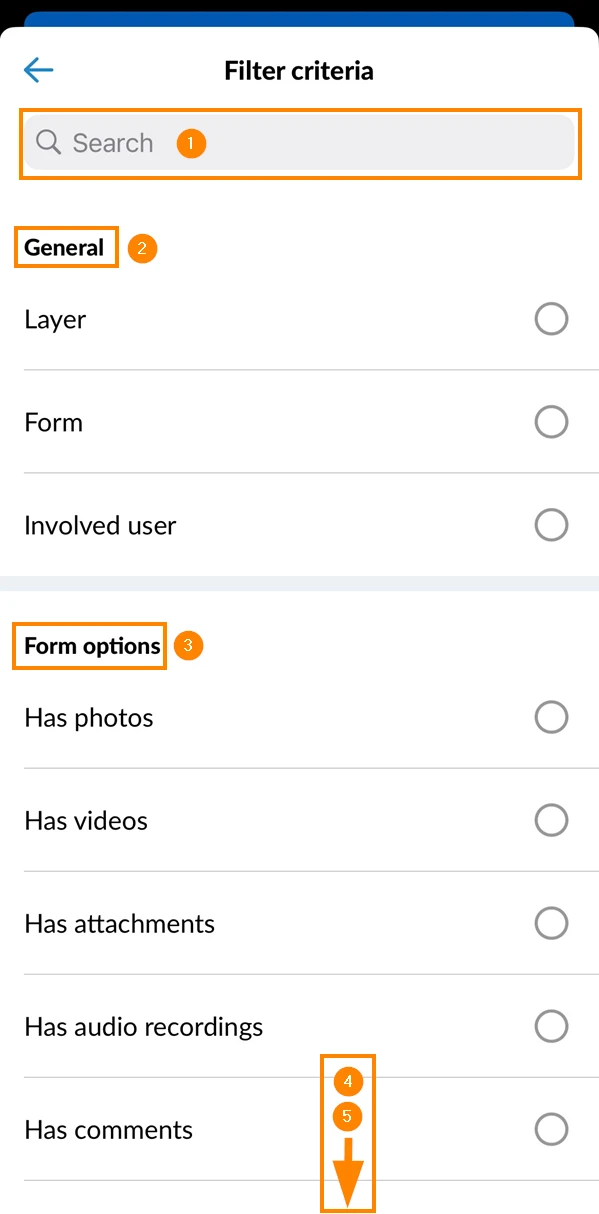
Description of the Add Filter Criteria Dialogue
- Search filter criteria
- General section includes Project, Layer and Form in case you want to save this in the filter or select multiple values. Involved user allows to filter over author, assignee and receiver fields at once (any match). Has attachments includes any attachment (including general and field attachments). Also Has images, Has documents, and Has videos include both types.
- Form settings refers to information stored in tickets besides the ticket fields which can be enabled or disabled when creating the form. Also see Edit Form Settings.
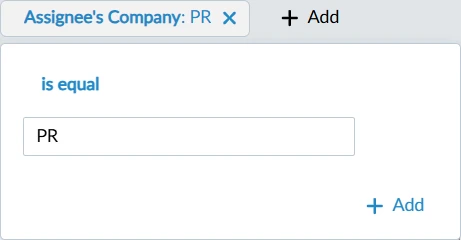
- Default fields includes all default fields that PlanRadar offers for forms and some criteria based on that like Assignee's company, Due in, or Overdue by at least.
- Custom fields are grouped by form e.g. the form named Order of Work
Define Values of Filter Criteria
Depending on the criteria and its field type (e.g. text, number, date, user, etc.) you have different possibilities to define values (e.g. high priority) and operators (e.g. is or is not).
To filter for tickets that have the value High in the ticket field Priority:
- Click the filter criteria e.g. Priority
- Keep the operator set to is
- Select the checkbox for the value High
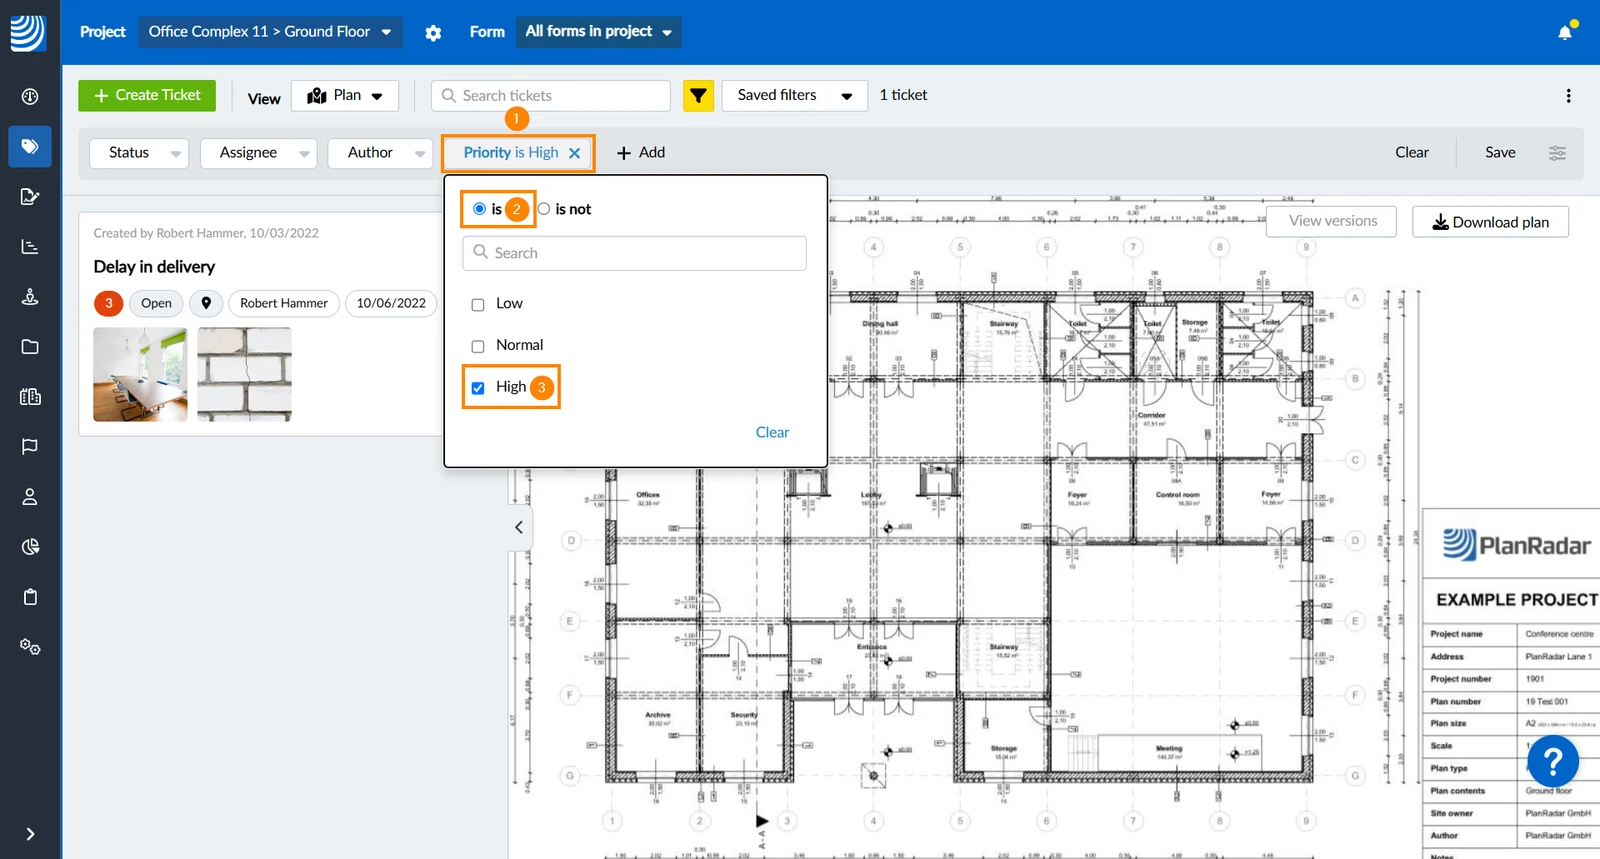
Right after selecting a value the filter is applied to the tickets displayed on the plan and in the ticket list.
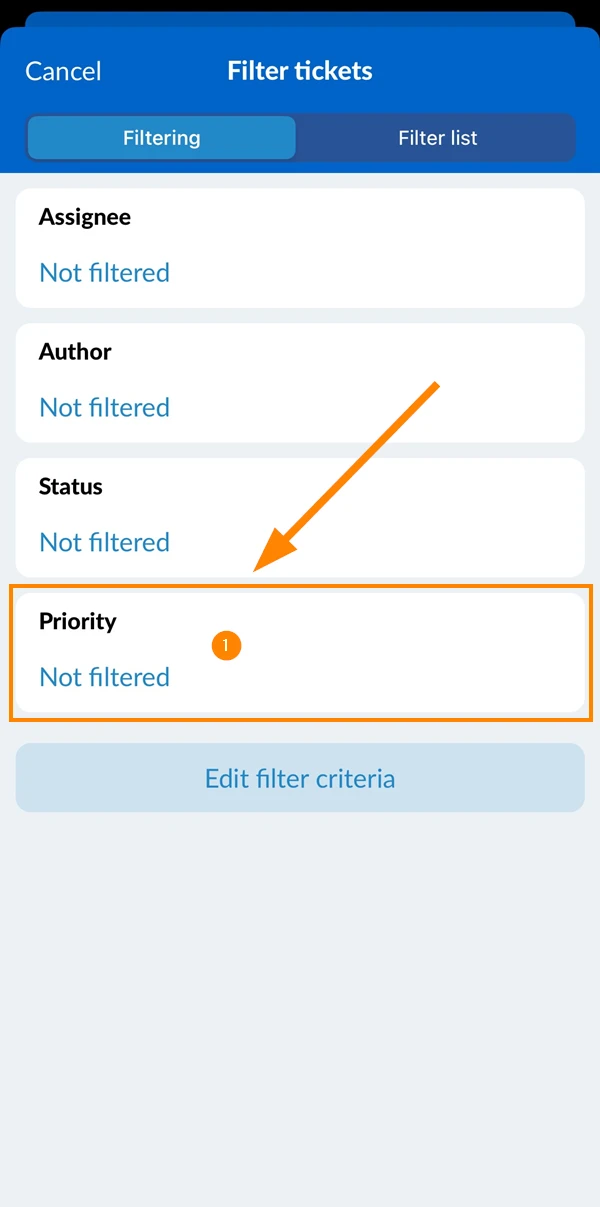
- Tap on the criteria Priority
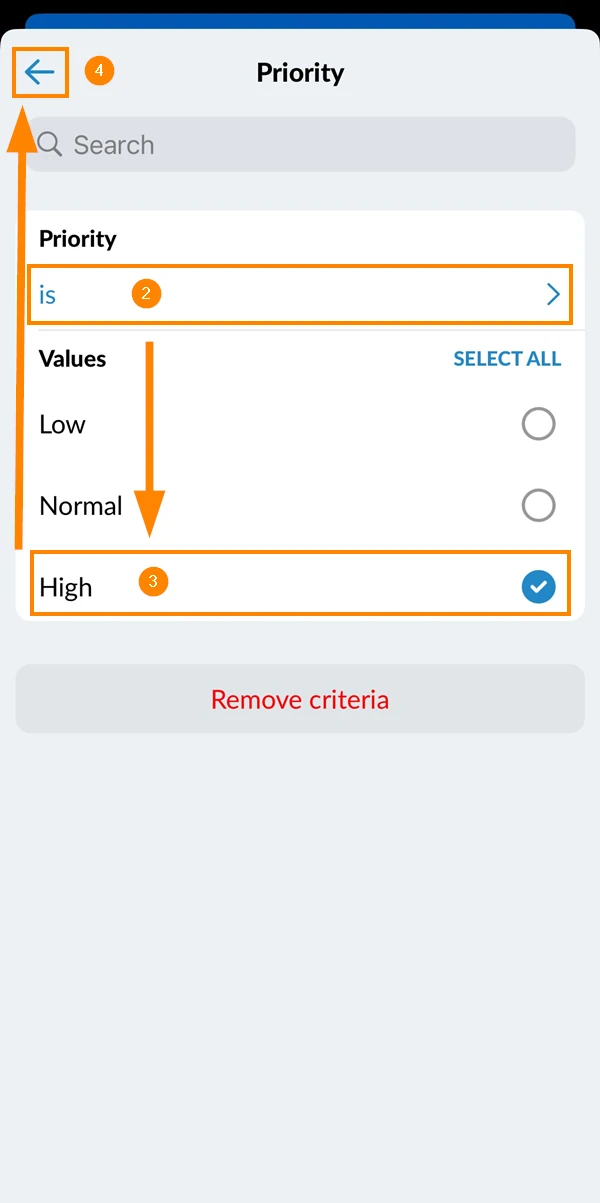
- Keep the operator set to is
- Select a value e.g. High
- Tap back
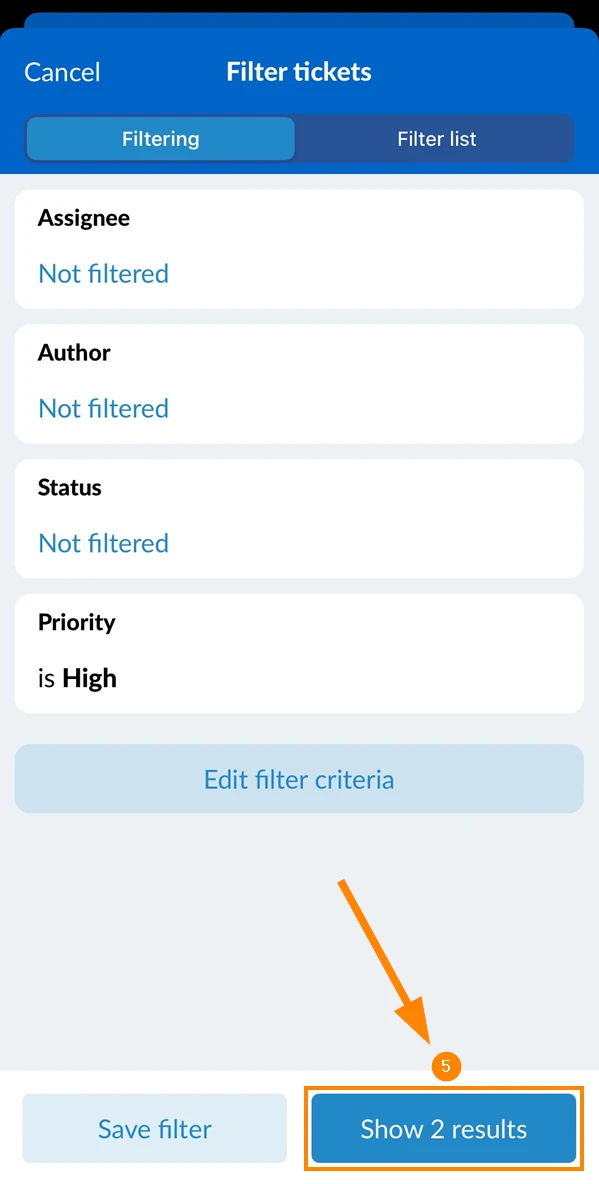
- Tap Show 2 results (button shows number of tickets that match the criteria)
Examples for Values and Operators of Filter Criteria
Here are some examples to show you the countless possibilities of ticket filters.
To show all tickets that are assigned to users from a certain company e.g. PR:
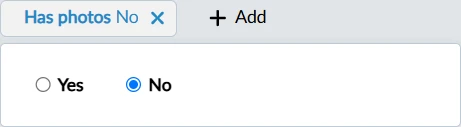
To show all tickets that have no photos attached (yet):
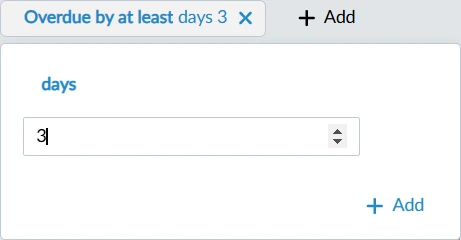
To show all tickets that are overdue by at least 3 days:
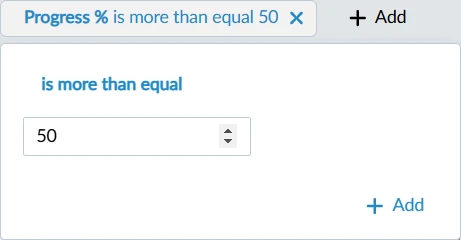
To show all tickets that have progress set above 50%:
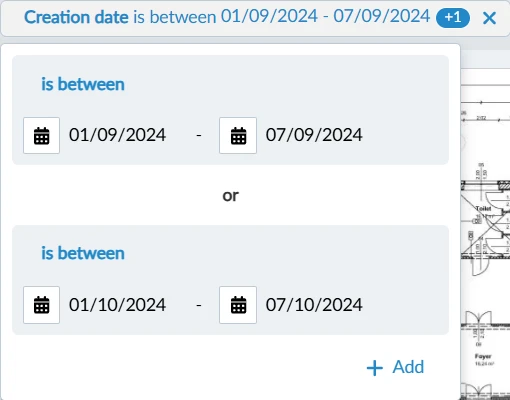
To show all tickets that got created in the first week of September or October:
Remove Filter Criteria
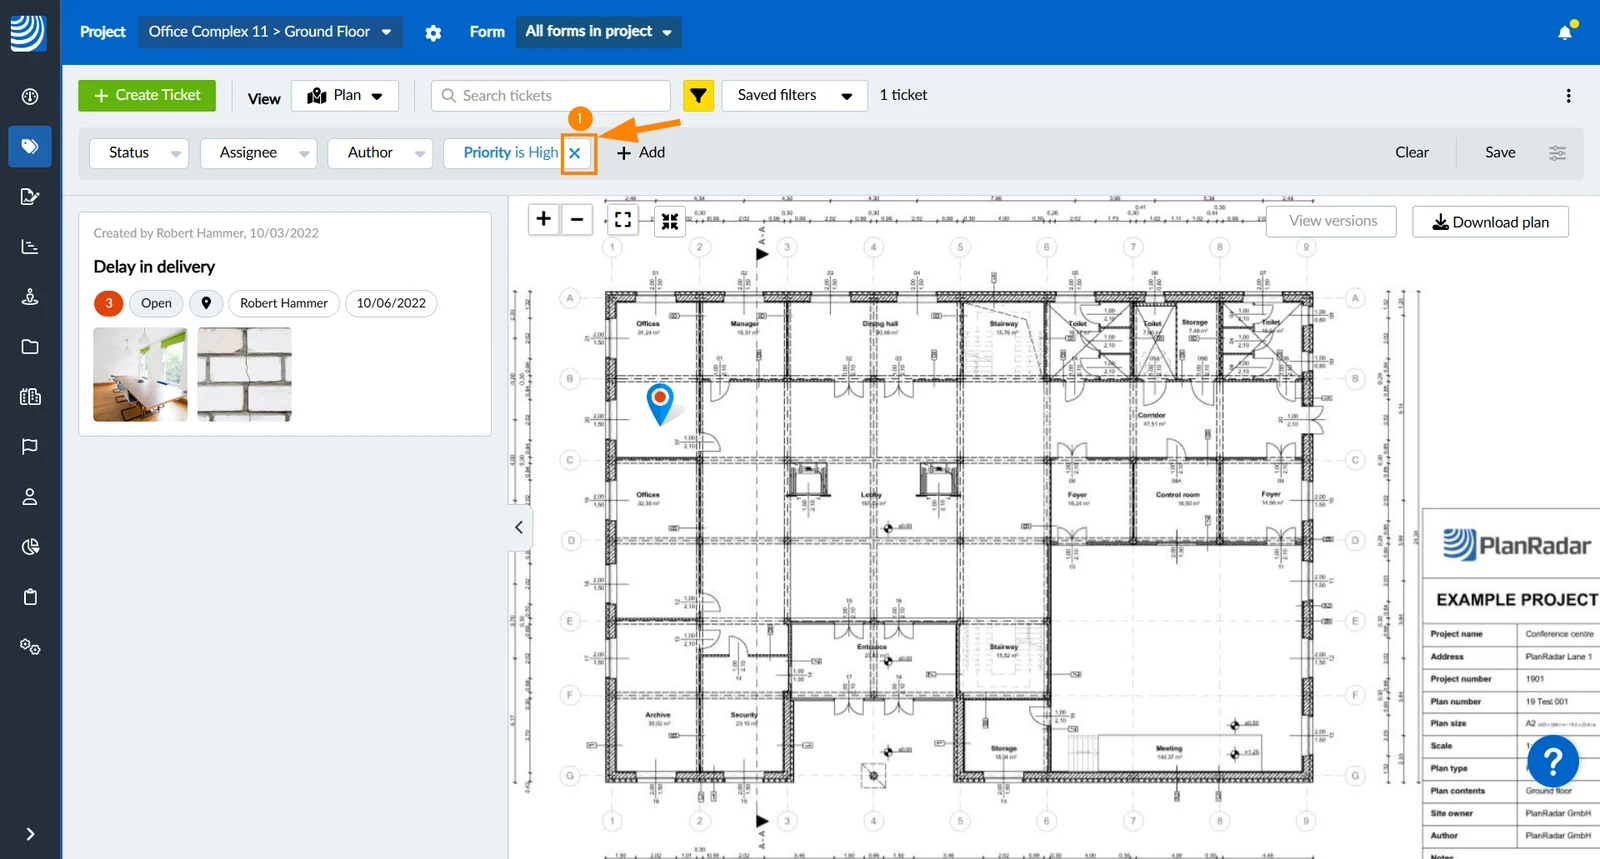
To remove a filter criteria from your current filter:
- Click X
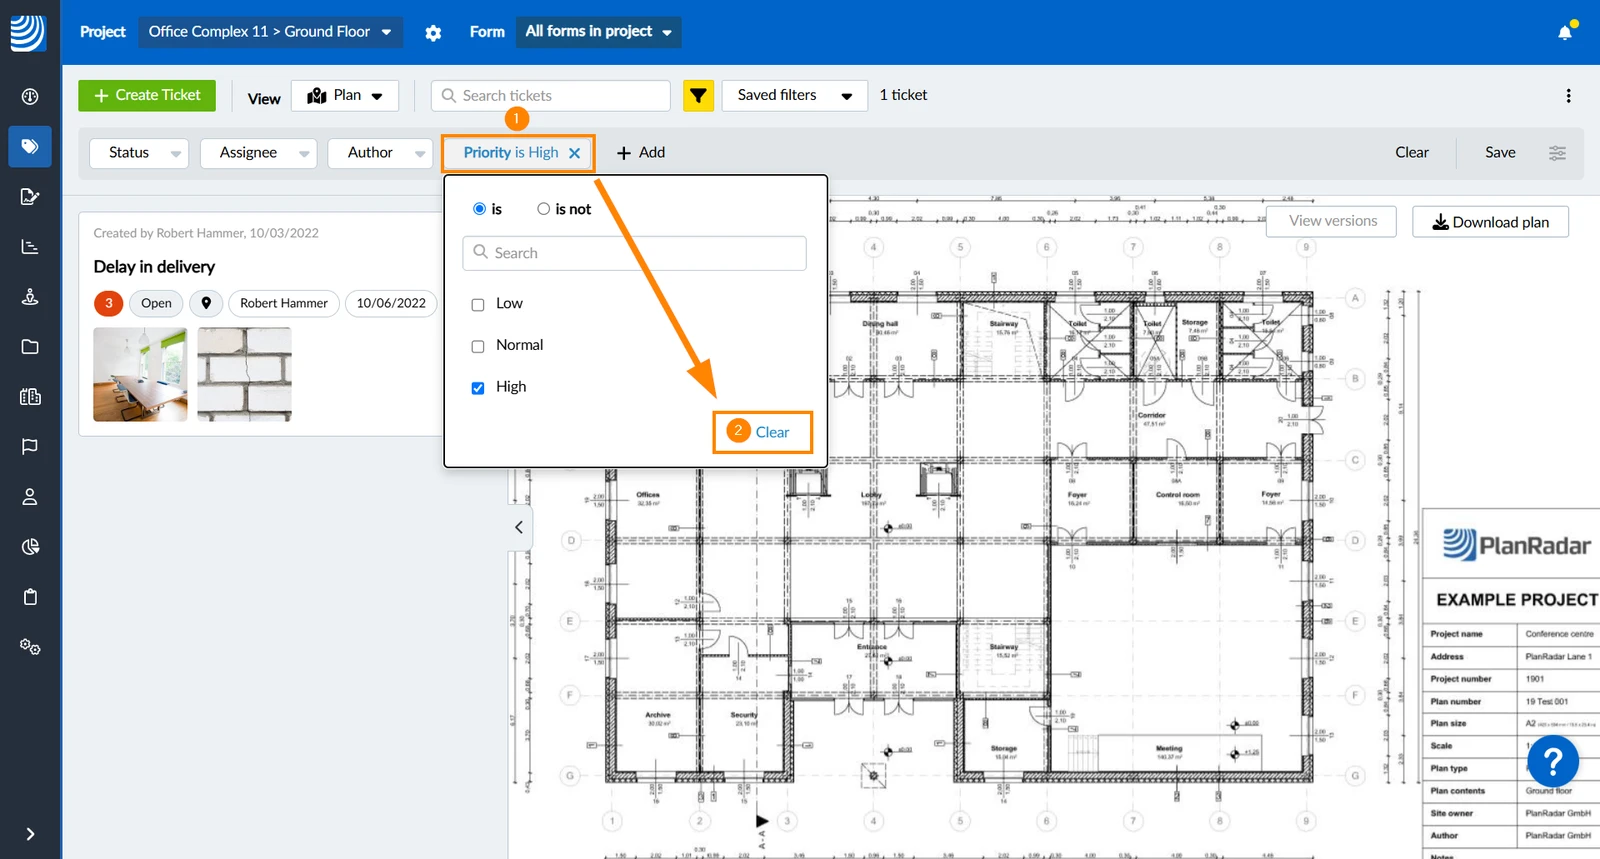
To clear all selected values while keeping the filter criteria:
- Click the filter criteria e.g. Priority
- Click Clear
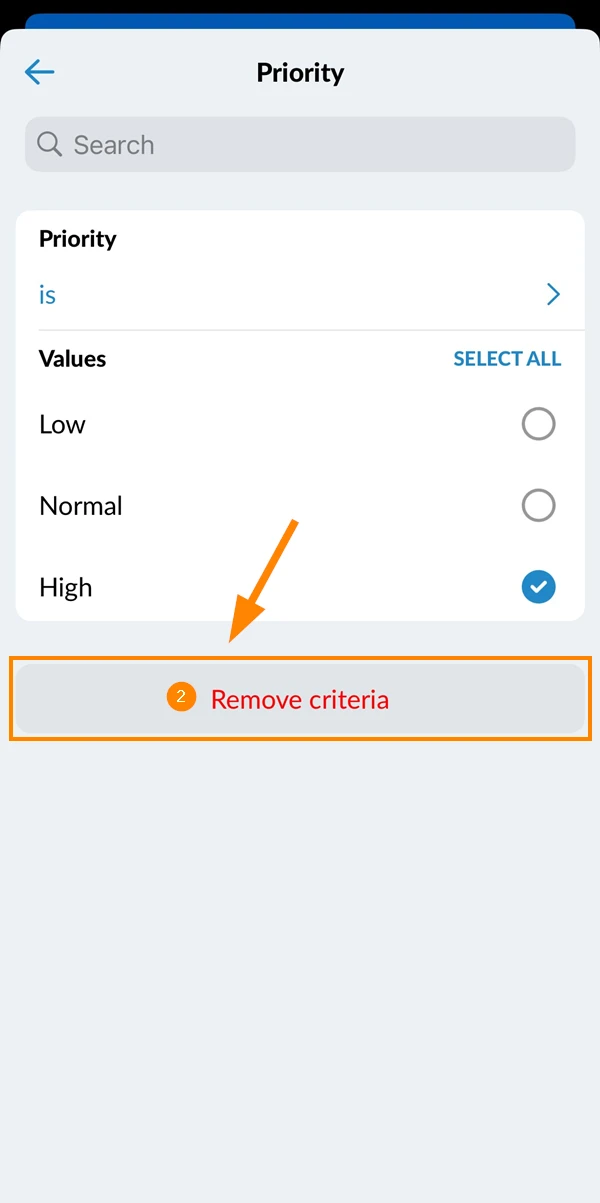
- Tap on the criteria e.g. Priority
- Tap Remove criterion
Save/Share a New Filter
If you want you (or others) to reuse the filter you can save (and share) it. After you defined at least one criteria with a value you can save the filter.
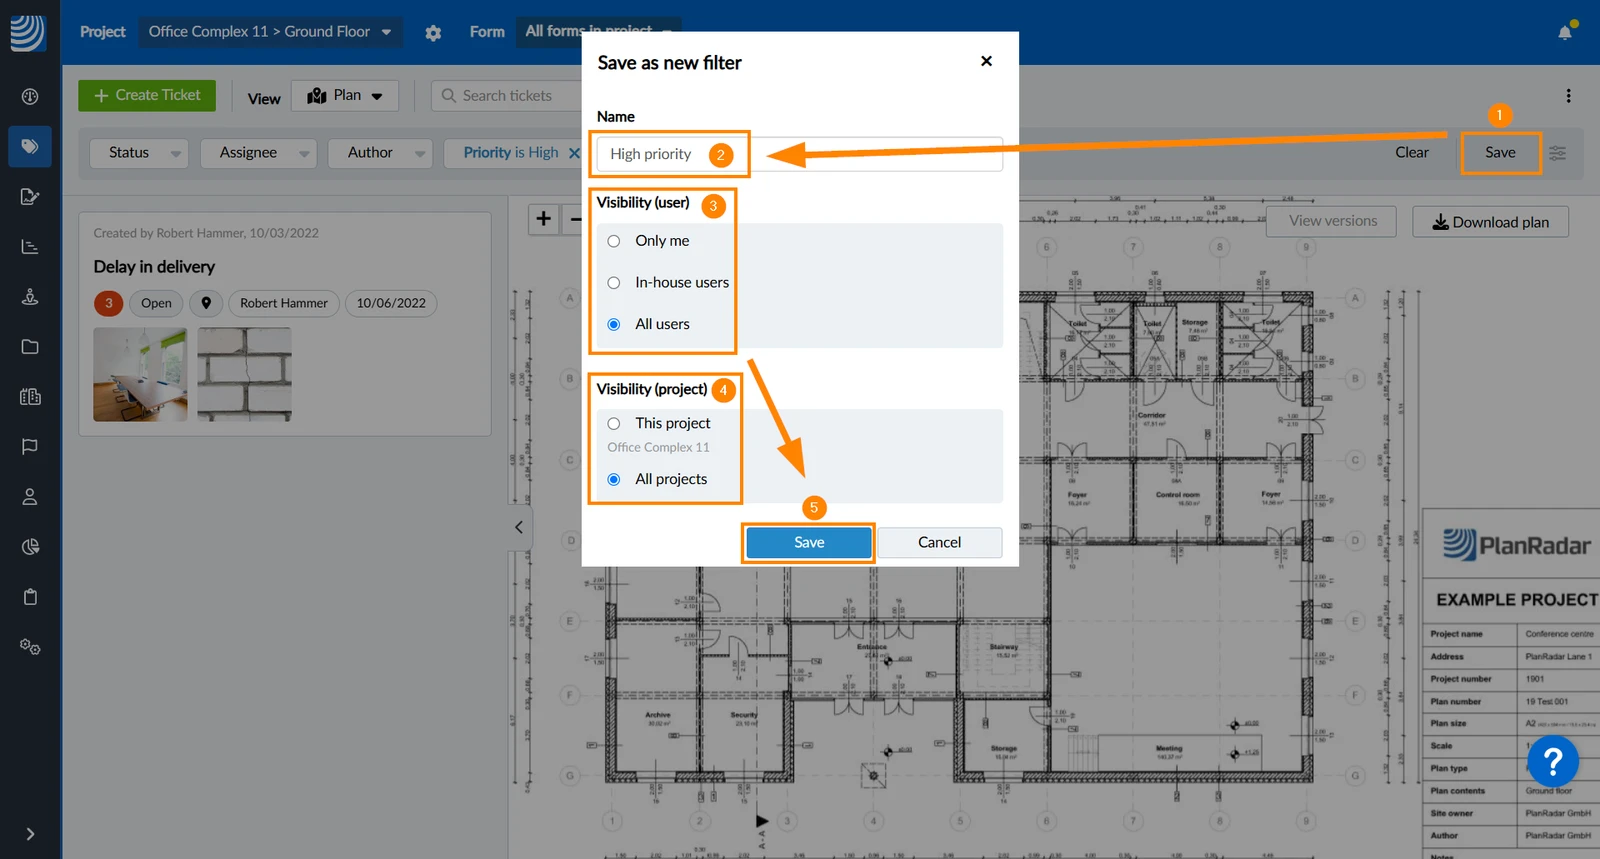
- Click Save
- Enter a Name e.g. High Priority
- Select Visibility (user):
Only me = nobody except you will see the filter
In-house users = everybody except subcontractors and watchers will see the filter
All users = everybody will see the filter. - Select Visibility (project):
This project → select if filter is not relevant in other projects
All projects → select if filter is helpful in all projects. - Click Save to confirm
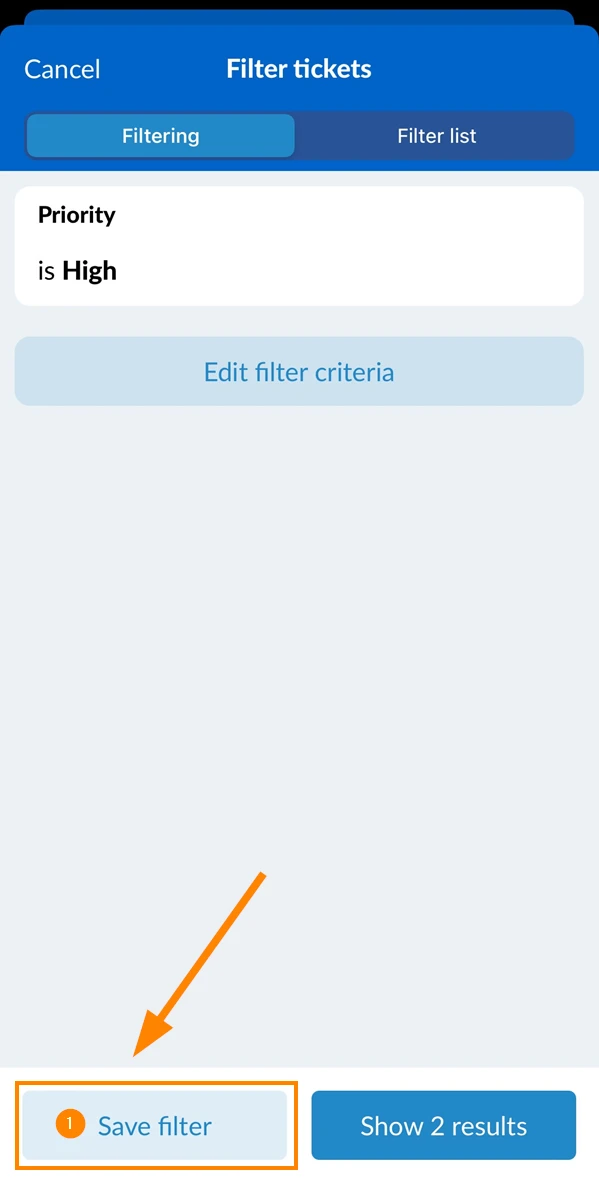
- Tap Save filter
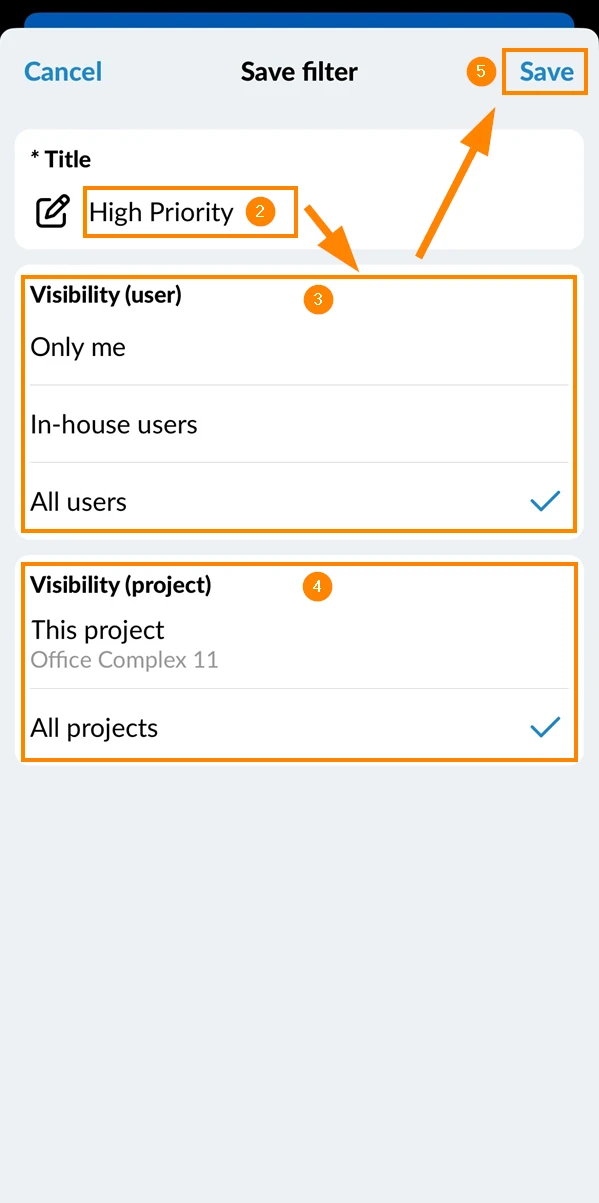
- Enter a Title e.g. High Priority
- Select Visibility (user):
Only me = nobody except you will see the filter
In-house users = everybody except subcontractors and watchers will see the filter
All users = everybody will see the filter. - Select Visibility (project):
This project → select if filter is not relevant in other projects
All projects → select if filter is helpful in all projects. - Tap Save to confirm
Edit a Saved Filter
You can save changes to a loaded filter (e.g. name, criteria, visibility/sharing) or save an existing filter as a new one, as well as rename or delete a filter.
To do this, first load the filter:
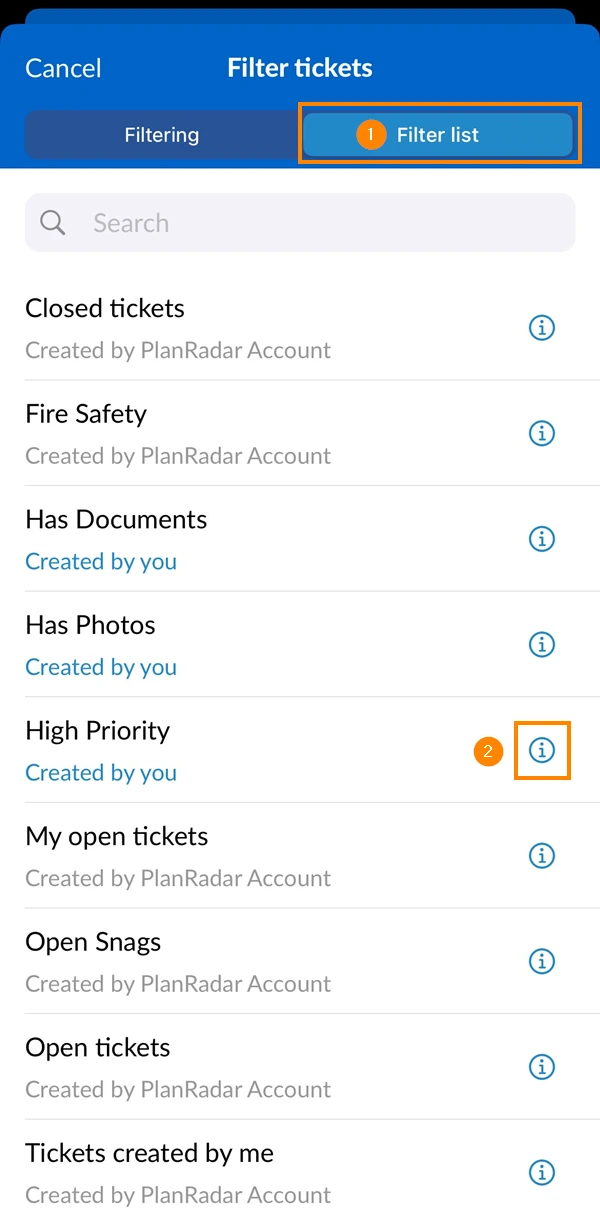
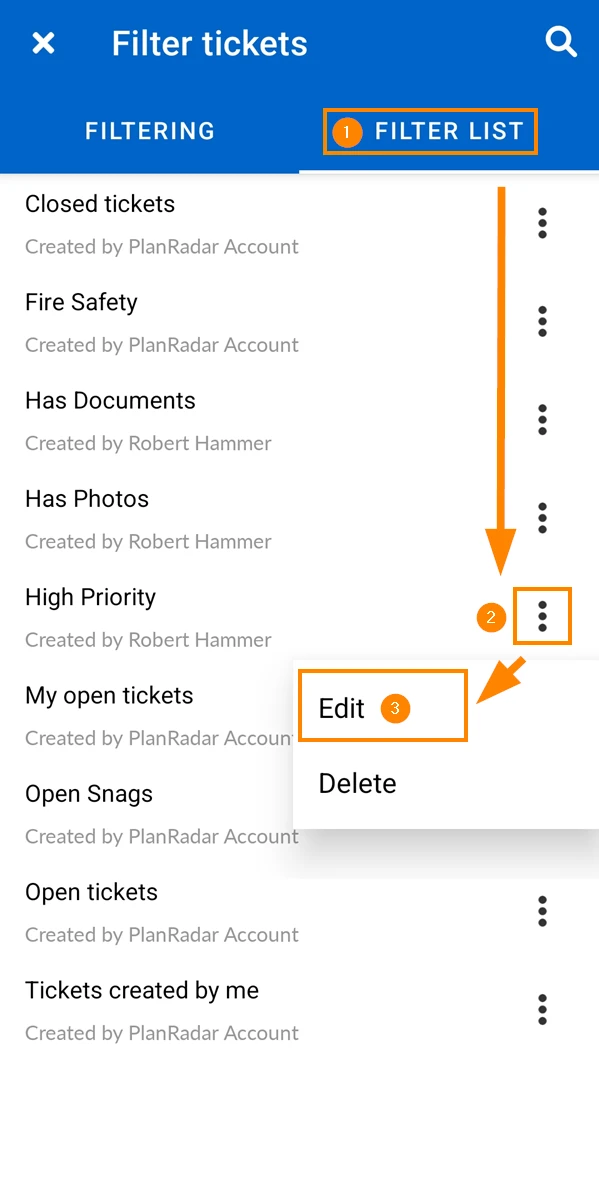
- Open the Saved filters drop-down
- Select the filter e.g. High priority
- Tap Filter list
- Tap the i icon next to the filter
- Tap Filter list
- Open the more menu
- Tap Edit
Change Filter Criteria
Make your changes to the filter criteria as described above in Create a Filter.
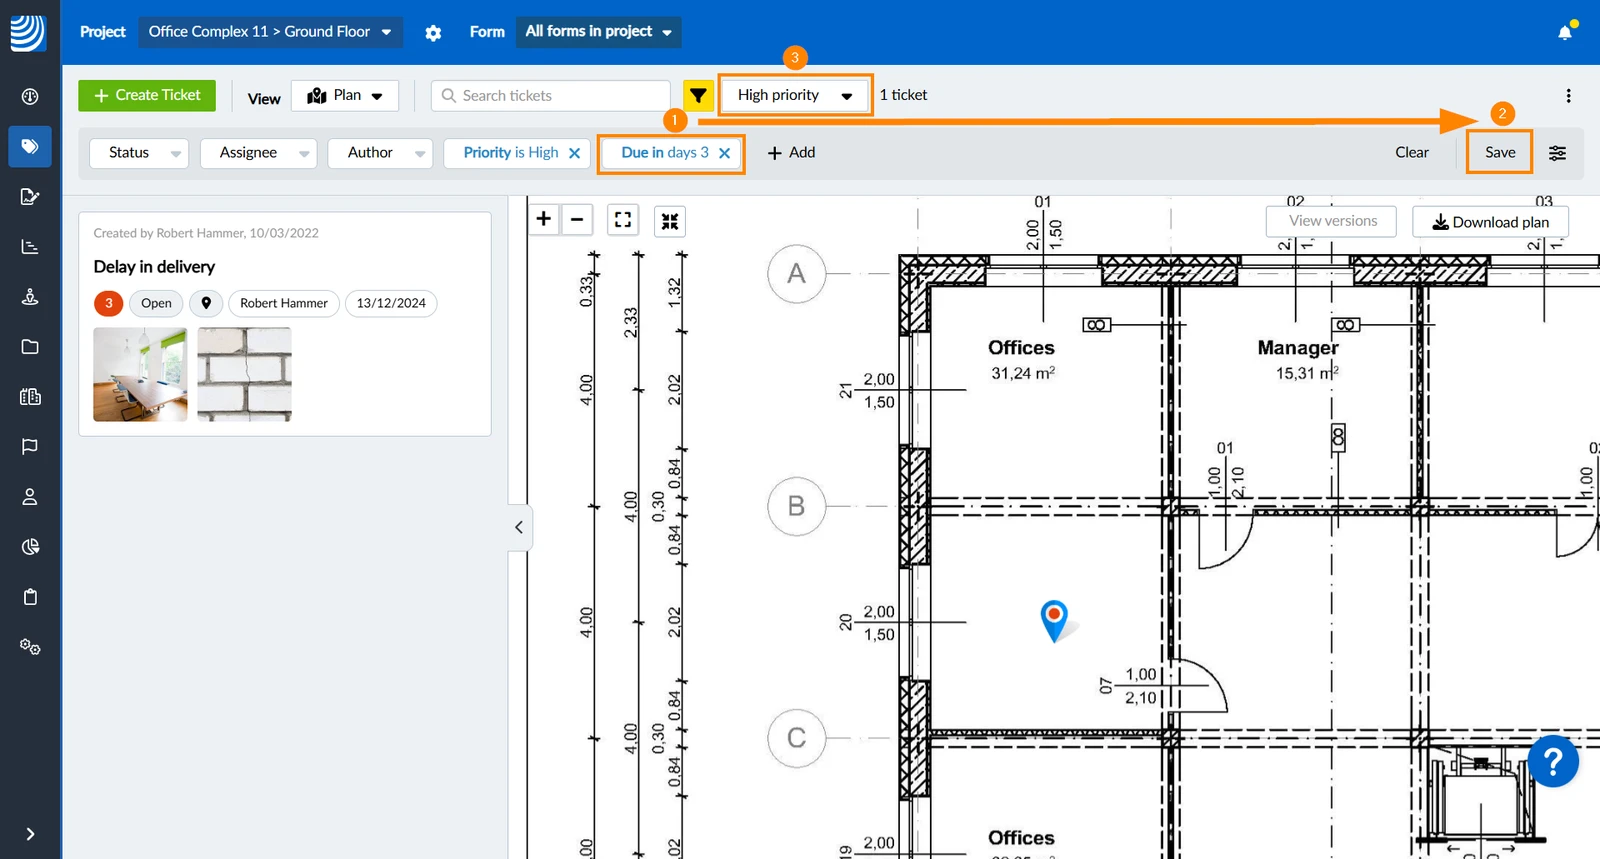
- Add the criteria e.g. Due in 3 days as described above
- Click Save changes
- → The new criteria will be saved in the existing filter named High Priority
- Add the criteria e.g. Due in 3 days as described above
- Tap Save filter
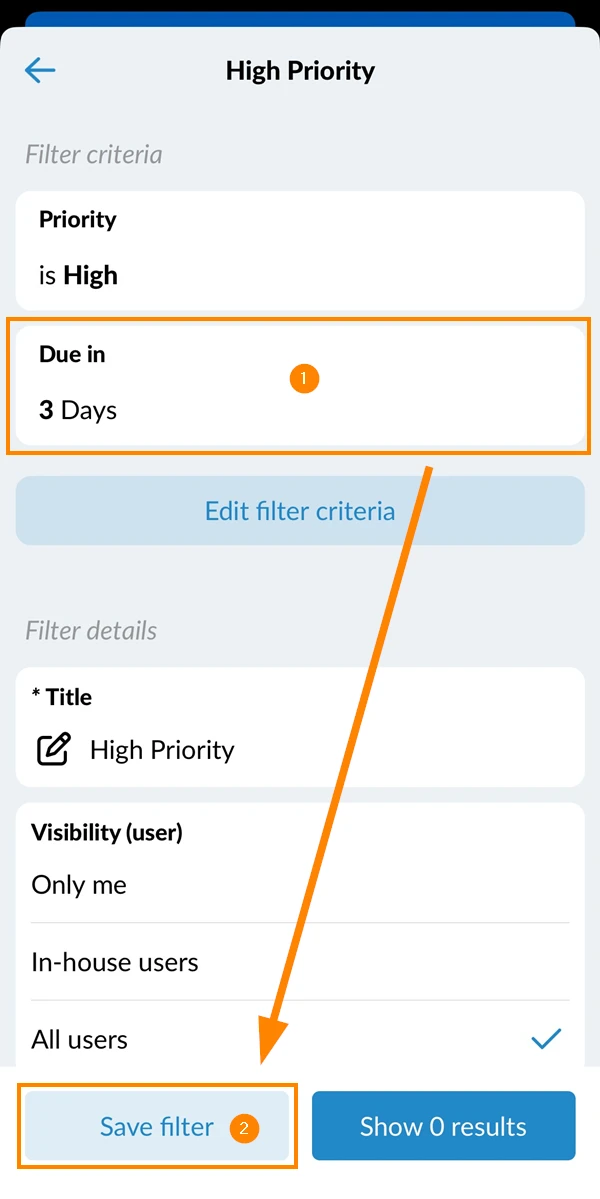
- Tap Save changes
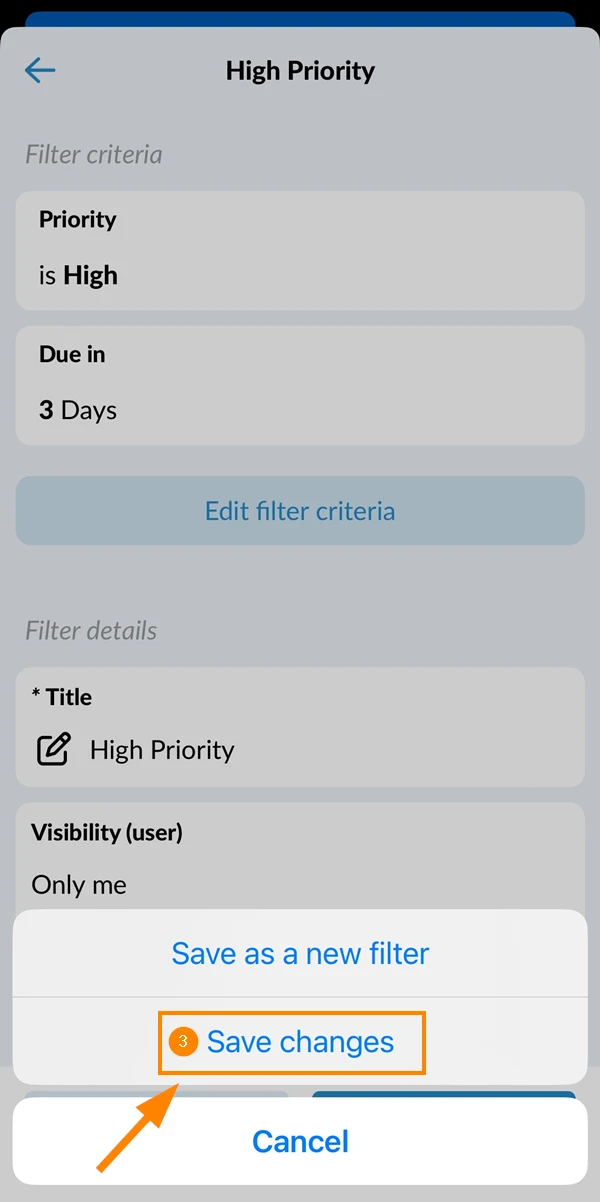
Save as a New Filter
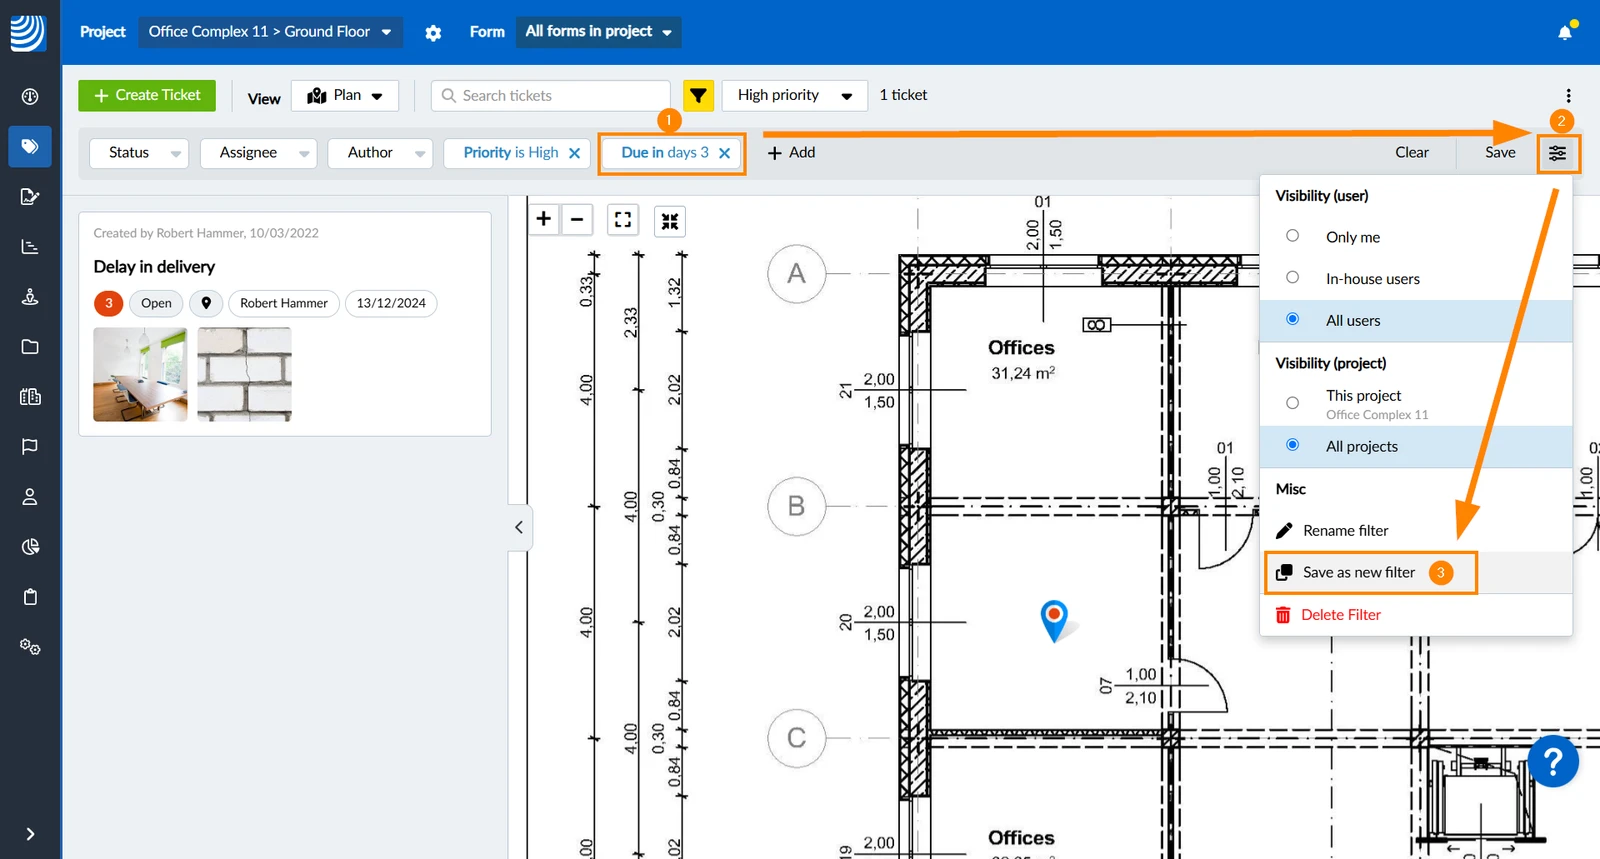
If you want to keep the existing filter named High Priority, you can save the new criteria in a new filter (instead of clicking Save changes):
- Add a criteria e.g. Due in 3 days as described above
- Click the Filter Options icon
- Click Save as new filter
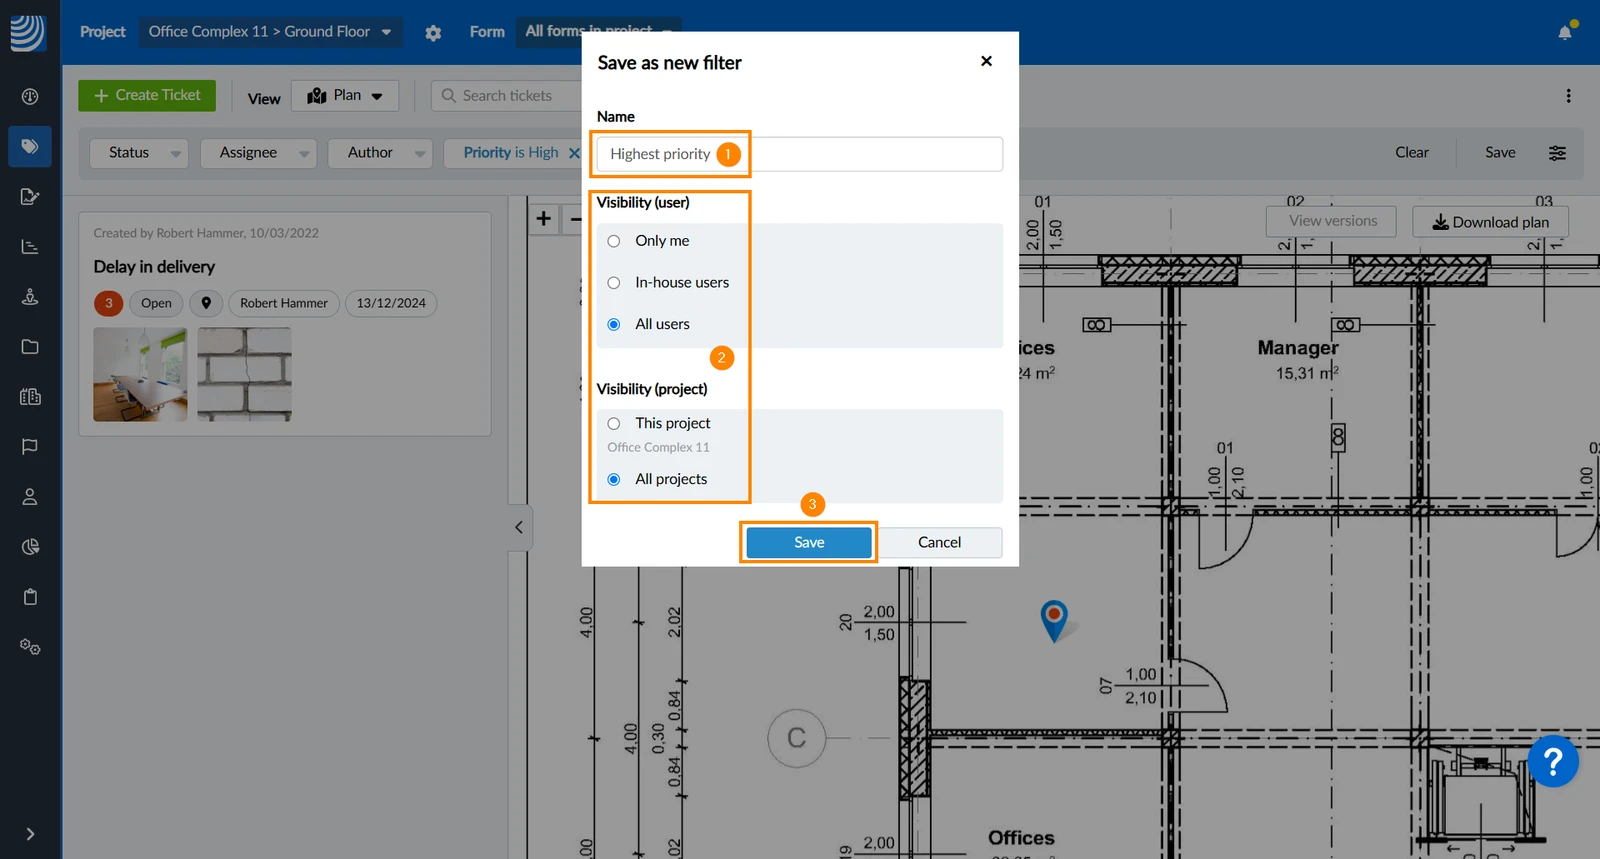
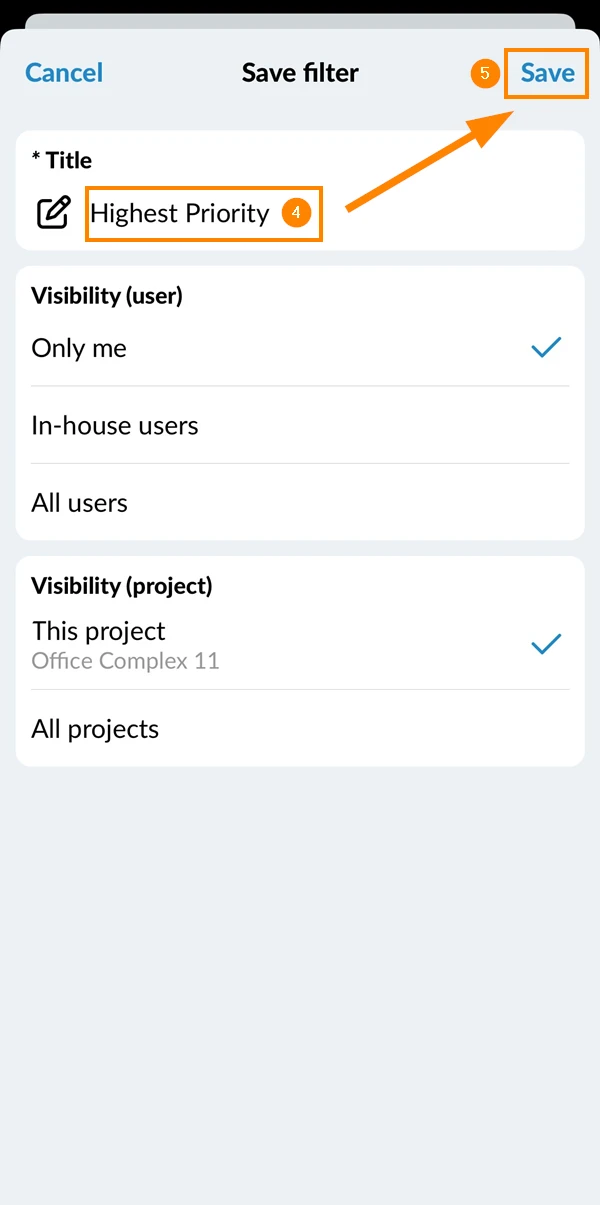
- Enter new name e.g. Highest Priority
- Select Visibility options
- Click Save
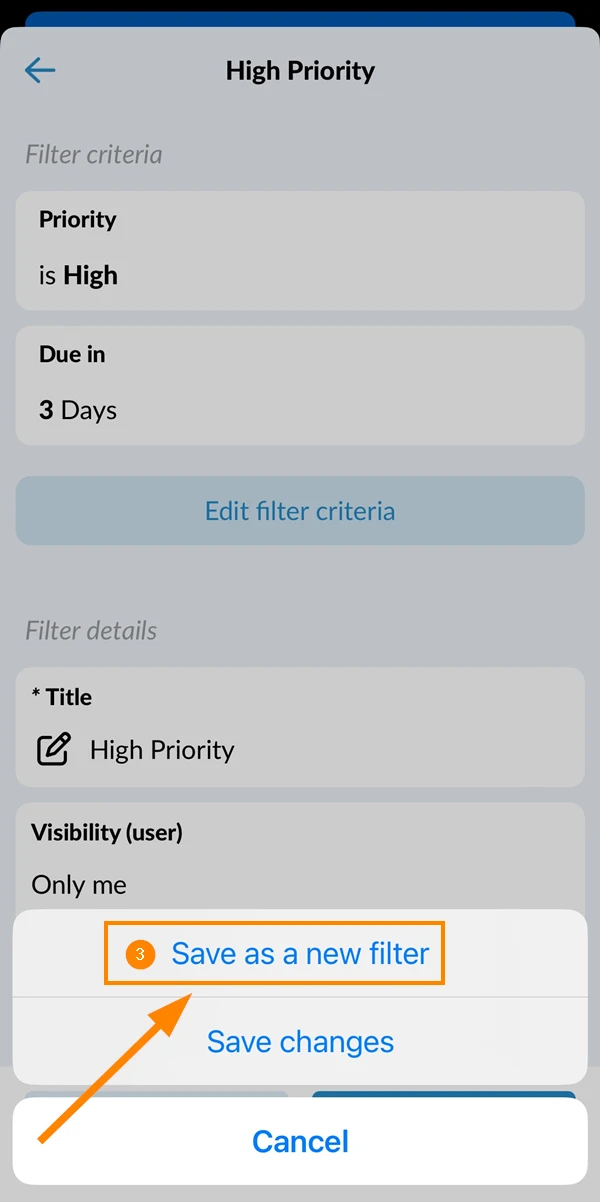
- Add a criteria e.g. Due in 3 days as described above
- Tap Save filter
- Tap Save as new filter
- Enter a new title e.g. Highest Priority
- Tap Save
Change Visibility/Share-Settings
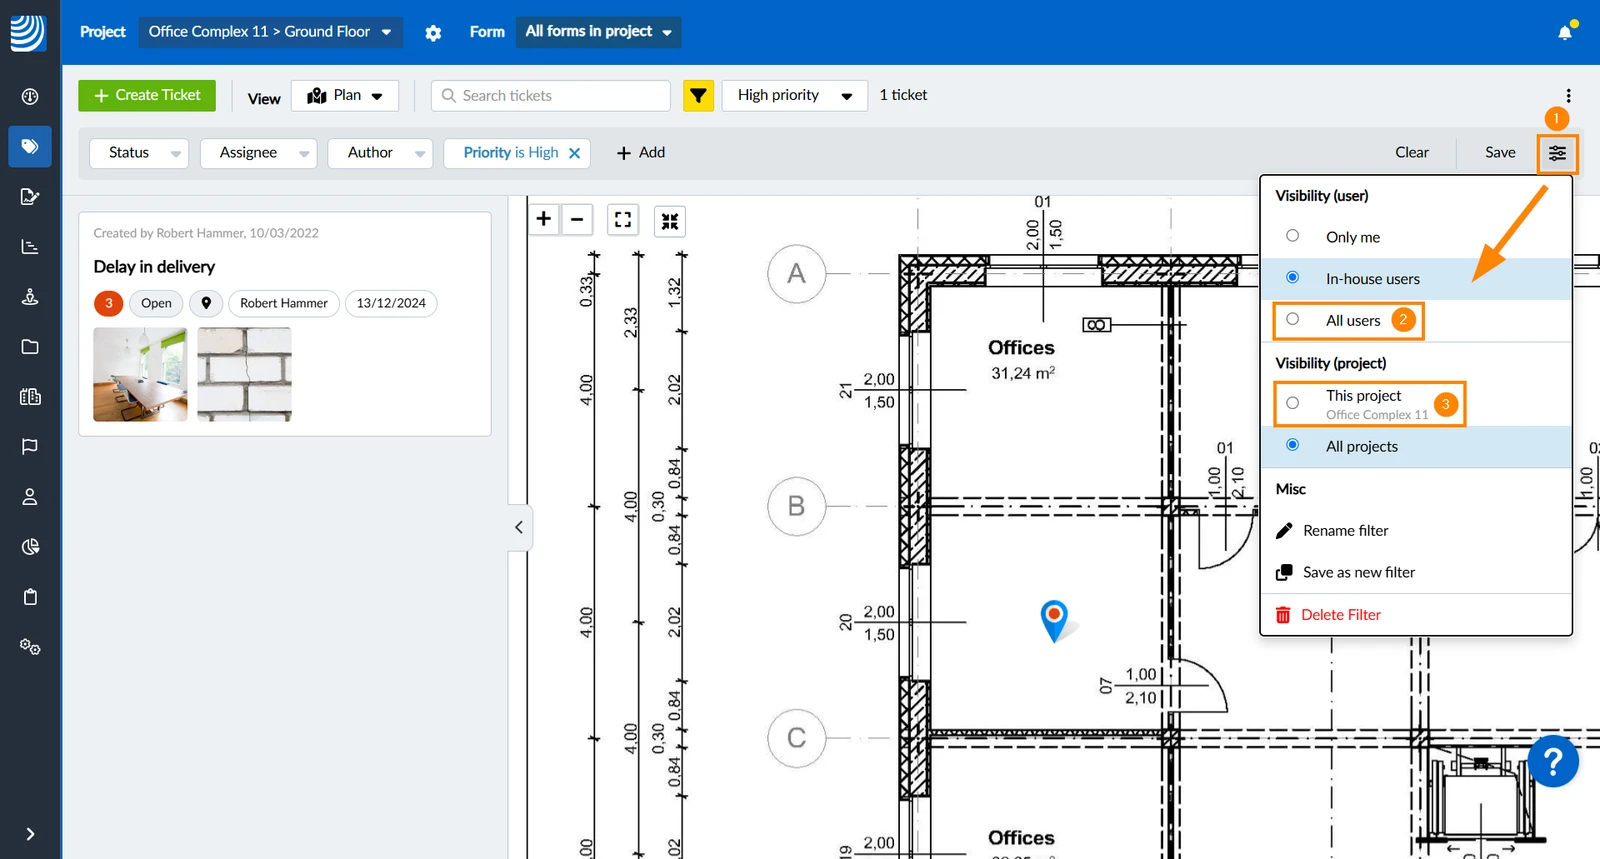
To change the users or projects for which a filter is visible:
- Click the Filter Options icon
- Select new setting for Visibility (user) e.g. All users
- Select new setting for Visibility (project) e.g. This project
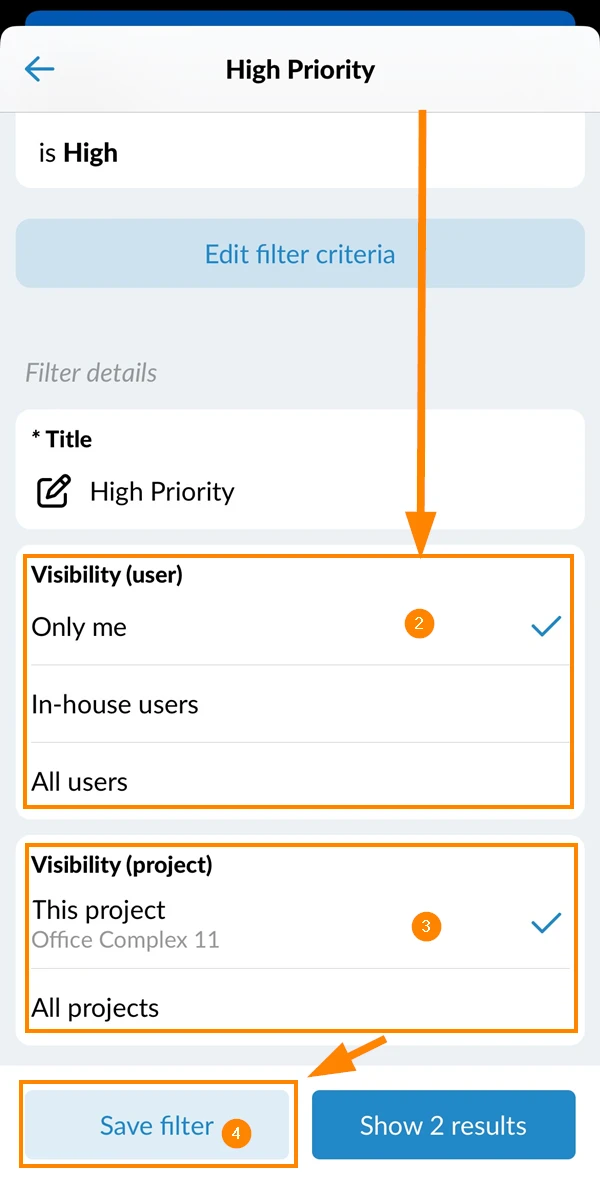
- Scroll down in the edit filter screen
- Select new setting for Visibility (user) e.g. Only me
- Select new setting for Visibility (project) e.g. This project
- Tap Save filter
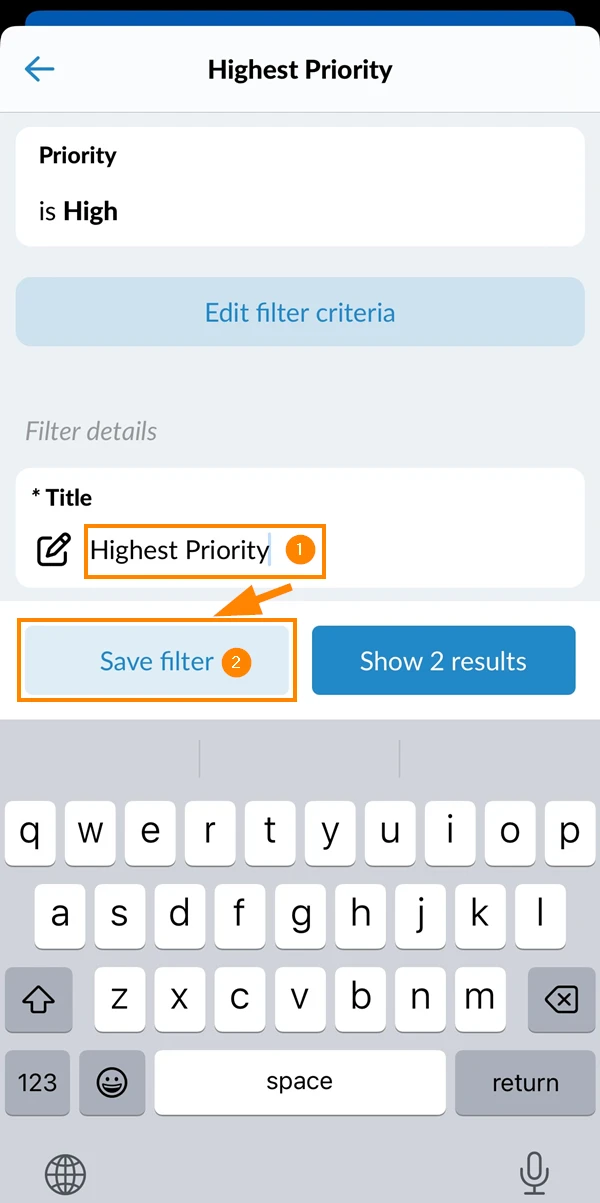
Rename Filter
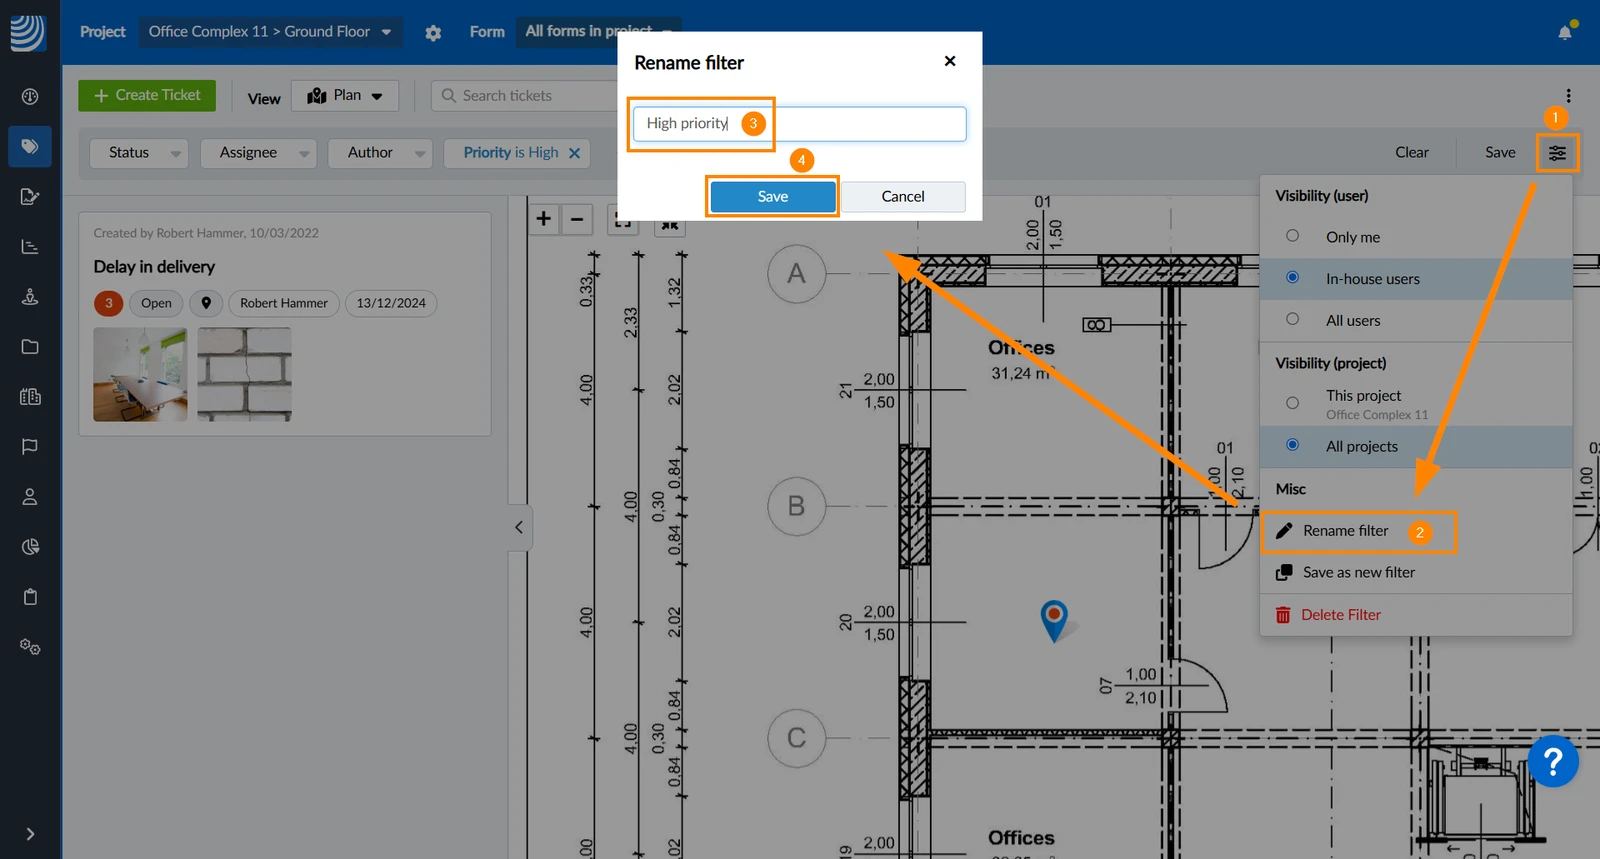
To rename a filter:
- Click the Filter Options icon
- Click Rename filter
- Enter new name
- Click Save
- Tap on the Title in the edit filter screen and enter a new title
- Tap Save filter
Delete a Filter
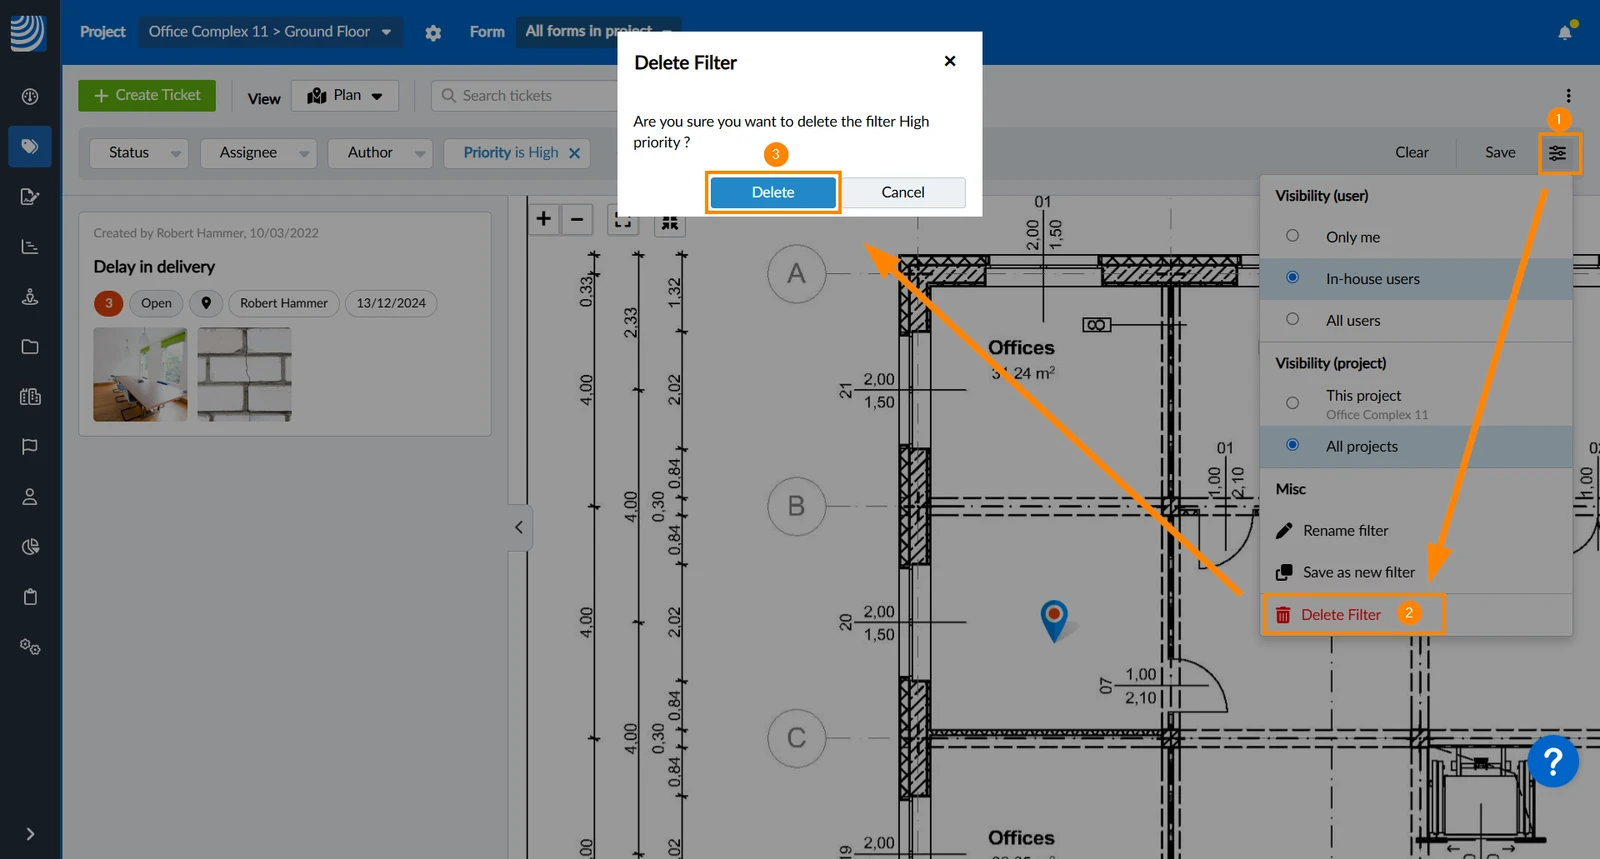
To delete a filter:
- Click the Filter Options icon
- Click Delete filter
- Click Delete
- Scroll to the bottom in the edit filter screen
- Tap Delete filter
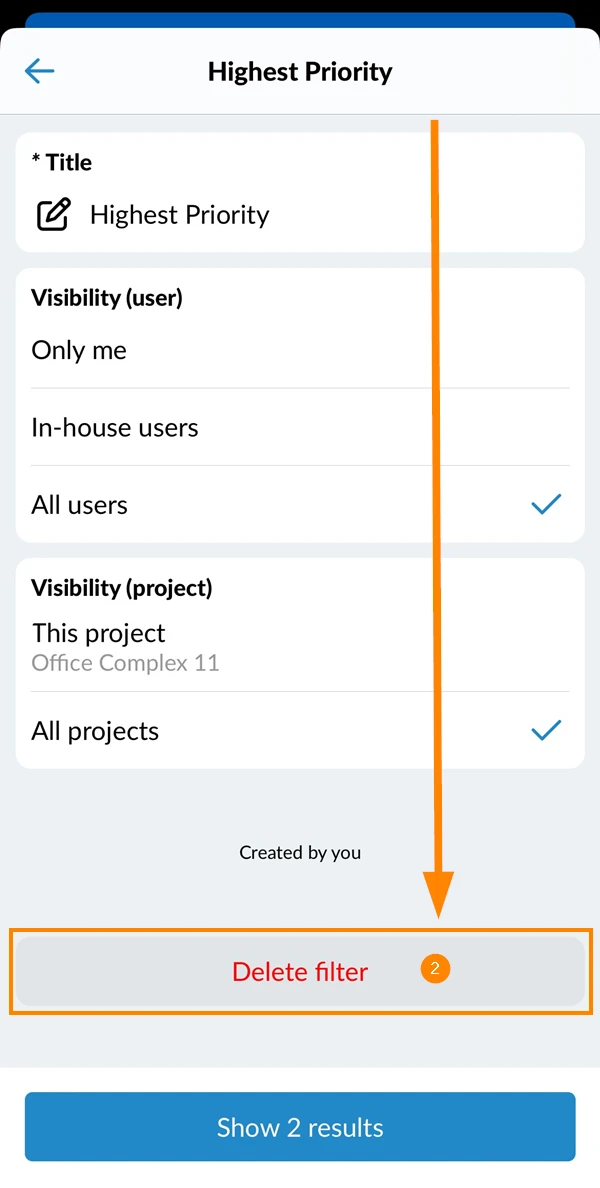
- Tap Delete
Updated February 13, 2026