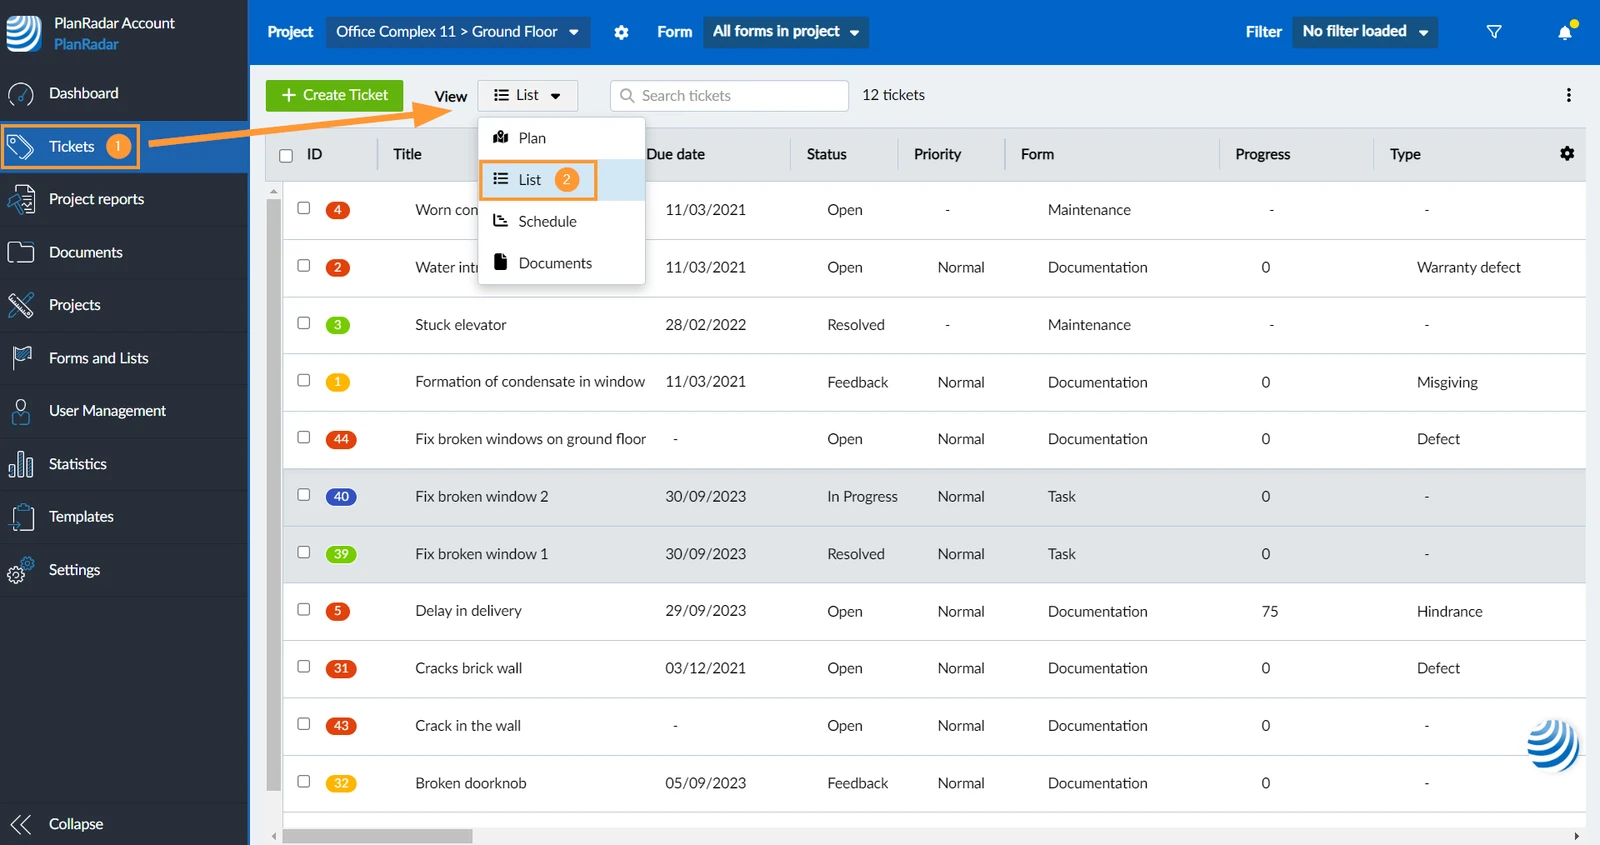
Use the tickets list view to get an overview of your tickets with all information displayed in a fully configurable table in the Webapp.
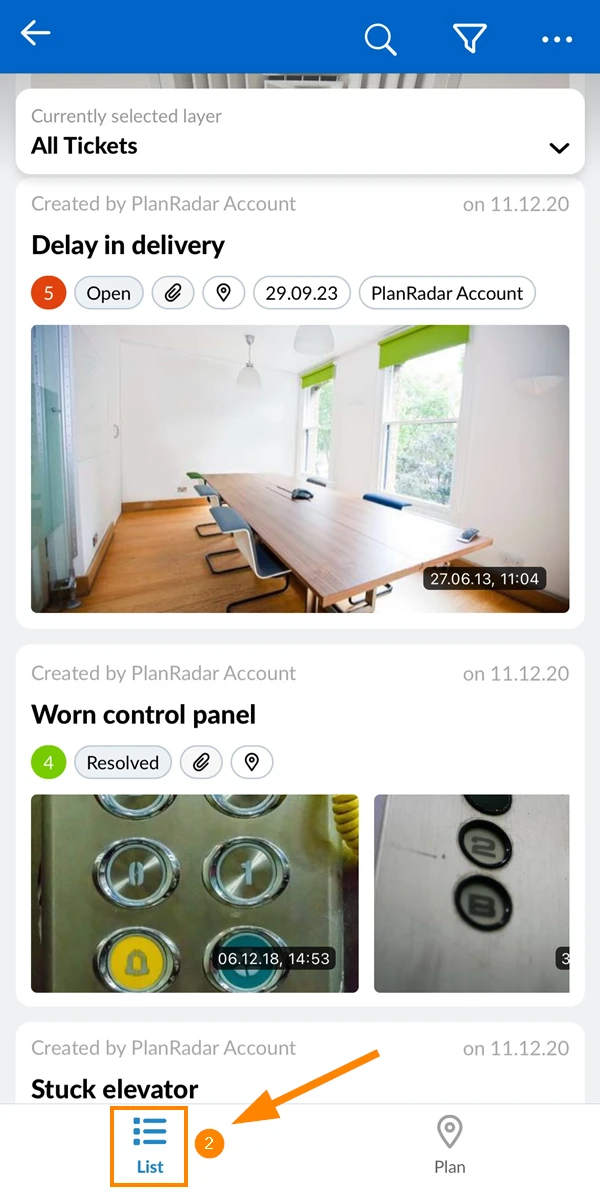
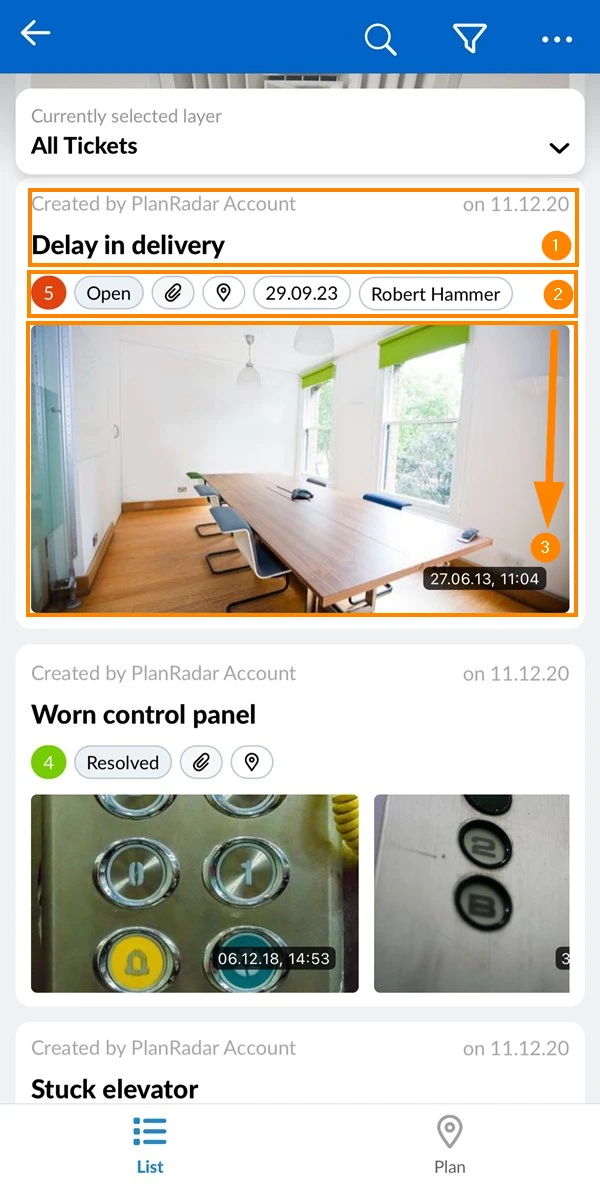
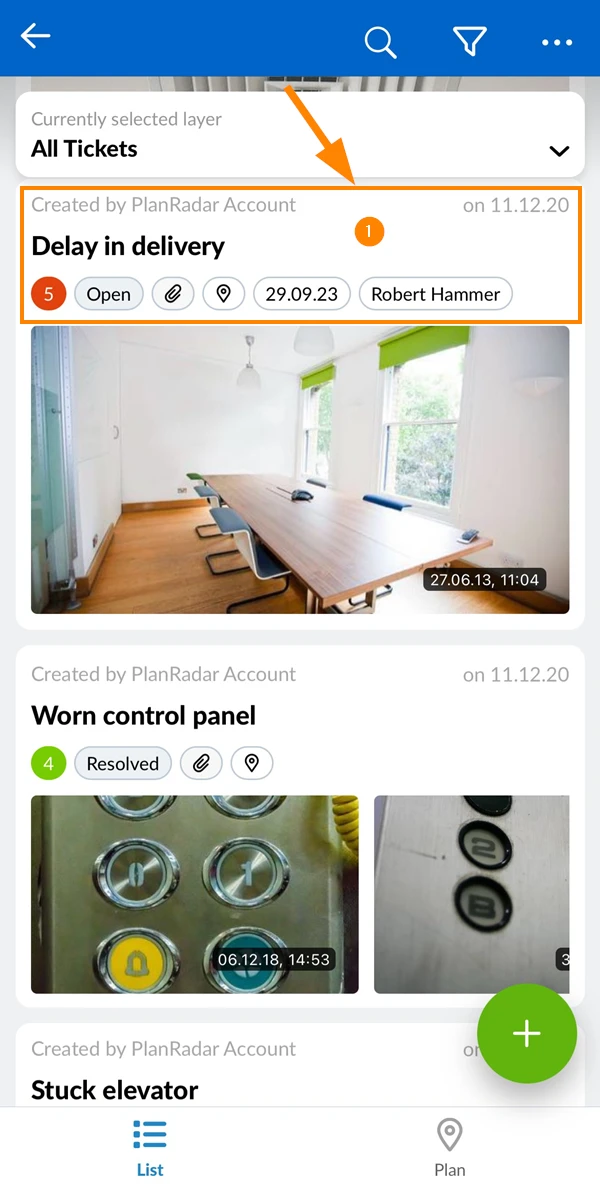
In the mobile app, the list view is not displayed as a table, but is similar to the list of tickets in the Tickets Plan View in the Webapp.
Access & Permissions
How to access Tickets List View
Click Tickets
In the View drop-down select List
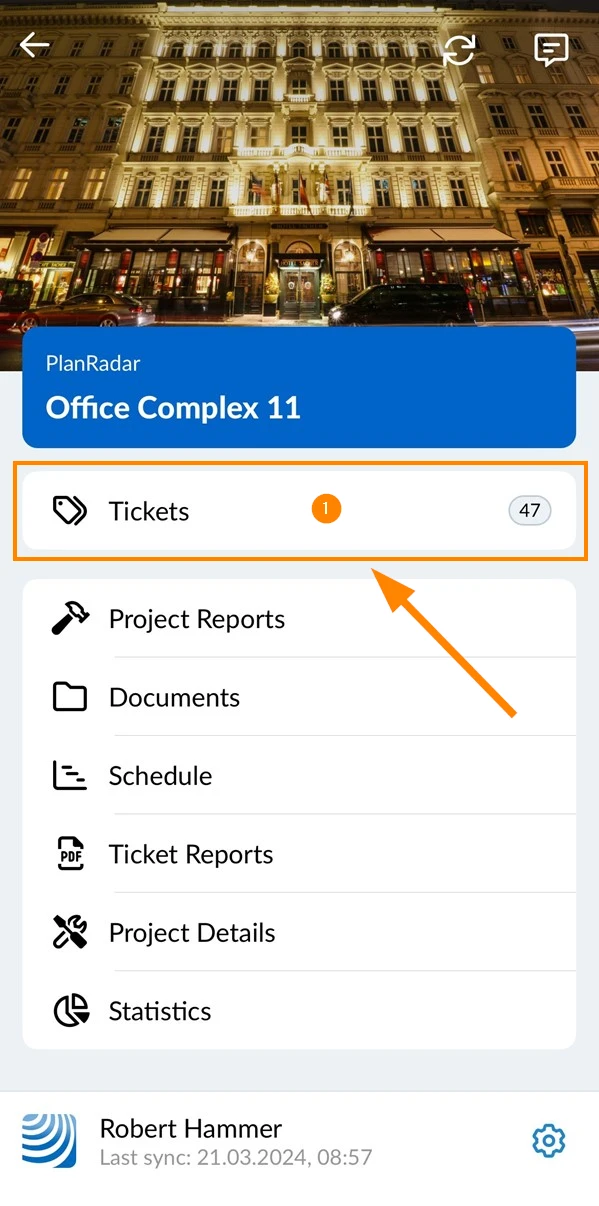
Tap Tickets in the main menu
You always start in the list view.
Tap List if you worked on the plan view before.
Tickets List View
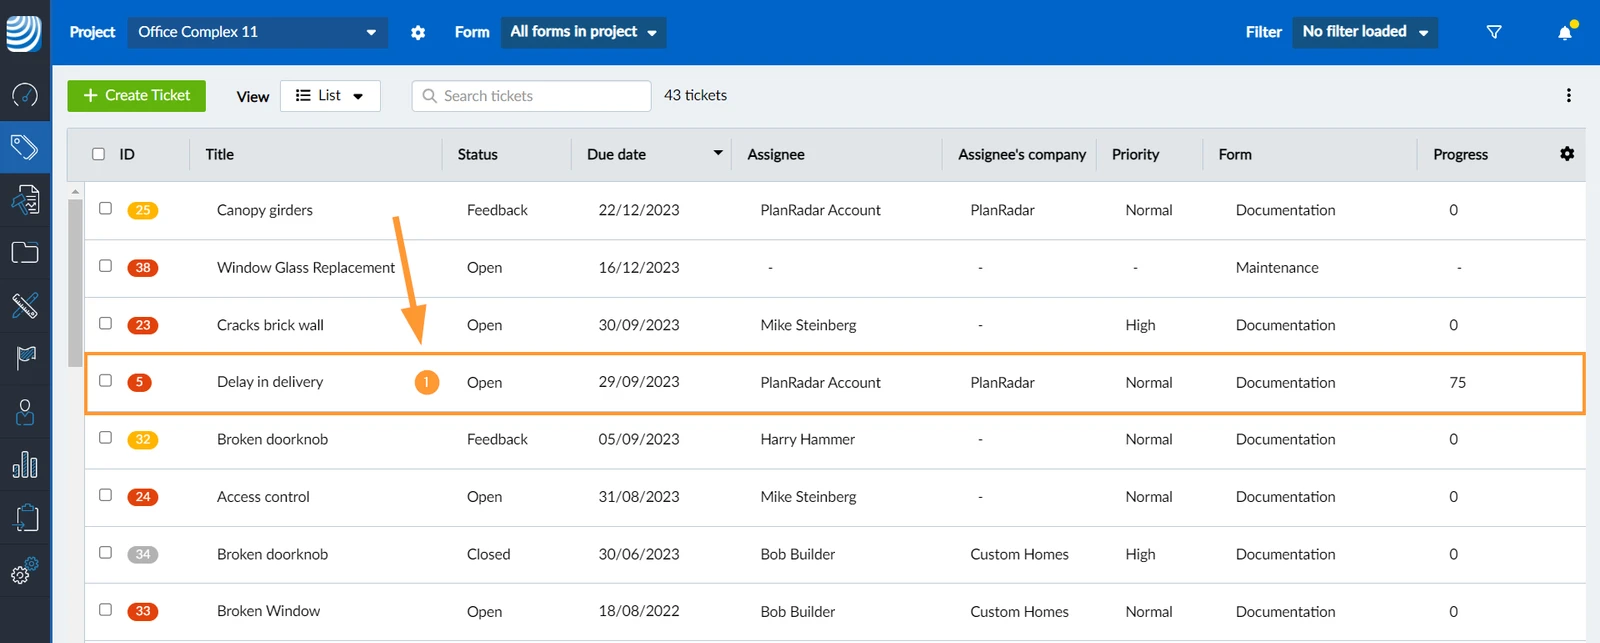
In the toolbar you select the project, layer, form and filter to define which tickets are displayed in the tickets list view table.
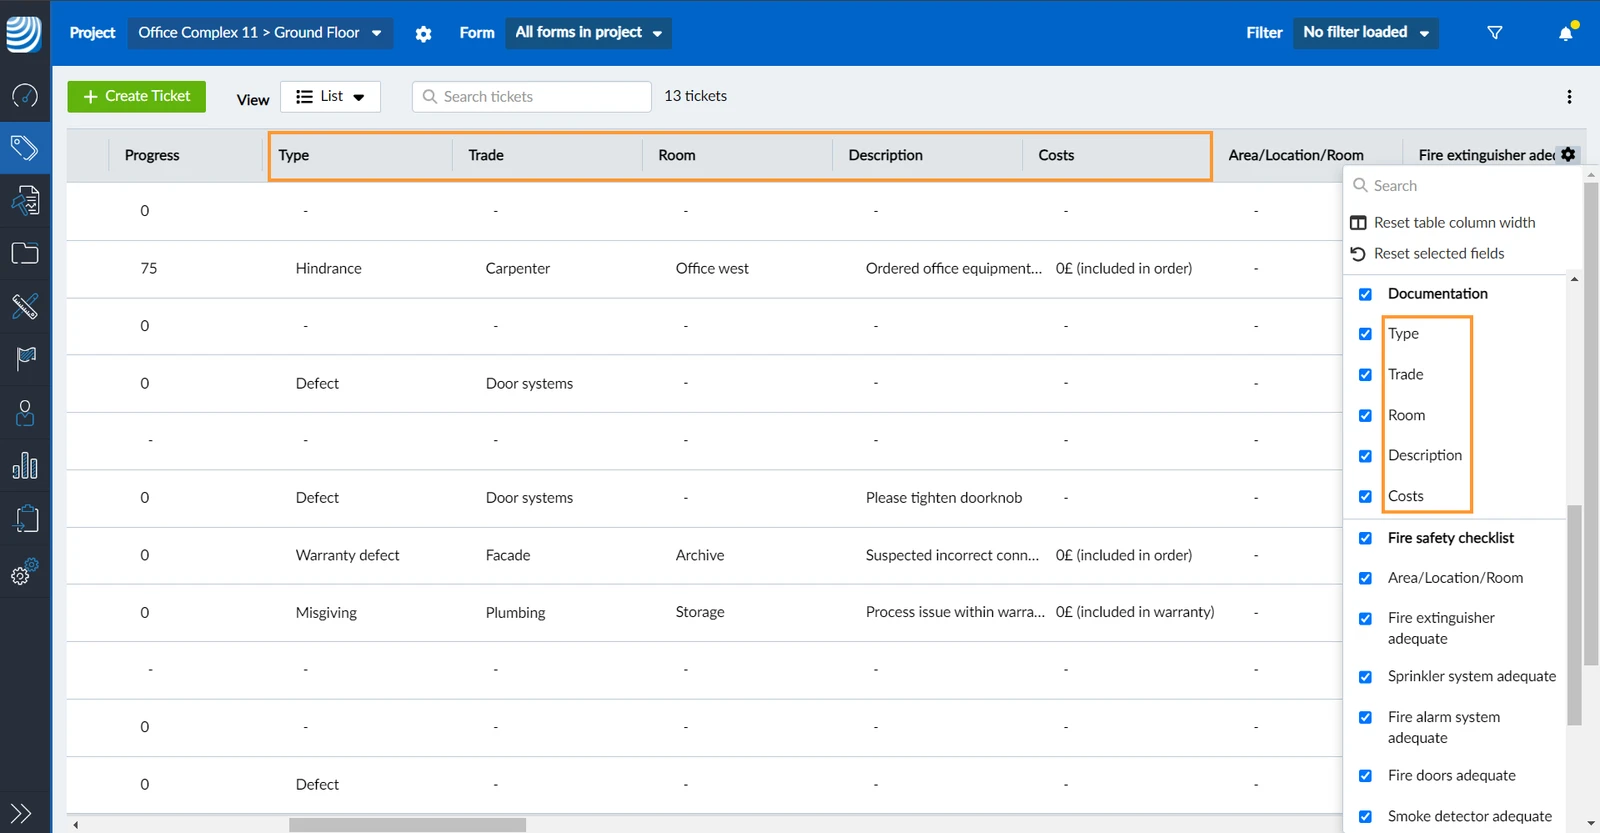
The table shows a row for each ticket and a column for each ticket field. The columns are grouped by form, starting with the predefined/default fields that can be used in all forms.
Depending on the forms of the tickets that are currently displayed, the table columns will adapt automatically to show all the relevant ticket fields.
Customise the Table
Customise your tickets list table with the following options:
Sort by column
Change column order
Change column width
Show/hide columns
Initially you see tickets of all layers. Selecting a layer works the same for plan view and list view.
To open a ticket and view it's details or edit it:
Click the ticket in the table
You can also quickly edit single ticket fields without opening the ticket.
Tap on the ticket in the list
Select & Edit Multiple Tickets in the Webapp
In the tickets list view you can select multiple tickets. This allows you to edit or delete them, create a ticket report, or add them to your schedule.
Select
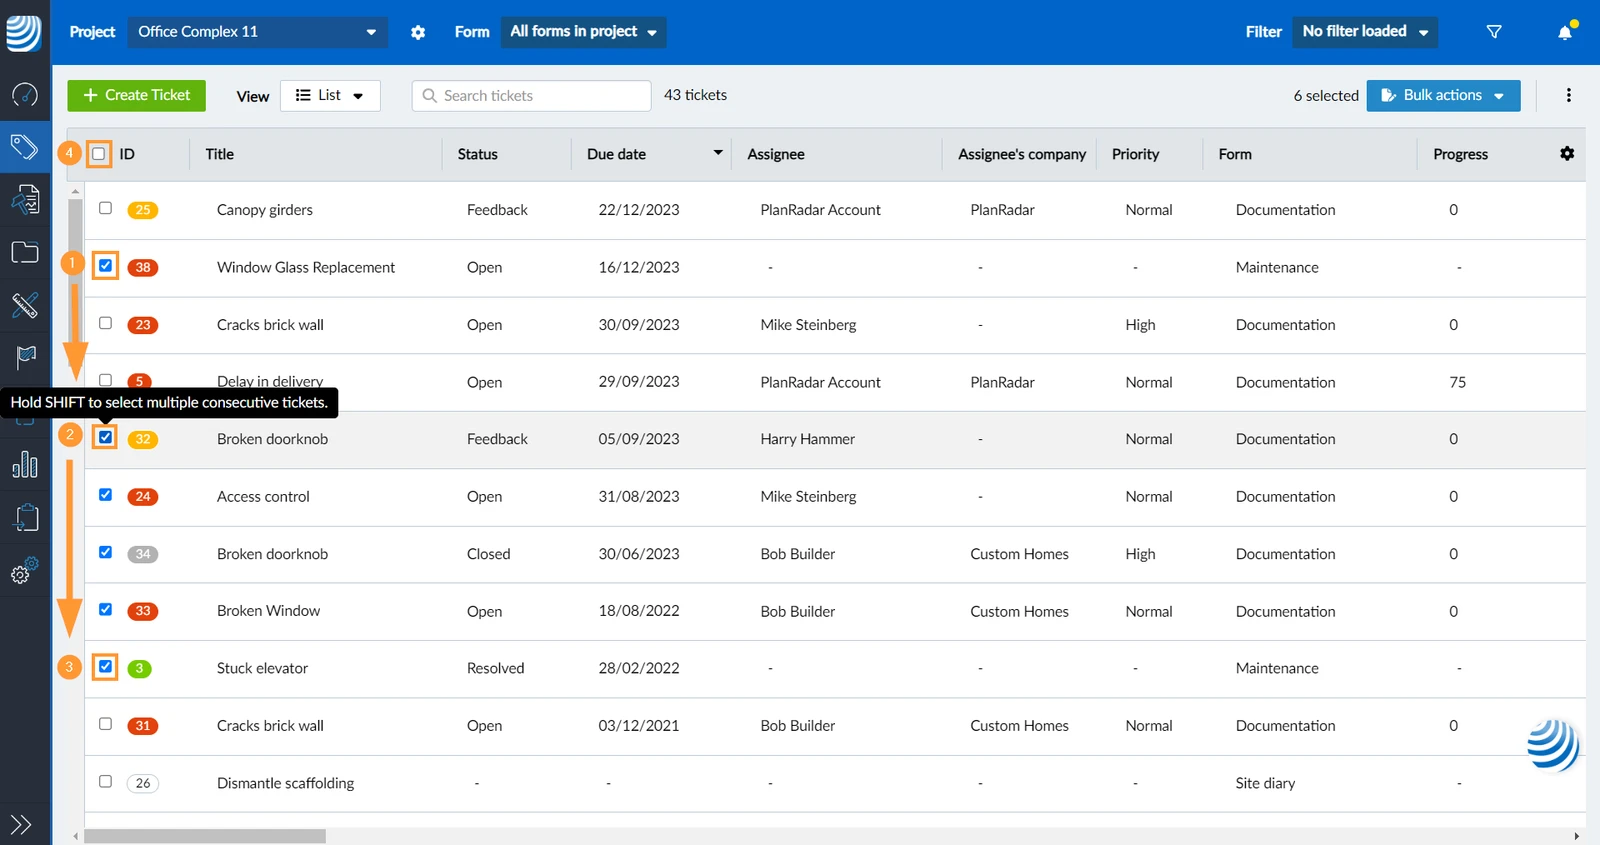
Select the checkbox next to the ticket ID to select a single ticket. (repeat)
Select another ticket checkbox.
Hold the Shift button on your keyboard and select another ticket checkbox.
→ All ticket between get selected this way.
Use the checkbox in the header row to select/deselect all tickets.
Edit
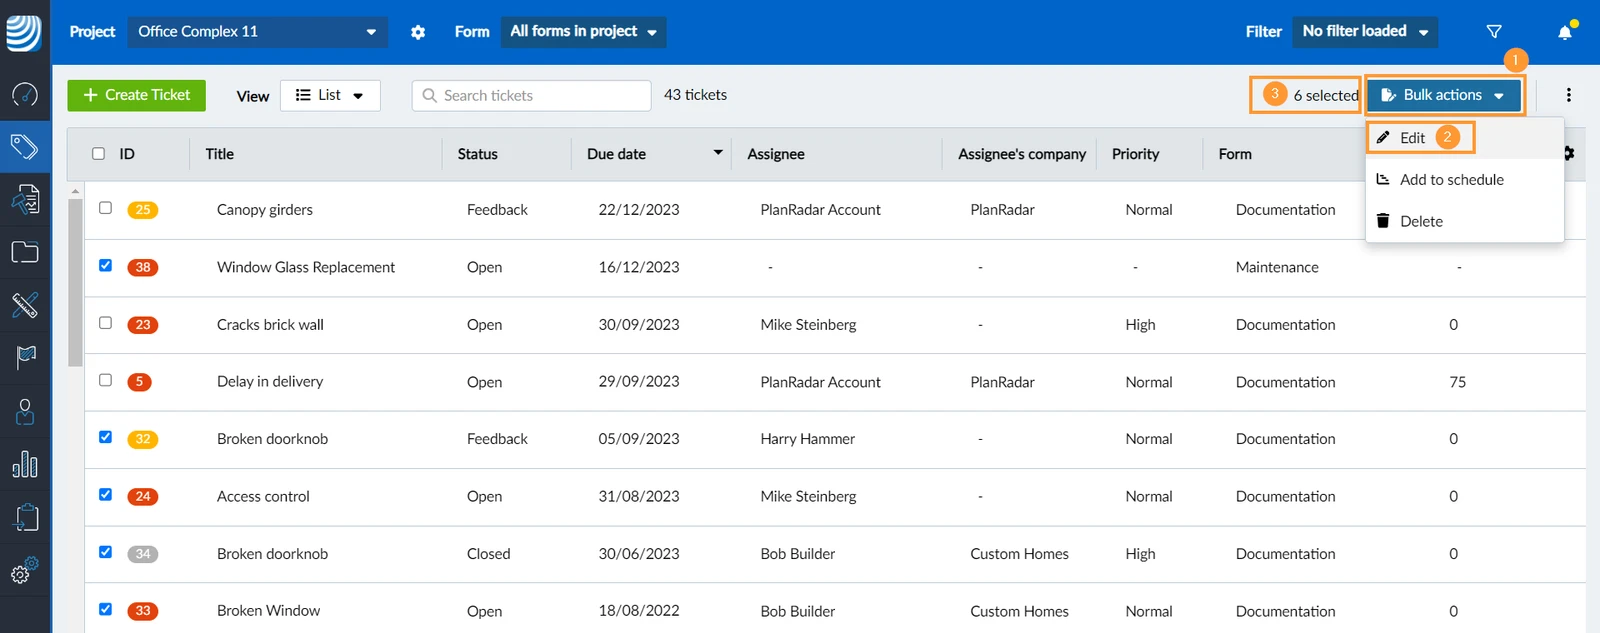
To edit one or multiple ticket fields of the selected tickets:
Click Bulk actions (hidden if no tickets are selected)
Click Edit
Info: See the number of selected tickets.
Delete
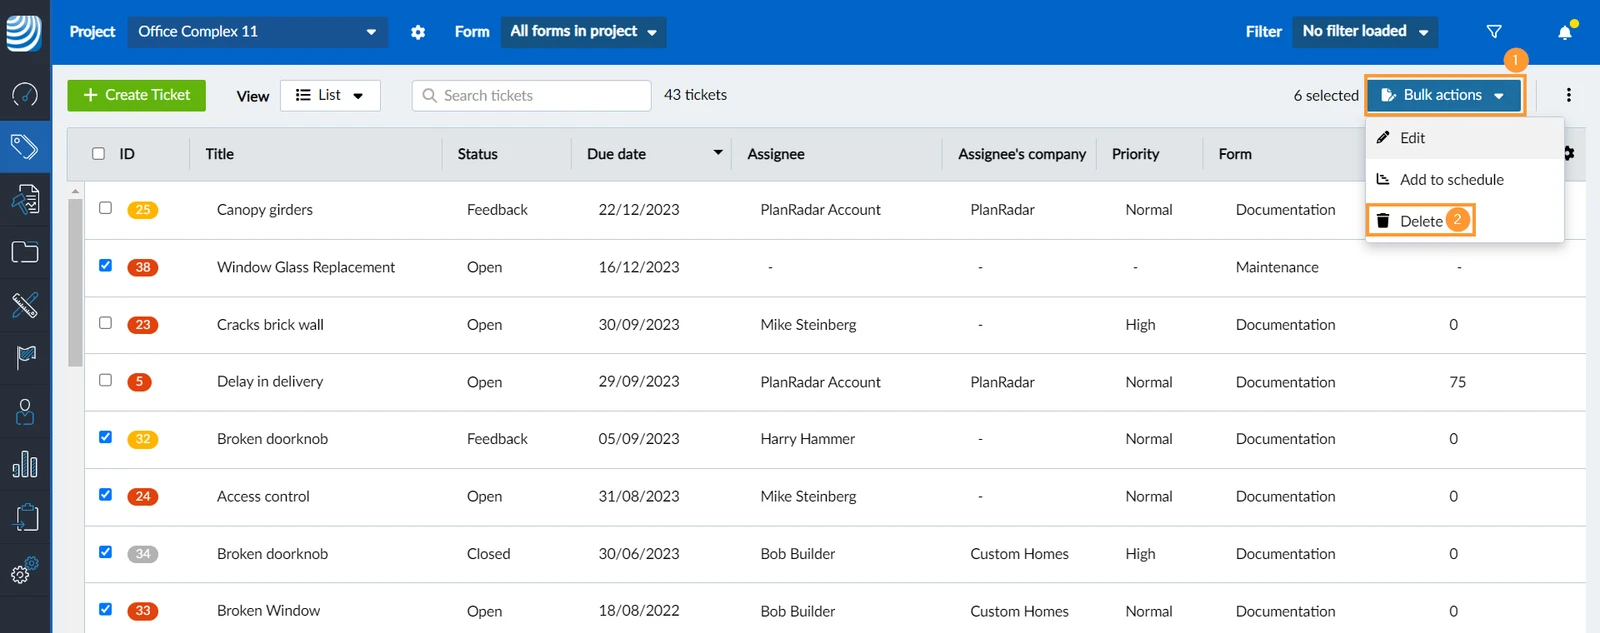
To delete one or multiple tickets in the list view:
Click Bulk actions (hidden if no tickets are selected)
Click Delete
Click Delete to confirm
Create Ticket Report
You can create ticket reports by selecting multiple tickets or by using filters.
Add to Schedule
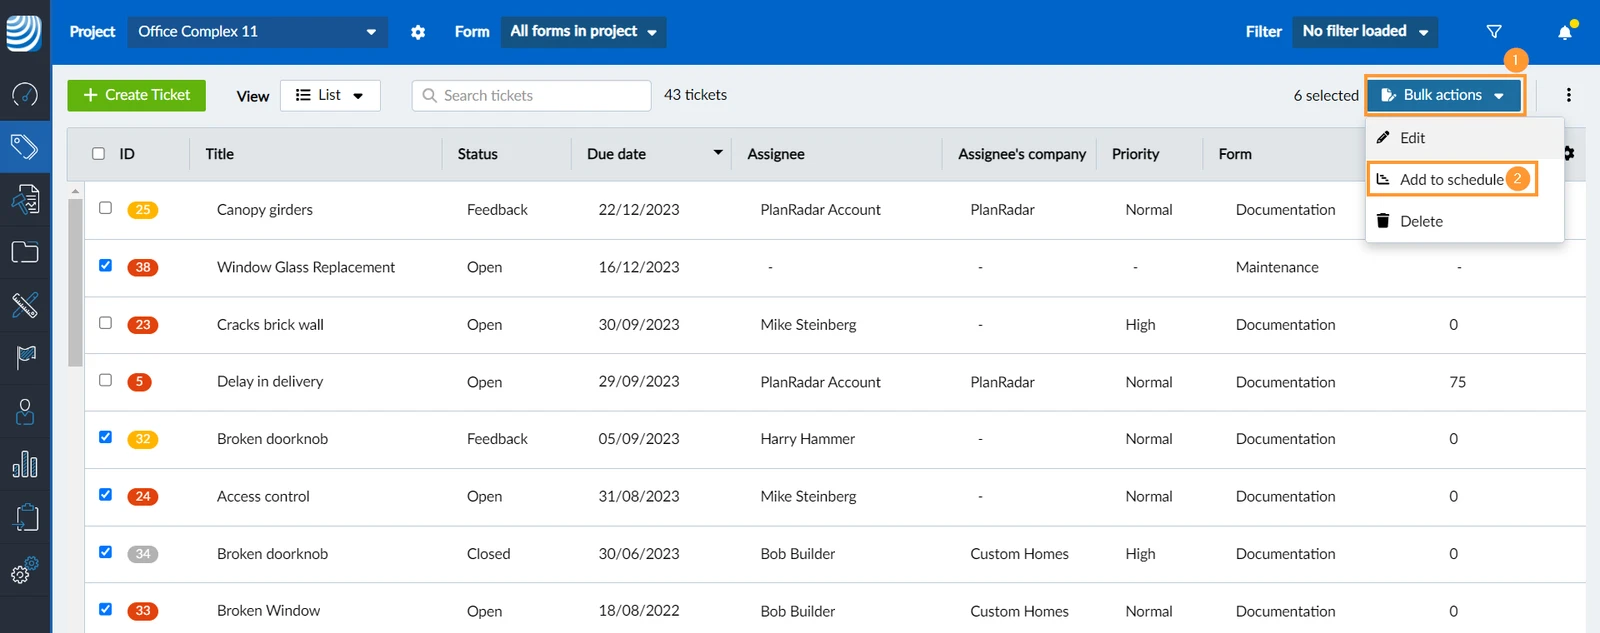
All selected tickets will be added to the same parent phase in your schedule.
Click Bulk actions (hidden if no tickets are selected)
Click Add to schedule 

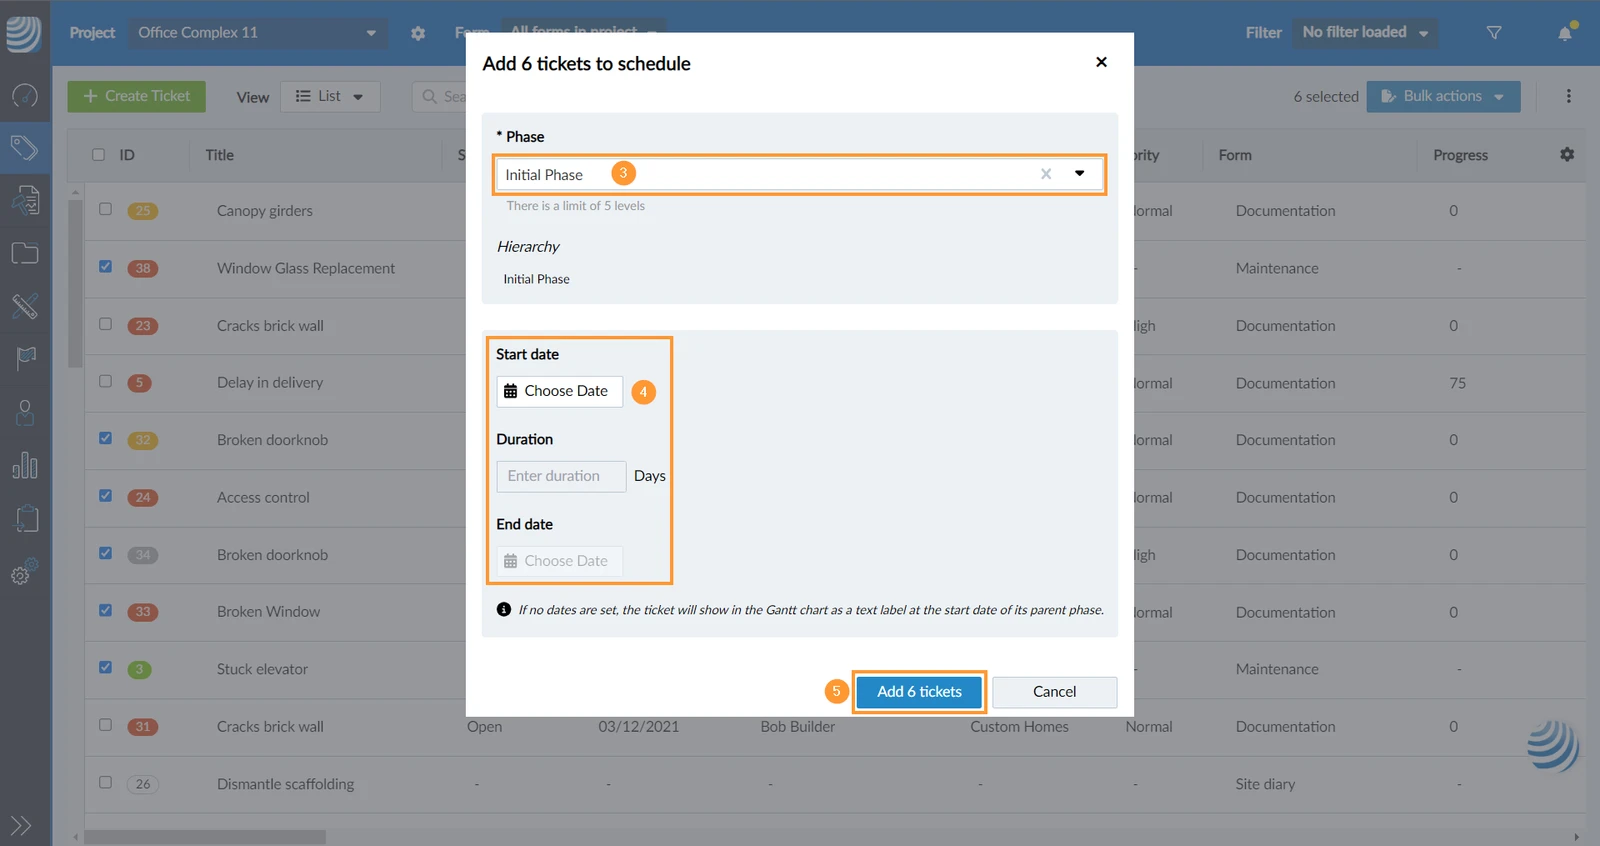
In the Phase drop-down select a phase e.g. Initial Phase.
Optional: Set a start date and duration or end date.
Click Add 6 tickets to confirm. (button always shows the number of tickets) 



 Deutsch
 Español
 Français
 Hrvatski
 Italiano
 Polski
 Português (BR)