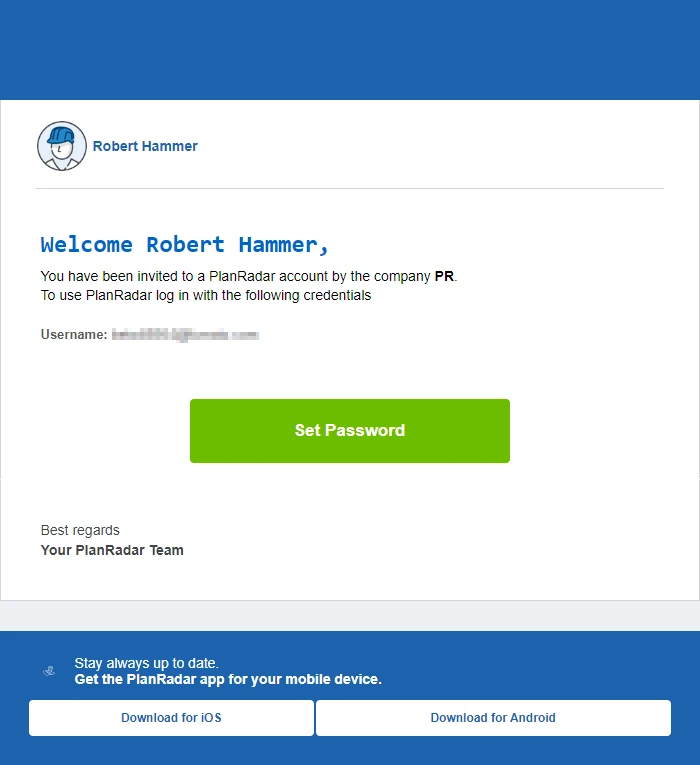
You should have received an invitation email from PlanRadar with your username and a link to set your password. This email also contains links to download the mobile app.
Download the Mobile App
Besides the PlanRadar Webapp which you can run in any common browser, PlanRadar provides mobile apps for iOS and Android that make working on site even more convenient. With the mobile apps, you can continue working even without an internet connection.
To get the mobile app on your smartphone or tablet you have three options:
Open the link at the bottom of your invitation email on your mobile device
Or open the AppStore or PlayStore and search for PlanRadar.
Mobile & Webapp Instructions
If you want to learn how to use the Webapp in a browser on a computer continue reading in the Webapp tab. If you want to learn how to work on-site with a smartphone or tablet, continue reading the instructions in the Mobile tab.
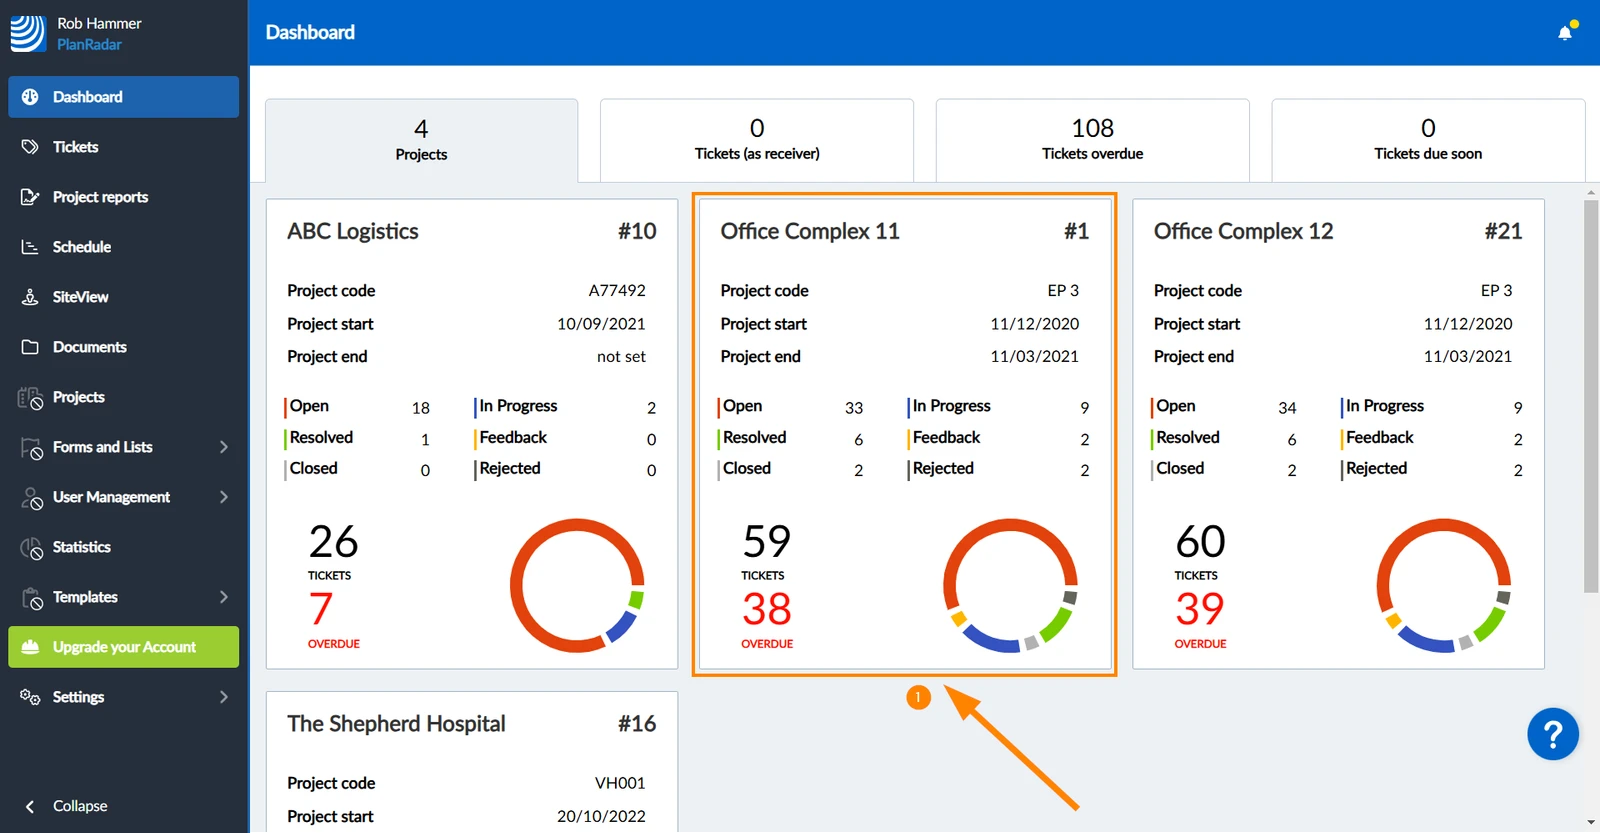
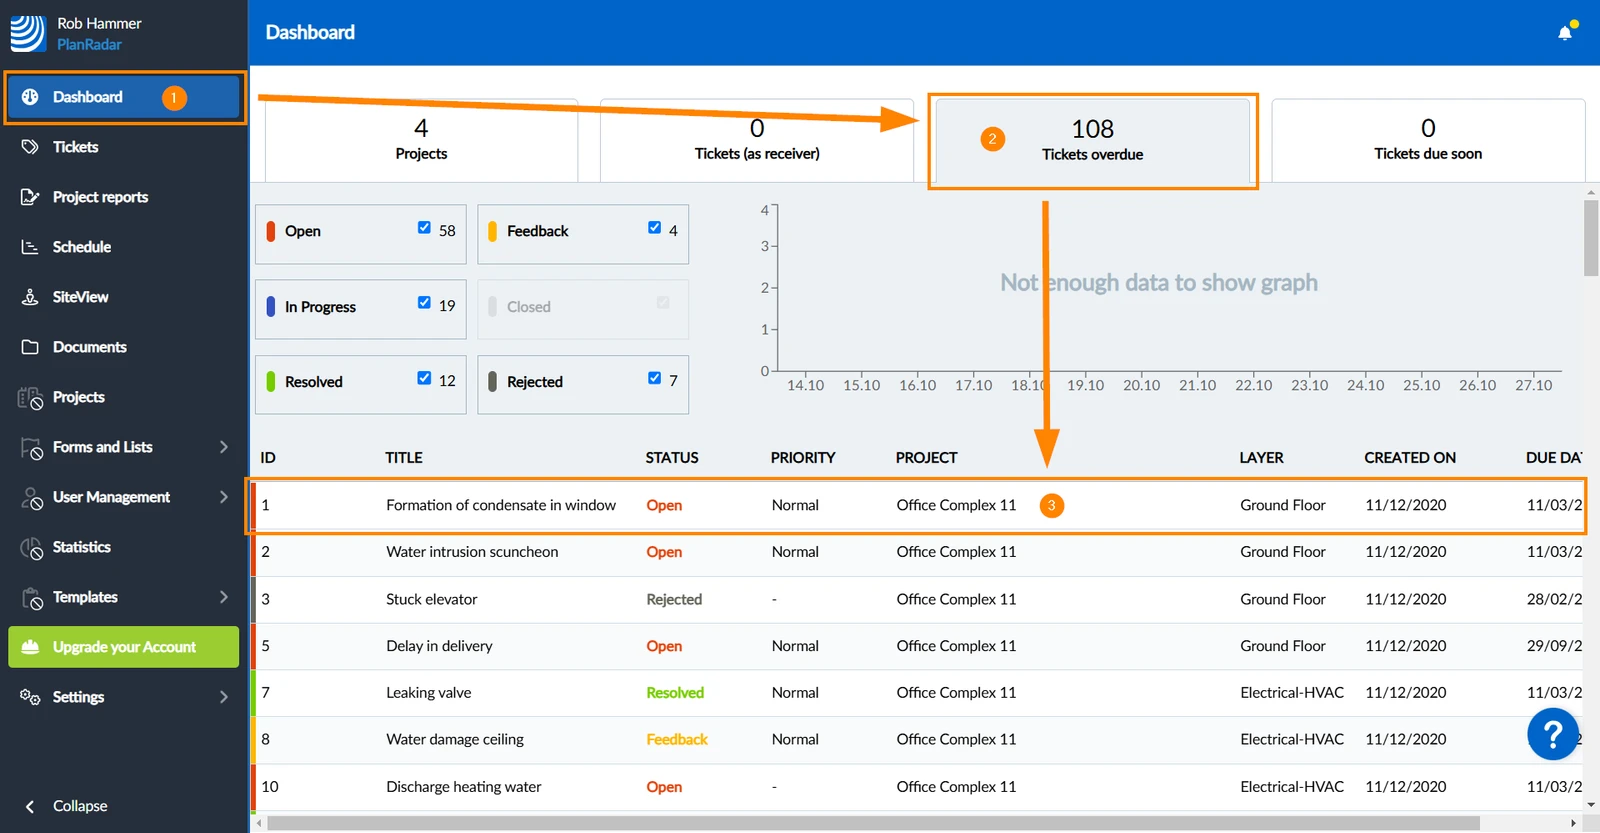
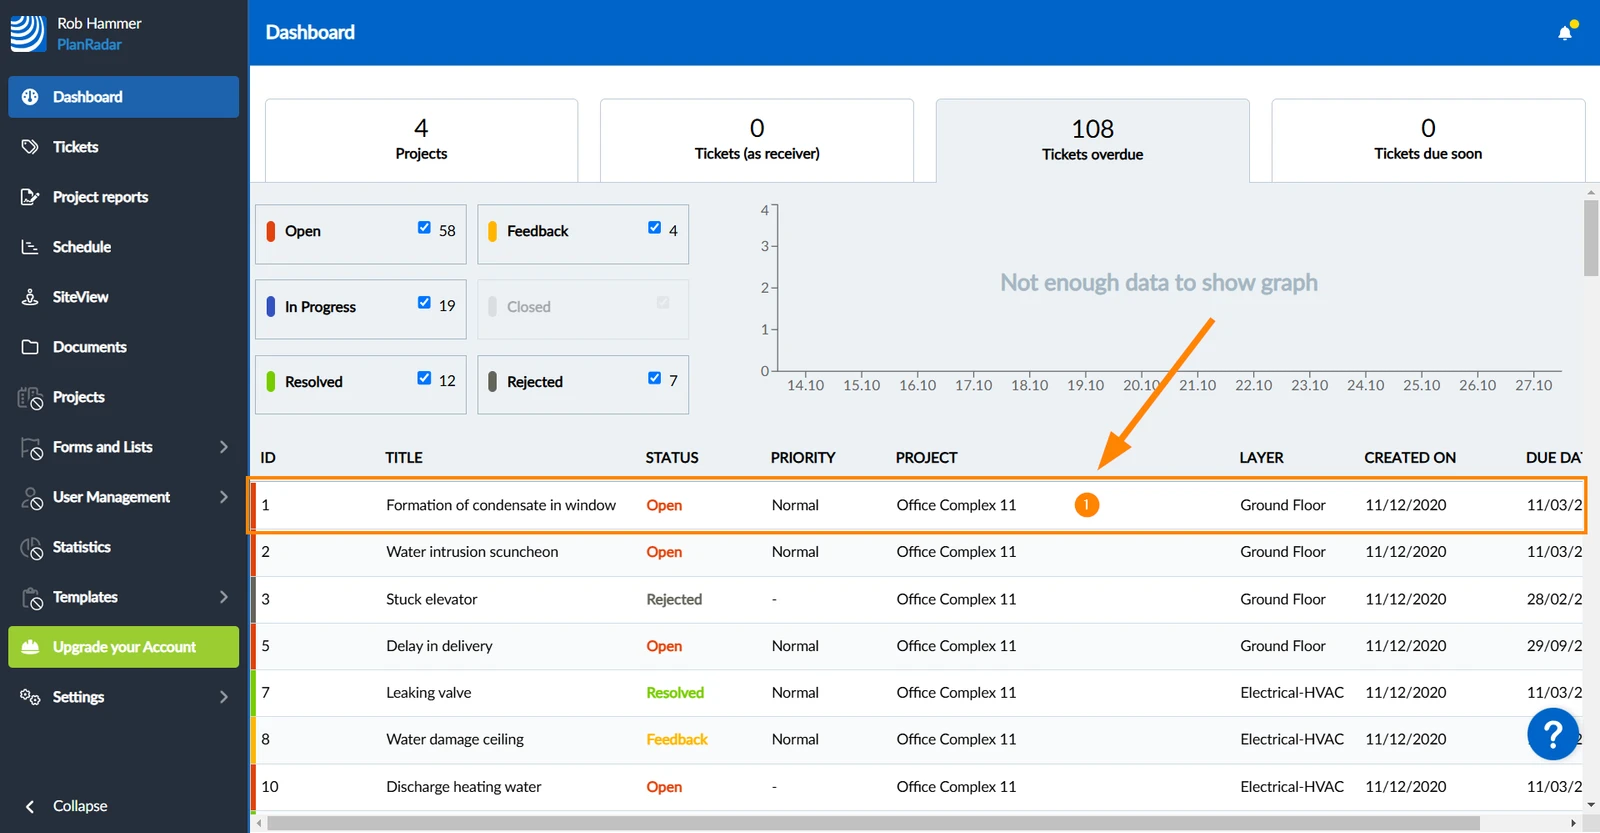
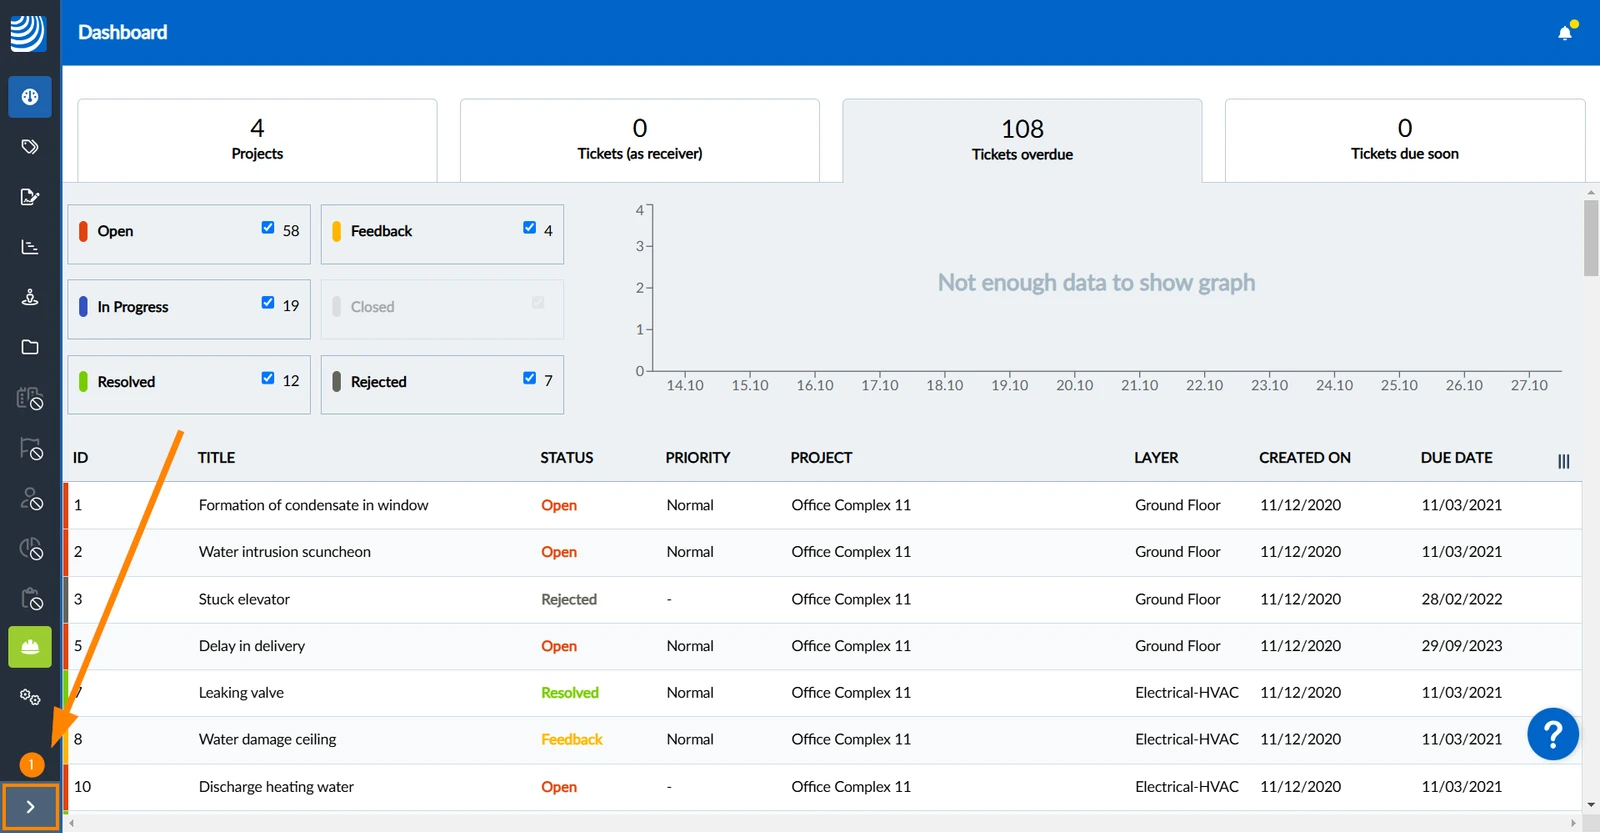
From the dashboard you can quickly view a list of all overdue tickets (i.e. due date is in the past and status is not closed or resolved).
To view a list of all overdue tickets of your projects:
Click Dashboard
Click Overdue tickets to show a list of overdue tickets of your projects.
Overdue Tickets
View a Ticket
To view a ticket:
Click on the ticket in the list:
View Ticket Details
What you see in the ticket details depends on the ticket form. Read more in Forms.
One of the most common ticket from fields is the status field. Each status has a different colour to visualise the progress of tickets in the list view and also in the plan view.
Read more in Status Colours & Ticket Pins.
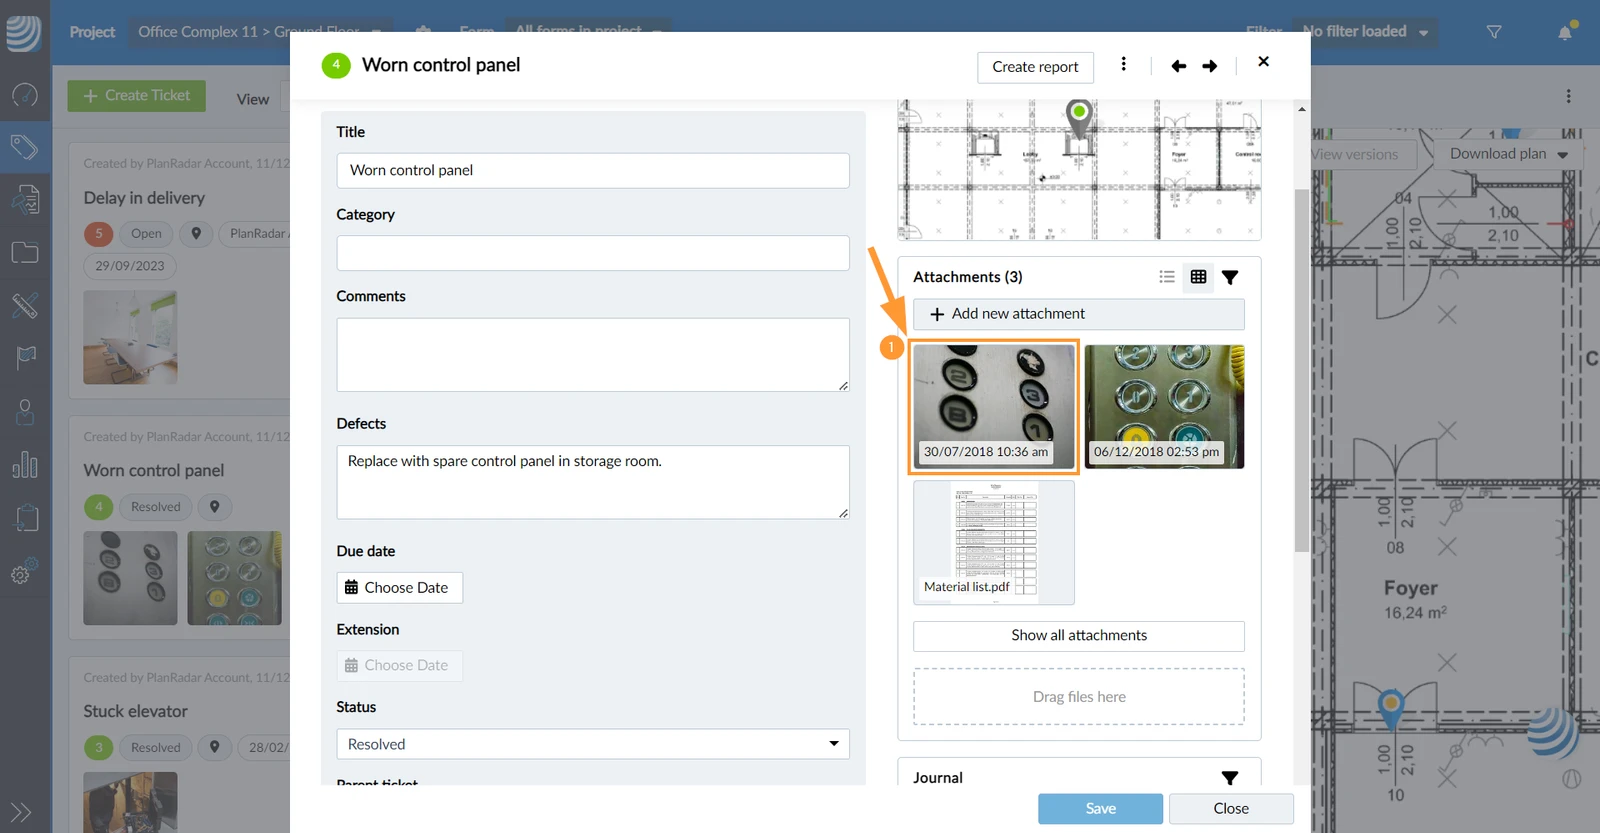
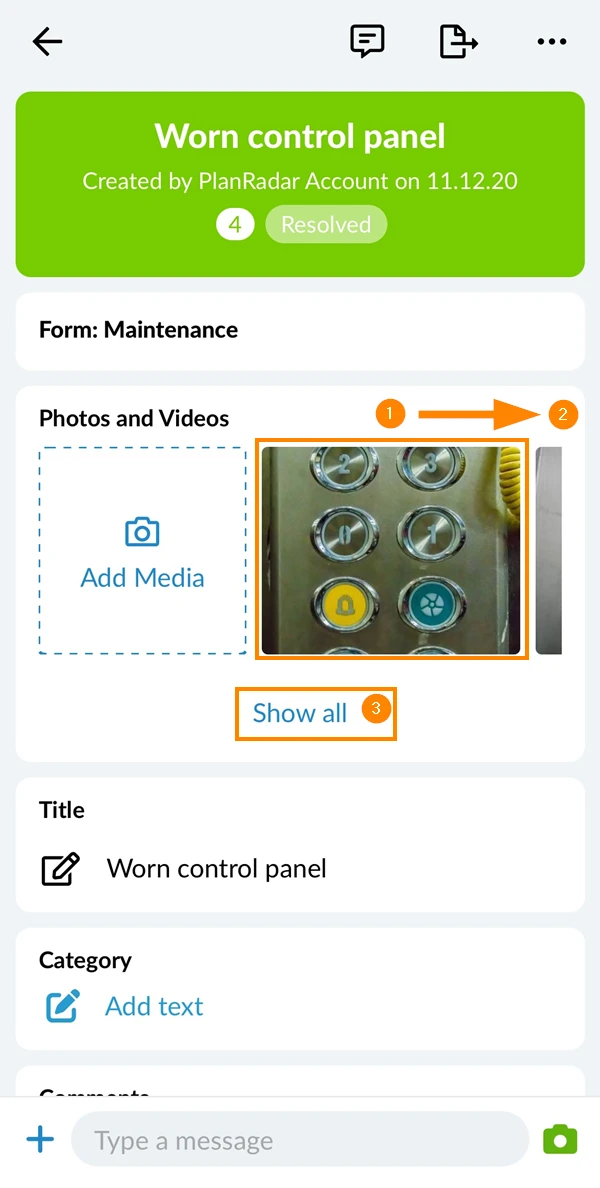
Photos, videos, voice recordings, PDFs and Microsoft Office files can be viewed/played directly in PlanRadar.
To view attachments:
Click on the thumbnail in the attachment preview or gallery
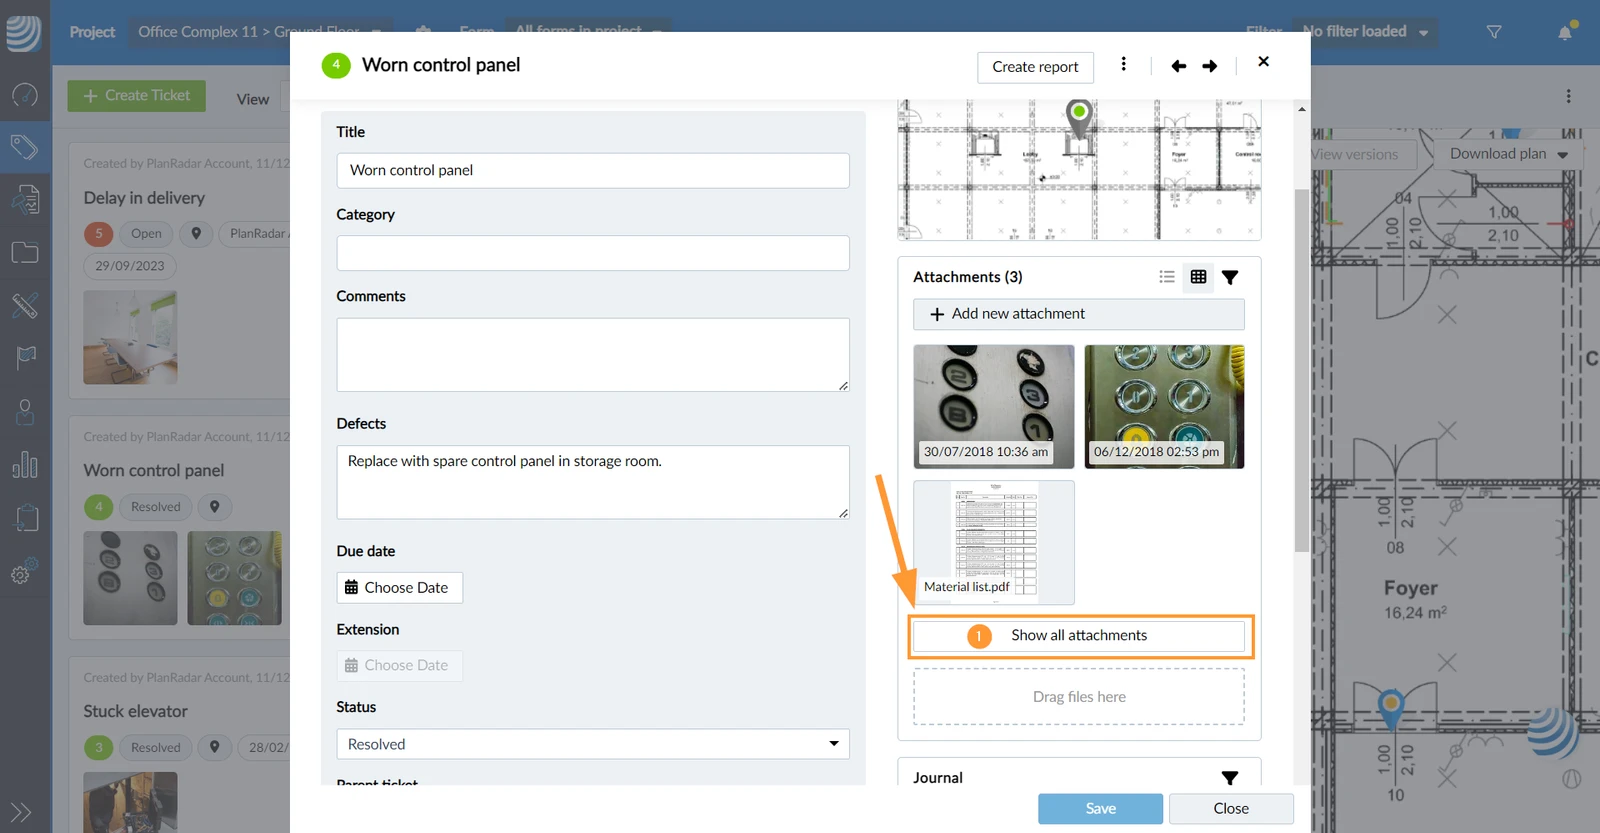
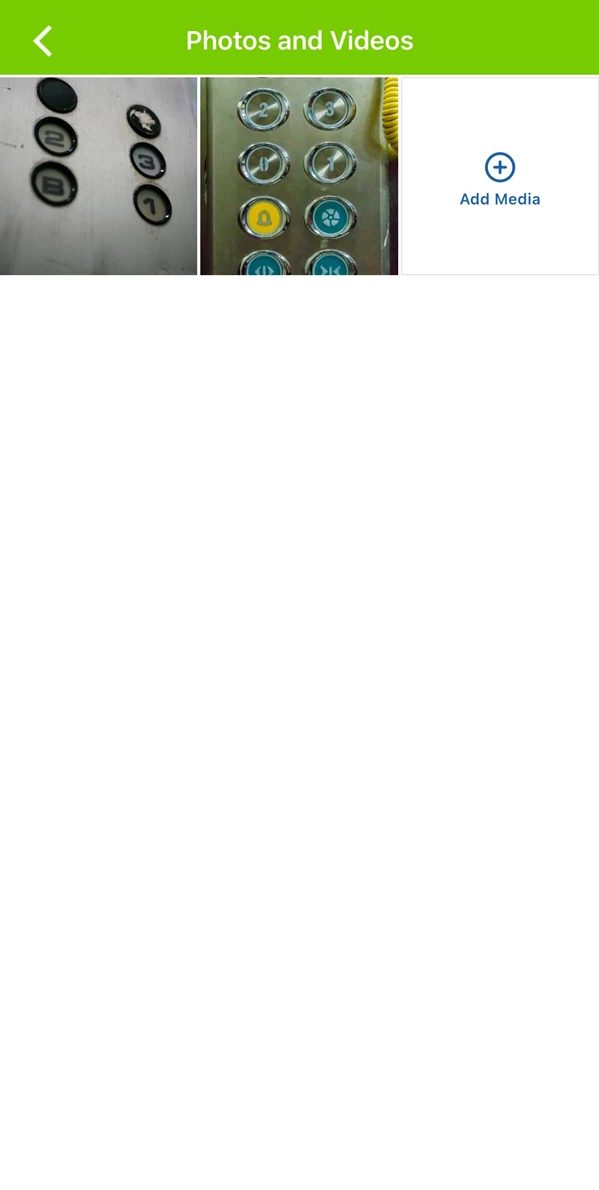
To open the attachments gallery:
Click Show all attachments
View Ticket Activity
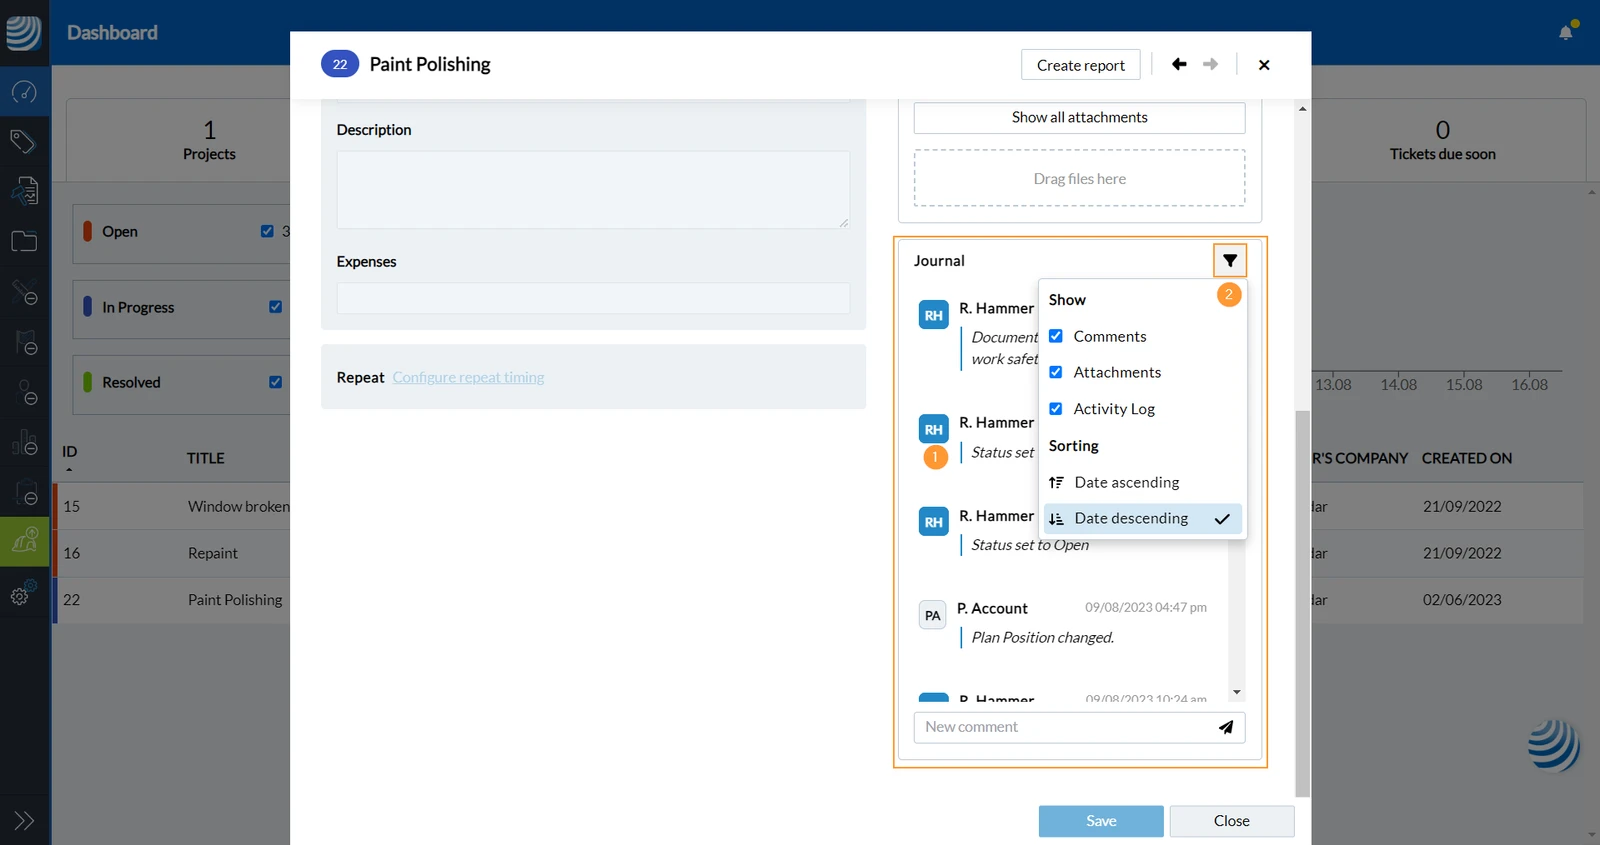
When information in a ticket is changed or a comment is sent, an entry is added to the journal.
Click the filter icon to define which entries you want to see in which order.
Navigate through the Webapp
So far you only used the dashboard and opened tickets from the tab 'Tickets overdue'.
In the main menu on the left you can access other features including:
Dashboard
Tickets (plan view, list view, and calendar view)
Project Reports
Schedule
SiteView
Documents
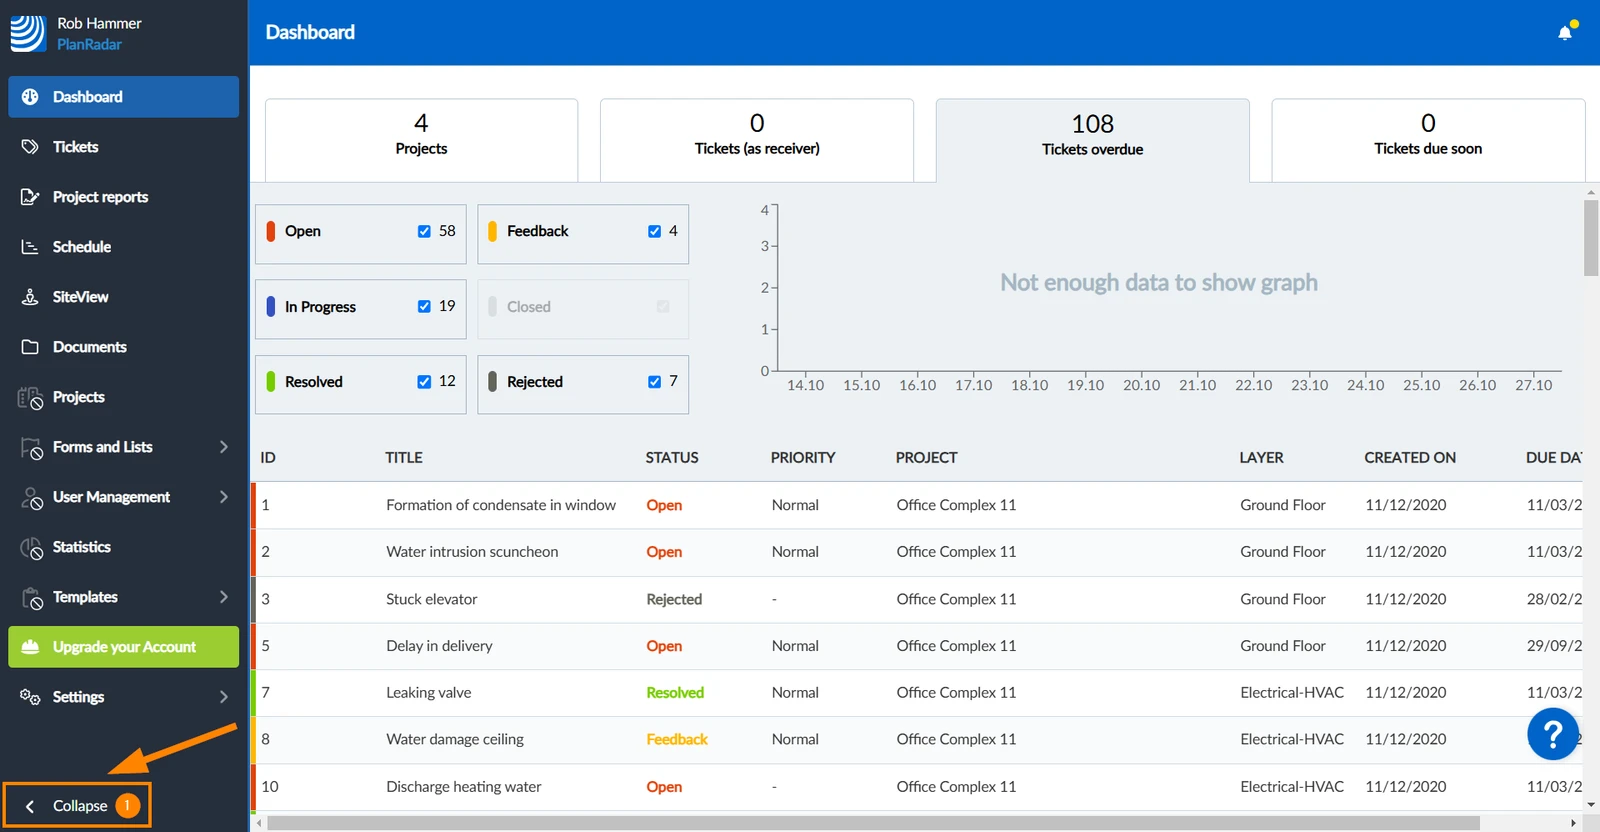
To expand the main menu to see labels in addition to the icons
Click the arrow icon 

To collapse the main menu again and save space:
Click Collapse 

Show the Plan & Tickets of a Layer
Like folders in a file system, the layers in PlanRadar help to organise the plans and tickets of a project. Each ticket is associated with a specific layer. Layers can be associated with a 2D plan or BIM model but they can also be used without a plan.
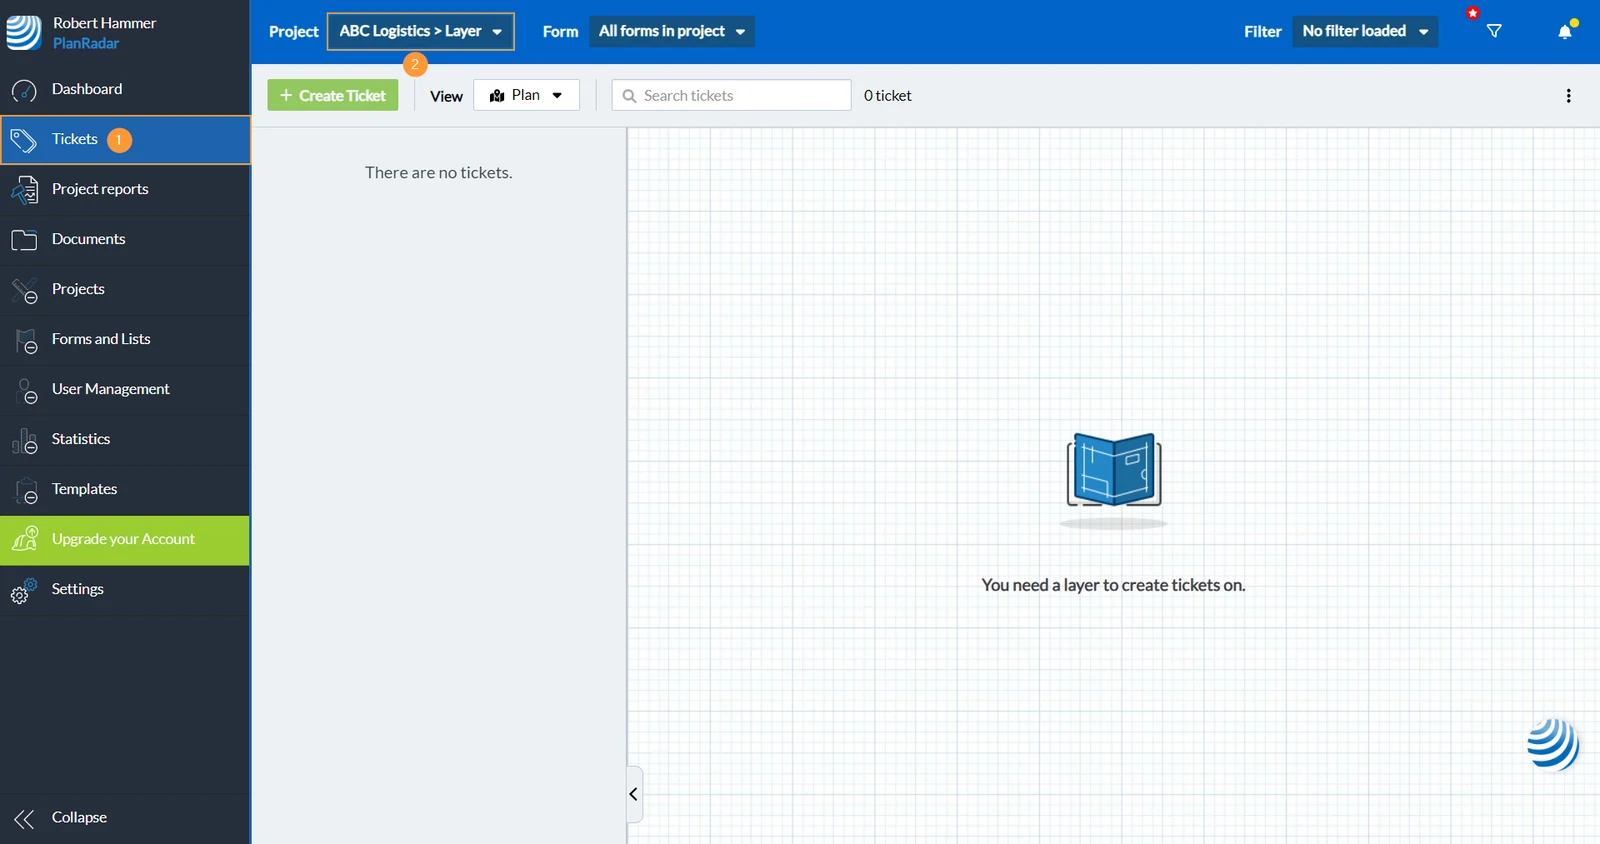
To show the plan & tickets of a layer, follow these steps:
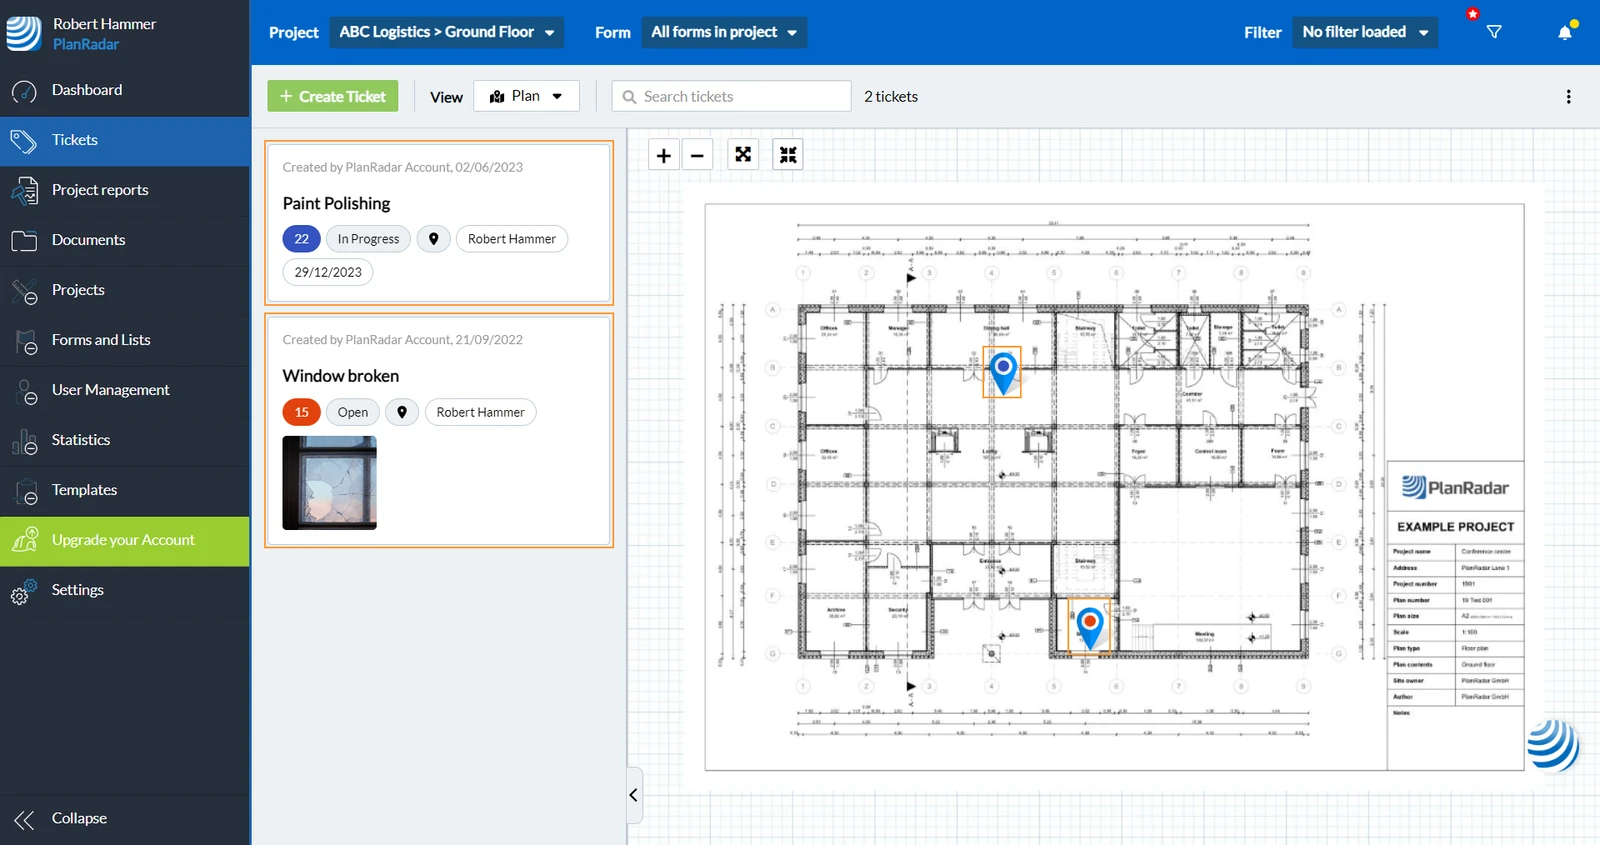
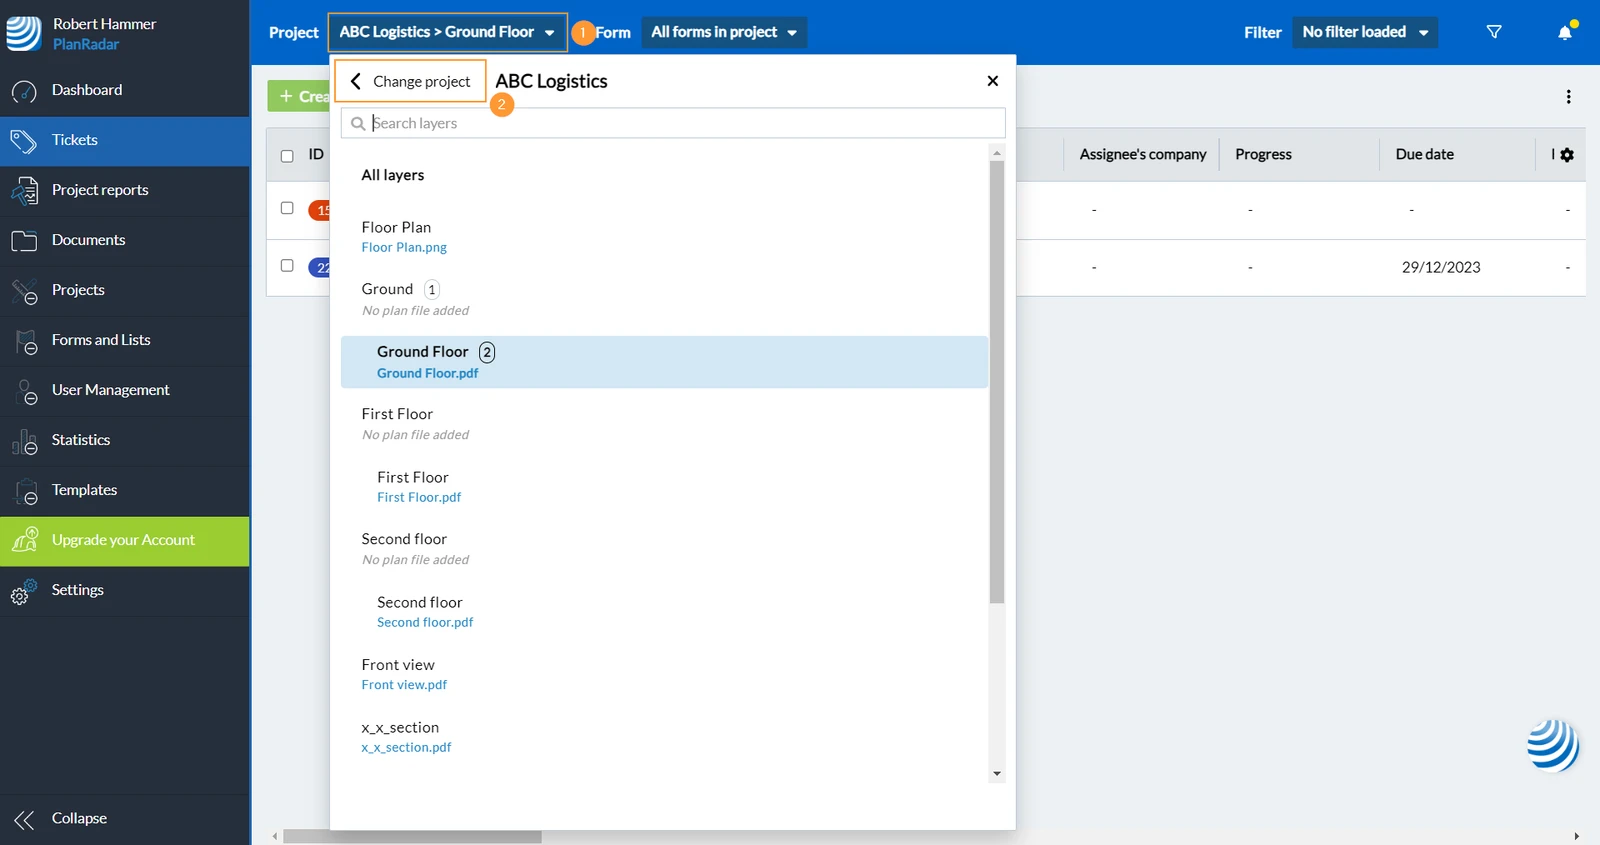
Click Tickets
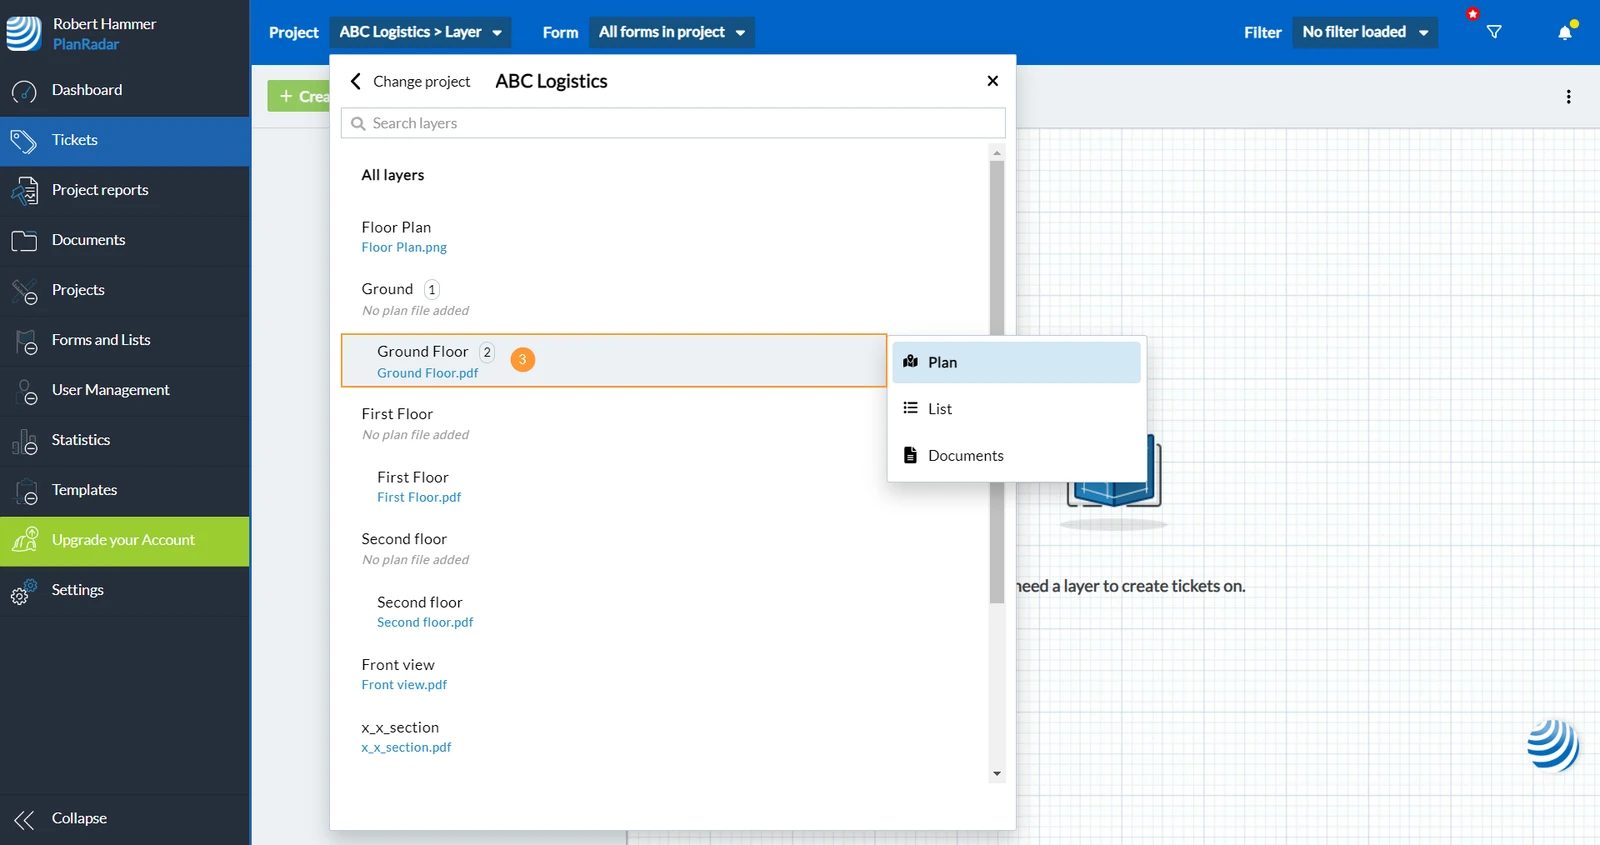
Open the Project and layer selector
Select a layer, e.g. Ground Floor
On the left you see a list of ticket and on the right you see the plan. Ticket pins show the position of the tickets on the plan.
To open a ticket click on the ticket or on the ticket pin:
Ticket List View
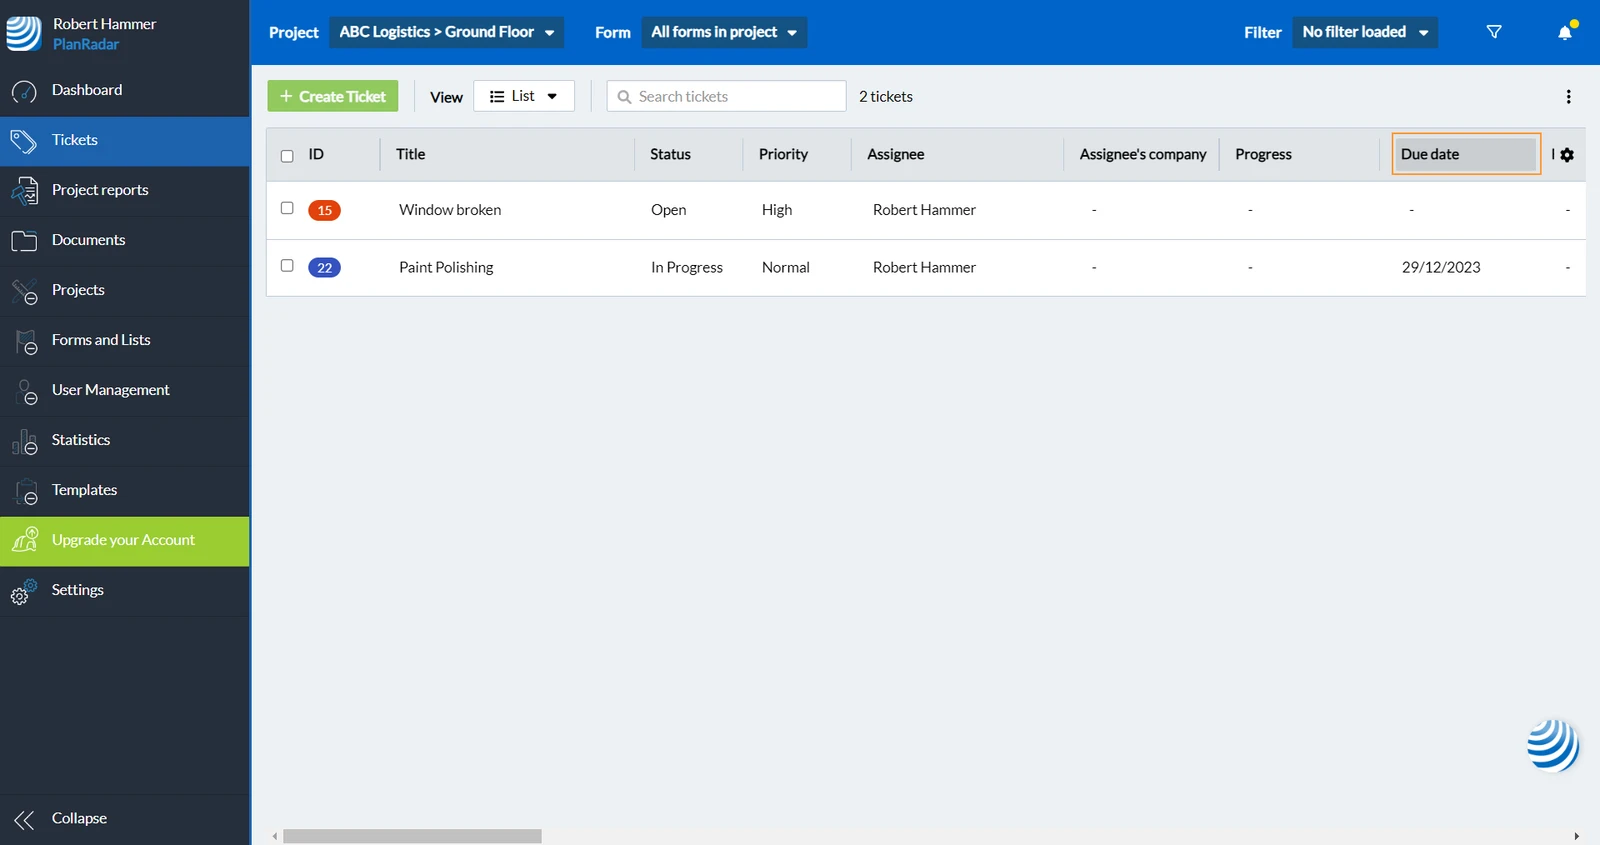
This view displays all tickets of the selected layer in a table.
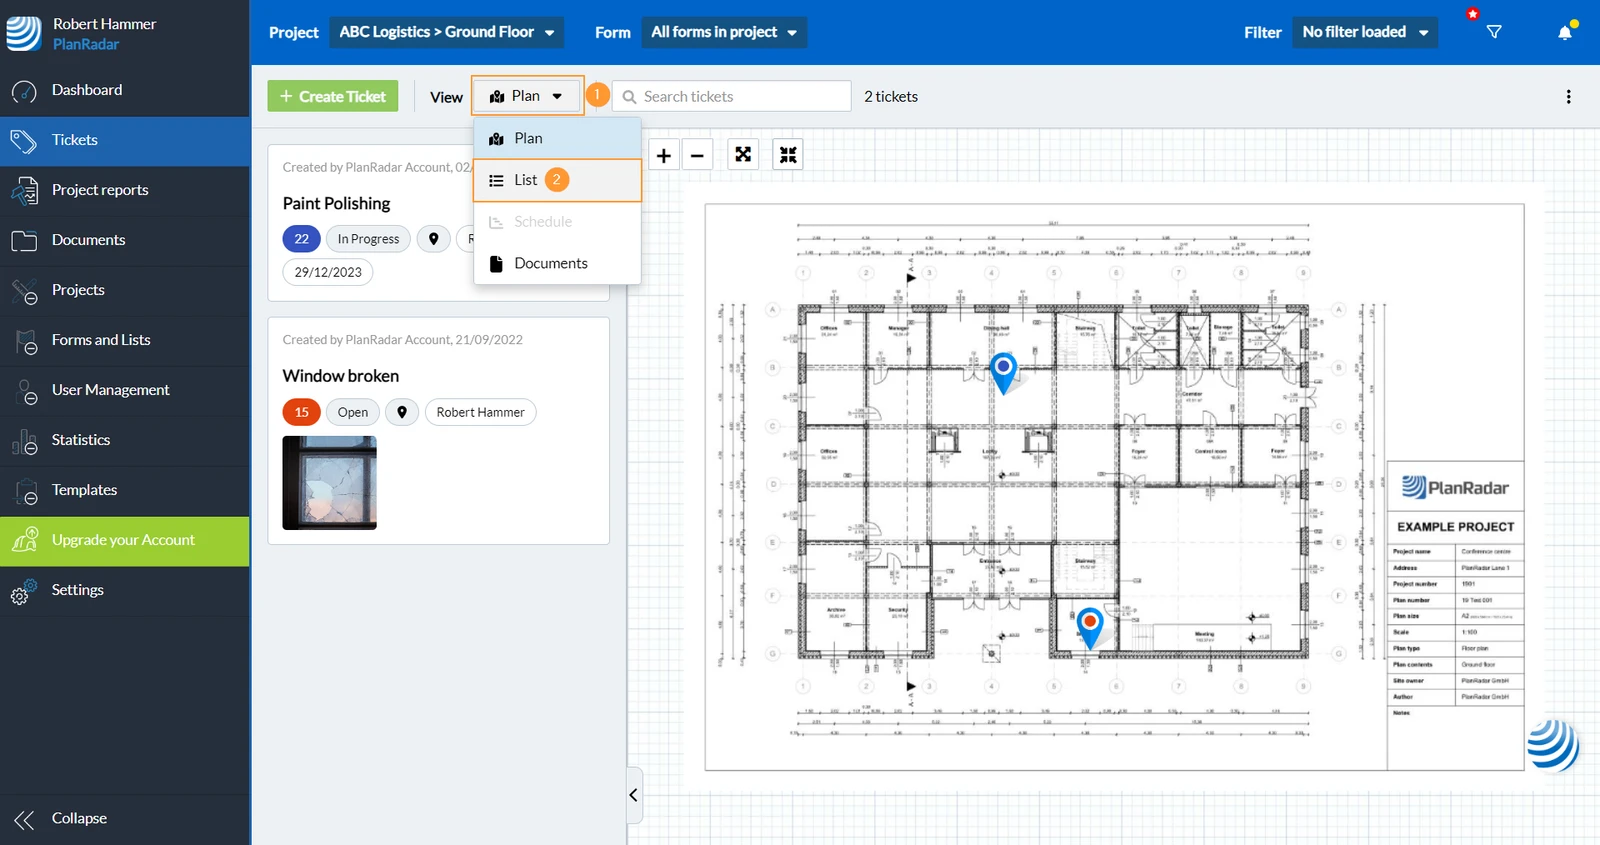
To switch to the list view:
Open the View drop down menu
Click List
In the list view you get a more data-driven overview of your tickets. You can sort the list by any field e.g. due date, just by clicking on the column header:
Show Tickets of All Layers/Projects
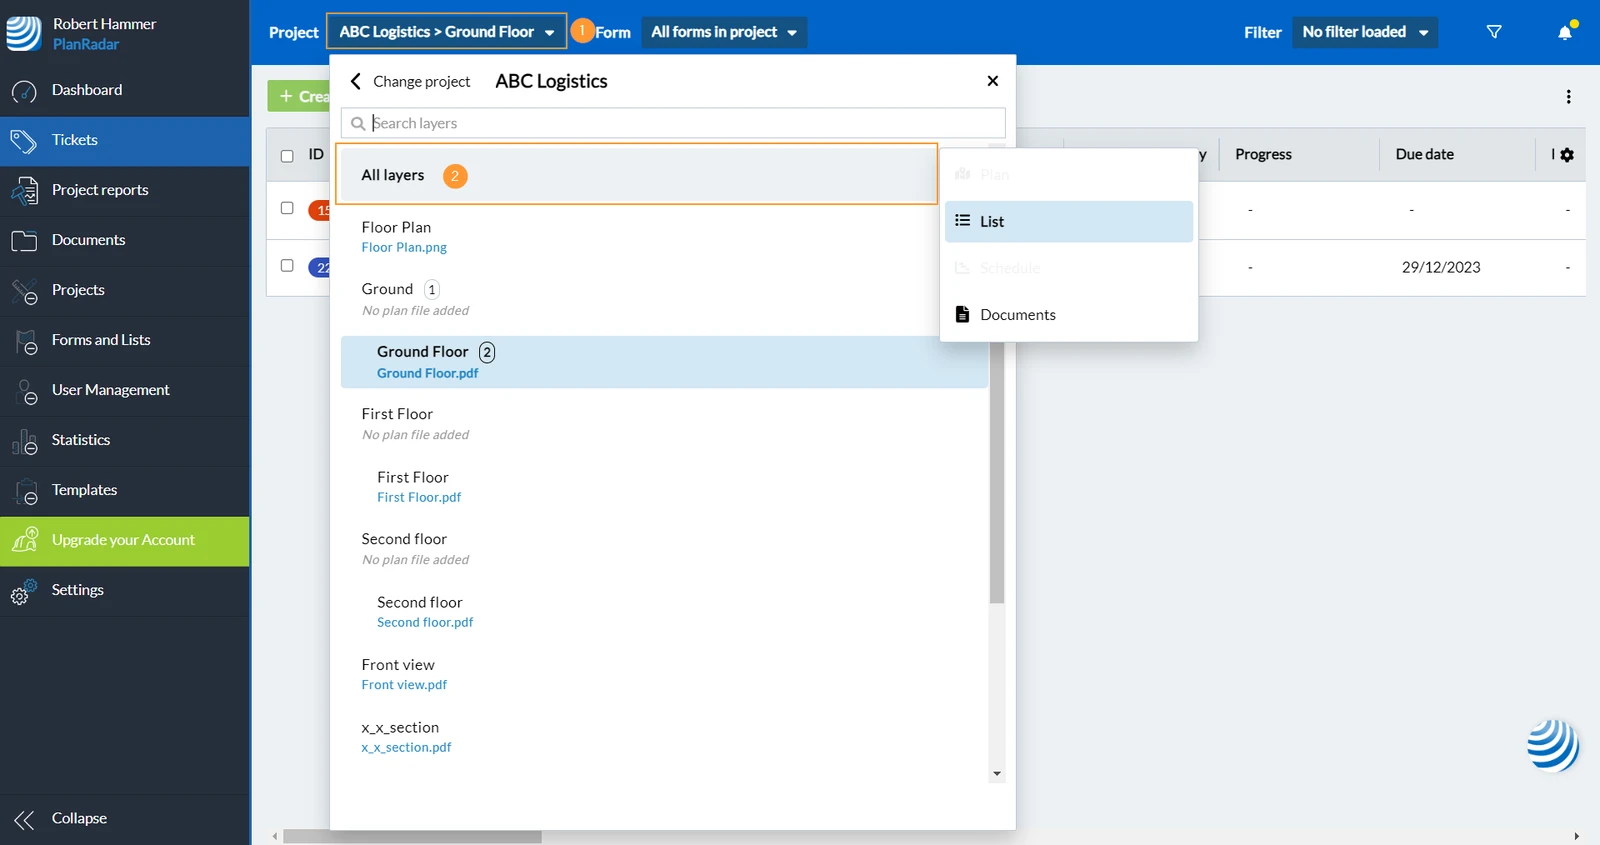
In the list view it is possible to not only show tickets of a specific layer, but also of "All layers" of a project. You can even show tickets of all projects at once.
To show all tickets of a project:
Open the Project and layer selector
Click All layers
To show all tickets of all projects:
Open the Project and layer selector
Click Change project
Click Show all projects
Search Tickets
Regardless of whether you are in the list view or the plan view, you can always search for tickets using text. Only matching tickets will be shown until you cancel the search.
Filter Tickets
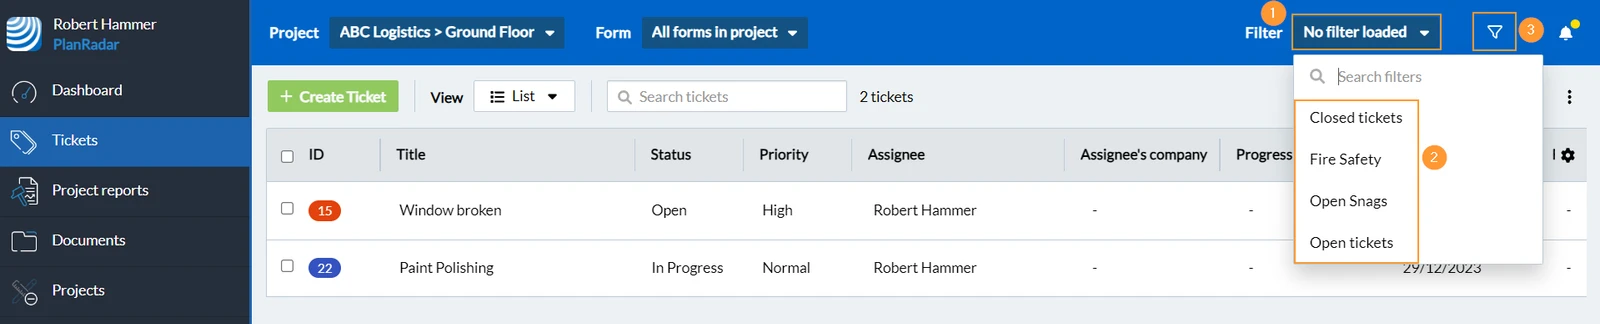
Filtering tickets works similar to searching, but you can create filter criteria based on any form field. Filters are available in the list view, plan view and calendar view.
To apply filters that someone else has defined and shared:
Open the Filter drop-down menu
Select a saved filter e.g. Open tickets
Or open the filter panel to define your own filter criteria
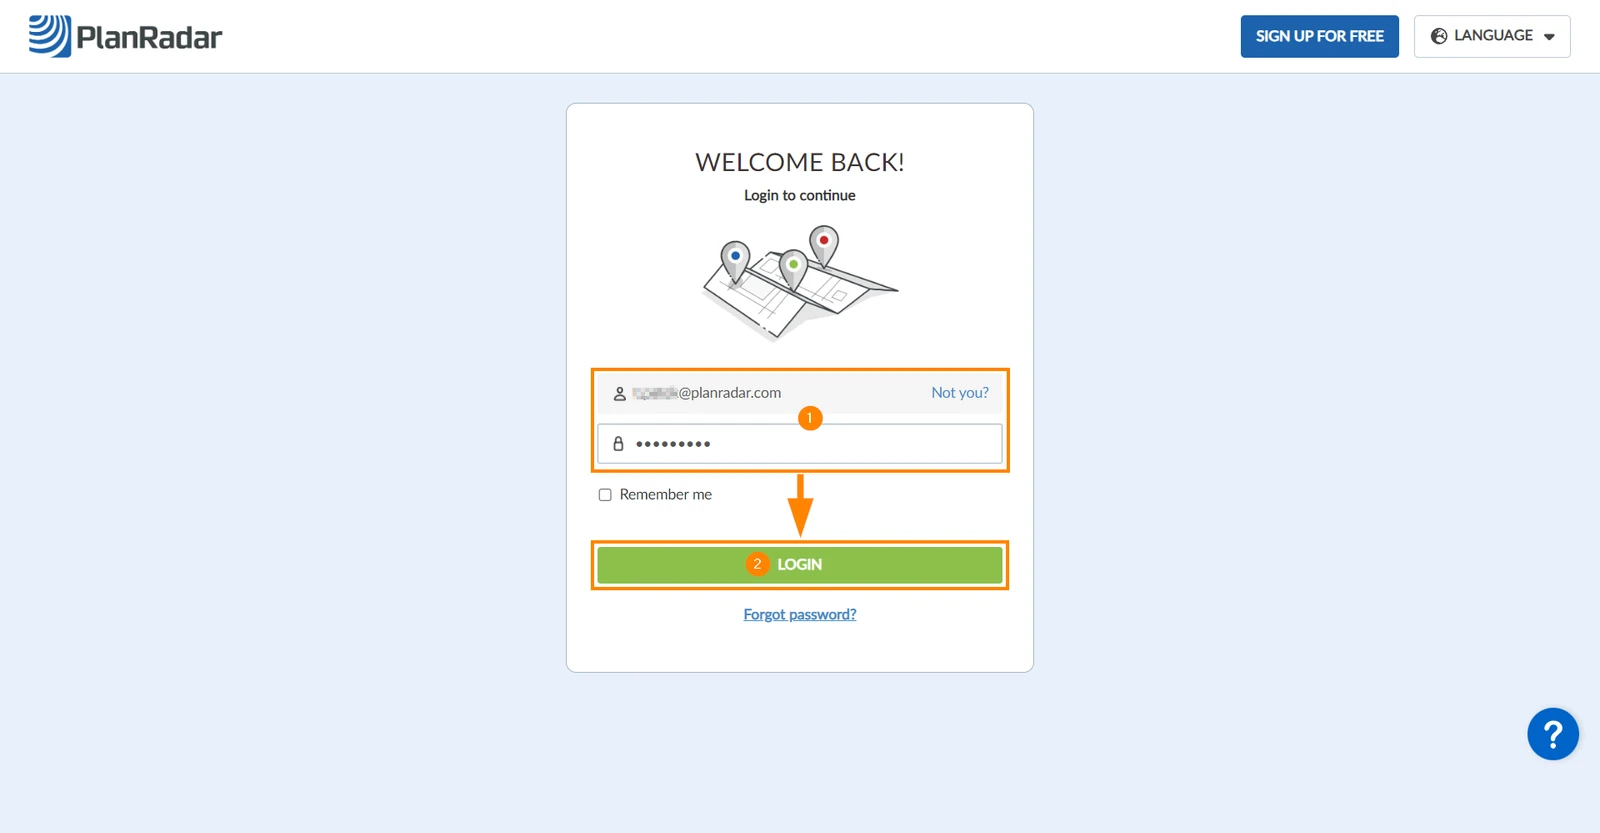
Login
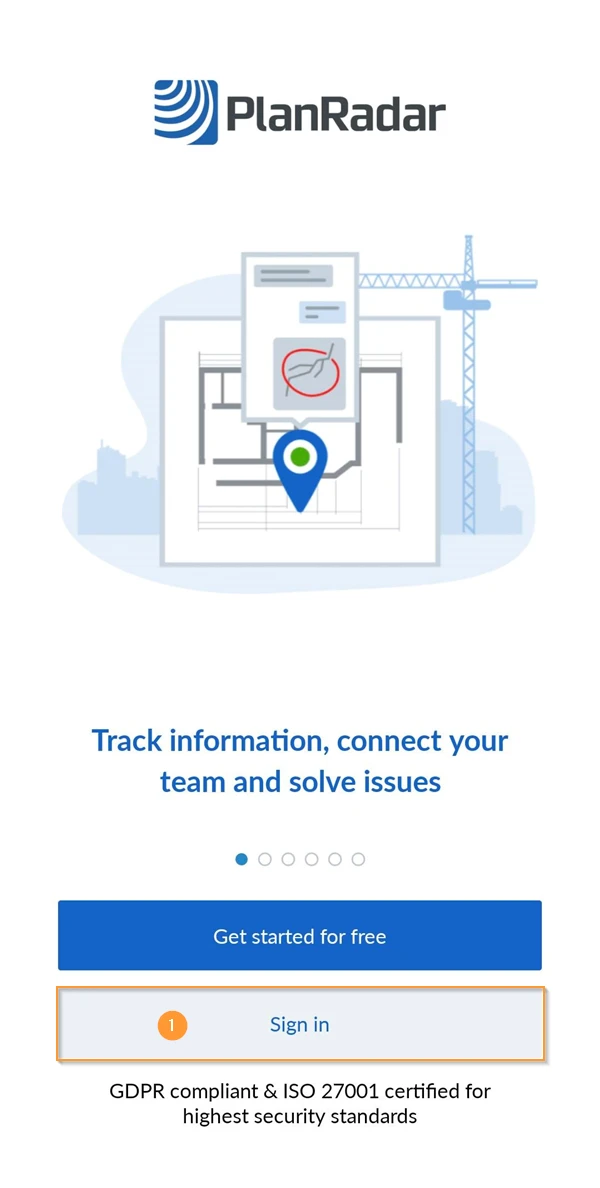
After you downloaded the mobile app and start it the first time, you will see the login screen.
Click Sign in
Enter your username and password.
Navigate to a Ticket and View it
Select Account & Project
After login the app will sync data with the PlanRadar servers.
A first-time sync might take a few minutes. Please do not close the app and allow the process to complete before you continue.
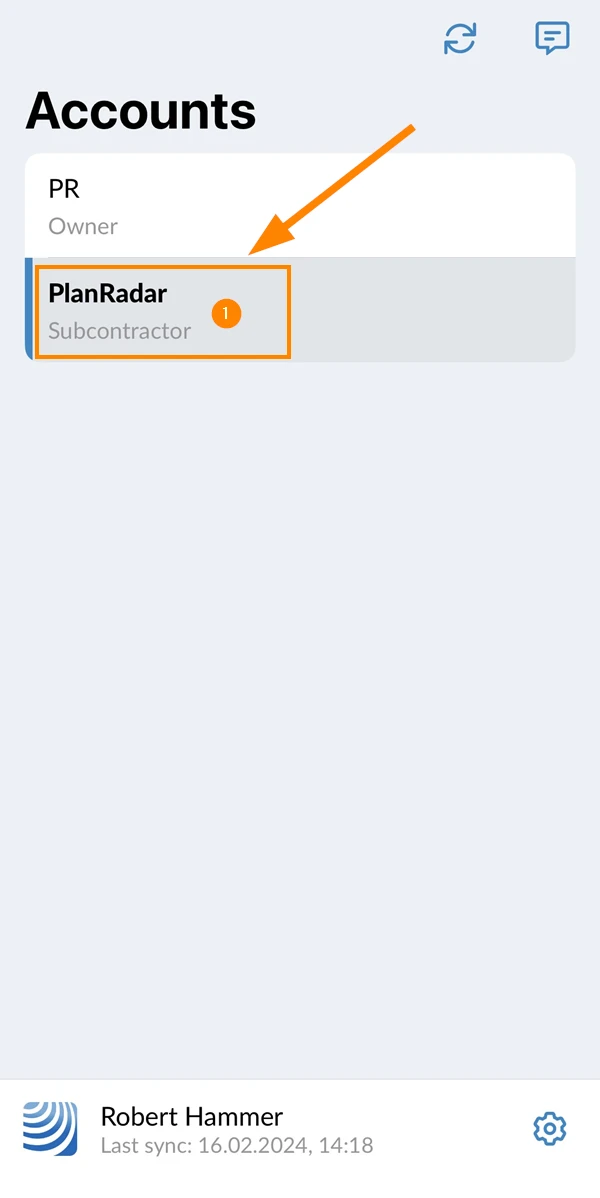
When the sync has finished you will see the account selection screen. If multiple companies have invited you to their PlanRadar accounts, you can select the account you want to work with now.
To select an account:
Tap the account name e.g. PlanRadar
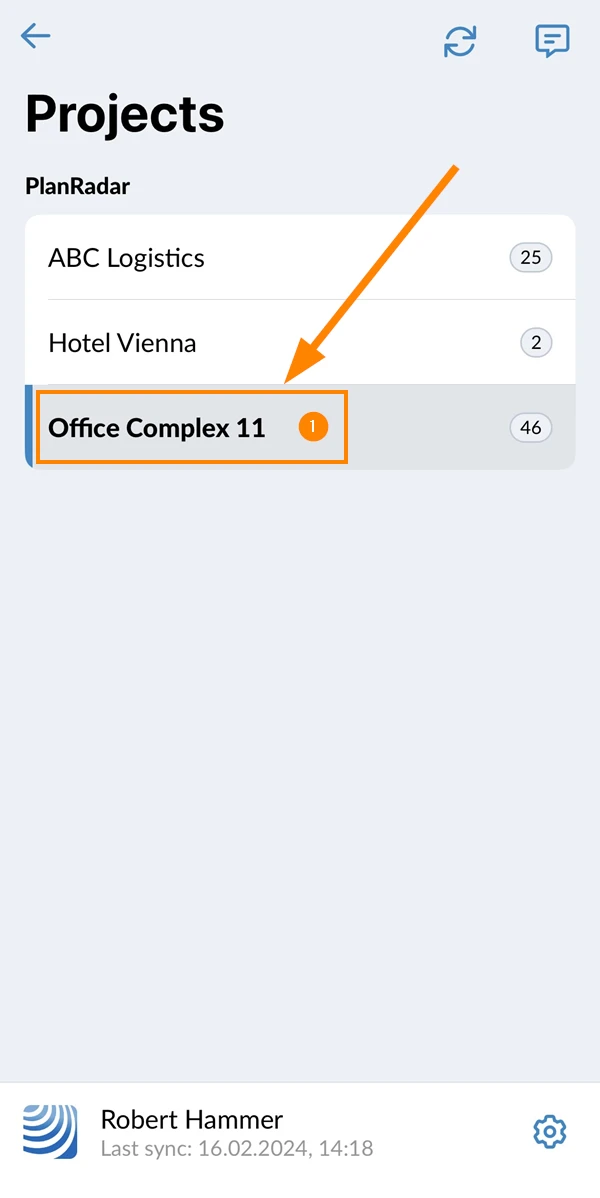
After selecting an account you will see the project selection screen. If you were invited to multiple projects within the previously selected account, you can select the project you want to work on now.
To select a project:
Tap the project name e.g. Office Complex 11
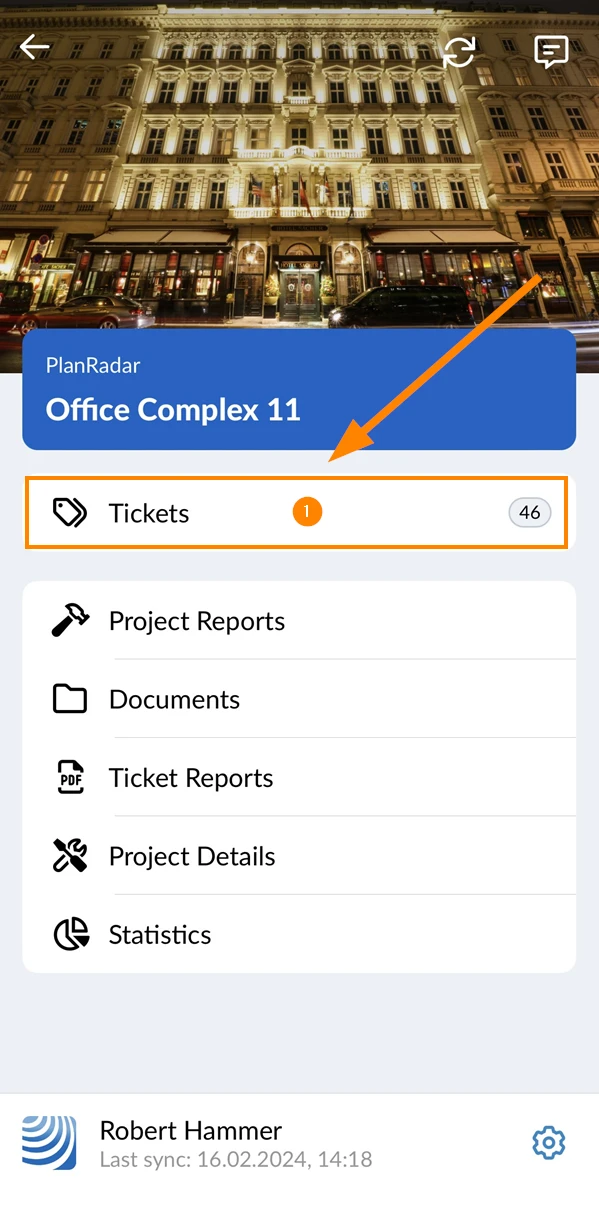
Select Tickets in the Main Menu
Once you have selected a project, the main menu will appear, allowing you to choose which feature you want to use.
To select the tickets feature:
Tap Tickets
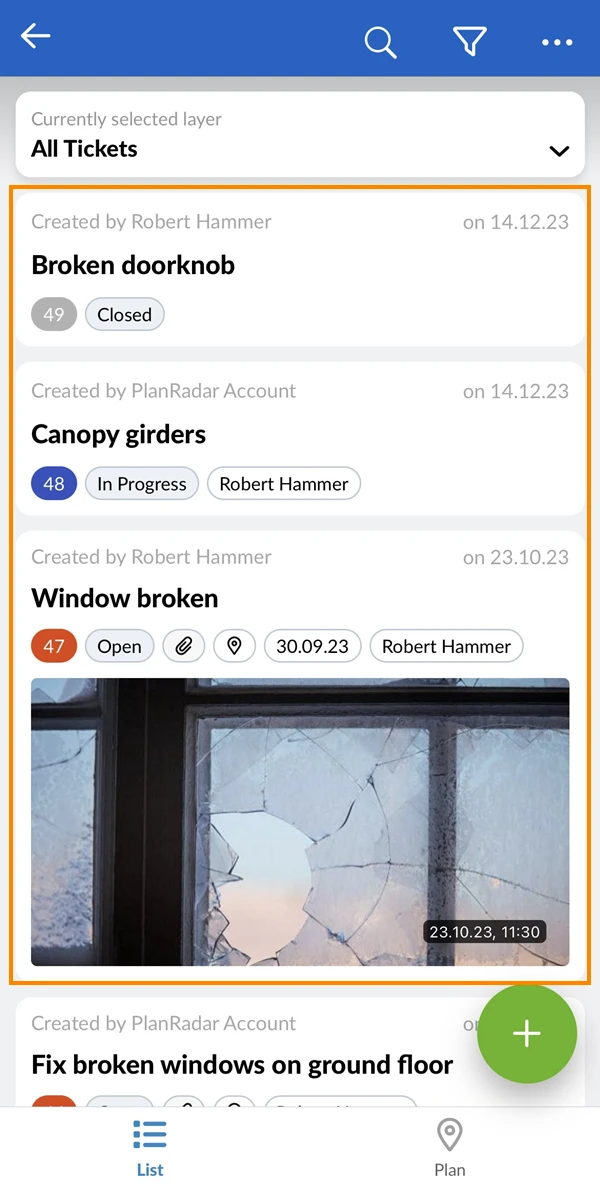
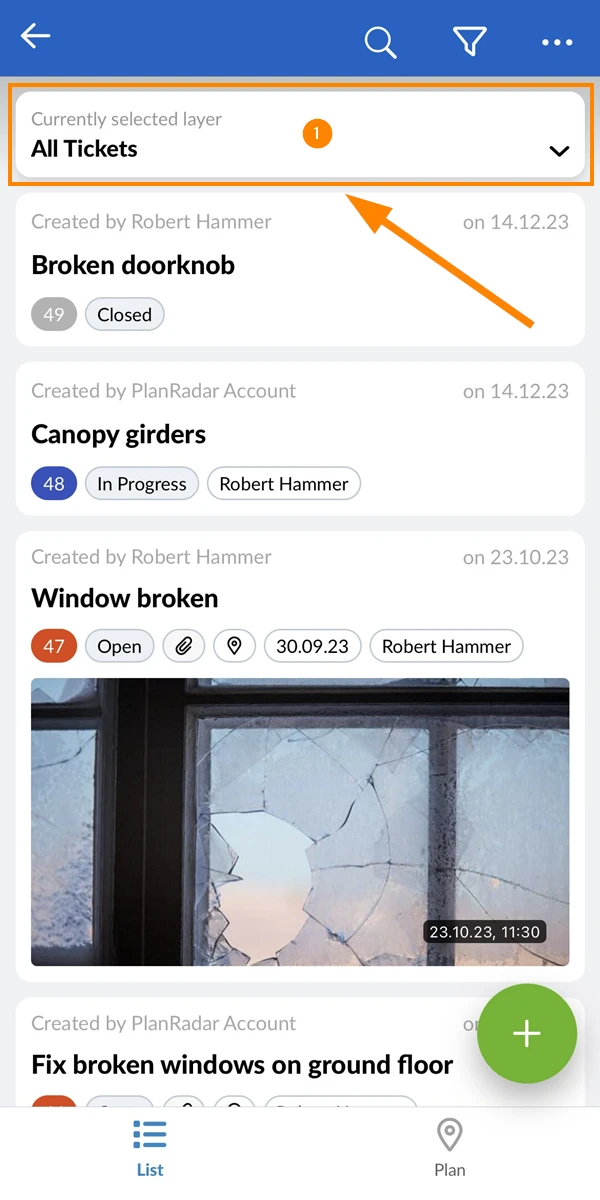
You see a list of all tickets in the selected project:
View a Ticket
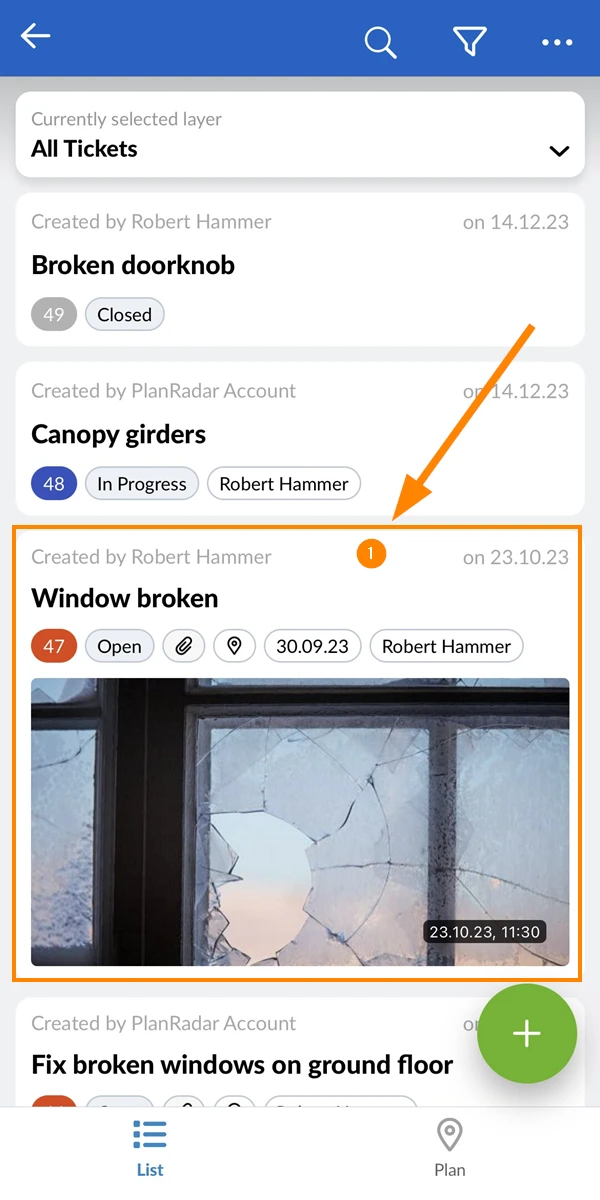
To view the details of a ticket:
Tap on a ticket
View Ticket Details
What you see in the ticket details depends on the ticket form. Read more in Forms.
One of the most common ticket from fields is the status field. Each status has a different colour to visualise the progress of tickets in the list view and also in the plan view.
Read more in Status Colours & Ticket Pins.
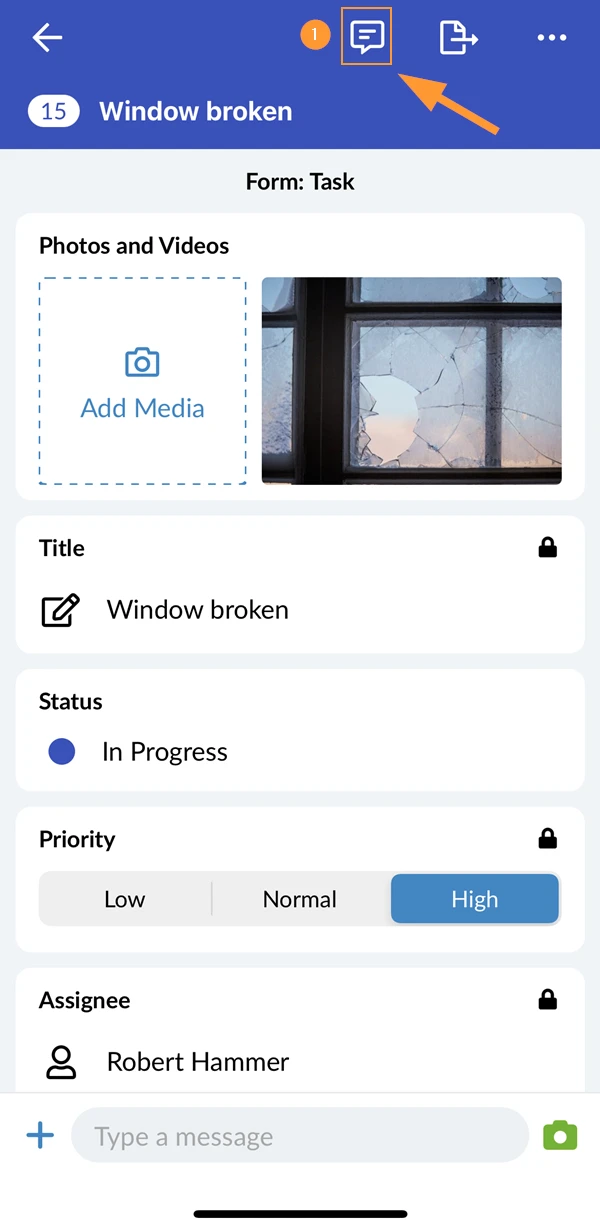
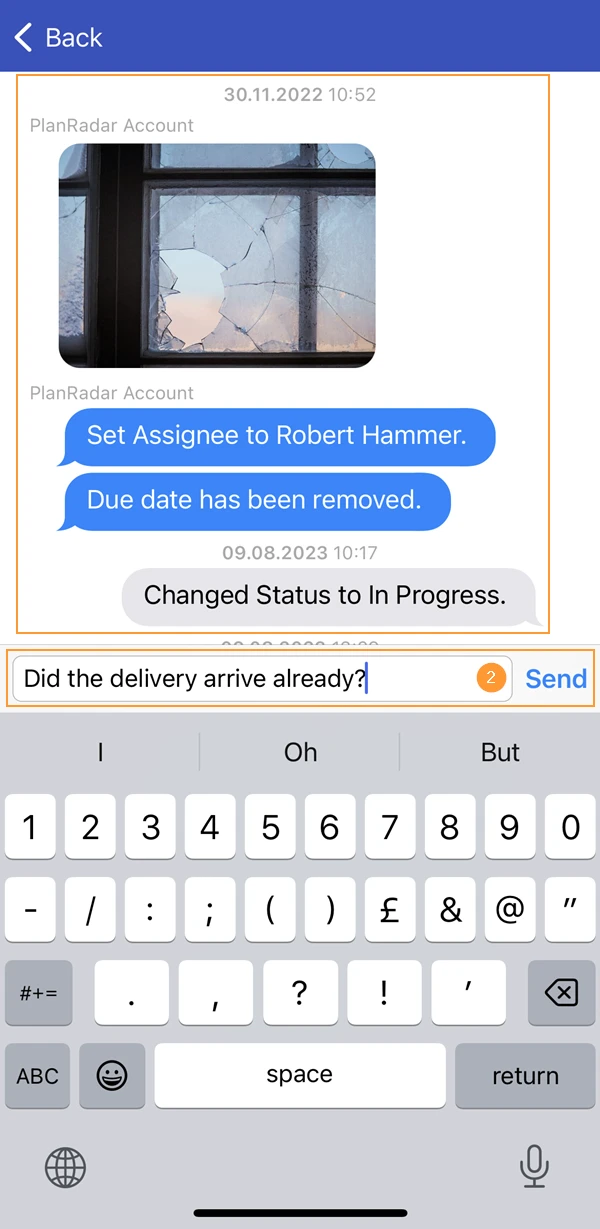
When information in a ticket is changed or a comment is sent, an entry is added to the journal (see second screenshot).
Tap the journal icon to view the journal.
In the journal it is also possible to write a comment.
Show the Plan & Tickets of a Layer
Like folders in a file system, the layers in PlanRadar help to organise the plans and tickets of a project. Each ticket is associated with a specific layer. Layers can be associated with a 2D plan or BIM model but they can also be used without a plan.
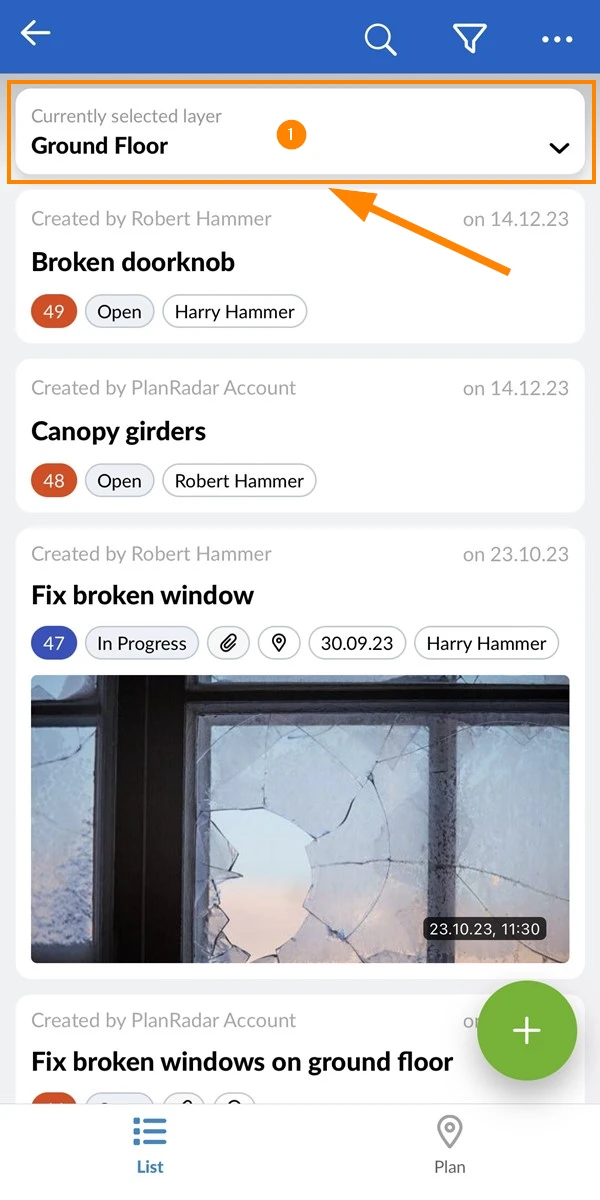
Select a Layer
To select a layer:
Tap on the layer selector
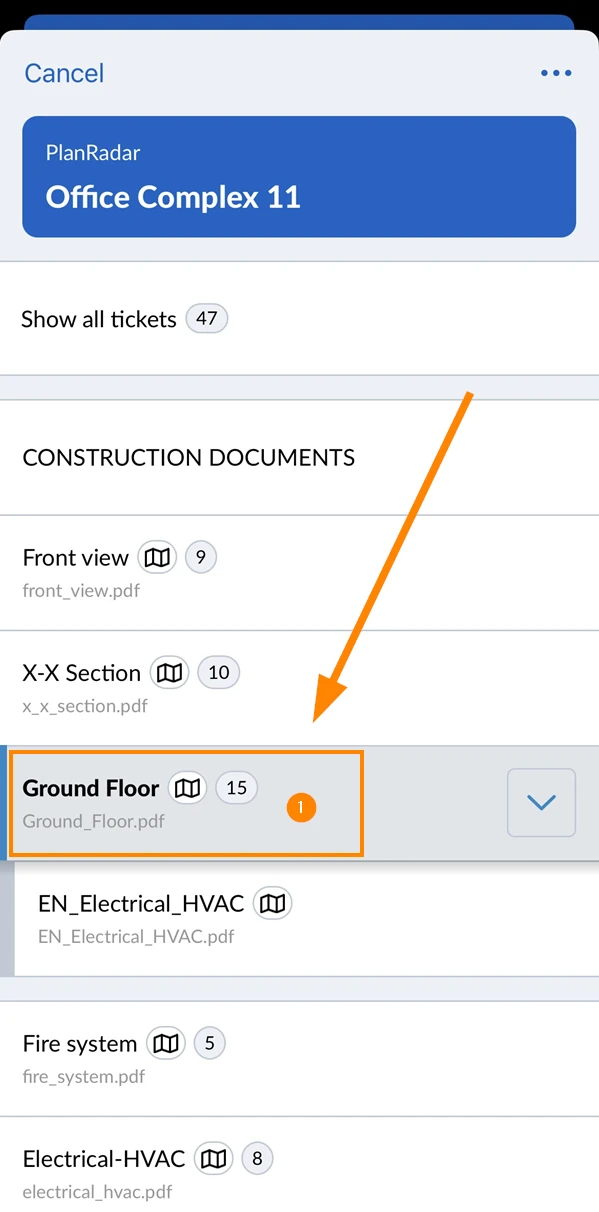
Tap on the desired layer e.g. Ground Floor
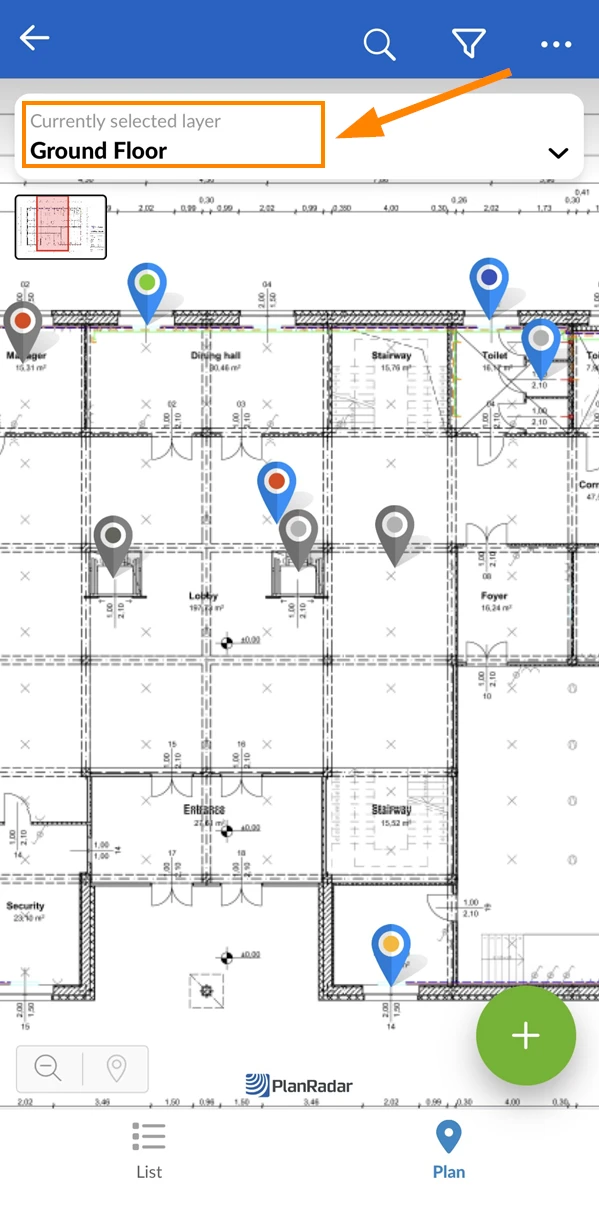
The layer selector always shows the currently selected layer:
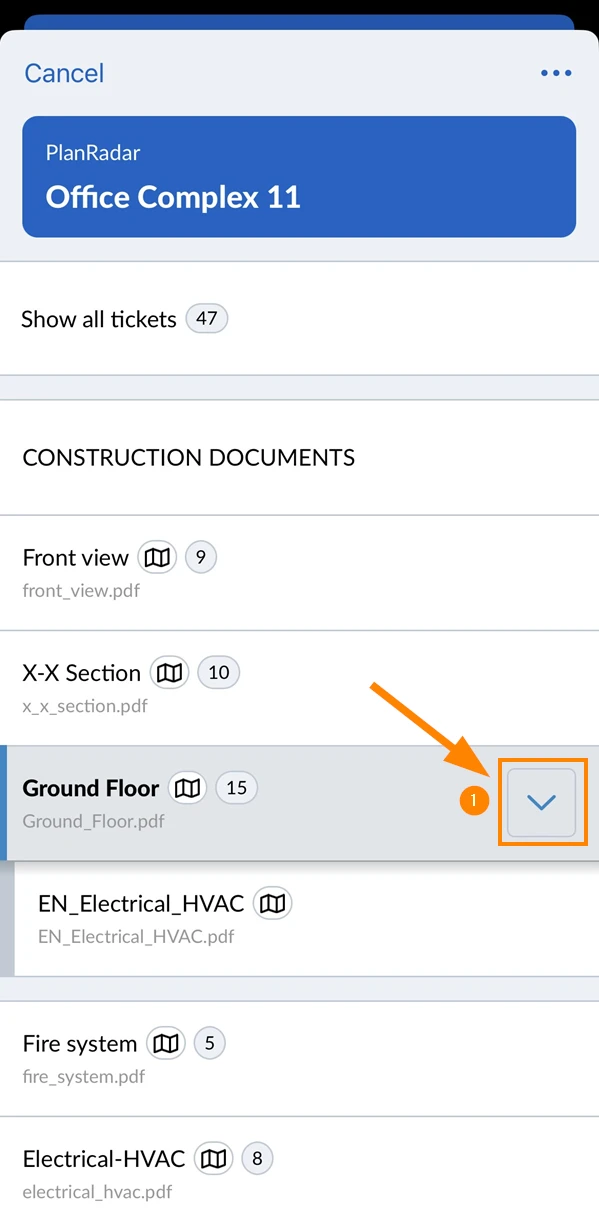
Show/Hide Sub-Layers
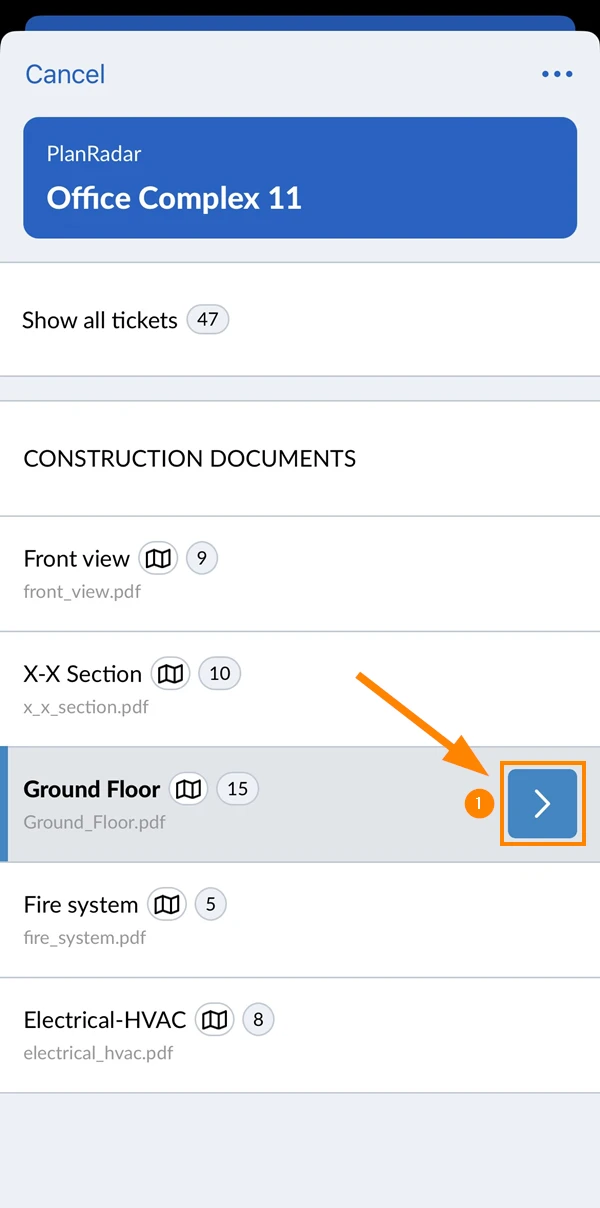
To show sub-layers while you are in the layer selector:
Tap the arrow button next to the parent layer
To hide sub-layers:
Tap the arrow button
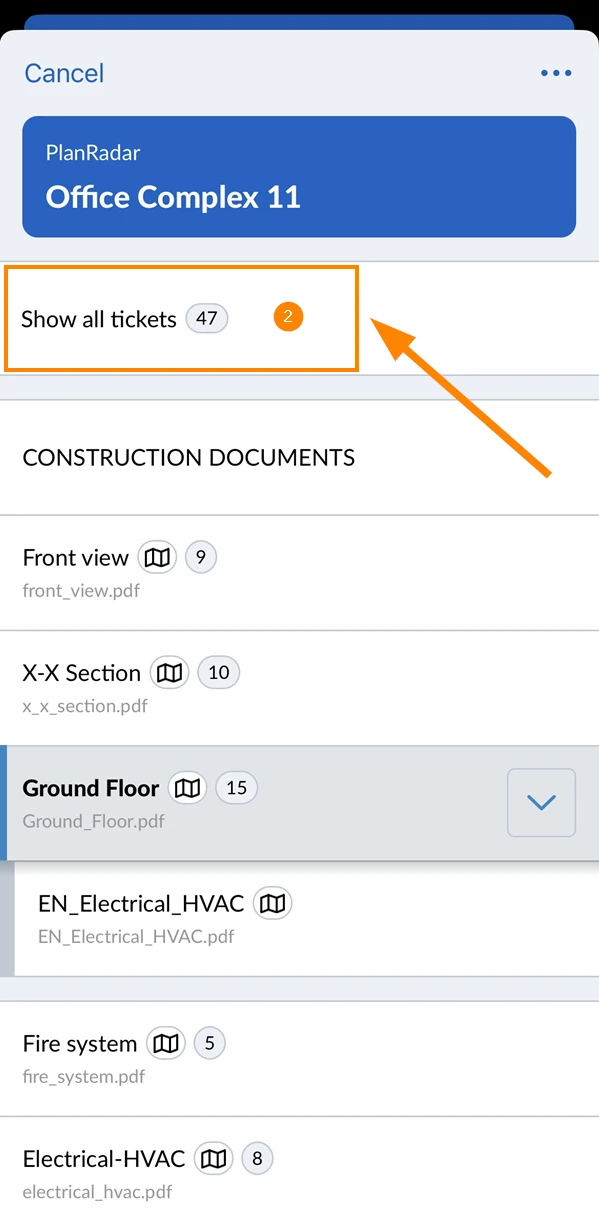
Show All Tickets
To show all tickets of all layers of the selected project:
Tap on the layer selector
Tap Show all tickets
View and Find Tickets
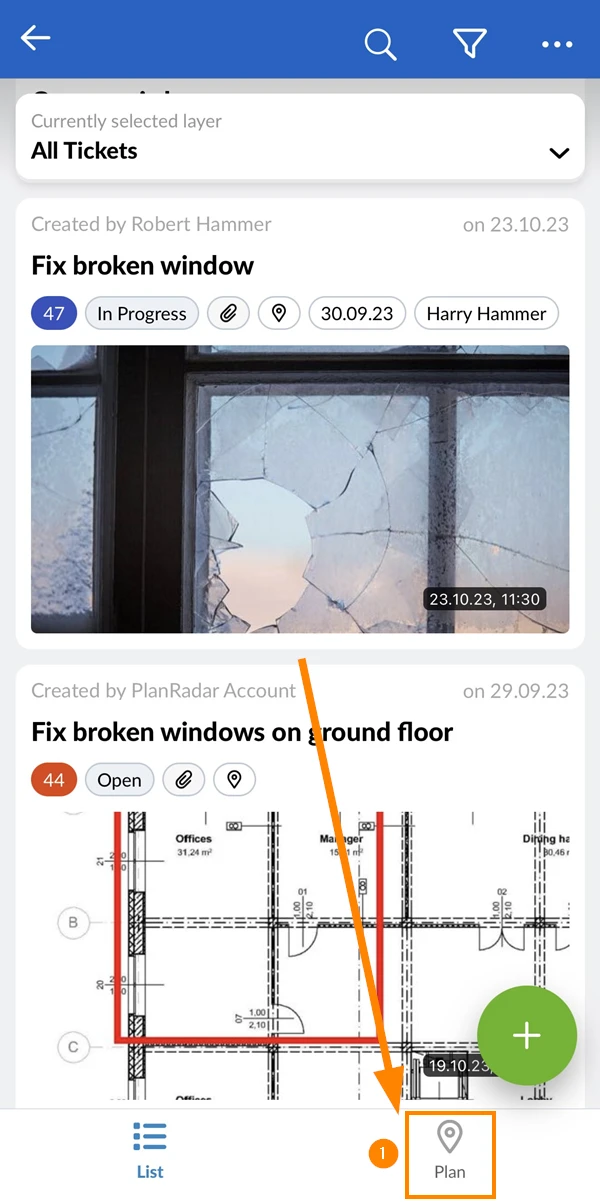
Plan View
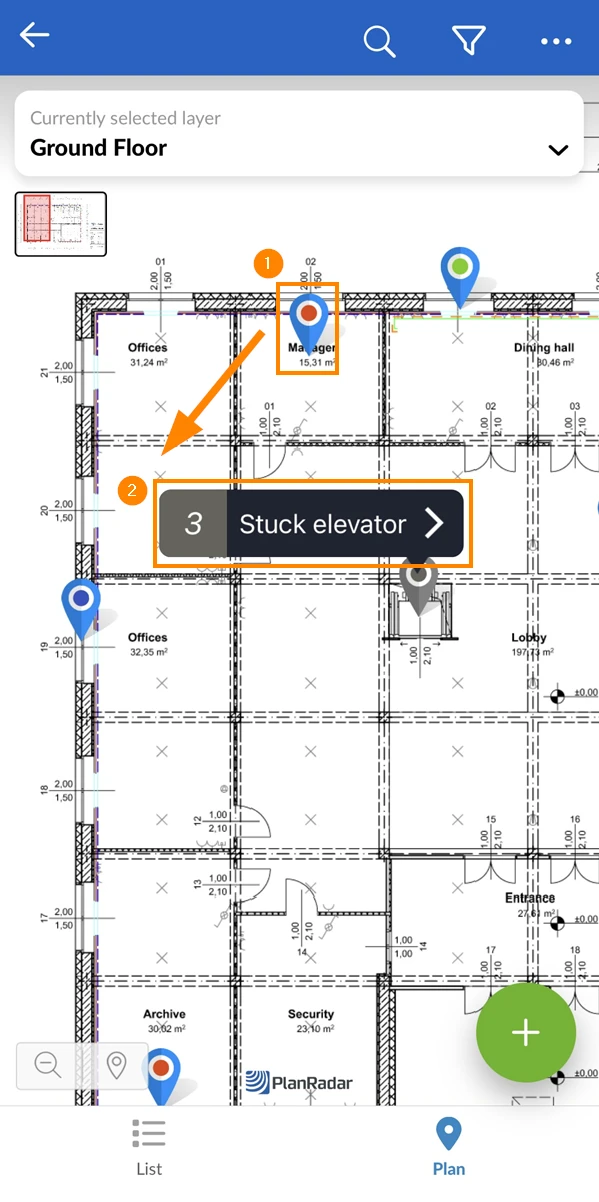
To switch to plan view:
Tap Plan
Tickets with a plan position are represented by a ticket pin. The pin also indicates the status by its colour.
Tap on a ticket pin to open the callout which shows the ticket id and title.
Tap on the callout to open the ticket.
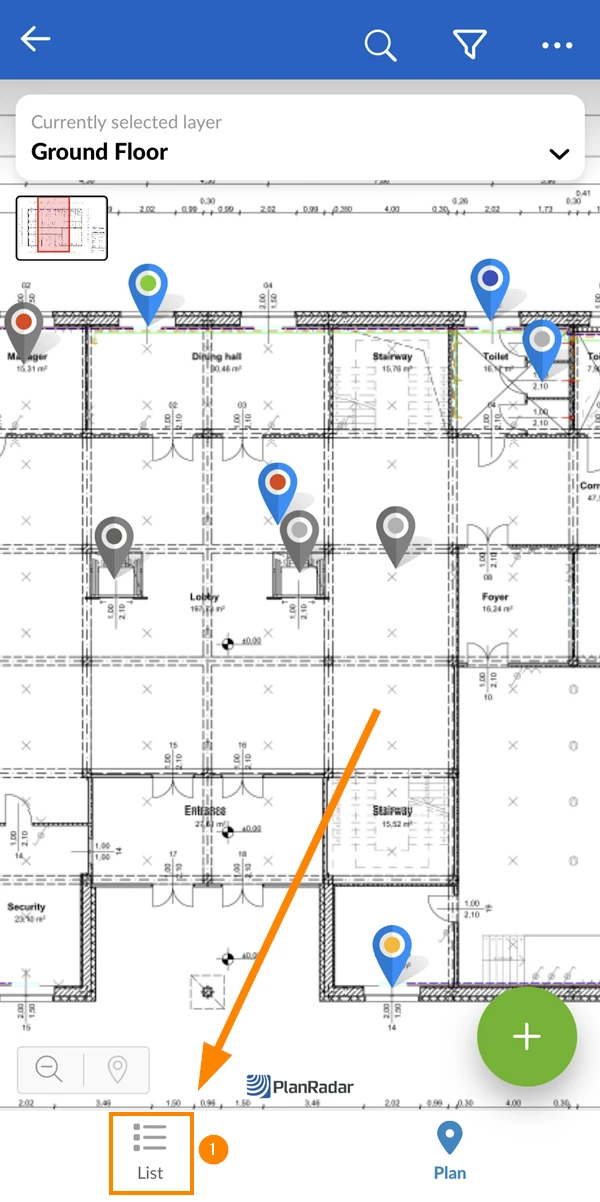
List View
To switch to list view:
Tap List
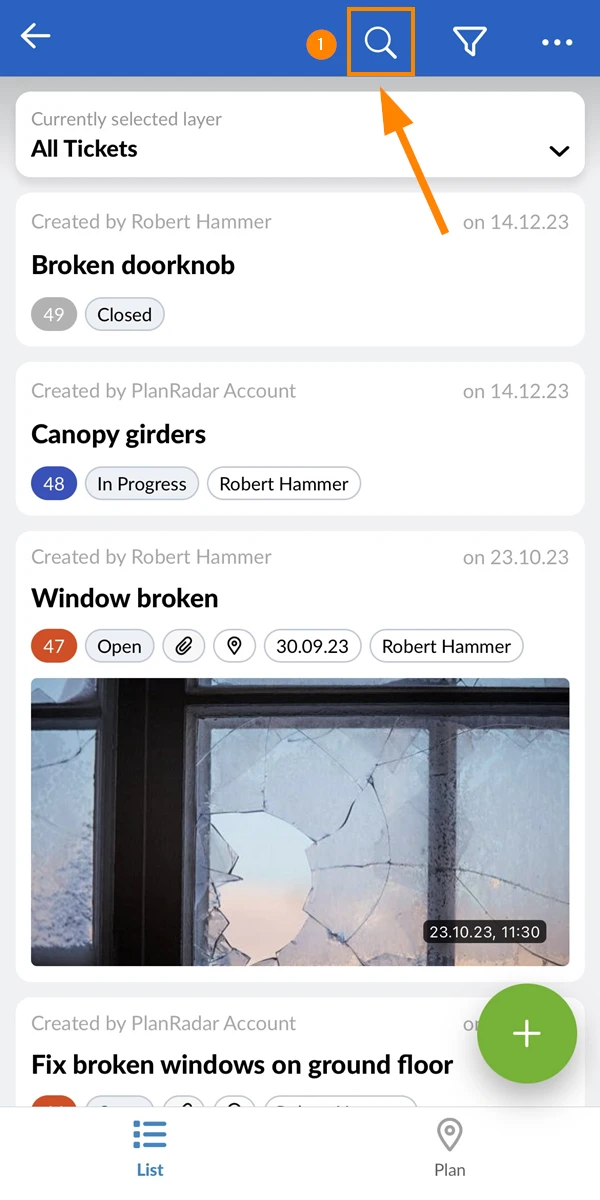
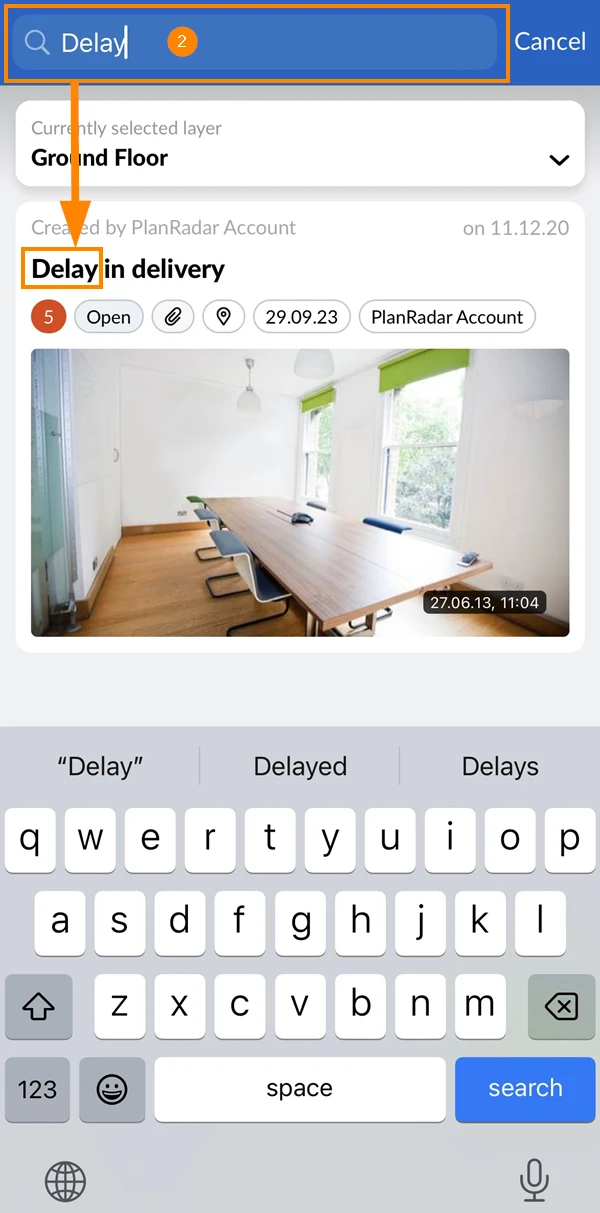
Search Tickets
Regardless of whether you are in the list view or the plan view, you can always search for tickets using text. Only matching tickets will be shown until you cancel the search.
To search for tickets:
Tap the search icon
Enter your search term
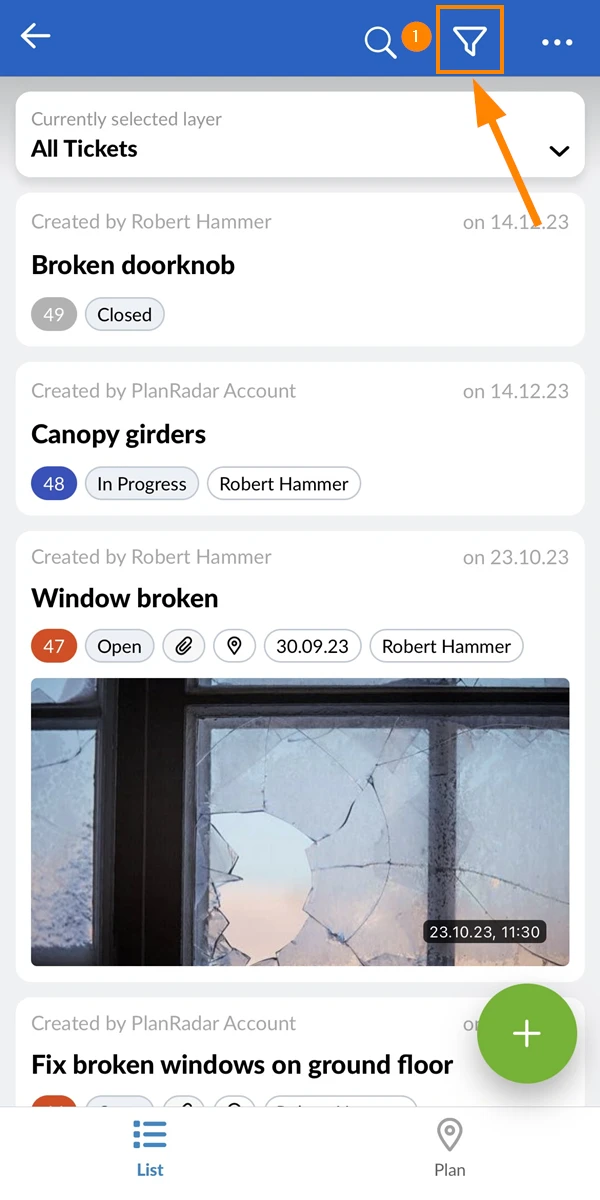
Filter Tickets
Filtering tickets works similar to searching. Filters are available in the list view, plan view and calendar view.
You can apply filters that someone else has defined and shared, or define your own filter criteria.
To open the filter panel tap the filter icon:
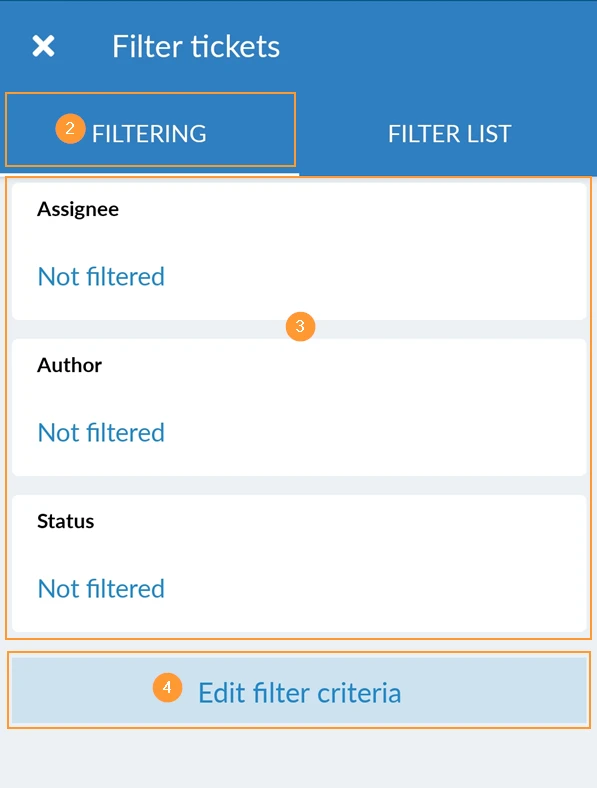
In the Filtering tab you define filter criteria.
Use one of the pre-selected most common criteria like Status.
OR tap Edit filter criteria to open the complete list of all available filter criteria.
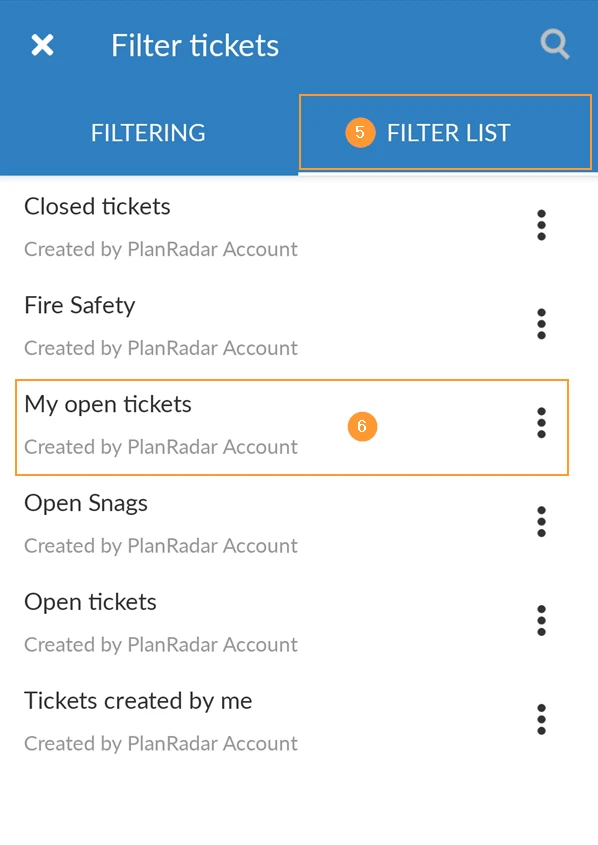
In the Filter List tab you see all saved and shared filters.
Tap on My open tickets as example to apply this filter.
Change Feature/Project/Account
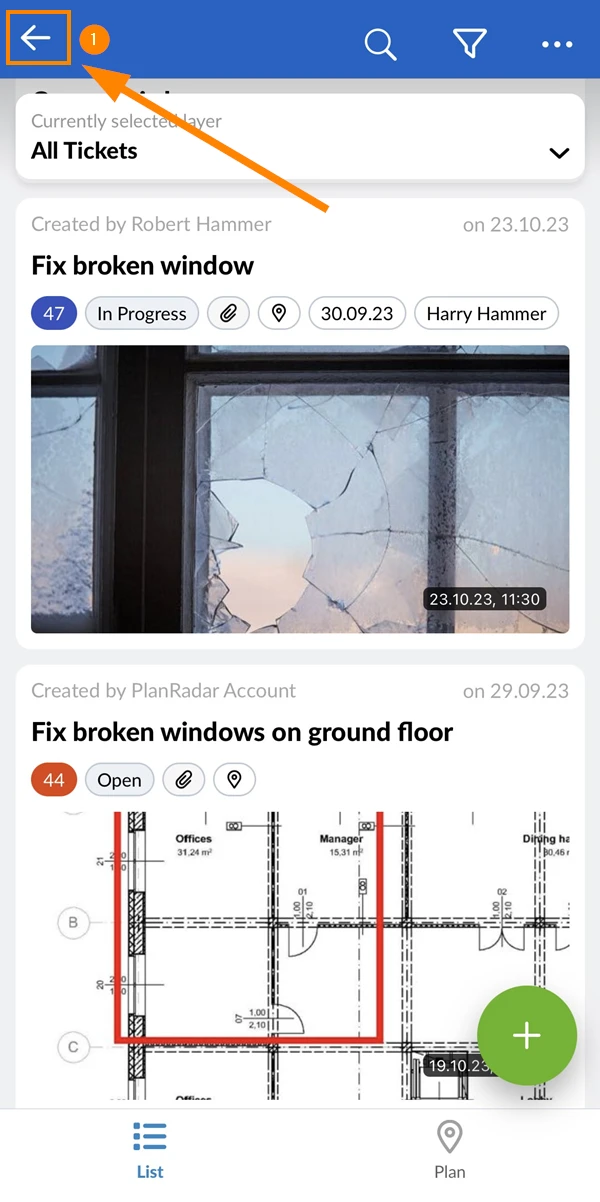
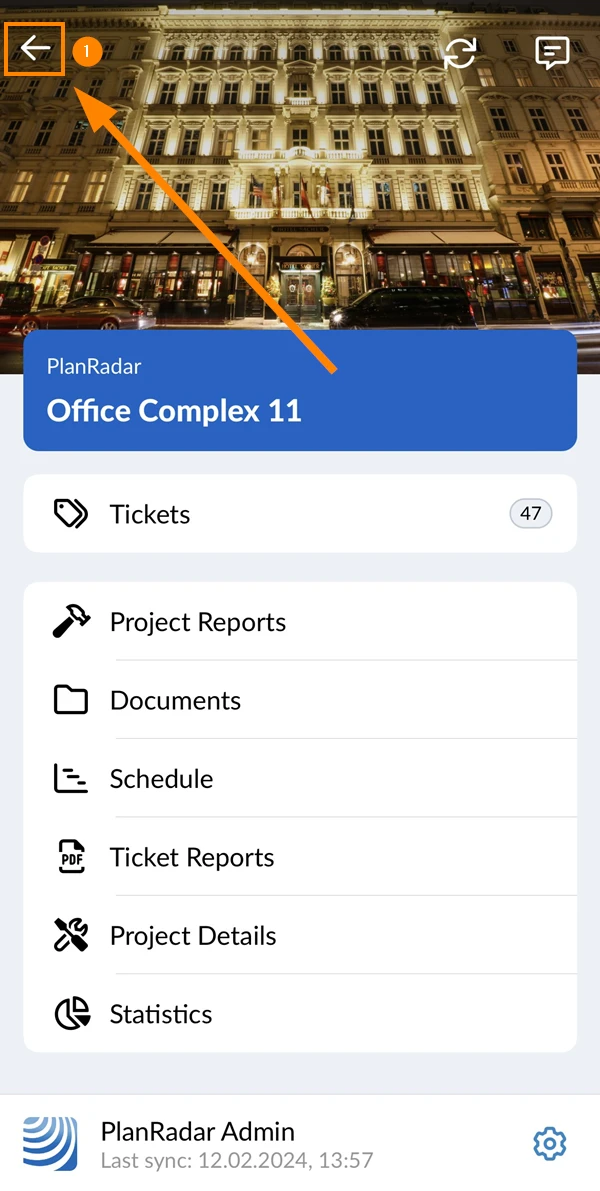
When you are in a feature and want to go to the main menu:
Tap the Back button
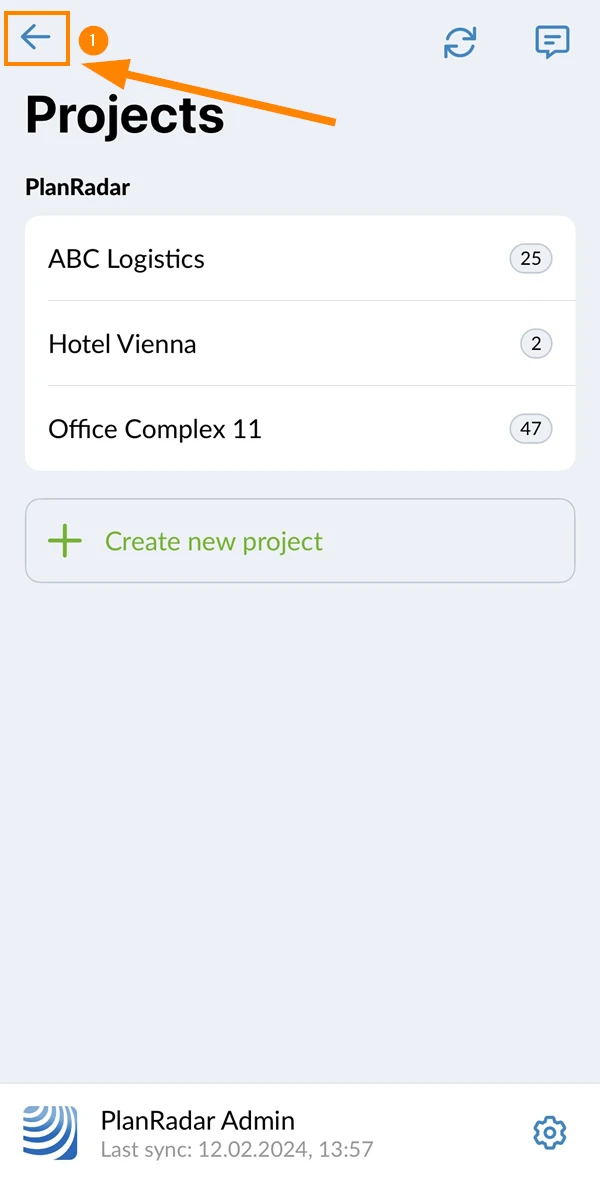
When you are in the main menu and want to go to the project selection screen:
Tap the Back button
When you are in the project selection screen and want to go to the account selection screen:
Tap the Back button
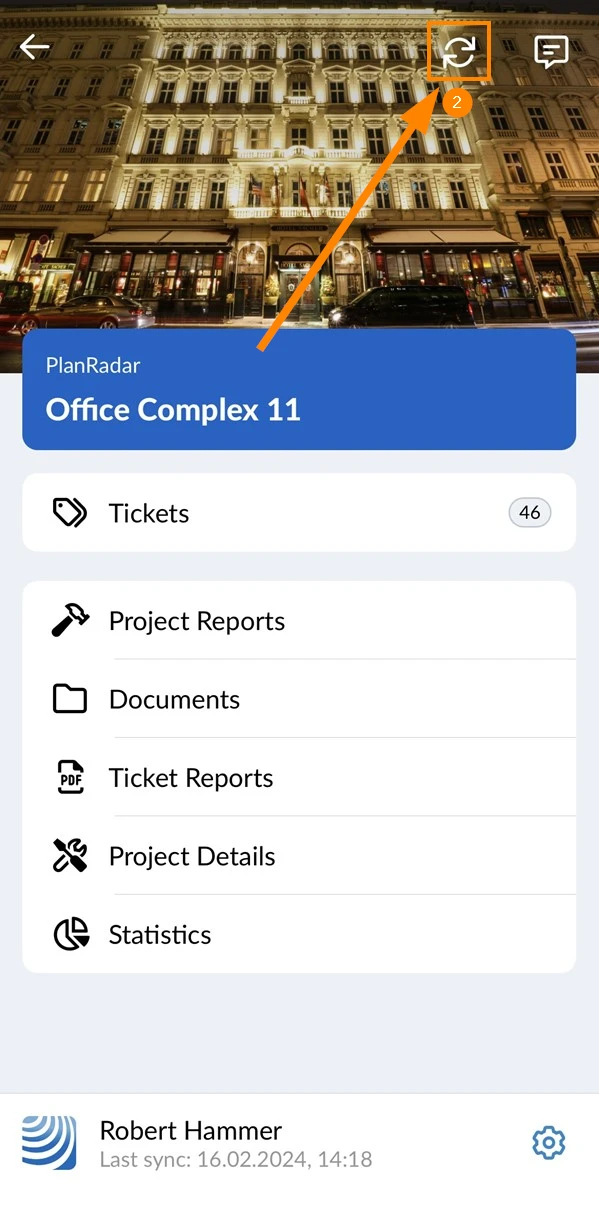
Start Sync
To start synchronisation of your mobile device with the PlanRadar server:
Go to the main menu (as described above)
Tap the Sync button
Related Articles
As a watcher you can not only view tickets as described above, you can also view:


 Deutsch
 Español
 Français
 Hrvatski
 Italiano
 Polski
 Português (BR)