This article explains the minimal necessary steps to set up a new project, add forms (for tickets), upload plans and add users. You also learn some basics about permissions, roles and how to create/invite new users.
Access & Permissions
Invite Users
There are two options to add new users to your account:
Invite user: The user gets an invitation email that he/she needs to accept. Only then the user creation is completed and tickets can be assigned.
Create user: The user gets created immediately and therefore you can assign tickets (and groups) already.
Learn how to invite/create in-house users. It works the same for subcontractors and watchers, except that user permissions are only available for in-house users.
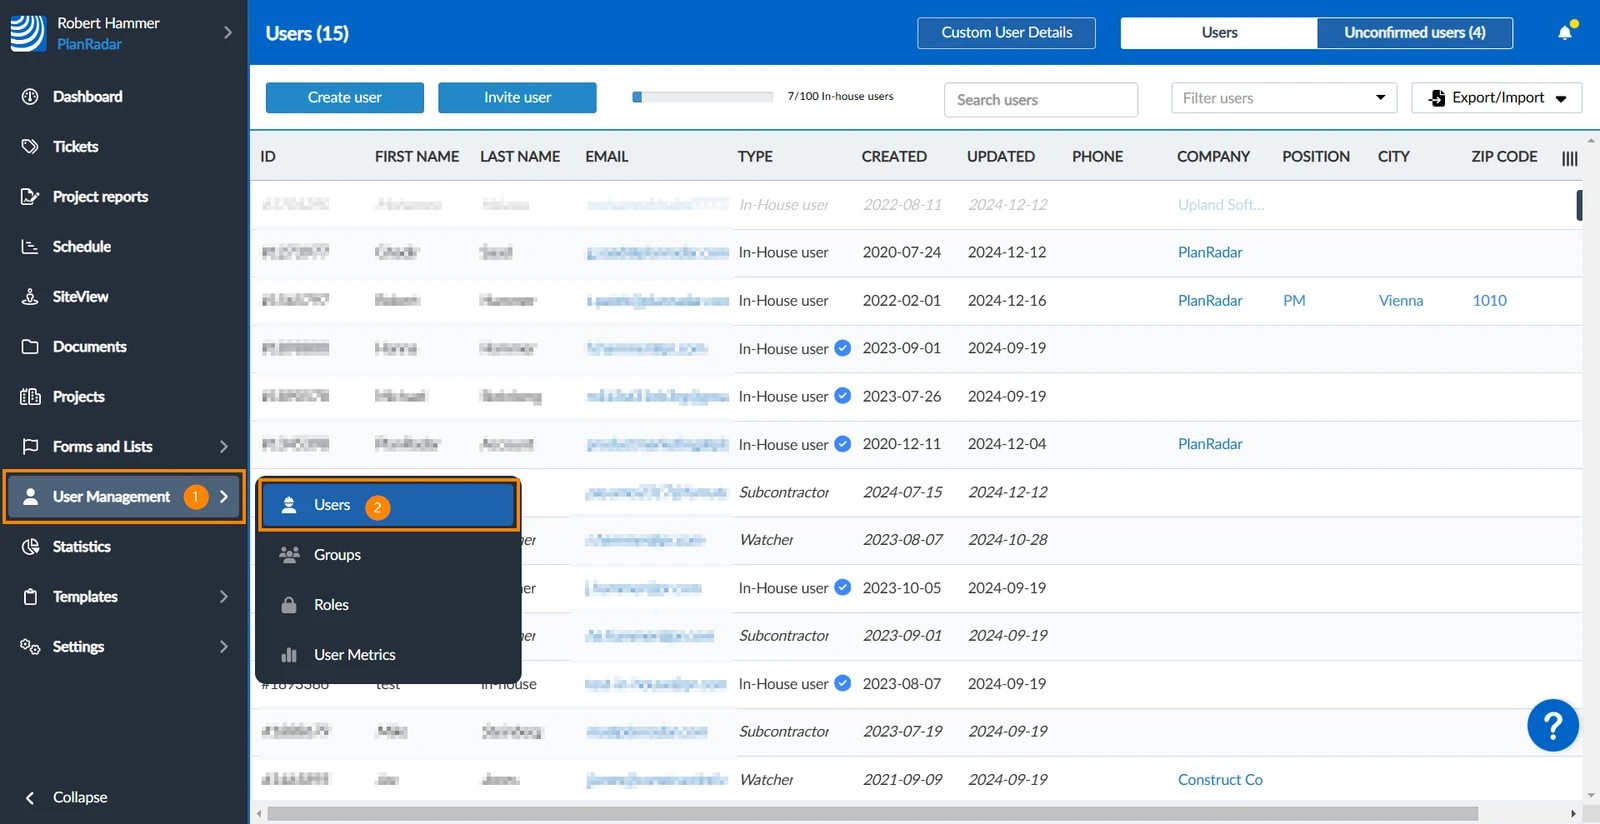
First navigate to Users:
Hover over User Management
Click Users
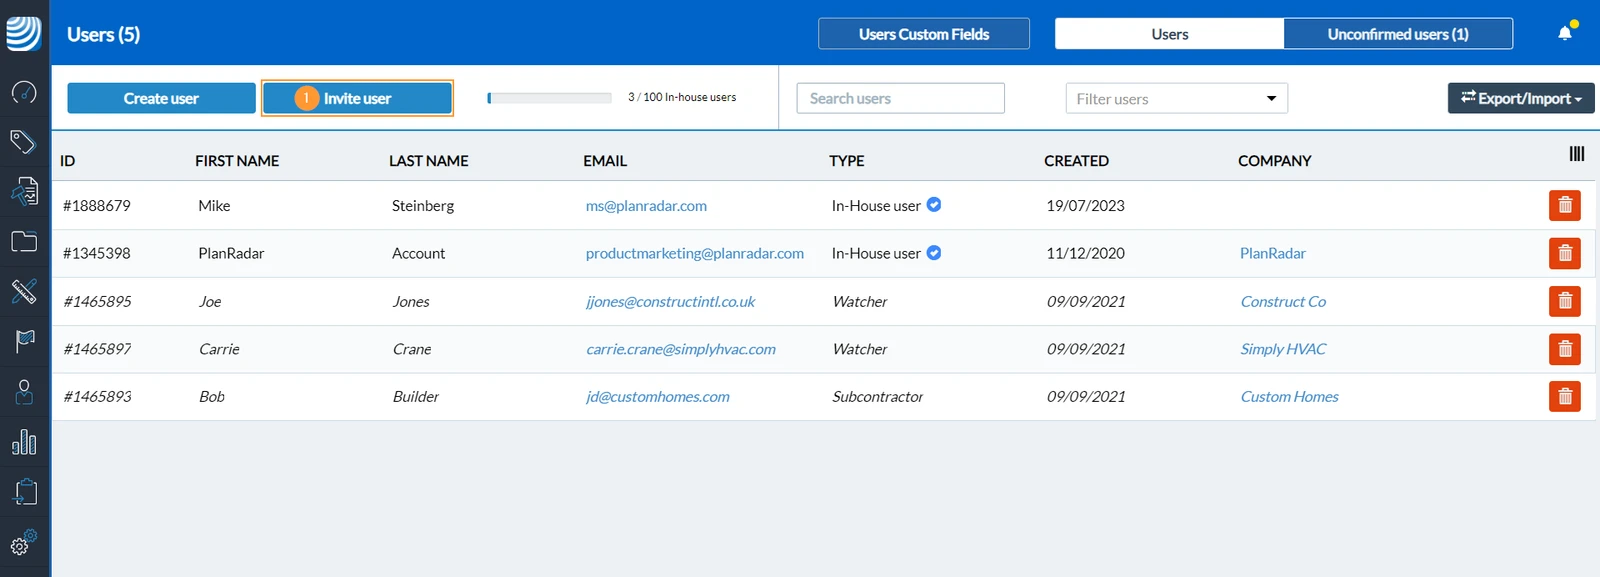
Invite a user
Click Invite user
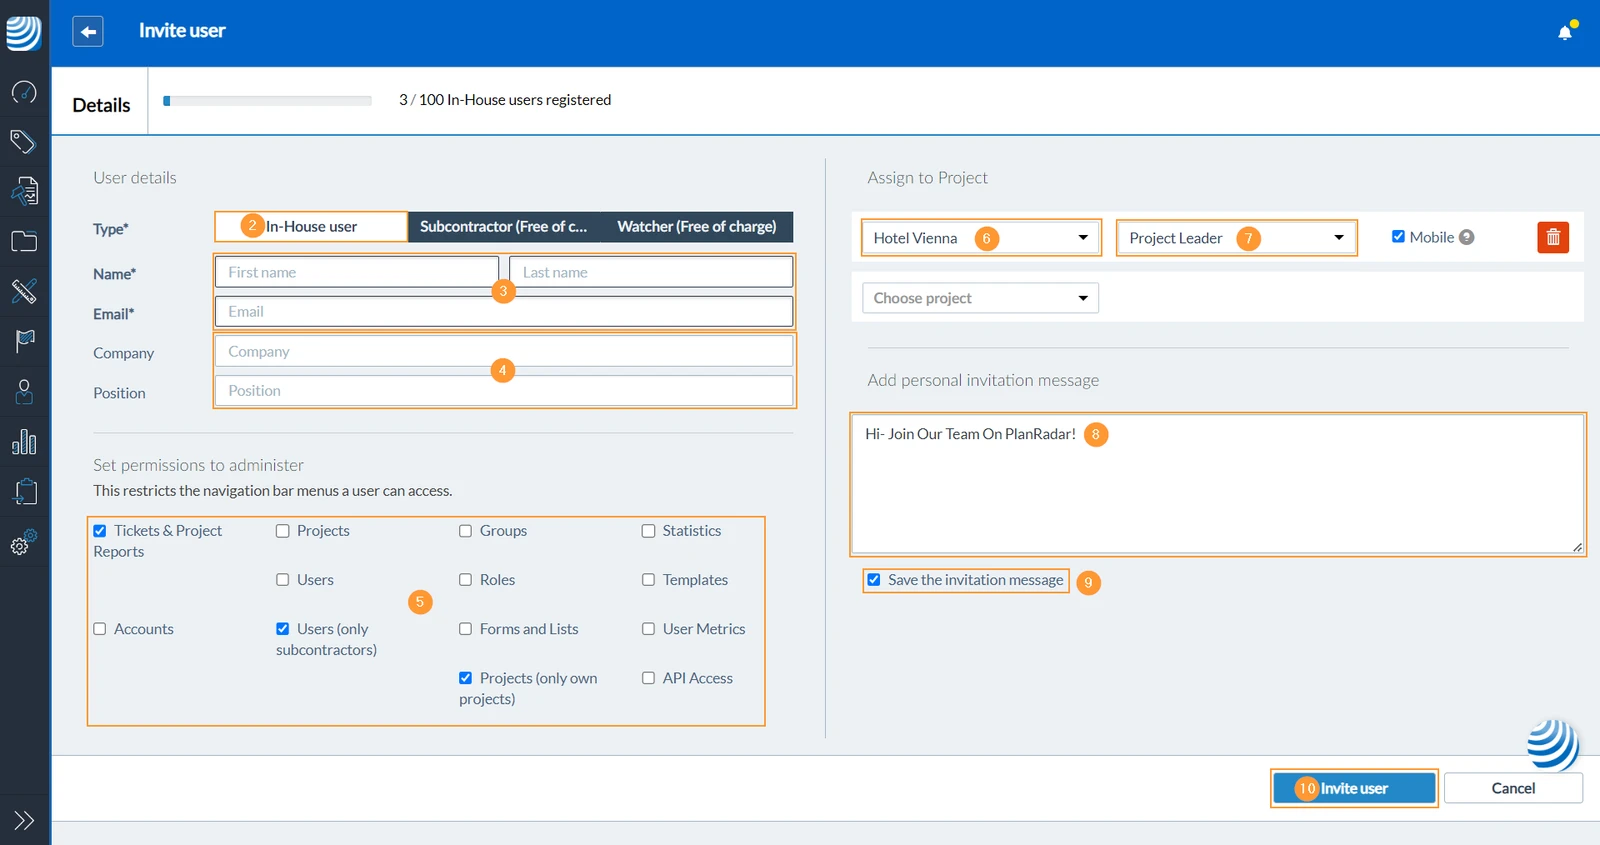
Click In-House user to define the user type and to be able to define user permissions.
Enter First name, Last name and Email (mandatory).
(optional): Enter additional information about the user (Company, Position)
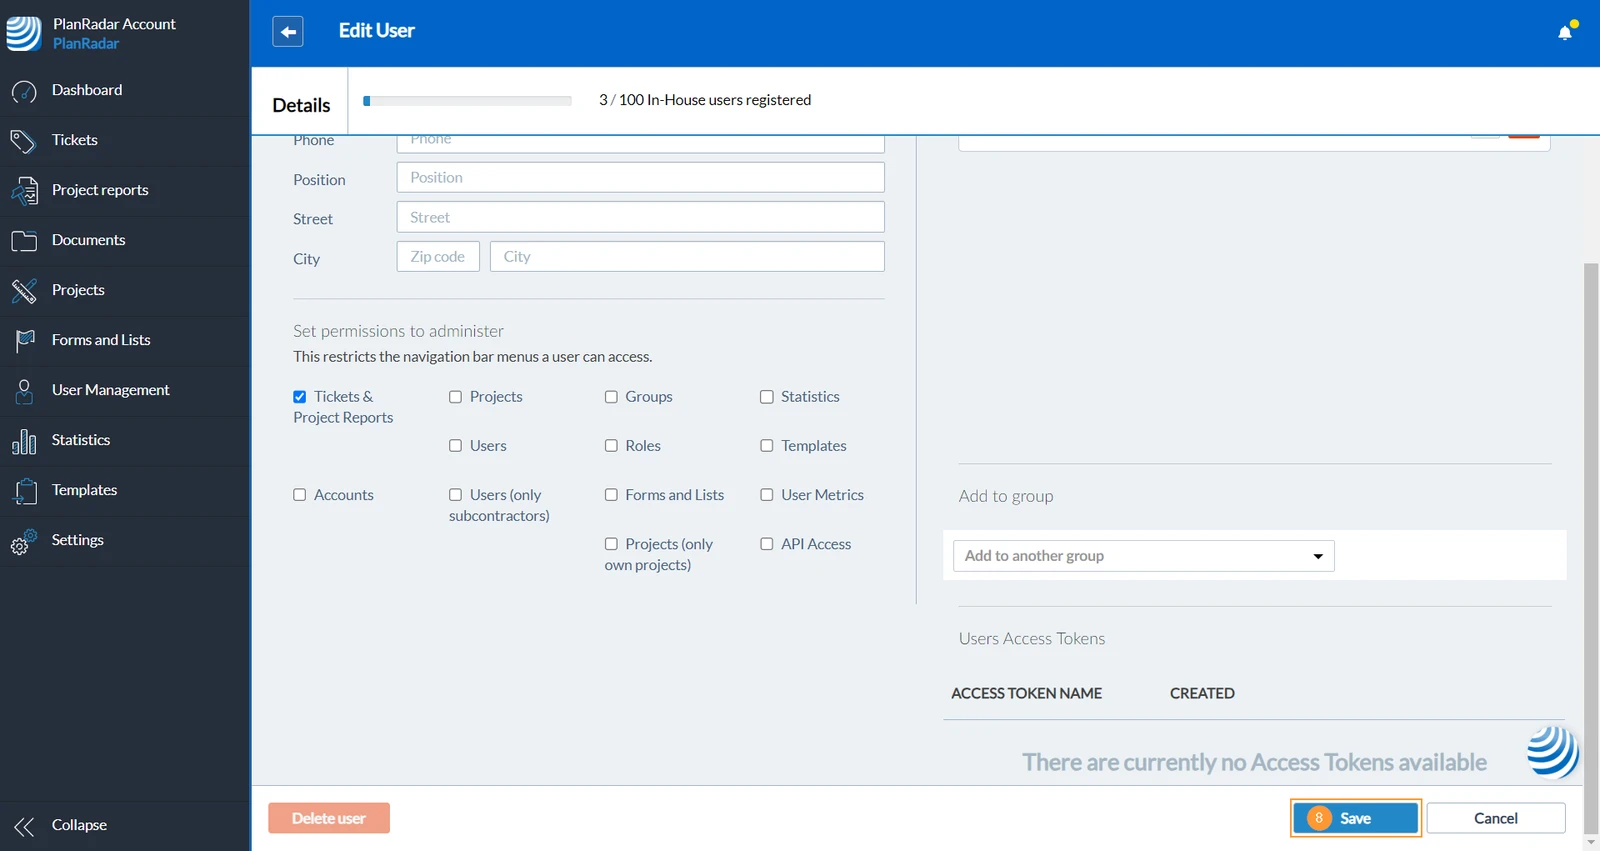
Select the check boxes for user permissions to define which main menu items the in-house user can access. (not available for sub-contractors and watchers)
Select a project in the Choose project drop down menu to assign the user to one or multiple projects.
Select a Role in the Set role drop down menu to assign the user a role in the project.
Enter personalised text that will be added to the invitation email.
(optional): Select check box Save the invitation message to reuse it next time.
Click Invite user to confirm and send the invitation message.
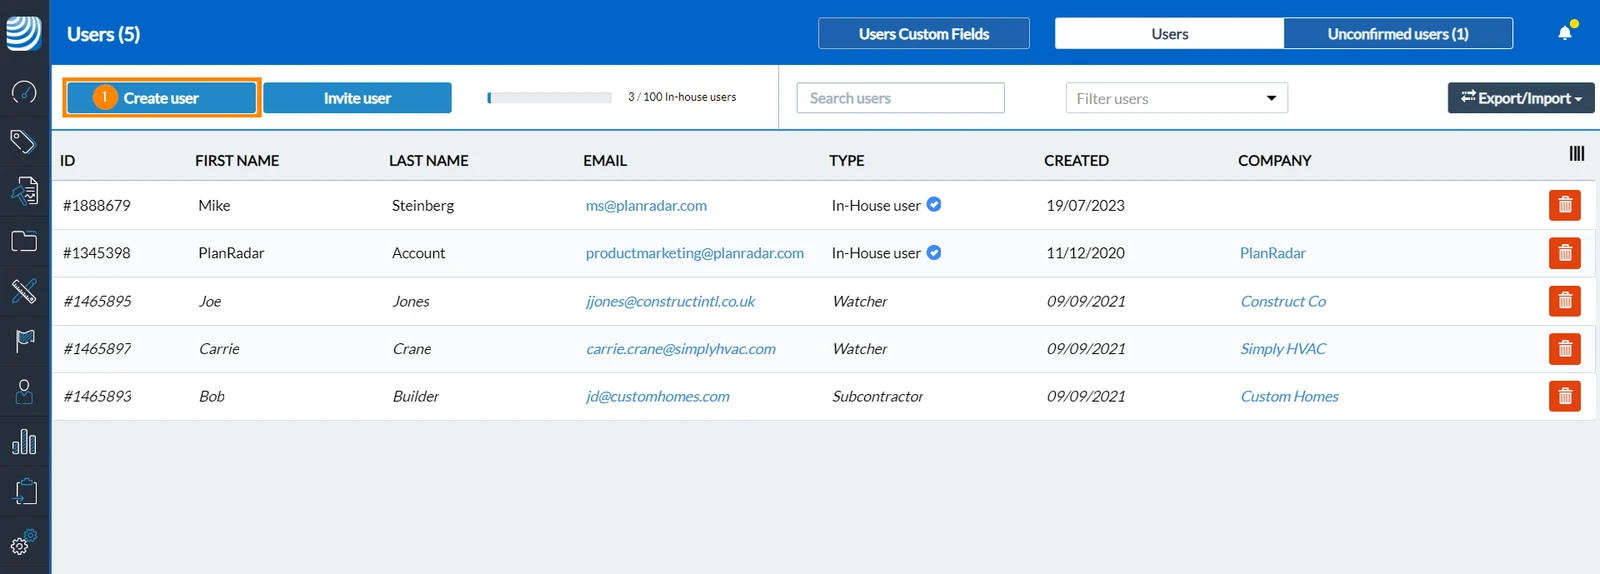
Create a User
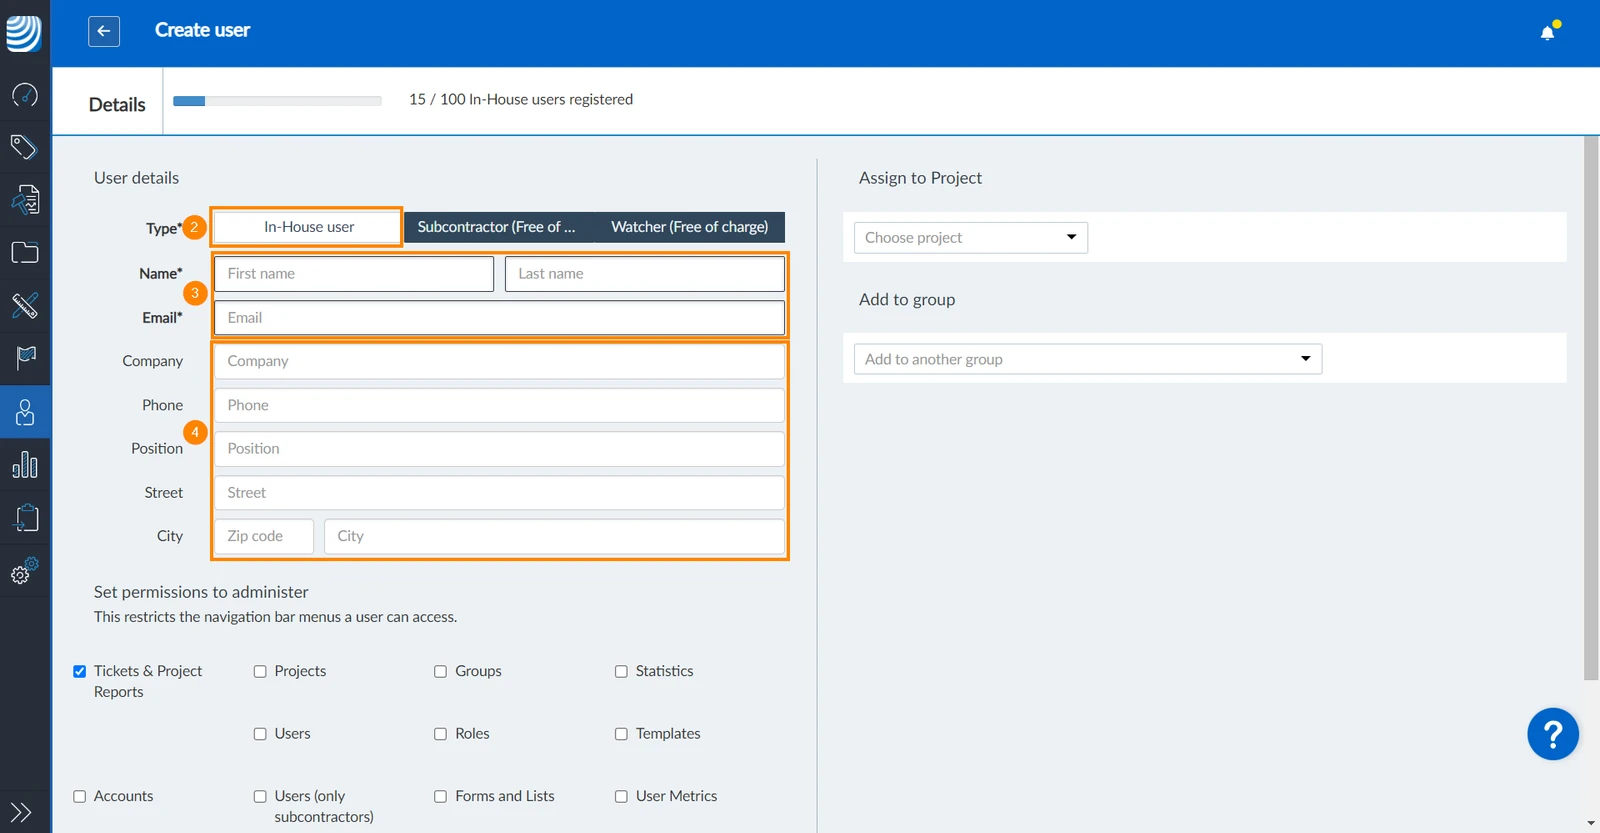
Click Create user
Click In-House user to define the user type and to be able to define user permissions.
Enter First name, Last name and Email (mandatory).
(optional): Enter additional information about the user (Company, Phone, Position, Address)
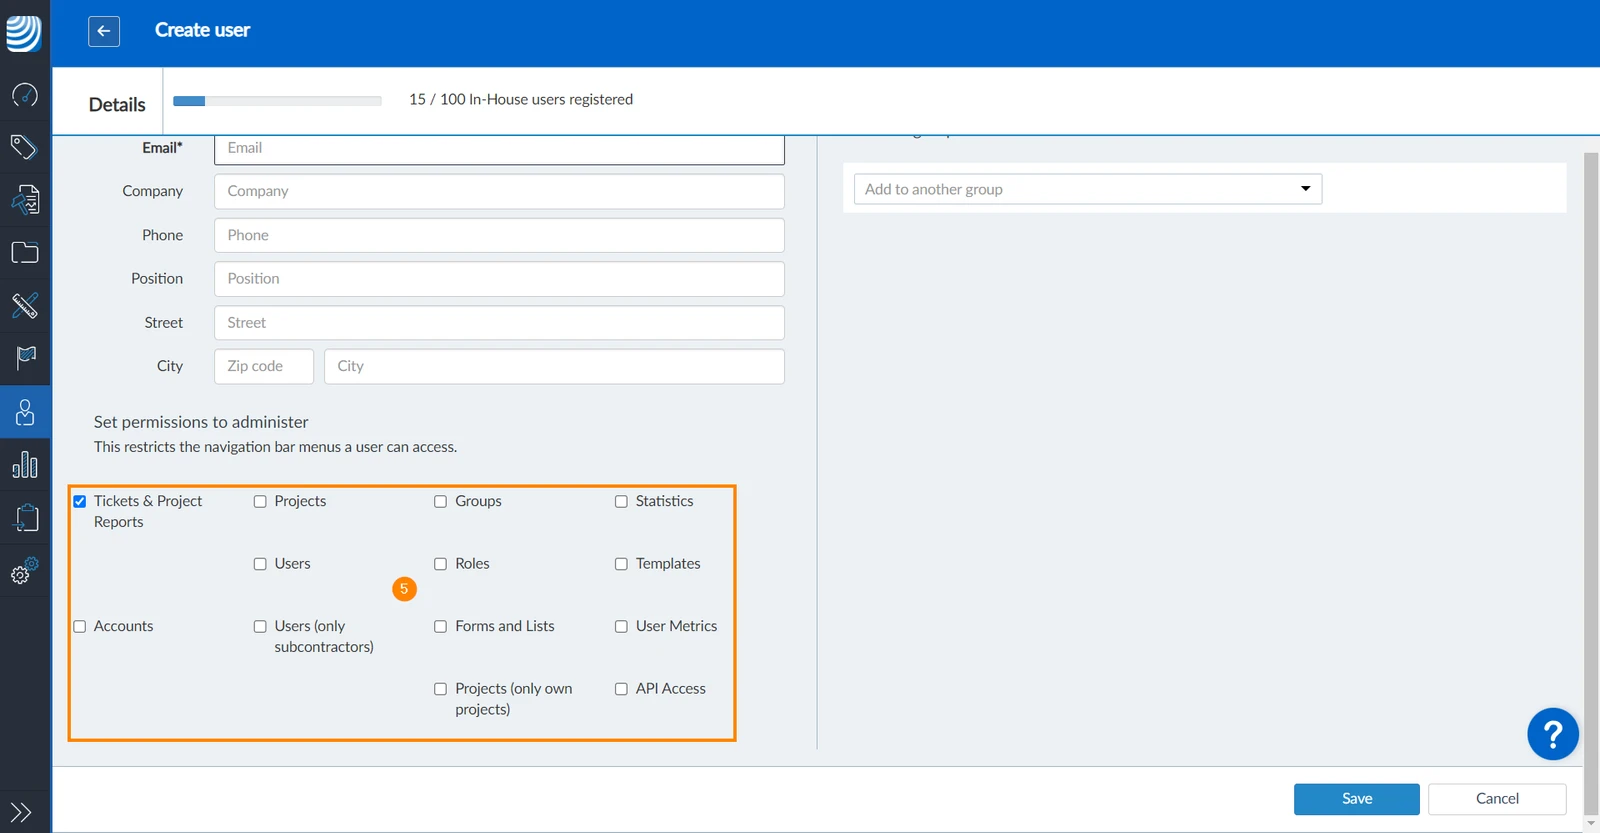
Select the check boxes for user permissions to define which main menu items the user can access.
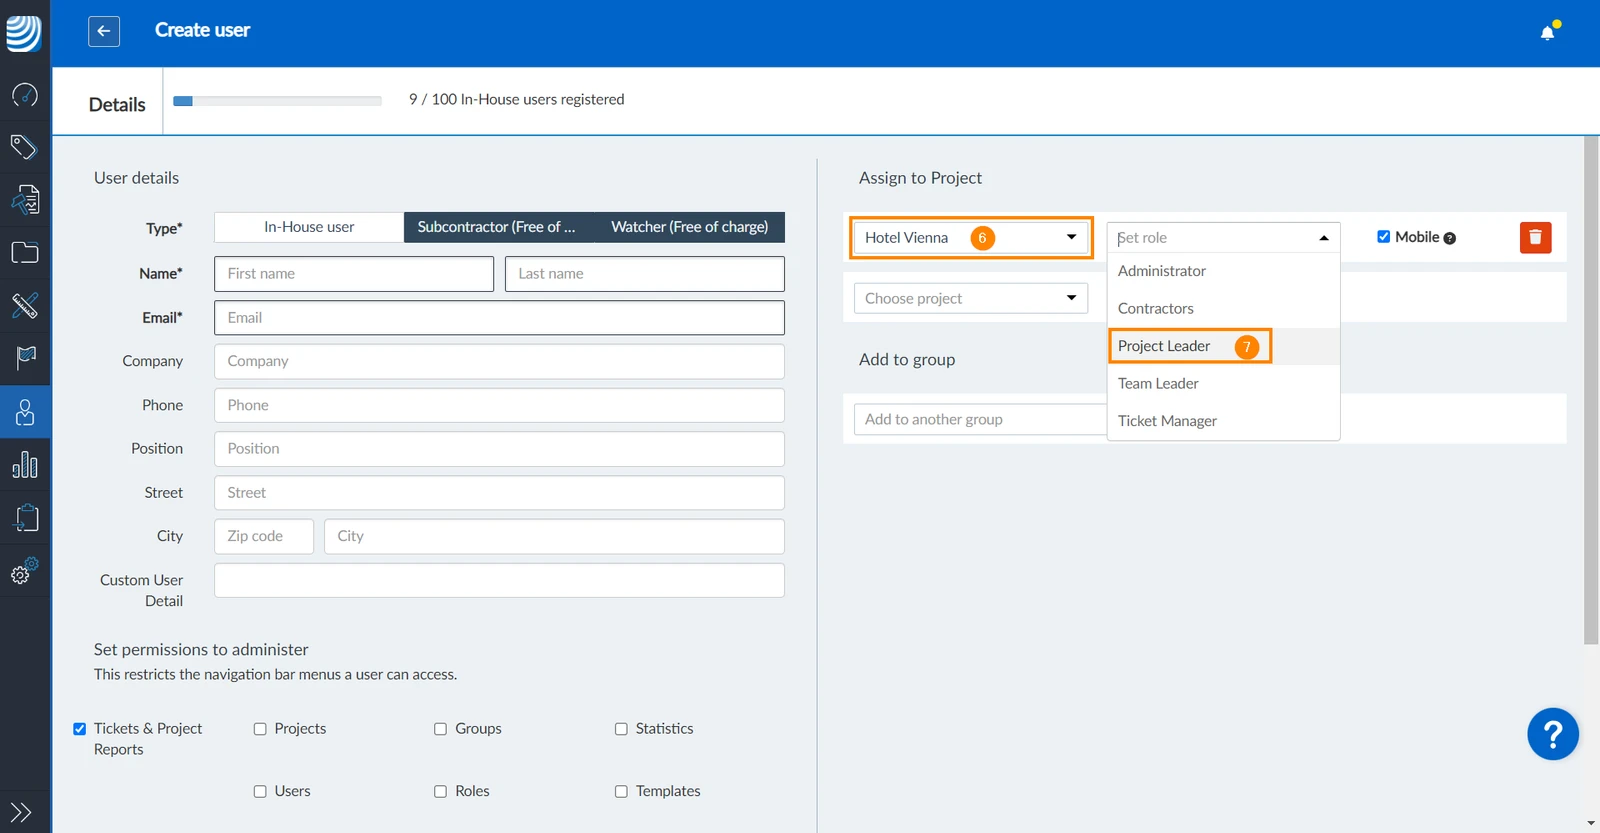
Select a project in the Choose project drop down menu to assign the user to one or multiple projects.
Select a Role in the Set role drop down menu to assign the user a role in the project.
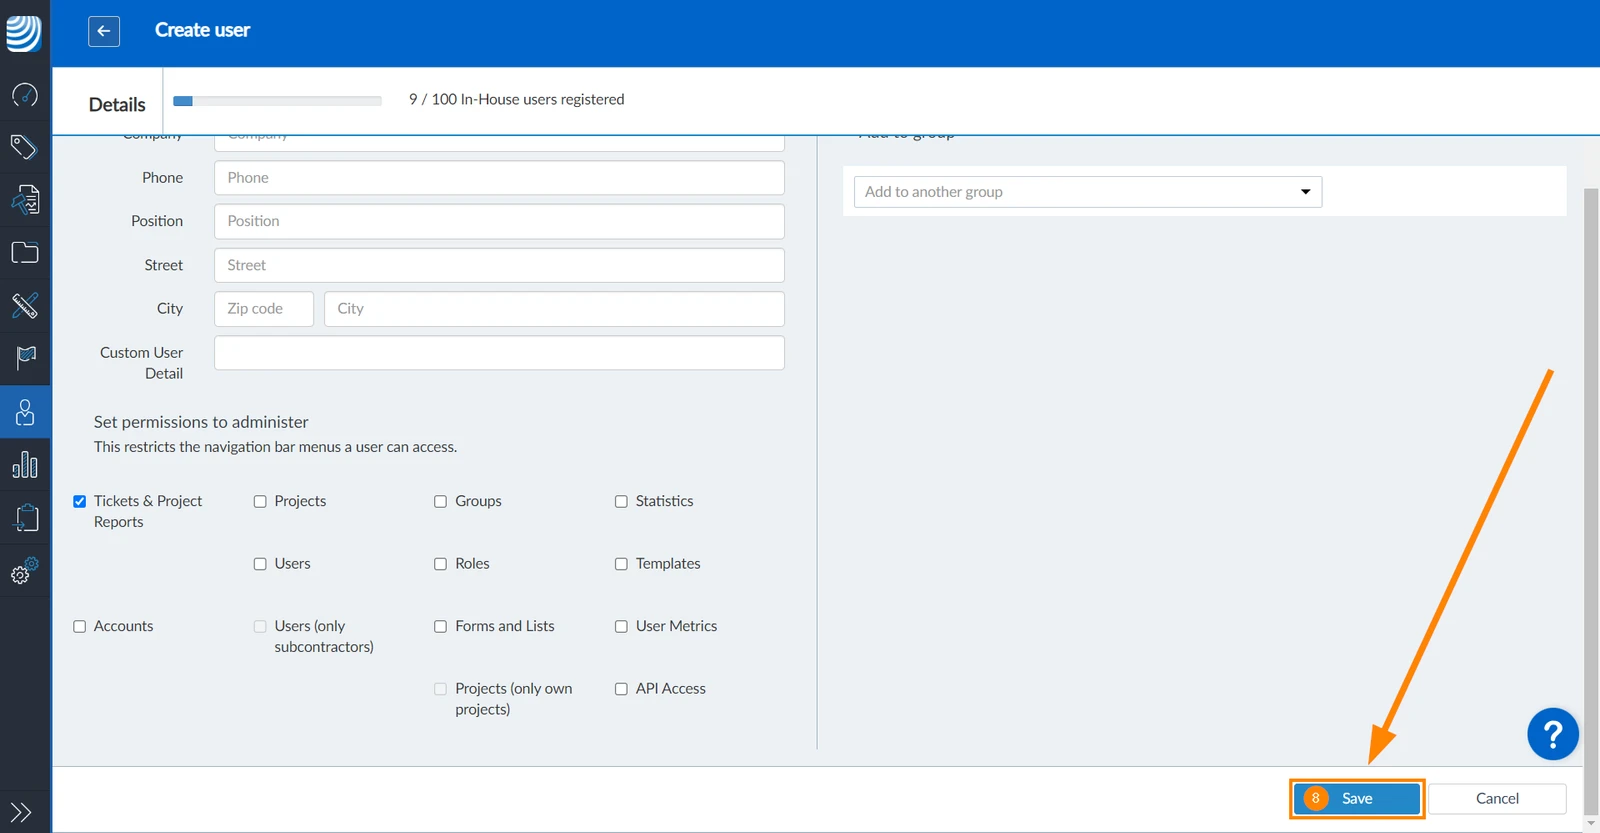
Click Save to confirm the creation of the new user.
Unconfirmed Users
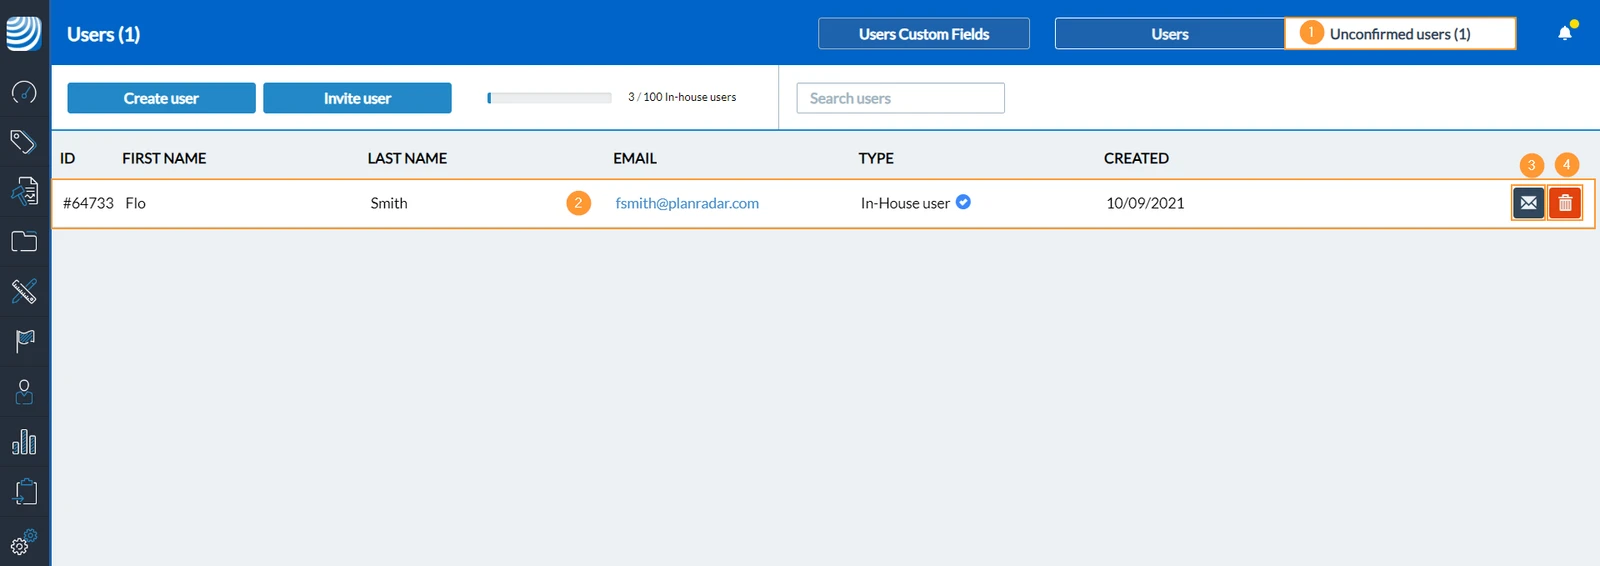
After invitation, all unconfirmed users are listed here until they click the link in the confirmation email.
Click Unconfirmed users
Each unconfirmed users is listed here.
(optional): Click Resend Invitation to send the invitation email again.
(optional): Click Delete to cancel and delete the invitation.
Grant Permissions
In PlanRadar there are two main categories of permissions:
User permissions: They define which items users are allowed to access in the main menu, independent from their permissions in individual projects.
Role permissions: They define in detail what users with a specific role are allowed to do. Roles provide project-based permissions since adding users to a project always requires a role. Roles can even be used in the form editor to control access to each single ticket field.
Grant Permission to Create and Manage Projects
To grant other users the permission to create and manage projects follow theses steps as the account owner (or as a user with the user permission "Users"):
Hover over User Management
Click Users
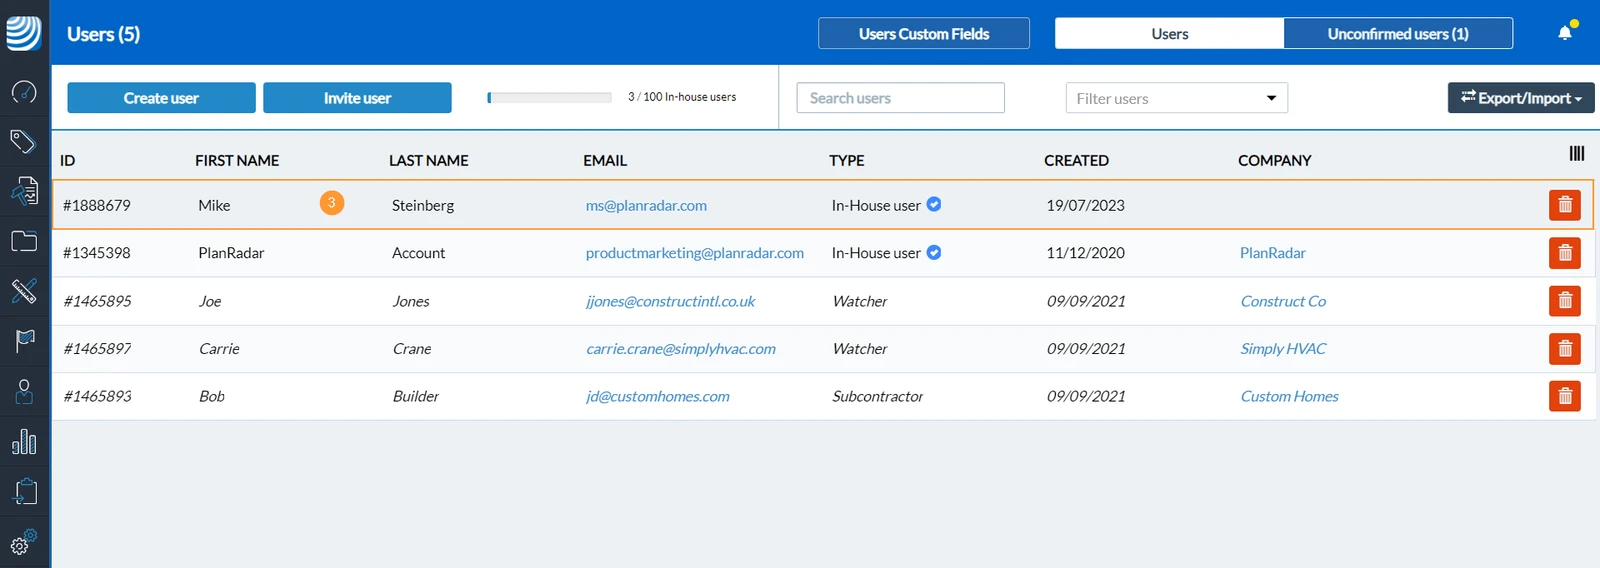
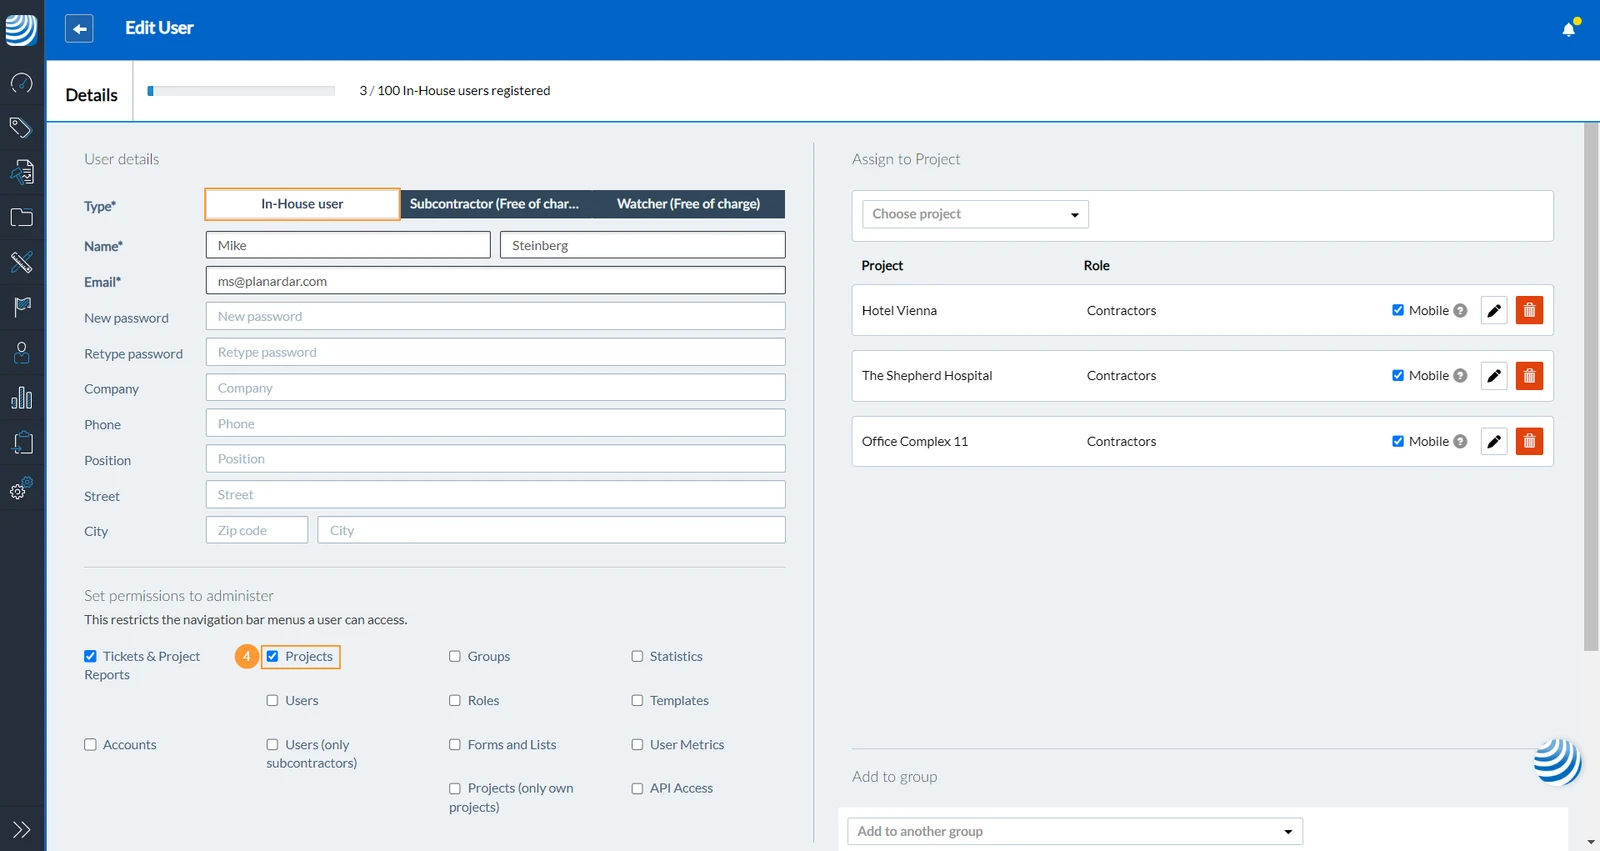
Click on the row of an in-house user to open it
Select Projects check box
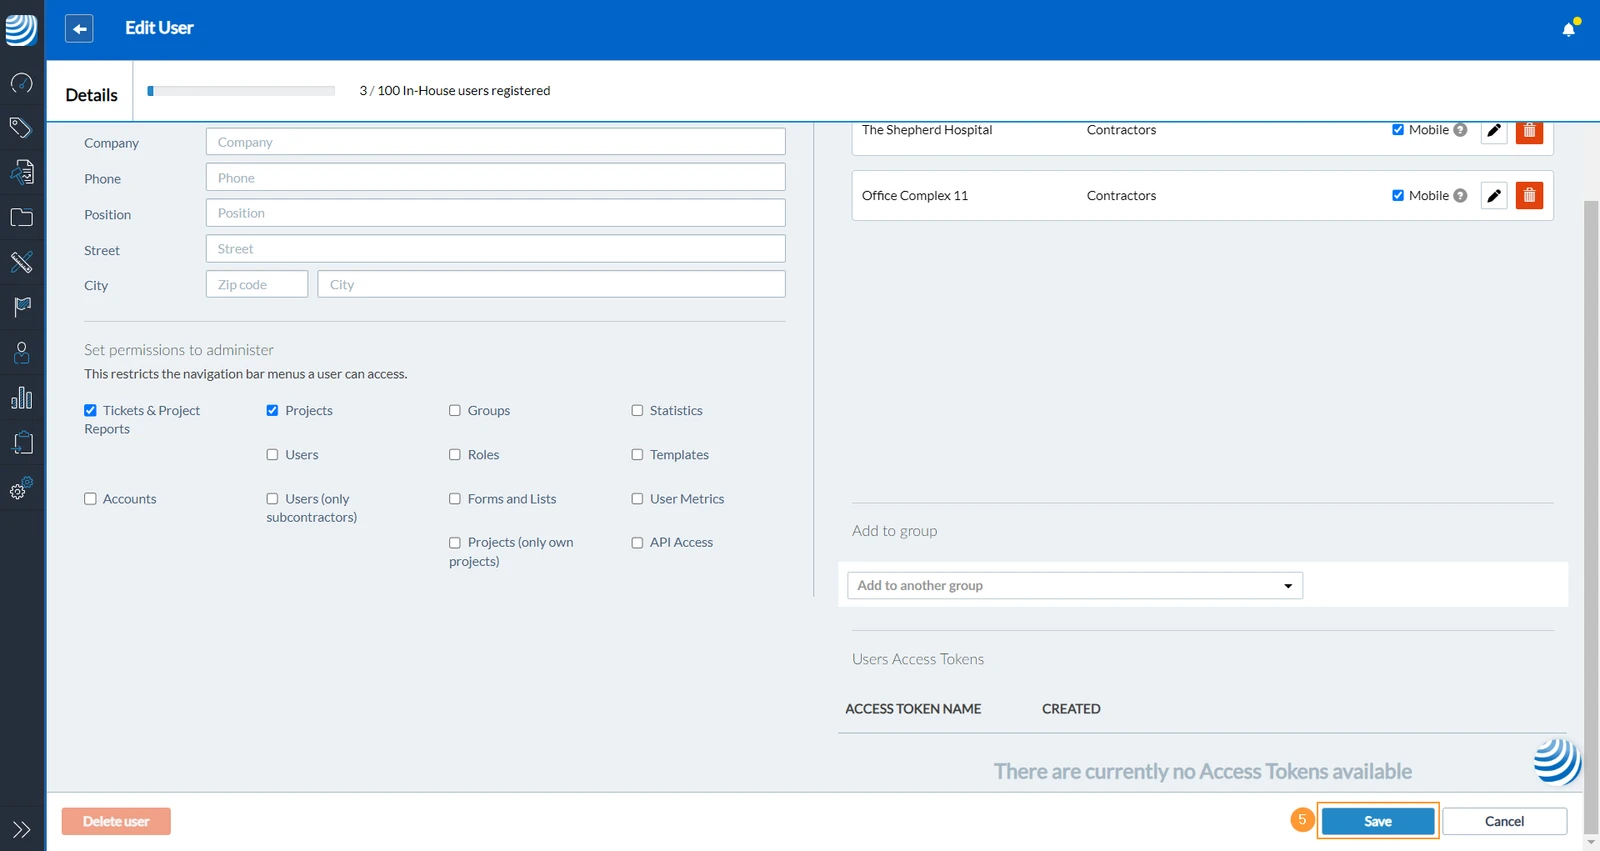
Click Save (you probably have to scroll down first)
Select Projects (only own Projects) check box to restrict access to only projects that the user created himself.
Grant Permission to Create & Edit Tickets
You probably want to create roles to define who can see and manage specific information in a project.
In the following example we grant the permission to create tickets and to view and edit all existing tickets in a project to an in-house user. First we create the role and then we assign the user with this role to a project.
Create a Role
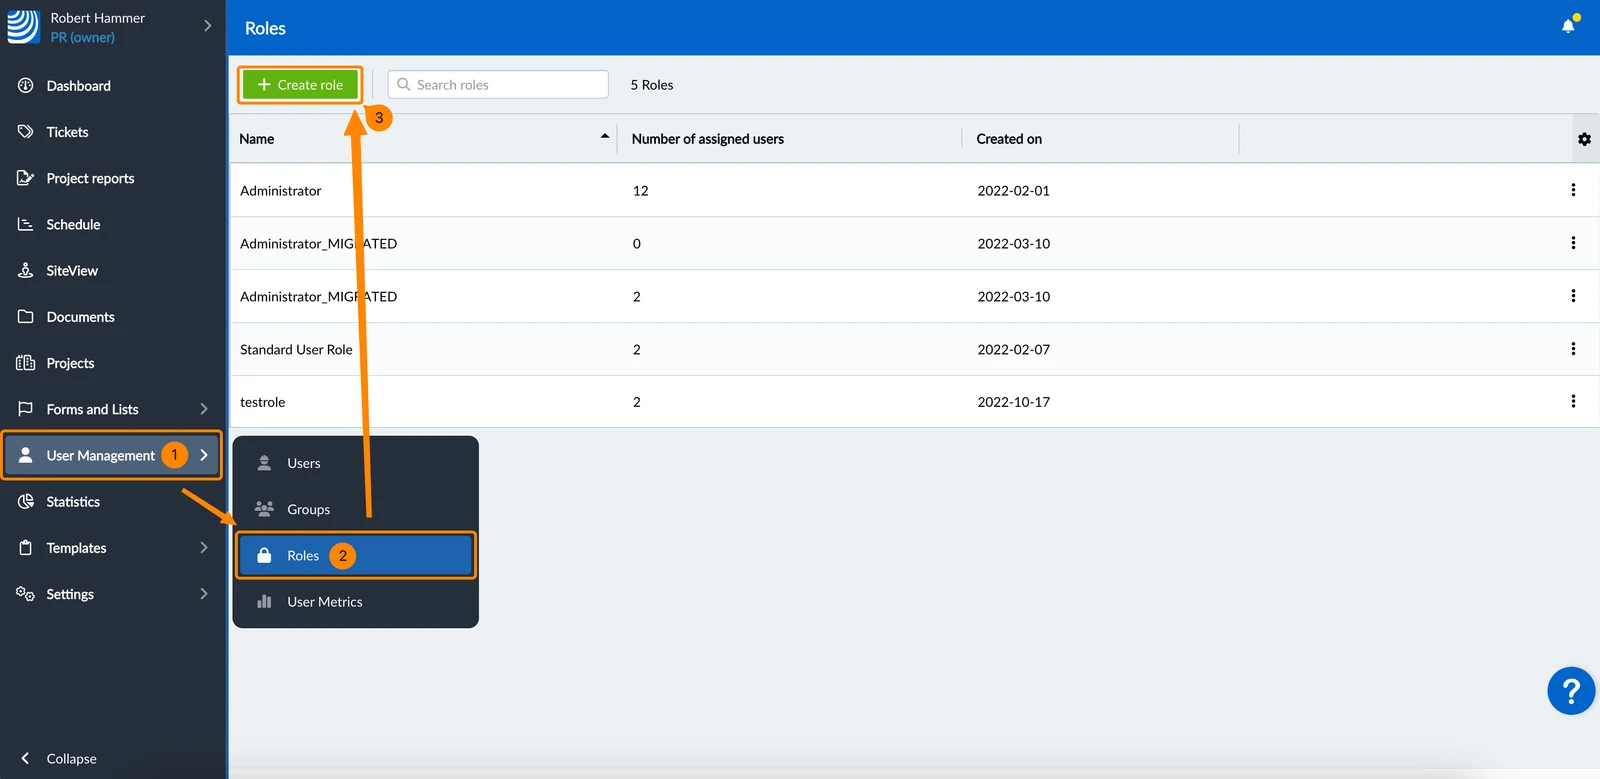
Hover over User Management
Click Roles
Click + Create role
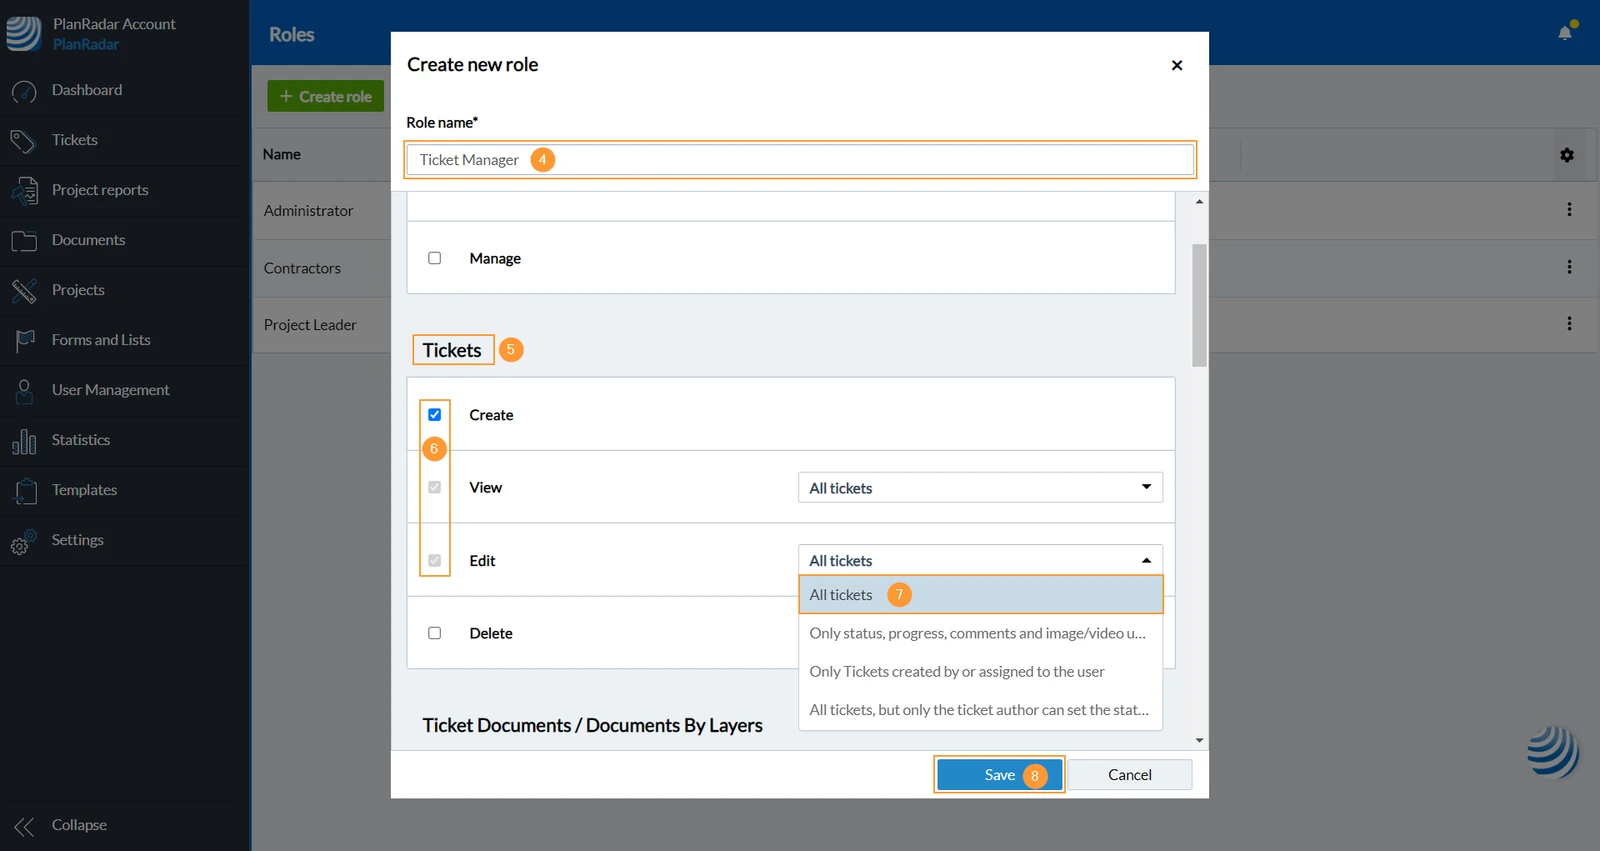
Enter a Role name (mandatory) e.g. Ticket Manager
Scroll to the Tickets section
Select the Create check box
Select All tickets in the drop-down menu
Click Save to confirm the creation of the role
Click Run automatic assignment, because we want to add the new role to all form fields of existing forms.
Add a User with a Role to a Project
Hover over User Management
Click Users
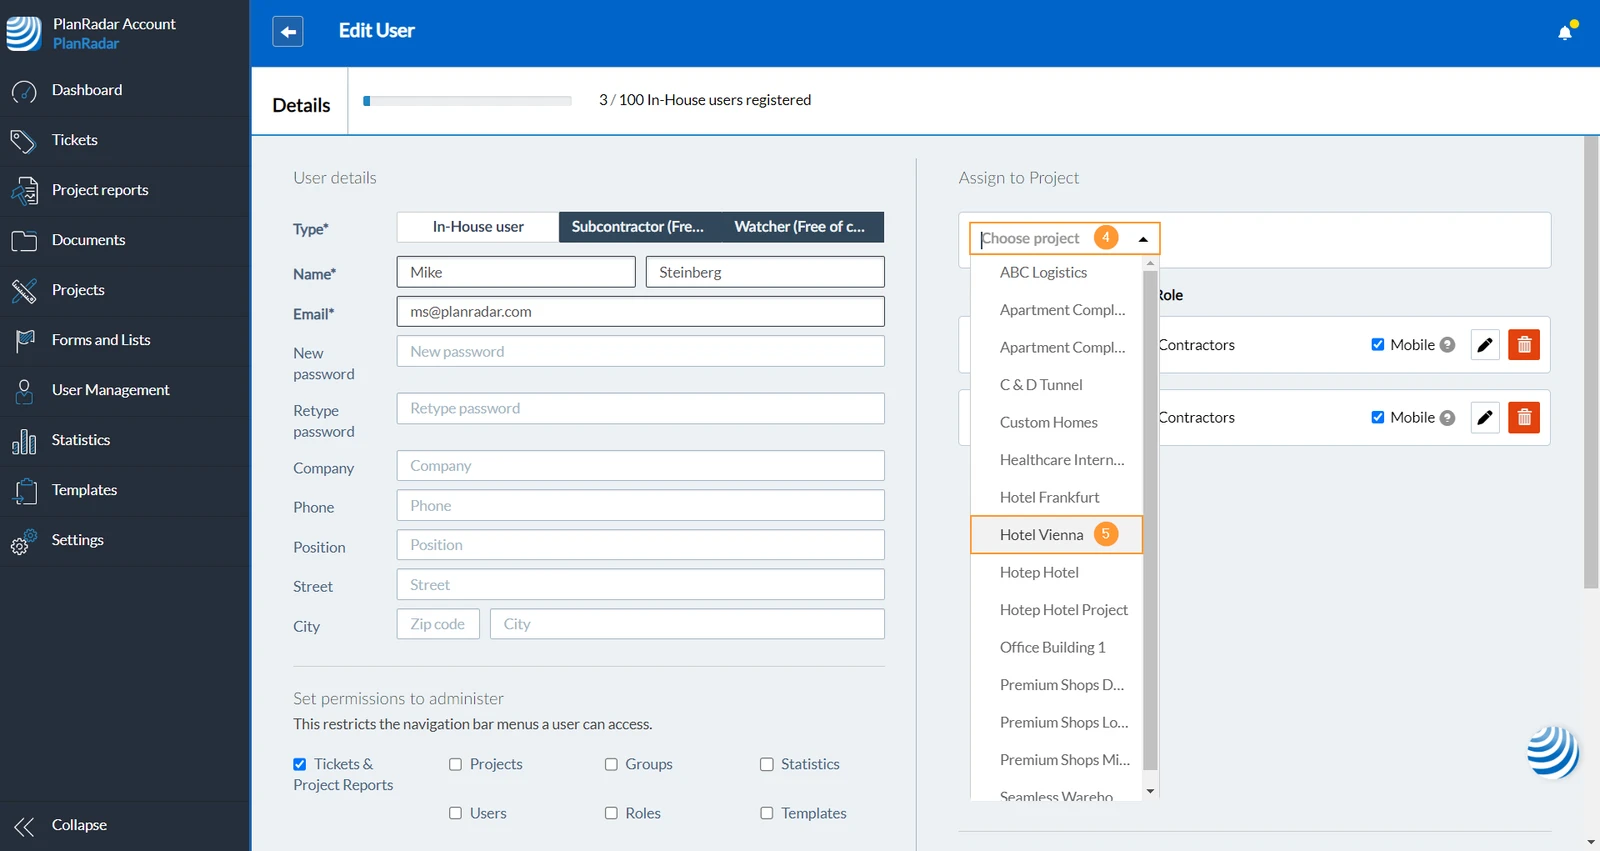
Click on the row of an in-house user to open it
Open the Choose project drop-down menu
Select the project in the drop-down menu
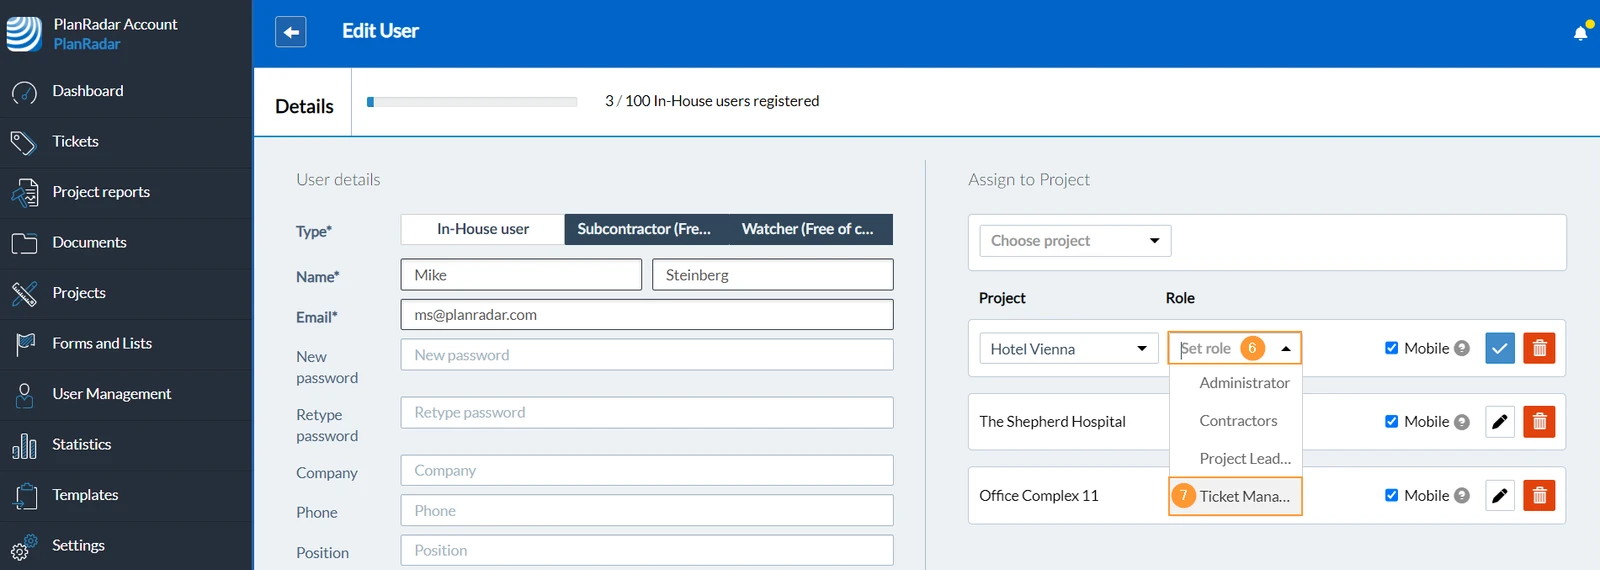
Open the Set role drop-down menu
Select the role (e.g. Ticket Manager) in the drop-down menu
Click Save (you probably have to scroll down first)
Set up a new project
To start working and creating tickets you need at least a project with:
a layer (with or without a plan)
a form (where ticket fields are defined)
a user (to assign the tickets to)
Later on you might have more layers with plans for each floor of a project, multiple forms to cover all your use cases and multiple users working with tickets.
Create a new Project
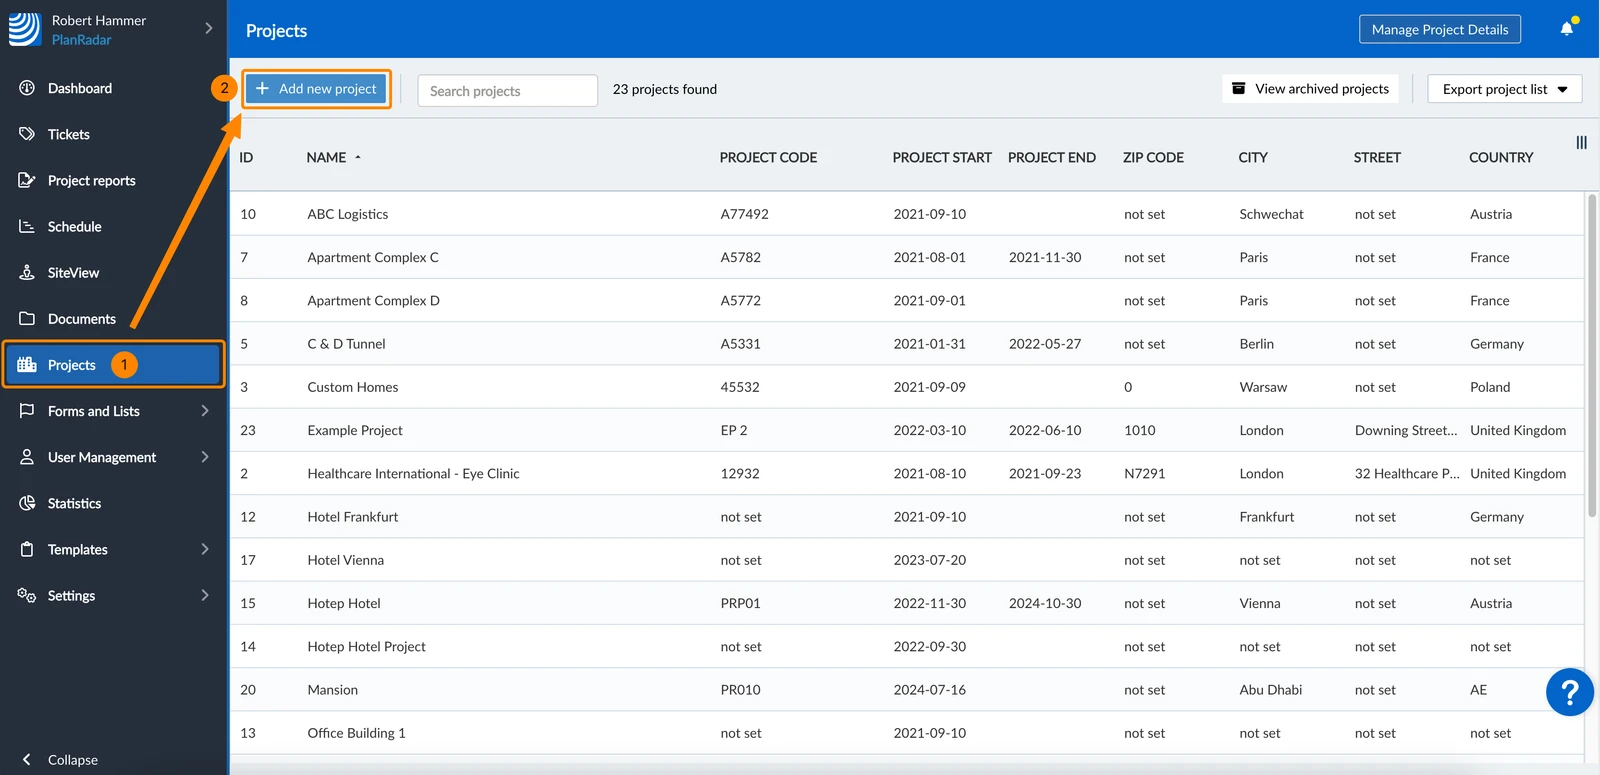
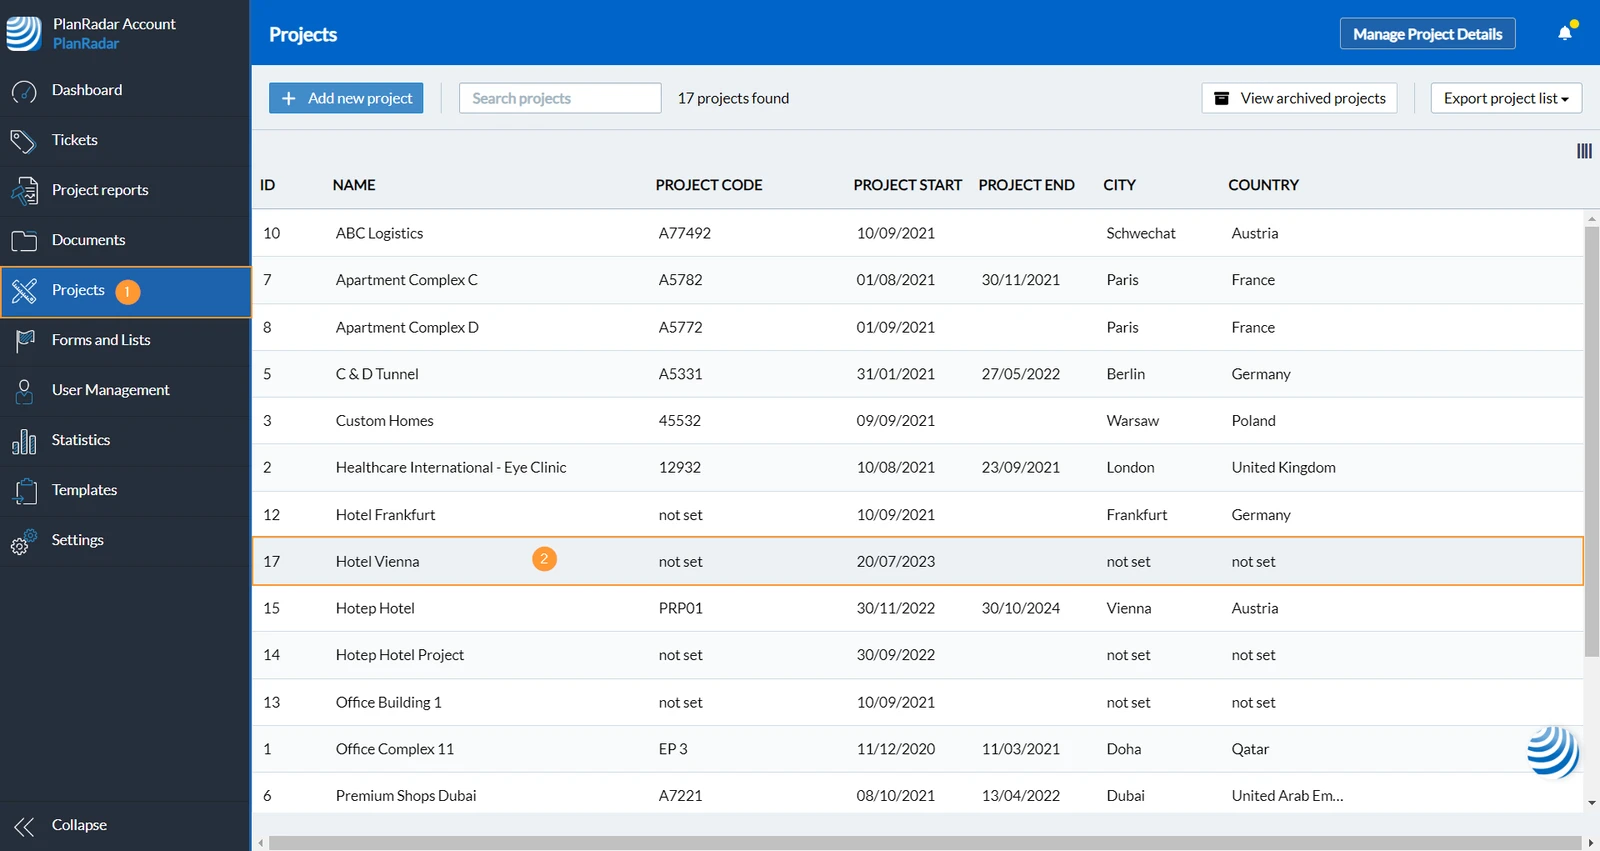
Click Projects
Click + Add new project
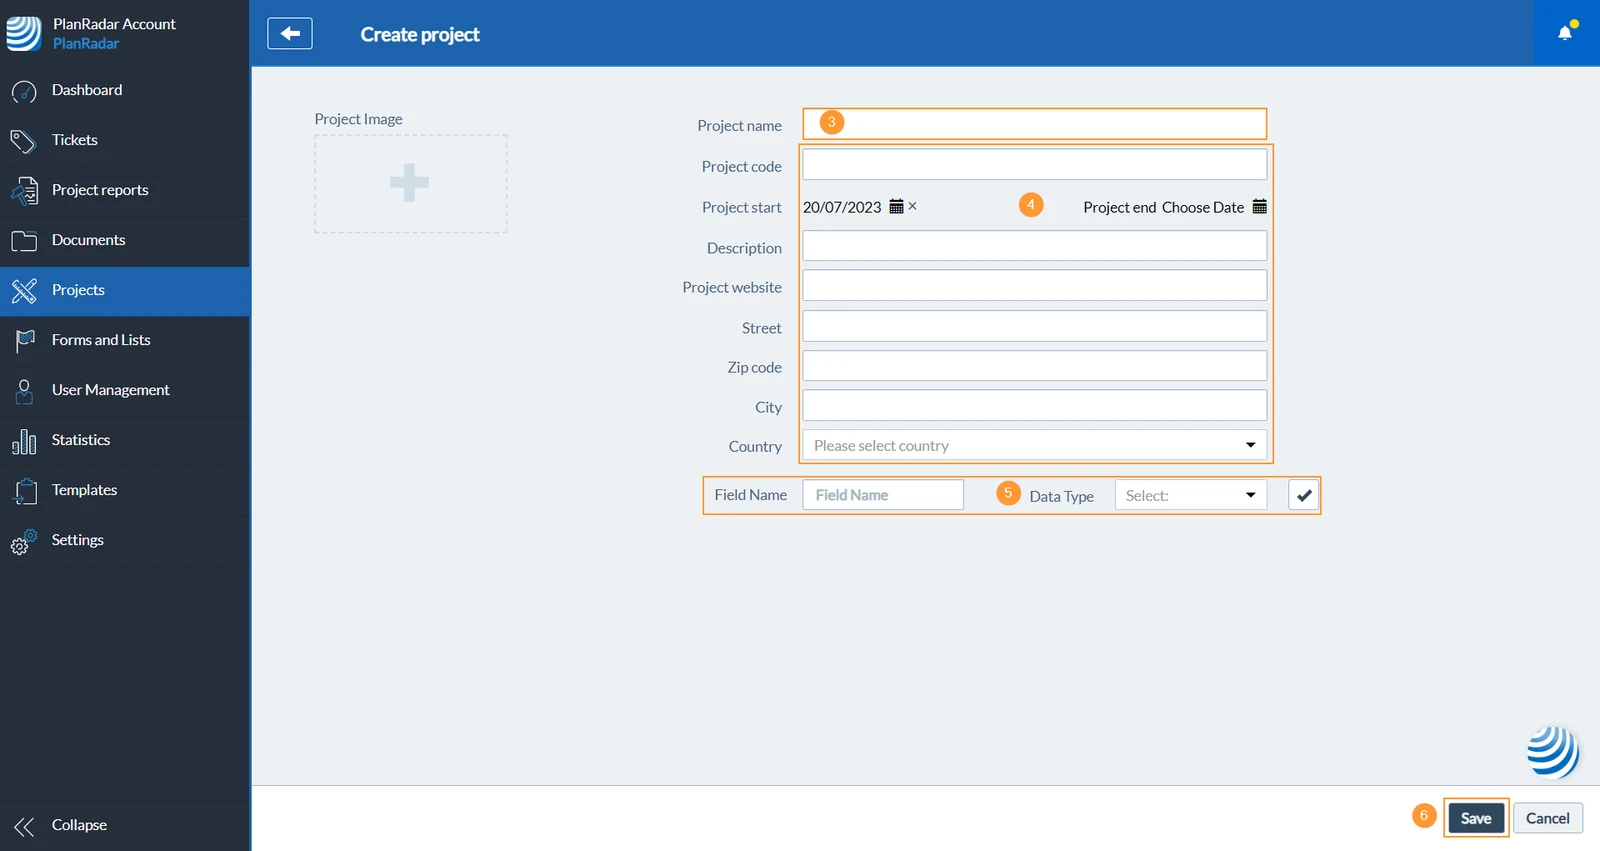
Enter Project name (mandatory)
(optional): Enter project details
(optional): Add custom project fields
Click Save to confirm the creation of the project
Open/Edit a Project
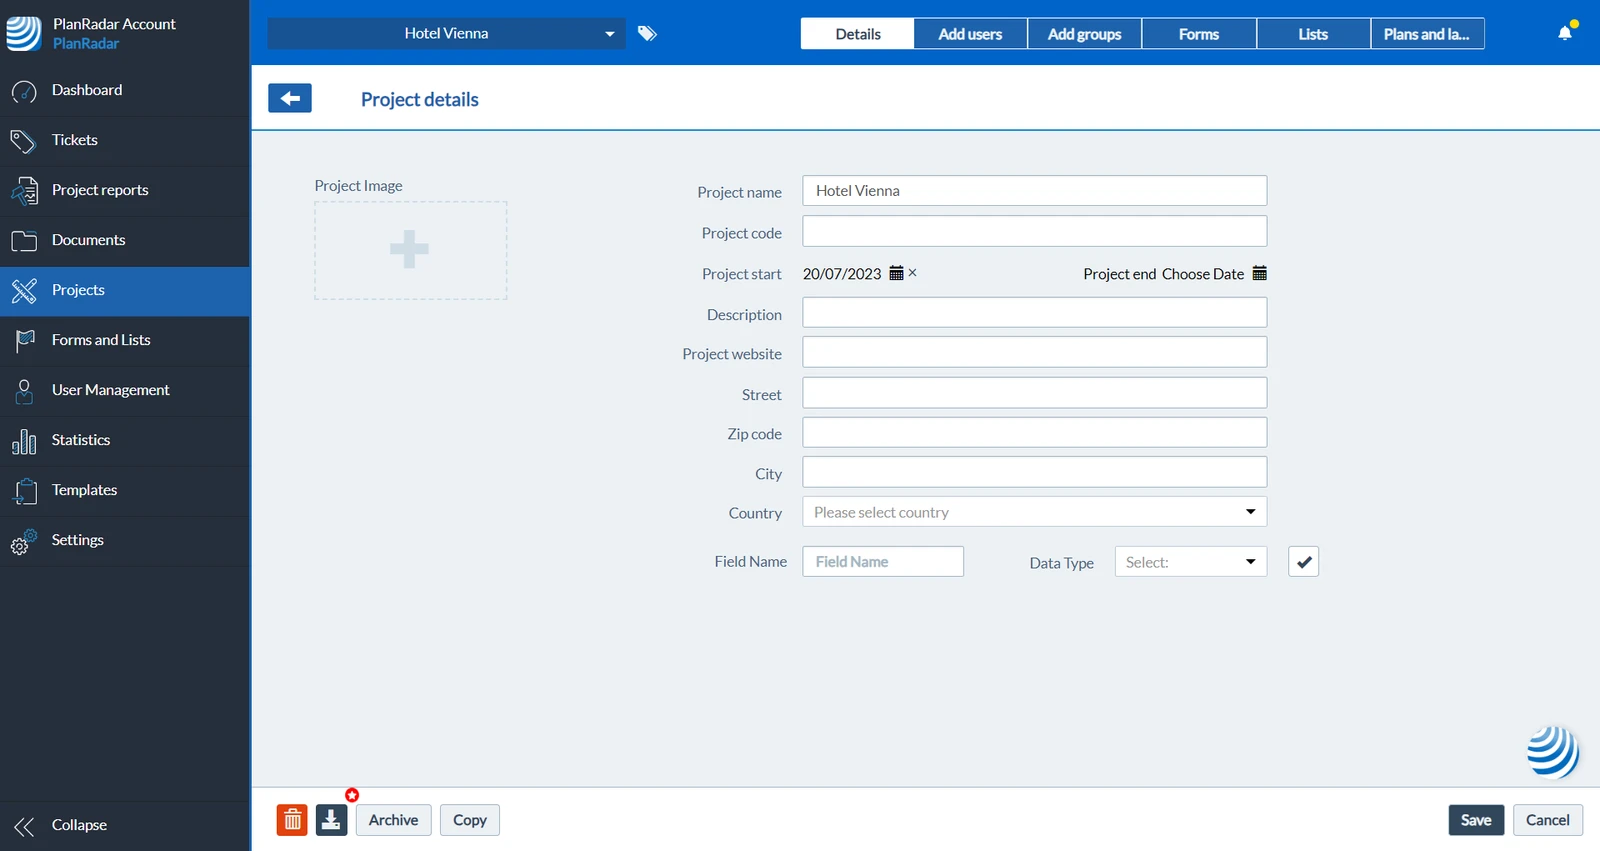
After creating a project in the previous step, you are forwarded to the project view:
To get there later and view or edit a project:
Click Projects
Click the line of the project in the project list to open it
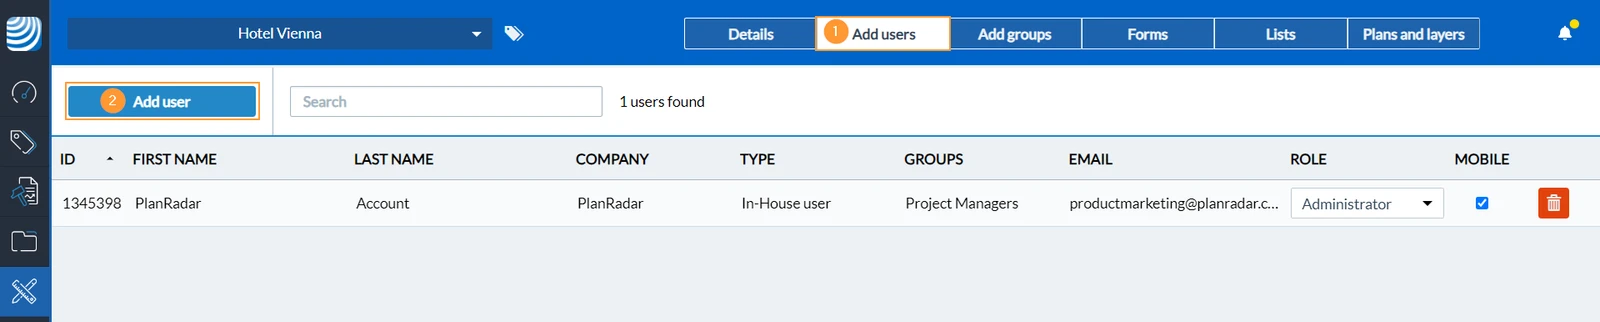
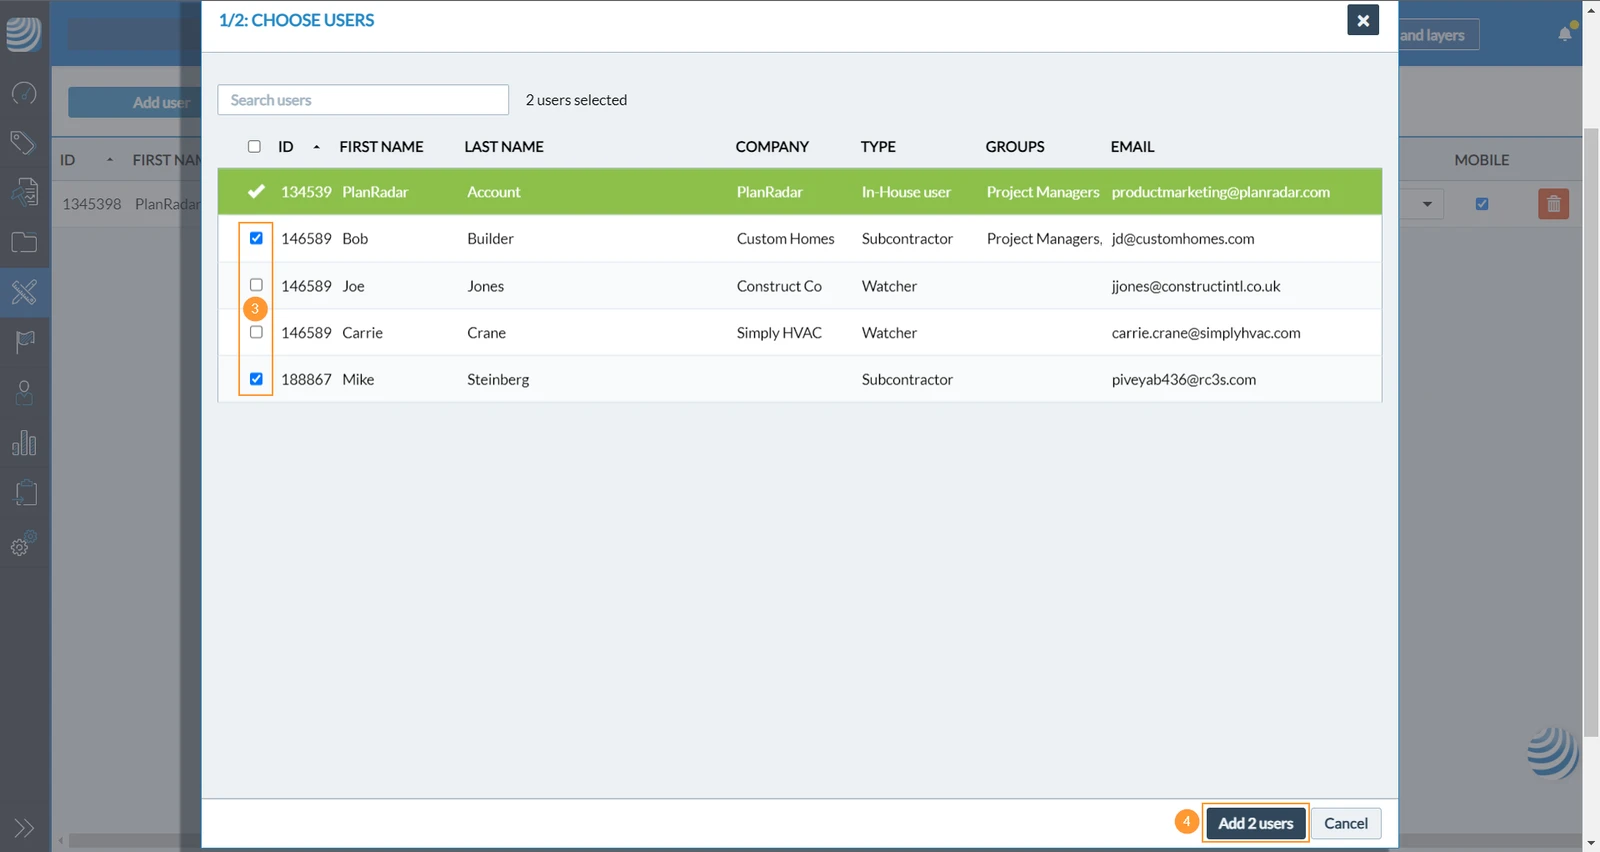
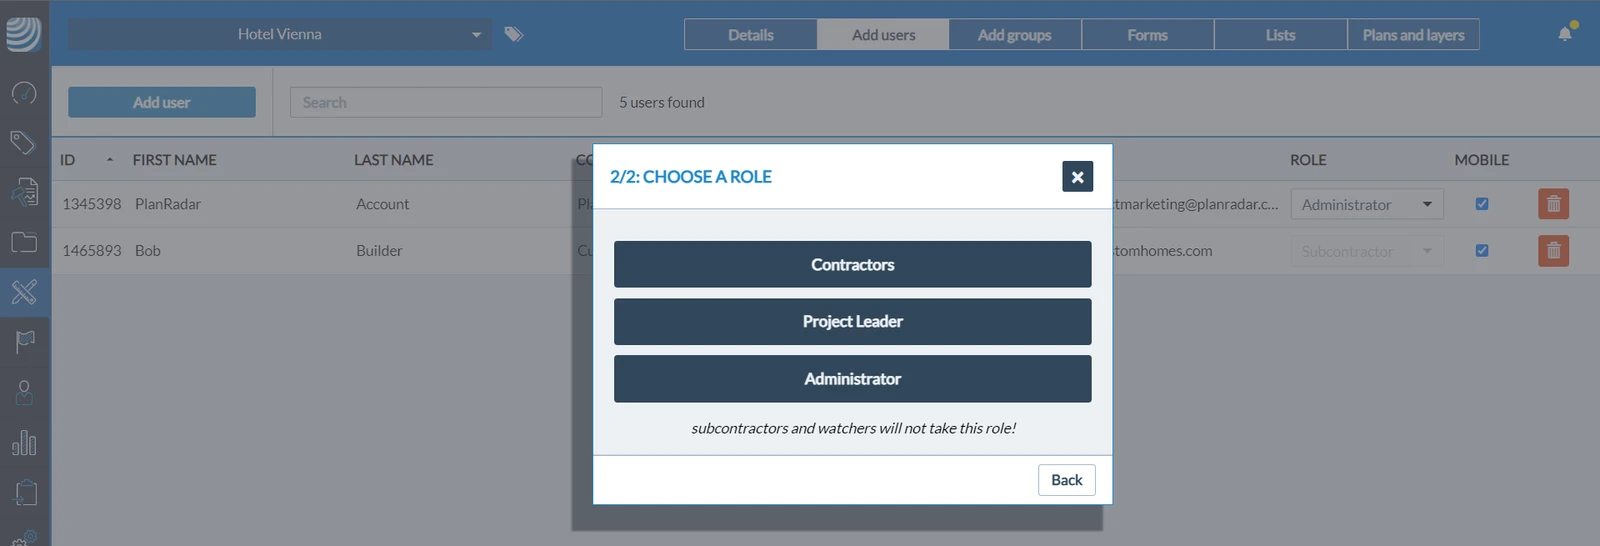
Add Users to a Project
Assign users that exist in your account to a project.
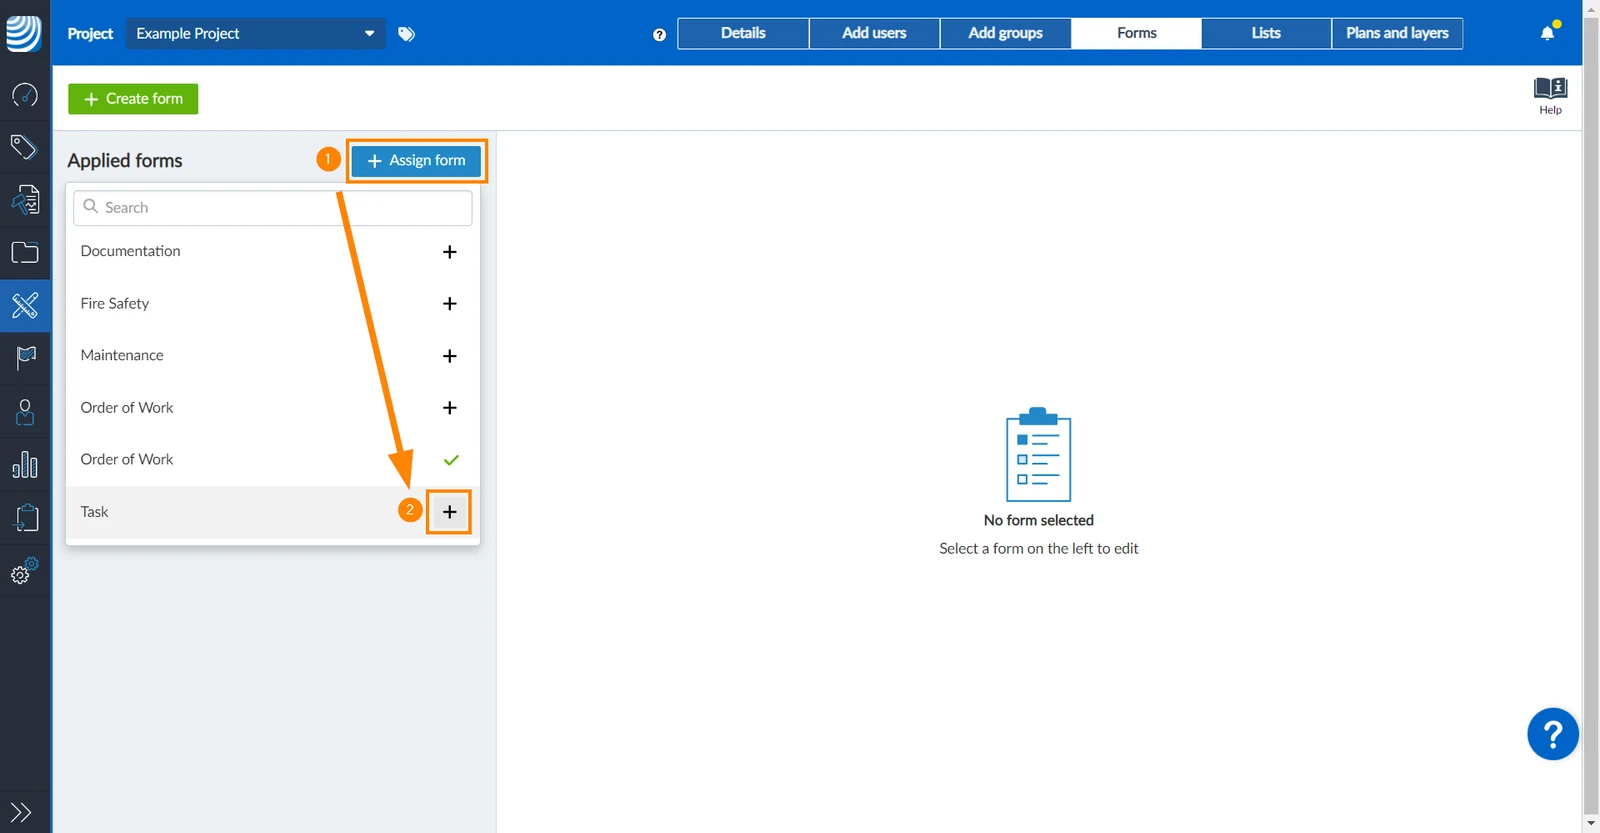
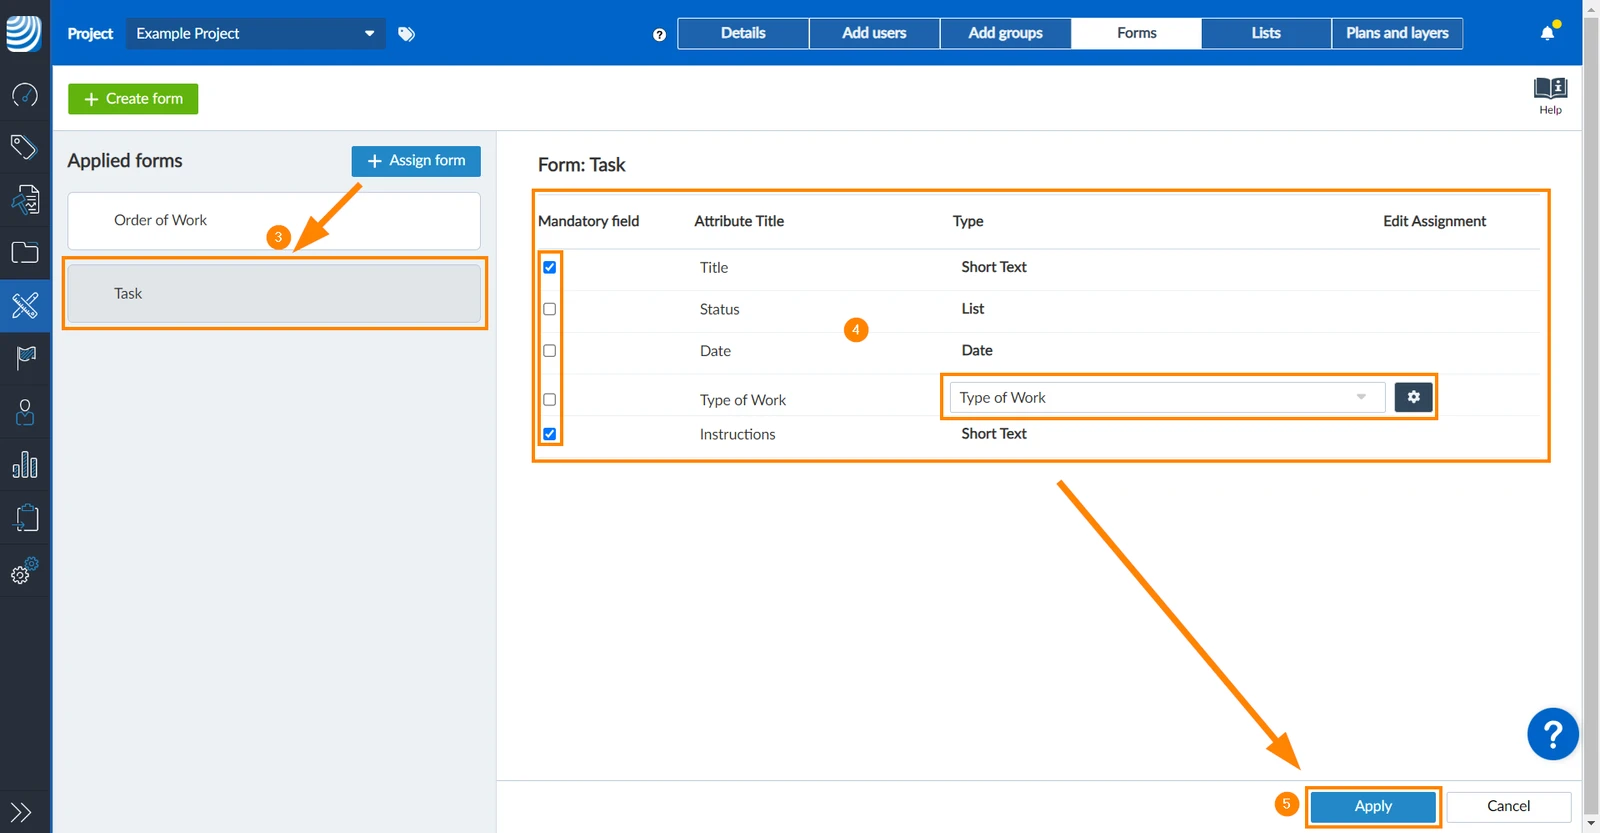
You can override any form defaults and configure the form for your project as needed.
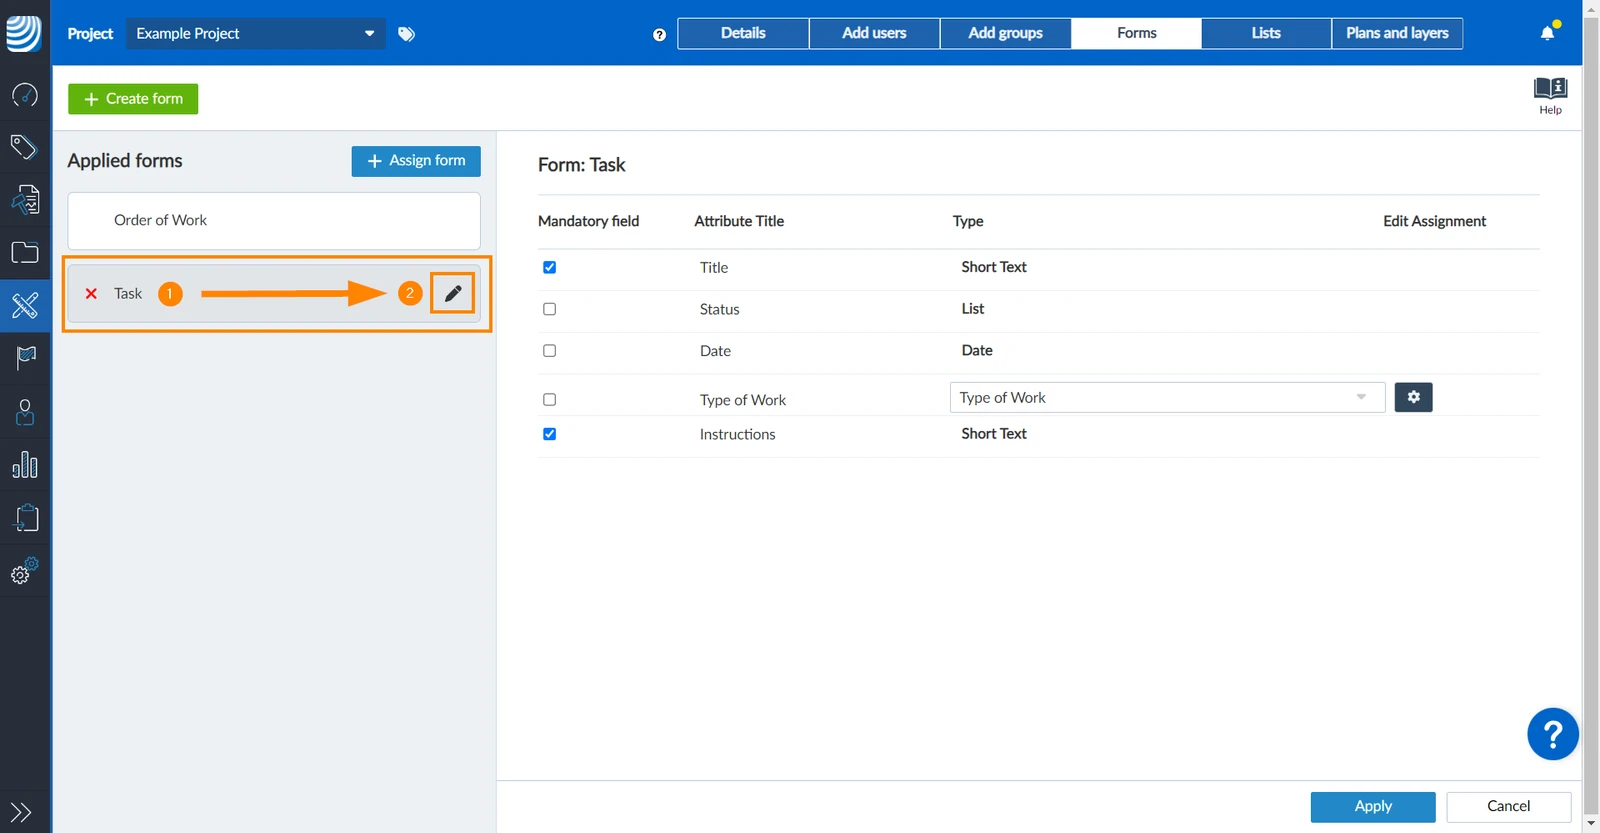
To edit an assigned form:
Hover over the form in the list of applied forms
Click the edit icon
Change Mandatory Field Settings
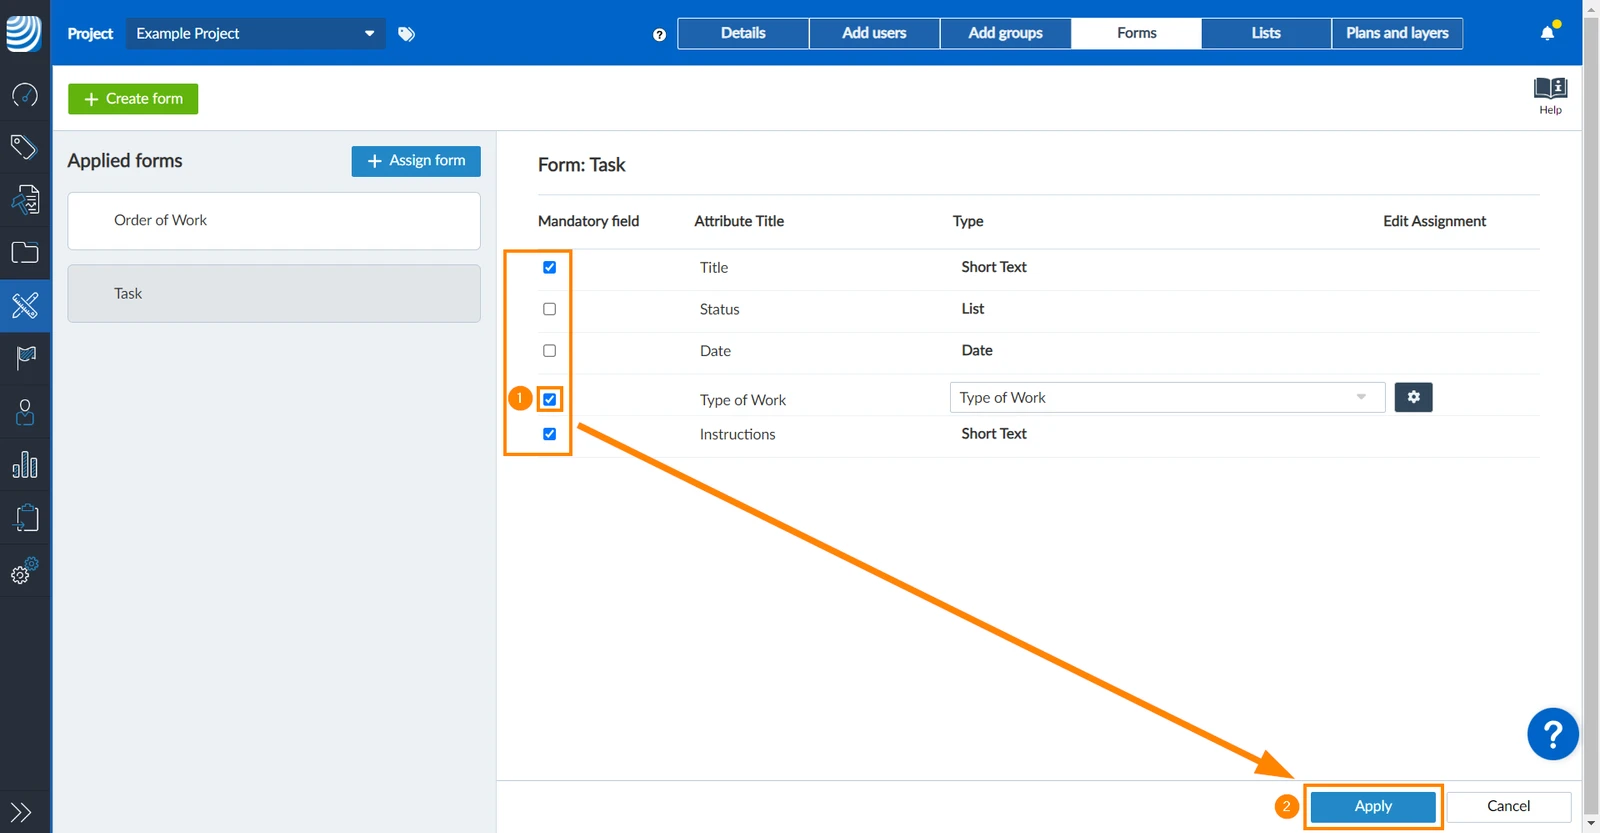
Mandatory fields must be filled before the ticket can be saved.
To make a field mandatory:
Select the checkbox next to the desired field
Click Apply
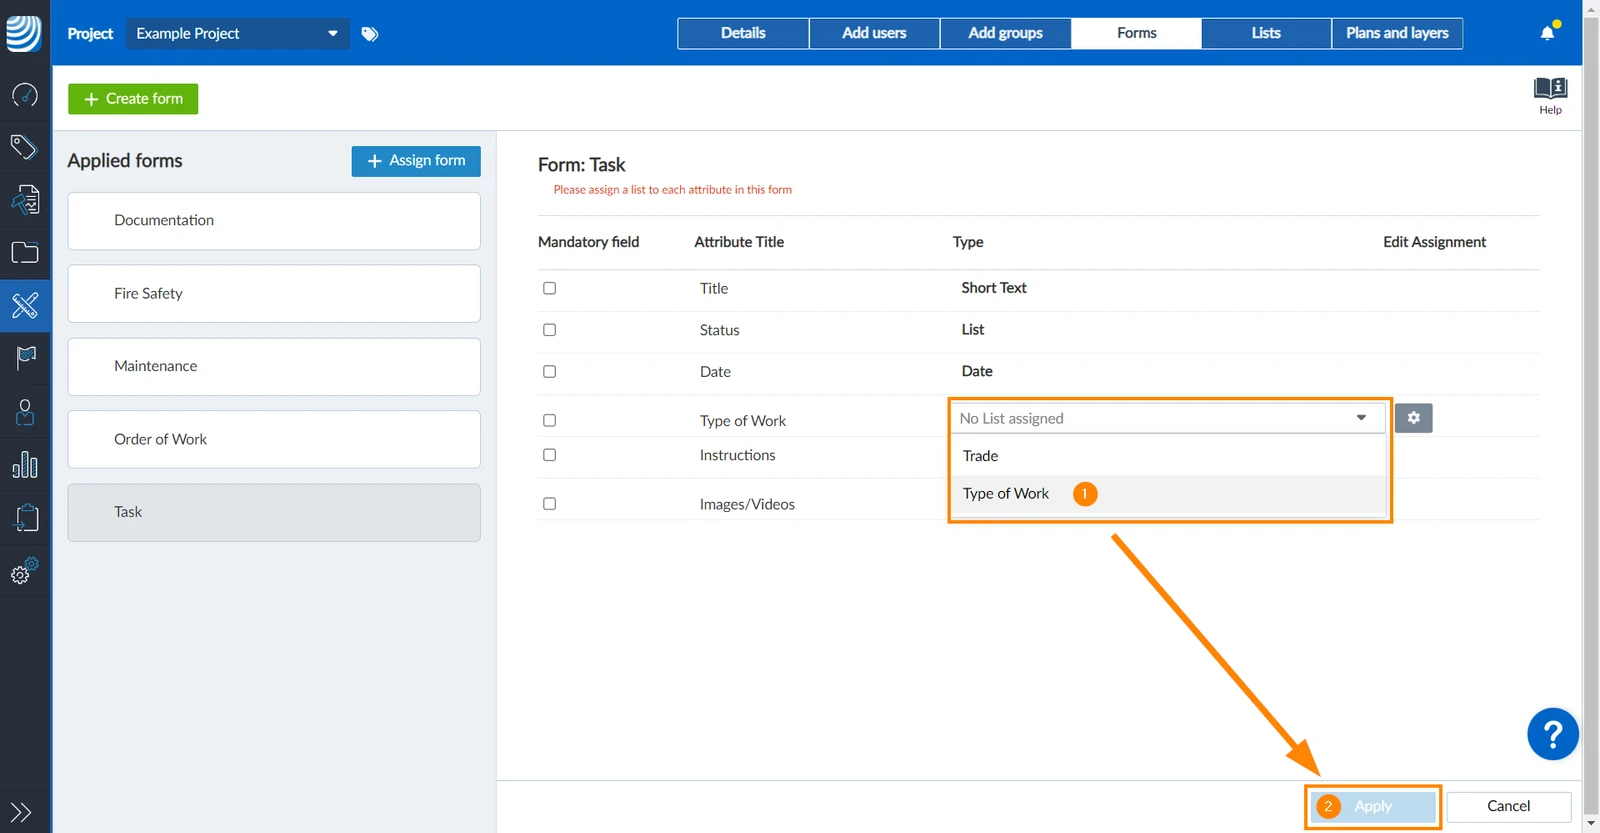
Assign a List
To assign a list to a list field:
Select a list in the drop-down menu e.g. Type of Work
Click Apply
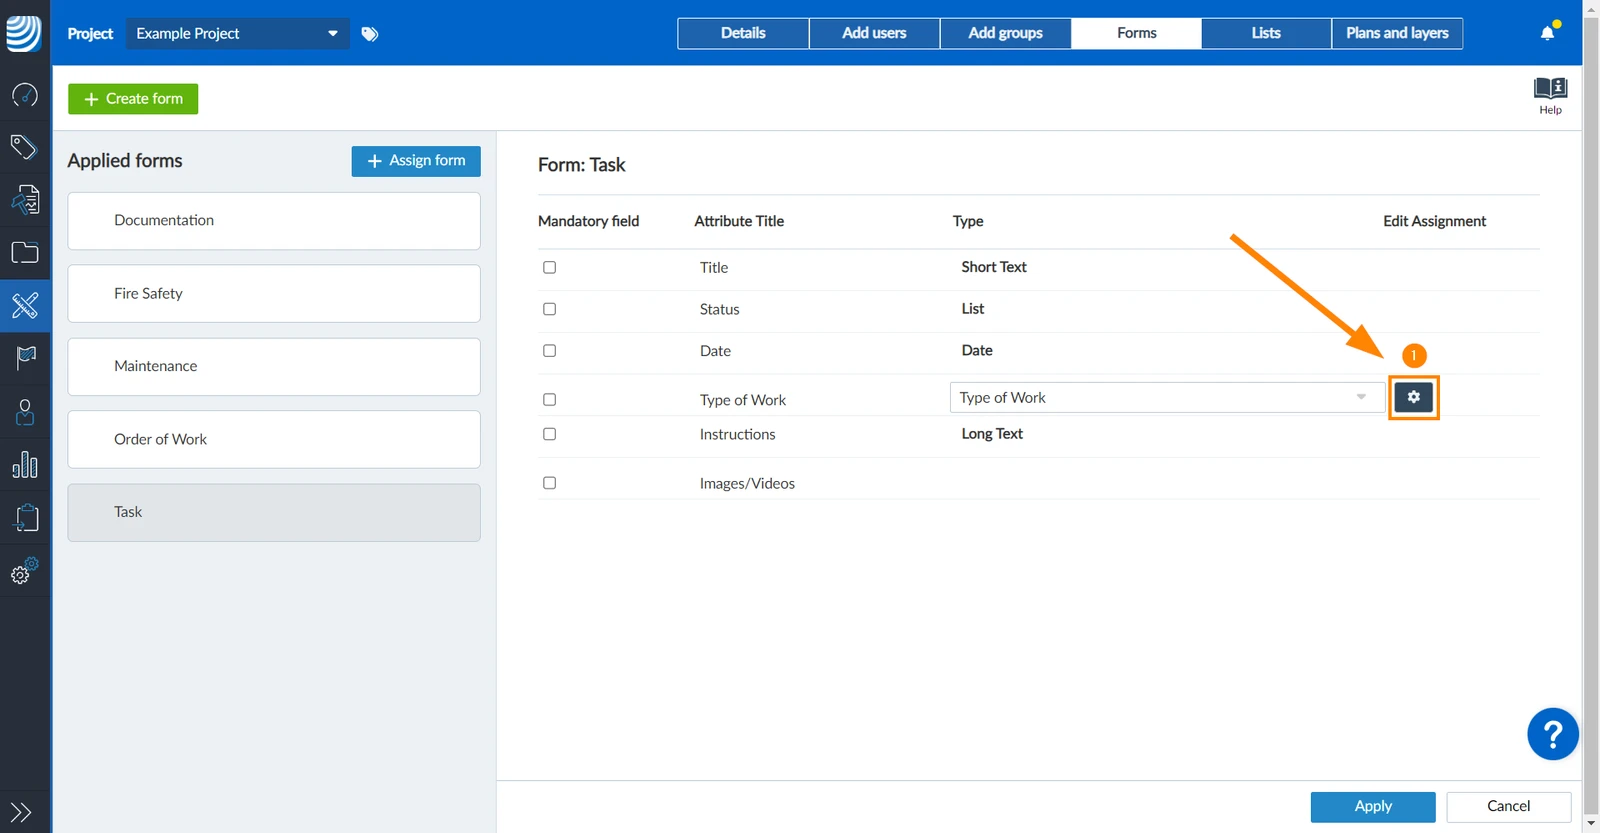
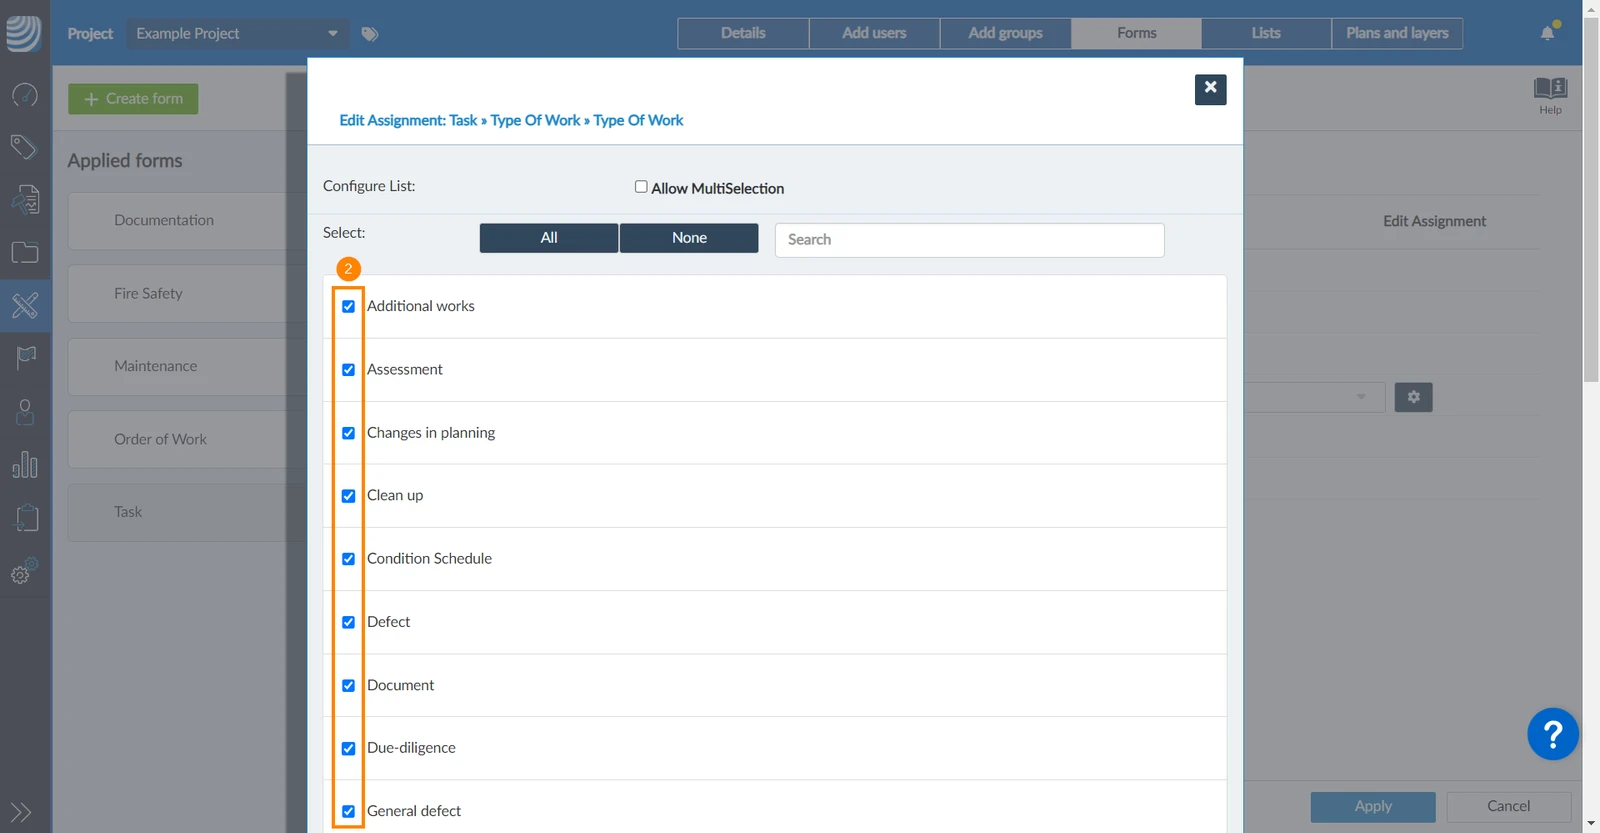
To disable values in the list:
Click the settings icon
Clear the checkbox(es) of the desired value(s)
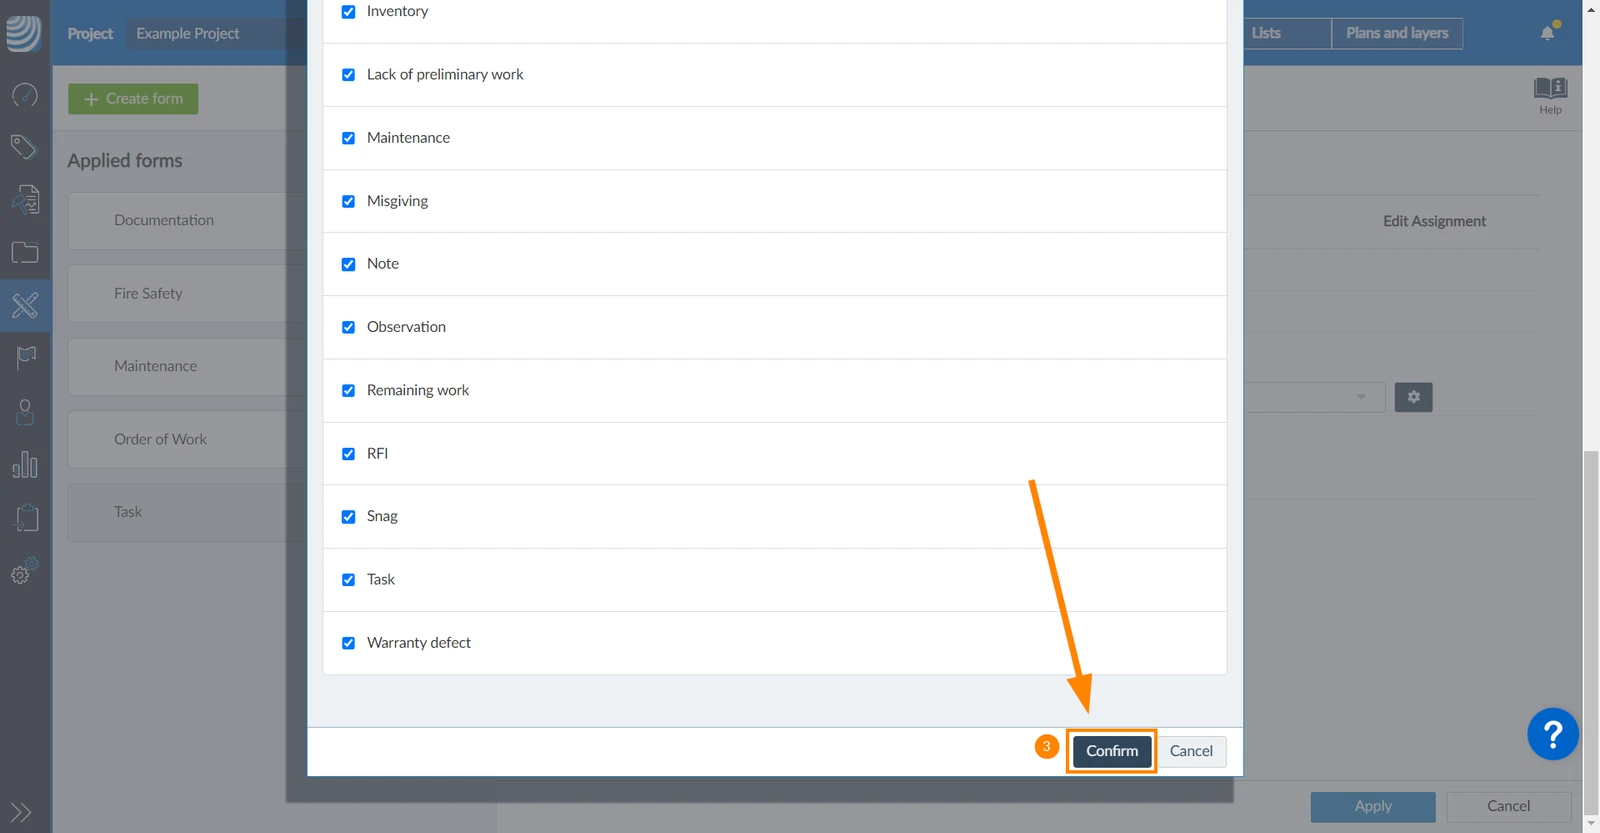
Click Confirm (for long lists you need to scroll down)
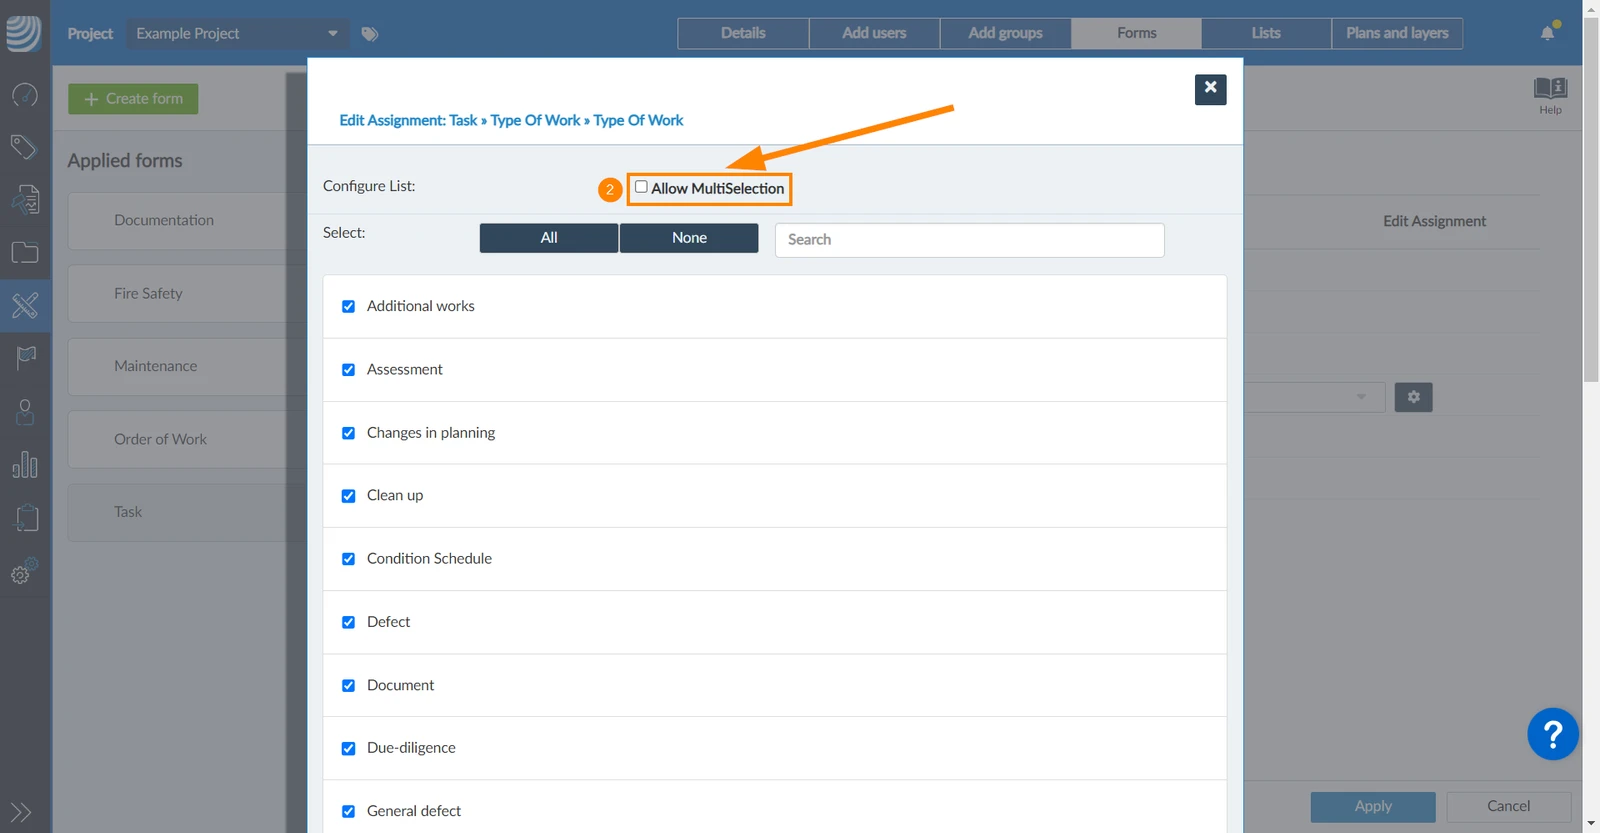
To allow the selection of multiple values for this list field in the ticket:
Click the settings icon
Select the Allow MultiSelection checkbox
Click Confirm (for long lists you need to scroll down)
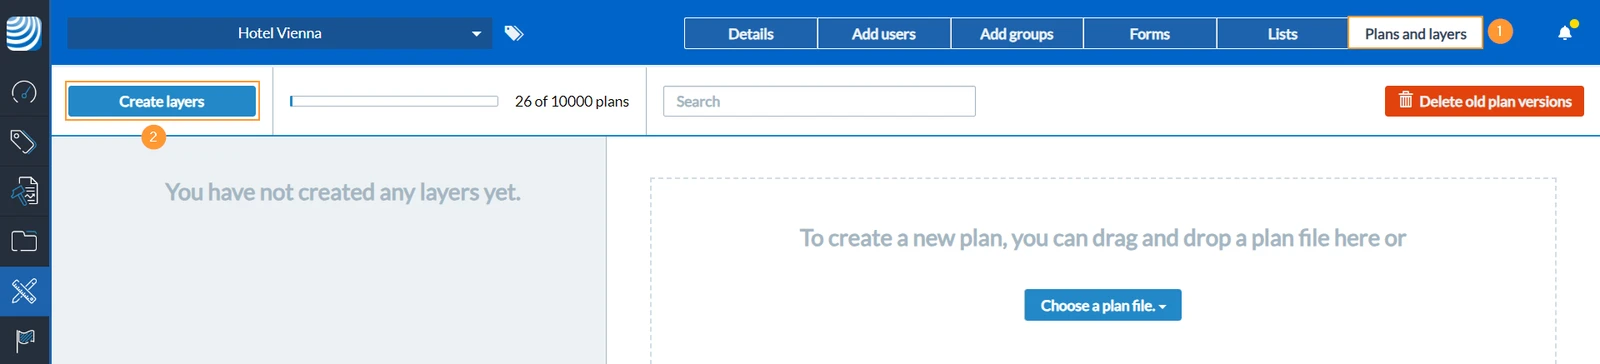
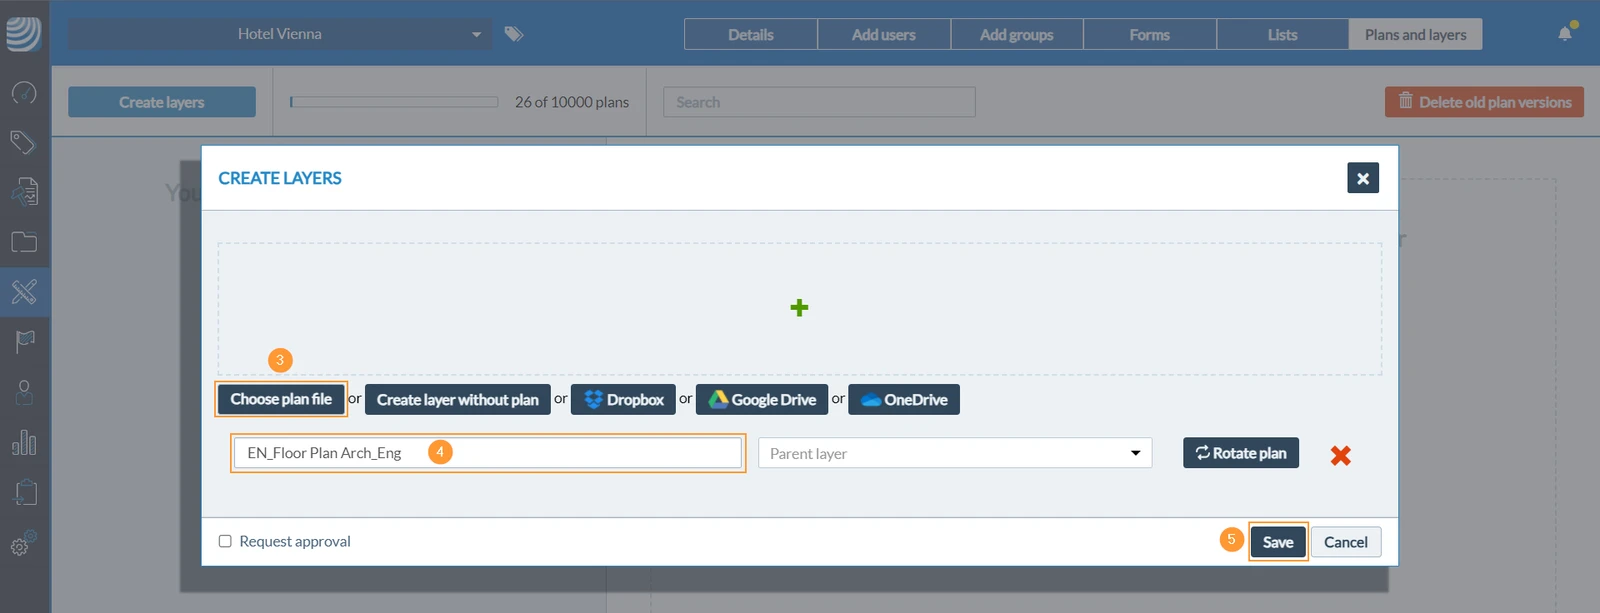
Create a Layer & Upload a Plan
Plans are managed in layers. Layers are similar to folders to help you organise your plans and tickets.
Each plan must be assigned to a layer. Each layer cannot have more than one plan. Layers can also be used without a plan and they can be used with BIM models.


 Deutsch
 Español
 Français
 Hrvatski
 Italiano
 Polski
 Português (BR)