

 Deutsch
 Español
 Français
 Hrvatski
 Italiano
 Polski
 Português (BR)
Application Settings in the Mobile App
Overview
Configure the PlanRadar mobile app to best suit your personal preferences.
How to access
- Go to the main menu
- Tap Settings
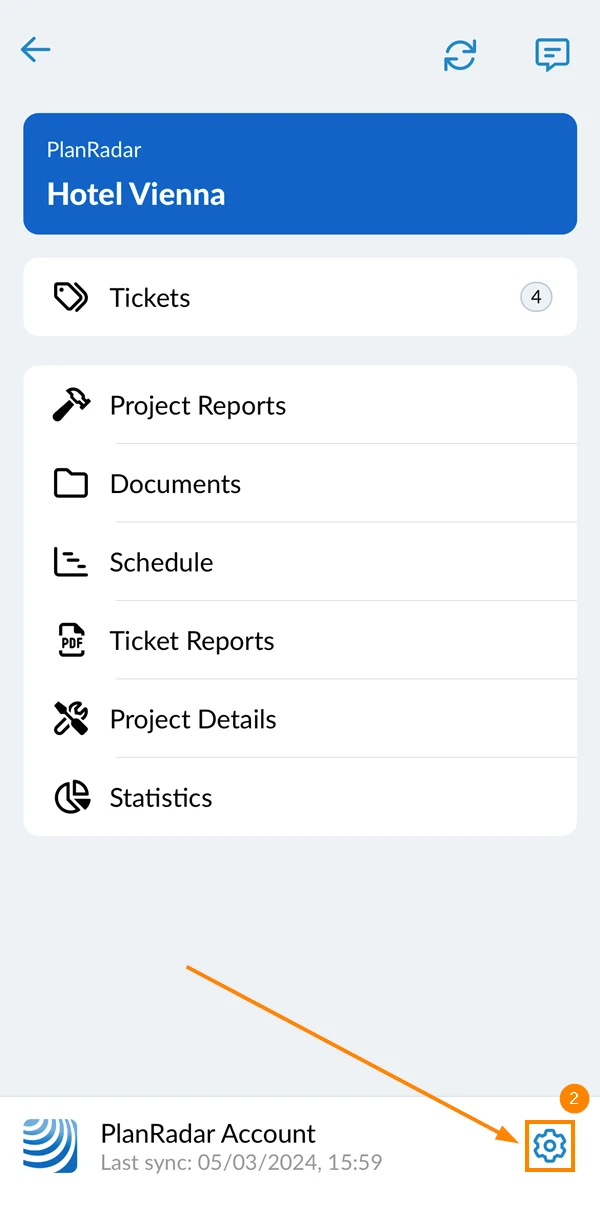
Ticket Views
List View
Configure what is displayed in your tickets list view.
- Activate/deactivate the Show pictures in list toggle button to show/hide photos in the ticket list.
- Tap Done
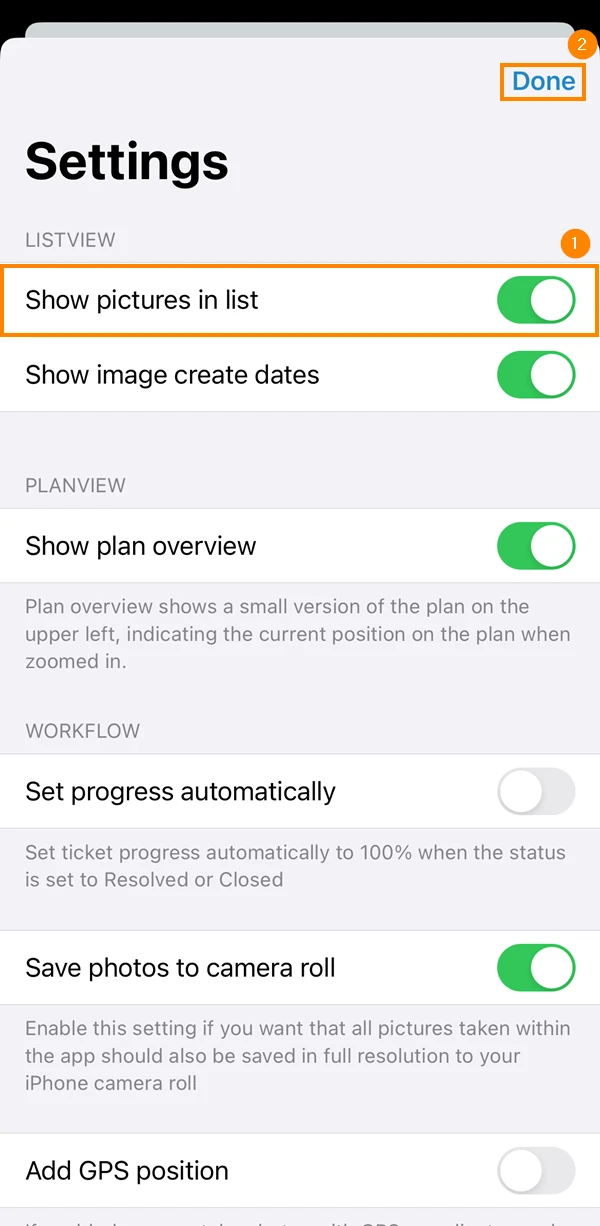
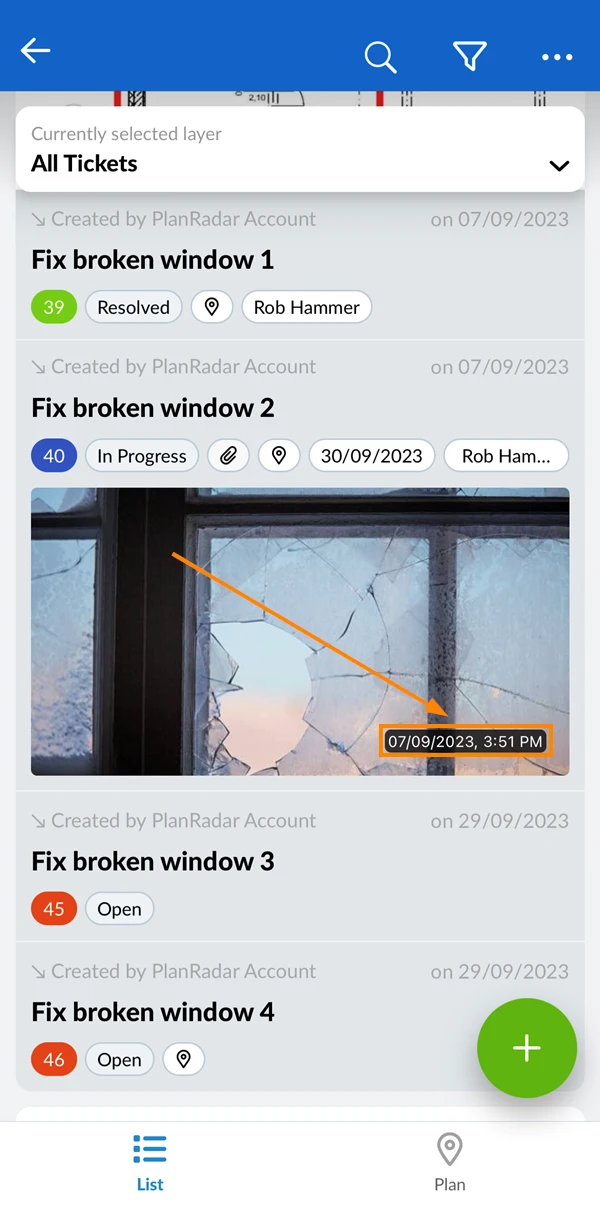
If enabled, photos will now be shown for each ticket in the list view if available:
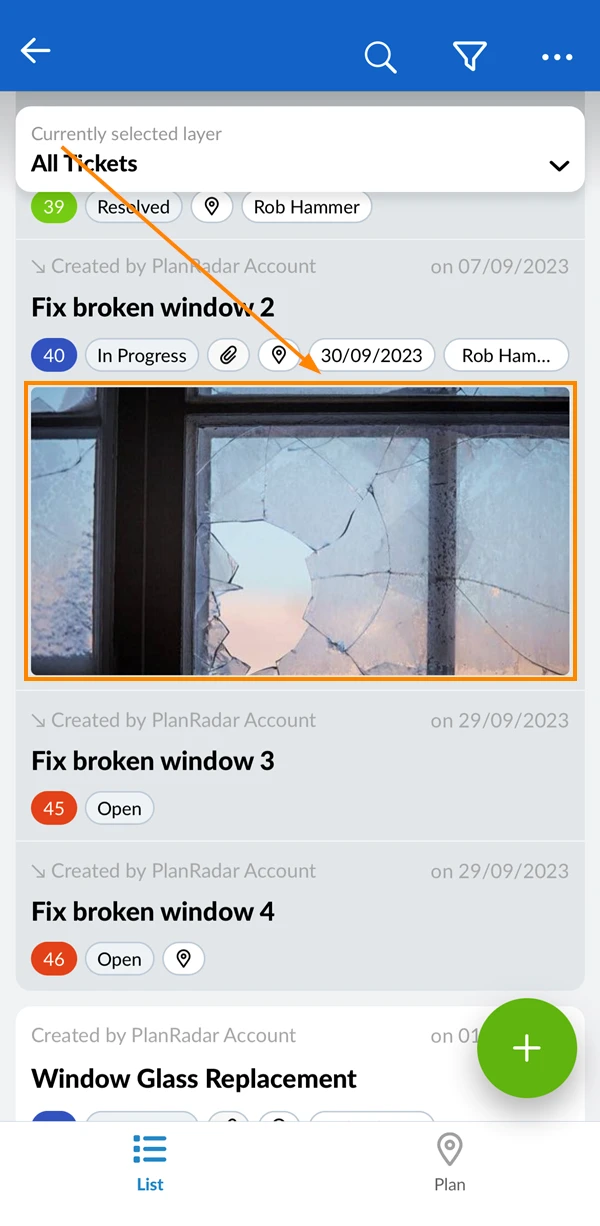
- Activate/deactivate the Show image creation dates toggle button to see labels with the creation date on each photo.
- Tap Done
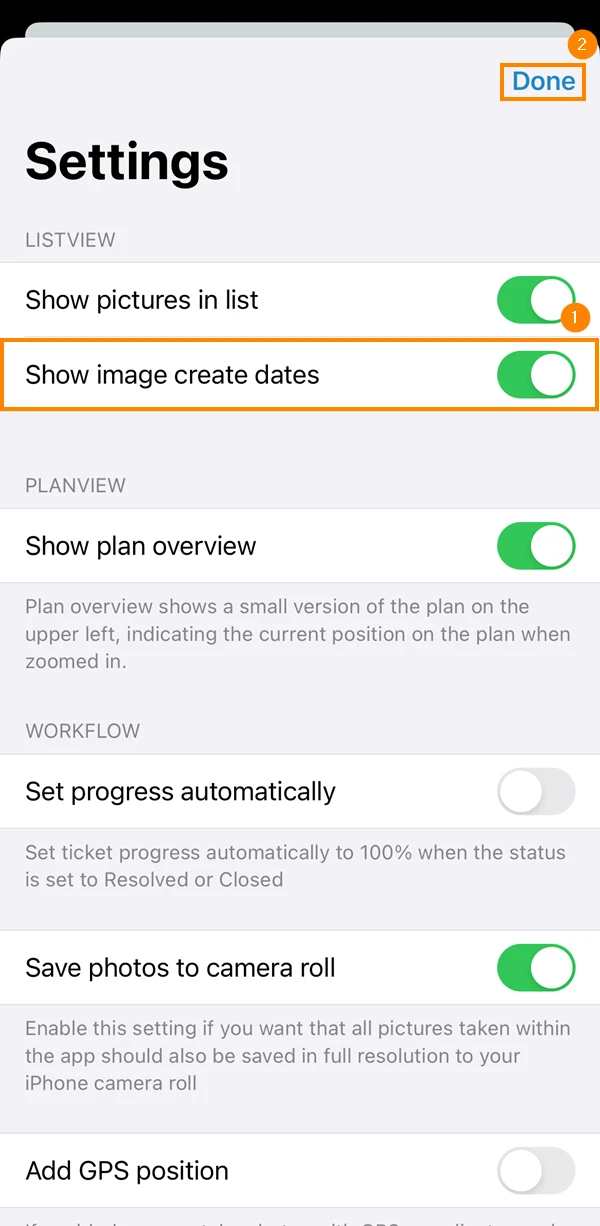
If enabled, the creation date and time will be shown for all photos in the ticket list:
- Activate/deactivate the Show photos in ticket list toggle button to show/hide pictures in ticket list
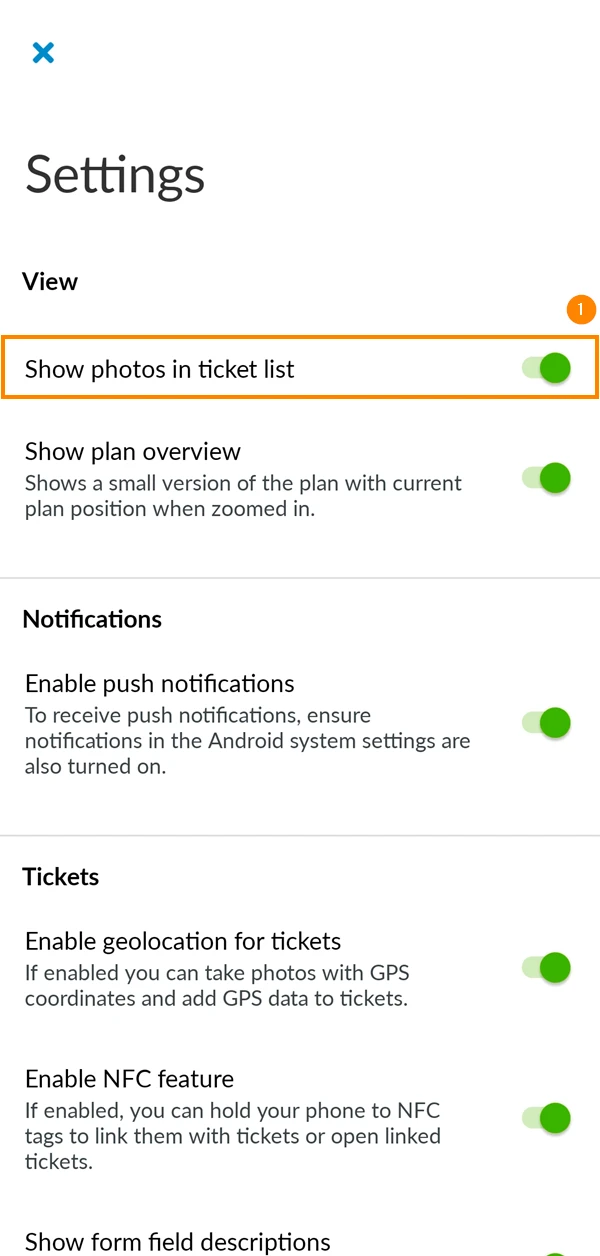
If enabled, photos will now be shown for each ticket in the list view if available:
Plan View
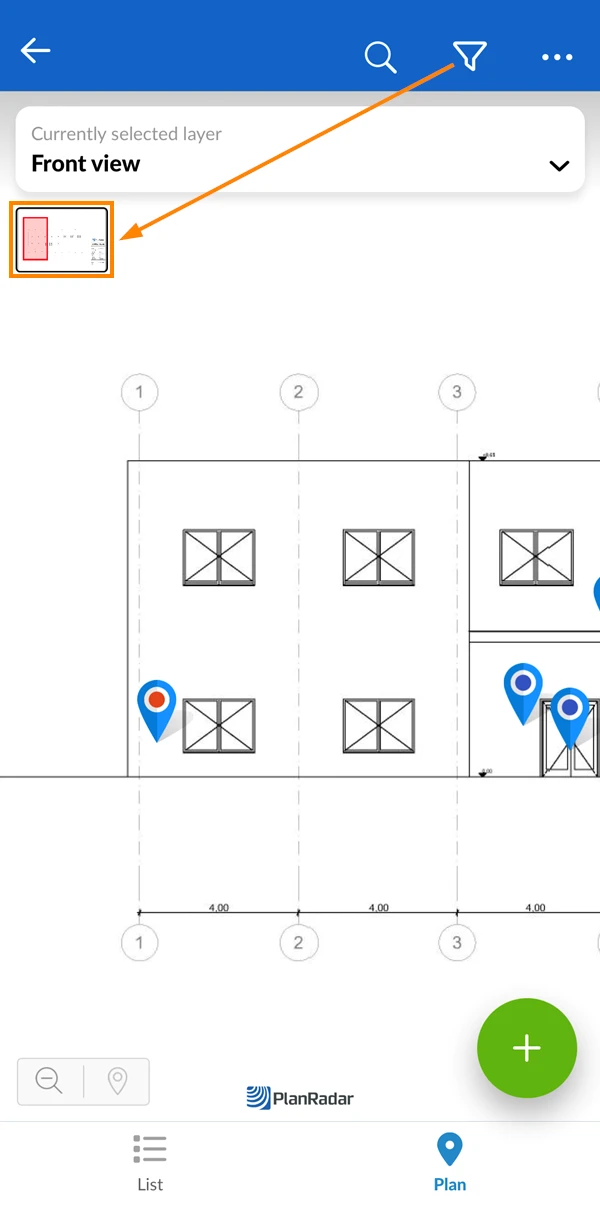
Enable a small overview plan on the top left when using the tickets plan view. To do so:
- Activate/deactivate the Show plan overview toggle button
- Tap Done
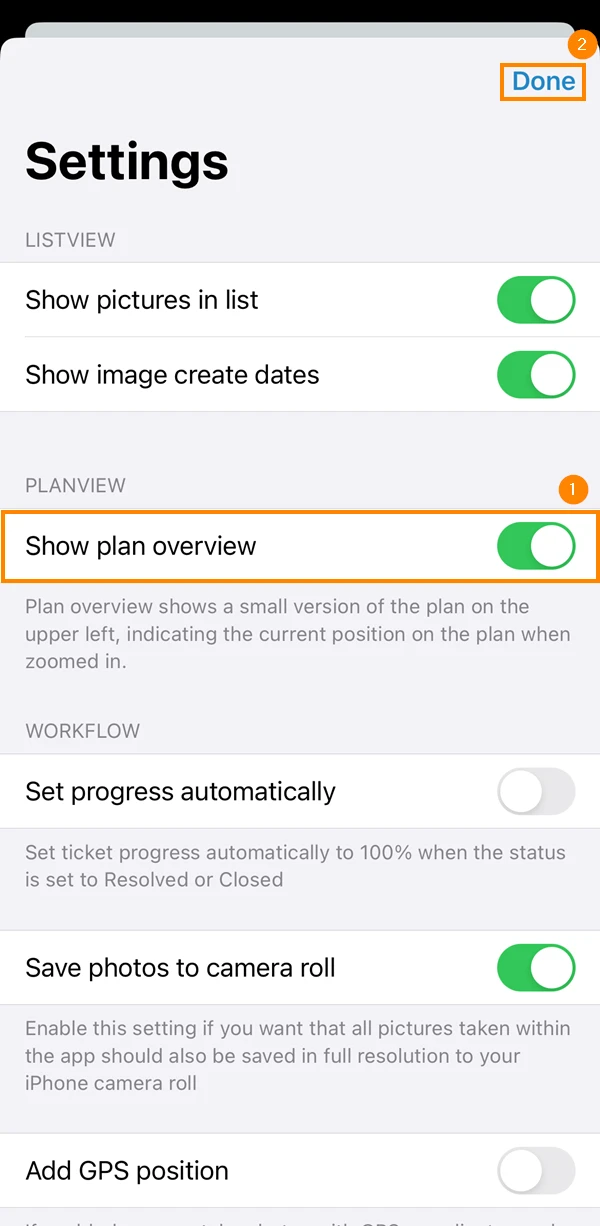
- Activate/deactivate the Show plan overview toggle button
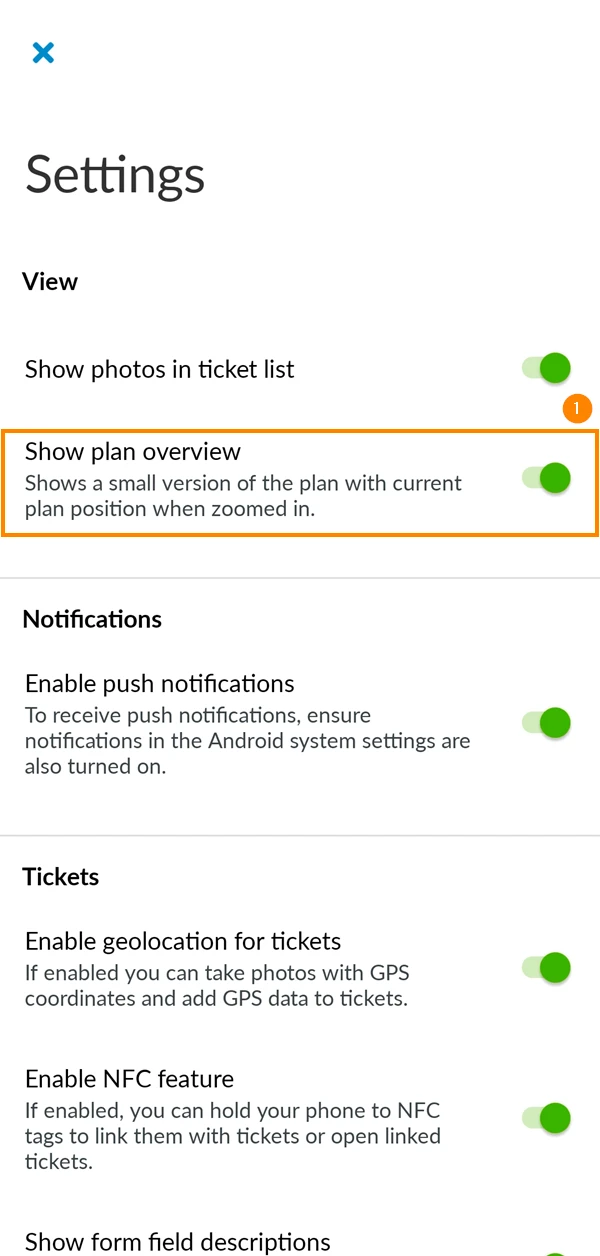
If enabled, a small overview plan will be displayed when you zoom in to indicate your current position in the plan:
Workflow/Tickets
The workflow/tickets section includes a number of settings that are related to ticket workflows:
Automatic Progress
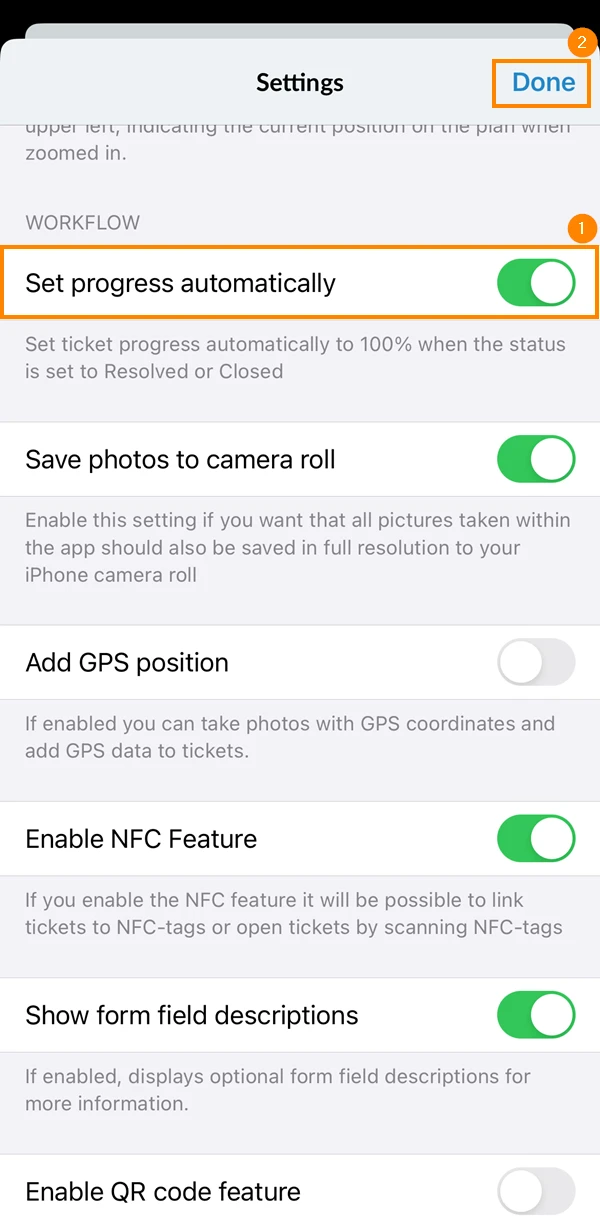
This setting allows you to set the progress of closed and resolved tickets to 100% automatically. To do so:
- Activate/deactivate the Set progress automatically toggle button
- Tap Done
Save Photos to Device
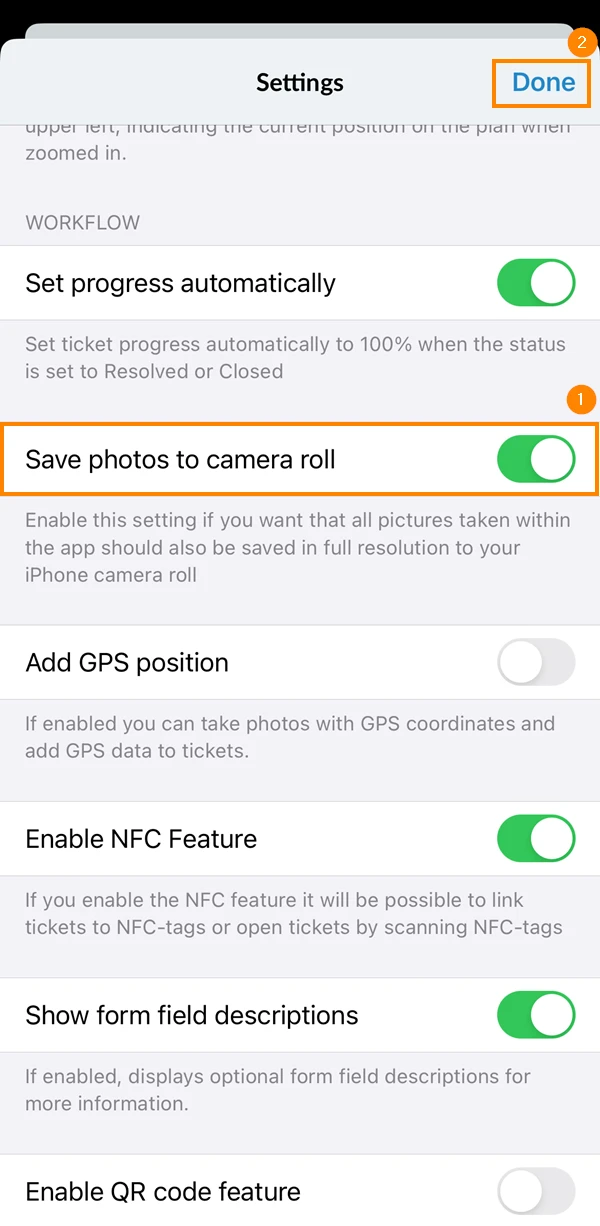
This setting saves all photos captured for tickets to your Photos app as well. To do so:
- Activate/deactivate the Save photos to camera roll toggle button
- Tap Done
Add GPS Position to Tickets
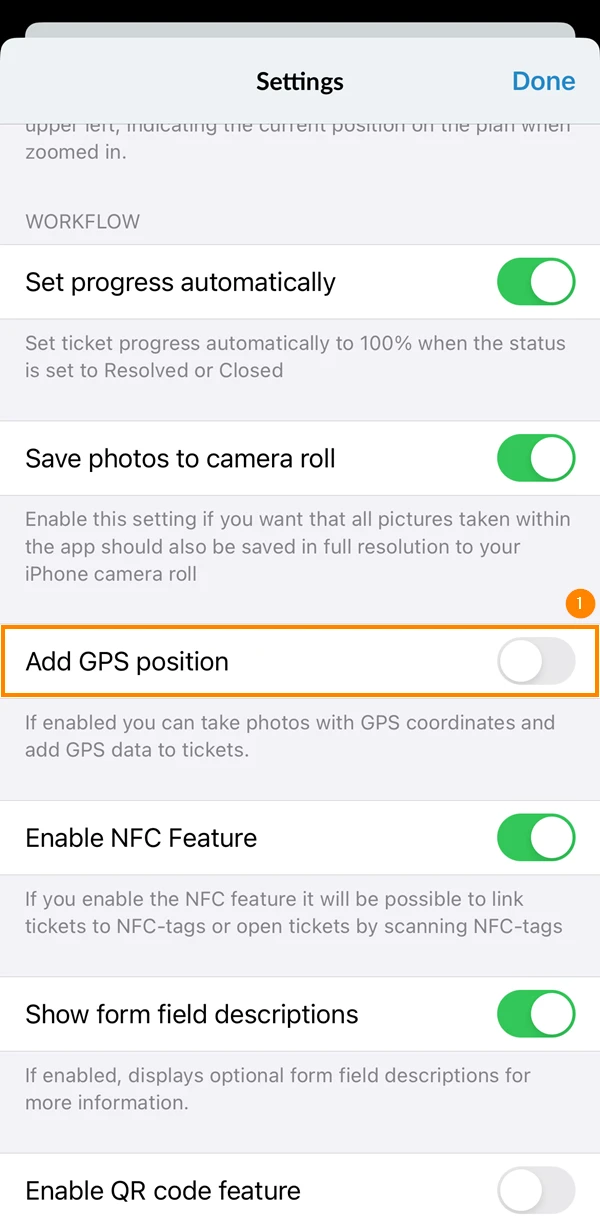
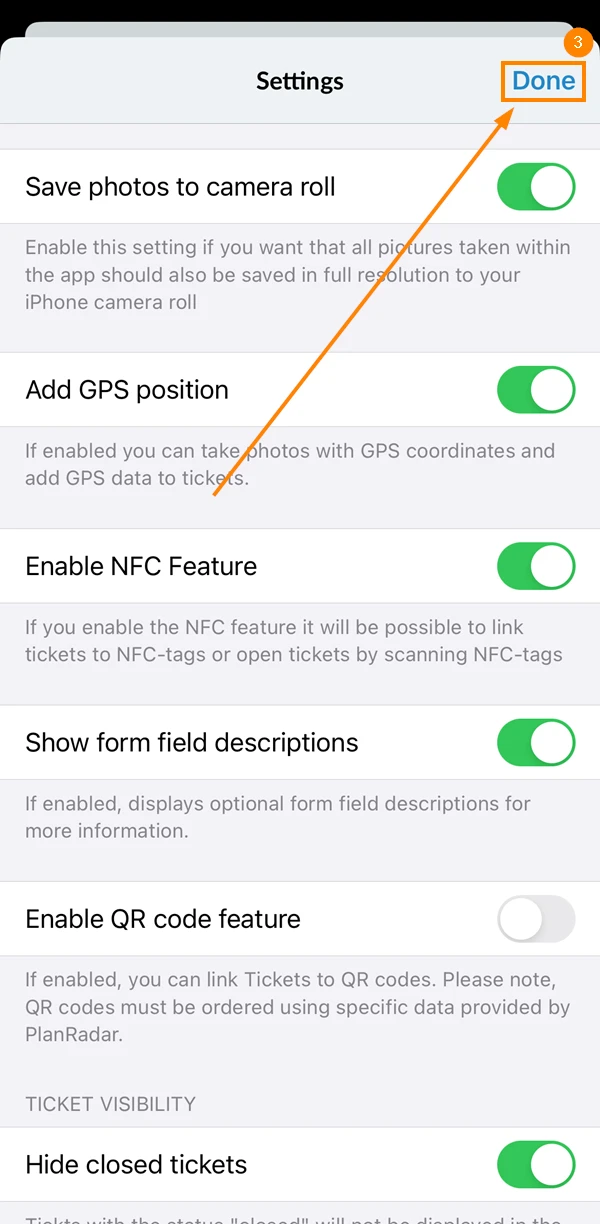
If you want to add GPS positions to tickets or to photos attached to tickets, you need to ensure this setting is enabled:
- Activate/deactivate the Add GPS Position toggle button
- Allow PlanRadar to use your location
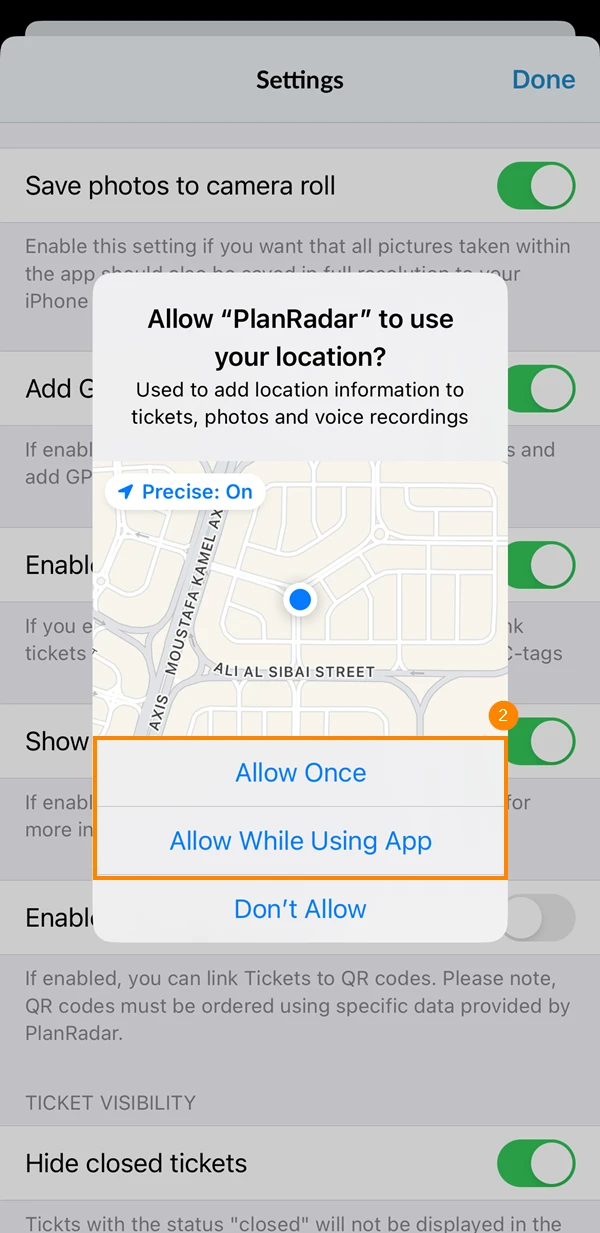
- Tap Done
Link Tickets to NFC Tags
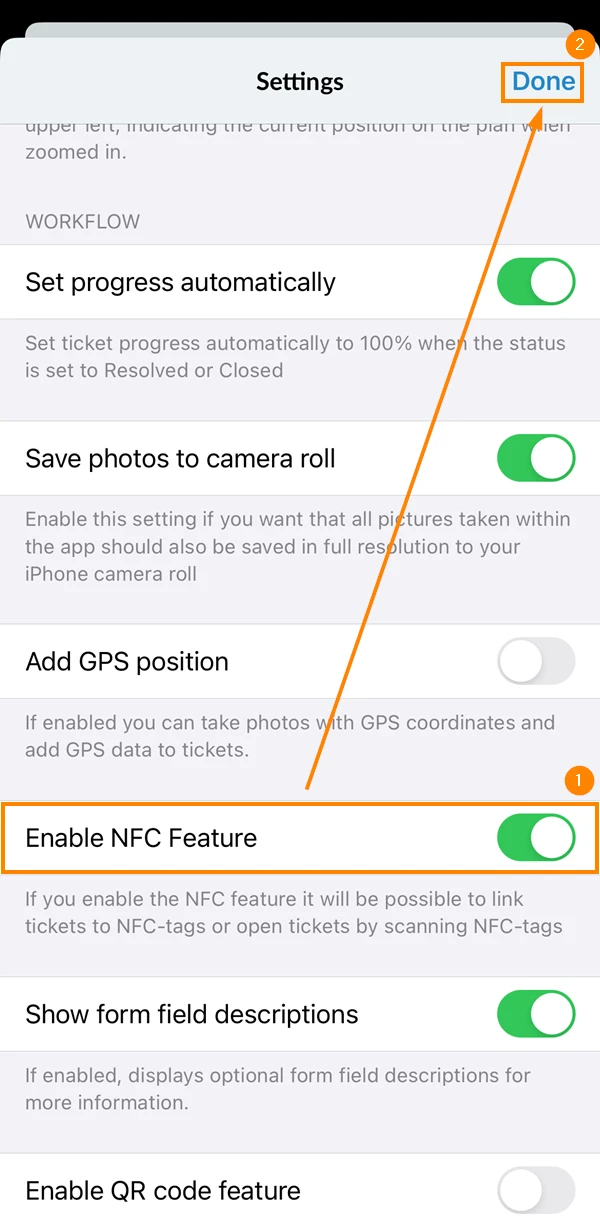
You can link tickets to NFC tags and then scan these tags to open tickets. To allow this:
- Activate/deactivate the Enable NFC Feature toggle button
- Tap Done
Show Ticket Field Descriptions
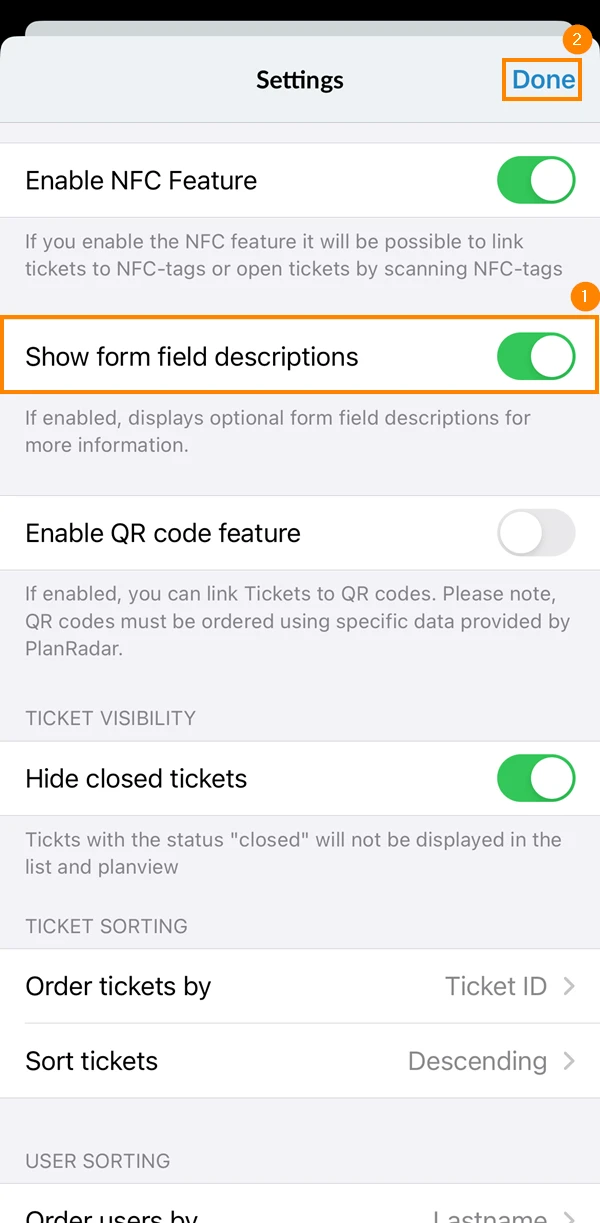
If enabled, descriptions for ticket fields are displayed in the ticket form for additional information provided by the author of the ticket form:
- Activate/deactivate the Show form field descriptions toggle button
- Tap Done
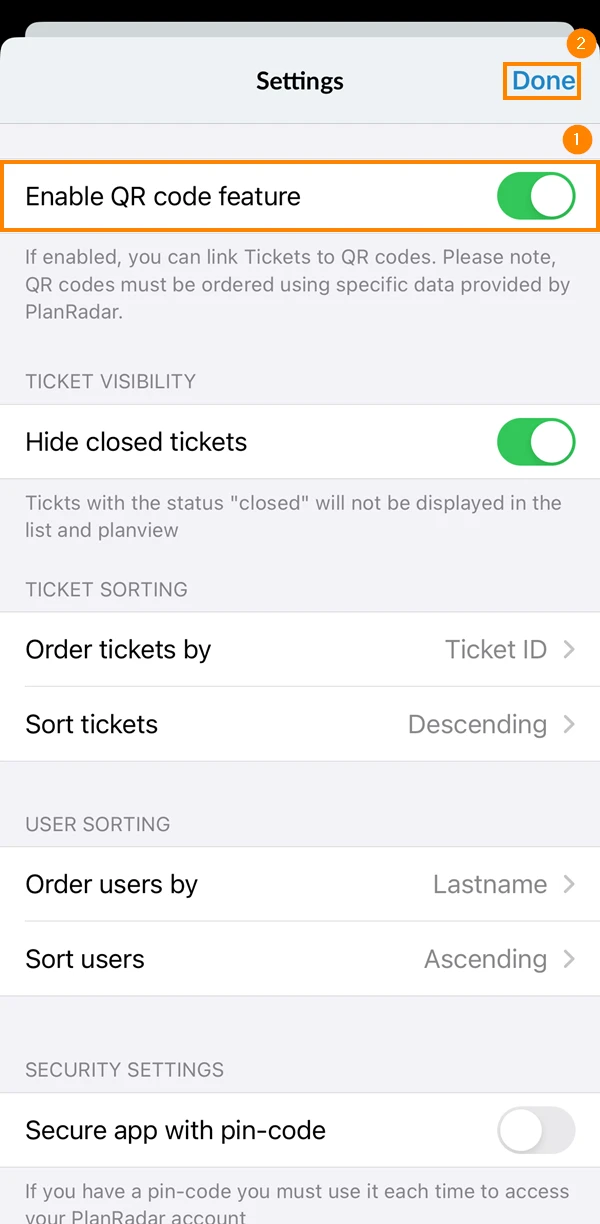
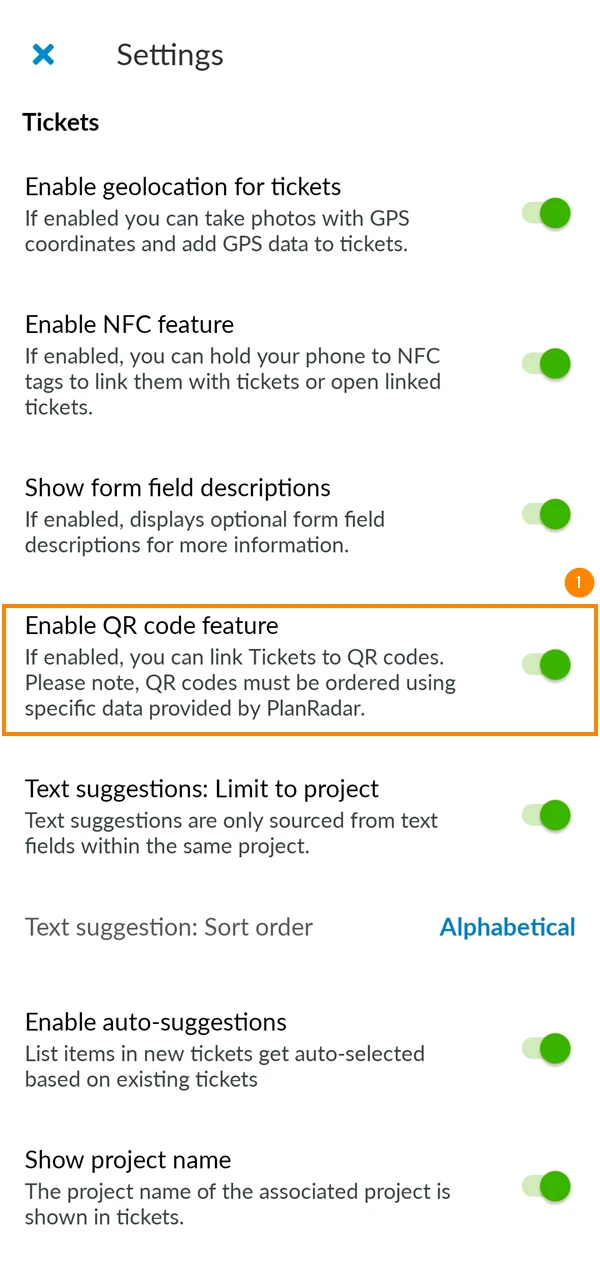
Link Tickets to QR Codes
You can link tickets to QR Codes and then scan these codes to open tickets. To allow this:
- Activate/deactivate the Enable QR code feature toggle button
- Tap Done
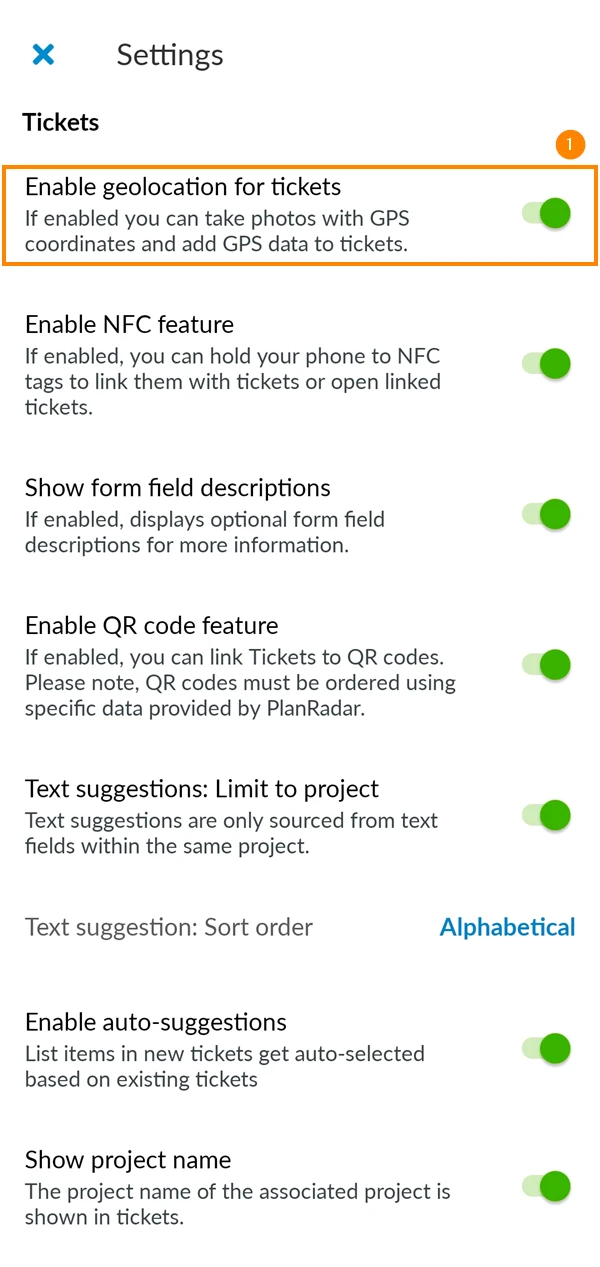
Add GPS Position to Tickets
If you want to add GPS positions to tickets or to photos attached to tickets, you need to ensure this setting is enabled:
- Activate/deactivate the Enable geolocation for tickets toggle button
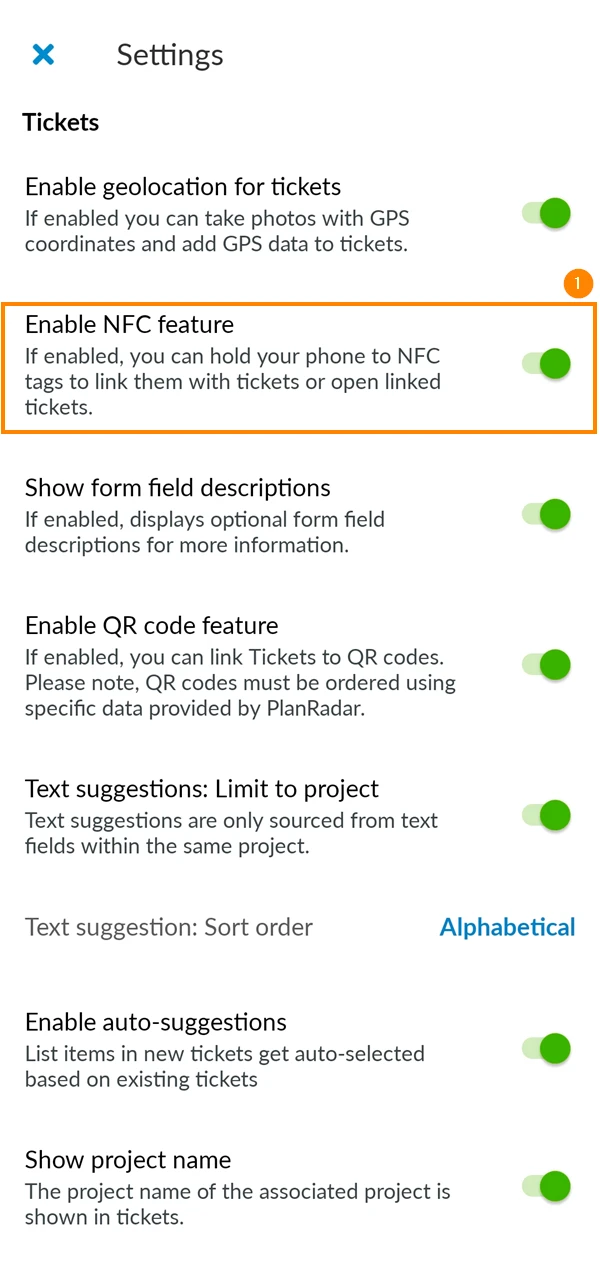
Link Tickets to NFC Tags
You can link tickets to NFC Tags and then scan these tags to open tickets. To allow this:
- Activate/deactivate the Enable NFC Feature toggle button
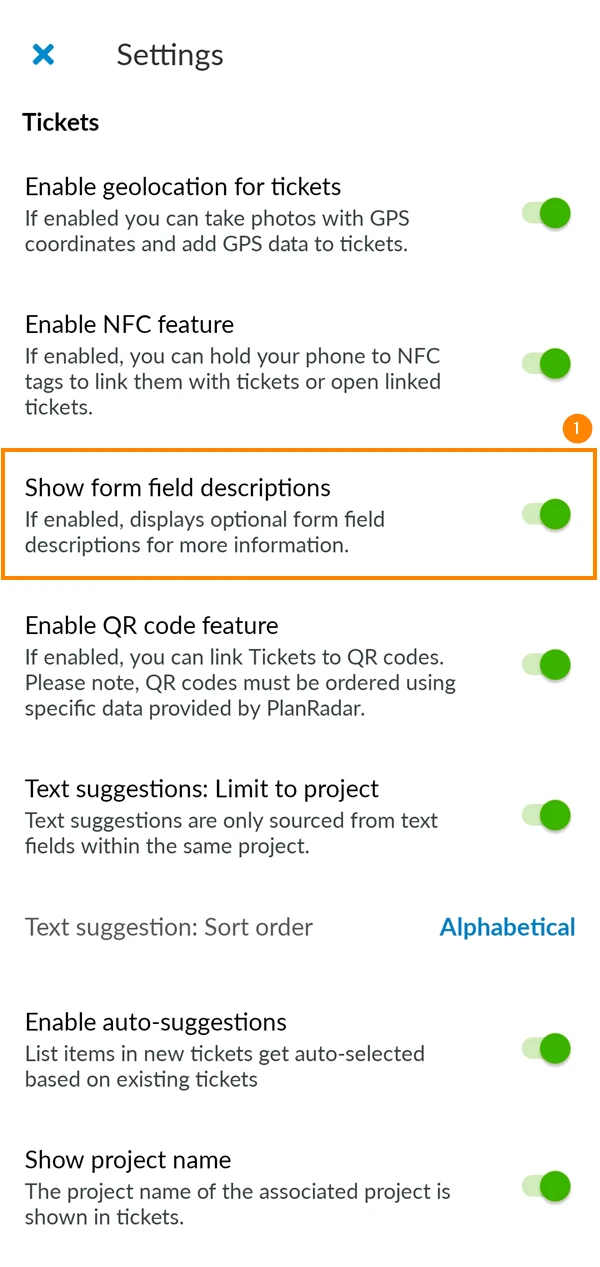
Show Ticket Field Descriptions
If enabled, descriptions for ticket fields are displayed in the ticket form for additional information provided by the author of the ticket form:
- Activate/deactivate the Show form field descriptions toggle button
Link Tickets to QR Codes
You can link tickets to QR Codes and then scan these codes to open tickets. To allow this:
- Activate/deactivate the Enable QR code feature toggle button
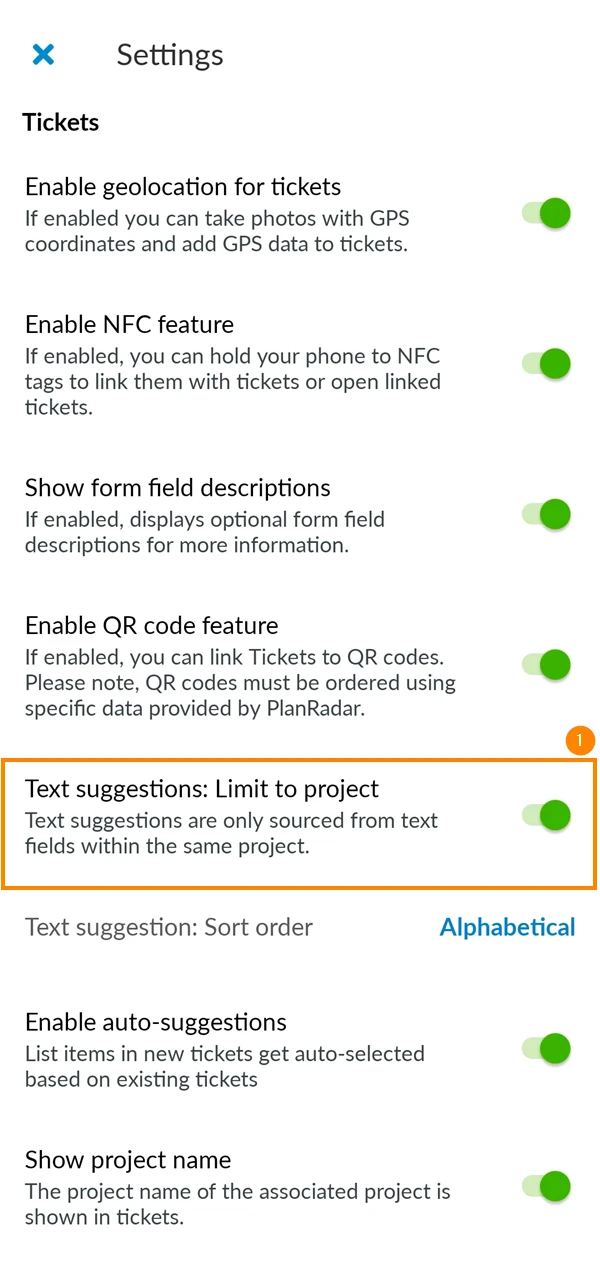
Auto-Suggestions for Text Fields
Control automatic suggestions when filling text fields.
- Activate/deactivate the Text suggestions: Limit to project toggle button to get suggestions based on the current project only. If disabled, suggestions will be sourced from all your projects instead.
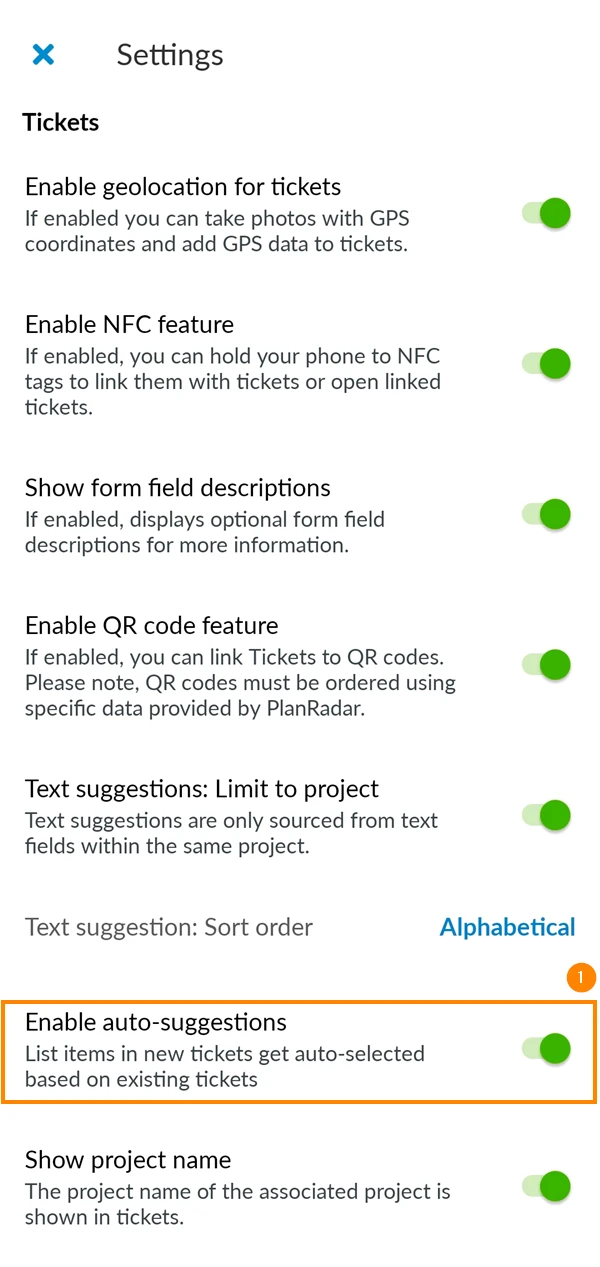
Auto-Suggestions for List Fields
Control automatic suggestions when filling list fields. Auto-suggestions are derived and ranked based on previously created tickets with similar titles, layers, and forms.
- Activate/deactivate the Enable auto-suggestions toggle button to enable/disable suggestions for selections of list fields.
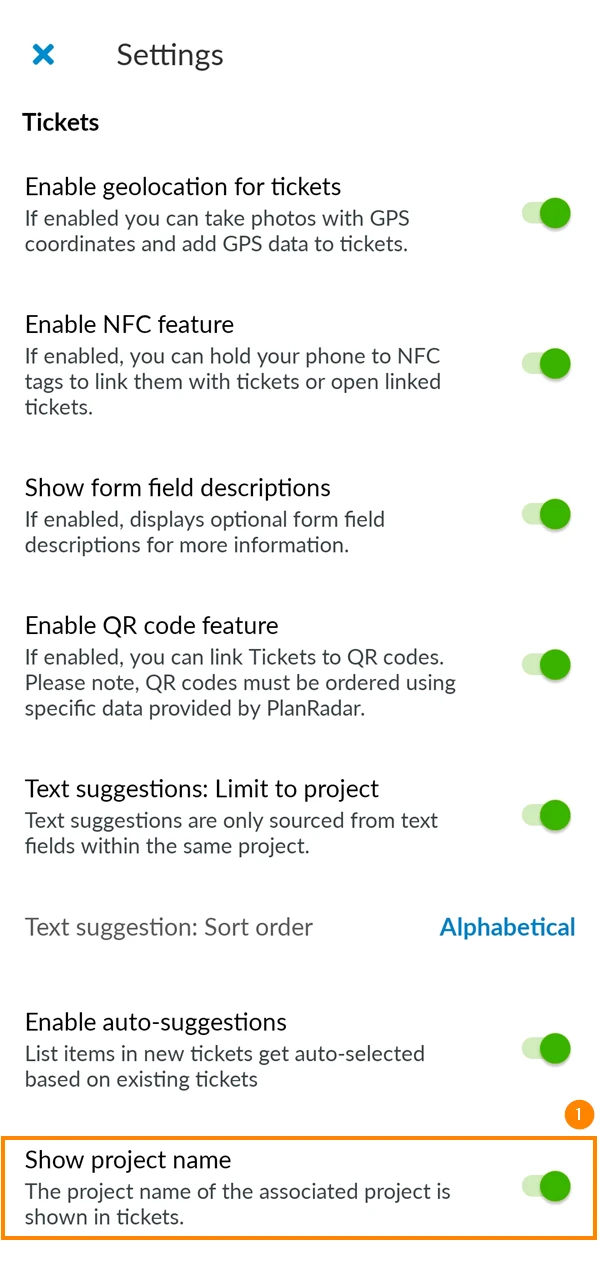
Show Project Name in Tickets
This setting shows the project name on top of the ticket when you open it:
- Activate/deactivate the Show project name toggle button
Ticket Visibility
You can hide tickets with the status "Closed" to focus on tickets that require your attention.
Ticket Sorting
Sort tickets in your preferred order. To do so:
- Tap Order tickets by
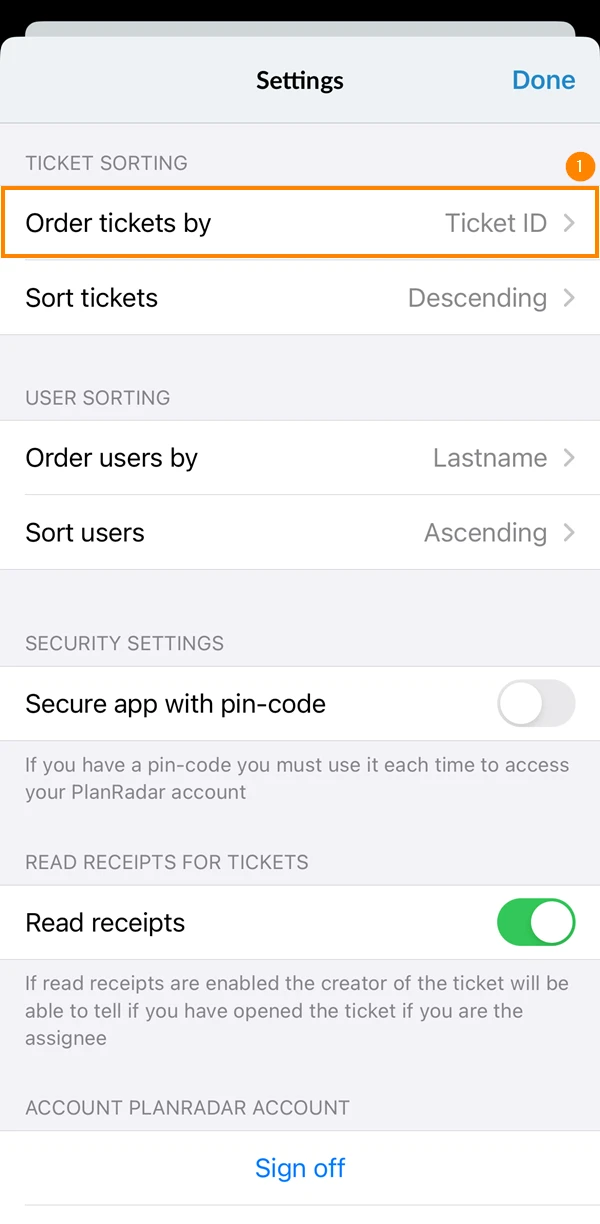
- Select the attribute according to which tickets should be sorted.
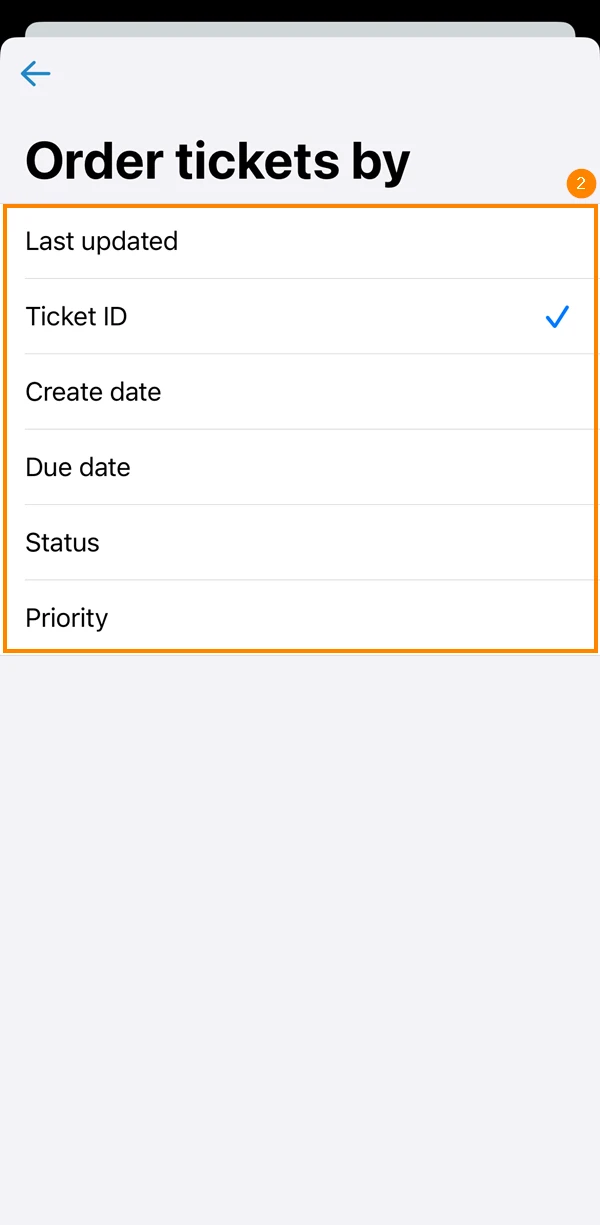
- Tap Sort tickets
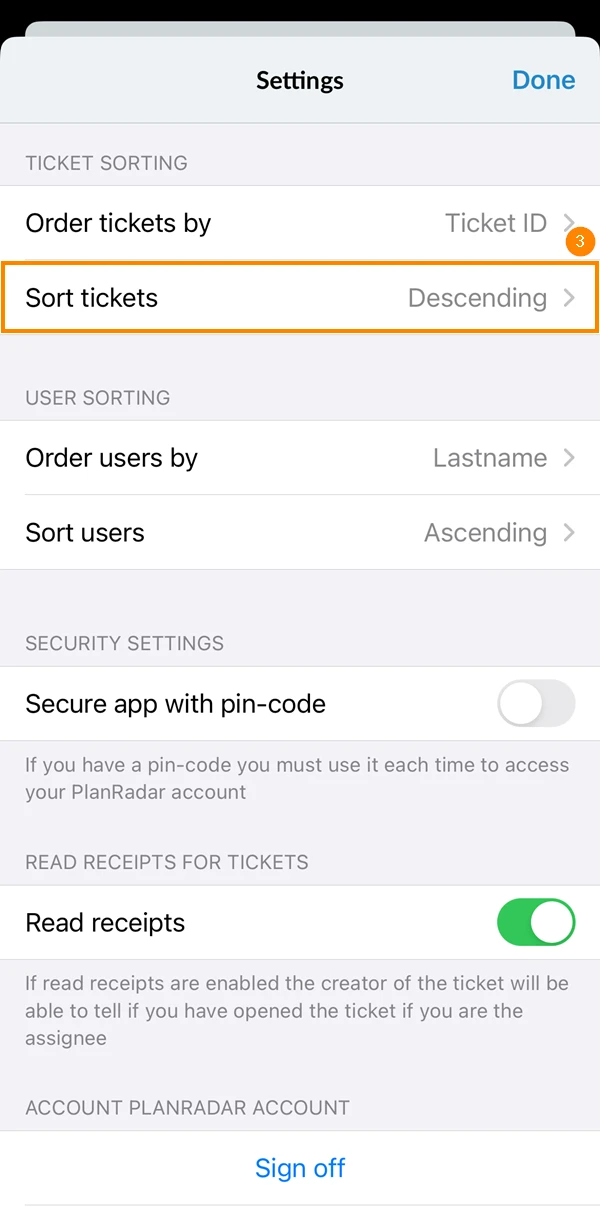
- Select whether you want tickets to be sorted in an Ascending or Descending order.
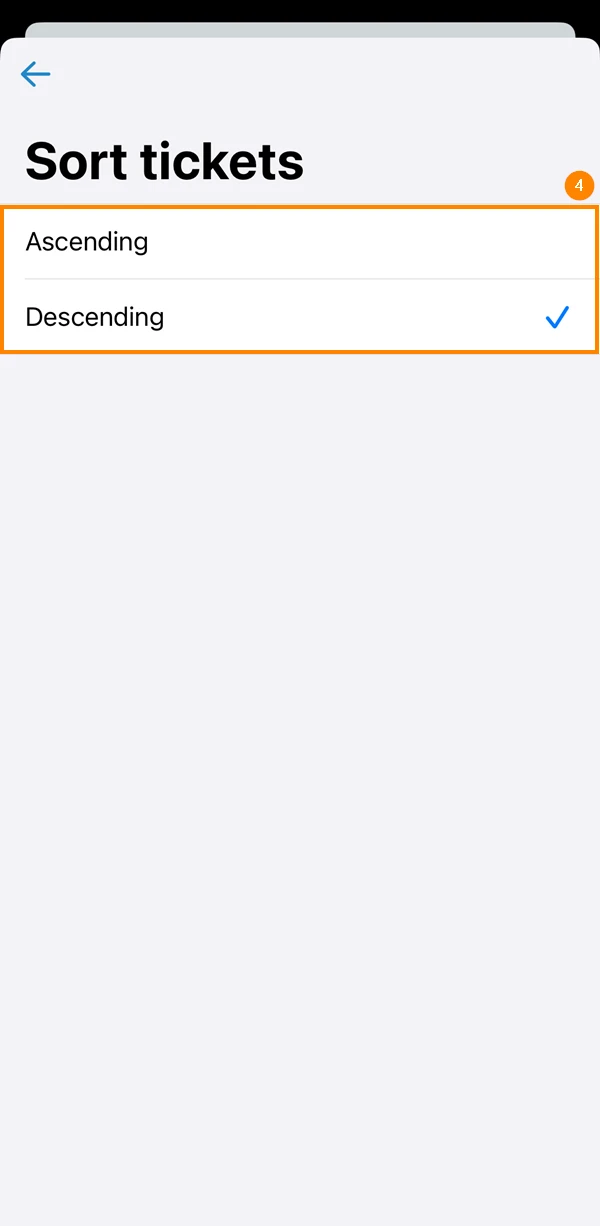
- Tap Order tickets by
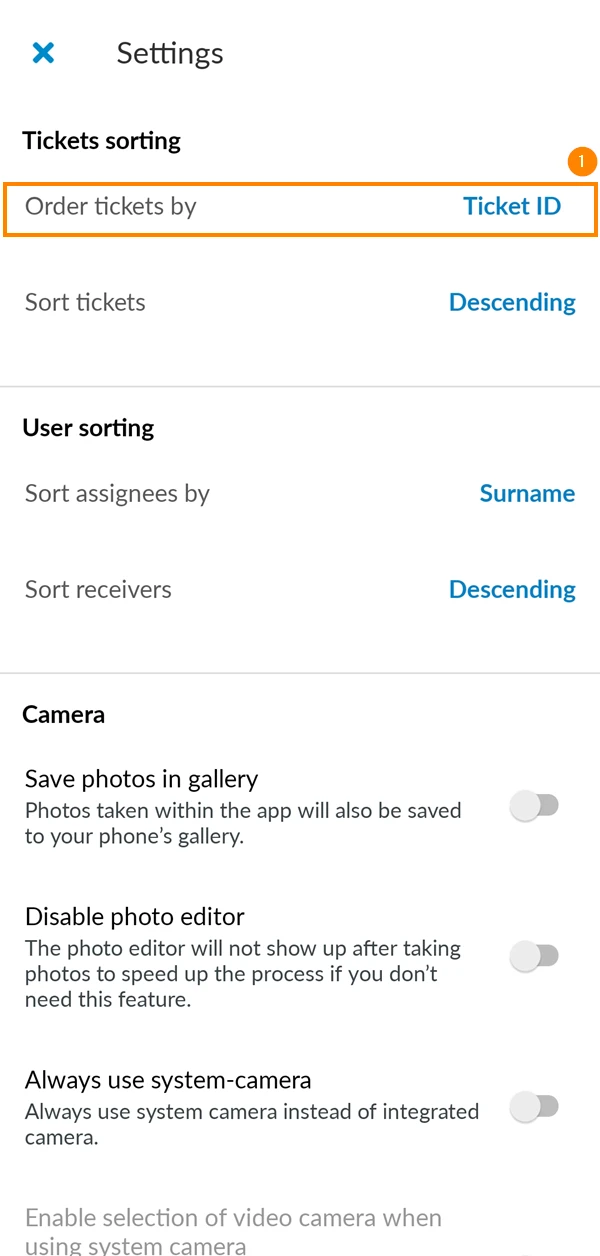
- Select the attribute according to which tickets should be sorted.
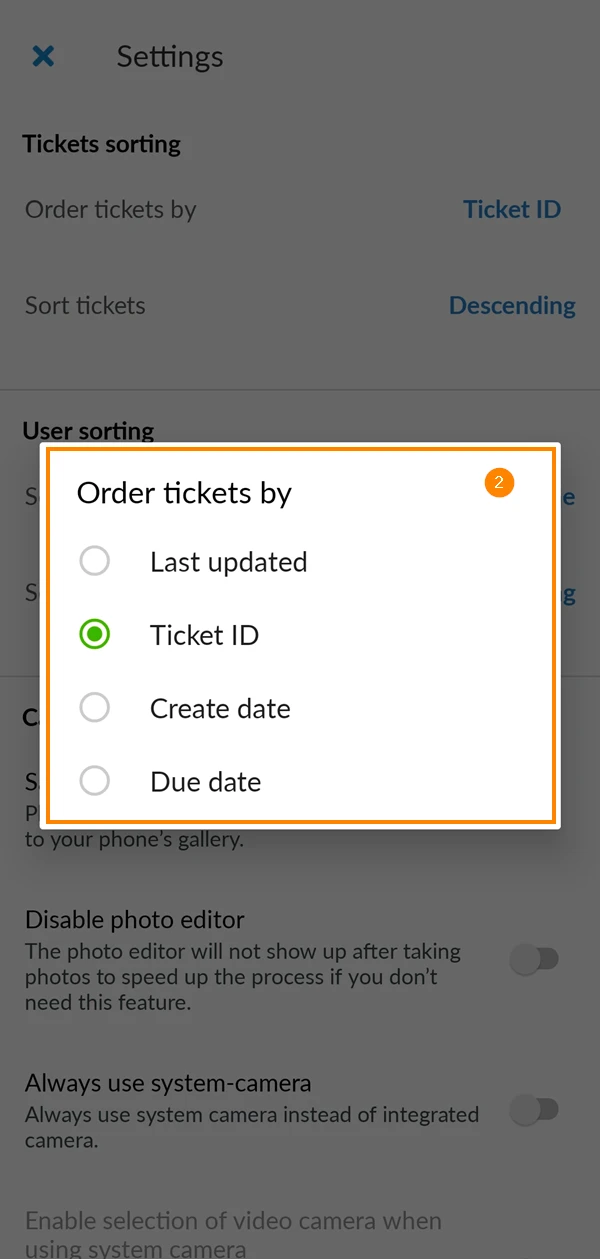
- Tap Sort tickets
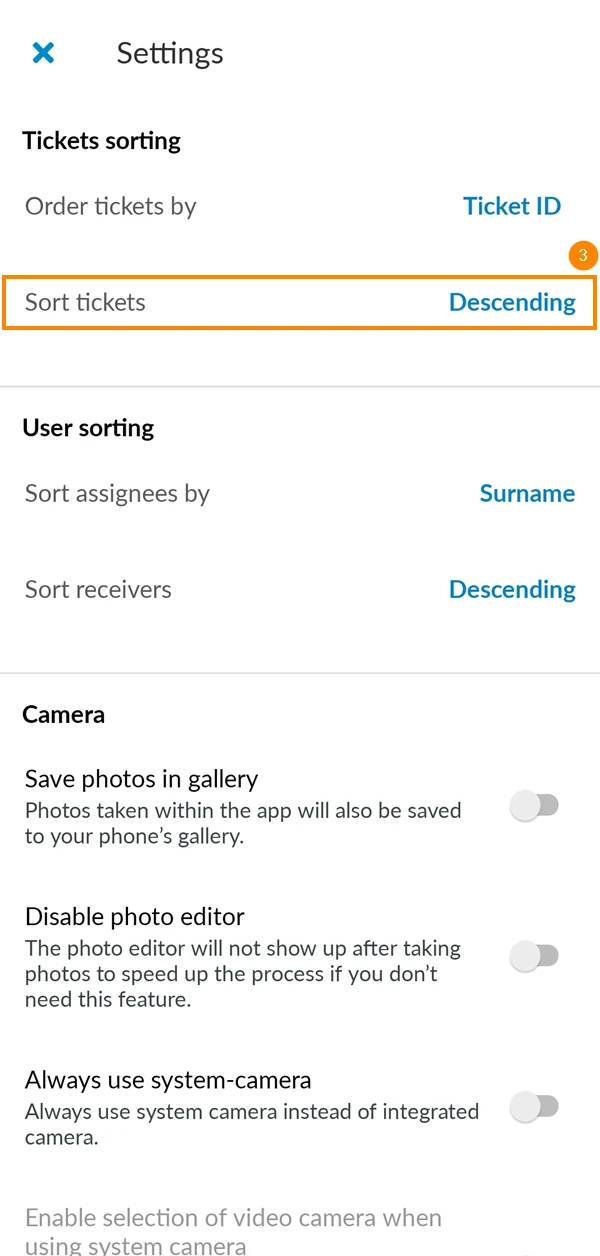
- Select whether you want tickets to be sorted in an Ascending or Descending order.
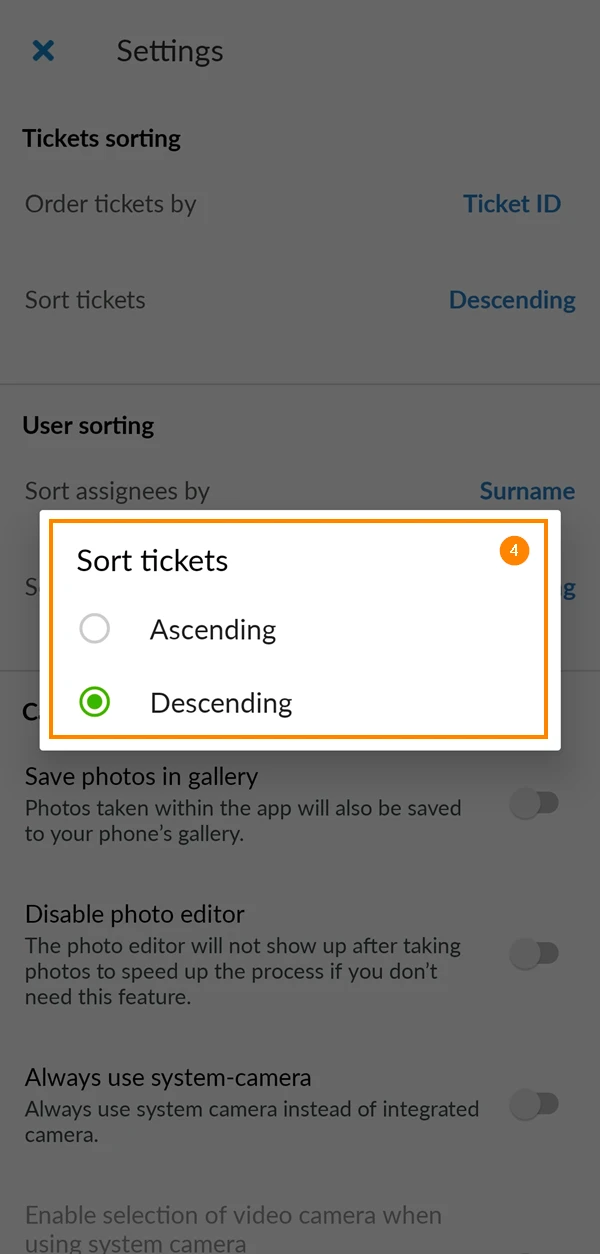
Sorting of Users in Tickets
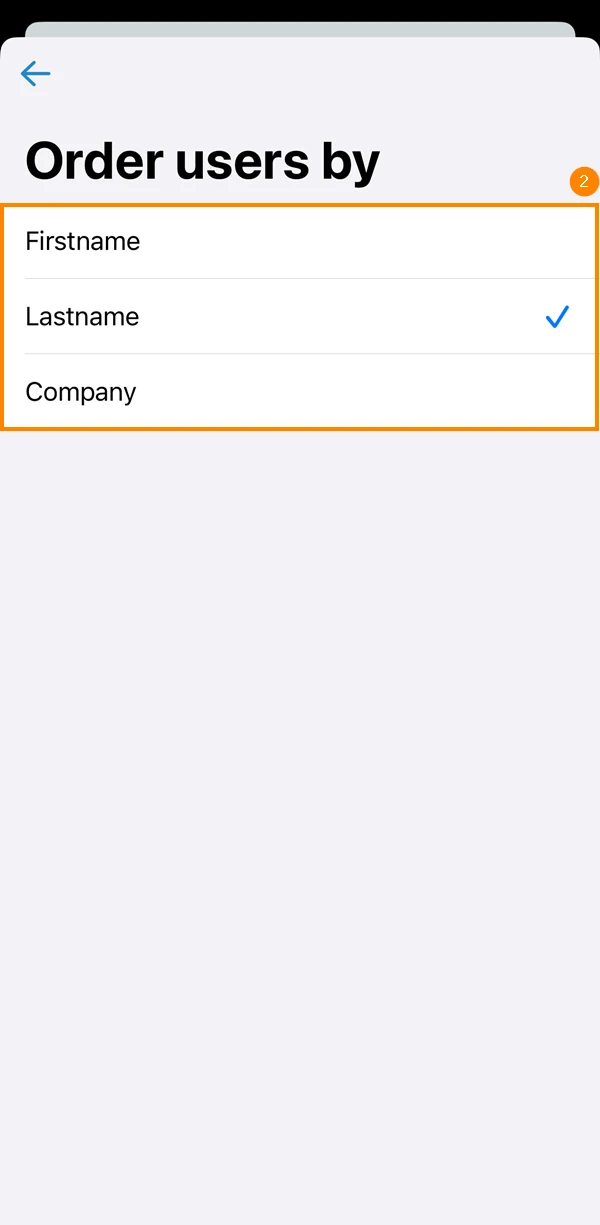
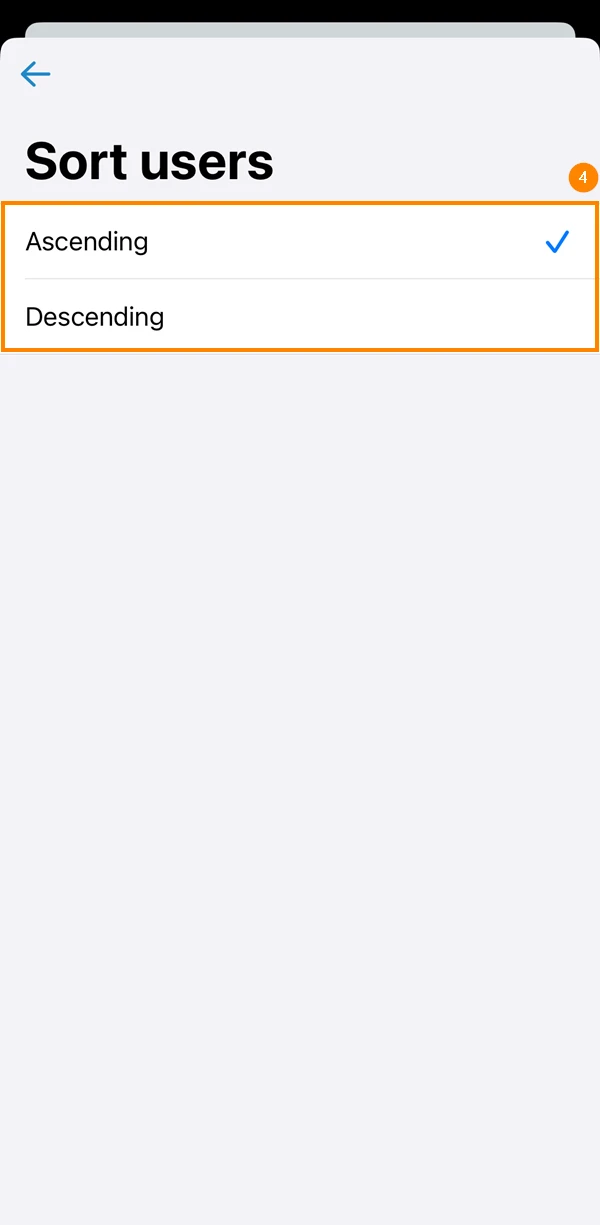
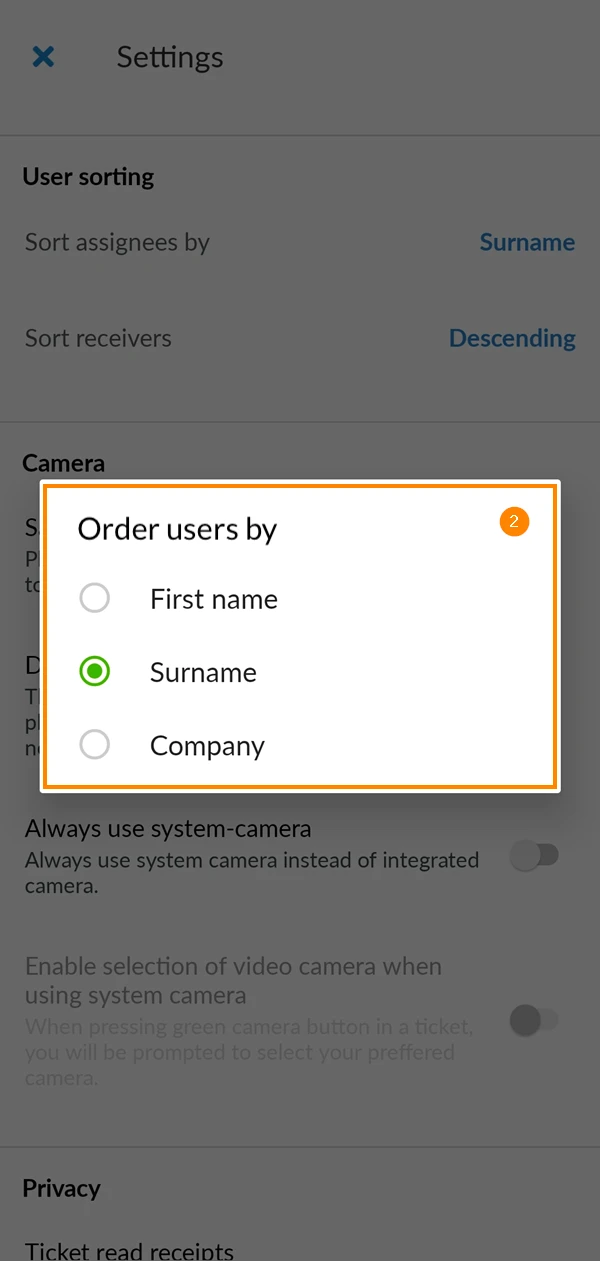
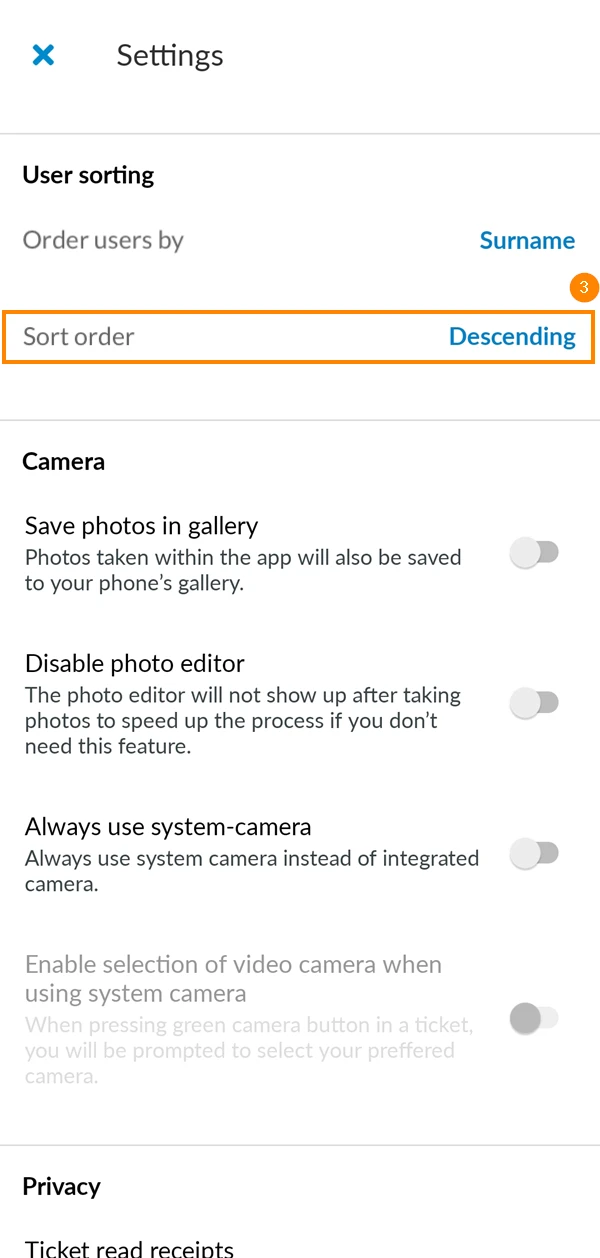
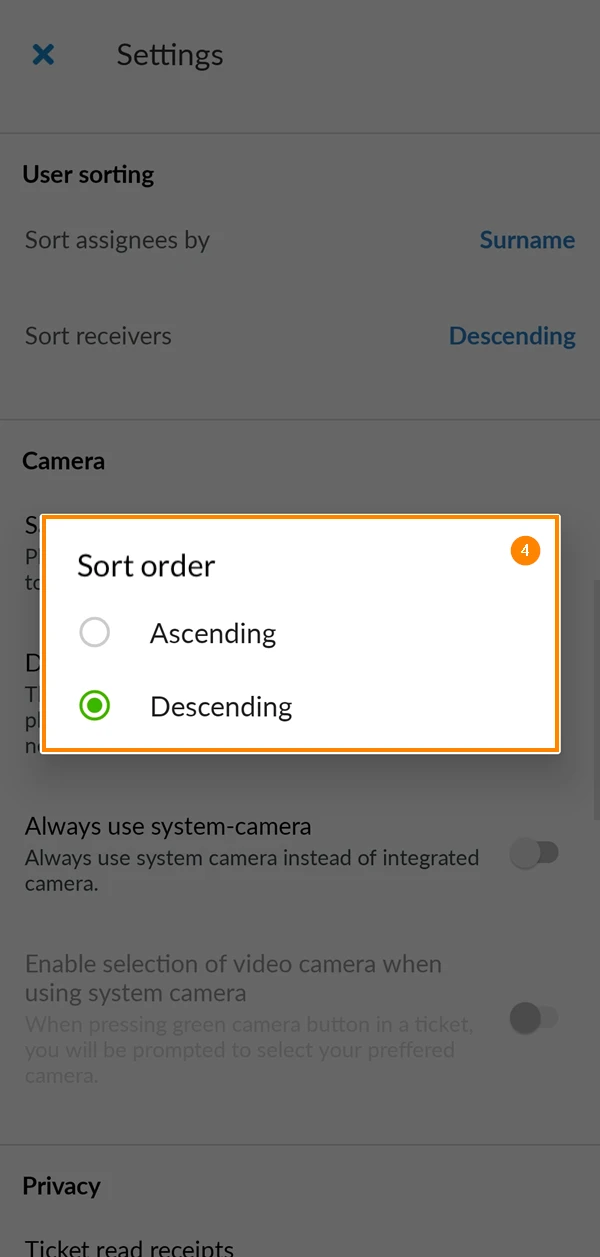
Sort users (e.g. assignees and receivers) in your preferred order when filling tickets. To do so:
- Tap Order users by
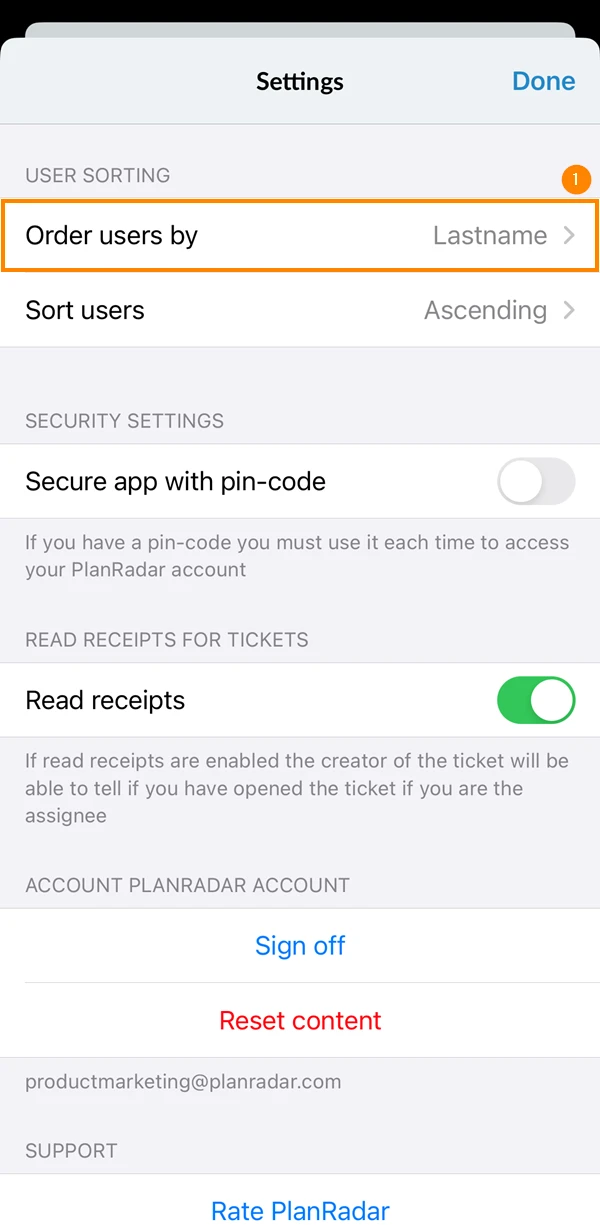
- Select the attribute according to which users should be sorted.
- Tap Sort users
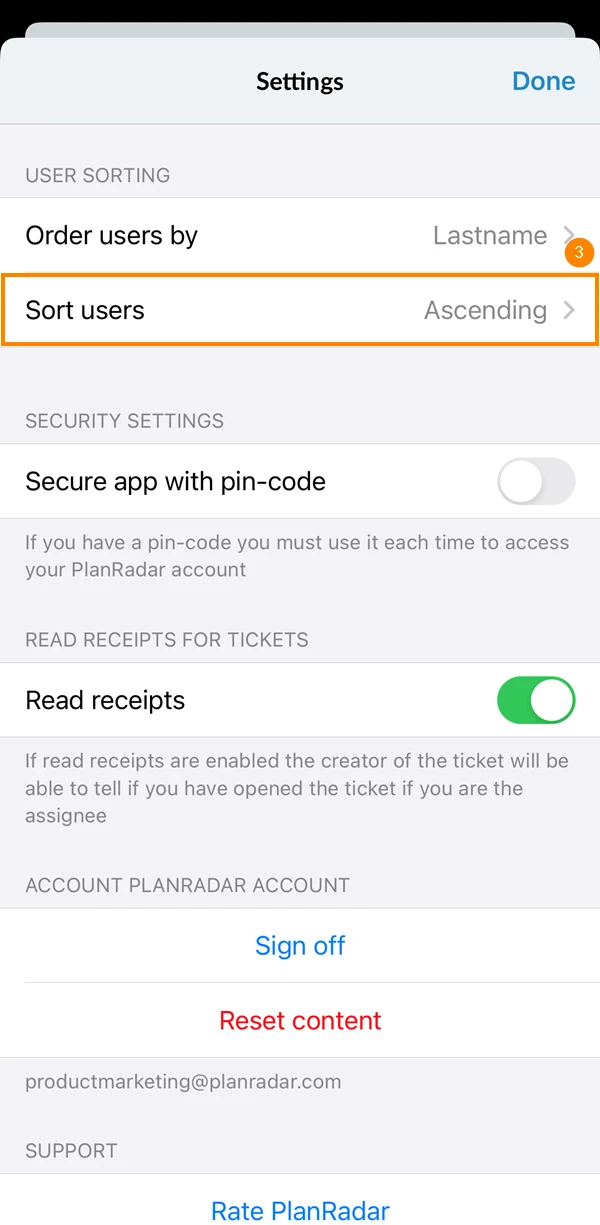
- Select whether you want users to be sorted in an Ascending or Descending order.
- Tap Order users by
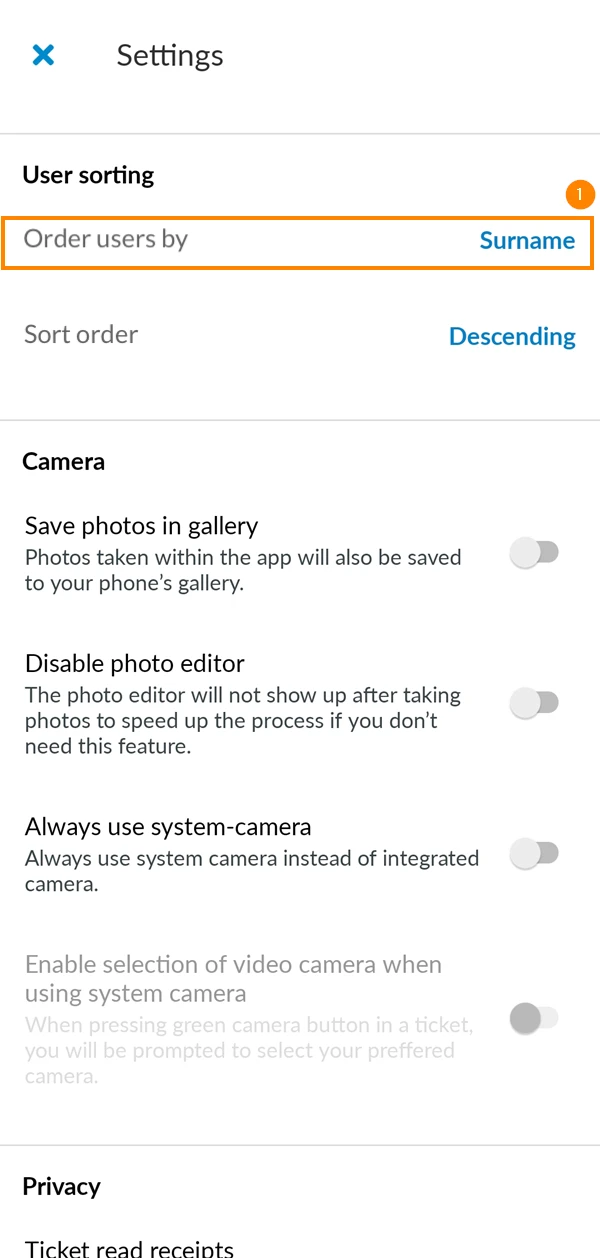
- Select the attribute according to which users should be sorted.
- Tap Sort order
- Select whether you want users to be sorted in an Ascending or Descending order.
Security
To increase the level of security you can setup a PIN code to unlock the app and enable biometric security.
Read Receipts
Enable read receipts for tickets to get an indication whether the assignee of your ticket has viewed it or not.
Logout
We do not recommend to logout from the PlanRadar app unless you want to login with a different user.
Read more in Login to PlanRadar > Log Out.
Support
Contact our support team and if you like PlanRadar we would be very happy about your rating.
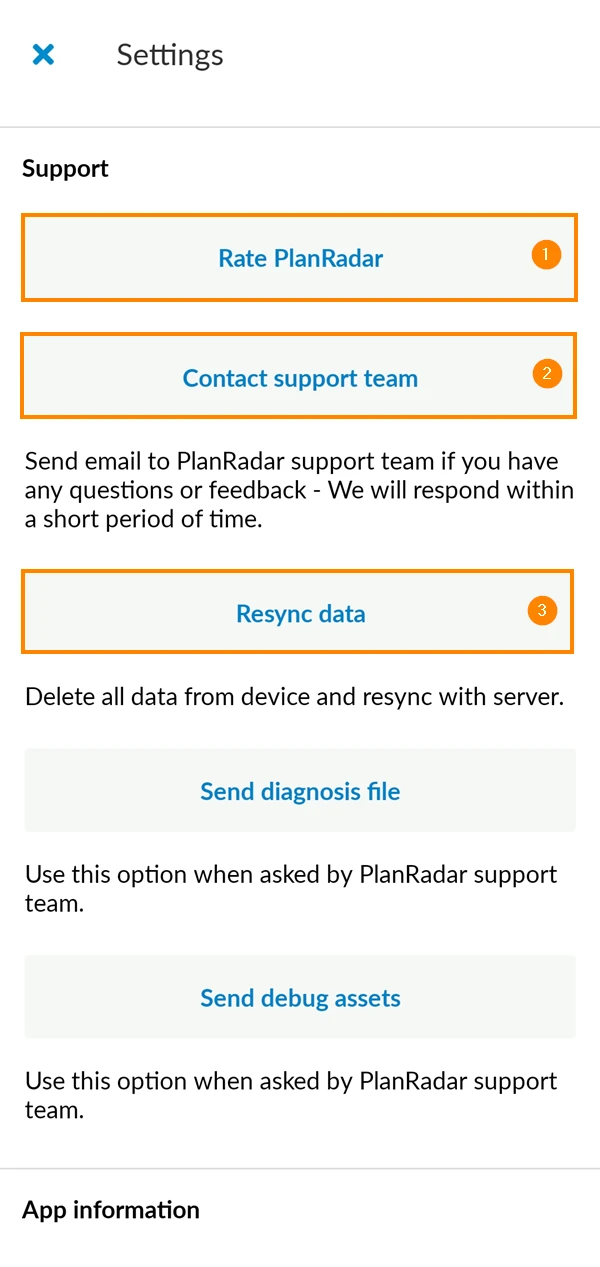
- Tap Rate PlanRadar if you find PlanRadar useful and if you want to share your experience with us and others.
- If you need help, do not hesitate and contact our support team via Get support. Your favourite e-mail app will open to send us a message.
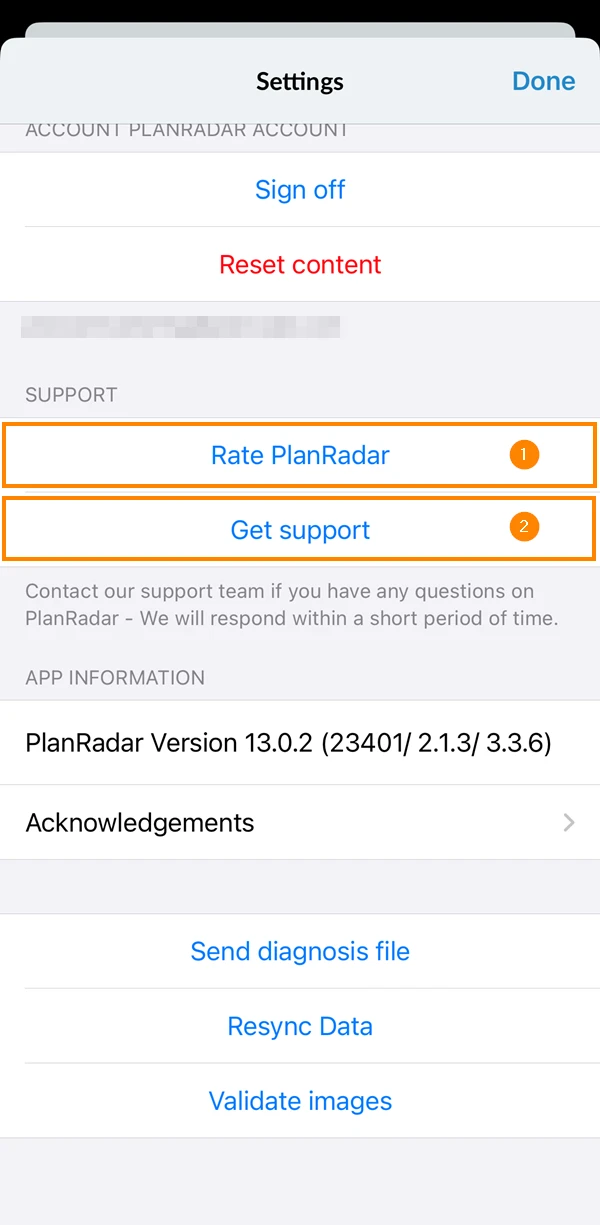
- Tap Rate PlanRadar if you find PlanRadar useful and if you want to share your experience with us and others.
- If you need help, do not hesitate and contact our support team via Get support. Your favourite e-mail app will open to send us a message.
- In some cases, you might want to clear all local data and start a full resync from the PlanRadar server by tapping Resync data.
App Information
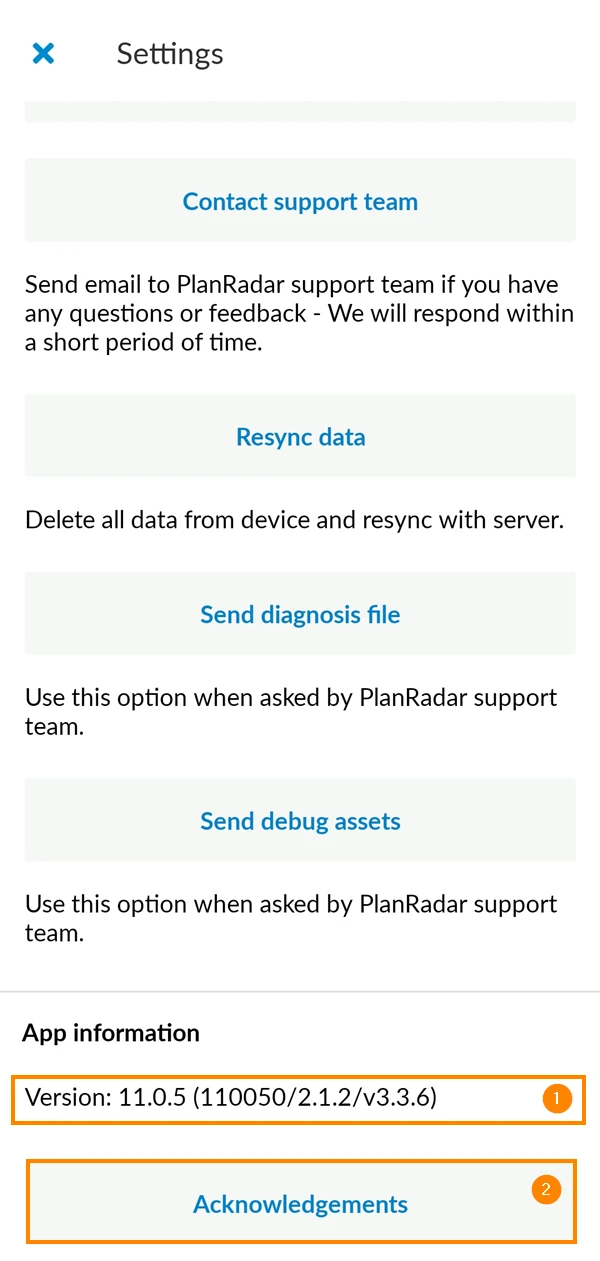
Find details about the currently installed app version and acknowledgements to third party libraries.
- PlanRadar version number
- Acknowledgements
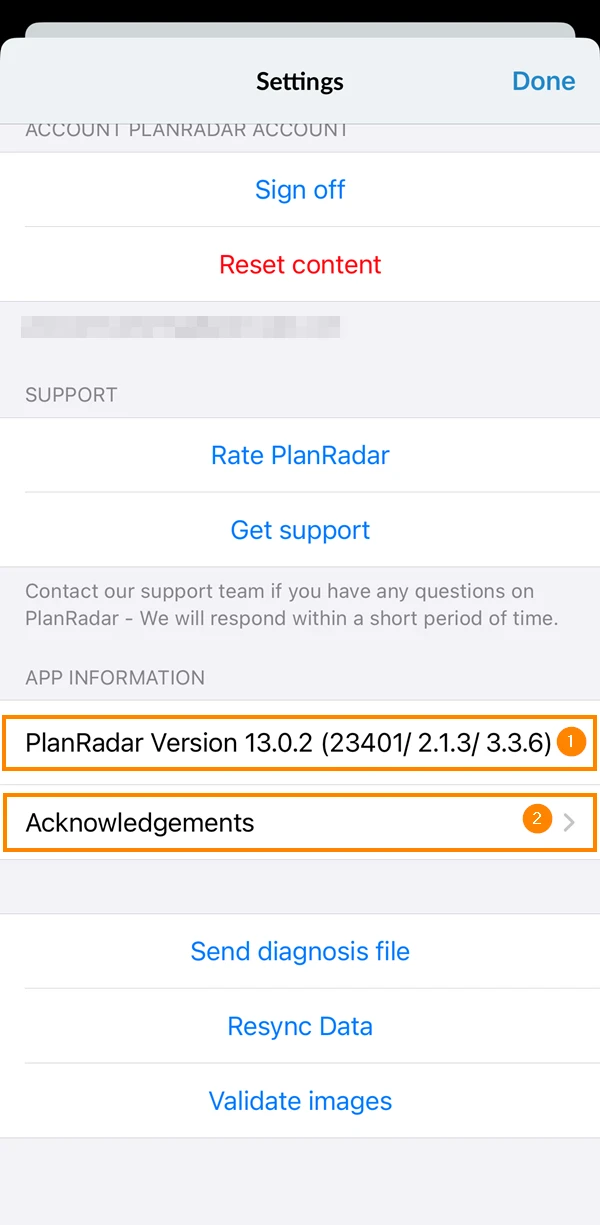
- PlanRadar version number
- Acknowledgements
Android Only Settings
Notifications
You can enable or disable push notifications for the Android app.
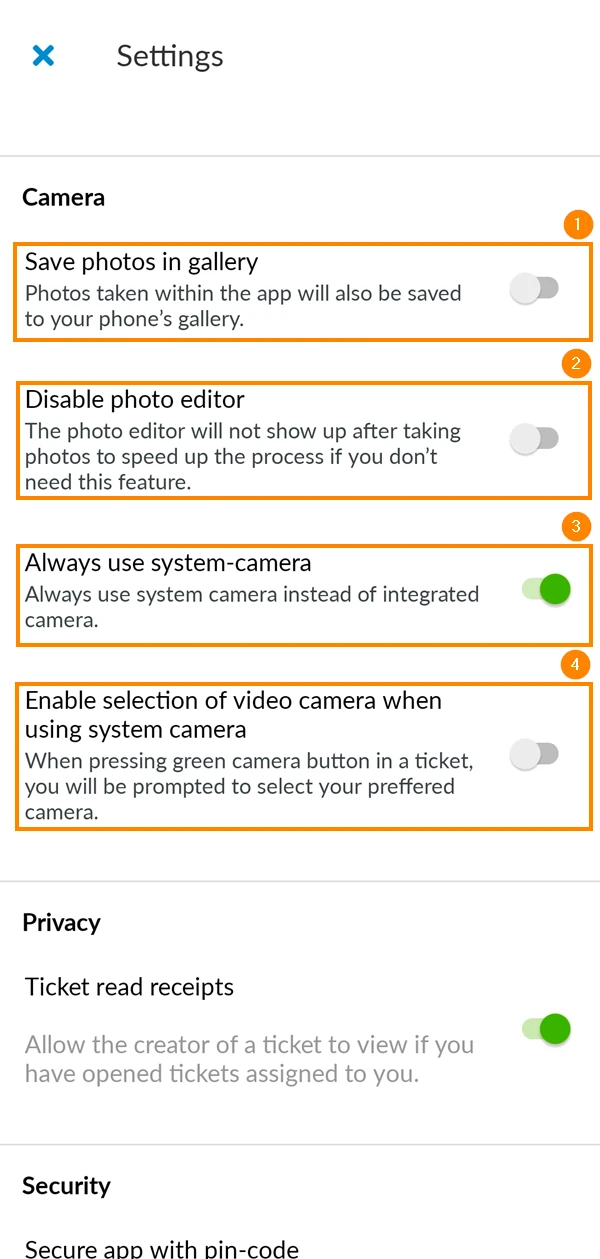
Camera
There are a number of settings related to taking photos when creating/editing tickets. These include:
- Save photos to the device
- Don't open the photo editor after taking a photo to speed the process up
- Use the system camera instead of the integrated camera
- If the previous setting is activated, you can activate this setting to be able to select your preferred camera when taking a video
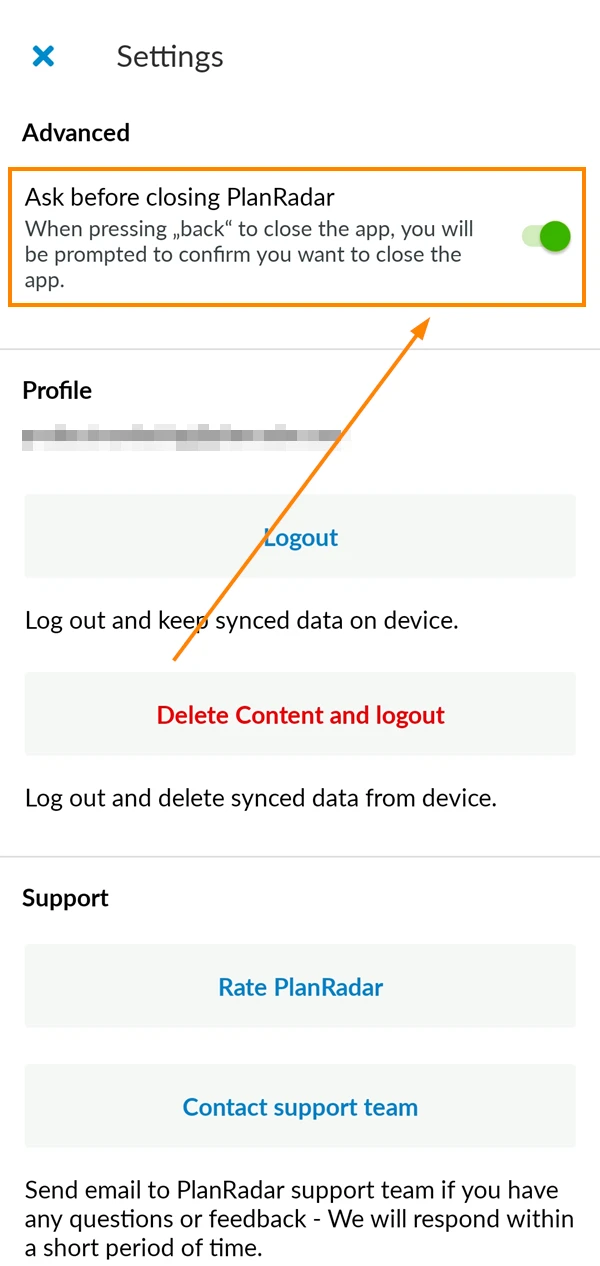
Advanced
Activating this setting, would show a pop-up to confirm if you'd like to close the app when pressing the back button:
Updated December 18, 2024