

 Deutsch
 Español
 Français
 Hrvatski
 Italiano
 Polski
 Português (BR)
Tickets
Overview
Learn about Tickets, what you can do with them, how tickets are related to forms and what other PlanRadar features they are integrated with.
What is a Ticket?
Tickets are a very flexible and powerful tool to track, collect, share and communicate any kind of information within a project. It makes working together easy and more efficient and ensures complete and reliable documentation as well as customisable reporting.
Tickets consist of a customisable form, optional attachments, a chat for communication and they can be located on digital plans or BIM models.
Other tools might call them tasks or issues and often implement them for specific use cases.
PlanRadar takes a more generic approach and doesn't dictate a process your business must adapt to. You can tailor PlanRadar so it adapts to your processes. You can use tickets for a variety of use cases and adjust everything exactly to your needs and the existing processes within your company.
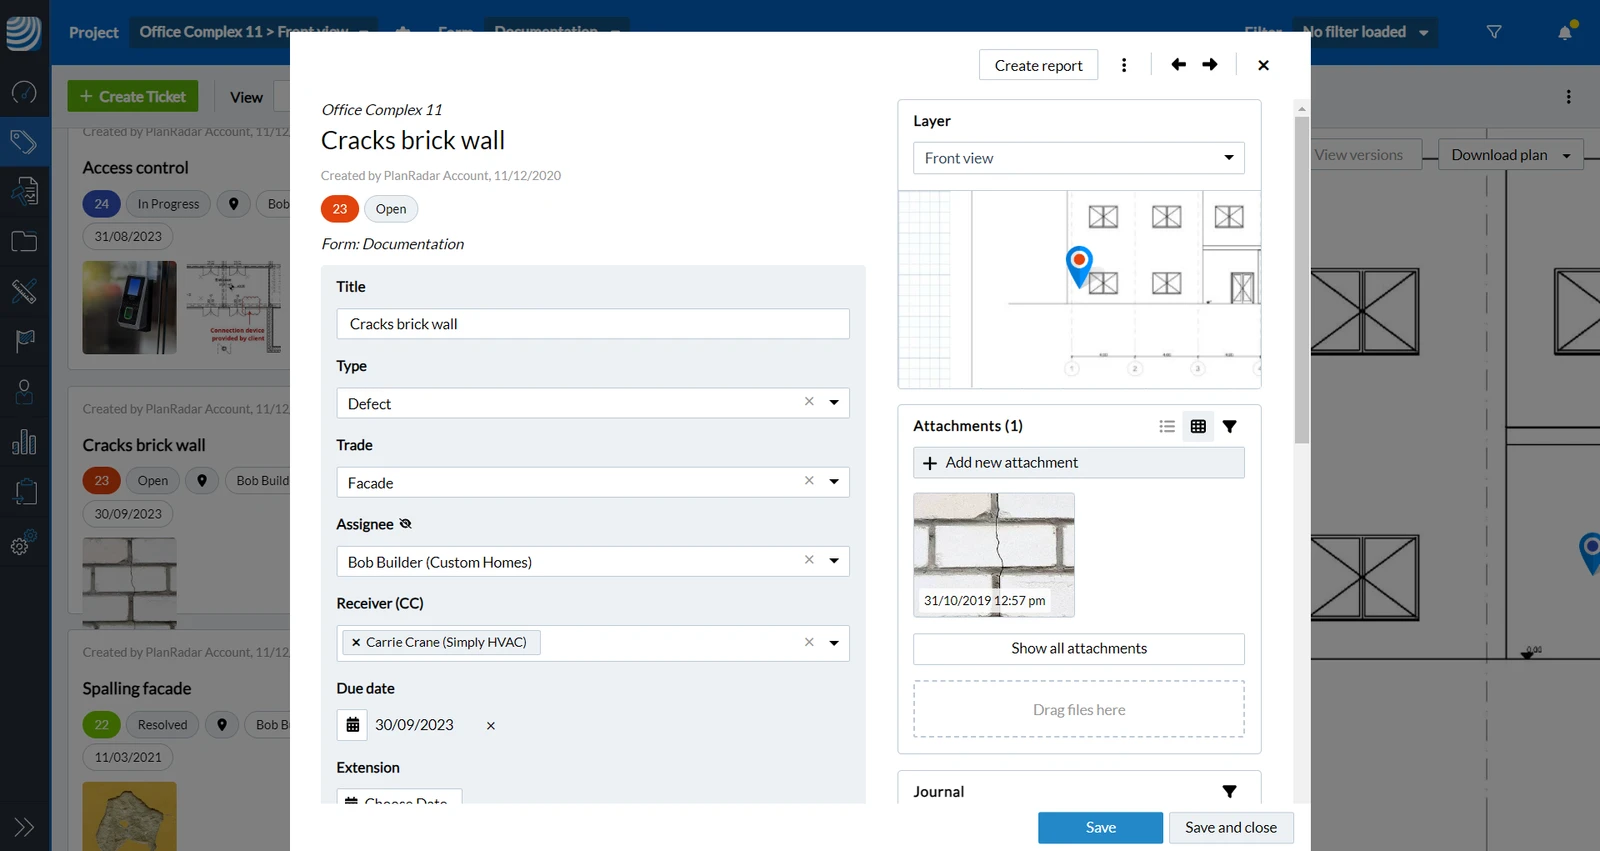
Example ticket for defect tracking:
Adapt Tickets for your Use Cases
Ticket Forms are fully customisable to your needs. Because of this dynamic approach its easy to use tickets for all different kinds of use cases, e.g:
- Defect tracking (snagging) on a construction site
- Site reports
- Managing recurring tasks, such as facility management responsibilities
- Conducting fire safety checklists
- Photo documentation
- Handovers
Forms for Tickets
Forms are the foundation of tickets. They allow you to define what fields and attributes a ticket is displaying. You can also define which users can view and edit those fields.
Form Options
You can specify whether a form can have attachments, comments, a plan position, GPS coordinates or a schedule for reopening tickets for recurring tasks.
Creating and Working with Tickets
You can create a ticket to assign a task to someone by providing the relevant information to resolve it with written descriptions, a plan position and photos or videos to visualise the issue.
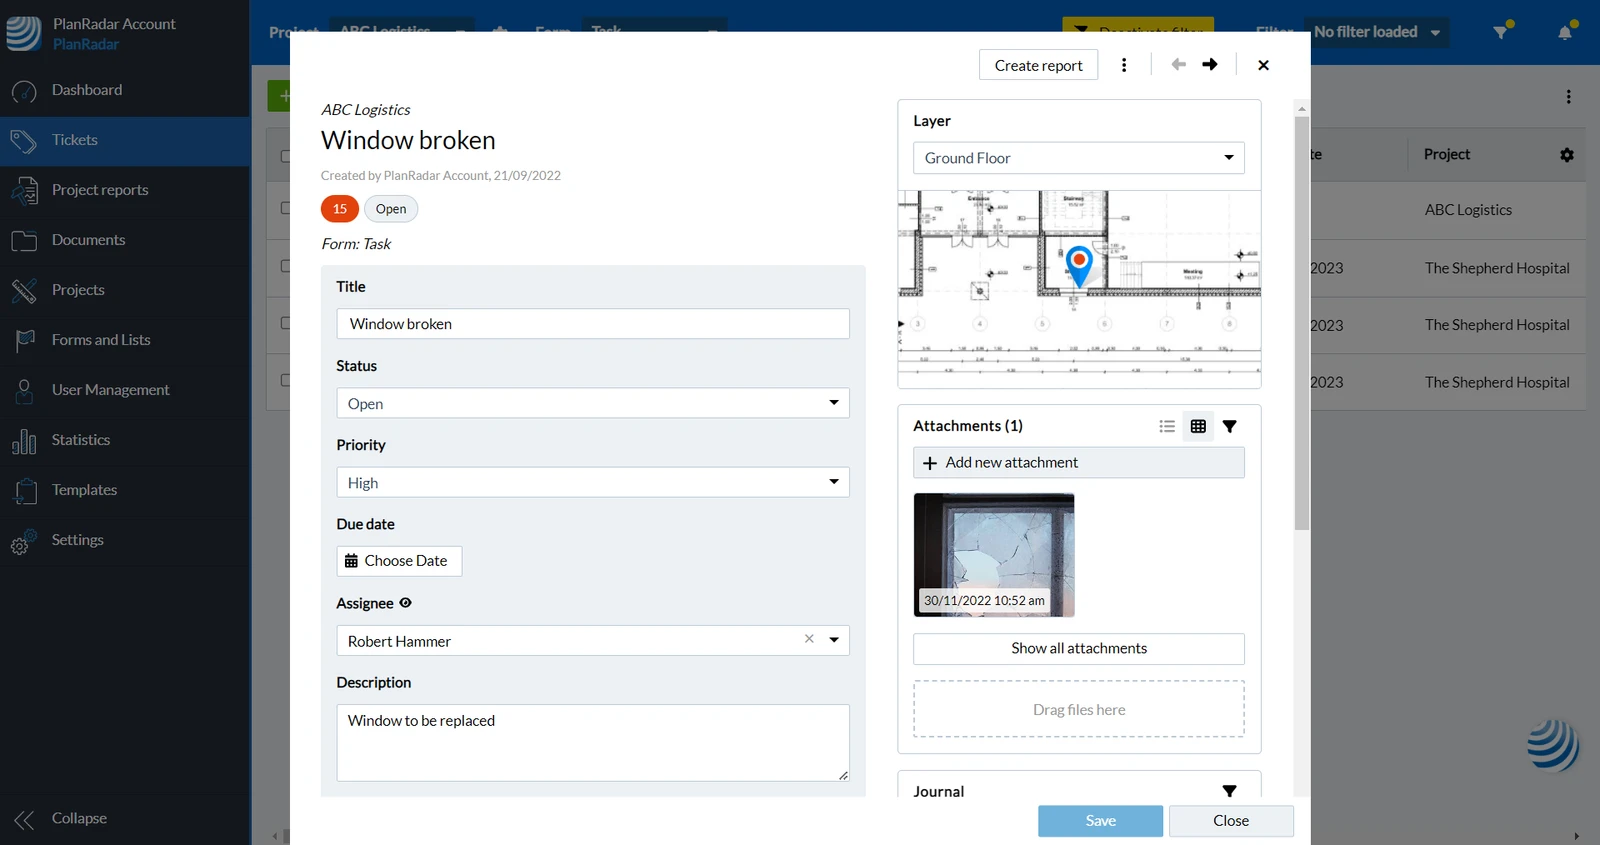
You could create another ticket to collect data for a site diary which doesn't require an assignee.
To create a ticket you must be an in-house user with a payed license.
Sub-contractors cannot create tickets, but they can get tickets assigned to work on them and resolve them. Sub-contractors don't need a payed license.
The status field can be used to track the progress and state of a ticket until it gets closed and resolved.
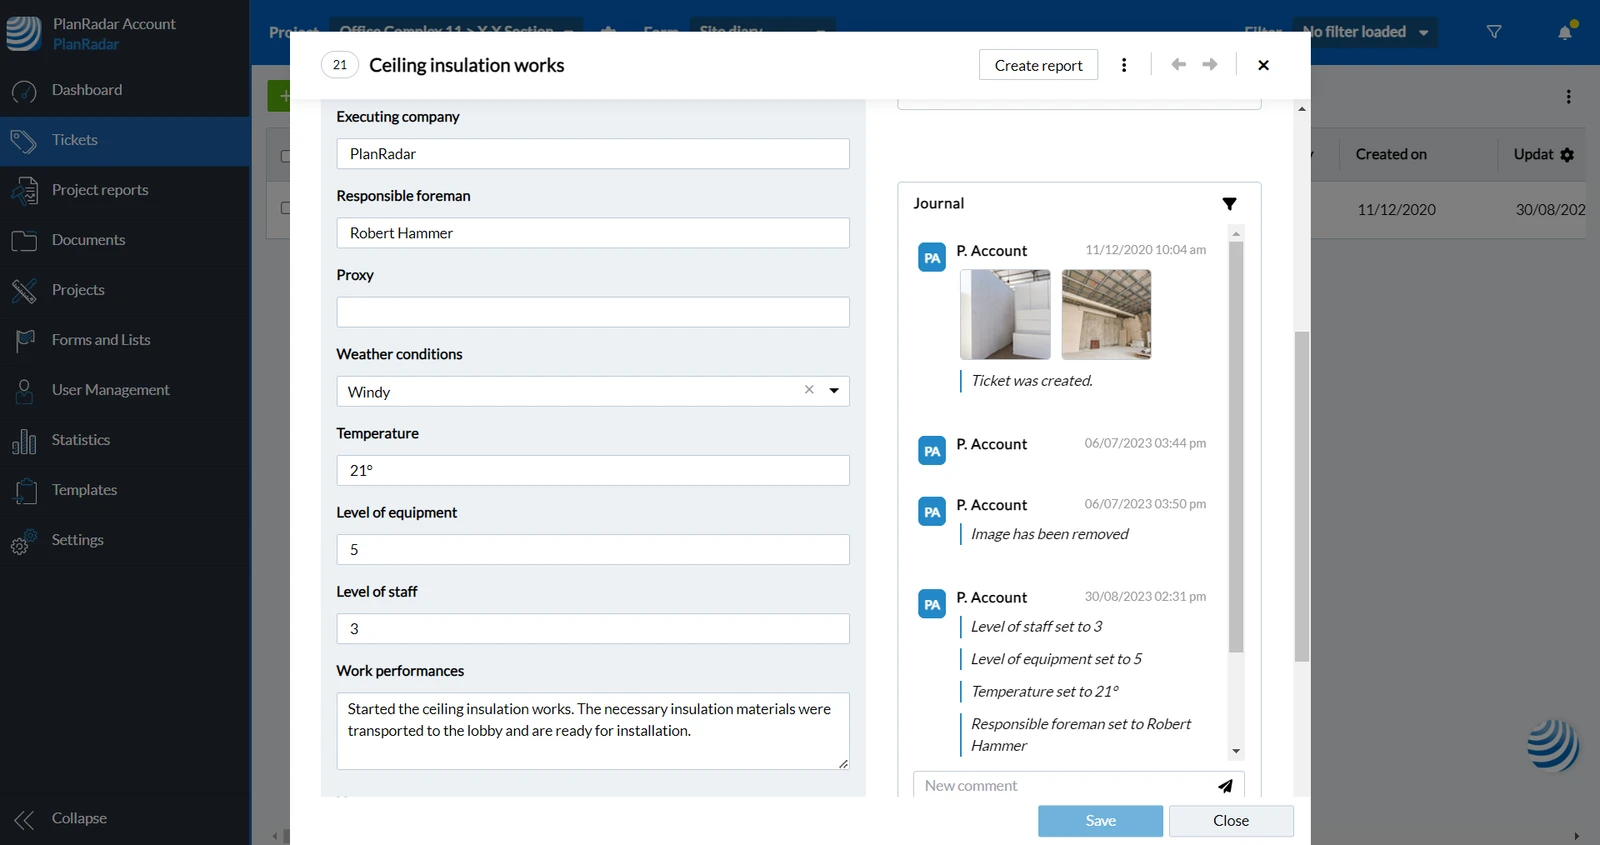
Each activity is logged automatically to the ticket journal to provide full documentation and evidence.
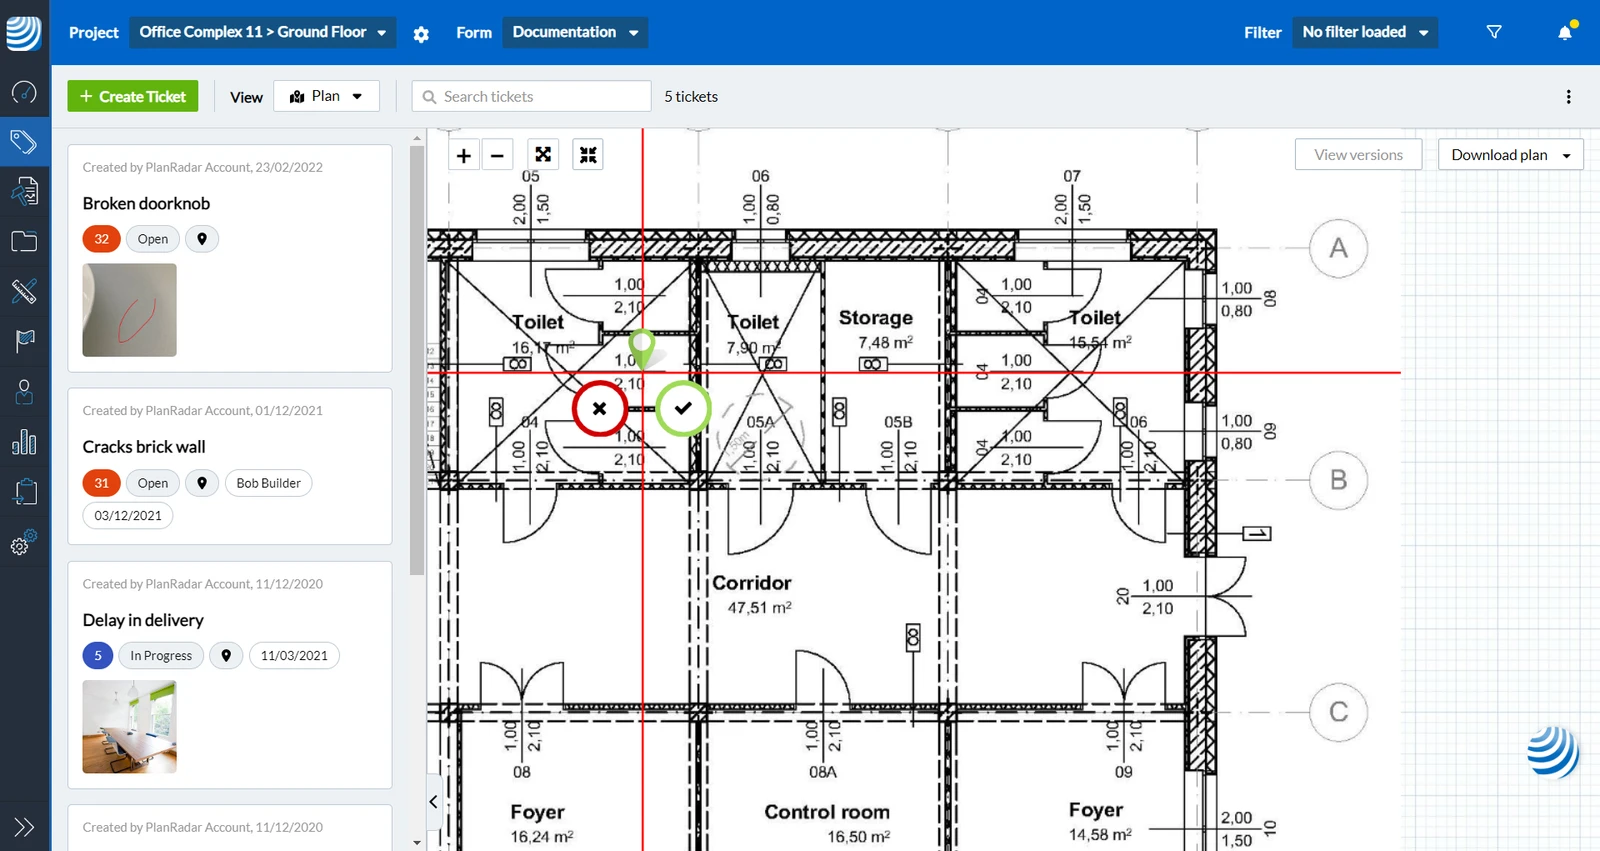
Tickets must be attached to a layer. Layers help to structure and organise the content of your project by floors, buildings or whatever you choose. They work similar to folders in a file system. You can also assign a plan or BIM model to each layer.
Example of creating a ticket with plan position:
Ticket Notifications
Once a ticket is created or updated, all relevant users (assignee and receivers) get notified via email and/or push notifications in the mobile apps. Each user has control over their notification settings, determining which events they want to be informed about and when.
Reminders for time-sensitive tickets can be set using due dates and extensions.
Viewing Tickets
PlanRadar offers two different views for your tickets: the plan view and the list view.
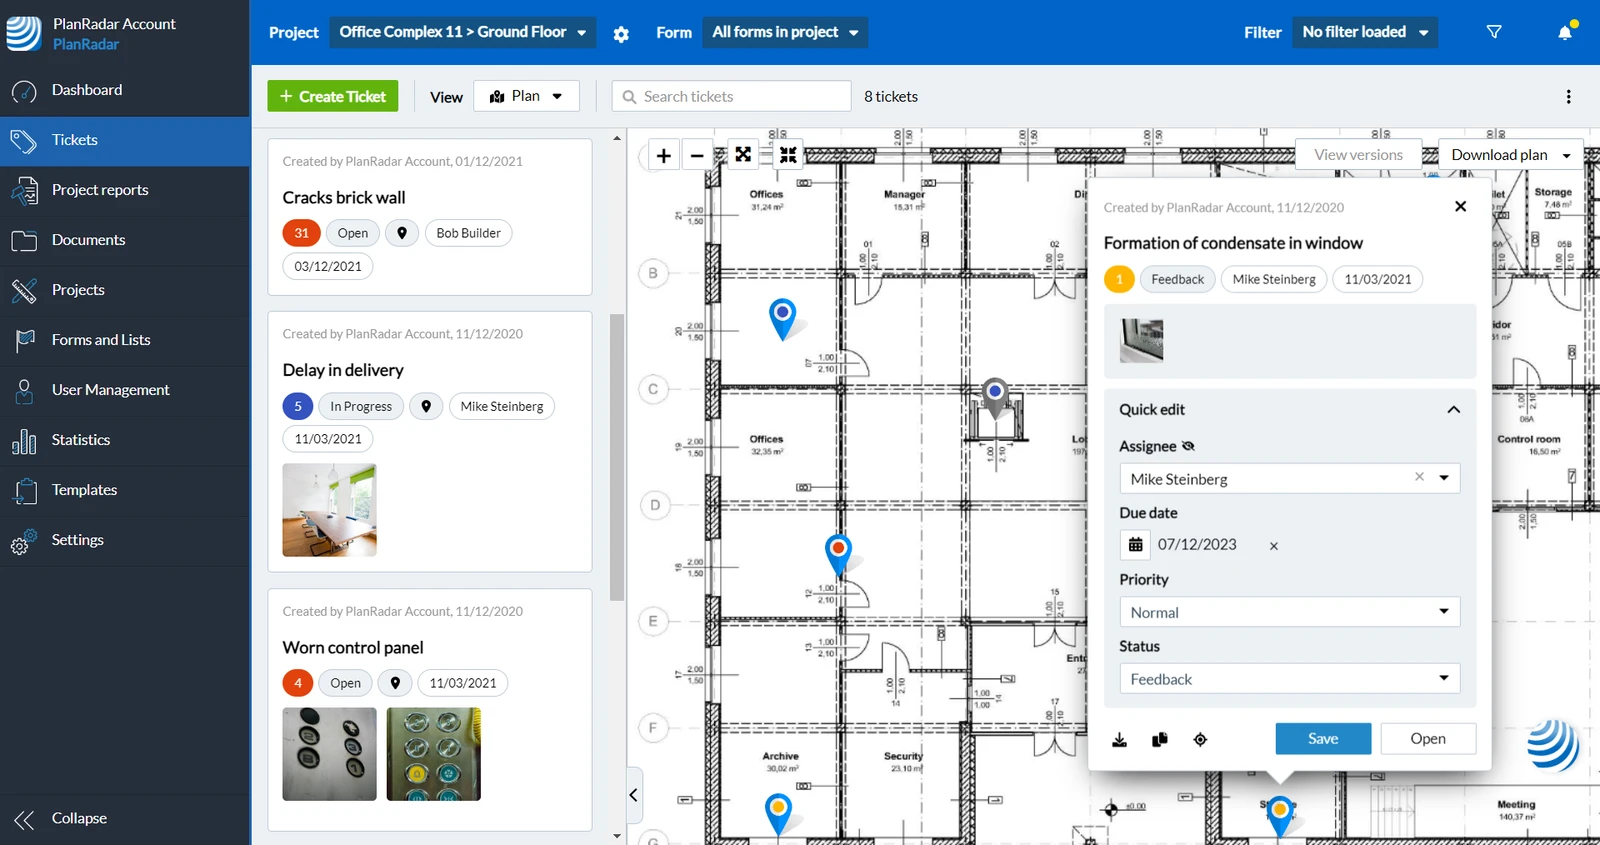
The plan view offers more visualisation including pins for ticket locations on the plan and a list of tickets with the most essential information about each ticket and attached photo previews.
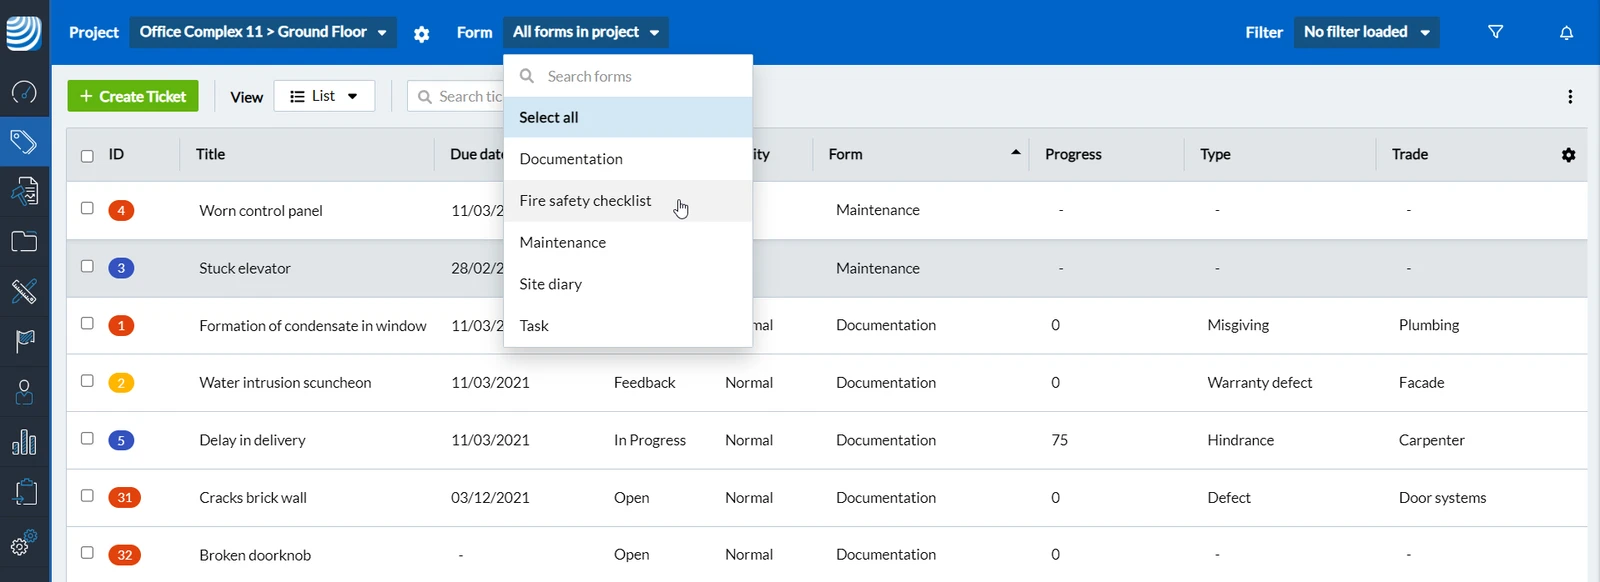
The list view offers more customisation and a better overview in a table for all your tickets even across multiple layers or projects, depending on your needs.
Both views have the same possibilities to select a layer and form, text search and filtering options.
Example of list view with form selection:
Example of plan view:
Searching & Filtering Tickets
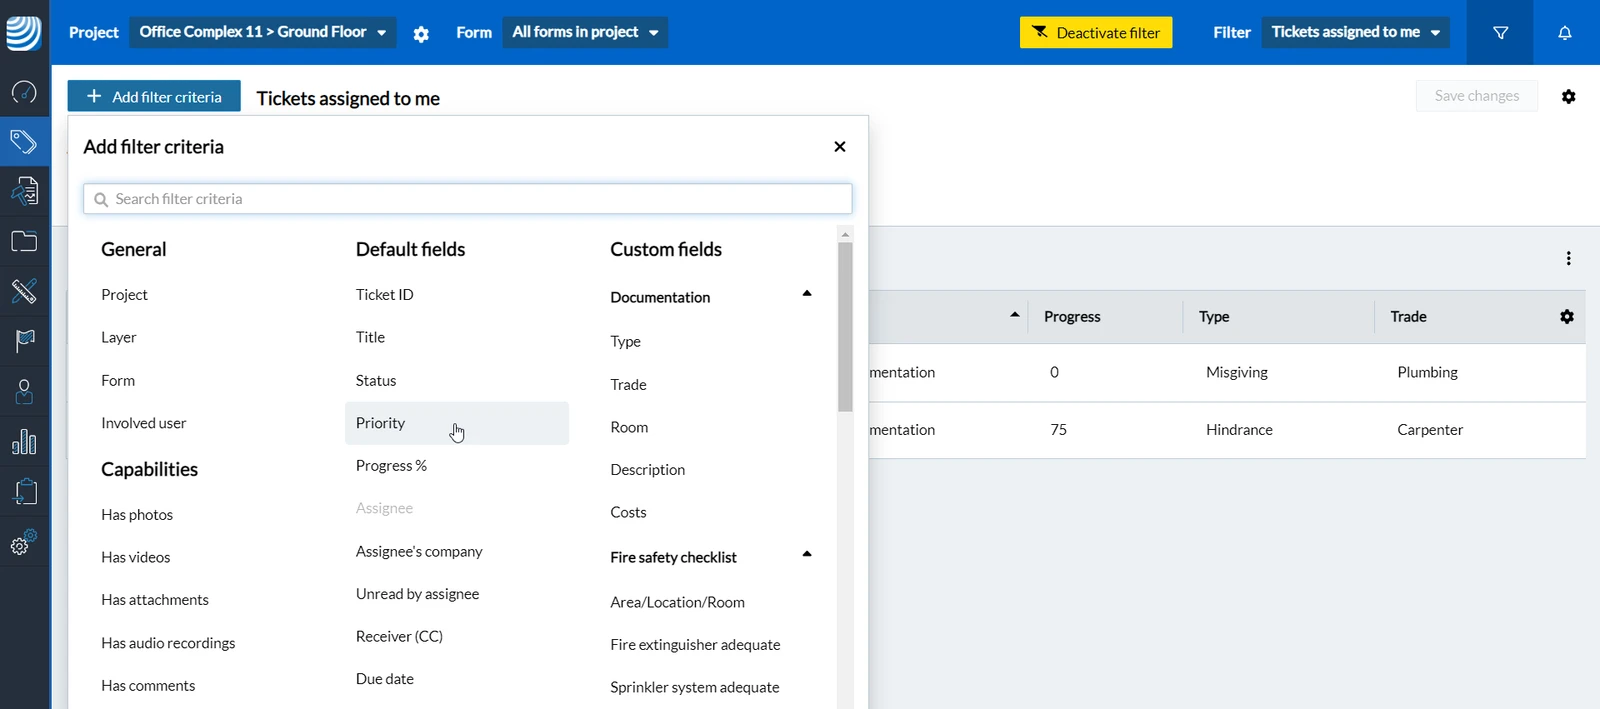
Use the search field to quickly find specific tickets by key terms or use filters to show only tickets that meet certain criteria. Filter criteria are based on ticket fields and more. Filters can be saved only for you or shared with other users across projects.
Example of active filter 'Tickets assigned to me' and 'Add filter criteria' menu:
Reports based on Tickets
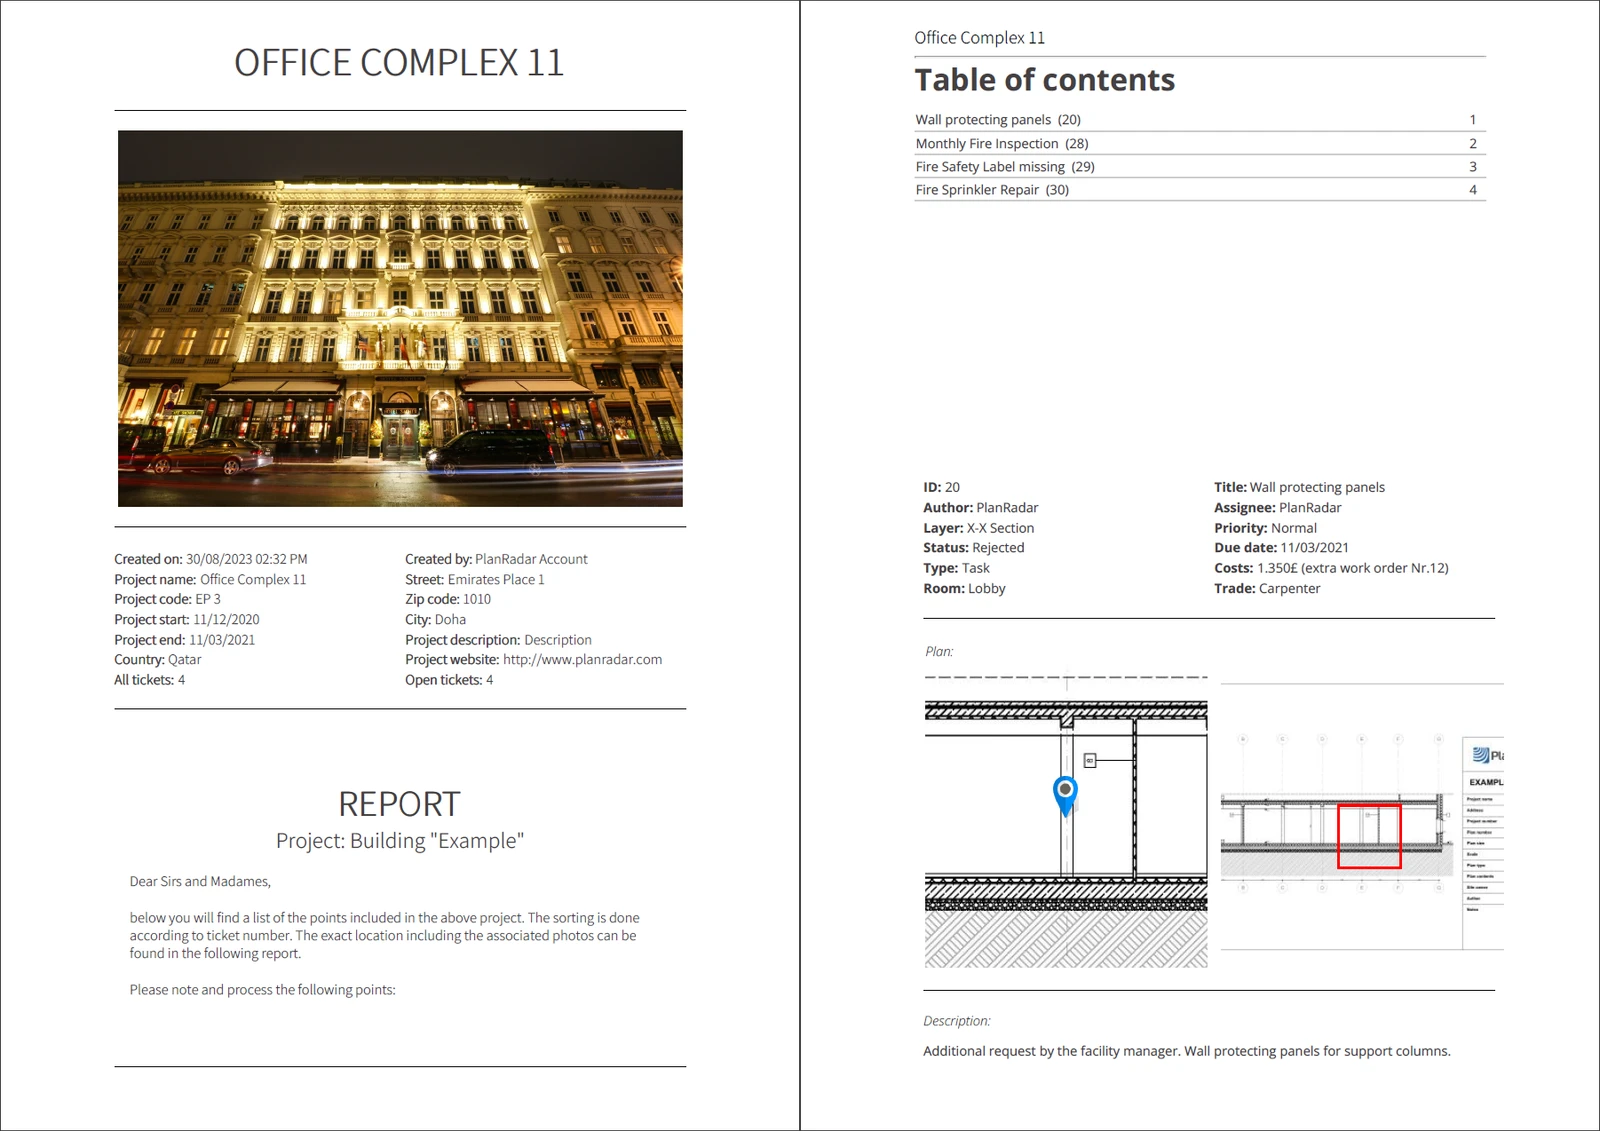
Create ticket report templates to define which information from your tickets gets included in your ticket reports. Those reports can be exported in PDF or Excel files and shared with stakeholders outside of PlanRadar.
The advanced template builder offers countless possibilities to customise those reports to your needs. To keep it more simple there is also the basic template builder and sample templates.
To create a ticket report you just select a template and define which tickets get included, usually by using filters. Or create a ticket report for a single ticket.
Example of a PDF ticket report:
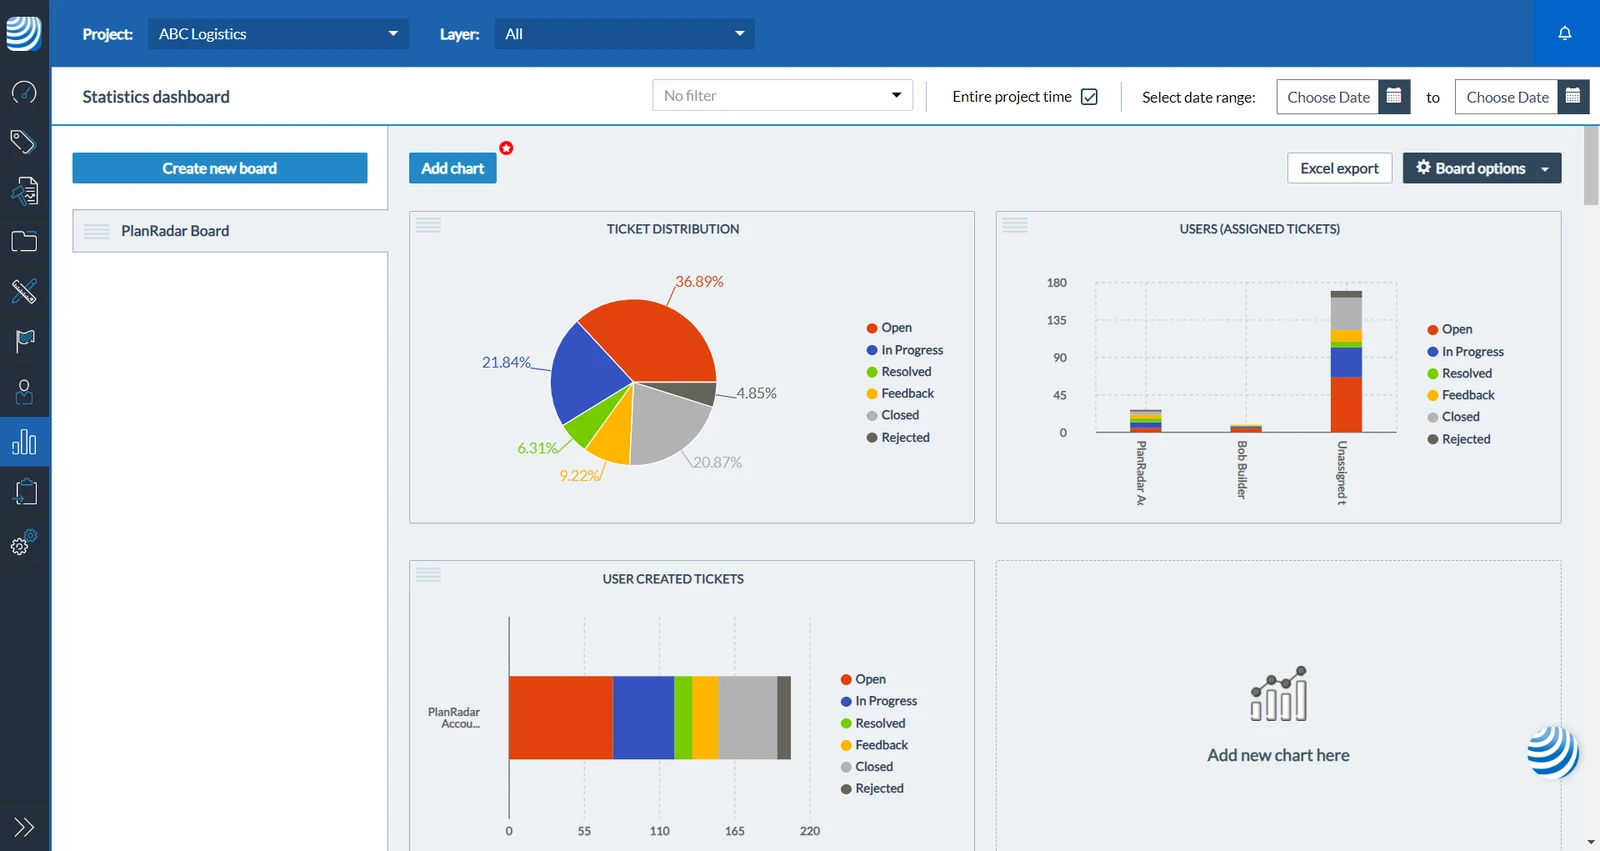
Statistics based on Tickets
Create statistics and charts based on the data in your tickets and share them in PlanRadar or export them to Excel files.
Example of statistics dashboard:
More Ticket Features
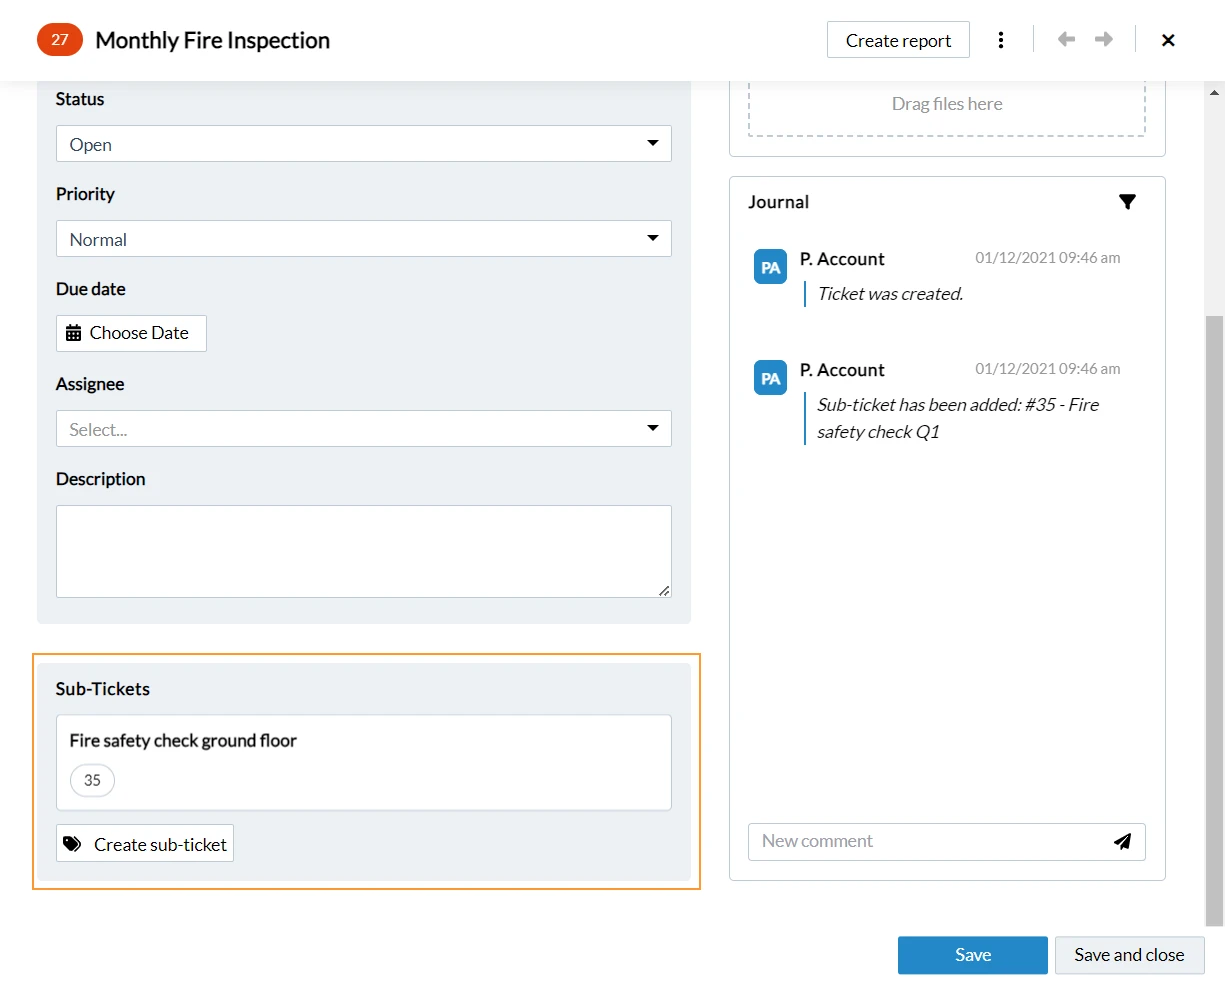
Sub-Tickets
Group your tickets if there is a bigger task that consists of smaller tasks by creating sub-tickets within a parent-ticket or by assigning a parent-ticket to existing tickets.
Example parent-ticket with sub-ticket:
Open Tickets by Scanning QR Codes or NFC Tags
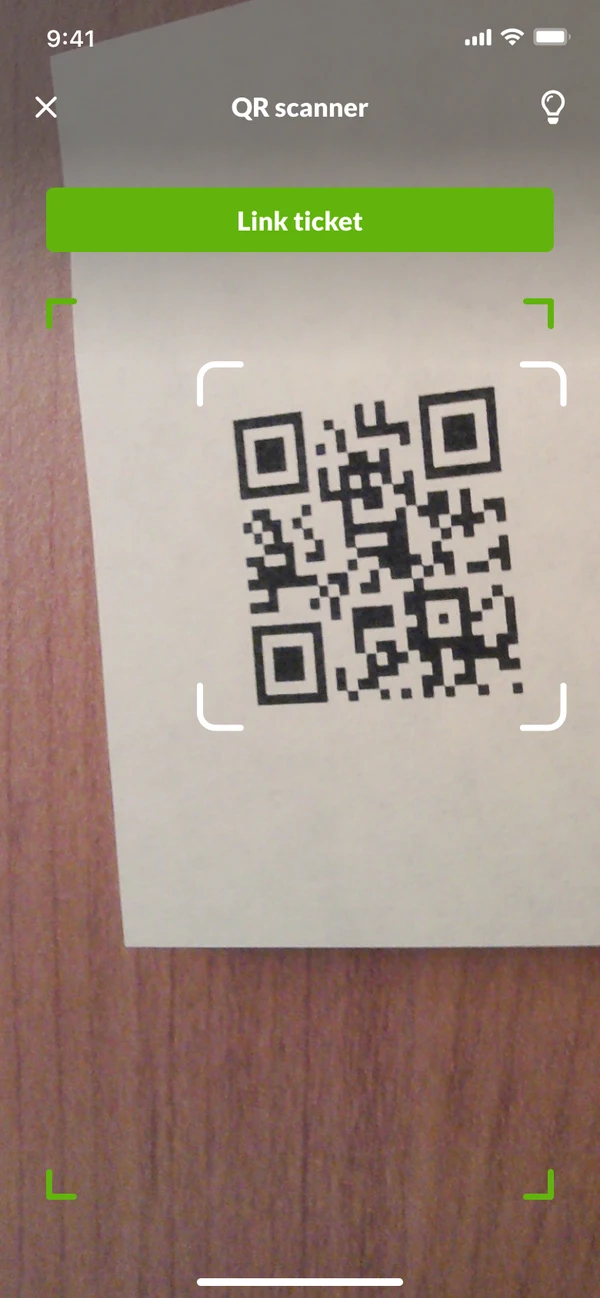
Link tickets with QR codes to save time finding the right ticket when working on-site. Scan the QR code with your camera or PlanRadar mobile app, and the linked ticket will open.
You can also link NFC tags to tickets in a similar way.
Example of scanning a QR code to link a ticket:
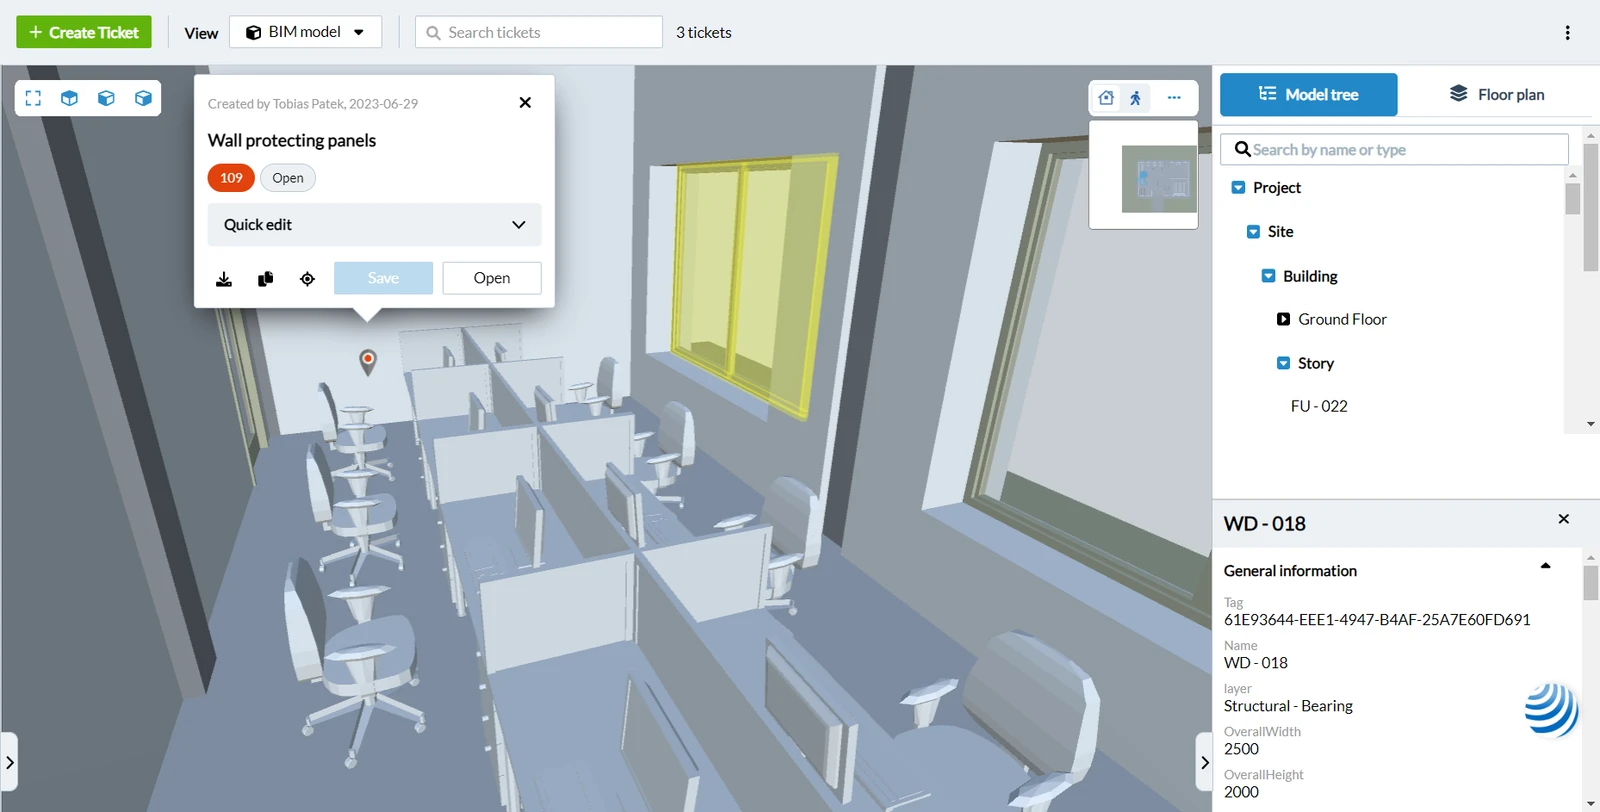
Locate Tickets on 3D BIM Models
Tickets can also be placed within a 3D BIM model and can be attached to IFC entities.
Example ticket in a BIM model:
Link Tickets in your Project Schedule
With the scheduling feature you can create phases to plan and manage your projects.
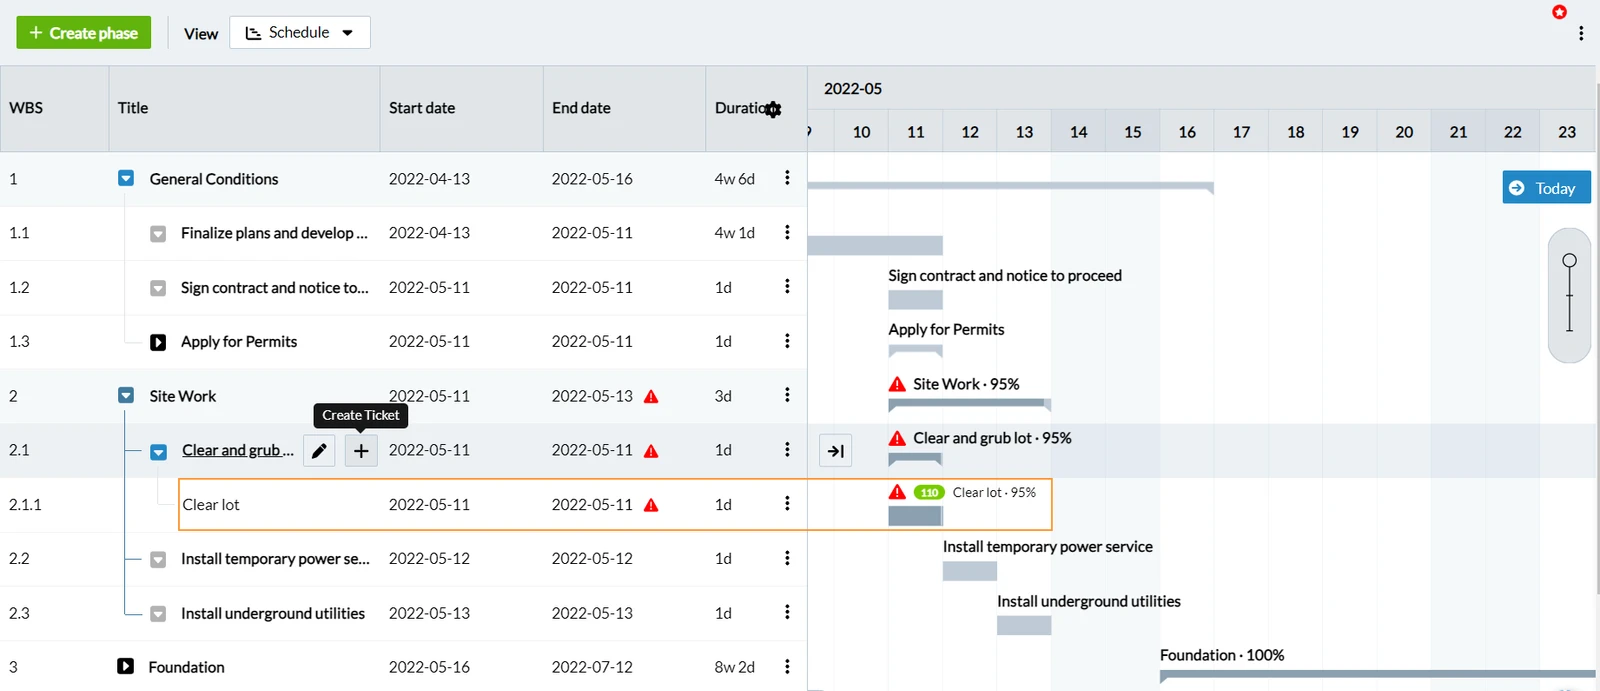
It is also possible to link your tickets directly to those phases and automatically update the progress of phases based on their linked tickets.
Example ticket in schedule:
Add Tickets to 360° Images
Add tickets to 360° images in PlanRadar SiteView in the Webapp. You can add existing tickets or create new ones. These tickets are just like any other tickets that are not related to SiteView, but with an additional location pin on the 360° image.
Updated June 15, 2026